Python has emerged as a go-to language for students, new programmers, and experienced developers. This general-purpose programming language is dynamically typed, memory-managed, and supports multiple programming paradigms. Python is popular for web development, data science, artificial intelligence and machine learning (AI/ML), scripting for Linux, and more.
Containers are a game-changing solution for packaging your code and dependencies, allowing for your application to run quickly and consistently across any environment. Using containers to support your Python application enables efficient development and deployment.
This article shows how to use containers to support your Python applications. We'll take a pre-configured application and build a Containerfile for it from scratch. Additionally, we will walk through the importance and implementation of each part.
Example Flask application
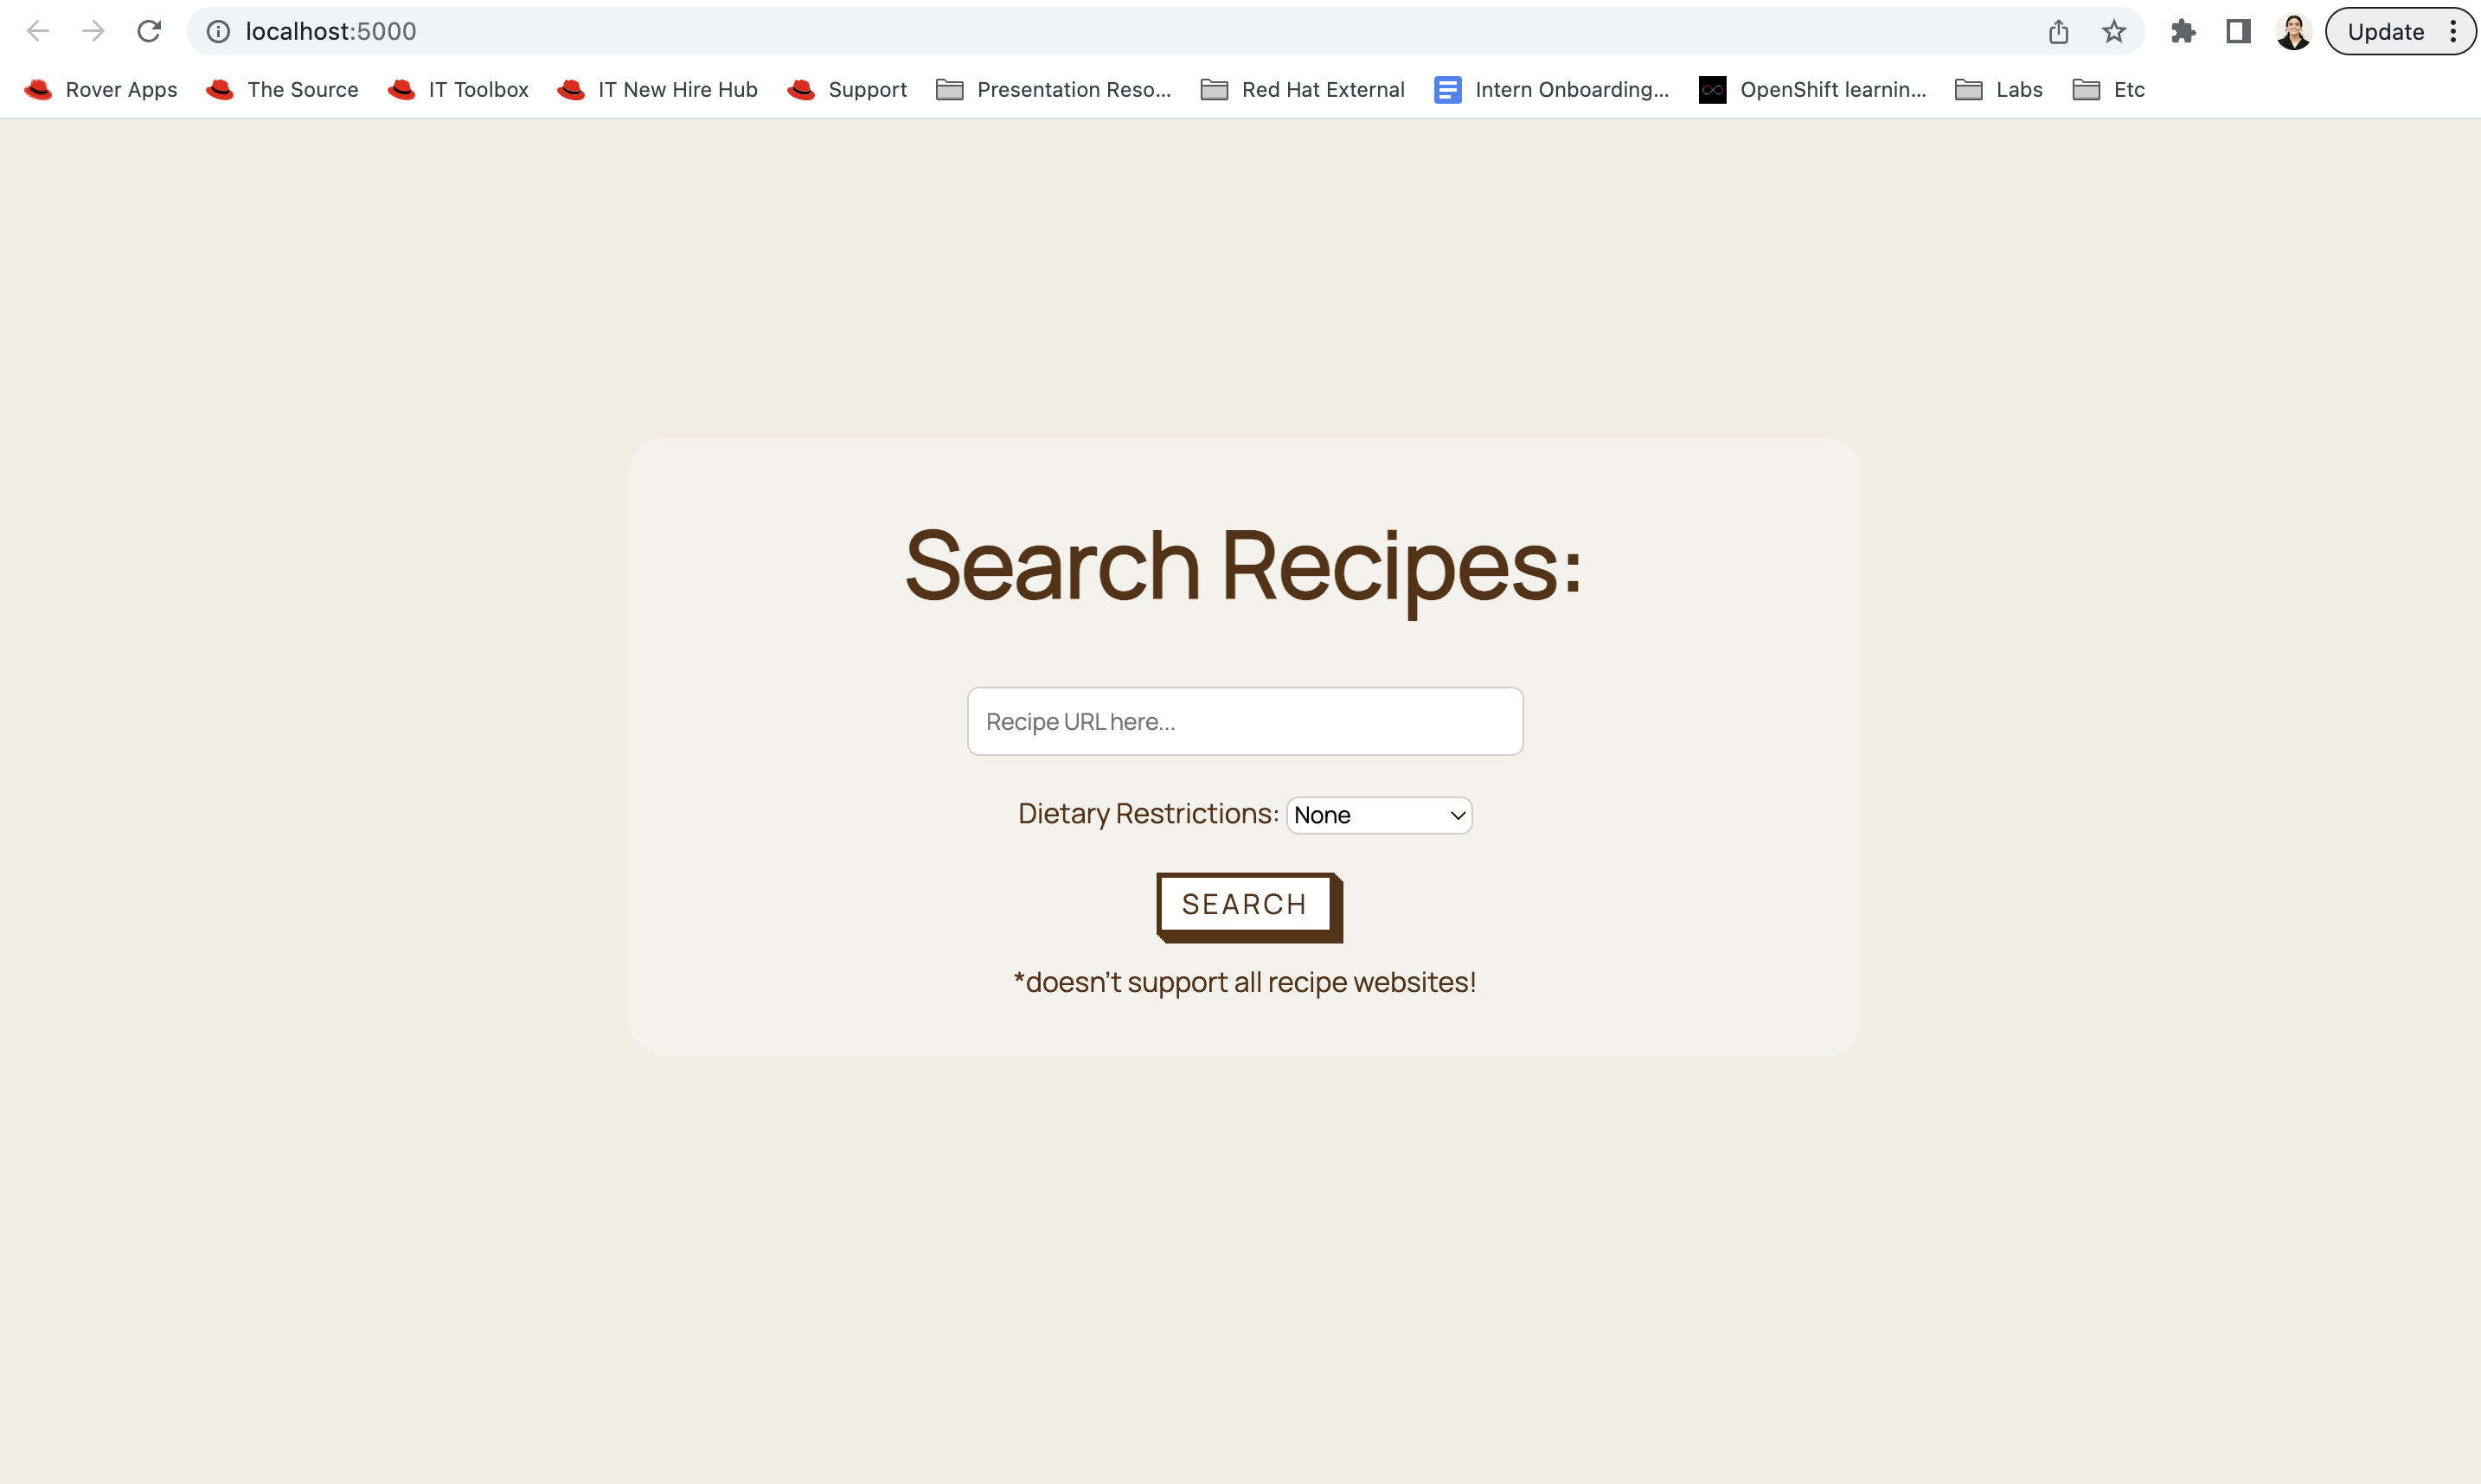
This tutorial uses an example Python Flask application. When you input a URL for a recipe, it will return links to other recipes with similar "rare" ingredients.
If you would like to follow along, clone the example repository and cd into the /files directory.
Install Podman
Podman is a cloud-native, daemonless tool for developing, managing, and running Linux containers. Podman manages the entire container ecosystem from pulling, building, running, and pushing an image. Podman's features are based on secure practices, but also minimize the friction between your local development environment and production.
[ Learn more: What is Podman Desktop? A developer's introduction ]
Our Python container will rely on Podman to build our image, run the image, and manage the running container.
To install Podman:
- Head to the Podman Desktop site and select the download for your environment.
- Launch Podman Desktop.
- If not already installed, Podman Desktop will prompt you to download Podman, the underlying container engine.
- Start the Podman machine when prompted by Podman Desktop.
Now that we've configured our container engine, let’s build a Containerfile.
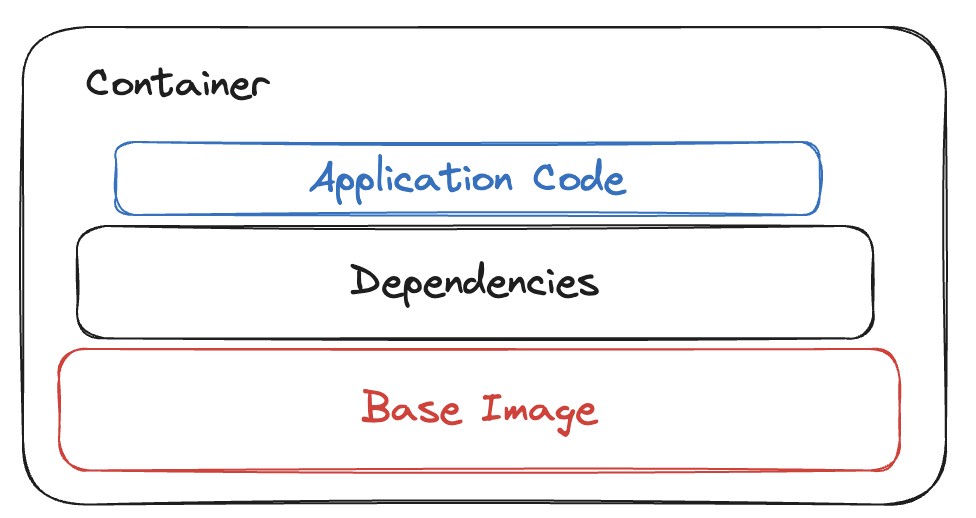
Container parts
A container will include everything your application needs to run on any machine. The main elements (illustrated in Figure 1) include a base image or platform operating system that you want the system calls to virtualize. You also need your application code. Finally, you need all dependencies, like specific versions of programming language runtimes and libraries your code needs to run.
The repository for our recipe website application holds this Containerfile:
FROM python

LABEL maintainer="akeenan@redhat.com"

COPY dependencies.txt dependencies.txt

RUN pip3 install -r dependencies.txt

RUN python3 -m spacy download en_core_web_sm

COPY . .

CMD ["python3", "-m" , "flask", "run", "--host=0.0.0.0"]
The file dependencies.txt contains the following:
flask

beautifulsoup4

requests

numpy

pandas

clean-text

spacy
Next, let's break down the Containerfile and explain why each part is necessary.
FROM
FROM python
The first necessary instruction for any Containerfile is FROM. FROM tells the container system to start a new build stage, or a new creation of an image, using the specified image as a base image.
#Syntax for FROM
FROM [--platform=] [AS ]
FROM [--platform=] [:] [AS ]
FROM [--platform=] [@] [AS ]
You can use the :<tag> to specify a specific version of an image. For example, to receive the Python version 3.9.17 image, the image argument would look like this: python:3.9.17. Tags can be reused, so there is no guarantee the python:latest image will be the same as python:latest image in 2 months.
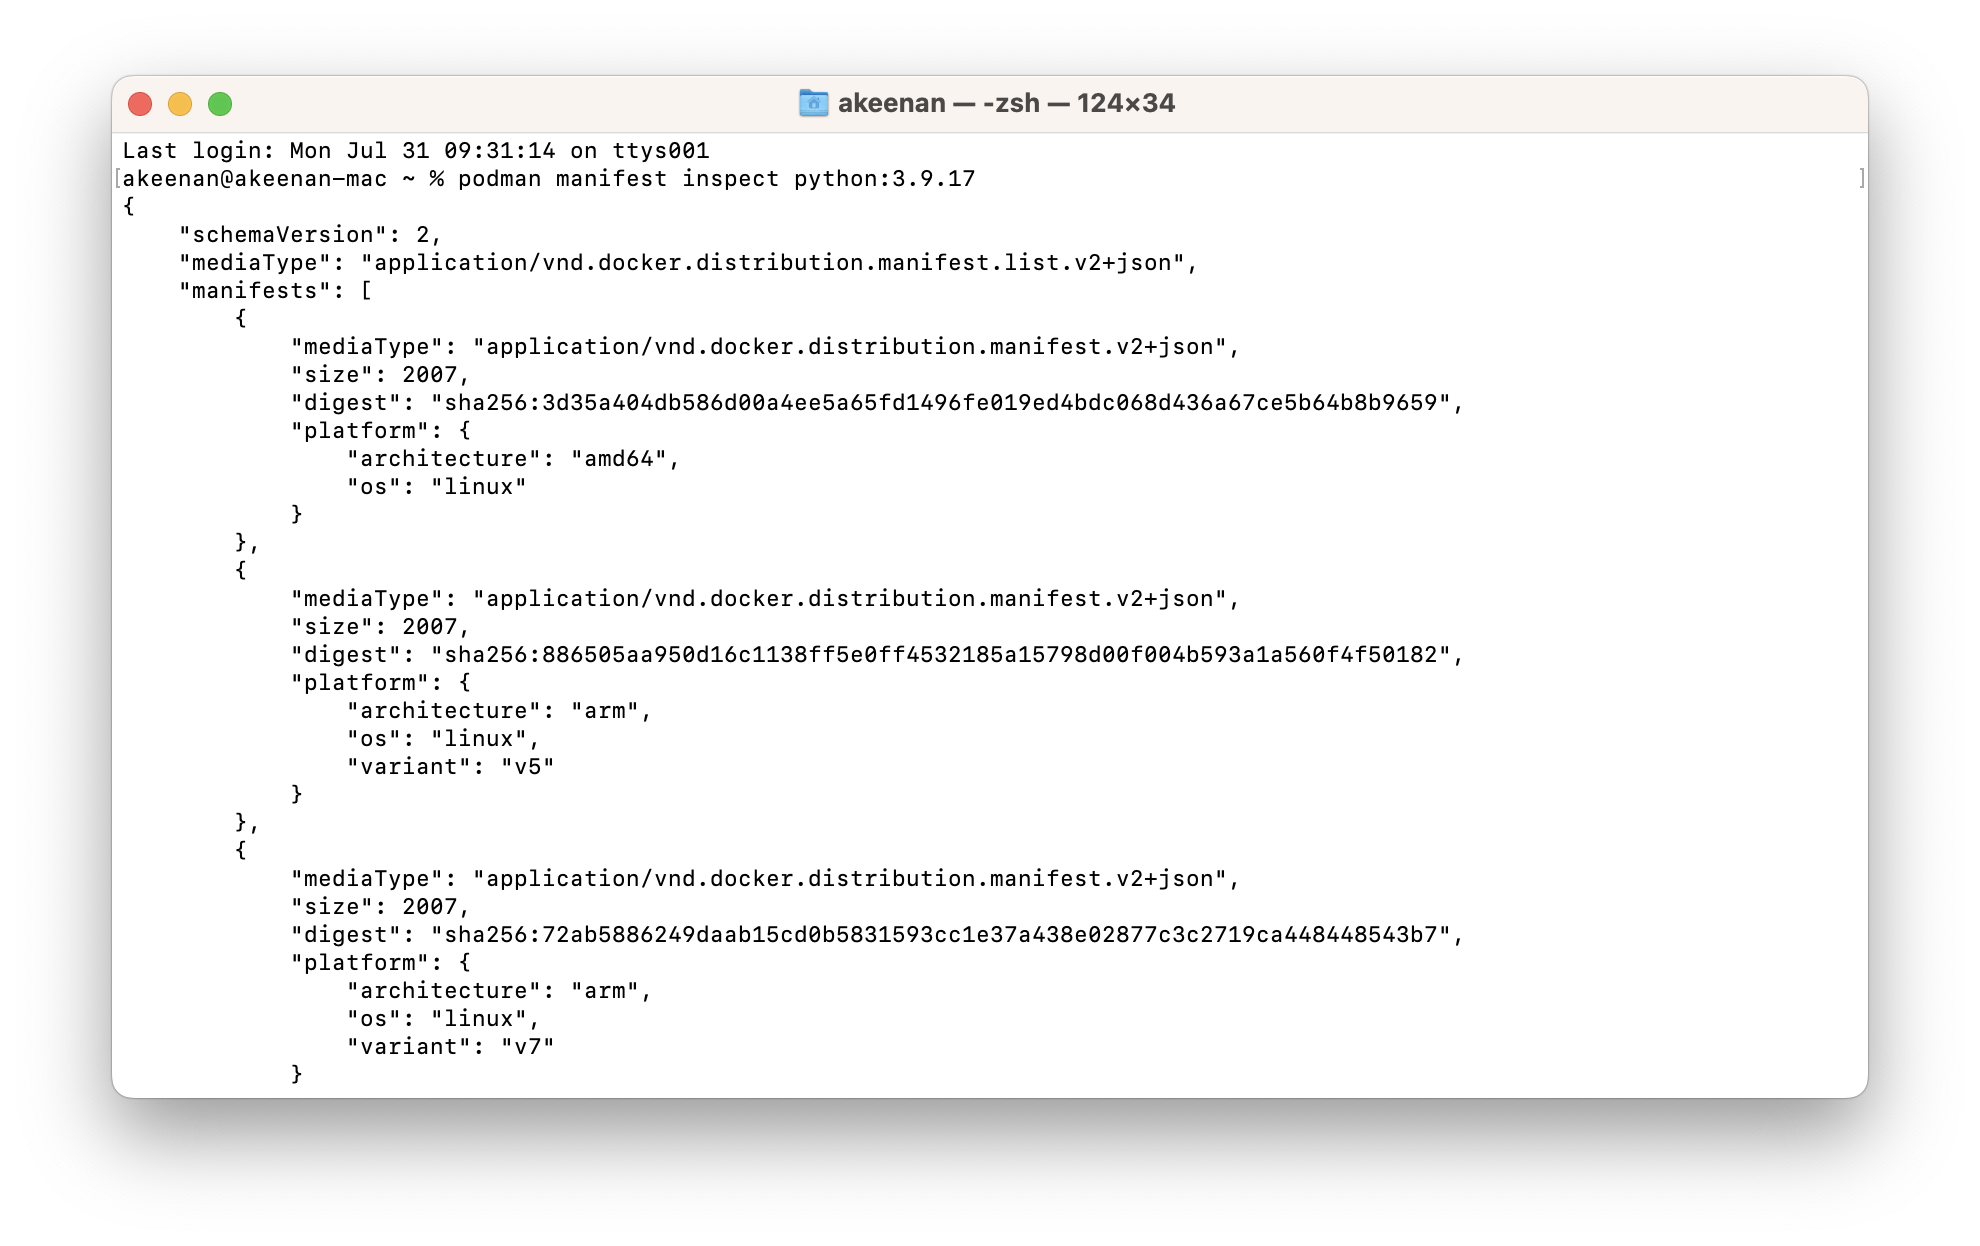
If you want to ensure that you are using the same image at all times, you can specify a digest. A digest is a specific image, specified by an ID, that will not change over time. You can obtain a digest ID in the following ways:
- By running
podman manifest inspect python:<tag>(Figure 2) - By downloading it from various image repository hubs:
If a tag or digest is not specified, the :latest tag will be used by default.
FROM scratch
If you do not want to use a base image—perhaps you want to containerize your own underlying operating system (OS), or you have a very minimal image—you have the option to use FROM scratch. The scratch image does not include any files or folders; instead, it tells the container system to have the next container instruction to be the first filesystem layer of the image.
Each base image, except for scratch, includes an OS that it virtualizes. The default python:<version> image virtualizes Debian GNU/Linux, while python:<version>-alpine virtualizes Alpine Linux, and python:<version>-windowsservercore virtualizes Windows Core OS.
Each operating system has a user space and a kernel space. User spaces are processes executed by a user in the operating system. The kernel space manages resources like RAM and Disk.
A container runs in the user space and accesses these resources by system calls. A container abstracting a certain OS will abstract the user space, and perform system calls to the host OS. In your container, the OS virtualizes Linux distributions by having their file systems packaged into a container filesystem. Sharing an underlying virtualized OS allows for a standard environment among containers.
For a Python application, the Python base image works well, including all up-to-date packages you may need. FROM python will instruct the container engine to inherit the Python base image. The Python base image will have an underlying OS, the language (Python source code, compiled), the Python runtime dependencies, and pip.
If you have a specific OS you would like to virtualize, you can inherit that base image and download Python (more on that later in this article).
LABEL
LABEL maintainer="akeenan@redhat.com"
A label is used for metadata about a container, using a key=value format. In this label, we use a maintainer key, with the value of. Using a maintainer reference provides a way for developers to reach out to the maintainer if they have questions or feedback about the container. It also gives you a way to take credit for your work.
COPY
#Copy (local source) (destination in container)
COPY dependencies.txt dependencies.txt
Now we have our base image and a reference to a maintainer. Our container has an owner, and the basics of the Python language.
The next step is to use pip (which is included in the Python base image) to install our dependencies. Any extra library or package a developer downloads is a dependency. In our example Python program, we imported several dependencies, including Flask, BeautifulSoup, and pandas.
from flask import Flask, render_template, request

from bs4 import BeautifulSoup

import numpy as np

import pandas as pd

import spacy
Steps to use the COPY instruction:
-
Create a file to hold the names of all dependencies. In the sample application, it is named
dependencies.txtand looks like this:#dependencies.txt flask beautifulsoup4 requests numpy pandas clean-text spacy
- The instruction
COPYwill copy your dependency file from your local source into the container. If your file is under another directory, you can include the path or use the WORKDIR instruction. - Inside our local directory, the dependency file is there, named
dependencies.txt. The instructionCOPY dependencies.txt dependencies.txtwill create a new file nameddependencies.txtin your container and copy over the contents.
RUN
RUN pip3 install -r dependencies.txt
RUN python3 -m spacy download en_core_web_sm
The RUN instruction will execute any commands needed in a new layer on top of our image.
We are using Python 3, so the command in the terminal to use pip to install <insert-dependency-here> is pip3 install -r <insert-dependency-here>.
In our dependencies.txt file, we have all packages and libraries that need to be downloaded using pip. To shorten the installation process, RUN pip3 install -r dependencies.txt will use pip to install everything listed in our dependencies.txt file.
Additionally, for our sample program, we need to download en_core_web_sm using the Python module space. This extra dependency is not installed using pip, but we can use an extra RUN command to complete the task.
COPY
COPY . .
Now we have all dependencies downloaded using the RUN instruction, it is time for our application files!
Our Containerfile is hosted in the same directory as our application files. COPY . . copies our local directory outside of the container into the local directory inside the container.
CMD
CMD ["python3", "-m" , "flask", "run", "--host=0.0.0.0"]
Every Containerfile must have one—and only one—CMD instruction for the container to start. CMD provides a default command for an executing container.
--host=0.0.0.0 makes a non-routable meta-address of 0.0.0.0 for the host. It means that the mapping is valid for all addresses/interfaces of the host.
Normally, you would use the command python3 -m flask run to run a Flask application. The same command is used here, in CMD ["executable","param1","param2"]
--host=0.0.0.0 makes a non-routable meta-address of 0.0.0.0 for the host. It means that the mapping is valid for all addresses/interfaces of the host.
Alternate images
While the Containerfile above includes the official Python image, users can create a Containerfile to support Python in many different ways. Below, the first Containerfile inherits the Red Hat Enterprise Linux (RHEL) Universal Base Image, and then installs Python. The second Containerfile inherits a base image that has combined RHEL and Python dependencies. Users can customize their Python Containerfile to work best for their dependencies and target environment.
#Alternate images that work!

#Red Hat Enterprise Linux UBI, then installing Python

FROM redhat/ubi8

LABEL maintainer="akeenan@redhat.com"

RUN yum -y install python39

COPY dependencies.txt dependencies.txt

RUN pip3 install -r dependencies.txt

RUN python3 -m spacy download en_core_web_sm

COPY . .

CMD ["python3", "-m" , "flask", "run", "--host=0.0.0.0"]

EXPOSE 5000
#RHEL UBI + Python in base image

FROM registry.access.redhat.com/ubi8/python-311:1-13

LABEL maintainer="akeenan@redhat.com"

COPY dependencies.txt dependencies.txt

RUN pip3 install -r dependencies.txt

RUN python3 -m spacy download en_core_web_sm

COPY . .

CMD ["python3", "-m" , "flask", "run", "--host=0.0.0.0"]

EXPOSE 5000
Build and run the container
Now that you've written your image, it's time to build and run it. We'll walk through a few different ways to do this.
Command-line interface
In the command-line terminal, in the Containerfile directory, run:
# should have your repo cloned

# ensure you are in the files directory (Cd files)

podman build --tag python-podman .

podman run --publish 5000:5000 python-podman
podman build --tag python-podman . tells Podman to build the image in the current directory and name the image python-podman.
podman run --publish 5000:5000 python-podman will run the python-podman image, and publish it on port 5000 outside of the container.
The --publish flag has syntax (outside container): (inside container). All Flask applications run on default port 5000, so here we connect our local host (address 127.0.0.1) port 5000 to container port 5000 on address 0.0.0.0.
Now, head to http://127.0.0.1:5000, as seen in Figure 5, and enjoy your application!
Podman Desktop
Add to the Containerfile:
EXPOSE 5000
When we use the command-line interface, we force our application to be exposed on the localhost port 5000 using the command --publish 5000:5000. On Podman Desktop, we just use the GUI, so including this line on our Containerfile will force our application to be exposed on the localhost port 5000.
There are multiple ways to run a container file on Podman Desktop:
- Build from Containerfile (Figure 3).
- Build on local terminal.
- Build from Quay.
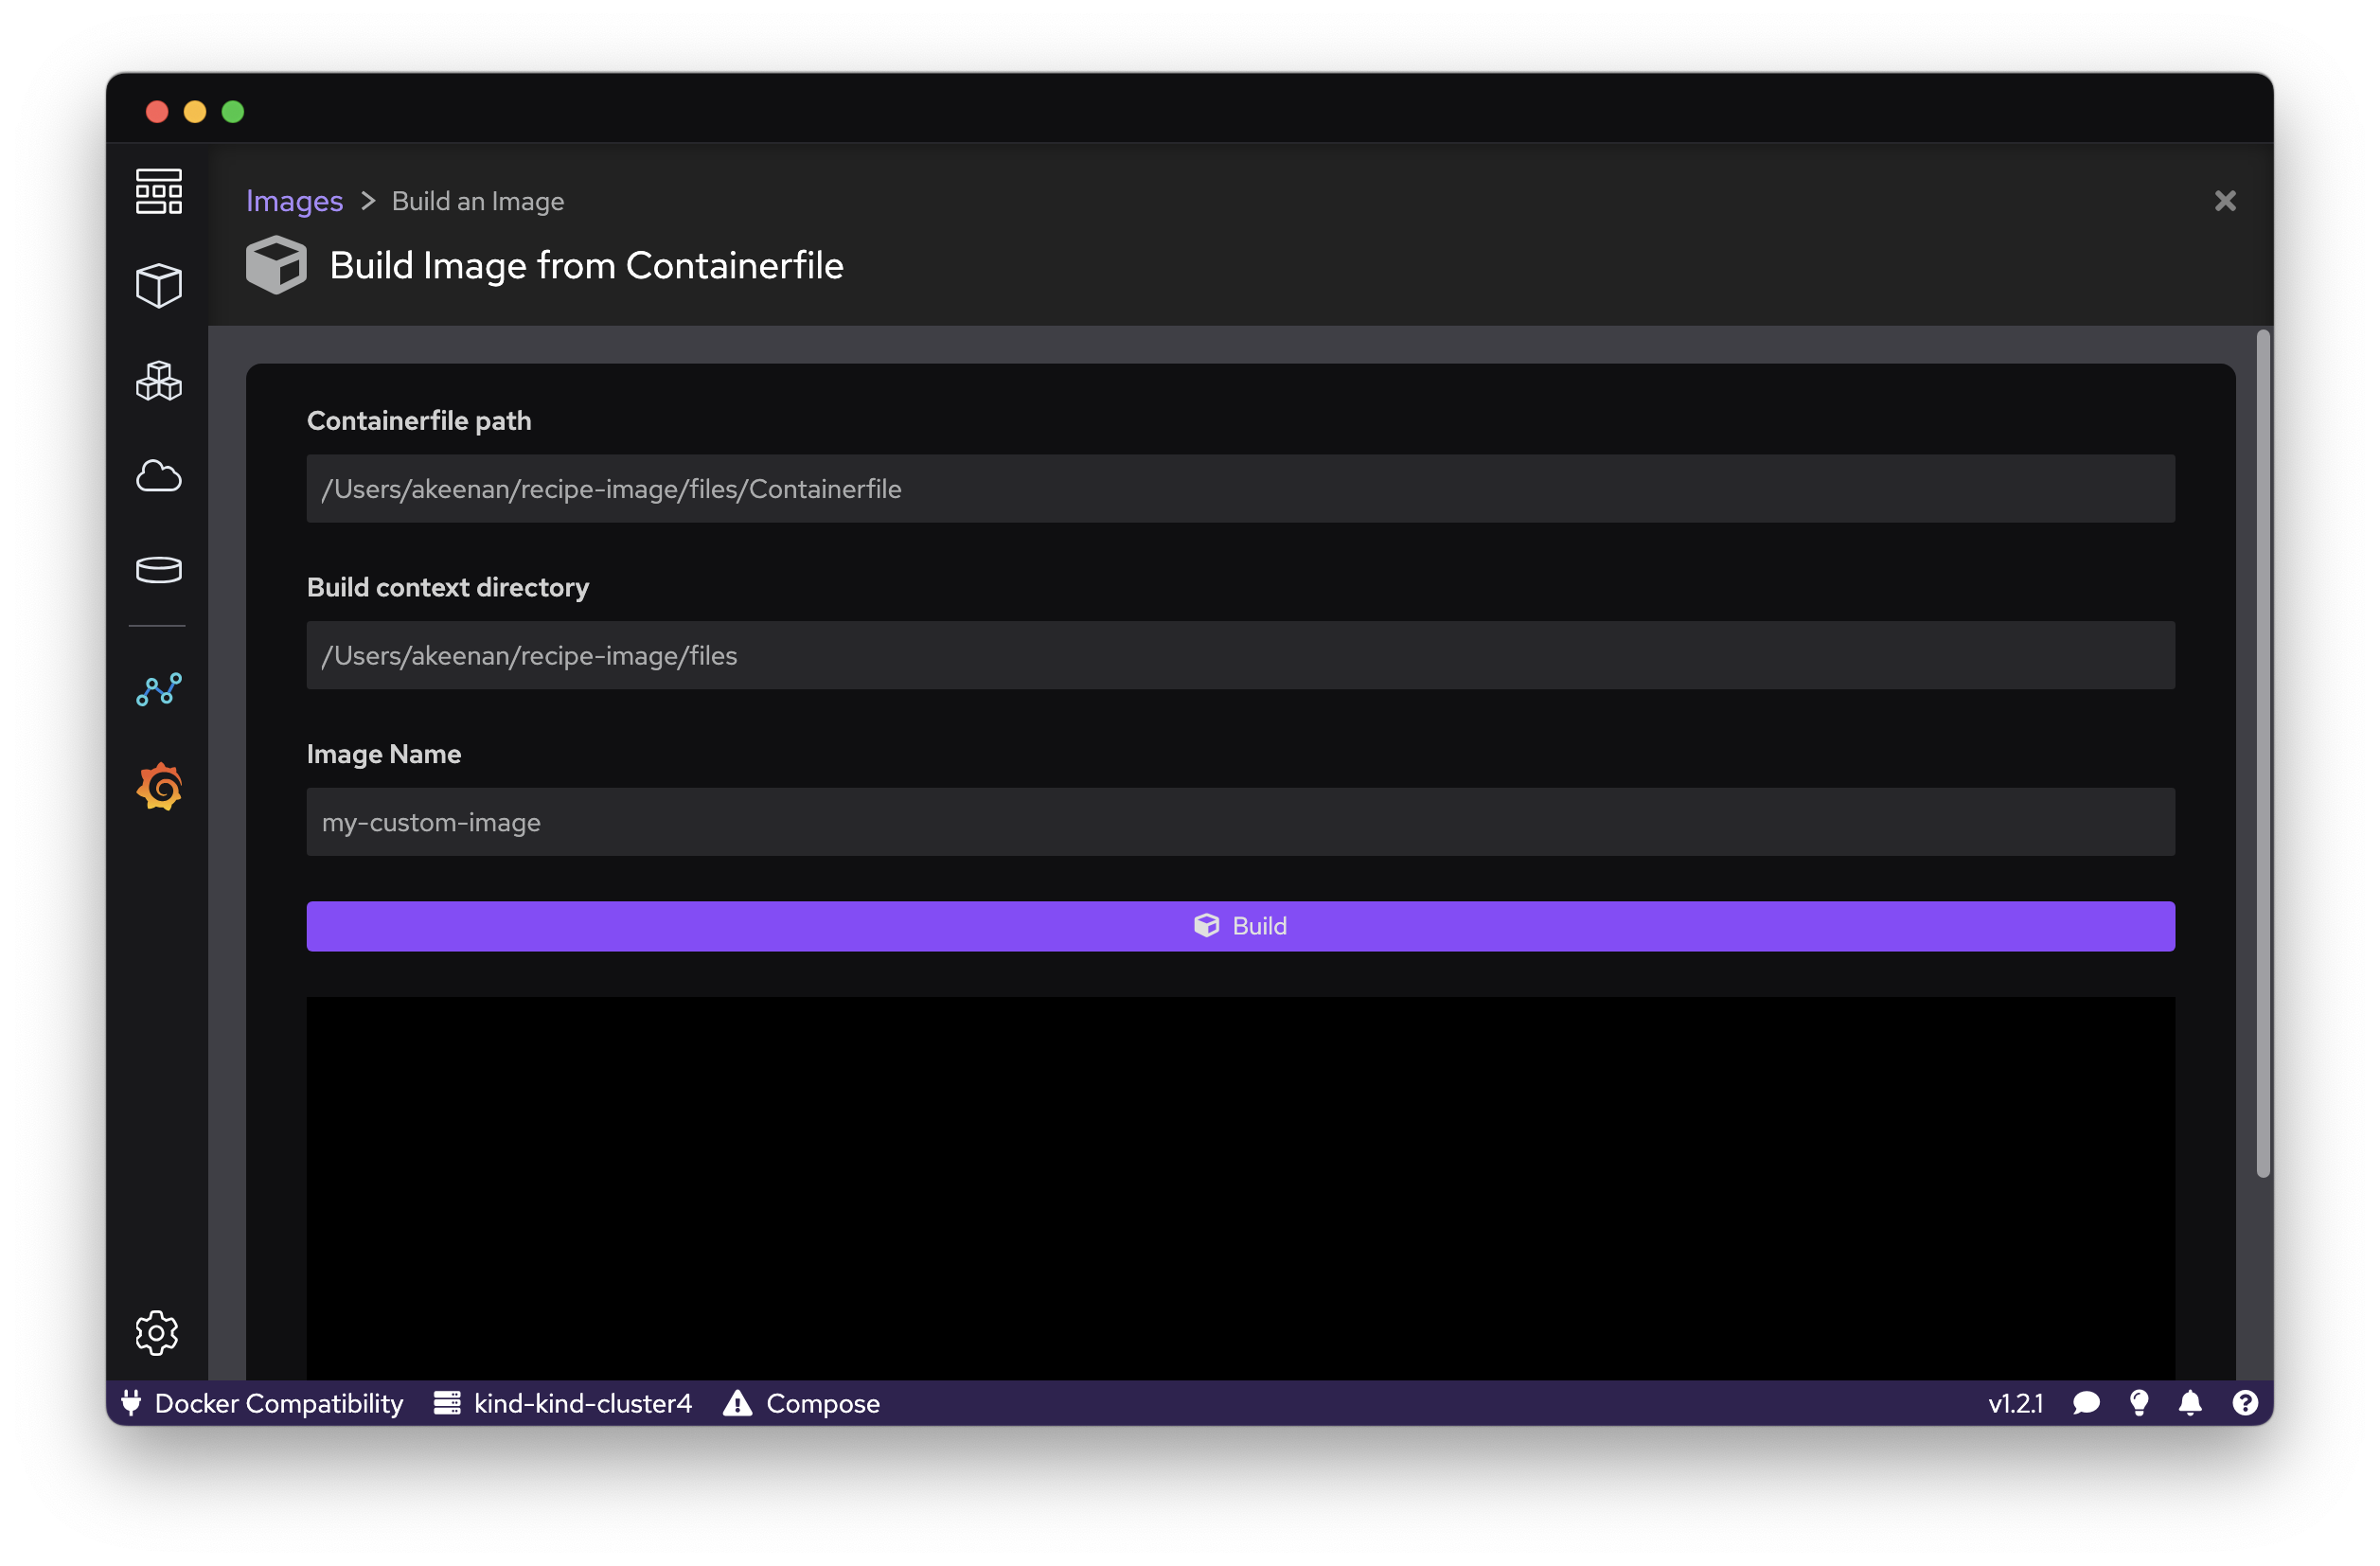
Build from Containerfile
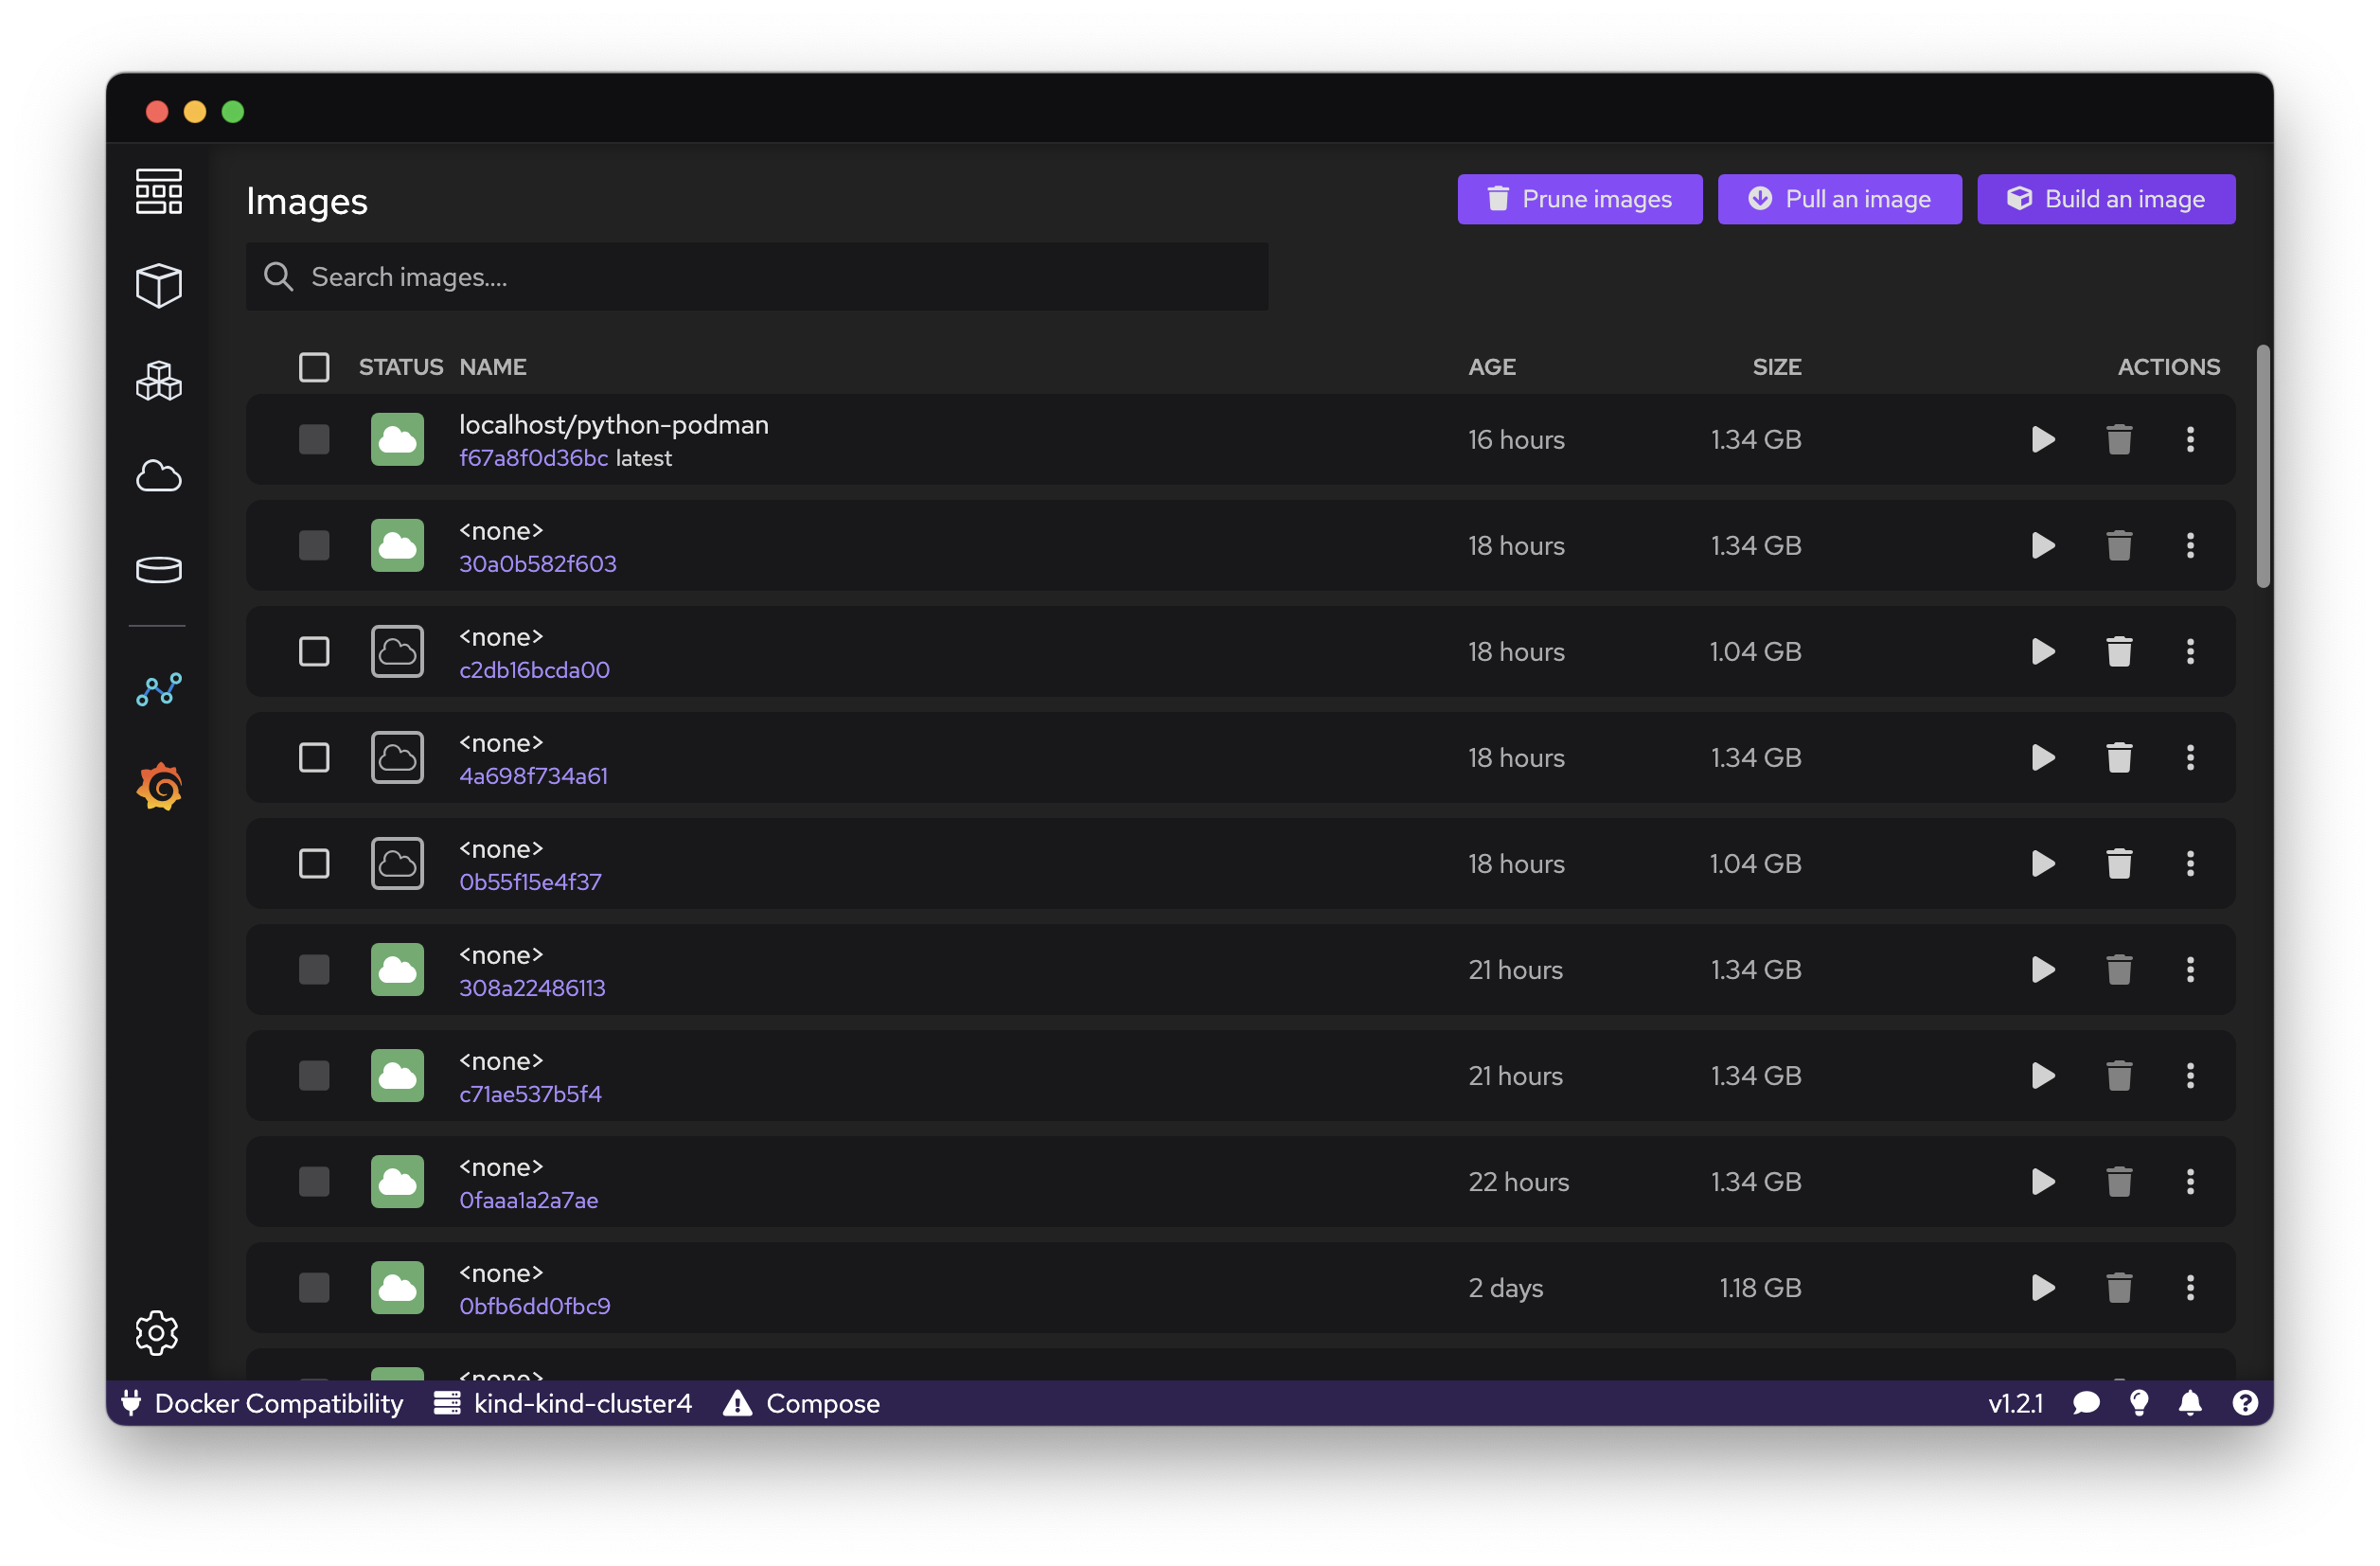
- Navigate in Podman Desktop to the Images tab and select Build an Image, as shown in Figure 4.
- Select the location of your Containerfile.
- Select the location of your build directory.
- Name the image.
- Select Build, let the image build, and then select Done.
- Click the play button to start the container.
- Name the container.
- Click Start.
- Visit the application by selecting the … icon and Open in Browser. You will be redirected to localhost:5000, as seen in Figure 5.
Build on local terminal
- In your build context directory, run:
podman build --tag python-podman .- In Podman Desktop, under the Images tab, you will have a image called
localhost/python-podman.
- In Podman Desktop, under the Images tab, you will have a image called
- Click the play button to start the container.
- Name the container.
- Click Start.
- Visit the application by selecting the … icon and Open in Browser. You will be redirected to localhost:5000, as seen in Figure 5.
Build from Quay (or another image repository)
If you need to set up your Quay repository, refer to the instructions in this guide.
- In Podman Desktop, under the Images tab, select the Pull an Image icon, as shown in Figure 4.
- Enter the name of your image. It will look like this:
quay.io/<username>/<image-name>/ - Pull the image.
- Enter the name of your image. It will look like this:
- Click the play button to start the container.
- Name the container.
- Click Start.
- Visit the application by selecting the … icon and Open in Browser. You will be redirected to localhost:5000, as seen in Figure 5.
Conclusion
Congratulations! We successfully created a containerized Python application and saw how to run it in multiple ways. If you are working with multiple teams or multiple environments, you can now guarantee that your application will work the same every time you run it.
Whether you are a student, attending a hackathon, doing a personal project, or working on a business, Python and containers are a great place to start coding. Here are a few other resources to check out:
- Deploy a sample app on the Developer Sandbox for Red Hat OpenShift
- Build and deploy a Quarkus application to OpenShift in minutes
- Using OpenShift Pipelines for automated builds and deployment
When it comes time to scale your application, check out Kubernetes for container orchestration.