Podman Desktop (now generally available) is an amazing tool for building, running, and managing containerized applications locally—but in a real-world environment, you need to deploy your applications on container orchestration platforms such as Kubernetes. If you’re looking for an enterprise-grade Kubernetes, look no further than Red Hat OpenShift.
Let’s deploy and test a containerized application from your desktop to the free Developer Sandbox for Red Hat OpenShift using Podman Desktop’s Developer Sandbox for Red Hat OpenShift extension.
Getting started
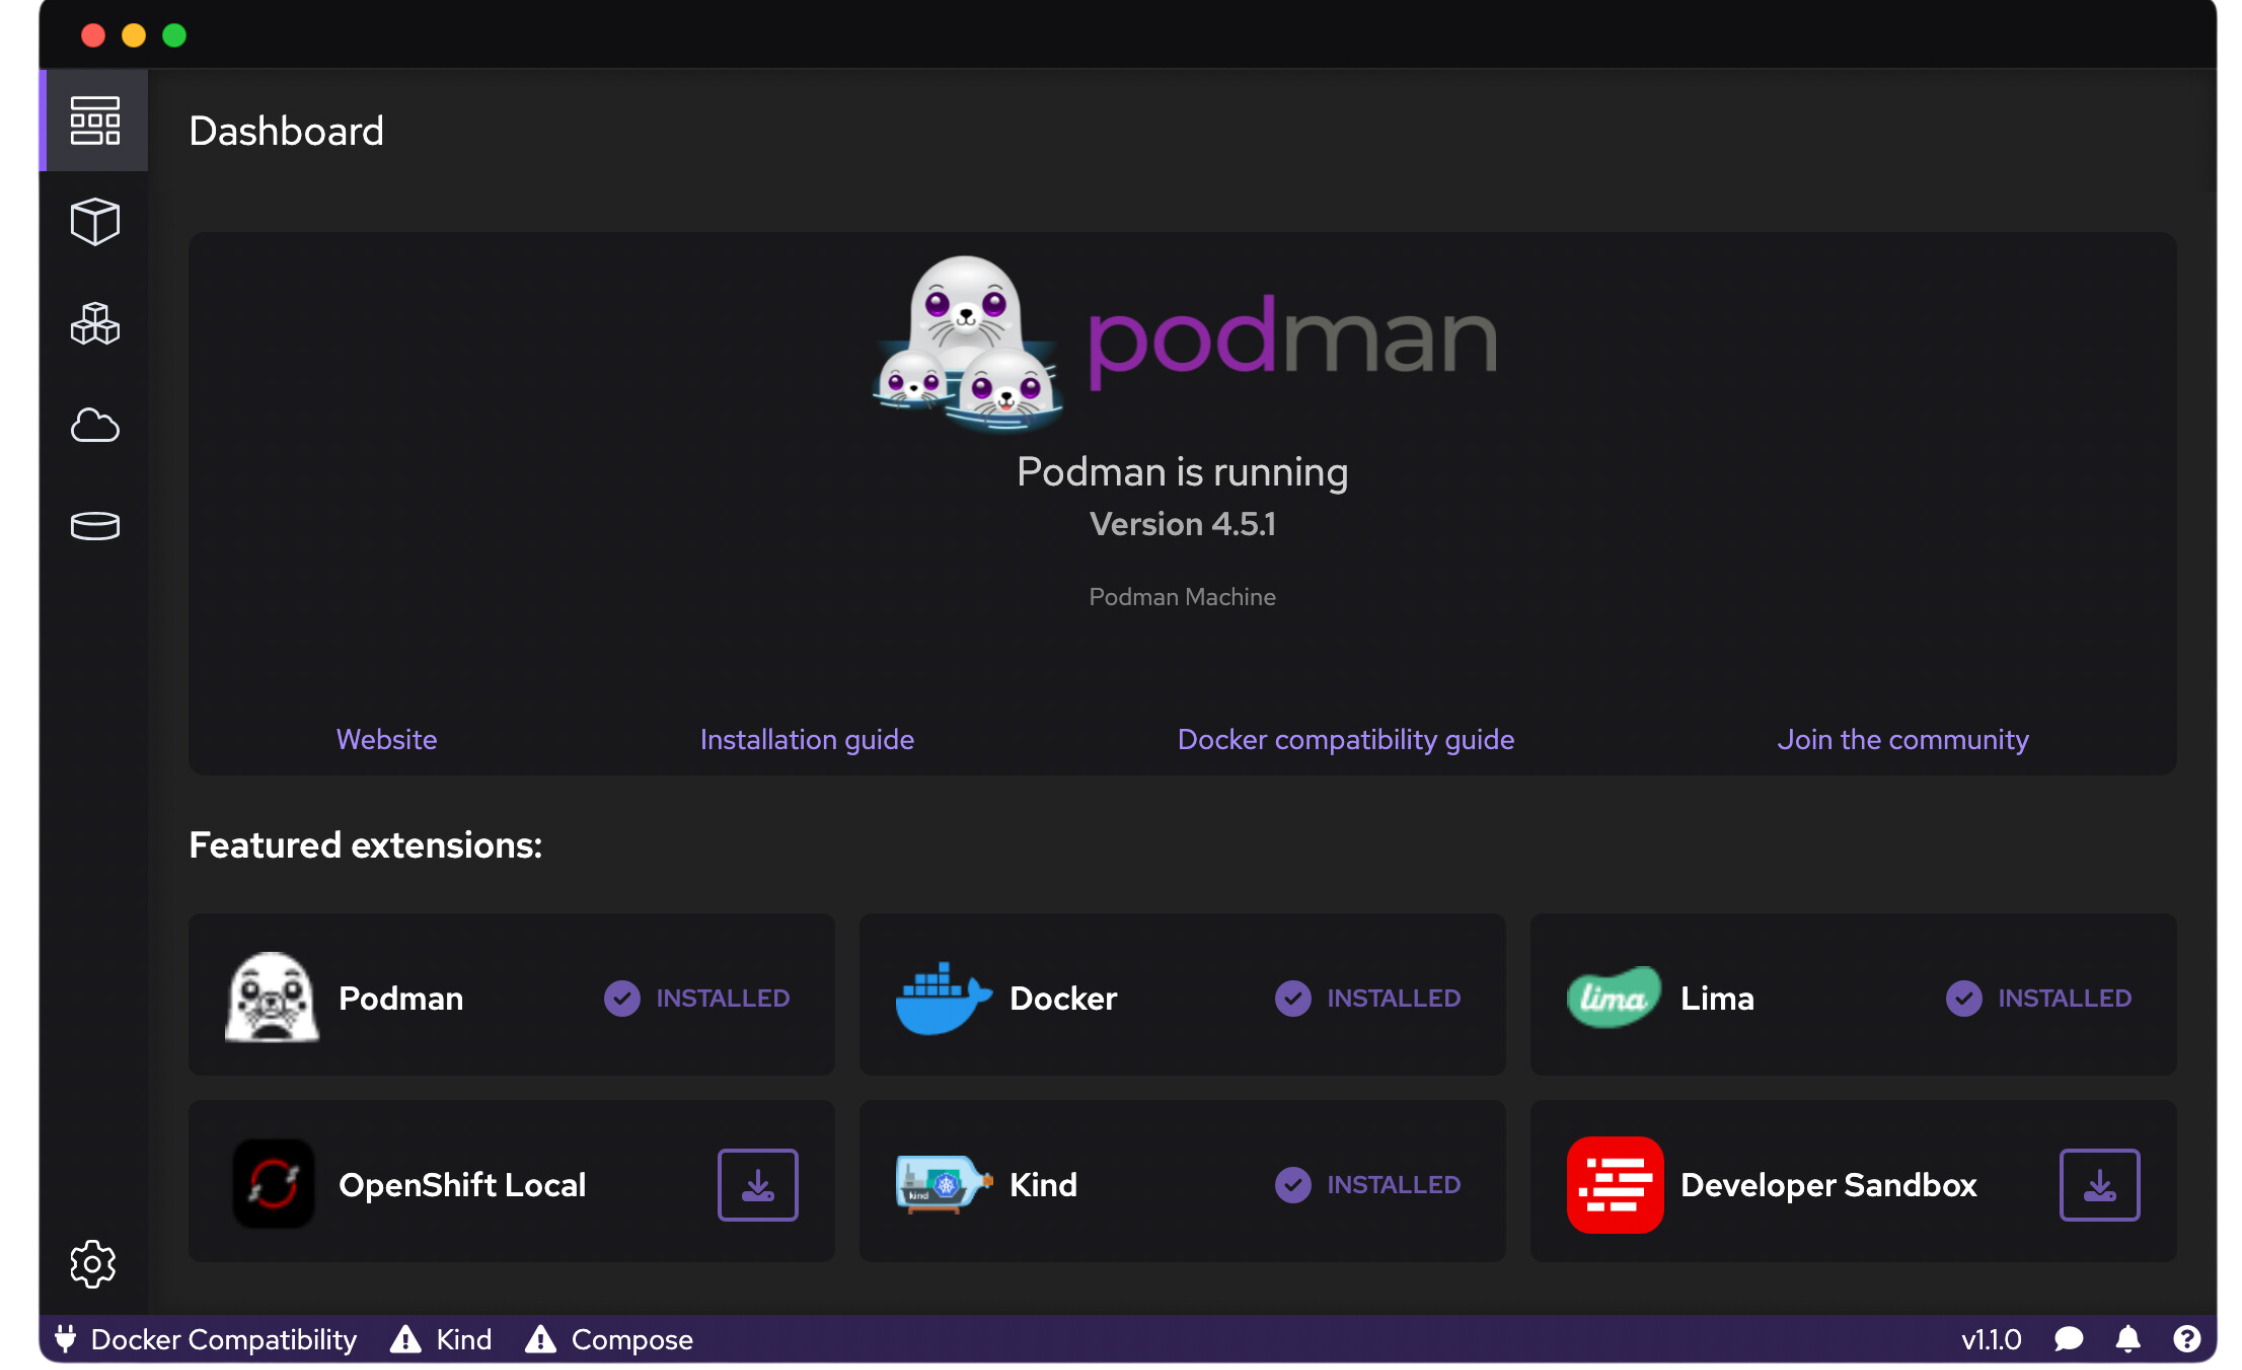
If you haven’t already installed Podman Desktop (Figure 1), head to podman-desktop.io to download the latest release to your machine, compatible with Windows, macOS, or Linux.
This tutorial uses the Developer Sandbox for Red Hat OpenShift extension, which allows you to deploy your containerized applications to a free, cloud-based OpenShift cluster for 30 days. Using this extension, you can easily sign up for the Developer Sandbox and easily deploy pods or YAML to the hosted OpenShift environment without a local installation or leaving Podman Desktop.
Install the Developer Sandbox extension
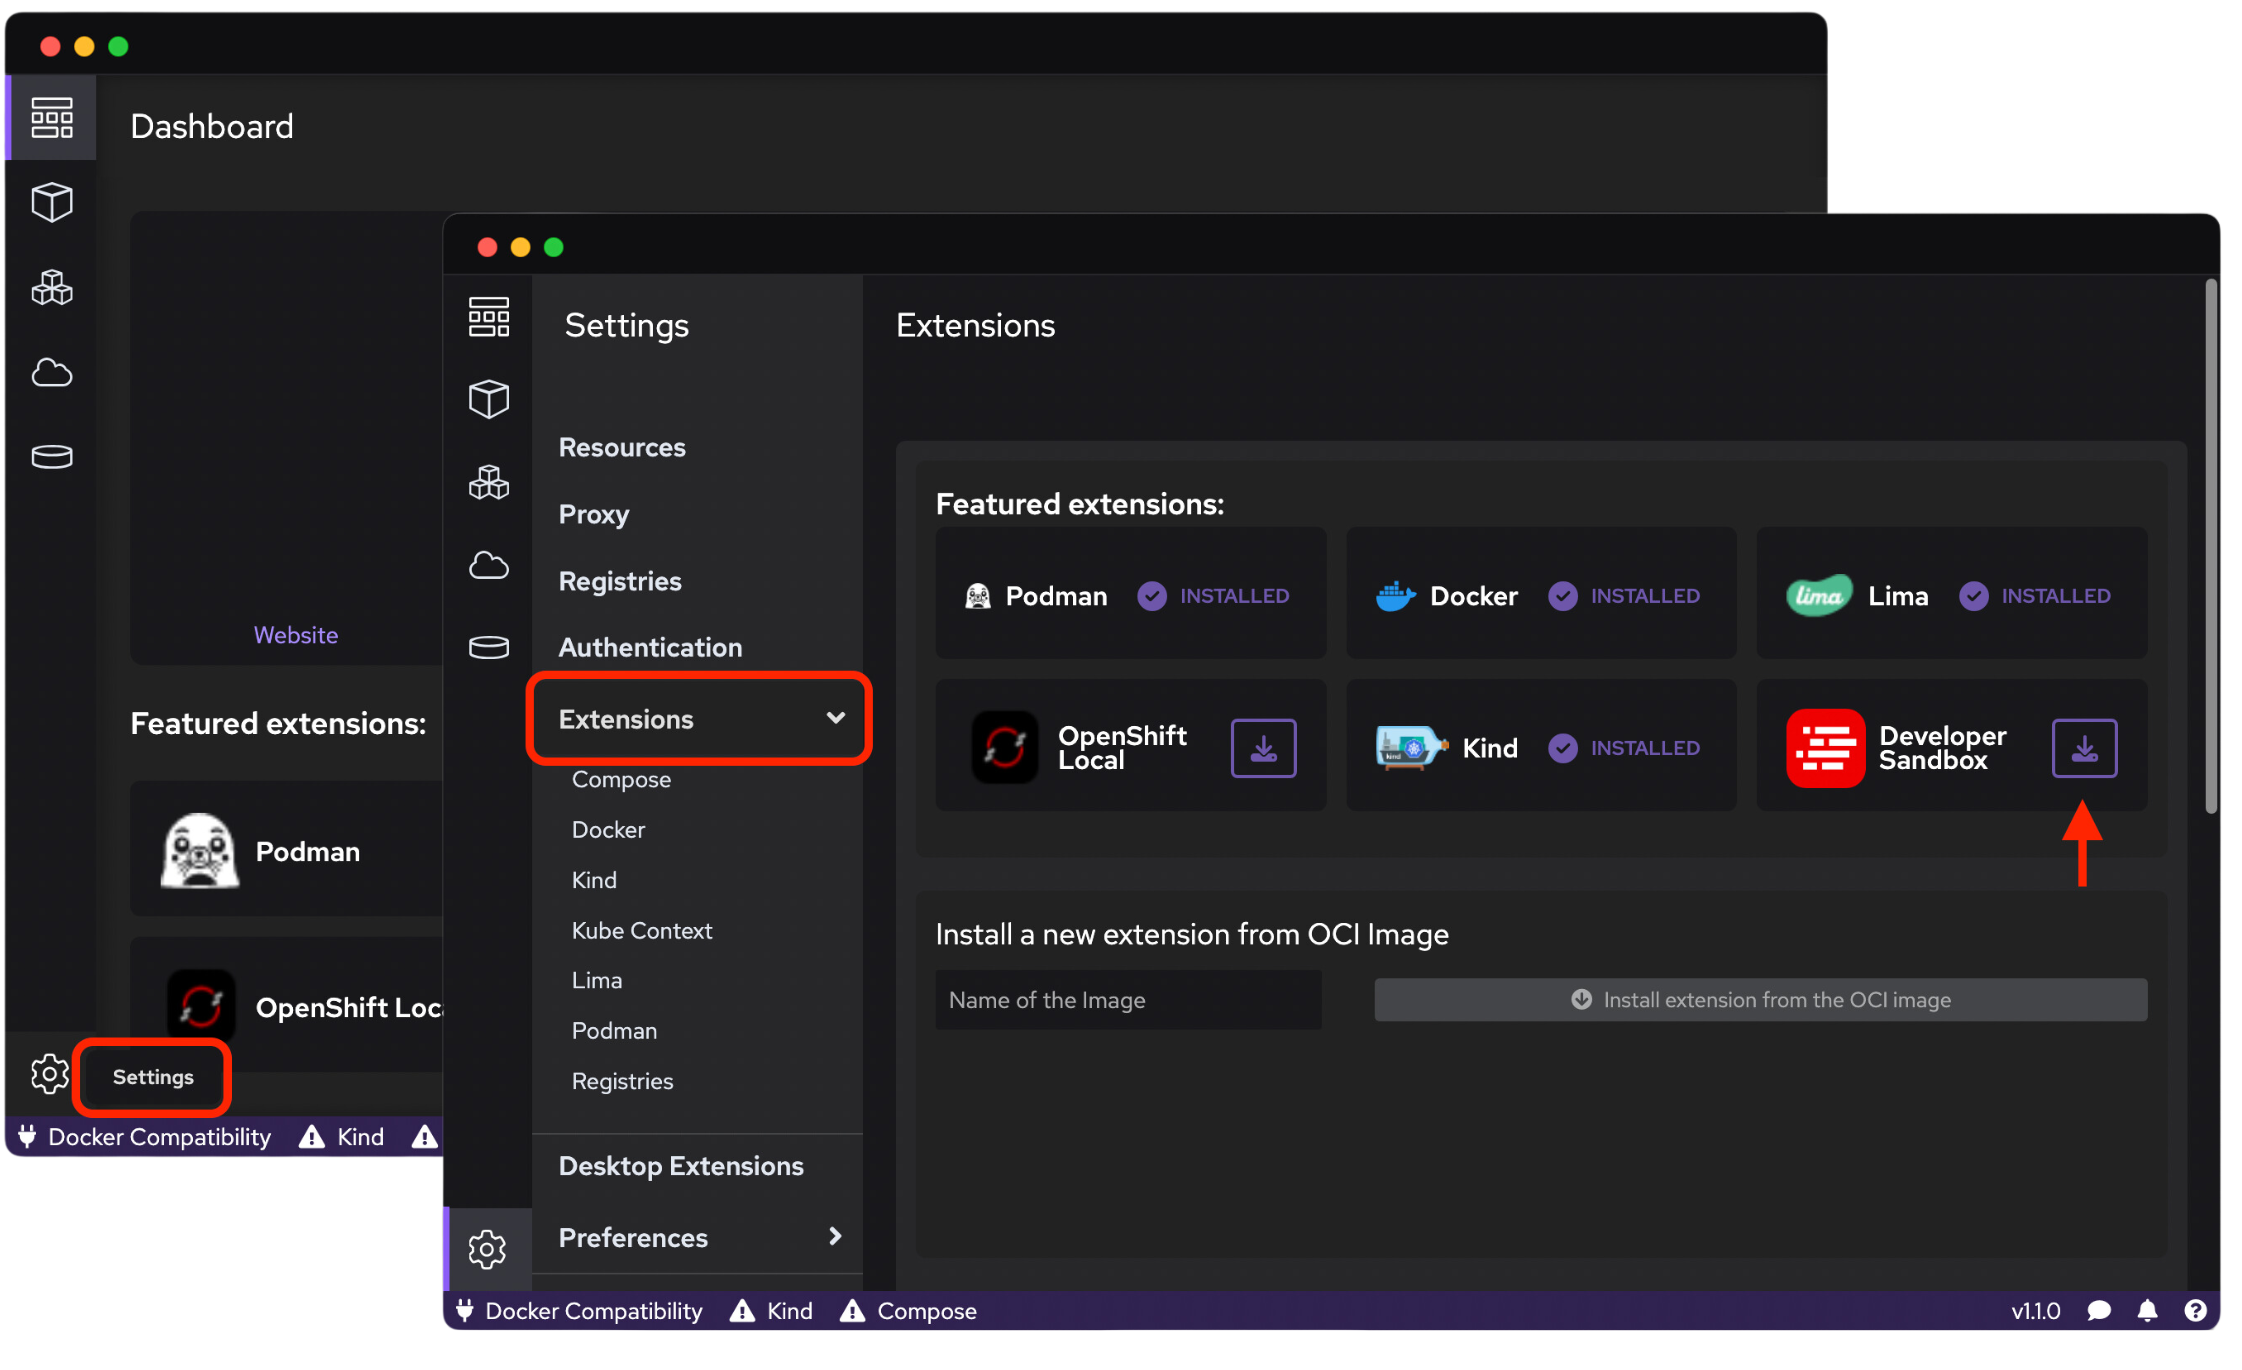
To install the Developer Sandbox extension for Podman Desktop, navigate to the Settings button on the lower-left corner of Podman Desktop. Next, select Extensions from the left-hand menu. From there, install the Developer Sandbox extension from the list of featured extensions (Figure 2). Podman Desktop also provides functionality to install new extensions from OCI images or even Docker Desktop extensions!
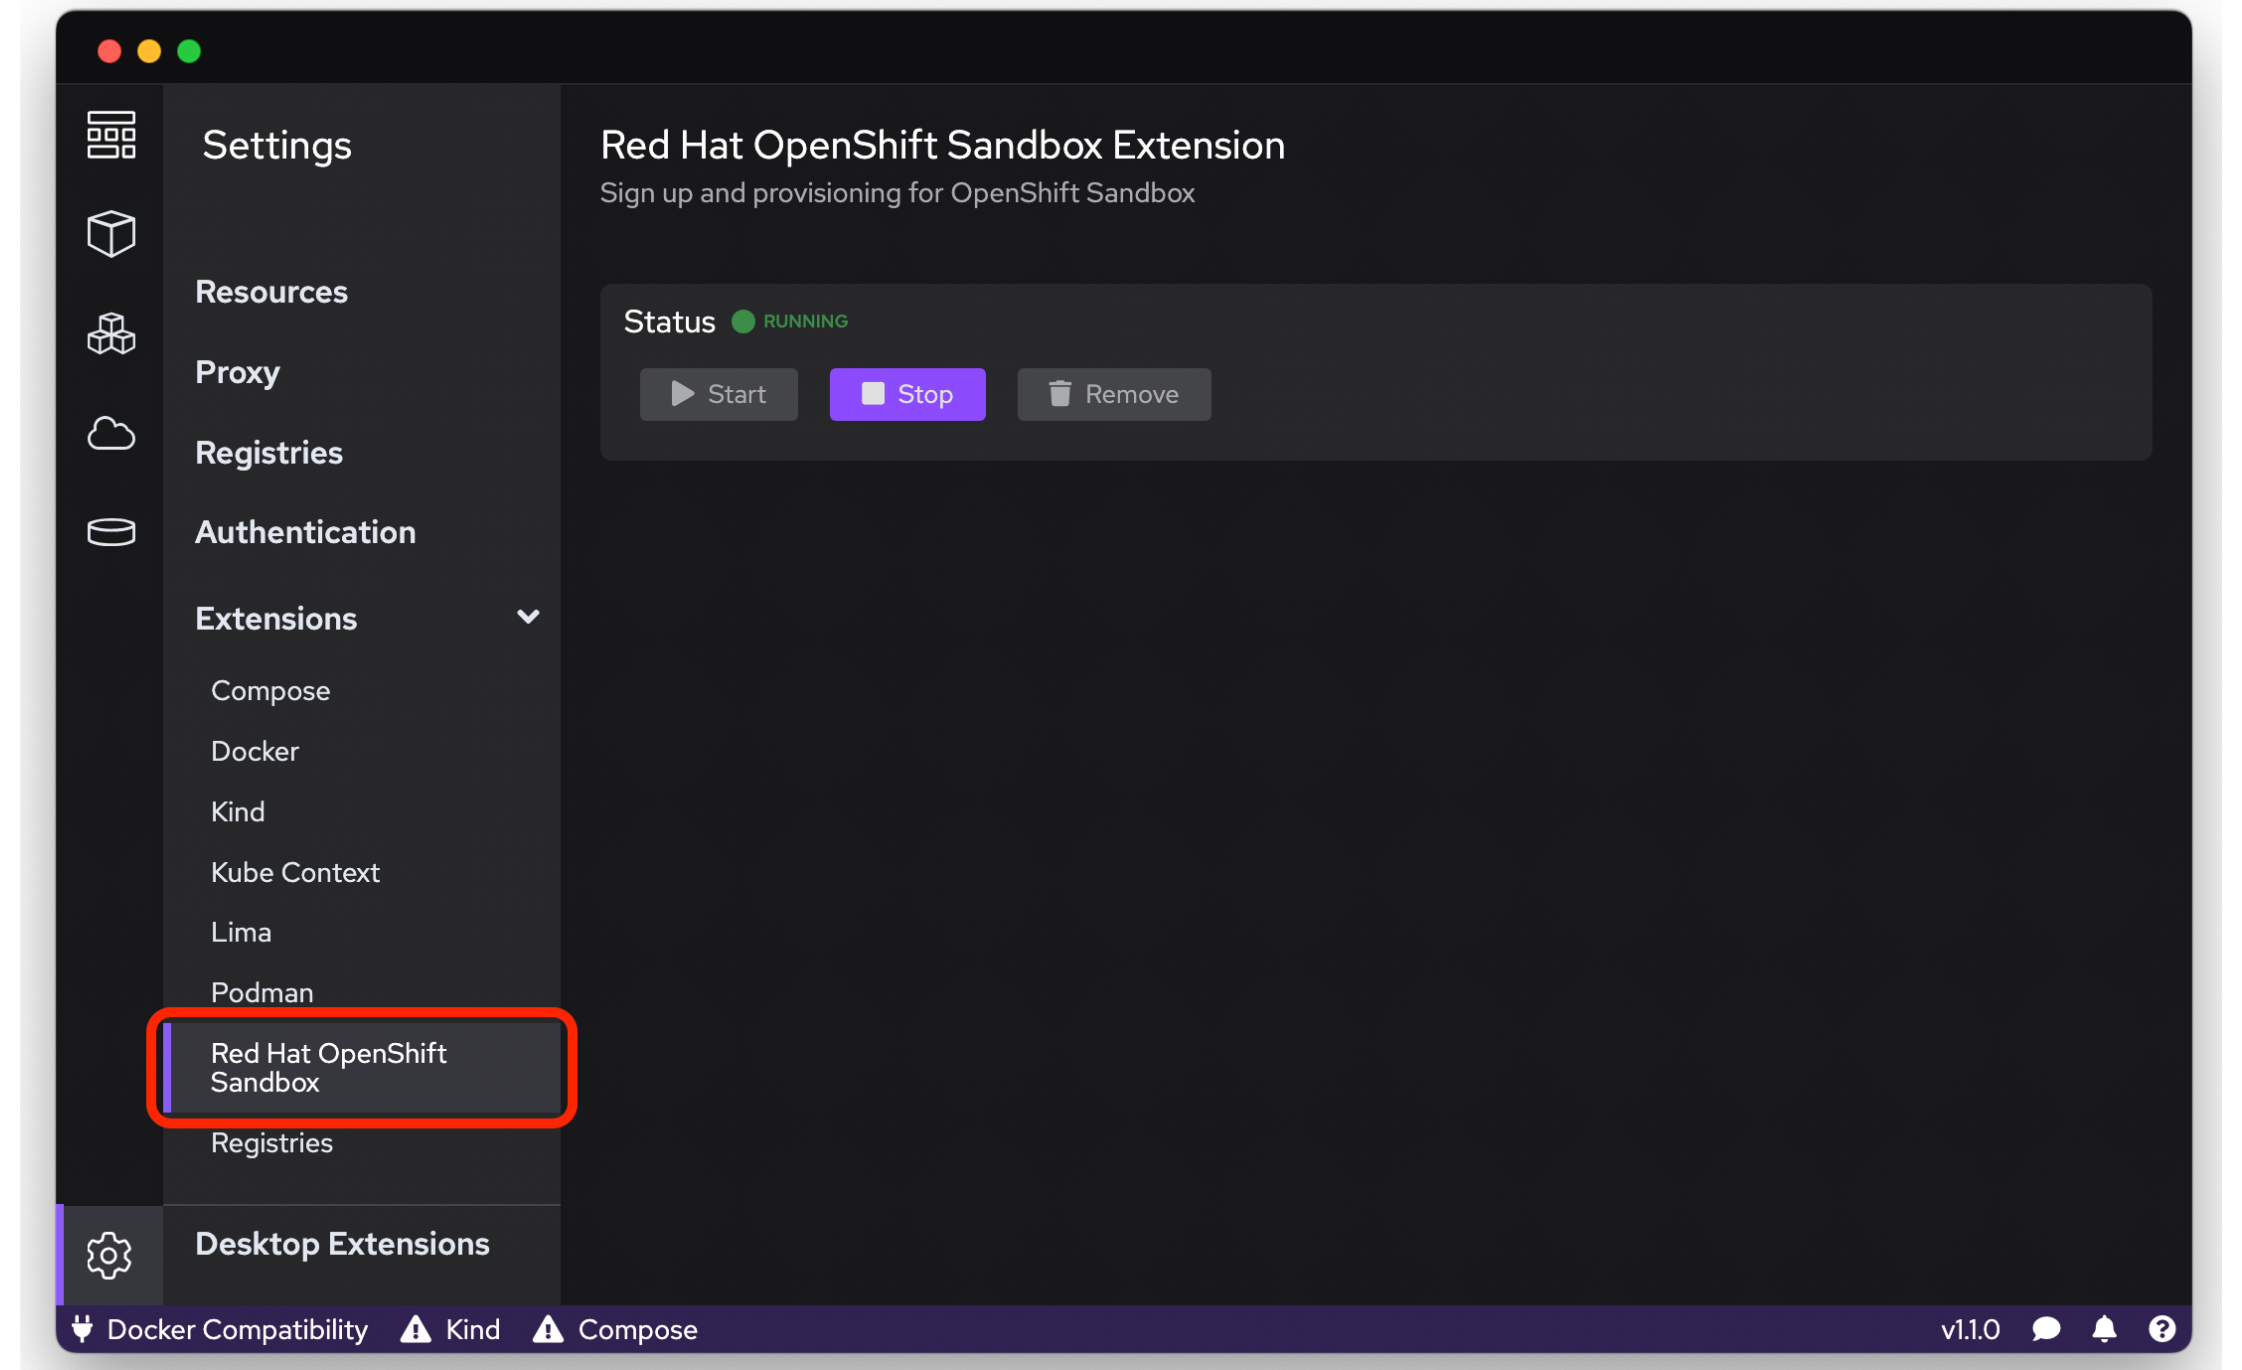
After you click the button to install the Developer Sandbox extension, you'll notice a new section under the Extensions section on the left-hand side of the panel. Click the Red Hat Developer Sandbox extension (Figure 3), and this is where you can see information related to the extension's status (as well as start, stop, or remove the extension).
Register and connect to the Developer Sandbox
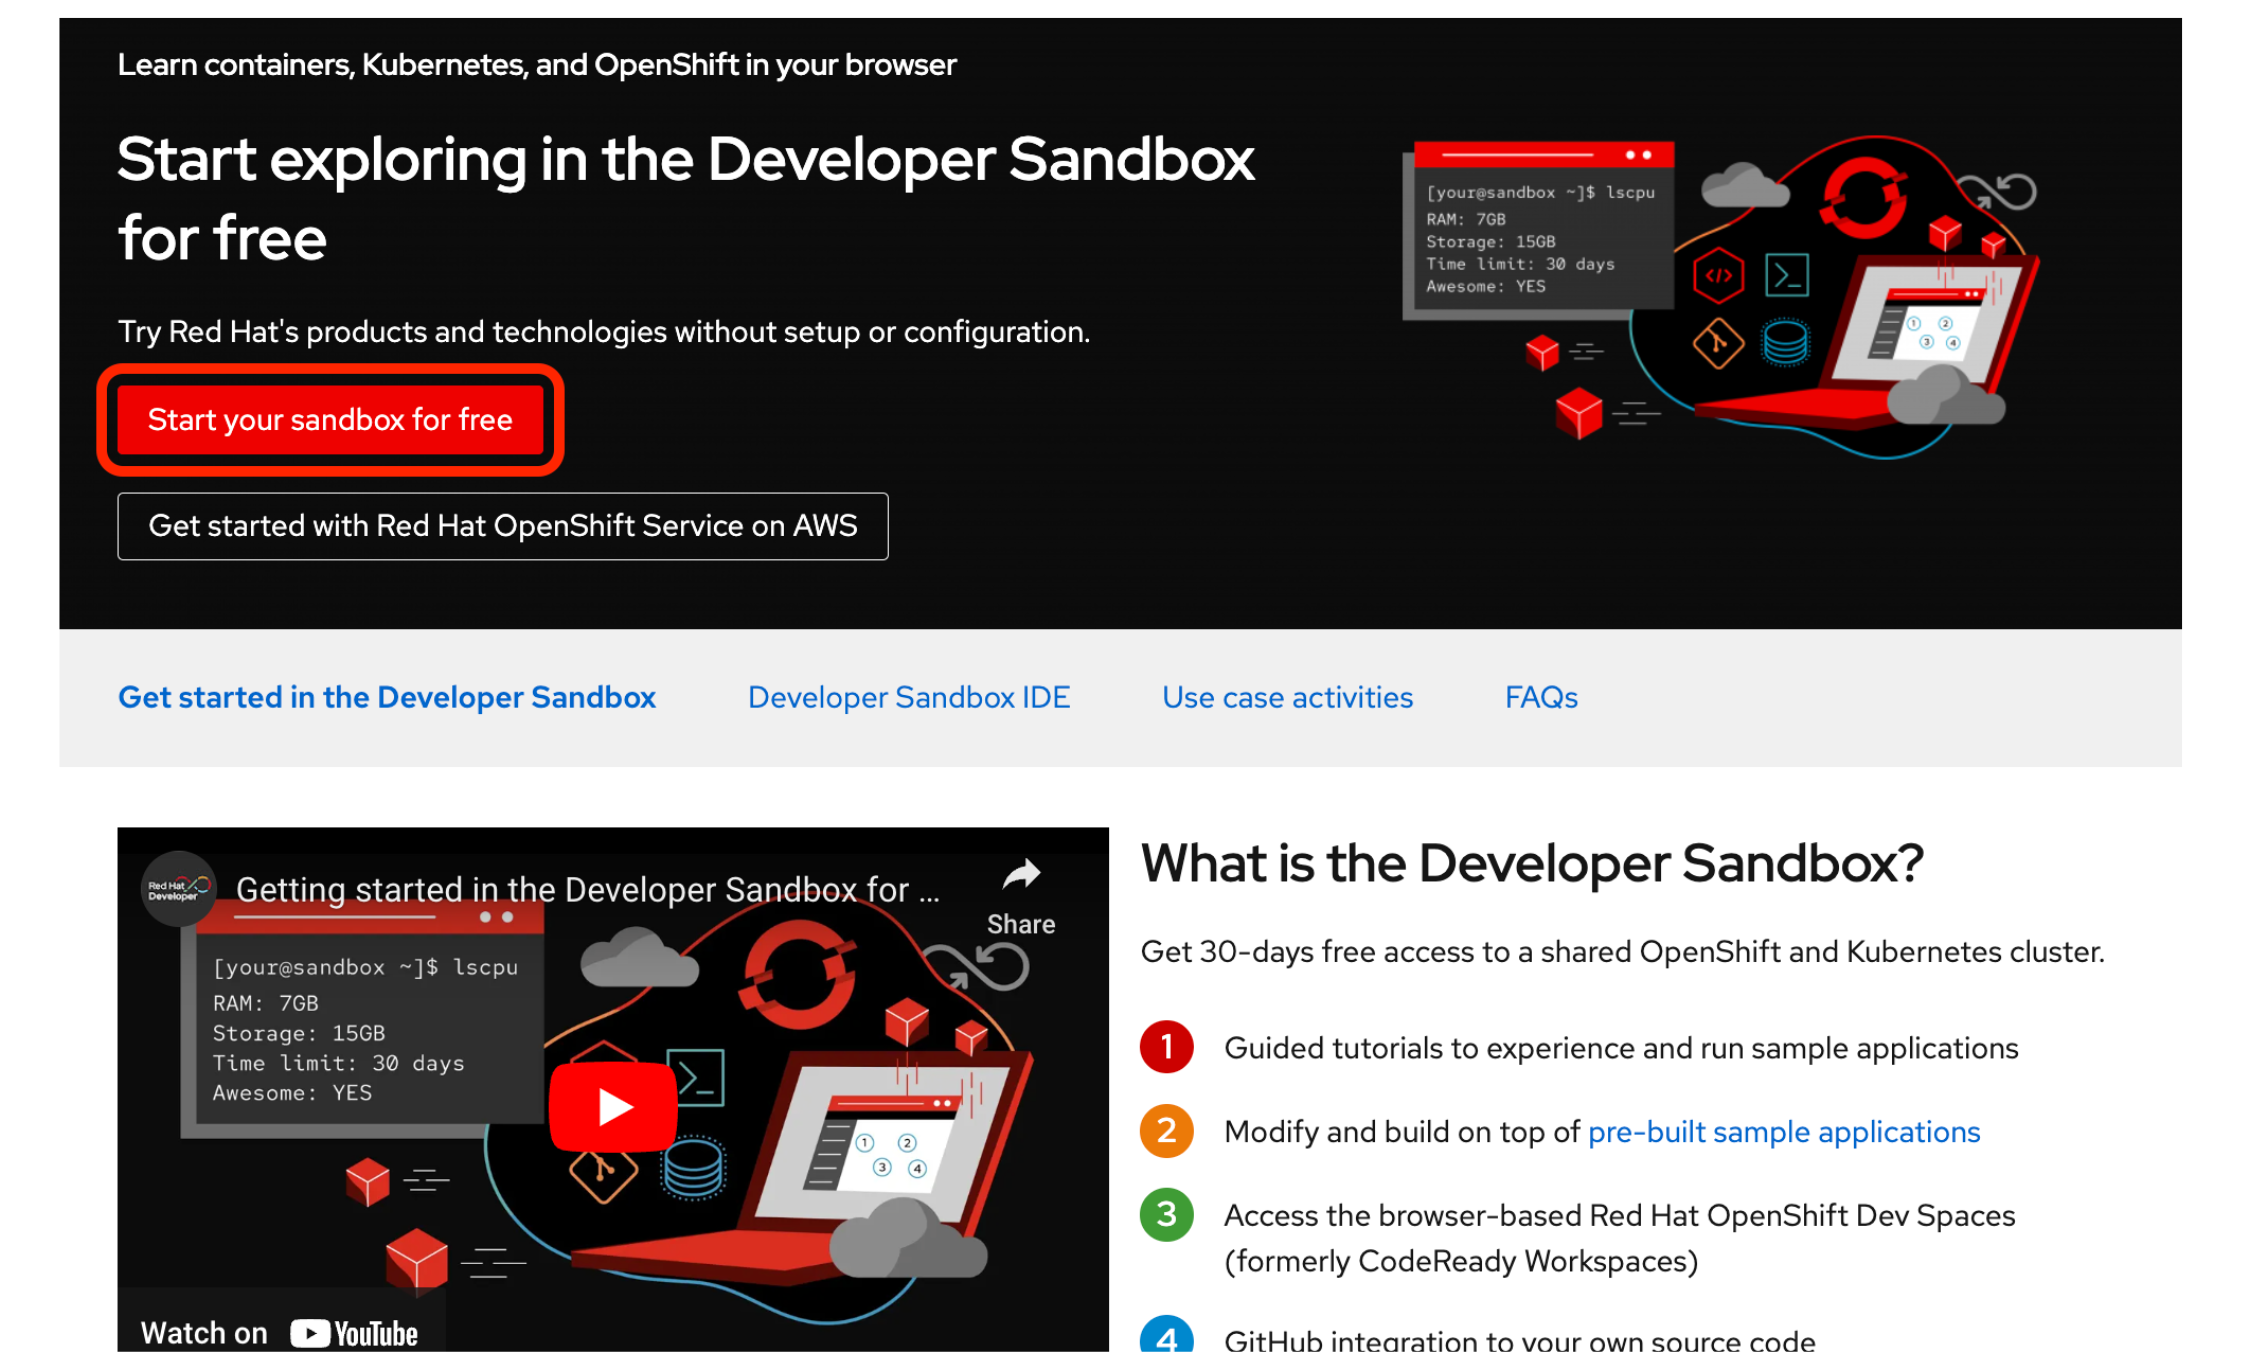
For this tutorial, you can use the Developer Sandbox for Red Hat OpenShift to get a free OpenShift cluster for 30 days to deploy and test your applications. To get started, visit the Resources section on the left-hand side of the Settings. This is where you can connect to your Developer Sandbox environment using your OpenShift authentication token. For now, let's click the link to Sign up for the Developer Sandbox, as shown in Figure 4). (If you already have a Developer Sandbox instance, you can skip to the next section.)

The Developer Sandbox for Red Hat OpenShift gives you access to a shared OpenShift and Kubernetes cluster at no cost, with 14 GB RAM and 40 GB storage. Simply log in using your Red Hat account and complete the phone verification process (Figure 5).
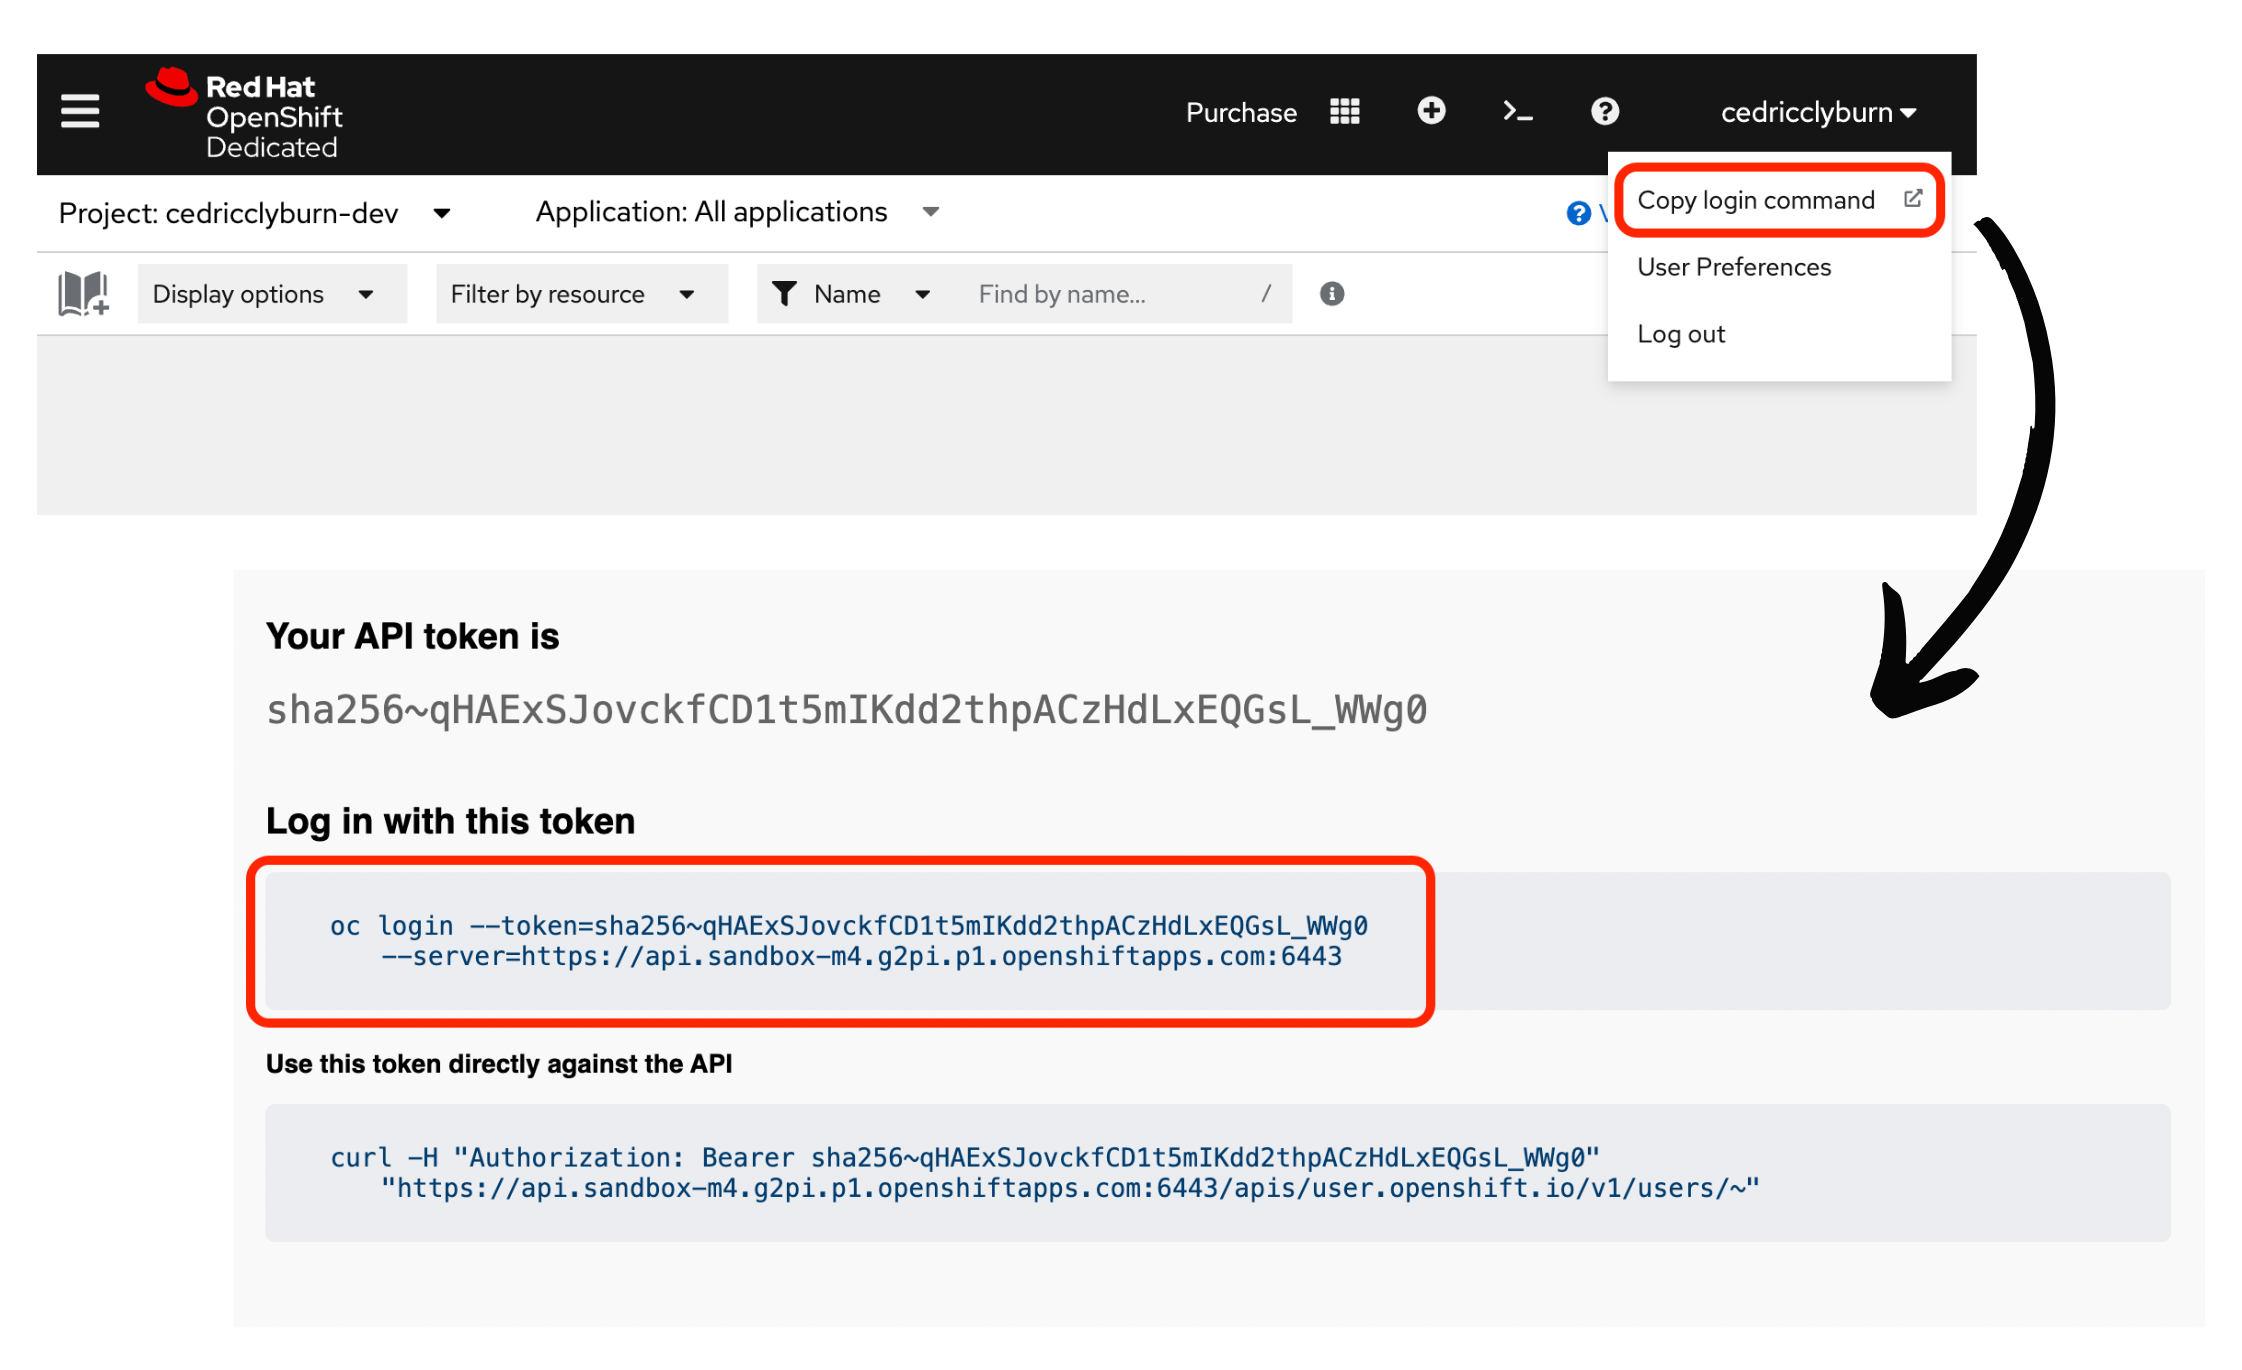
Once you've logged into the Developer Sandbox, you can connect Podman Desktop to the OpenShift cluster. On the top right-hand side of your OpenShift cluster, select the drop-down menu under your Red Hat username and click Copy login command. Click the Display token button to reveal your cluster URL and token and copy the entire command, as illustrated in Figure 6.
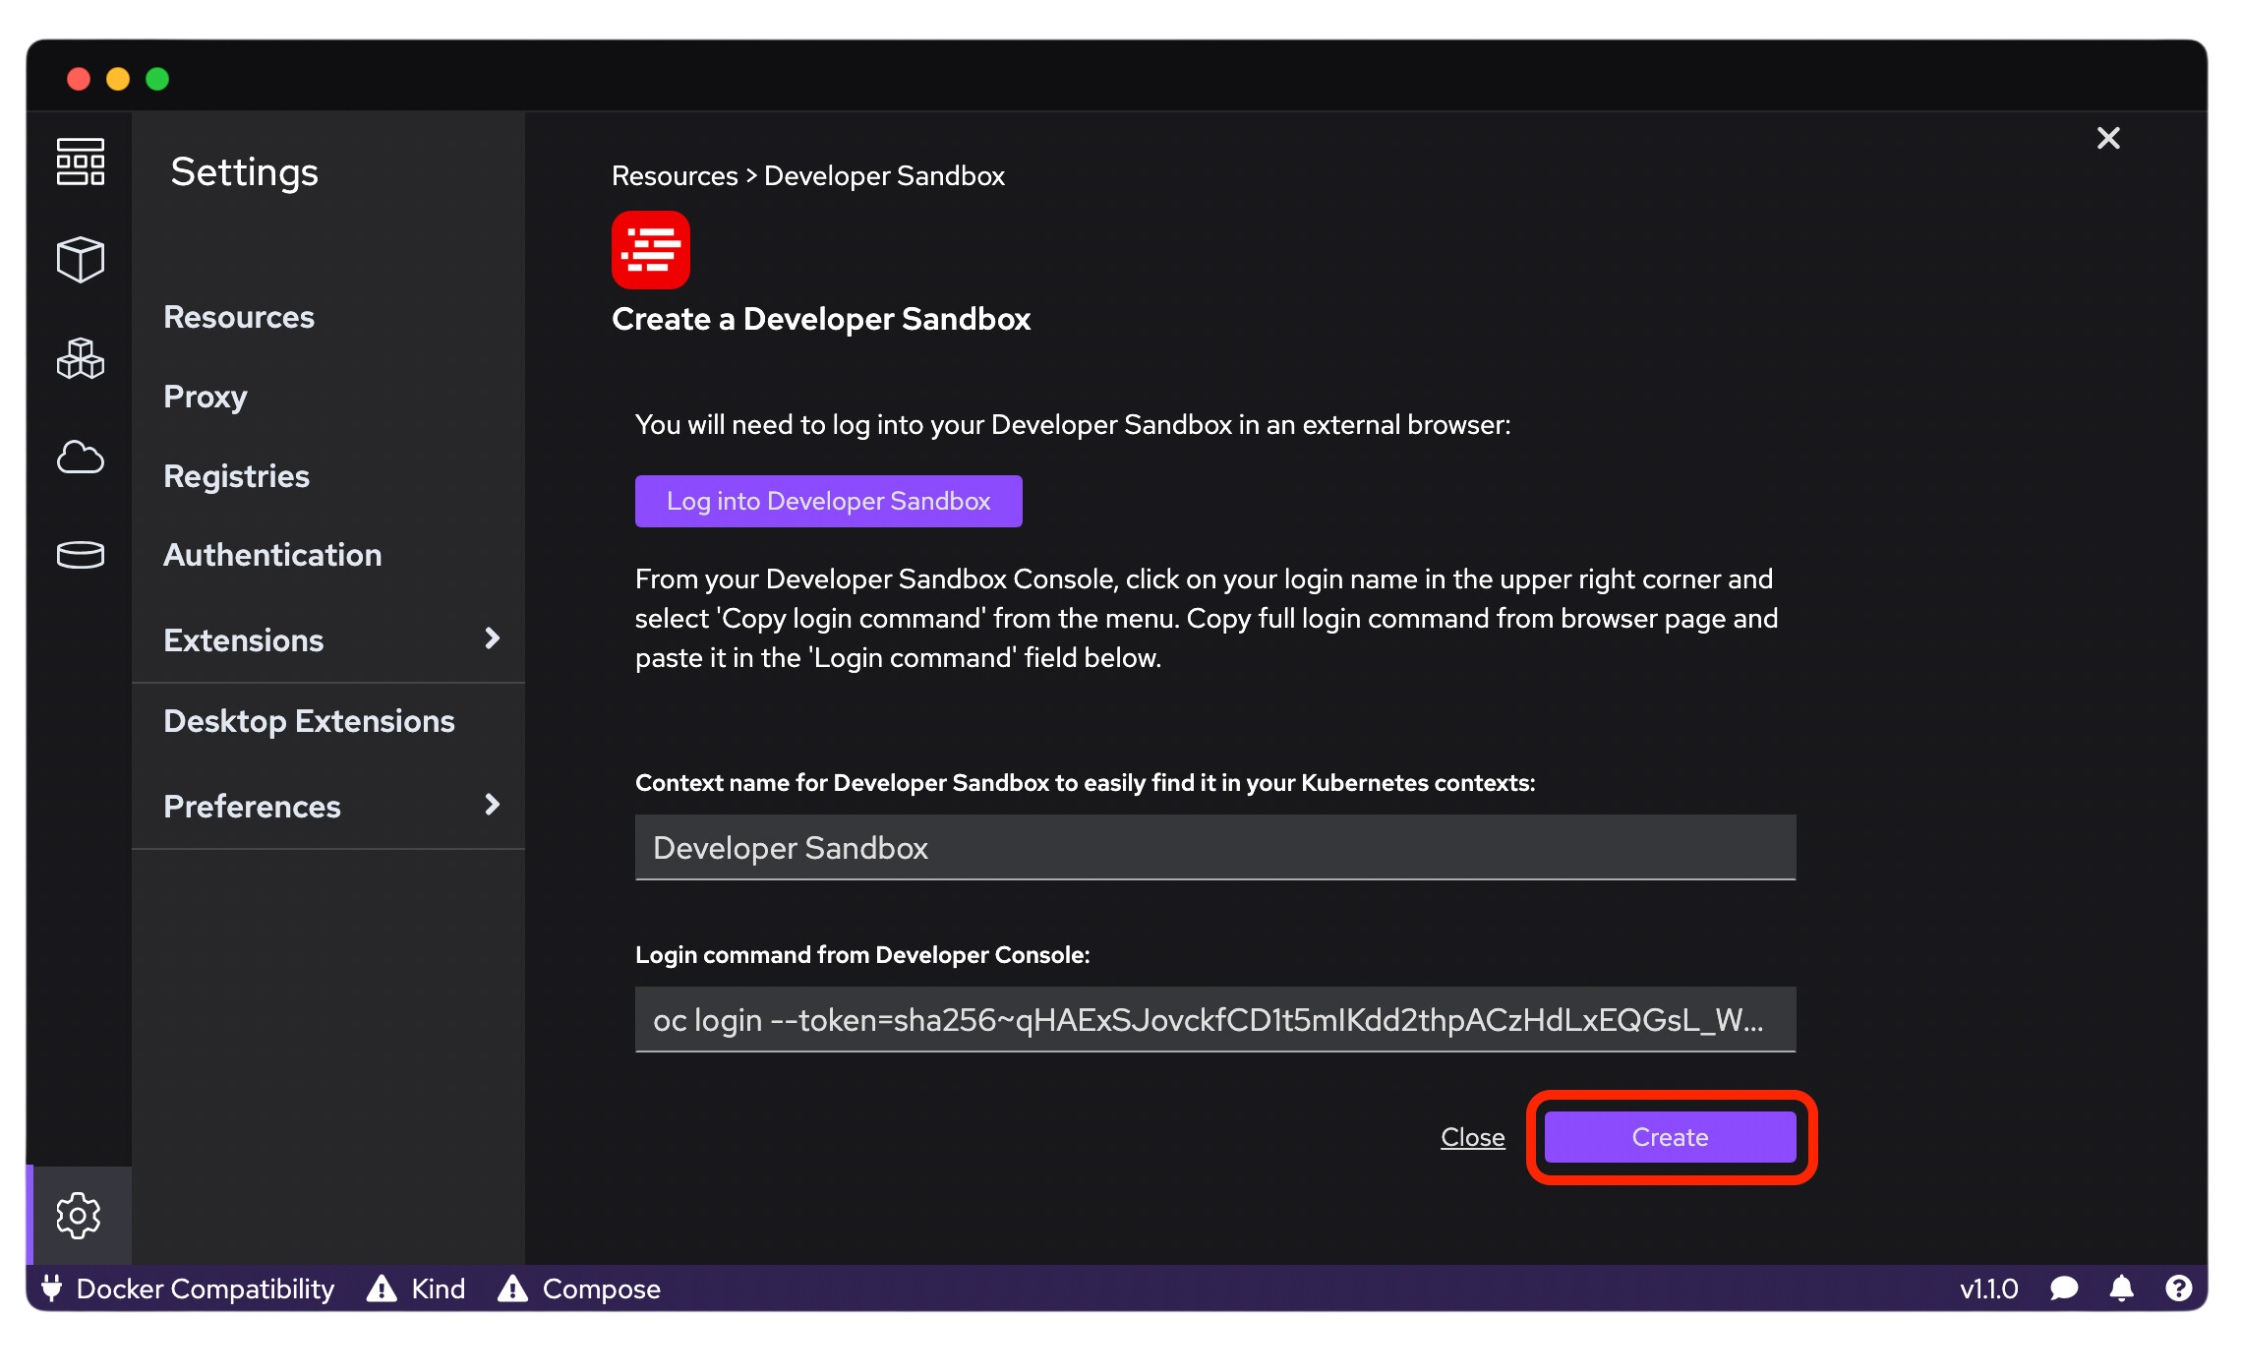
Return to Podman Desktop and select Create new Developer Sandbox on the Resources settings page. Here, you select a context name for your Developer Sandbox instance to easily find it within Podman Desktop, as well as paste in the full login command from the OpenShift web console. When you're ready, just click the Create button to authenticate to your Red Hat OpenShift cluster (Figure 7).
Deploy your application to the OpenShift cluster
Now that you’ve connected to your OpenShift cluster through the Developer Sandbox extension for Podman Desktop, it’s time to deploy a containerized application. While this guide won’t cover building a container image from a Containerfile, you can use Podman Desktop to pull an image down from a container registry before deploying it on the Developer Sandbox.
Pull an image from a container registry
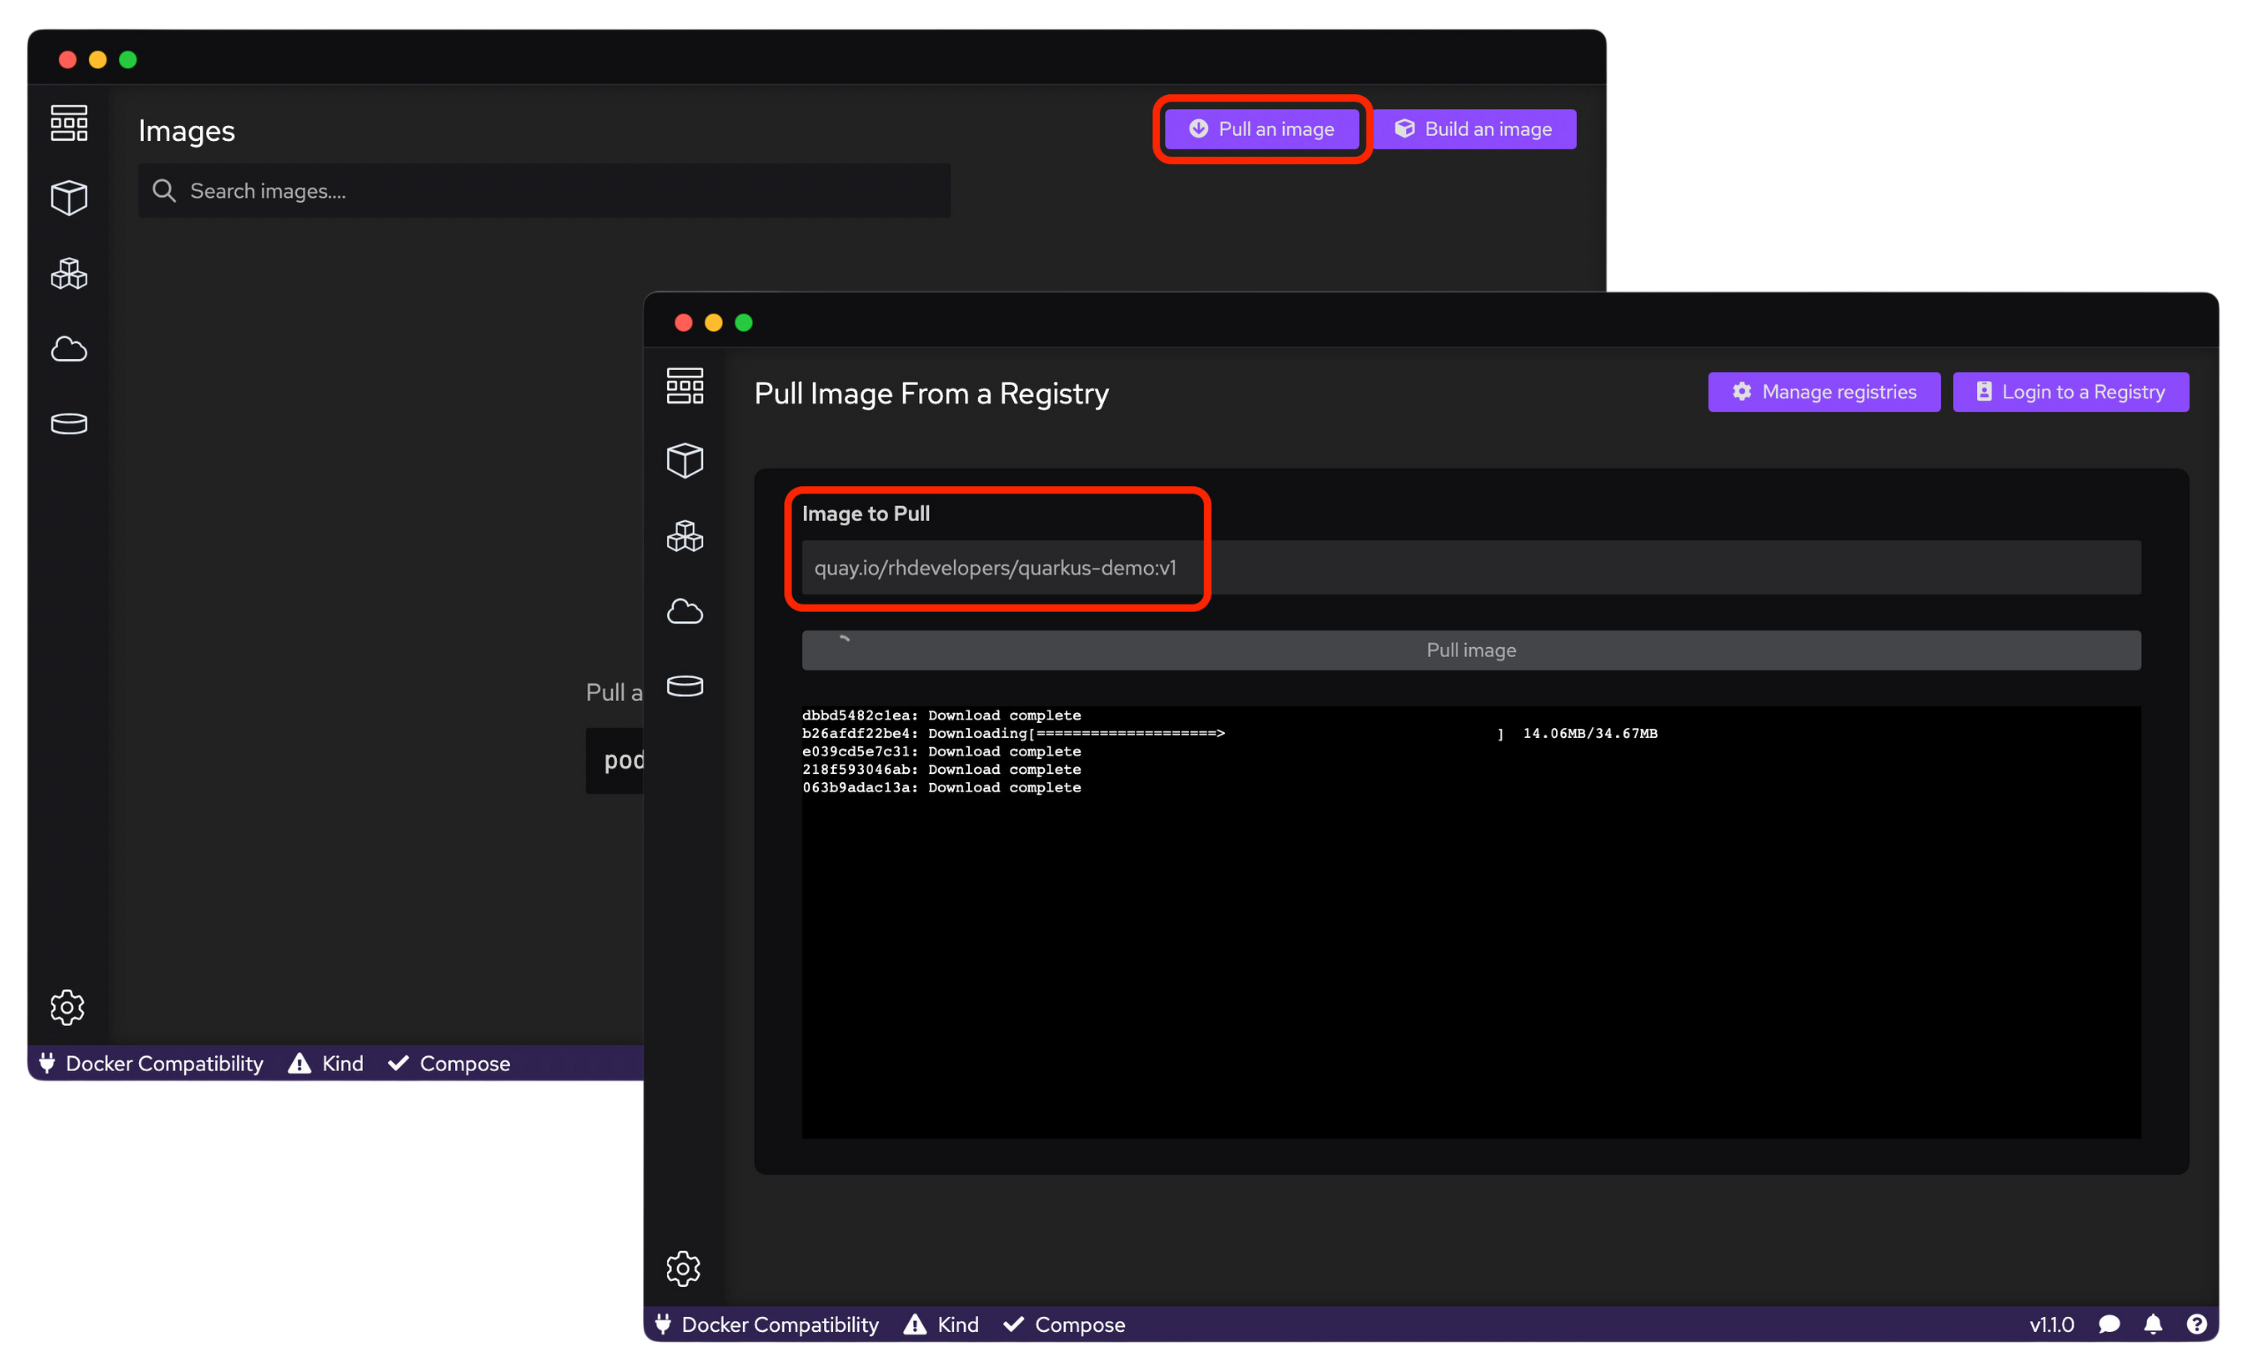
Let’s go ahead and pull an example image from Quay.io, an open-source public container registry similar to the Docker Hub. Within Podman Desktop, select the Images tab from the left-hand side of the panel. Here, select Pull an image in the upper right-hand corner of Podman Desktop.
For the image to pull, you can use a basic Quarkus demo application with the tag quay.io/rhdevelopers/quarkus-demo:v1. Select Pull image to begin the downloading process (Figure 8).
With the image pulled to Podman Desktop, you can now run the image as a container, delete the image, or view the image’s history. Let's begin checking out this container locally before we go and deploy it to our Developer Sandbox. Testing locally allows you to ensure your applications will run smoothly in a Kubernetes or OpenShift environment before deploying them.
Back in the Images section of the left-hand menu, select the newly downloaded Image, and click the Run Image icon, as shown in Figure 9. Here, we'll select the default configuration and select Start . Next, select the new container from the Containers section, and you can view various information about the running container, including logs, access to the container's shell using a terminal, and even the Kubernetes YAML needed to create a running pod on your cluster of your container.

Deploying your container to the Developer Sandbox
With your container either running or stopped, we can now deploy it to our Developer Sandbox using the registered cluster information in your local kubeconfig file. Before doing so, let's ensure that we've selected the correct Kubernetes namespace first by clicking the Podman Desktop Tray, selecting Kubernetes, and choosing the Developer Sandbox context (or another custom name). See Figure 10. Back in Podman Desktop, select the Deploy button (rocket emoji) to generate a Kubernetes pod on your cluster.

You can use the default generated Pod Name, review the Kubernetes YAML, select Create OpenShift routes, and click Deploy again to start the process of pod creation on your Developer Sandbox (Figure 11). The Developer Sandbox extension will handle the creation of the deployment, service, and route in deploying this container to our cluster.

Verify deployment status using the OpenShift web console
Now that your container has been deployed to the cluster using the Developer Sandbox extension for Podman Desktop, let’s take a look at the OpenShift web console to make sure everything looks right.
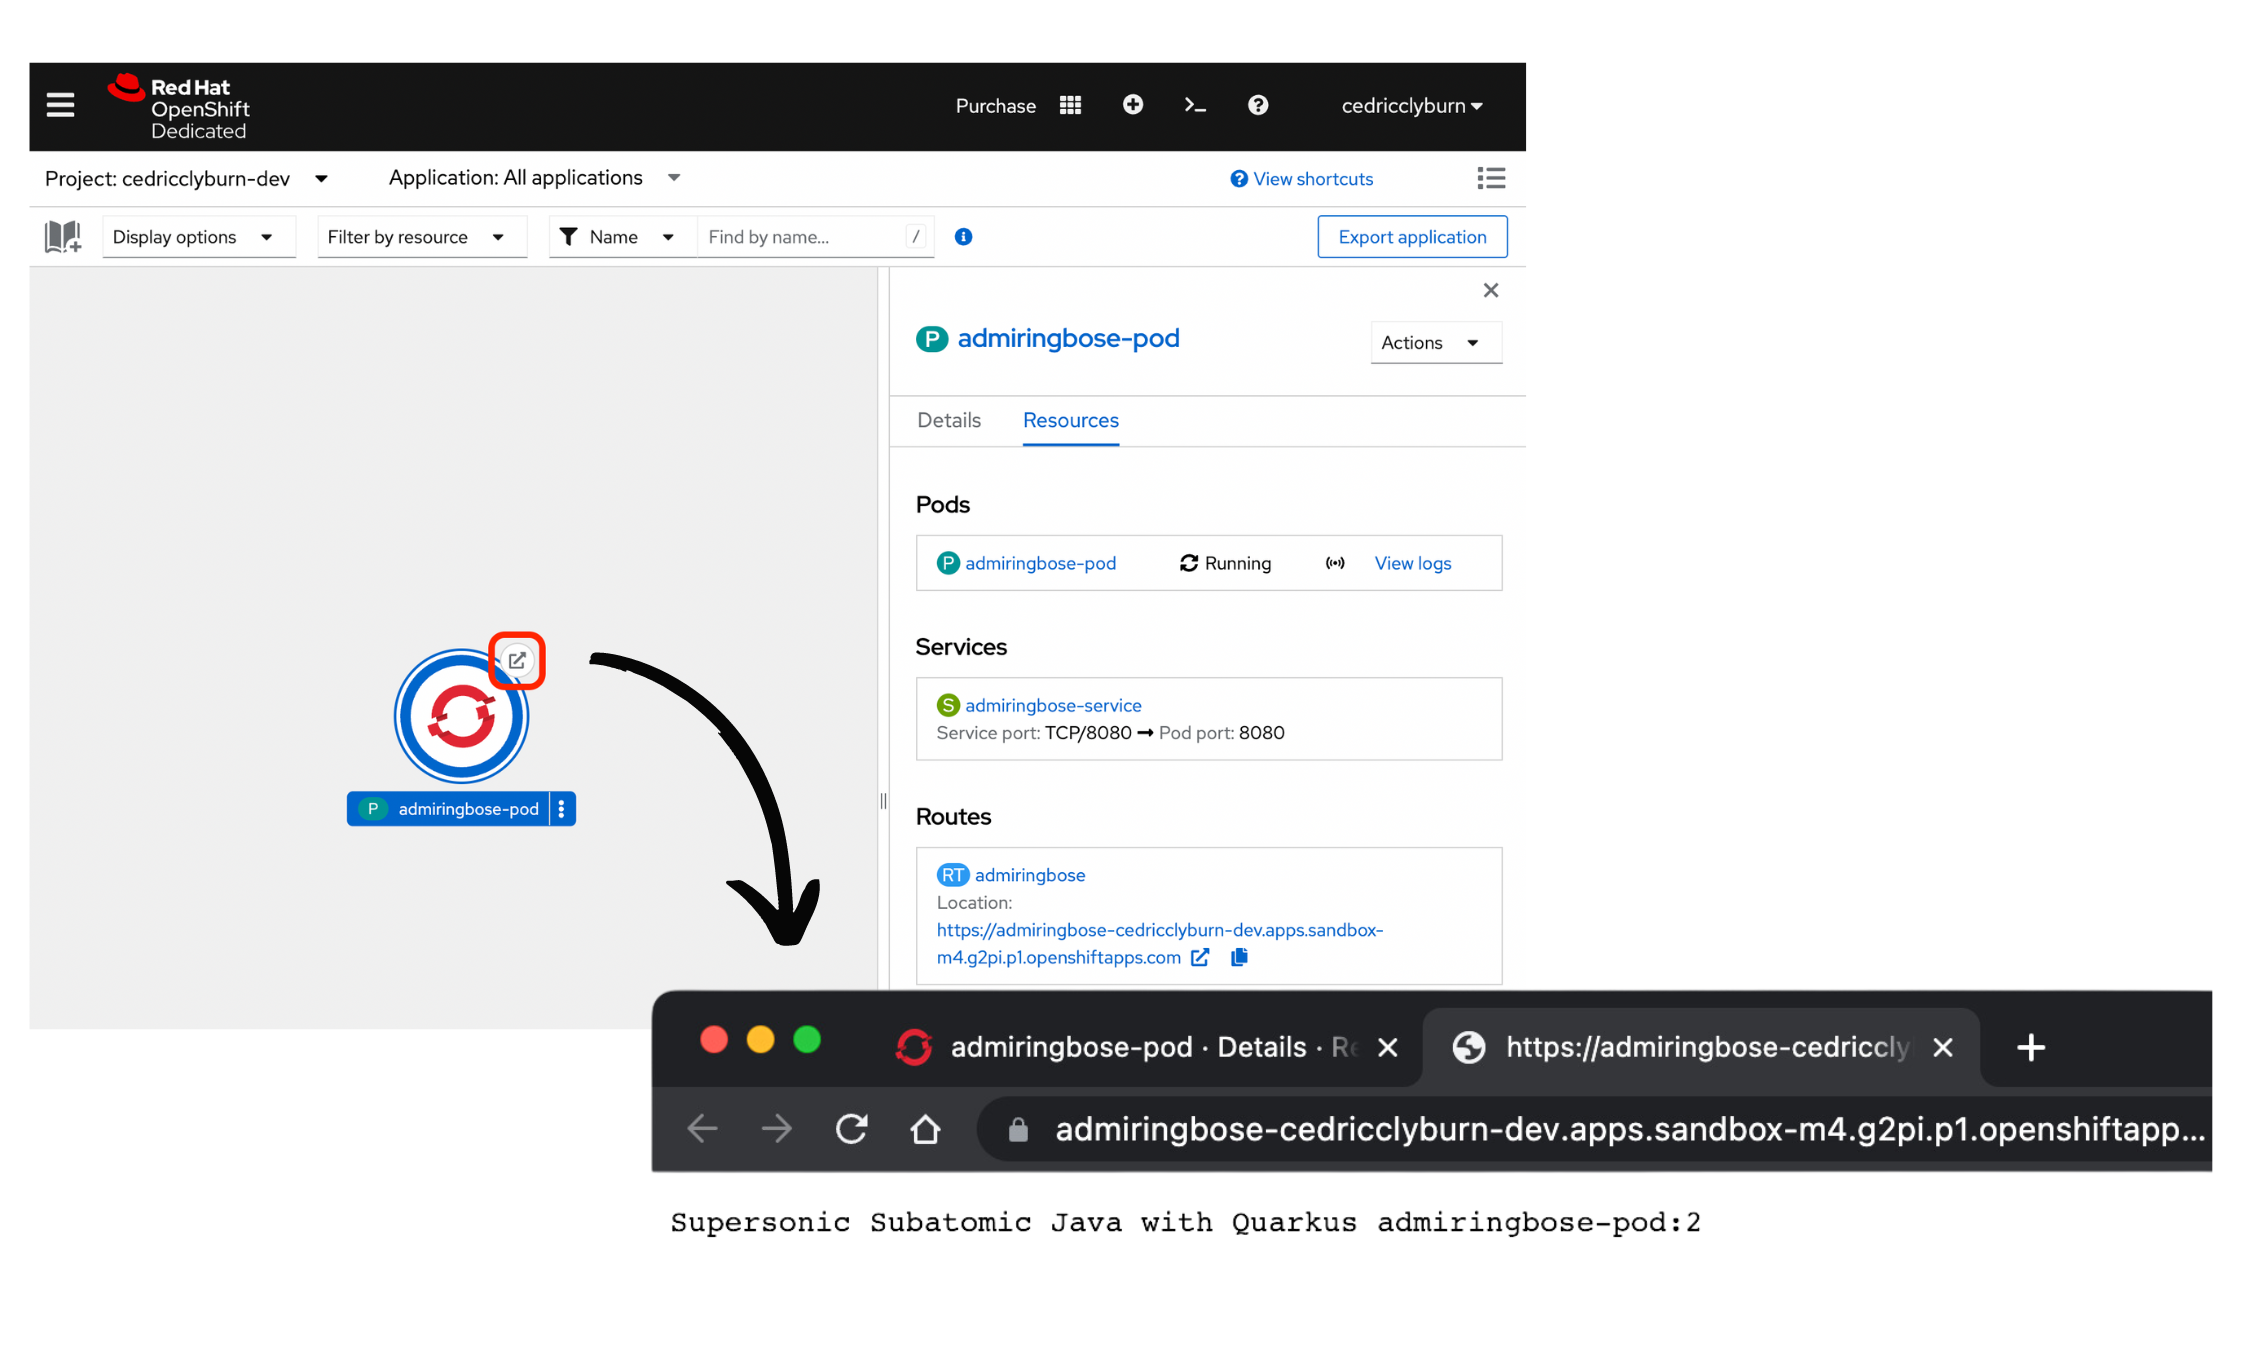
Back in the Developer Sandbox, head to the Developer view and select the Topology tab from the left-hand side menu. Here, you can see details about the new Quarkus application deployment, the service that has just been created, the running pod, and a link to the route created in order to access your application (Figure 12). Select the link to view the application in your browser.
Additionally, you can also select the Pod name to view relevant details like metrics, logs, and use the terminal, just how we did using Podman Desktop (Figure 13).

Conclusion
Congratulations! You’ve just learned how to deploy a container image to the no-cost Developer Sandbox for Red Hat OpenShift directly from Podman Desktop using the Developer Sandbox extension. For more information, check out the Podman Desktop documentation.
Explore other Podman and container resources on Red Hat Developer:
Last updated: February 7, 2024