In my previous article, I introduced the Red Hat OpenShift Serverless Functions Operator for creating serverless functions and led you through building and deploying an HTTP function written in Python. We ended up with a basic service that simply returned a "Hello world"-type string.
In this article, we'll take it up a notch by developing a Python-based serverless function that sends an email in response to a CloudEvent. This is a very real-world type of application for serverless functions and Functions as a Service (FaaS).
Note: See Faster web deployment with Python serverless functions for a guide to installing the OpenShift Serverless Functions Operator with Knative. Although we're only using Knative Eventing, the "scale to zero" feature, which is what makes a function a function, is part of Knative Serving. So, we need both parts.
Using CloudEvents with serverless functions
According to the CloudEvents homepage, CloudEvents is a "specification for describing event data in a common way." Just what we need: Yet another standard.
But the CloudEvents spec is actually a good thing, with the weight of the Cloud Native Computing Foundation (CNCF) behind it. CloudEvents is the way to create an event-driven, cloud-based application.
As a specification, CloudEvents gives us a standard way to fire and consume events, with SDKs for the following languages:
- C#
- Go
- Java
- JavaScript
- PHP
- Python
- Ruby
- Rust
We'll use Python to consume and act on CloudEvents, but you could use any other language for the example.
Step 1: Create a basic serverless function
You can create a basic function with one command: kn func create.
Before we do that, let's create a directory for our function and move into it.
mkdir pymailer
cd pymailer
Now we can run kn func create to create a function with the same name as the directory. However, doing that creates an HTTP-based function written in Node.js. We want an event-driven function written in Python. Fortunately, the --help tag, shown in Figure 1, gives us the information we need.

kn func create --help.Apparently, we can use the following command to create our function:
kn func create --runtime python --template events
Check the function
If you were to build and run the function as-is, as shown in Figure 2, it would work. It wouldn't do much, but it would be a working function.

Note that we can override the function name by adding our preferred name to the end of the command, such as kn func create foobar. I'm not a fan of this approach because having a function name different from the directory name can cause confusion. Like many things in IT management, naming is a good place to really make a mess of things. Tread carefully.
Python code to accept and process a CloudEvent
Do you want to see something cool? Remember that the function we've just created will accept a CloudEvent and process it. Keeping that in mind, here's the Python code required to do it:
from parliament import Context, event


@event
def main(context: Context):
    """
    Function template
    The context parameter contains the Flask request object and any
    CloudEvent received with the request.
    """
    # print(f"Method: {context.request.method}")

    # The return value here will be applied as the data attribute
    # of a CloudEvent returned to the function invoker
    return { "message": "Howdy!" }
We need just four lines of code to accept a CloudEvent and return a message.
Notice the @event decorator. The kn func build command uses the @event decorator to inject all the dependencies required for CloudEvent support. In short, the kn CLI is doing a lot of the heavy lifting to create an event-based serverless function.
Of course, we're not stopping here. We're going to tweak this application to handle an event and send an email to the enclosed email address. Let's light this candle!
Step 2: Modify the basic function for your application
We'll be accepting a JSON document that contains an email address (property "recipient") and a subject line for the email ("subject").
Modify the contents of func.py like so:
from parliament import Context, event
import yagmail
import os
import json

@event
def main(context: Context):

     # Get credentials from environment variables, which will be
     # stored in an OpenShift secret
    sender_email_address  = os.environ['SENDER_EMAIL_ADDRESS']
    sender_email_password = os.environ['SENDER_EMAIL_PASSWORD']

    emaildata = json.loads(context.cloud_event.data)
    receiver  = emaildata['recipient']
    body      = "Hello there from the PyMailer Function as a Service, running in OpenShift using OpenShift Serverless Functions."

    yag = yagmail.SMTP(sender_email_address,sender_email_password)

    yag.send(
        to=receiver,
        subject=emaildata['subject'],
        contents=body,
    )

    return { "message": receiver }
Using Gmail with the Python serverless functions
For this article, I'm using my own Gmail account as my SMTP server. You can, of course, use the SMTP server of your choice and tweak the code as required. But I wanted something easy as opposed to fast or loaded with features.
To support using Gmail, I chose the awesome yagmail library by Pascal van Kooten. It makes using Gmail with Python so easy that even this .NET developer can do it. You basically set the credentials, create a connection, and send. Too easy, almost.
Note that I'm reading the credentials from my local environment variables. This is very slick for at least three reasons:
- It is easy to run (meaning, test) locally because I can set the variables at the command line.
- OpenShift Serverless Functions allows me to store the variables as OpenShift secrets, bringing an added level of security to my application.
- OpenShift Serverless Functions reads the secrets for me, so I don't need to import and use a Kubernetes API library.
Notice that I'm importing yagmail, os, and json. The os and json libraries are built into Python, but I need to modify my requirements.txt file to read as follows:
parliament-functions==0.1.0
yagmail
I did not specify the version number for yagmail because it's not necessary. Python's pretty cool like that.
Using secrets with func.yaml
I did have to alter the func.yaml file to use my secrets. First, however, let's create the secrets. I created a file called pymailer-auth-secrets.yaml with the following contents:
apiVersion: v1
kind: Secret
metadata:
  name: pymailer-auth-secrets
type: Opaque
data:
  username: <<redacted>>
  password: <<redacted>>
The username value is my own email address. The password is a Gmail app password that I generated. Both values must be Base64 encoded. How this is done differs between Bash and PowerShell, but the results are the same.
Figure 3 shows the Bash method for email; repeat it using the app password to get both values.

Figure 4 shows the PowerShell method.

Step 3: Build the serverless function
Run the command kn func build, as shown in Figure 5.

Seriously; that's all you need to build the function image in your machine. The first time you run the build, it will prompt you for the registry where the image will eventually be pushed. In my case, it was docker.io/donschenck. This value will automagically update the file func.yaml.
Step 4: Test the serverless function locally
Before you can test the function on your local machine, you'll need some test data.
I created a file, test.json, with the following contents:
{
    "recipient":"validemail@gmail.com",
    "subject":"Hello there FROM THE CLUSTER!"
}
Of course, the value of "recipient" must be a valid email address. Use your own email address if you want to see the results of the function; use a coworker's address if you want to annoy them.
You also need to set the local environment variables for your Gmail address and application password—the SMTP server you're using. In this case, you do not want to Base64 encode the values because they are not being stored in a secrets file. Here's an example (this is PowerShell):
$env:SENDER_EMAIL_ADDRESS="my.email@gmail.com"
$env:SENDER_EMAIL_PASSWORD="mypassword"
Use the following for Bash:
export SENDER_EMAIL_ADDRESS="my.email@gmail.com"
export SENDER_EMAIL_PASSWORD="mypassword"
Now simply run the function on your machine at the command line:
kn func run
And send the test data, again at the command line:
kn func emit --sink "local" --file test.json
And ... it doesn't work.
Why? One word: Containers.
Setting environment variables inside the container
When we set the environment variables in our terminal session, those variables were local to our machine. But our function is running in a container. We need to somehow set the environment variables inside our container.
Fortunately, the kn CLI has it covered. We'll simply add the environment variable names and values to our kn func run command, as such:
kn func run -env SENDER_EMAIL_ADDRESS="my.email@gmail.com" -env SENDER_EMAIL_PASSWORD="mypassword"
Again, note that the values are not Base64 encoded here.
Now, run the kn func emit command (as mentioned previously) again.
kn func emit --sink "local" --file test.json
After about a minute or so, the email will arrive. The function works on your machine. Next, we'll move it to our Red Hat OpenShift cluster.
Note: See Build your first Python application in a Linux container for more about running Python in containers.
Step 5: Deploy the serverless function on OpenShift
Before you can deploy the serverless function in an OpenShift cluster, you need to ensure three things:
- You are logged into your OpenShift cluster and the OpenShift Serverless Functions Operator is installed, along with the Knative Eventing and Knative Serving APIs.
- You are in the correct OpenShift project. If you're not sure, simply run
oc new-project faas-example. - You are logged into the correct image registry. For example, the
docker logincommand.
Update the configuration
In our OpenShift project, we need to create the secrets we'll be using.
oc create -f pymailer-auth-secrets.yaml
The build, deploy, and runtime information that the function needs are all stored in the file func.yaml. While this file was automatically created, we need to update it. Specifically, we need to make sure we are referencing the secrets that we created. You can edit your func.yaml file to be like the following (from >envs: to the end of the file), or you can use the command kn func config envs add. Here's my final func.yaml file:
name: pymailer
namespace: ""
runtime: python
image: docker.io/donschenck/pymailer:latest
imageDigest: sha256:597f5035c94617f9a2e5015d9fab825a883f99c244e43bc90ebc52dbf0d76ade
builder: quay.io/boson/faas-python-builder:v0.8.3
builderMap:
  default: quay.io/boson/faas-python-builder:v0.8.3
volumes: []
envs:
- name: SENDER_EMAIL_ADDRESS
  value: '{{ secret:pymailer-auth-secrets:username }}'
- name: SENDER_EMAIL_PASSWORD
  value: '{{ secret:pymailer-auth-secrets:password }}'
annotations: {}
options: {}
Deploy the function
Now for the easiest part: The actual deployment. We can do that with one command:
kn func deploy
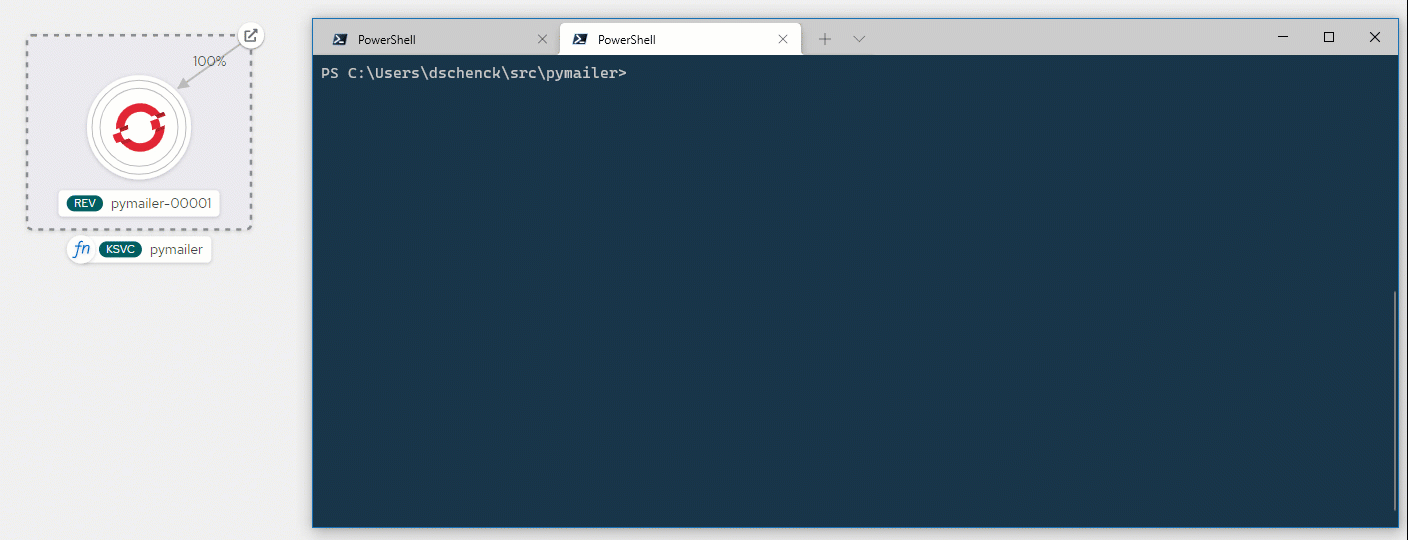
The image will be sent to your image registry, pulled down into your project in your cluster, and started. The function is running in a container, using the secrets you supplied to connect to your SMTP server. It's waiting for a CloudEvent to be sent at the URL assigned to it—you'll see that shortly. You can see the function represented in the OpenShift dashboard's developer topology page, as shown in Figure 6.

The function URL
At the command line, the URL of the function will be returned. We'll use that in the final step, as shown in Figure 7.

Step 6: Test the serverless function in your cluster
This is the fun part. Enter the following command to test the function in your cluster:
kn func emit --file test.json --sink "<<url_goes_here>>"
If you first wait until your function scales to zero pods, you can then watch it "wake up" and process your command, as shown in Figure 8.
Behold: The fully-functional Python serverless function
You've done it. You created a Python serverless function, running in your OpenShift cluster, with the bare minimum of coding, configuration, and so on. The biggest challenge was creating the OpenShift secrets.
After a few minutes, the function will scale to zero pods. At that point, if you send it a CloudEvent, it will again wake up and continue. This "wake up" time is the single biggest argument against FaaS, so you need to be sure it's not a hindrance for your particular use case. I chose the send-an-email example because, typically, sending a confirmation or password reset email doesn't require sub-second timing.
Also, once the function is scaled up and running, you can send event after event and expect a much faster response time.
What next?
How about creating a web-based front-end in say, React.js, to really tie it all together?
Last updated: September 20, 2023