Setting up your Python 3.9 development environment in a Linux container is quick and easy. This article shows you how to install Python 3.9, set up your environment, and use it to create and run a Python web service on Red Hat Enterprise Linux (RHEL) 8. The whole process should take about 15 minutes.
The amazing thing about building and using a Linux container with Python is that you don't actually need Python on your machine to do it. Creating a Python containerized application on a machine without Python support might not be ideal, but it is possible.
Step 1: Install Python 3.9 on RHEL 8
Use the following commands to install Python 3.9 on your RHEL 8 machine:
sudo yum module install python39/build
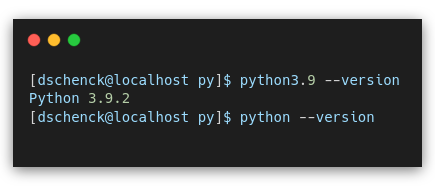
Now you can start using Python via the python3.9 command, as shown in Figure 1.

Notice that we installed a module, the yum module. Modules were introduced with RHEL 8 as part of the new Application Streams concept. A module is a streamlined way to get all the components you would typically need for a particular deployment. For example, the Python3.9 module includes development tools like numby, pip, setuptools, scipy, and many more. You can see a complete list by running the yum module info python39 command.
Step 2: Don't install Docker (you don't need to)
That's right, there's no need to install Docker on RHEL 8 because Podman is included automatically. Podman is the open source alternative to Docker that does not run as root, which improves security. You can run podman --version to verify that it exists.
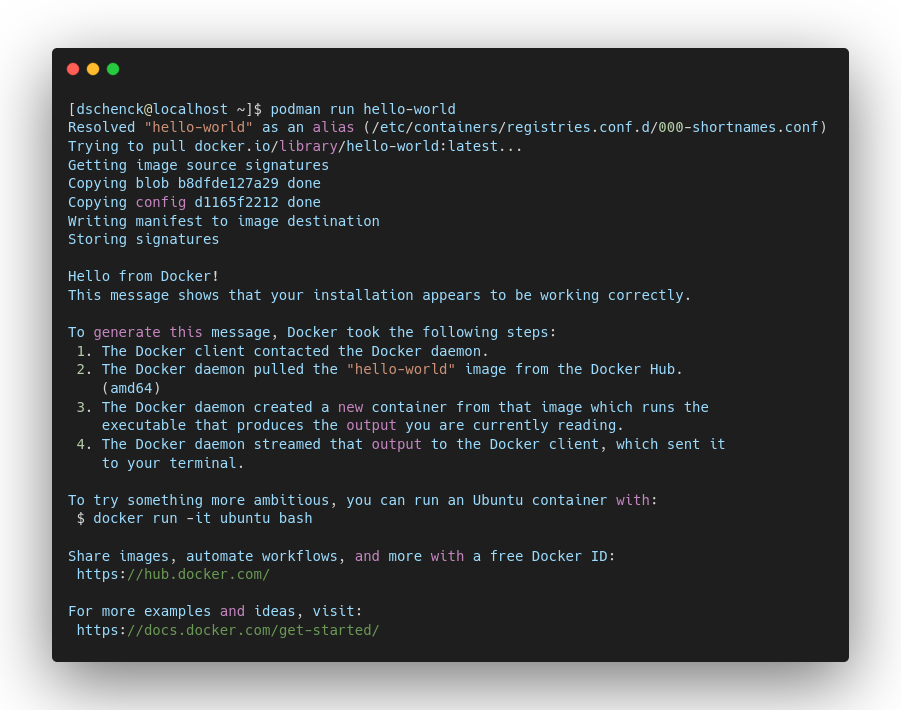
You can use the Docker "Hello World" example to see a containerized application running on your local system. Enter the following command to see it run:
podman run hello-world
You'll see output like the screenshot in Figure 2.

Note: If you really feel the need to run docker commands, you can always use alias docker='podman'. Also, every podman instance in this article can be replaced with docker; they're command-for-command compatible.
Step 3: Create a Python web service
Now it's time to create a simple Python HTTP server that will act as our very basic web service. It will run on port 8000 and return a "Hello world"-type message.
There are three parts to this service:
- The HTML file that will be served.
- The Python code to run as the HTTP server.
- The Dockerfile build instructions to build the container image.
Note: I'm borrowing the code for this article from my colleague Mike Guerette. See his tutorial Build your first application using Python 3.5 on RHEL 7 with containers and Red Hat Software Collections if you need instructions for building a Python application on RHEL 7.
Let's get started with our Python web service.
Set up a directory for the Python project
First, create a directory and move into it with the following commands:
mkdir firstpython && cd firstpython
Create the HTML file
Typically, a web service will return data as a JSON document, but for this demonstration, we'll be returning HTML. That means it'll display nicely in a browser.
Create a file named index.html with the following contents:
<html>Hello, Red Hat Developers World from Python!</html>
This content will be returned by our web service.
Write the Python code to run as the HTTP server
Create a file named web.py with the following contents:
#
# A very simple Python HTTP server
#

import http.server
import socketserver

PORT = 8000

Handler = http.server.SimpleHTTPRequestHandler

httpd = socketserver.TCPServer(("", PORT), Handler)

print("serving at port", PORT)
httpd.serve_forever()
This is a very simple HTTP server, running on port 8000. That's good enough for our demonstration.
Step 4: Test the Python application locally
You can test your Python application before building an image and running it in a container. Use the following command to start the web server, running at localhost:8000:
python3.9 -u web.py
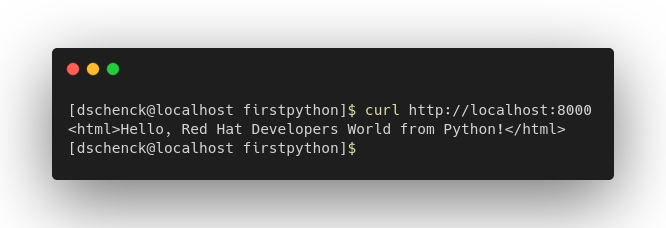
Then, either use the curl command or open your browser to the address. You'll see results similar to the screenshot in Figure 3.

Step 5: Build a container image
Now that we have the Python web service, and we've tested it, we'll build a container image for it.
We will use a Dockerfile containing build instructions to build the container image. Create a file named Dockerfile with the following contents:
FROM registry.access.redhat.com/ubi8/python-39

EXPOSE 8000

COPY . /opt/app-root/src

CMD /bin/bash -c 'python3 -u web.py'
Use the following command to build the image:
podman build -t pythonweb .
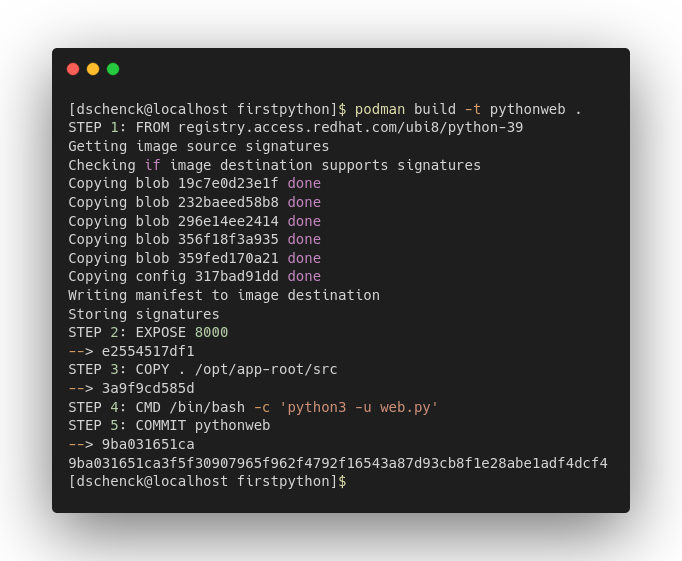
As the image is being built, you will see the underlying image (ubi8/python-39) being pulled from the Red Hat registry. This image will be stored on your local machine. If you use this underlying image in a future build, it will not be pulled again.
Note: UBI is the acronym for Universal Base Images. A UBI is a Red Hat image that allows you to use RHEL in your container and make sure it runs anywhere. UBI is specifically designed for cloud-native and containerized applications.
Finally, the commands in your Dockerfile build instructions are carried out, and the resulting image ID is displayed. Figure 4 shows the build on my machine.

You can see the images on your local machine by running the command podman images, as shown in Figure 5.

Step 6: Run, run, run ... run it in a container
Now that we've built the image, we can run it in a container. Use the following command:
podman run --detach --publish 8000:8000 --name=helloweb localhost/pythonweb
When you enter this command, the container runtime engine runs the image in the background—that's what the --detach flag does—and returns the container ID. The --publish flag publishes the port to the host. In this case, the container's port 8000 is made available to the host (your local machine), which, in turn, is mapping it to it's own port 8000. Note that these port numbers do not need to match. Figure 6 shows an example of the command output on my machine.

Just to recap: The image ID is created when you build the image. The container ID is assigned to the container in which the image is being run. You can see the container running by entering the command podman ps. Figure 7 shows the running container.

Results? We got 'em
That's it, we've created a Python web service and it's running in a container. Now let's view the results. As before, open your browser or use the curl command with the address http://localhost:8000. You'll get something like the screenshot in Figure 8.

What's in a name?
Did you notice the mess I've made with naming? The directory is named firstpython. The image is named pythonweb. The name I assigned to the container is helloweb.
I did this on purpose to demonstrate that, if you really want to, you can make a colossal mess with naming. A best practice would be to have the directory name, the image name, and the container name match.
Additionally, the name that I assigned to the image, pythonweb, was not fully qualified by me, so the system assigned it to the localhost namespace. The tag assigned, by default, is :latest. So, putting this together, the name is localhost/pythonweb:latest.
In real life, you would use an image registry as part of your namespace, and perhaps assign a tag. For example, if I were to build this image for my own (personal) image registry—where I will later send it using the podman push command—I would use the following command to name and build it:
podman build -t quay.io/donschenck/pythonweb:v1 .
It is not uncommon to use only two tags for image naming: :latest and :next. When you wish to update to the next version, you build the code for the :next image, but tag it as :latest.
"But what about rolling back?"
You don't. You never roll back; you roll forward, always. This idea is not without controversy, but it does force you to keep your microservices small and simple, and easy to update.
Keep all of this in mind, especially when you create your own free Kubernetes cluster in the Developer Sandbox for Red Hat OpenShift and run your Python application there.
Tips for running your application in a container
To stop the container from running, use the following command:
podman stop helloweb
You can view the logs of the container with the following command:
podman logs helloweb
You can restart the container if you wish—I'll let you do a web search for that command.
Finally, you can delete the container with the following command:
podman rm helloweb
After you remove the container, the logs are gone, which makes sense. But the image (localhost/pythonweb) is still on your local machine. In fact, if you want to see something interesting, run the following command:
podman inspect localhost/pythonweb
Now see what happens if you run the podman inspect command but, instead, reference the Red Hat Universal Base Images 8 image that was pulled down during the build process.
Where do we go from here?
This article has been a quick introduction to creating and running a Python web service in a RHEL 8 Linux container. If you are wondering about next steps, here are a few suggestions:
- Download your free copy of RHEL 8 and run it in a virtual machine (I'm using Windows 10 and Hyper-V).
- Are you a Windows developer and not super skilled with Linux? No worries: Download Burr Sutter's Linux Commands Cheat Sheet.
- Build an application on your RHEL 8 machine.
- Create an image from the application and push it to your own image registry.
- Get a free Kubernetes cluster and start experimenting in the Developer Sandbox for Red Hat OpenShift.
- Join Red Hat Developer for more resources like this one.
