Page
Overview of the web console
In this lesson, you will learn the basics about the structure and use of the OpenShift web console as well as the various resources it provides.
What you need to know
In order to get full benefit from taking this lesson, you need to:
- Have a basic understanding of the nature and use of Kubernetes as a container orchestration framework.
- Understand the relationship between OpenShift and Kubernetes.
- Know how to access your dedicated instance of the Developer Sandbox.
What you will learn
In this lesson, you will learn:
- How to access the technical documentation for OpenShift using the web console.
- How to access the Quick Starts and other learning resources available within the Developer Sandbox.
- The nature and use of an OpenShift project.
Access the learning features
The OpenShift web console is a powerful, complex tool for working with an OpenShift cluster. As with any complex tool, there is a learning curve. Fortunately, the OpenShift web console provides access to a variety of available resources, features, and services.
To access OpenShift learning resources from the web console, select the question mark icon in the upper right corner. A drop-down listing a variety of resources will appear (Figure 1).
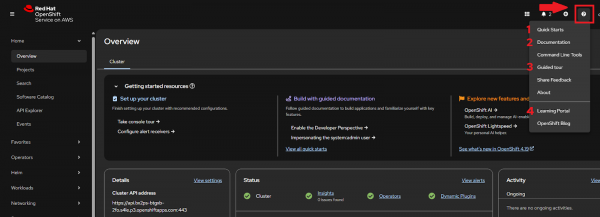
Figure 1: Clicking the question mark icon in the upper right corner of the sandbox displays the available learning features.

- The Quick Starts option displays a page within the web console that shows a number of quick start lessons that are conducted directly within the web console. Each lesson displays instructional content that you can execute directly within the web console user interface (UI).
- The Documentation option takes you to OpenShift technical documentation.
- The Guided Tour provides a short overview lesson directly within the web console that points out the use and purpose of the various OpenShift features at a high level.
- The Learning Tour option takes you to a page that provides a wide variety of interactive lessons about topics relevant to OpenShift, with experience levels ranging from beginner to advanced.
Work with OpenShift projects
The most important concept to understand about working with OpenShift is the notion of projects. OpenShift organizes applications and services by projects, and an OpenShift cluster can have one or more projects.
A "project" is an OpenShift representation of a Kubernetes namespace. As pointed out in the previous lesson, an OpenShift cluster is an undercover Kubernetes cluster. The benefit is that OpenShift removes a lot of the complexities of working with Kubernetes in favor of a simplified user experience.
Applications and services running in a given Kubernetes namespace cannot typically see applications and services running in another namespace. That's because a single namespace provides the isolation and security required to run an application and service in a cluster. However, managing multiple unique namespaces can be complex.
OpenShift removes the complexity by representing the namespace as a project. Once you declare an application or service to be part of a project, full-blown instances of OpenShift running either in a local or cloud setting within Red Hat OpenShift Local 2 lets you create any number of projects.
Note: The OpenShift instance running within the Developer Sandbox supports only a single OpenShift project and a single Kubernetes namespace.
The default single project is named according to the naming convention <login_name>-dev. Thus, if your log in name is joe123, the default project in your instance of OpenShift is the Developer Sandbox will be named joe123-dev.
You can view projects running in an OpenShift cluster. The highlighted option shows you how to access a list of projects in the Administrator perspective by selecting the Project tab under Home (Figure 2).
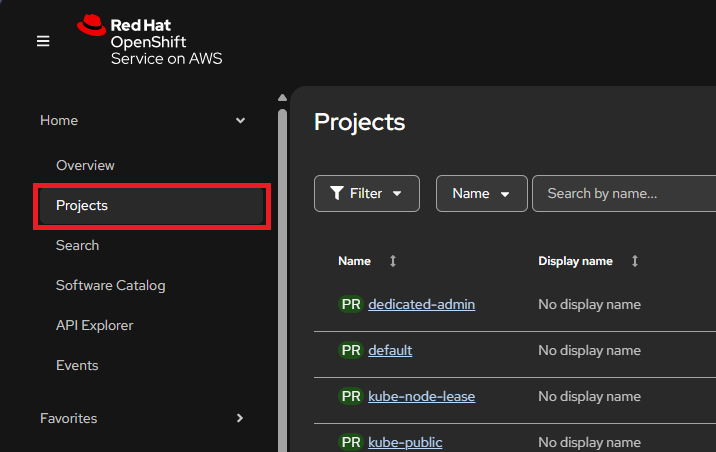
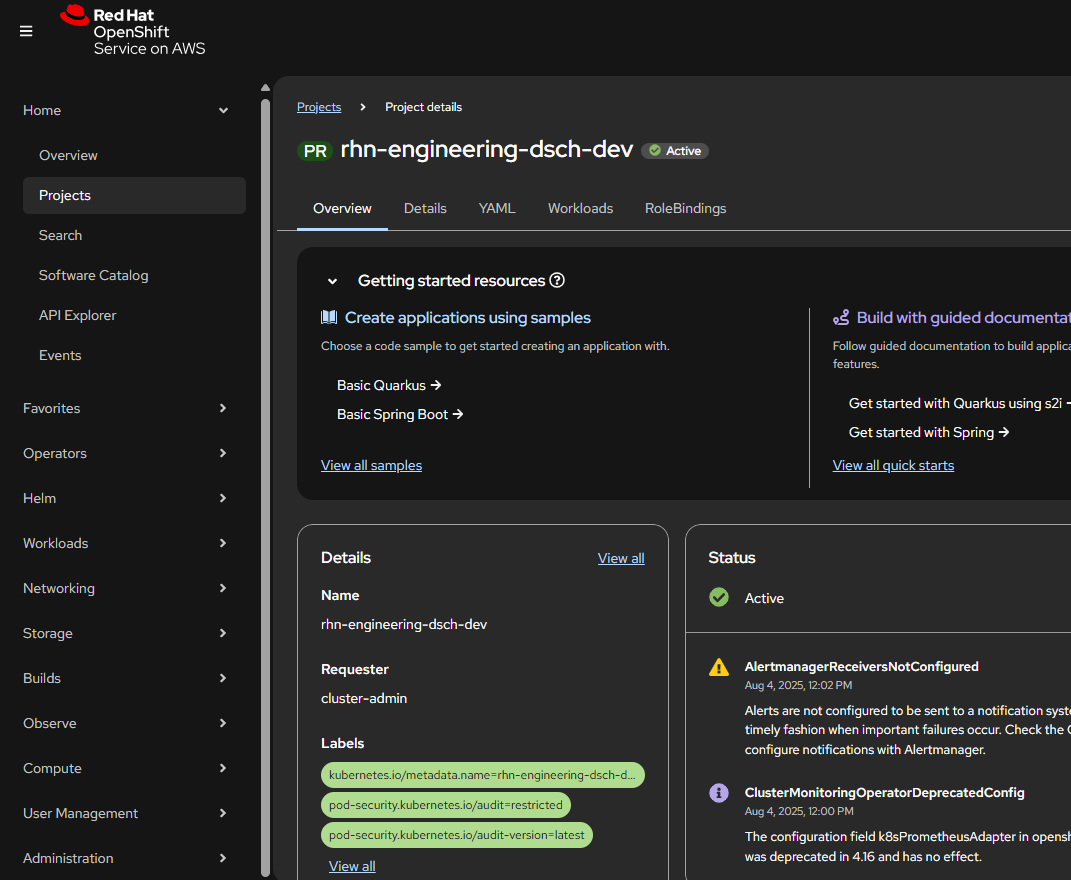
A list of projects appears in the Project page. Select a project in the list to view its project details. An Overview pane will appear. The Administrator perspective contains an expanded set of details which are relevant to the administration of a project, such as resource utilization, configuration, and security settings. (Figure 3).
Summary
Congratulations! You’ve learned about the OpenShift web console in a high-level overview. You also learned what an OpenShift project is and how to access information about a project from both perspectives.
Next
In the next lesson, you will learn how to use the terminal window built into the OpenShift console to work with various OpenShift and Kubernetes resources.