Page
OpenShift and the Developer Sandbox
In this lesson, you will learn what Red Hat OpenShift is in relation to Kubernetes and how to access the Developer Sandbox to work with OpenShift.
What you need to know
In order to get the full benefit of taking this lesson, you need to know about Kubernetes as a container orchestration framework for managing applications on the internet. If you need to brush up on your understanding of Kubernetes, you can take a look at this article that describes what Kubernetes is and what it does.
What you will learn
In this lesson you will learn:
- What OpenShift is.
- The relationship between OpenShift and Kubernetes.
- How to access the Developer Sandbox.
OpenShift and Kubernetes
Installing a web application directly under Kubernetes involves a good deal of time-consuming, manual configuration. This type of manual configuration means you need to know a whole lot about each of the components that you’re installing under Kubernetes in order to actually get the application up and running.
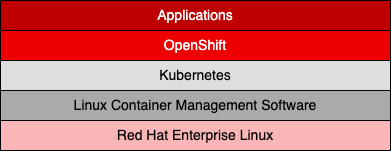
OpenShift is a layer of Red Hat components that sit on top of a Kubernetes cluster (Figure 1). Using OpenShift makes it easier to install, configure, network, and manage applications composed of containers.
For example, OpenShift lets you install a web application directly from source code or from a container image stored in an image repository by executing a few mouse clicks in the OpenShift web console.
Once you get the hang of how OpenShift works, you will be able to configure and install applications using the oc CLI tool as well as the web console. In addition, as you move further along the learning curve toward OpenShift mastery, you will be able to incorporate features such as continuous integration and continuous delivery (CI/CD) into your OpenShift development activities.
In short, anything you can do in Kubernetes, you can do in OpenShift. In many cases, you can do more.
As with any powerful technology, OpenShift takes time to learn. To reduce the learning curve, we provide access to a running instance of OpenShift to give you hands-on experience working with the technology. This interactive environment is called the Developer Sandbox. The Developer Sandbox offers a free (no cost) 30-day OpenShift cluster. All that’s required to use it is that you create a Red Hat Developer account.
The following lesson shows you how to create your own Developer Sandbox instance. In a subsequent lesson, you will use the sandbox to learn about the various concepts, features, and techniques associated with OpenShift.
Get started with OpenShift in the Developer Sandbox
Here are the steps for accessing an OpenShift instance through the Developer Sandbox.
Log in to the Developer Sandbox
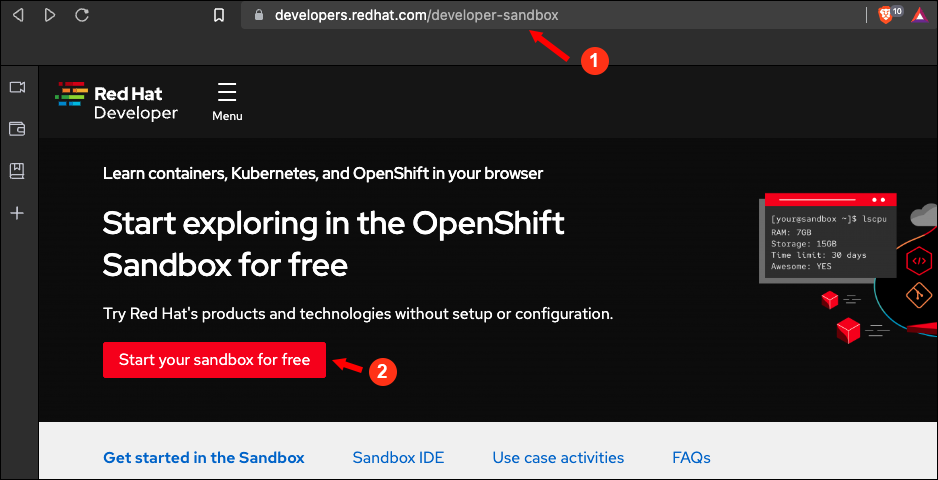
Use your web browser to navigate here (Figure 2, Callout 1) and select Start your sandbox for free (Figure 2, Callout 2).

Figure 1: The entry point for access to the Developer Sandbox for Red Hat OpenShift. Figure 2: The entry point for access to the Developer Sandbox. - Select Start your sandbox for free. You will be directed to log into your Red Hat Developer account.
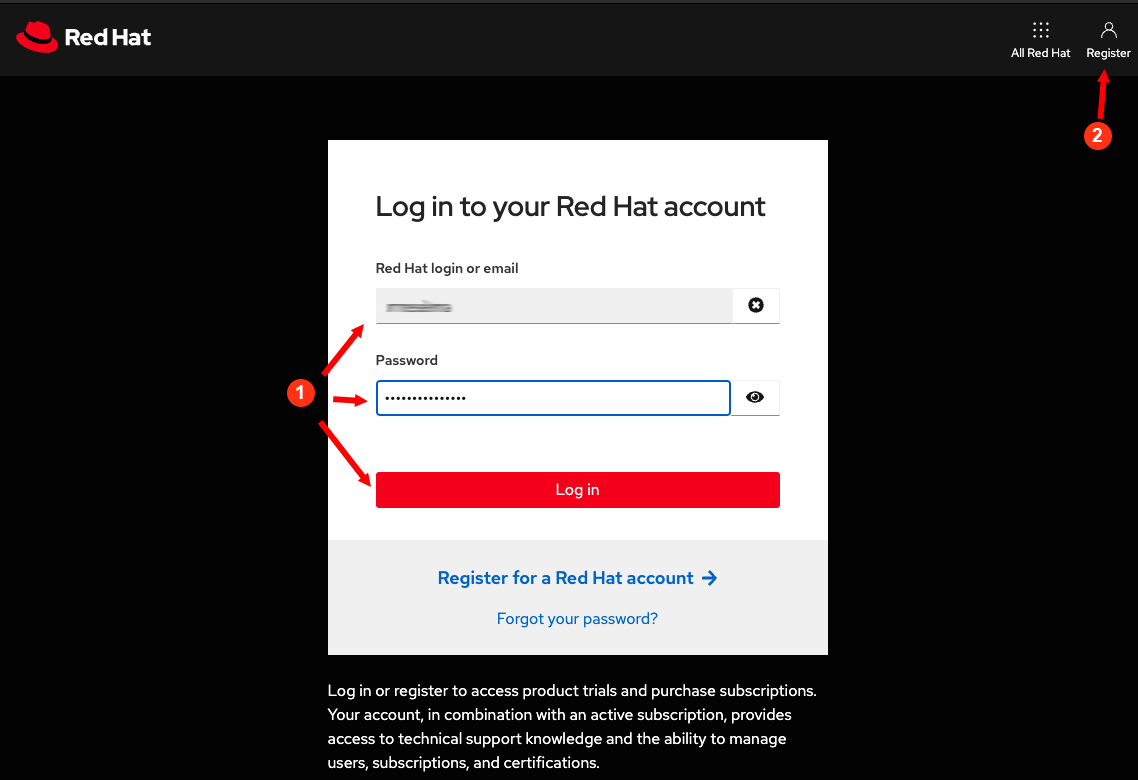
- Provide your username and password for your Red Hat Developer account in the log in web page (Figure 3, Callout 1).
If you don’t have a Red Hat account, click the Register icon at the upper right of the web page (Figure 3, Callout 2). From there, you can register with Red Hat to create an account.
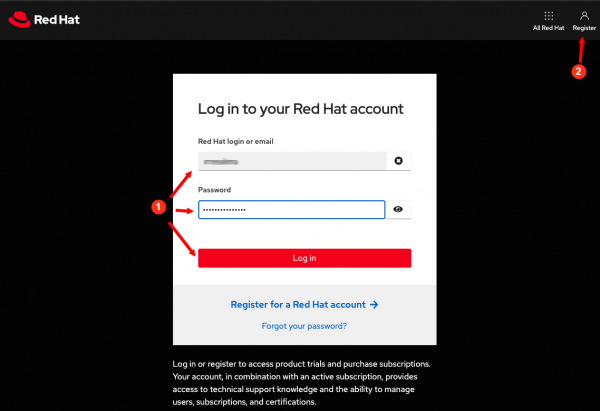
Figure 3: Log into your Red Hat account to access the Developer Sandbox for Red Hat OpenShift. Figure 3: Log into your Red Hat account to access the Developer Sandbox. You can return to your sandbox later using the same URL listed above. After you log in, you are prompted to get started. A short description of how it works is included (Figure 4).
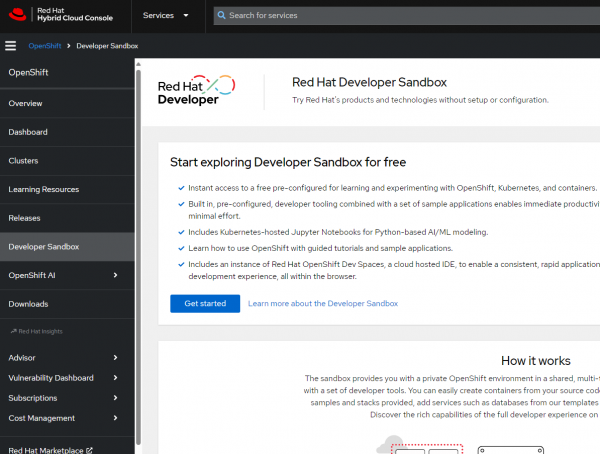
Figure 4: Provision your developer sandbox instance. Simply click Get started to begin the process of creating your own space in the Developer Sandbox.
When you select Get Started, you will briefly see a spinning “working” icon, then the screen will return as shown in Figure 4. At this point, patience is key. Just wait.
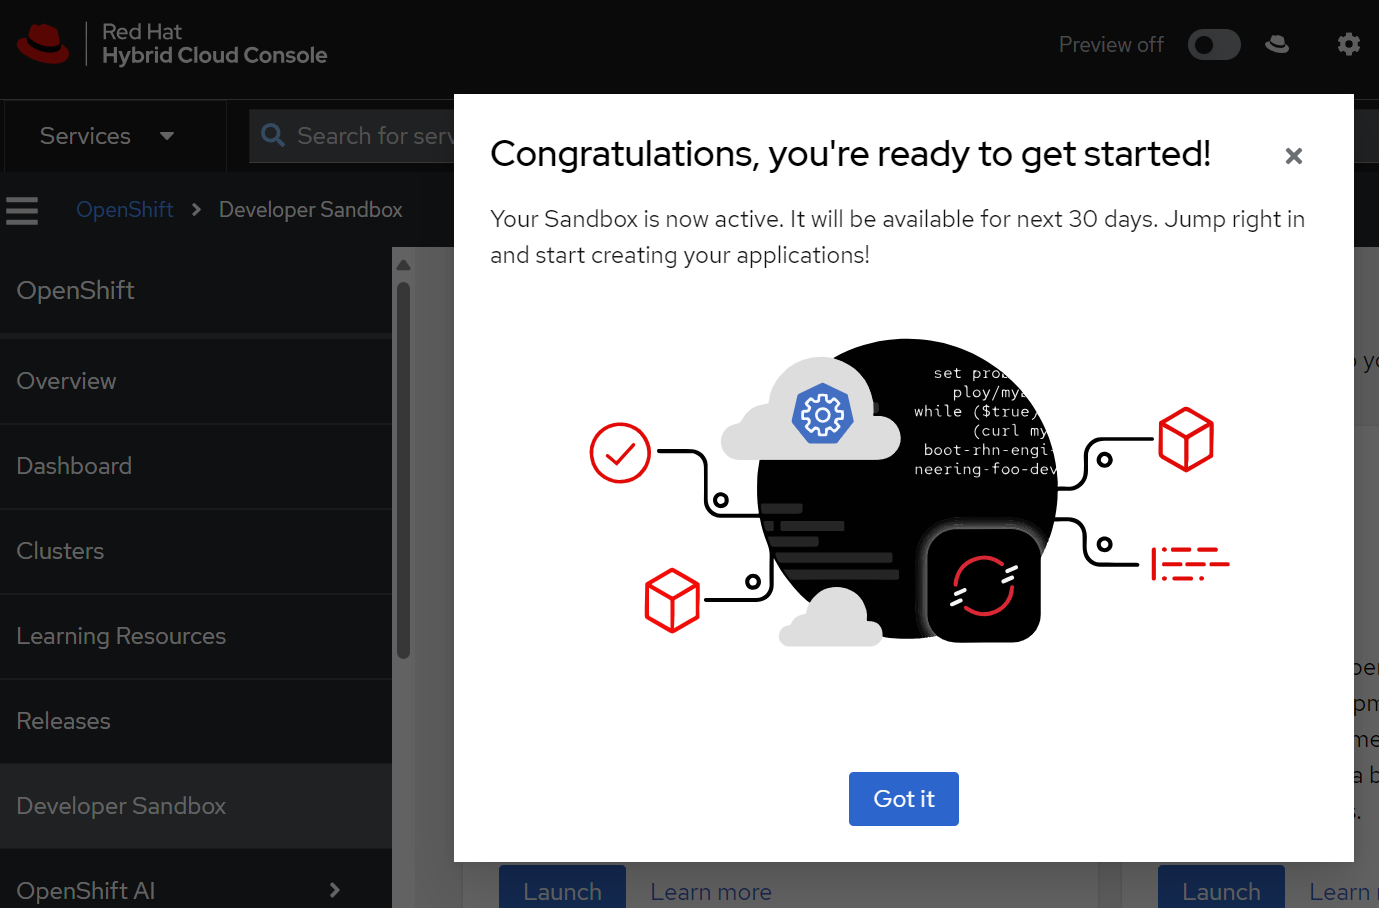
Within a minute or two, you will receive a prompt that your sandbox is ready (Figure 5). You will also receive an email noting that your sandbox has been provisioned.
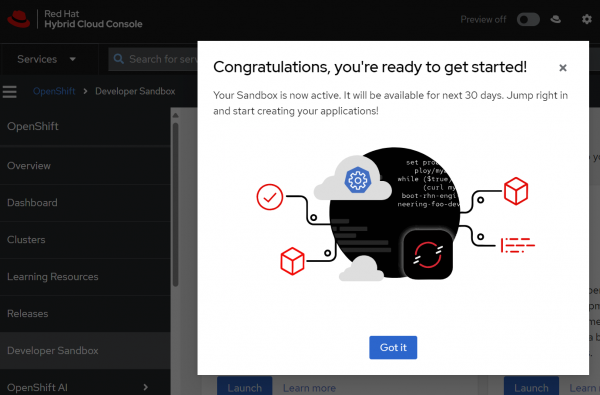
Figure 5: Your sandbox is ready. When you click the Got it button, you are presented with the Developer Sandbox Available services screen (Figure 6).
-

Figure 6: The Developer Sandbox starting point. - Click the Launch button for Red Hat OpenShift and log into your sandbox.

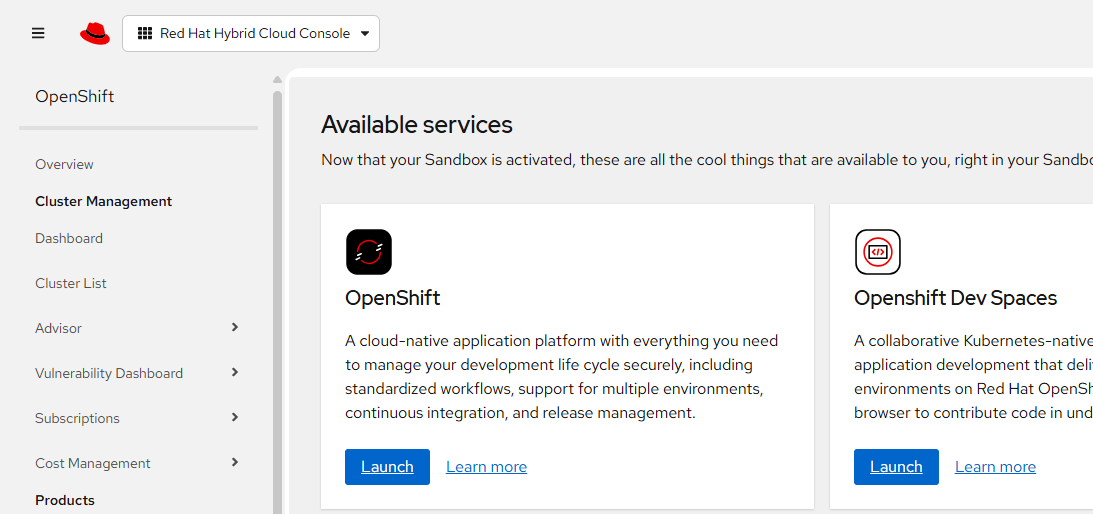
Info alert: In the future, when you want to return to the sandbox, this screen (Figure 6) is where you’ll start.
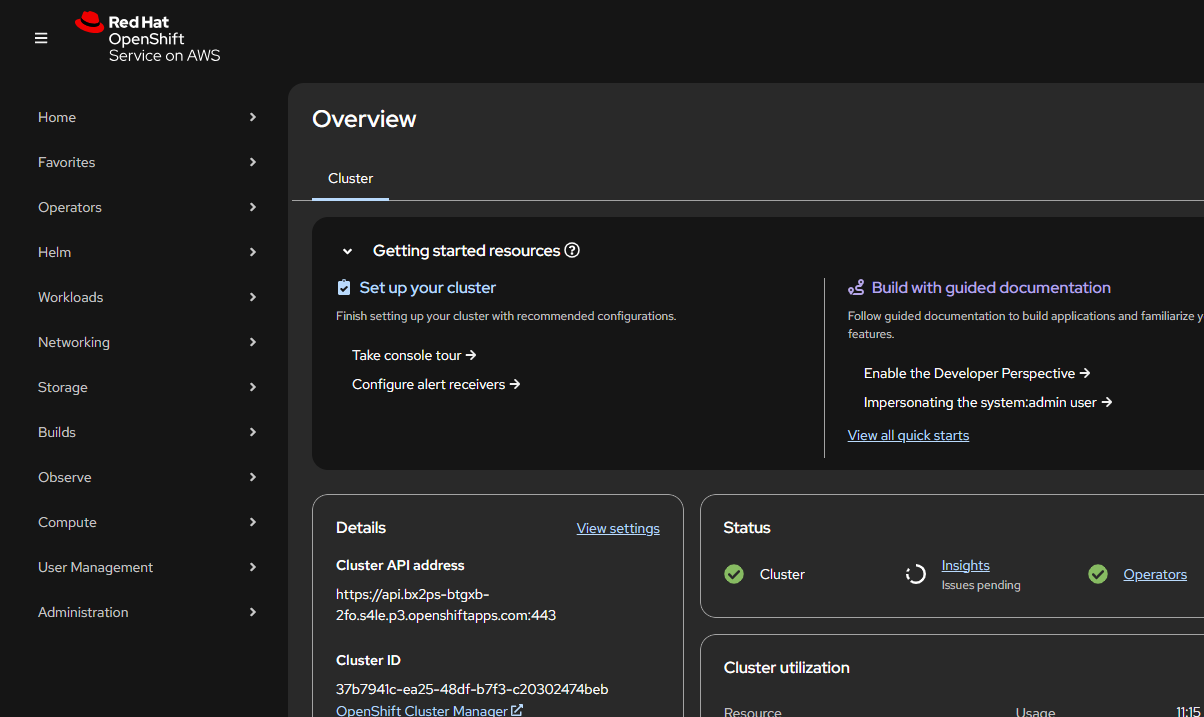
View the OpenShift web console
The first time you enter the Developer Sandbox, you will be presented with the option to take an interactive tour of the various features available in the OpenShift web console (Figure 7).
To take the interactive tour, select Get started. To navigate directly to the main page of the web console in the sandbox, select Skip tour.
Summary
Congratulations. You’ve learned about the basic relationship between OpenShift and Kubernetes. You've also learned how to access the Developer Sandbox and get hands-on experience working with OpenShift.
Next
In the next lesson, you will learn about the features you will use to create, configure, network, deploy, and maintain Kubernetes web applications running under OpenShift.