Page
Install an application from a Linux container image repository using the OpenShift web console
In this lesson, you will learn how to work with the OpenShift web console to install and run an application from a Linux container image stored on a container image repository.
What you need to know
In order to get full benefit from taking this lesson, you need to:
- Understand what a container image is and how it is used to create a Linux container.
- Understand the nature and purpose of container image repositories such as quay.io.
- Understand how to access the OpenShift web console.
- Understand the basics of the features available to users in the Administrative and Developer perspectives.
- Understand the relationship between OpenShift and Kubernetes.
What you’ll be doing
In this lesson you will learn:
- How to use a web console to import a Linux container image from a container image repository.
- How to use the web console to get the application up and running from a Linux container.
- How to remove an application from OpenShift using the web console.
In addition to providing the capability to install an application from source code, the OpenShift web console allows you to install an application from a Linux container that’s stored in a container image repository. The following steps show you how to identify and install an application from a Linux container that’s stored in the quay.io container image repository.
Identify the container image to install
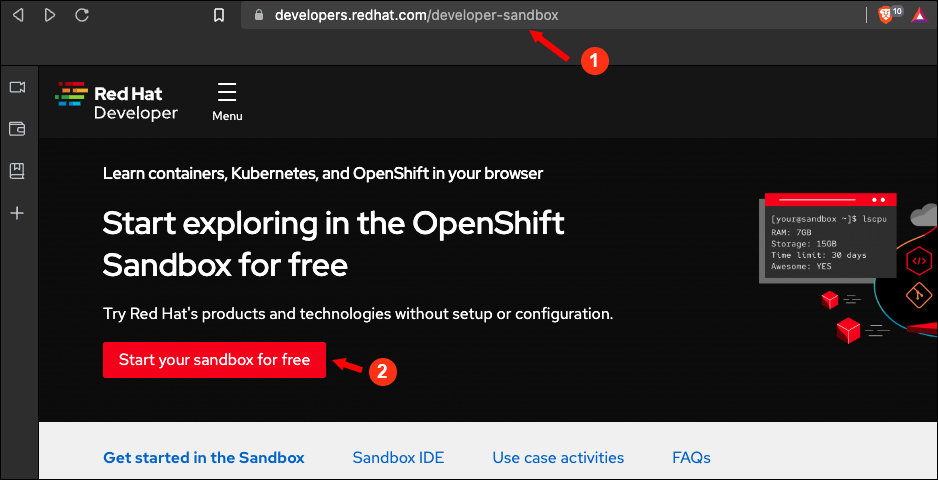
Using your web browser, navigate to the Developer Sandbox and select Start your Sandbox for free (Figure 1).

Figure 1: The entry point for access to the Developer Sandbox for Red Hat OpenShift. Figure 1: The entry point for access to the Developer Sandbox. Provide the username and password for your Red Hat account in the Developer Sandbox (Figure 2).

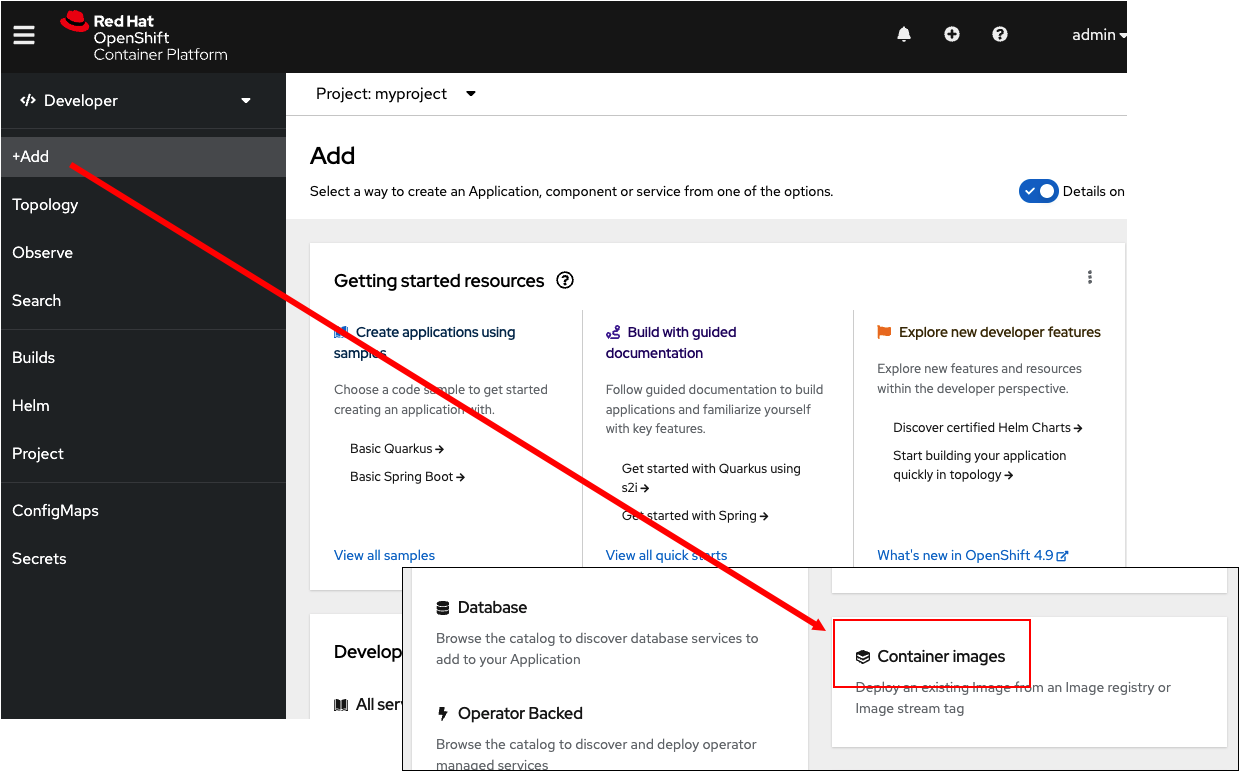
Figure 2: Log into the OpenShift web console with the username and password associate with your account on Red Hat. Click the +Add button on the left side menu bar. Scroll through the Add web page to Container images (Figure 3).
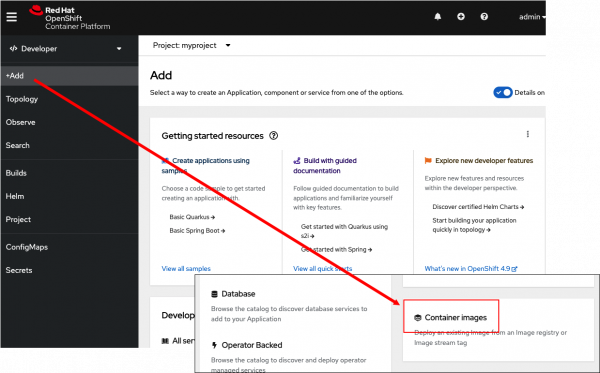
Figure 3: Select Container images to open the Deploy images web page and install an application from a container image. - The Deploy Image tab appears. This is where you declare the location of the container image according to a public container image repository. This container image represents the application to install in OpenShift.
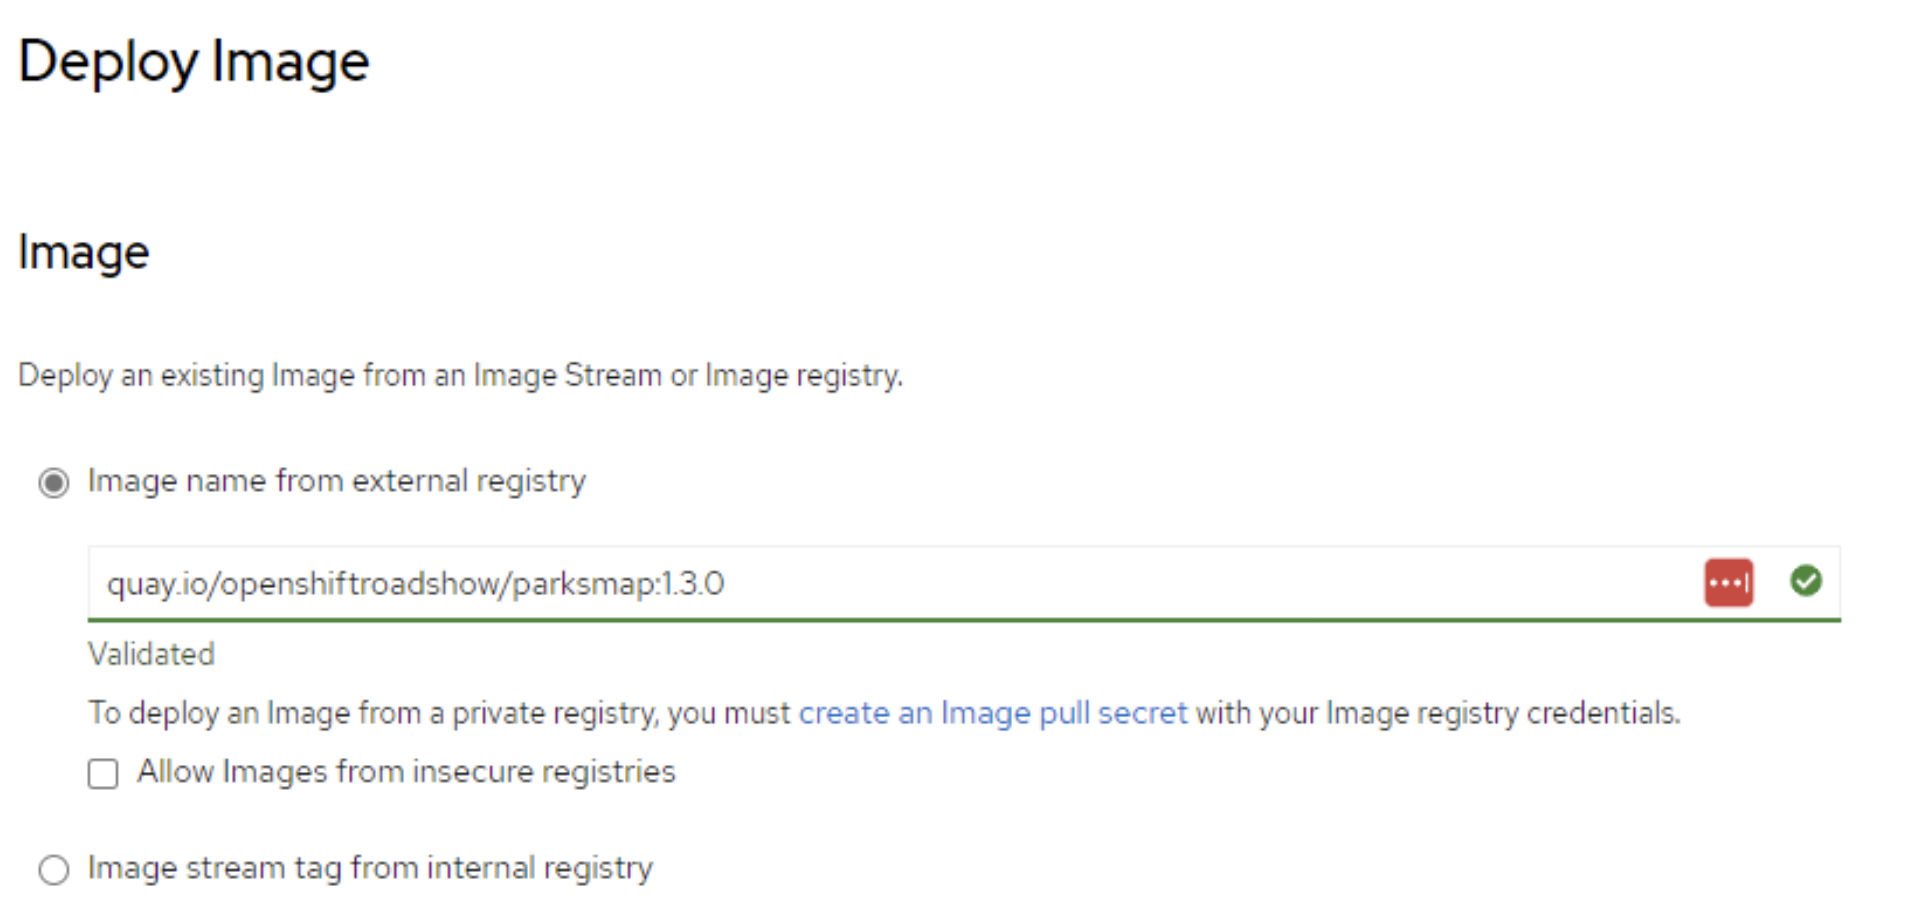
Add the following text in the Image name from an external registry field (Figure 4):
quay.io/openshiftroadshow/parksmap:1.3.0
Figure 4: Enter the fully qualified name of the image. Scroll to Deploy and select Deployment as the Resource type (Figure 5, Callout 1). Select Create (Figure 5, Callout 2). OpenShift will download the given container image from the container image repository and execute the process of creating and running the container based on the container image.
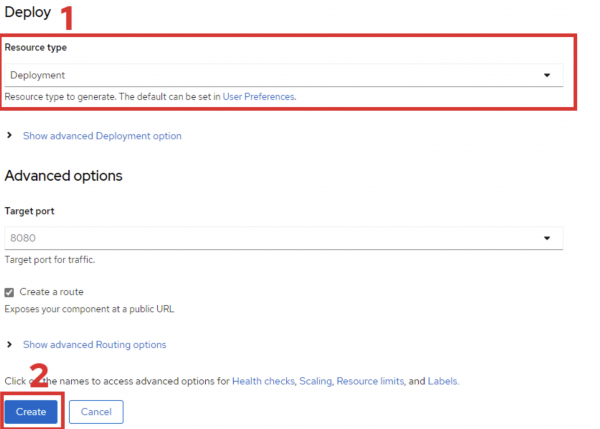
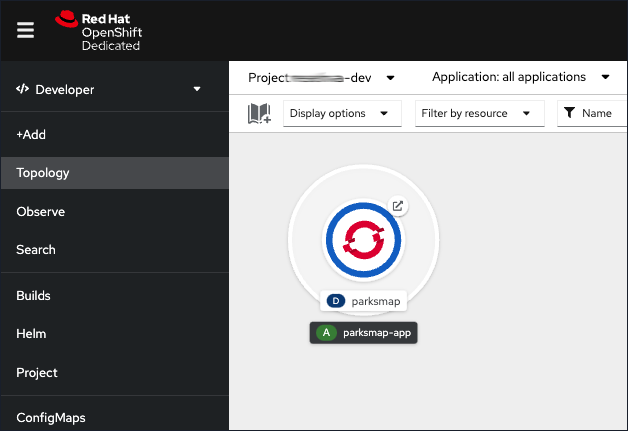
Figure 5: Select the Resource type and create the container. You are now on the Topology page, which will display a circular graphic that represents the application you just installed using a container image (Figure 6).
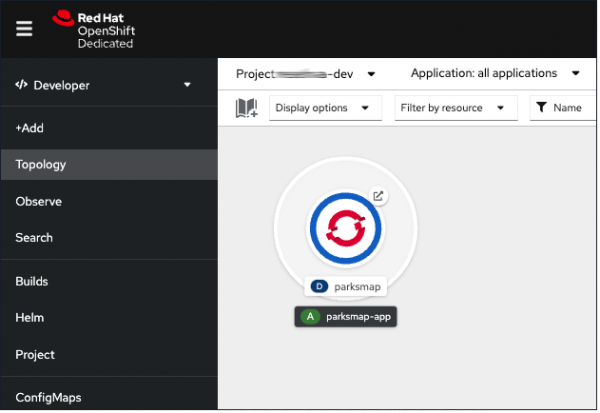
Figure 5: An application is represented by a circular graphic in Topology view of the OpenShift web console. Figure 6: An application is represented by a circular graphic in Topology view of the OpenShift web console.


Access the application in a web browser
Once an application is created from the container image as described in the previous steps, you can view the application in a web browser, provided that the application is a web application represented with a URL.
To open the Parks App application you just installed, click the icon in the upper right corner of the circular graphic (Figure 7).
The application will open a new window in your browser.
Delete the application using the OpenShift web console
You can delete an application running in OpenShift by right-clicking on the circular graphic representing the application in Topology view and selecting the Delete Application text from the dialog that appears when you click the graphic’s outer ring.
Right-click on the outer ring of the circular icon, then select Delete Application (Figure 8).
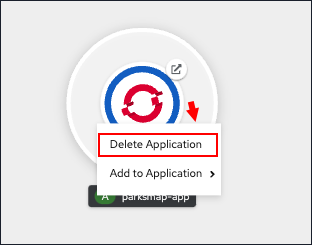
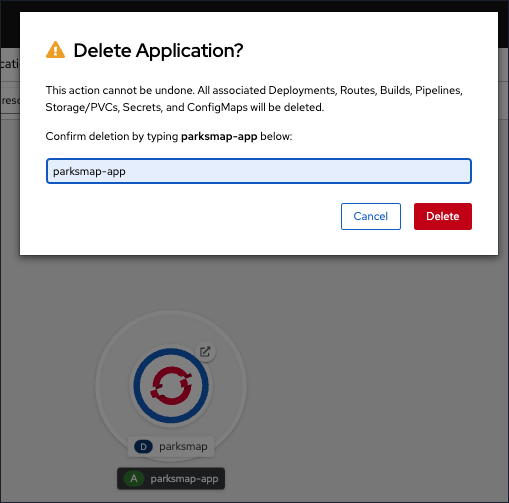
Figure 7: Right-click the outer ring of the application graphic to display the Delete Application dialog box. Figure 8: Right-click the outer ring of the application graphic to display the Delete Application dialog box. A dialog will appear asking you to confirm that you want to delete the application. Enter the application’s name (Figure 9).

Figure 8: Deleting an application using the OpenShift web console requires confirmation. Figure 9: Deleting an application using the OpenShift web console requires confirmation. Congratulations. You’ve completed this lesson!
Summary
In this lesson, you learned how to install an application from a container image using the OpenShift web console. You learned how to access the Deploy Image web page and then declare the URL for a container image hosted on a public container image repository. Once you clicked the Create button, OpenShift downloaded the container image and created a Linux container using that container image. That container image represents a web application running in the OpenShift Cluster.
You also learned how to view the web application that represents the application running in Developer Sandbox.
Finally, you learned how to use the web console to delete the application from Developer Sandbox.
Next
The next set of lessons will focus on learning to use the oc CLI tool on your local computer to work with your remote instance of the Developer Sandbox. You’ll learn how to use the oc CLI tool to install applications from source code as well as from a container image hosted on a public container image repository.