Page
Install an application from a source code using the oc CLI tool
In this lesson, you will learn how to work with the oc CLI tool running on a local machine to install an application on a remote OpenShift cluster running in the Developer Sandbox from source code stored in a GitHub repository.
What you need to know
In order to get full benefit from taking this lesson, you need to:
- Have a version of the
ocCLI tool installed on your local computer. - Understand the relationship between OpenShift and Kubernetes.
- Understand the purpose and use of a public GitHub repository to store application source code.
- Know how to log in to a remote OpenShift cluster using the
ocCLI tool running on a local computer.
Note: Go to this web page to learn how to install the oc CLI tool on your local computer and get the version of oc for your computer's operating system.
What you will learn
In this lesson, you will learn:
- How to log in to the remote instance of the Developer Sandbox running in OpenShift using the
ocCLI tool. - How to use the
ocCLI tool running on a local computer to import source code from GitHub and install it on a remote OpenShift cluster running in the Developer Sandbox. - How to use the
ocCLI tool to get the application up and running on a remote OpenShift cluster running in a Developer Sandbox.
OpenShift allows you to use the oc CLI tool to install an application directly from source code hosted in a Git repository. All you need to do is use some command-line options to declare the location of the source code and add some configuration information.
The oc CLI tool does the work of downloading the source code from the GitHub repository and then building a Linux container based on the source code. That Linux container is created as a pod(s) in the underlying OpenShift/Kubernetes cluster. Also, OpenShift does the work of creating a service that allows network access to the pod from within the cluster. If the application needs to be publicly accessible from the Internet, you will use the oc CLI tool to create a route that publishes a publicly available URL to the application.
Get login credentials for the OpenShift web console
In order to use the oc CLI tool to access a remote instance of the Developer Sandbox, you need to get a special set of login credentials that are available from within the OpenShift web console. The following steps describe how to get the necessary login credentials:
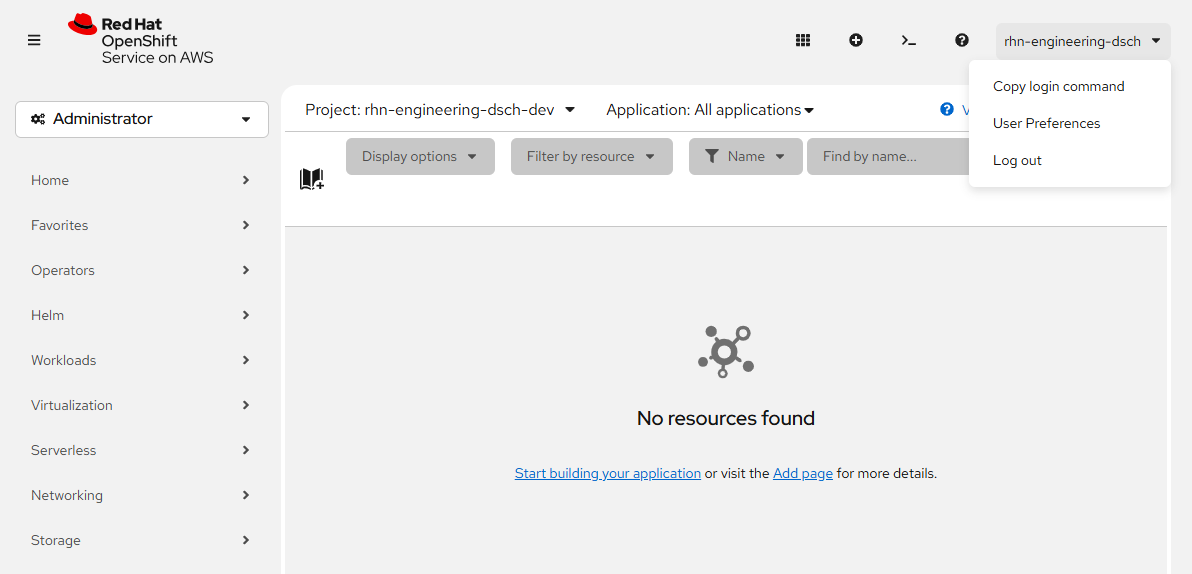
Go to the web console in the Developer Sandbox. Click the user name in the upper right corner and select the Copy login command option (Figure 1).
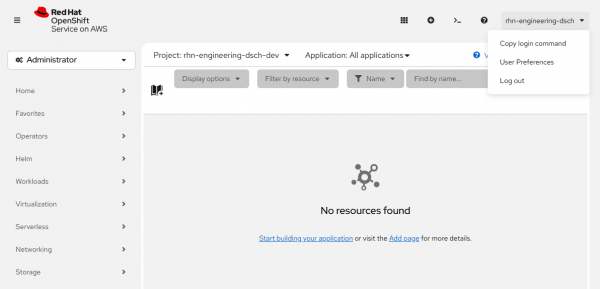
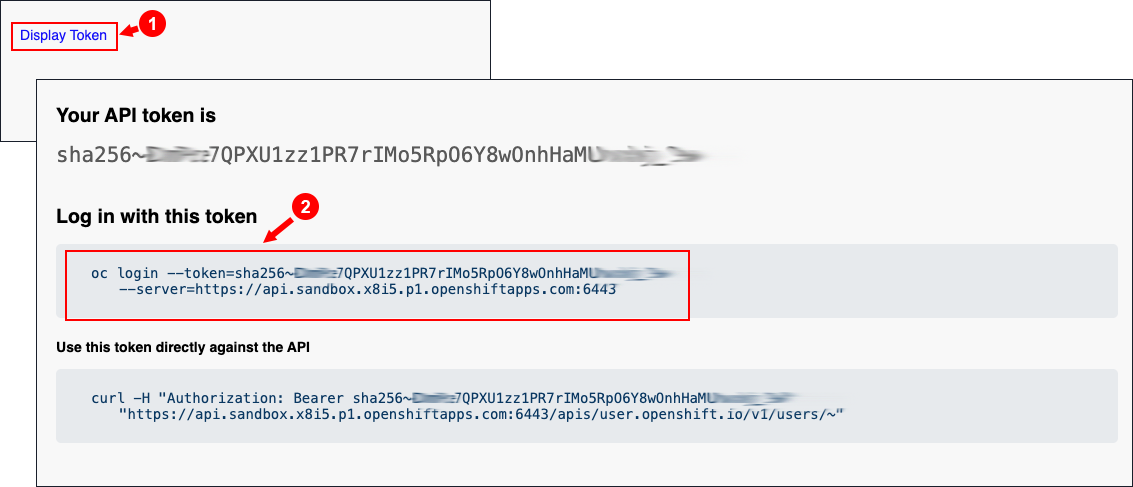
Figure 1: You access command-line Tools by clicking the question mark in the upper right of the OpenShift web console. A page with a Display Token field will appear. Select Display Token (Figure 2, Callout 1). Copy the content from the Log in with this token field (Figure 2, Callout 2).
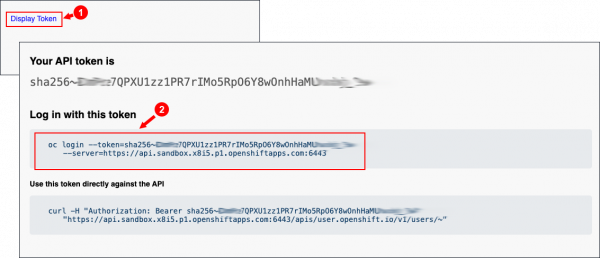
Figure 2: Clicking Display Token displays another page that shows a variety of log in credentials Go to a terminal running on your local machine. Paste the text you copied, then select Enter (Figure 3).

Figure 3: Once you have a log in token, you can use the oc CLI tool to access the remote Developer Sandbox from your local machine.

Now that you're logged in, you can do work in the remote Developer Sandbox using the oc CLI tool.
Install an application from source code using oc new-app
To install an application's source code in a GitHub repository into OpenShift, go to the local computer you installed the oc CLI tool onto and enter the following command in a terminal window:
oc new-app https://github.com/openshift/ruby-hello-world.git#beta4You will see output similar to the following:
--> Found container image e42d0dc (4 years old) from Docker Hub for "centos/ruby-22-centos7"
Ruby 2.2 available as container is a base platform for building and running various Ruby 2.2 applications and frameworks. Ruby is the interpreted scripting language for quick and easy object-oriented programming. It has many features to process text files and to do system management tasks (as in Perl). It is simple, straight-forward, and extensible.

Tags: builder, ruby, ruby22

    * An image stream tag will be created as "ruby-22-centos7:latest" that will track the source image

    * A Docker build using source code from https://github.com/openshift/ruby-hello-world.git#beta4 will be created

      * The resulting image will be pushed to image stream tag "ruby-hello-world:latest"

      * Every time "ruby-22-centos7:latest" changes a new build will be triggered

--> Creating resources ...

    imagestream.image.openshift.io "ruby-22-centos7" created

    imagestream.image.openshift.io "ruby-hello-world" created

    buildconfig.build.openshift.io "ruby-hello-world" created

    deployment.apps "ruby-hello-world" created

    service "ruby-hello-world" created

--> Success

    Build scheduled, use 'oc logs -f buildconfig/ruby-hello-world' to track its progress.

    Application is not exposed. You can expose services to the outside world by executing one or more of the commands below:

    'oc expose service/ruby-hello-world'

    Run 'oc status' to view your app.
View the application from the web console
The command executed above has installed a web application written in Ruby, but is not yet available for viewing via a URL created by OpenShift. The next step is to expose the web application for viewing within a browser window:
Run the following command in the terminal window on your local machine:
oc expose service/ruby-hello-worldYou’ll see output similar to the following:
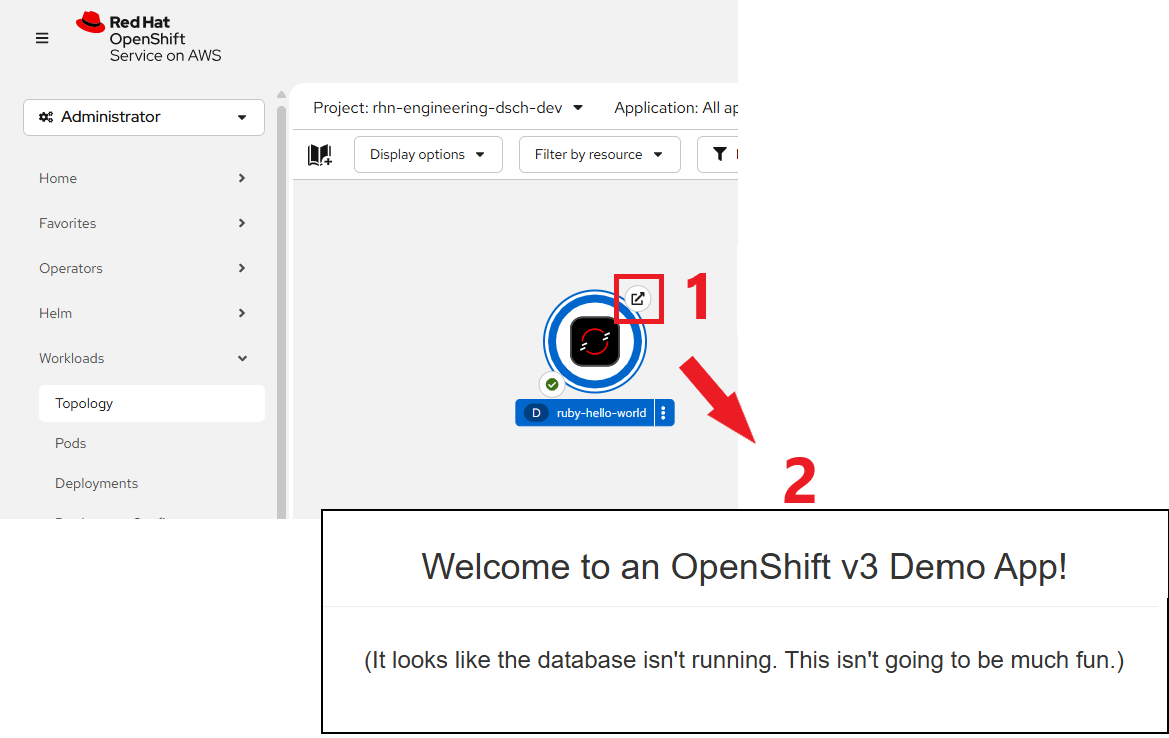
route.route.openshift.io/ruby-hello-world exposed- Go to the Workloads/Topology view in the OpenShift web console of the Developer Sandbox. You’ll see the circular graphic that represents the Ruby application you just installed (Figure 4, Callout 1).
Click the icon in the upper right corner of the circular graphic to access the installed web application in a web browser (Figure 4, Callout 2).

Figure 4: Click the icon in the upper right corner of the circular graphic to access the installed web application in a web browser.
Delete the application using the oc CLI
You can delete an installed application using the oc CLI tool. You will use the oc delete all command to delete all the underlying Kubernetes resources that are associated with the given application. A resource is associated with a Kubernetes label that OpenShift assigns to the given resource. For example, in terms of the demonstration Greeter application you just installed, all Kubernetes resources associated with the application will be assigned the label=value pair, app+greeter.
The syntax mechanism for declaring the label of interest is the -1 option in the oc delete all command, where -1 indicates your level of interest.
Run the following command in the terminal window on your local machine to delete all the resources associated with the Ruby demonstration application:
oc delete all -l app=ruby-hello-worldYou will see output similar to the following:
service "ruby-hello-world" deleted

deployment.apps "ruby-hello-world" deleted

buildconfig.build.openshift.io "ruby-hello-world" deleted

imagestream.image.openshift.io "ruby-22-centos7" deleted

imagestream.image.openshift.io "ruby-hello-world" deleted

route.route.openshift.io "ruby-hello-world" deleted
The application is now deleted from OpenShift. Go to your instance of the Developer Sandbox and navigate to the Topology view (Figure 5).
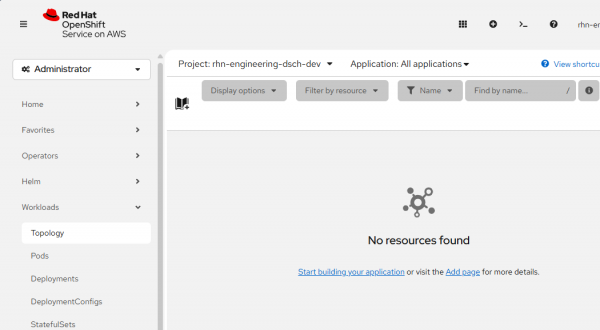
Figure 5: When an application is deleted using the oc CLI tool, it will no longer appear as a circular graphic is the Topology page of the OpenShift web console.
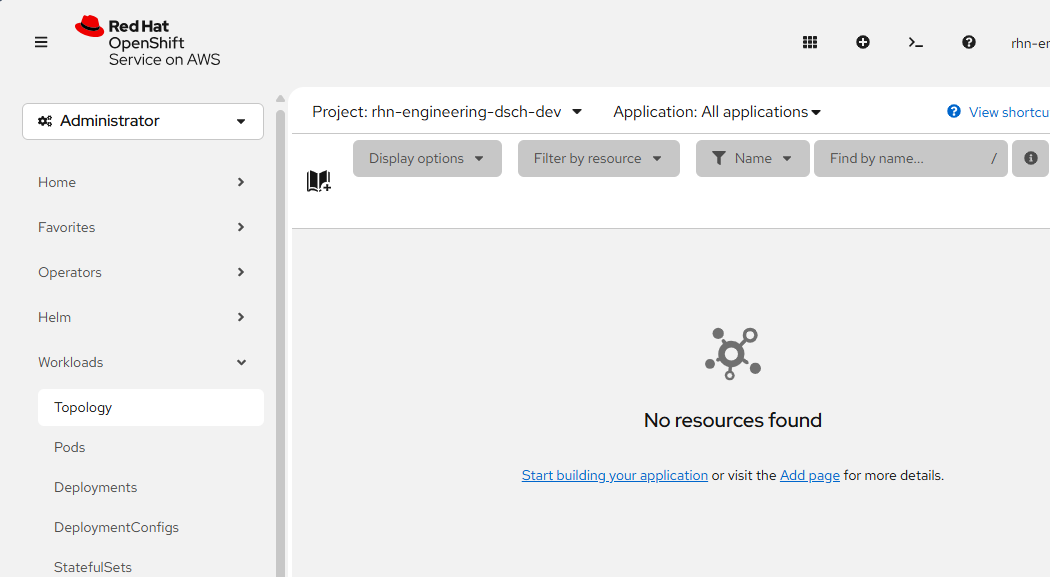
Note: The demonstration Ruby application you installed earlier and deleted using oc delete all is no longer visible.
Summary
In this lesson, you learned how to use the oc CLI tools to install an application from source code stored in a GitHub repository. You also learned how to delete an application using the oc delete all command.
Next
The next lesson will show you how to use the OpenShift web console to scale applications.