Page
Install an application from source code in a GitHub repository using the OpenShift web console
In this lesson, you will learn how to work with the OpenShift web console to install an application from source code stored in a GitHub repository.
What you need to know
In order to get full benefit from taking this lesson, you need to:
- Understand the relationship between OpenShift and Kubernetes.
- Understand the purpose and use of a public Git repository such as GitHub to store application source code.
- Understand how to access the OpenShift web console via the Developer Sandbox.
- Understand the basics of the features available to users in the Administrative and Developer perspectives.
What you will learn
In this lesson you will learn:
- How to use the web console to import source code from GitHub.
- How to use the web console to get the application up and running from source code.
- How to remove an application from OpenShift using the web console.
Red Hat OpenShift allows you to use the web console to install an application directly from source code hosted in a GitHub repository. All you need to do is declare the location of the source code, add some configuration information, and start the installation process.
OpenShift does the work of downloading the source code from the GitHub repository and then building a Linux container based on the source code. That Linux container is created as a pod(s) in the underlying OpenShift/Kubernetes cluster. Also, OpenShift does the work of creating a service that allows network access to the pod from within the cluster. OpenShift also creates a route to the application if the application needs to be publicly accessible.
Select the application to install
To select which application you want to install:
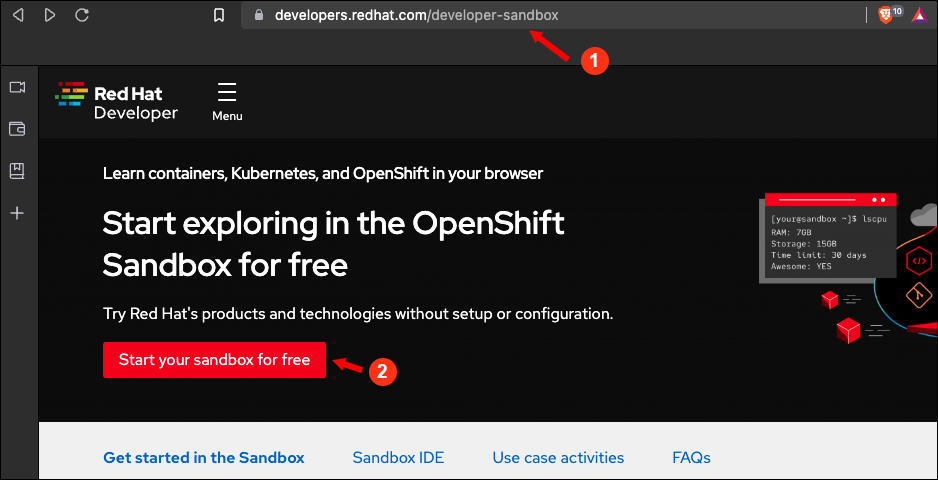
Navigate here (Figure 1, Callout 1) and Select Start your sandbox for free (Figure 1, Callout 2).

Figure 1: The entry point for access to the Developer Sandbox for Red Hat OpenShift. Figure 1: The entry point for access to the Developer Sandbox. Provide the username and password for your Red Hat account on the login page that appears when you first enter the sandbox (Figure 2).
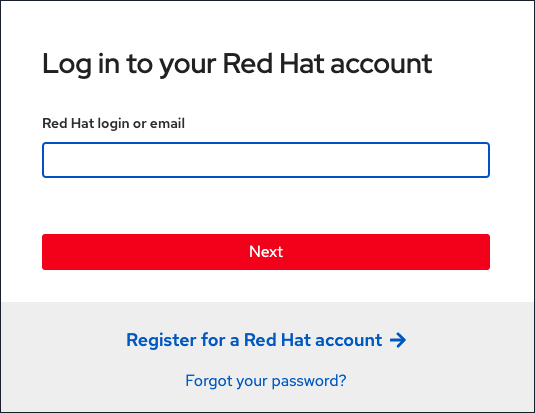
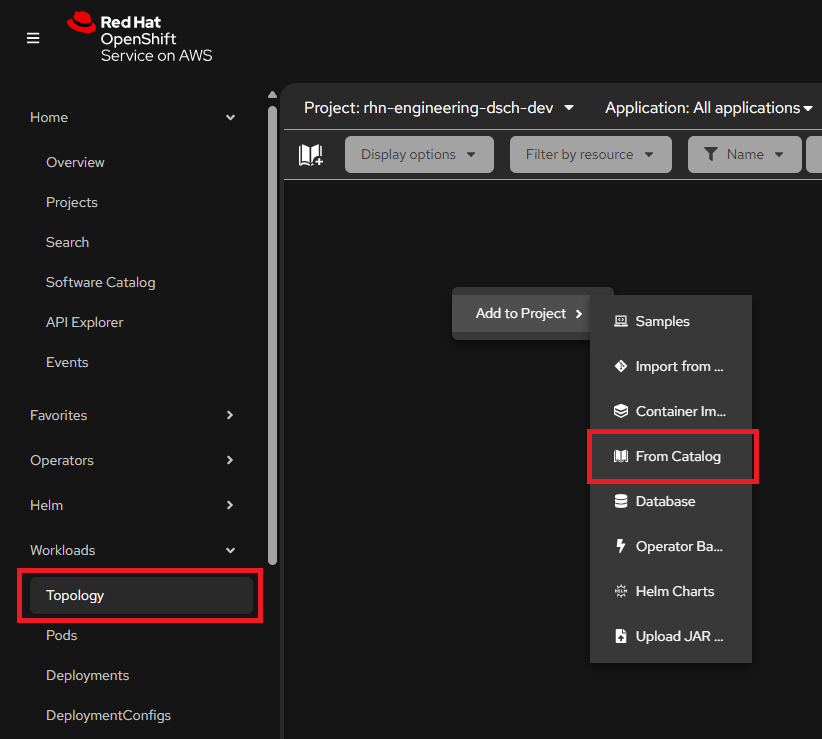
Figure 2: Log into the OpenShift web console with the username and password associated with your Red Hat account. In the OpenShift web console, right-click on the left side and select the From Catalog option (Figure 3).
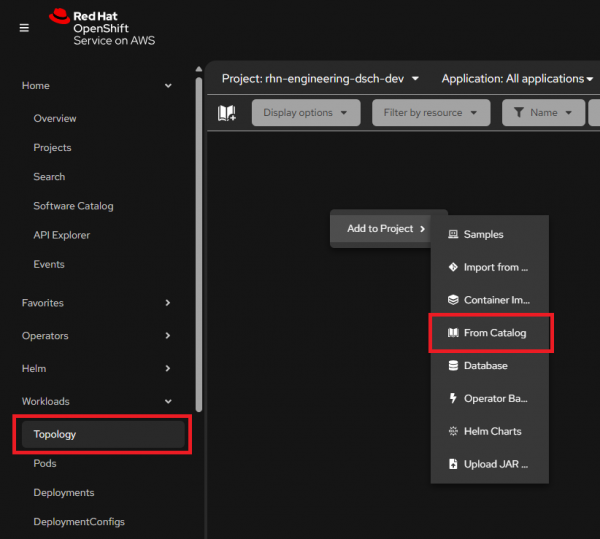
Figure 3: Select All Services in the +Add web page. The Software Catalog page appears. Under All items, there is a search field. Type Python. This action filters out all text blocks except those that are relevant to Python (Figure 4).
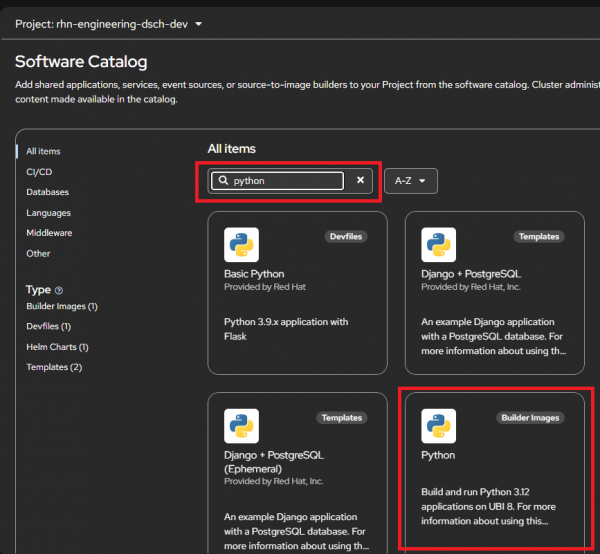
Figure 4: The Developer Catalog search feature. Select the text block labeled Python. You'll be presented with a web page that is unique to the Python service you've just selected. You will use this web page to install a Python application from source code. Select Create (Figure 5).
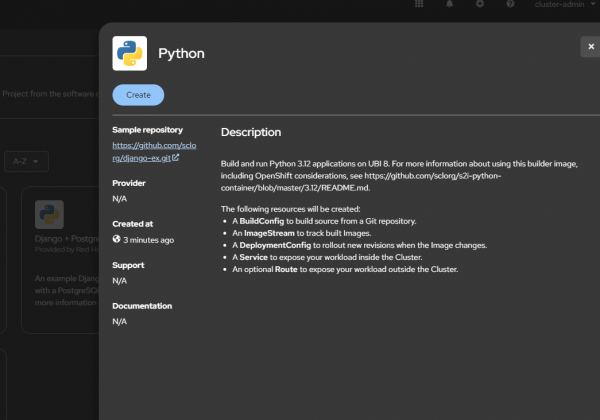
Figure 5: Select Create.


Create the application
When you select Create, a web page will appear titled Create Source-To-Image Application. You'll use this web page to import source code into OpenShift that's stored in a Git repository (repo). You'll use OpenShift's Source-To-Image capabilities to create a Linux container that represents the application running in OpenShift.
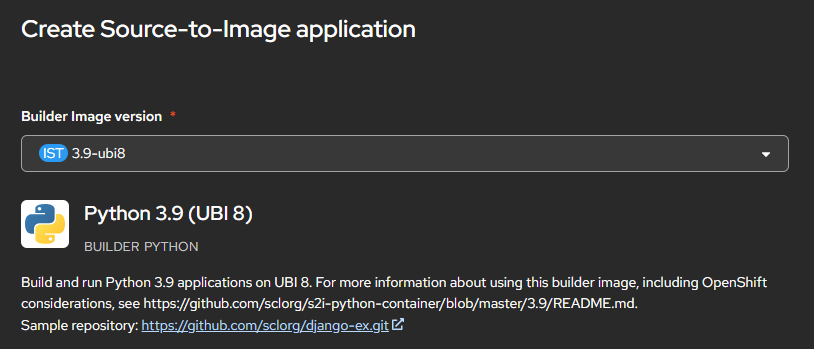
The first step is to make sure the Python 3.9 Builder Image (3.9-ubi8) version is selected (Figure 6).
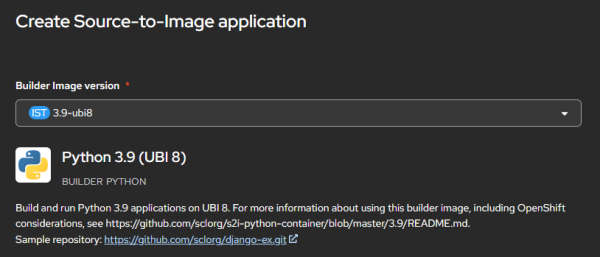
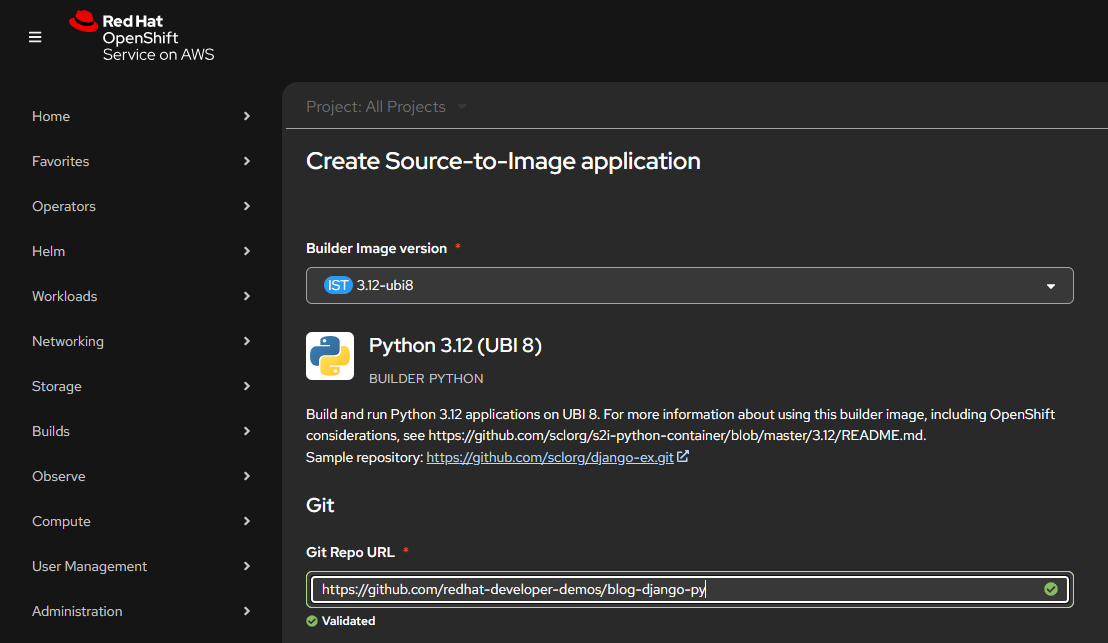
Figure 6: Use Python version 3.9 for this application. Your next step is to declare the location of the application’s source code in GitHub. Enter
https://github.com/openshift-instruqt/blog-django-pyin the text box labeled Git Repo URL (Figure 7).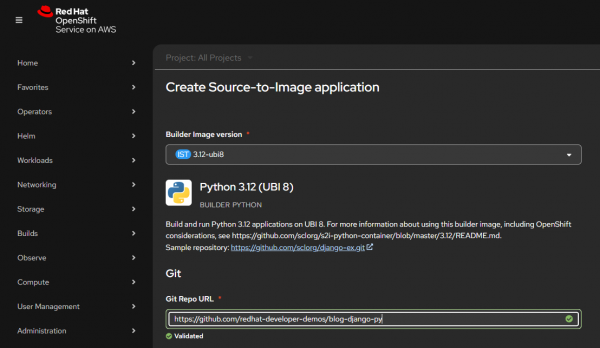
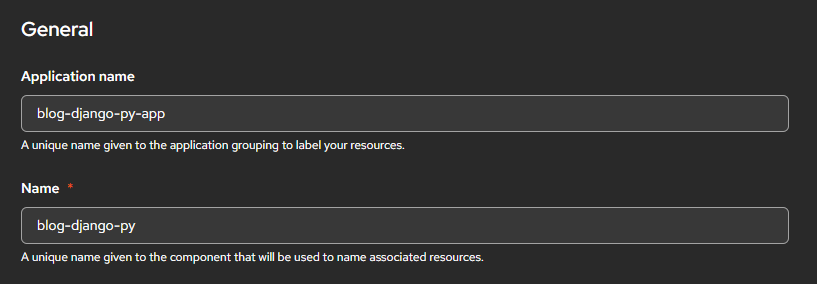
Figure 7: Create an Application under Source-to-Image by declaring a URL to the intended application’s source code. Scroll down the page. Your Create to Source-To-Image Application selection has automatically filled-in values for the Application and Name fields of the General section (Figure 8).

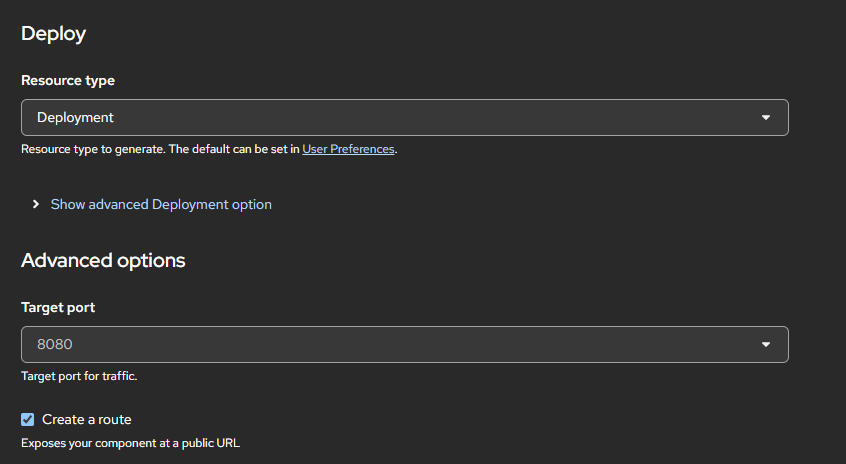
Figure 8: Source-to-Image provides default naming. Scroll until you reach Deploy. Select Deployment as the Resource type. Under Advanced options, make sure the Create a route option is selected. This means that as part of the application creation process, OpenShift will automatically create a URL that allows access to the application from the internet. (Figure 9).

Figure 9: Resource type should be Deployment. - Select Create. This action will save the source code data and start the build process for the application.
- As the application builds, OpenShift will take you to the Topology sub-menu.
- The Topology page will display a graphic that represents the application within the OpenShift cluster. OpenShift will display the application with a light blue circle as the build process progresses (Figure 10).
When the application's build process is complete, the circle’s color will turn dark blue (Figure 11).

Figure 10: An application’s status will change from build (light-blue circle) to running (dark-blue circle) in Topology view. 
Figure 11: The application is built and running. Once the application build process is complete, it is ready for use. In this case, the application is a web application written in Python that is viewable in a web browser. Click the icon in the upper right corner "to application" graphic to start the web application in a browser window (Figure 12).

Figure 12: Click the icon in the upper right corner of the application graphic to view it on a web browser.


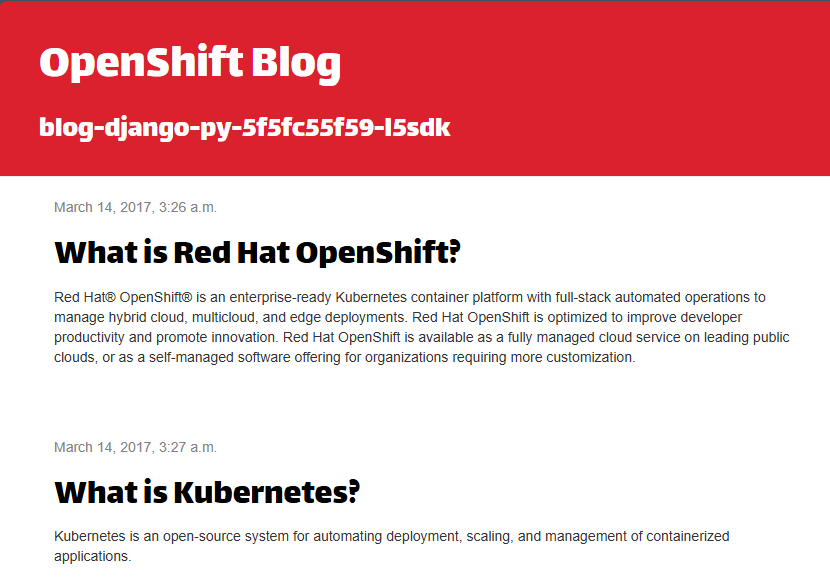
At this point, the Python application is up and running. All you did was choose an application template from the OpenShift library and set a URL that declared the location of the application’s source code in GitHub. OpenShift retrieved the source code, created a Linux container based on the source, then got the container up and running in the underlying Kubernetes cluster. Also, OpenShift did the work of exposing the application to the Internet at a URL created by OpenShift to enable access.
Delete the application from OpenShift
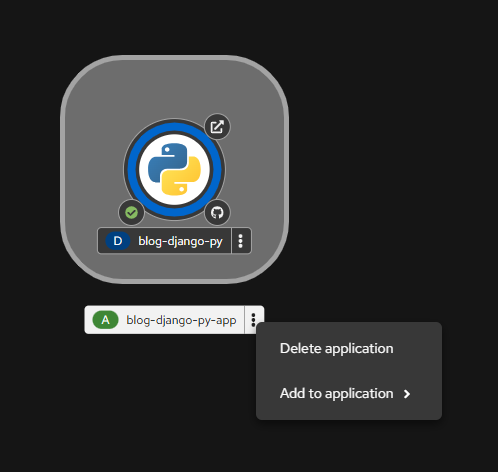
You can delete an application running in OpenShift by right-clicking on the circular graphic representing the application in Topology view, then selecting Delete Application.
Right-click on the outer ring of the circular icon representing the application in Topology view, then select Delete Application from the dialog box (Figure 13).
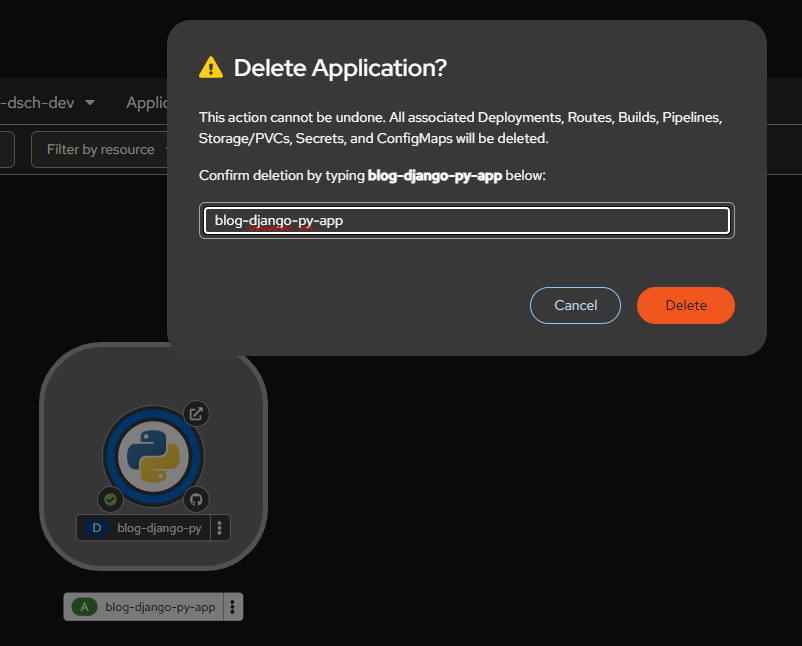
You will be asked to confirm if you want to delete the application. Enter the application’s name to delete it (Figure 14).
Summary
In this lesson, you learned how to use OpenShift to install an application from source code. You selected an application template for the OpenShift library. You declared the URL of the application’s source code in GitHub, then instigated the build process by doing nothing more than clicking a Create button. Finally, you viewed the application by using a URL that OpenShift created.
Next
In the next lesson, you’ll learn how to use the OpenShift web console to install and run an application from a container image that’s hosted in a public repository.