Red Hat CodeReady Containers (CRC) is the quickest way for developers to get started with clusters on Red Hat OpenShift 4.1 or newer. CodeReady Containers is designed to run on a local computer. It simplifies setup and testing by emulating the cloud development environment locally with all of the tools that you need to develop container-based applications.
Red Hat Marketplace is an open cloud marketplace that makes it easy to discover and purchase the certified, containerized tools you need to build enterprise-first applications. It was created to help developers using OpenShift build applications and deploy them across a hybrid cloud. Red Hat Marketplace works on any developer workstation that is running CodeReady Containers.
This article guides you through the steps of setting up Red Hat Marketplace and installing containerized products in your local CodeReady Containers-based OpenShift clusters.
Step 1: Install CodeReady Containers
CodeReady Containers is delivered as a Red Hat Enterprise Linux (RHEL) virtual machine that supports native hypervisors for Linux, macOS, and Windows 10. For this article, we will use CodeReady Containers version 1.15 with OpenShift 4.5.7 on macOS.
Installing CodeReady Containers requires you to log in with your Red Hat ID and download the CodeReady Containers archive along with the pull secret file. Here are the complete installation instructions for:
- macOS in Local OpenShift development environment on macOS
- Windows 10 Enterprise in How to run Red Hat CodeReady Containers on Windows 10 Enterprise
Once CodeReady Containers is installed, you should see something like this output, indicating that the command crc setup completed successfully:
INFO Checking if oc binary is cached
INFO Caching oc binary
INFO Checking if podman remote binary is cached
INFO Checking if goodhosts binary is cached
INFO Checking if CRC bundle is cached in '$HOME/.crc'
INFO Unpacking bundle from the CRC binary
INFO Checking minimum RAM requirements
INFO Checking if running as non-root
INFO Checking if HyperKit is installed
INFO Checking if crc-driver-hyperkit is installed
INFO Installing crc-machine-hyperkit
INFO Will use root access: change ownership of /Users/rojan/.crc/bin/crc-driver-hyperkit
Password:
INFO Will use root access: set suid for /Users/rojan/.crc/bin/crc-driver-hyperkit
INFO Checking file permissions for /etc/hosts
INFO Checking file permissions for /etc/resolver/testing
Setup is complete, you can now run 'crc start' to start the OpenShift cluster

Started the OpenShift cluster
WARN The cluster might report a degraded or error state. This is expected since several operators have been disabled to lower the resource usage. For more information, please consult the documentation
Step 2: Start CodeReady Containers
After you have completed the setup, start CodeReady Containers by running the command crc start or crc start -p pull-secret.txt. Ensure that your virtual private network (VPN) sessions are turned off. Leaving the VPN on can result in an improper start. Below is my output from the crc start command:
$ crc start -p ./pull-secret.txt

INFO Checking if oc binary is cached
INFO Checking if podman remote binary is cached
INFO Checking if goodhosts binary is cached
INFO Checking minimum RAM requirements
INFO Checking if running as non-root
INFO Checking if HyperKit is installed
INFO Checking if crc-driver-hyperkit is installed
INFO Checking file permissions for /etc/hosts
INFO Checking file permissions for /etc/resolver/testing
INFO Extracting bundle: crc_hyperkit_4.5.7.crcbundle ...
crc.qcow2: 9.68 GiB / 9.68 GiB [-------------------------------------------------------------------------------------------------------------------------------------------------------------------] 100.00%
INFO Checking size of the disk image /Users/rojan/.crc/cache/crc_hyperkit_4.5.7/crc.qcow2 ...
INFO Creating CodeReady Containers VM for OpenShift 4.5.7...
INFO CodeReady Containers VM is running
INFO Generating new SSH Key pair ...
INFO Copying kubeconfig file to instance dir ...
INFO Starting network time synchronization in CodeReady Containers VM
INFO Verifying validity of the cluster certificates ...
INFO Network restart not needed
INFO Check internal and public DNS query ...
INFO Check DNS query from host ...
INFO Starting OpenShift kubelet service
INFO Configuring cluster for first start
INFO Adding user's pull secret ...
INFO Updating cluster ID ...
INFO Starting OpenShift cluster ... [waiting 3m]
INFO Updating kubeconfig
INFO
INFO To access the cluster, first set up your environment by following 'crc oc-env' instructions
INFO Then you can access it by running 'oc login -u developer -p developer https://api.crc.testing:6443'
INFO To login as an admin, run 'oc login -u kubeadmin -p ILWgF-VfgcQ-p6mJ4-Jztez https://api.crc.testing:6443'
INFO
INFO You can now run 'crc console' and use these credentials to access the OpenShift web console
Started the OpenShift cluster
WARN The cluster might report a degraded or error state. This is expected since several operators have been disabled to lower the resource usage. For more information, please consult the documentation
Before you continue, save the login credentials for later use, or you can run the command crc console --credentials to retrieve them later.
Note: The output shows that the cluster started in a degraded state. See the CodeReady Containers documents for a summary of the difference between CodeReady Containers and a production OpenShift cluster.
Now, run the command below to ensure that you have set up the correct oc in the path:
$ eval $ (crc oc-env)
Verify that the cluster is running by entering the command crc console to open the cluster console. Log in as admin using the credentials from the crc start command. You will see the dialog shown in Figure 1.

Step 3: Install the Marketplace prerequisites
This article describes the process of setting up a Red Hat Marketplace account and a pull secret. Note that you will need the OpenShift command-line interface (CLI) and the jq command-line JSON processor plug-ins to run the Marketplace installation script. The OpenShift CLI comes with your CodeReady Containers installation.
Step 4: Add a CodeReady Containers cluster
Log in as admin from the command window using the credentials from the crc start command:
$ oc login -u kubeadmin -p 8rynV-SeYLc-h8Ij7-YPYcz https://api.crc.testing:6443
Login successful.

You have access to 57 projects, the list has been suppressed. You can list all projects with 'oc projects'

Using project "default".
In the Marketplace portal, select Workspace > Clusters and click Add cluster, as shown in Figure 2.

Generate a pull secret (or use one that was previously generated). Copy and run the installation script at the command window to install the Marketplace Operator into your CodeReady Container:
$ curl -sL https://marketplace.redhat.com/provisioning/v1/scripts/install-operator | bash -s -- -i 5eb98eb8995d3a00148c38b5 -p <pull_secret> -a Automatic
Note:
- The
pull-secretis automatically set as the parameter for the install script if the secret is generated in step 1. Set thepull-secretexplicitly, if it was created earlier. - Enter a name for your cluster when prompted. By default, a random string is generated as the name for the cluster.
- The source code for the Marketplace Operator is available at https://github.com/redhat-marketplace/redhat-marketplace-operator.
The following output indicates that you have successfully installed the Red Hat Marketplace Operator:
==================================================================================
[INFO] Installing Red Hat Marketplace Operator...
==================================================================================
> Cluster Name: 1CF169E2-CA2D-40A4-94EE-99C65C8FBE0B
Edit cluster name for easy reference in Red Hat Marketplace? [Y/n]
y
Enter Cluster Name:
devadv-mac-crc

Detected the following options:
> Account Id: 5e616369cea4170013e06453
> Cluster Name: rhm-mac-crc-45
> Pull Secret: eyJhbGciOiJIUzI1NiJ9.eyJpc3MiOiJJQk0gTWFya2V0cGxhY2UiLCJpYXQiOjE1OTg0NDU5NjQsImp0aSI6ImFhM2Q1YmRkYzNlNzRkYThhMGNjYWY4YzM3OWEzYWQyIn0.9Jgw35E4oWfHO5aa6BqZfjFeehEaeGAeQgg-DtpI_yo
> Marketplace Operator Approval Strategy: Automatic
Continue with installation? [Y/n]:

Continue with installation? [Y/n]:
y

STEP 1/5: Validating Namespace
Installing Red Hat Marketplace Operator

STEP 2/5: Installing the Red Hat Marketplace Operator. This might take several minutes
namespace/openshift-redhat-marketplace created
operatorgroup.operators.coreos.com/redhat-marketplace-operator created
secret/rhm-operator-secret created
subscription.operators.coreos.com/redhat-marketplace-operator created
Checking for Cluster Service Version
Checking for Custom Resource Definition

STEP 3/5: Creating Red Hat Marketplace Operator Config custom resource
marketplaceconfig.marketplace.redhat.com/marketplaceconfig created

STEP 4/5: Checking for Razee resources to be created
pod/rhm-watch-keeper-5ddb67c5d7-26fzp condition met
All Razee resources created successfully.

STEP 5/5: Applying global pull secret
W0908 11:28:44.716669 74930 helpers.go:549] --dry-run=true is deprecated (boolean value) and can be replaced with --dry-run=client.
W0908 11:28:44.924940 74933 helpers.go:549] --dry-run=true is deprecated (boolean value) and can be replaced with --dry-run=client.
secret/pull-secret data updated
Applying global pull secret succeeded
Install complete, all resource created.
==================================================================================

Red Hat Marketplace Operator successfully installed.

It may take a few minutes for your cluster to show up in the Marketplace console so you can install purchased software or trials.

Would you like to go back to the Red Hat Marketplace now? [Y/n]
n
Verify Marketplace Operator installed succeeded in the CRC console and pods are running as shown below.
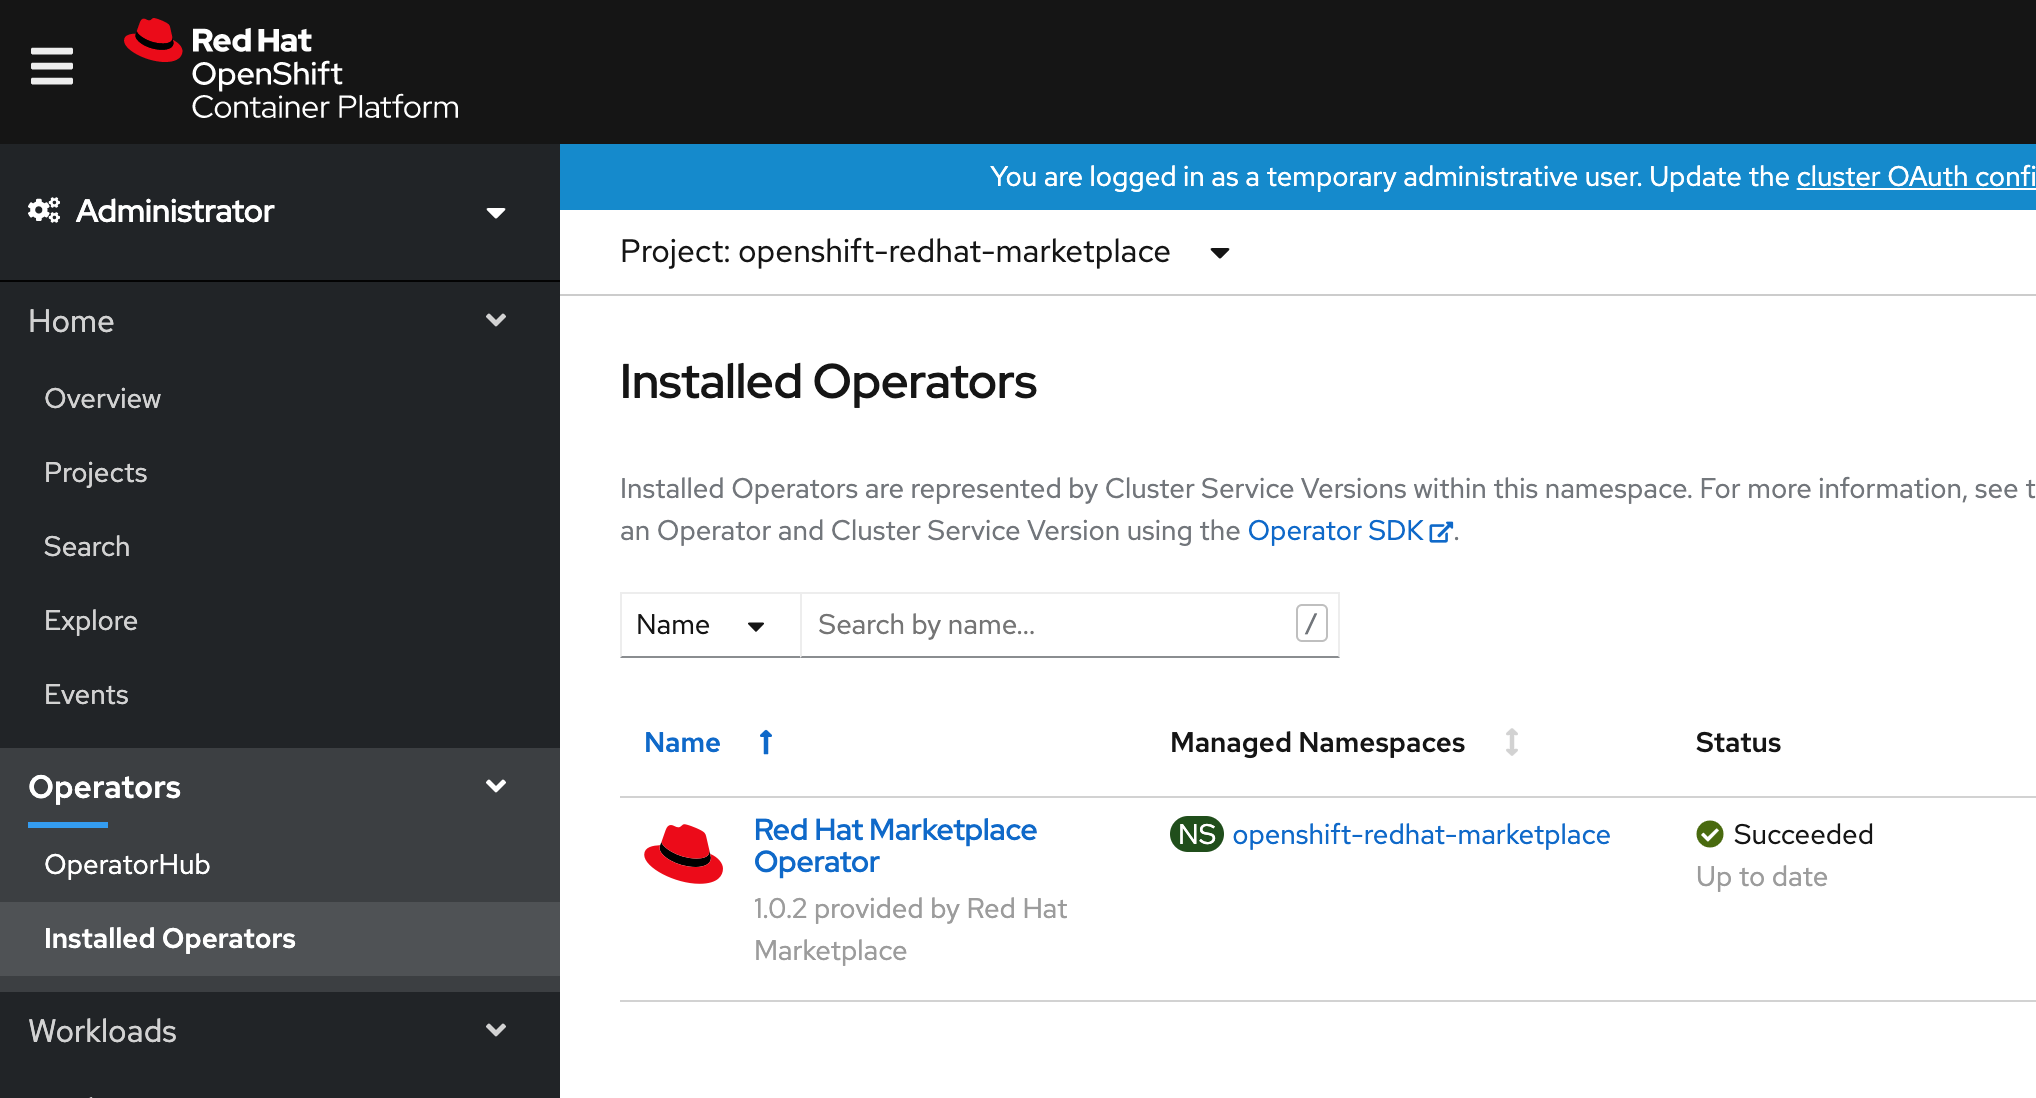
$ oc get pods -n openshift-redhat-marketplace

NAME                                               READY   STATUS    RESTARTS   AGE
prometheus-operator-8447b8b887-pm4nm               2/2     Running   0          10m
redhat-marketplace-operator-f7ff67bcd-mdjwq        1/1     Running   0          11m
rhm-metric-state-65fff5c5f8-9ttdk                  3/3     Running   0          10m
rhm-remoteresources3-controller-5cc6b4945b-lqb6b   1/1     Running   0          10m
rhm-watch-keeper-5ddb67c5d7-26fzp                  1/1     Running   2          10m
Step 5: Configure the pull secret
A few additional steps are required to make the cluster-global pull secret work in CodeReady Containers:
- Run
oc get secret pull-secret -n openshift-config --output="jsonpath={.data.\.dockerconfigjson}" | base64 --decodeand copy the output. - Get the node name by running
oc get node. - Debug the node using
oc debug node/<nodename>. - When the debug pod comes up, run
chroot /host. - Replace the content in
/var/lib/kubelet/config.jsonwith the output that you copied earlier from theoc get secret ..command. - Enter
exitto exit the debug pod. - Run
crc stopand thencrc start.
Here's the output for these steps:
$ oc get node
NAME STATUS ROLES AGE VERSION
crc-m27h4-master-0 Ready master,worker 9d v1.17.1
$ oc debug node/crc-m27h4-master-0

Starting pod/crc-m27h4-master-0-debug ...
To use host binaries, run `chroot /host`
Pod IP: 192.168.126.11
If you don't see a command prompt, try pressing enter.
sh-4.2# chroot /host
sh-4.4# vi /var/lib/kubelet/config.json
sh-4.4#
sh-4.4# exit
exit
sh-4.2# exit
exit

Removing debug pod ...
This completes the cluster setup in the Marketplace. Marketplace products are ready to install after the cluster comes up.
Step 6: Install an OpenShift Operator
The Red Hat Marketplace offers a wide variety of products across 12 categories. As an example, let's say that you want to try out Cortex Certifai.
Create a project and name it cortex-certifai-test in your CodeReady Containers cluster.
Go to the Marketplace catalog and search for Cortex Certifai. Select the correct tile and click on Free trial to start your 30-day trial, as shown in Figure 3.

Go to Workspace > My Software and click the Install Operator icon, which is shown in Figure 4.

Select the CodeReady Containers cluster from the list of target clusters, then pick the namespace scope where you want to install the Operator, as shown in Figure 5.

Log in to the cluster to verify that the Operator installed successfully, as shown in Figure 6.

Now, proceed to the Cortex Certifai Operator tab to install operands or instances of the Cortex Certifai Operator. You can install OpenShift Operators directly from the cluster. Red Hat Marketplace Operators become available in the OperatorHub after you install the Marketplace Operator. To install a product directly from CodeReady Containers, log in to the cluster, go to Operators > OperatorHub, search, and install. Figure 7 shows the dialog to install Cortex Certifai.

Note that Marketplace should appear as a filter parameter under Product type in the OpertorHub's search options.
Step 6: Uninstall an Operator
Uninstall the Cortex Certifai Operator by selecting Uninstall Operator from the drop-down list shown in Figure 8. The Operator for the cluster will be automatically de-listed from the Marketplace Operators page.

Conclusion
Installing Red Hat Marketplace on CodeReady Containers gives you the flexibility to try and test Marketplace products on your CRC workstation early in the application development lifecycle. As a developer, you can quickly evaluate certified software on your local development environment prior to recommending its use to your team. Download CodeReady Containers and create your Red Marketplace account to get started!
You can find a more specific example in How to install the CouchbaseDB Operator for Red Hat OpenShift on your laptop using Red Hat CodeReady Containers and Red Hat Marketplace.
Last updated: March 30, 2023