Redis is an open source, memory based key value store that is commonly used as a database, cache, and message broker. This article covers how to deploy a Redis cluster based on virtual machines (VMs) powered by Red Hat OpenShift Virtualization.
Export the environment variables
I created an Ansible playbook to automate the deployment of Redis virtual machines, OpenShift services, a Redis command-line interface (CLI) pod for interaction, and a Redis Insights deployment/service/route for cluster management and visualization. This playbook utilized the kubernetes.core and the kubevirt.core Ansible collections.
Before executing the playbook, we need to make sure the necessary authentication environment variables are exported. Below are the required environment variables for using kuberentes.core and kubevirt.core:
export K8S_AUTH_HOST=<https://api.ocp.example.com:6443>
export K8S_AUTH_API_KEY=<your-api-key>
export K8S_AUTH_VERIFY_SSL=<true/false>
Our Redis cluster will consist of 6 nodes: 3 primary nodes and 3 secondary nodes, all based on Fedora.
Create the OpenShift services
Before we create the virtual machines , we will create a dedicated OpenShift service for each VM as well as a service load balancing between all the Redis VMs. Individual VM services are targeted using the vm.kubevirt.io/name selector, while the load balancing service is using the app: redis selector to target all the VMs.
In the Service definition, we've specified two ports:
- Port 6379: The standard Redis data port for client connections.
- Port 16379: The Redis bus port used for inter-node communication and cluster coordination.
Below is a snippet of playbook detailing service creation:
- name: Create redis cluster service
  kubernetes.core.k8s:
    state: present
    definition:
      apiVersion: v1
      kind: Service
      metadata:
        name: "redis"
        namespace: "{{ project }}"
      spec:
        selector:
          app: redis
        ports:
          - name: redis
            protocol: TCP
            port: 6379
            targetPort: 6379
          - name: bus
            protocol: TCP
            port: 16379
            targetPort: 16379
- name: Create redis VM services
  kubernetes.core.k8s:
    state: present
    definition:
      apiVersion: v1
      kind: Service
      metadata:
        name: "{{ item }}"
        namespace: "{{ project }}"
      spec:
        selector:
          vm.kubevirt.io/name: "{{ item }}"
        ports:
          - name: redis
            protocol: TCP
            port: 6379
            targetPort: 6379
          - name: bus
            protocol: TCP
            port: 16379
            targetPort: 16379
  with_items:
  - "{{ redis_vms }}"
Create the virtual machines
Once the necessary services are created, we'll proceed to create the six virtual machines. The cloud-init configuration for these VMs will include installing the Redis package, configuring Redis with our desired parameters, and enabling the Redis service. Below is a snippet of playbook detailing VM cloud-init:
#cloud-config
user: fedora
password: fedora
chpasswd:
  expire: false
ssh_pwauth: true
packages:
- redis
runcmd:
- sed -i "s/bind 127.0.0.1/bind 0.0.0.0/" /etc/redis/redis.conf
- sed -i "s/protected-mode yes/protected-mode no/" /etc/redis/redis.conf
- sed -i "s/# cluster-enabled yes/cluster-enabled yes/" /etc/redis/redis.conf
- sed -i "s/# cluster-config-file nodes-6379.conf/cluster-config-file nodes-6379.conf/" /etc/redis/redis.conf
- sed -i "s/# cluster-node-timeout 15000/cluster-node-timeout 15000/" /etc/redis/redis.conf
- sed -i "s/# replica-announce-ip 5.5.5.5/replica-announce-ip {{(query('kubernetes.core.k8s', kind='Service', resource_name=item,namespace=project) | first ).spec.clusterIP}}/" /etc/redis/redis.conf
- sed -i "s/# cluster-announce-ip 10.1.1.5/cluster-announce-ip {{(query('kubernetes.core.k8s', kind='Service', resource_name=item,namespace=project) | first ).spec.clusterIP}}/" /etc/redis/redis.conf
- systemctl enable --now redis
Configure networking on OpenShift Virtualization
When configuring networking for VMs on OpenShift Virtualization, there are primarily two approaches:
- OpenShift CNI: Leveraging the built-in Container Network Interface (CNI) solution provided by OpenShift.
- External networks: Utilizing external networks via bridges to connect VMs to the outside world.
For this article, we will be deploying our Redis cluster VMs using the default OpenShift network.
When connecting VMs to the default Pod network using OpenShift CNI, they access the Pod network via NAT, assigning a default IP of 10.0.2.2/24 at the guest OS level of all VMs. This presents a challenge for clustered components like Redis, which often require unique hostnames or IPs for bootstrapping and cluster connectivity.
By utilizing Redis' cluster announce IPs and replica announce IPs configuration parameters, these issues can be effectively mitigated. When the Redis “cluster announce IP”/”replica announce IP” is set as a Kubernetes service, it acts as stable virtual IP addresses that abstracts the underlying VM.
By configuring the cluster announce IP and replica announce IP to point to the Service's cluster IP, which is associated with the VM, we can establish a reliable communication mechanism within the Redis cluster. This will avoid using the default 10.0.2.2 IP that is present at the guest OS level. Here is a snippet of playbook detailing replica-announce-ip and cluster-announce-ip values:
- sed -i "s/# replica-announce-ip 5.5.5.5/replica-announce-ip {{(query('kubernetes.core.k8s', kind='Service', resource_name=item,namespace=project) | first ).spec.clusterIP}}/" /etc/redis/redis.conf
- sed -i "s/# cluster-announce-ip 10.1.1.5/cluster-announce-ip {{(query('kubernetes.core.k8s', kind='Service', resource_name=item,namespace=project) | first ).spec.clusterIP}}/" /etc/redis/redis.conf"
These 2 lines in our cloud-init script are responsible for setting the replica-announce-ip and the cluster-announce-ip to the value of the OpenShift service cluster IP that has been assigned to it. This is done by using the Kubernetes Ansible query to retrieve the service cluster IP that has been pre-created for each VM.
Initialize the Redis cluster
Once the VMs are created and bootstrapped using cloud-init, we can initialize the Redis cluster. Connecting to the Redis CLI pod, execute the following command:
redis-cli --cluster create \
redis-master-1.redis-cluster.svc.cluster.local:6379 \
redis-master-2.redis-cluster.svc.cluster.local:6379 \
redis-master-3.redis-cluster.svc.cluster.local:6379 \
redis-slave-1.redis-cluster.svc.cluster.local:6379 \
redis-slave-2.redis-cluster.svc.cluster.local:6379 \
redis-slave-3.redis-cluster.svc.cluster.local:6379 --cluster-replicas 1
Figure 1 depicts this command being run inside the Project.
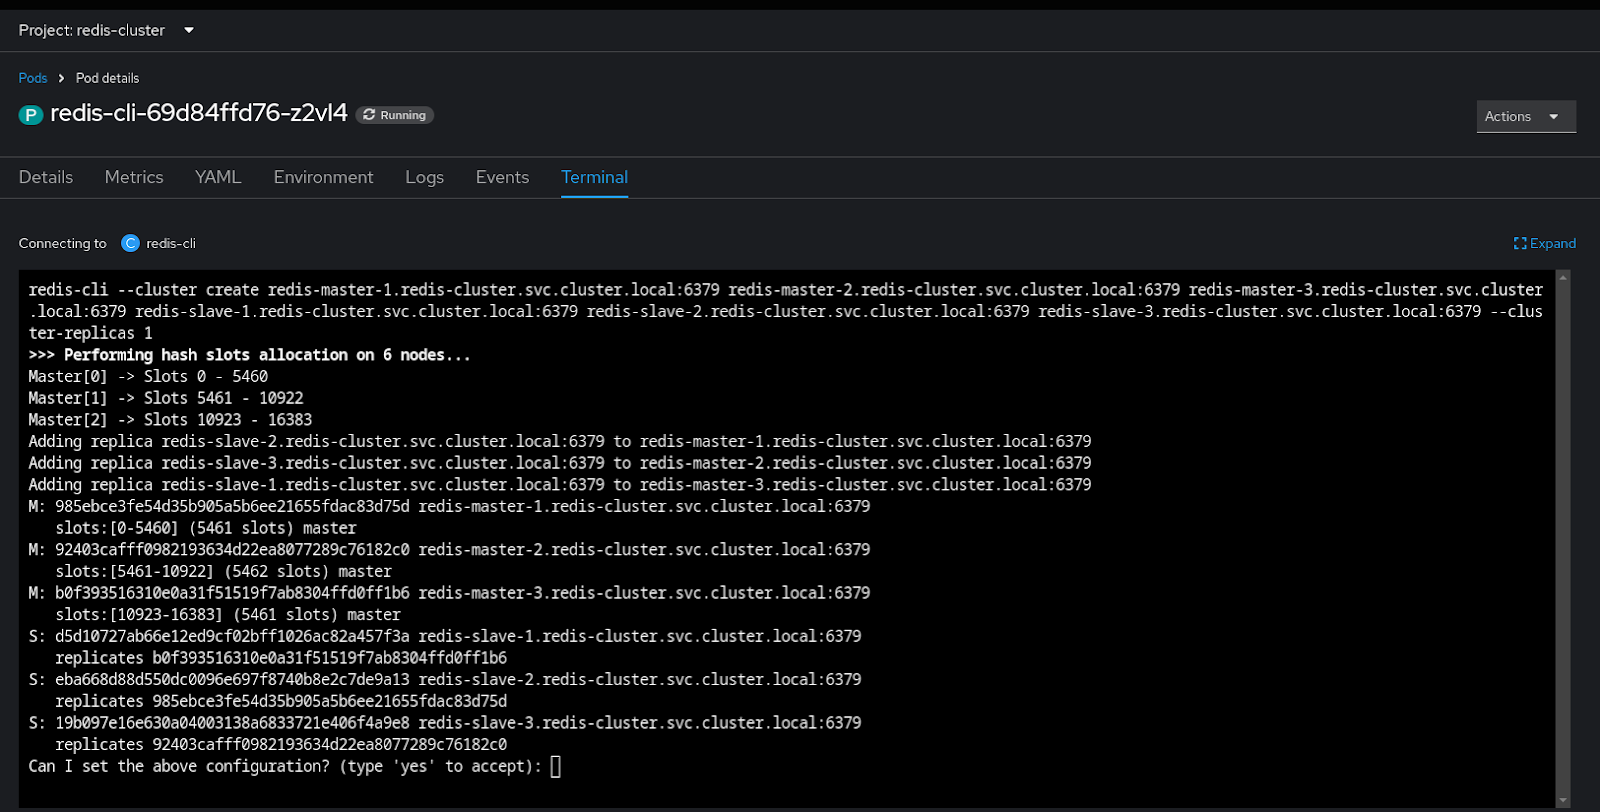
With the command executed, our Redis cluster is now ready to accept connections and clients. We can verify by running the following command and validating the PONG output:
redis-cli -h redis.redis-cluster.svc.cluster.local ping
+PONG
Add the cluster to Redis Insights
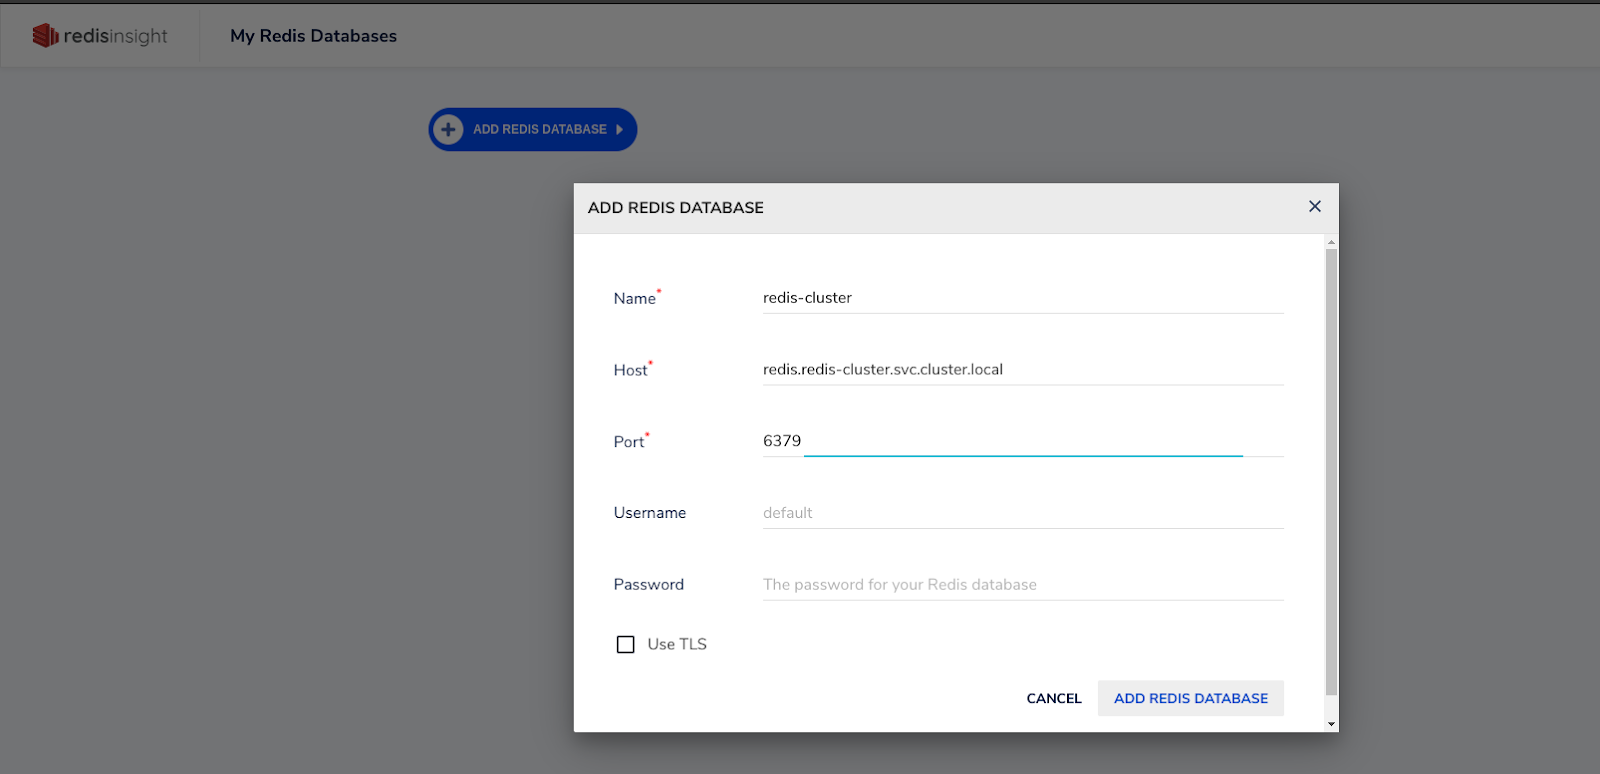
Now let's navigate our browser to the Redis Insights route that we created.
Once loaded, we can add our Redis cluster. Fill out the information below, as shown in Figure 2.
- Name:
redis-cluster - Host:
redis.redis-cluster.svc.cluster.local - Port:
6379
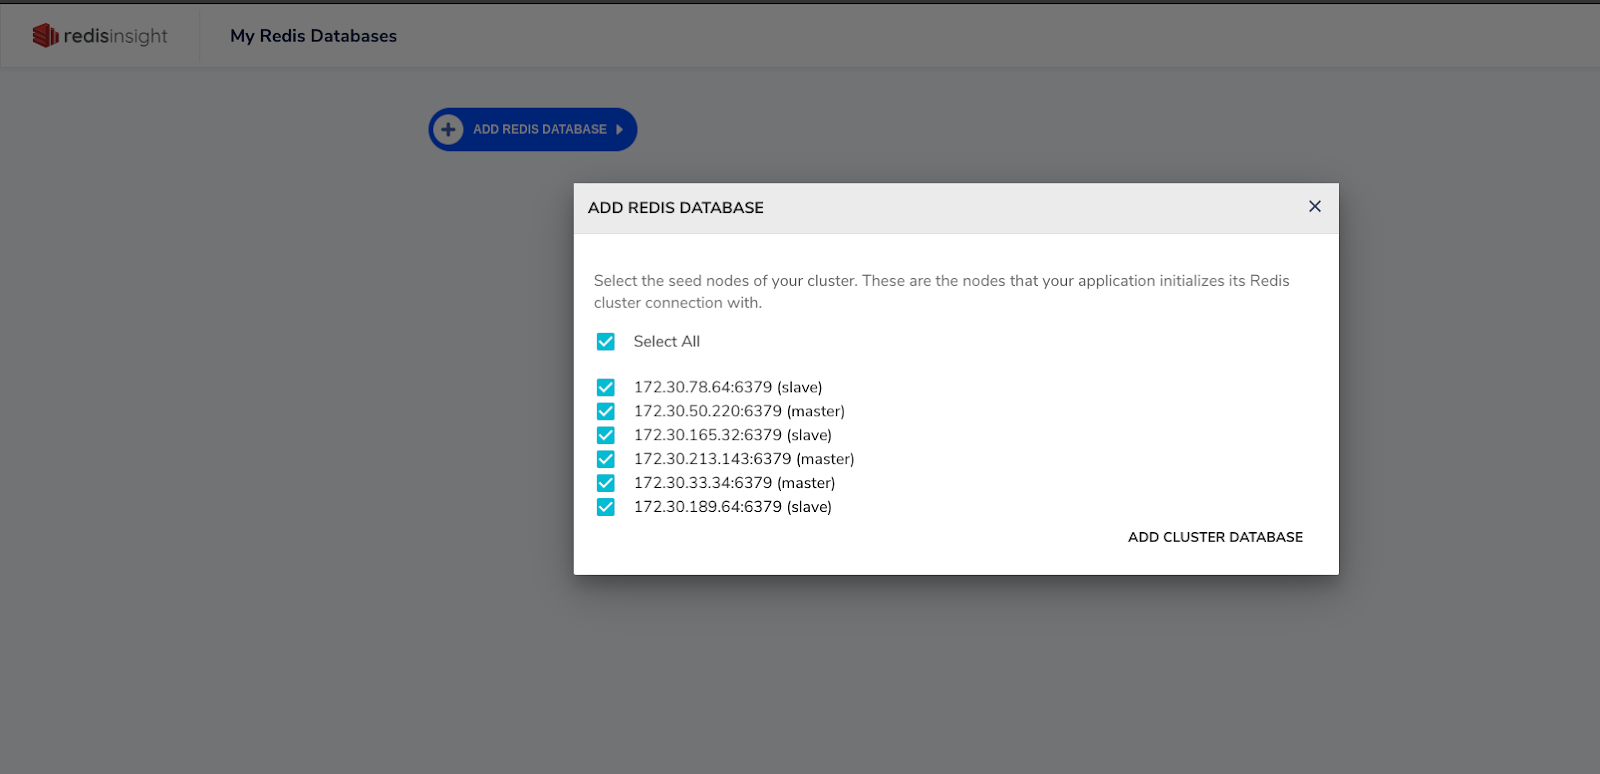
After adding the Redis cluster to Redis Insights, it will automatically detect the individual nodes. The displayed IPs are the OpenShift Service cluster IPs configured in the Redis configuration file. This indicates that the nodes are advertising themselves using the cluster IP as per our configuration. We can select all and proceed to Add Cluster Database, as shown in Figure 3.
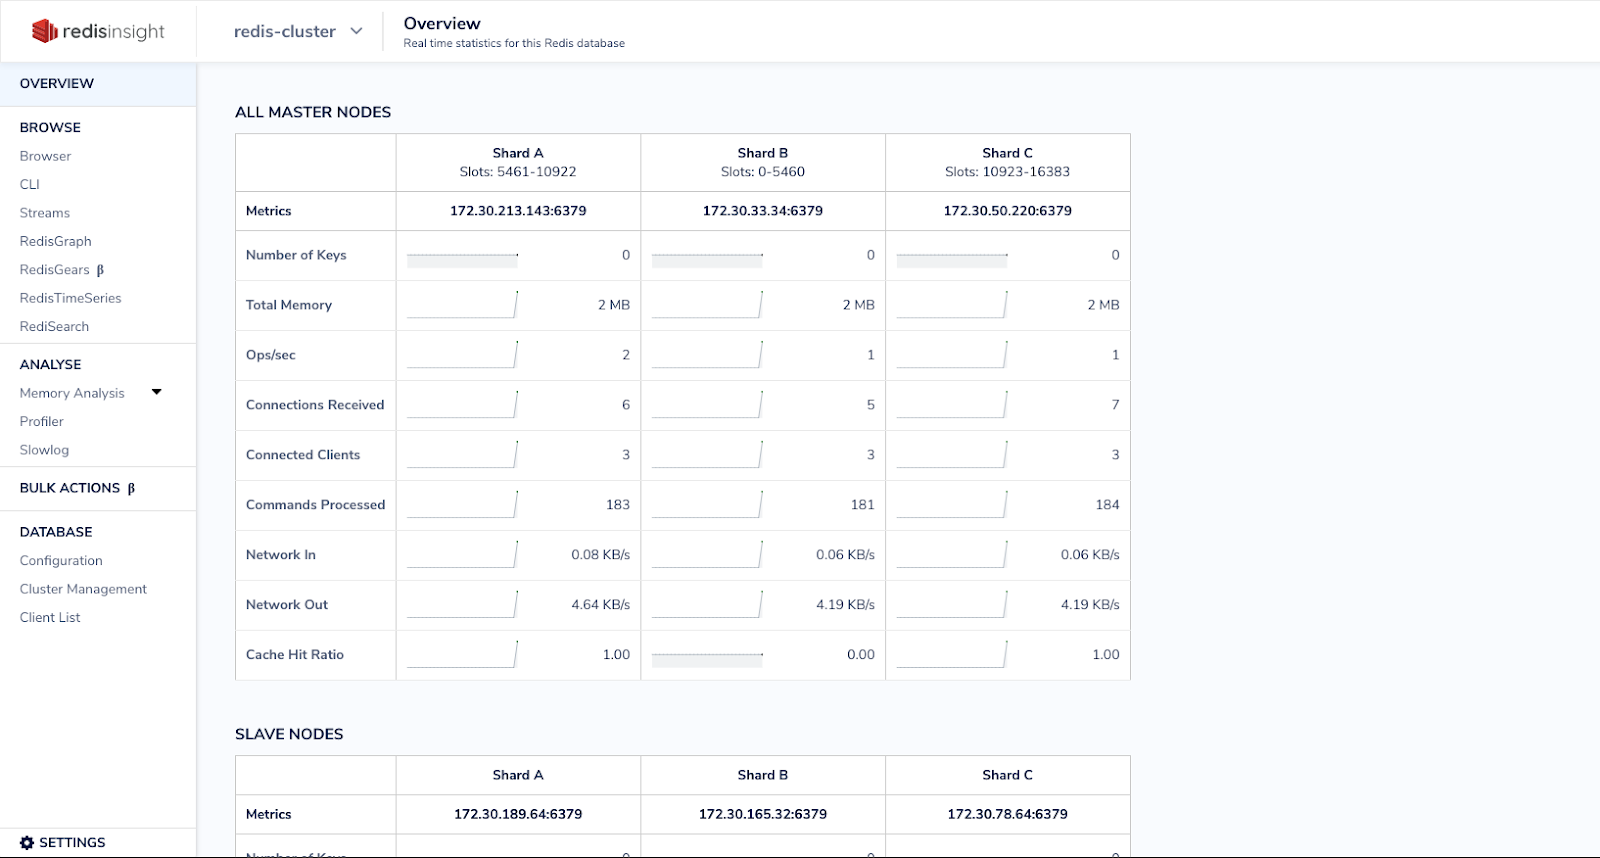
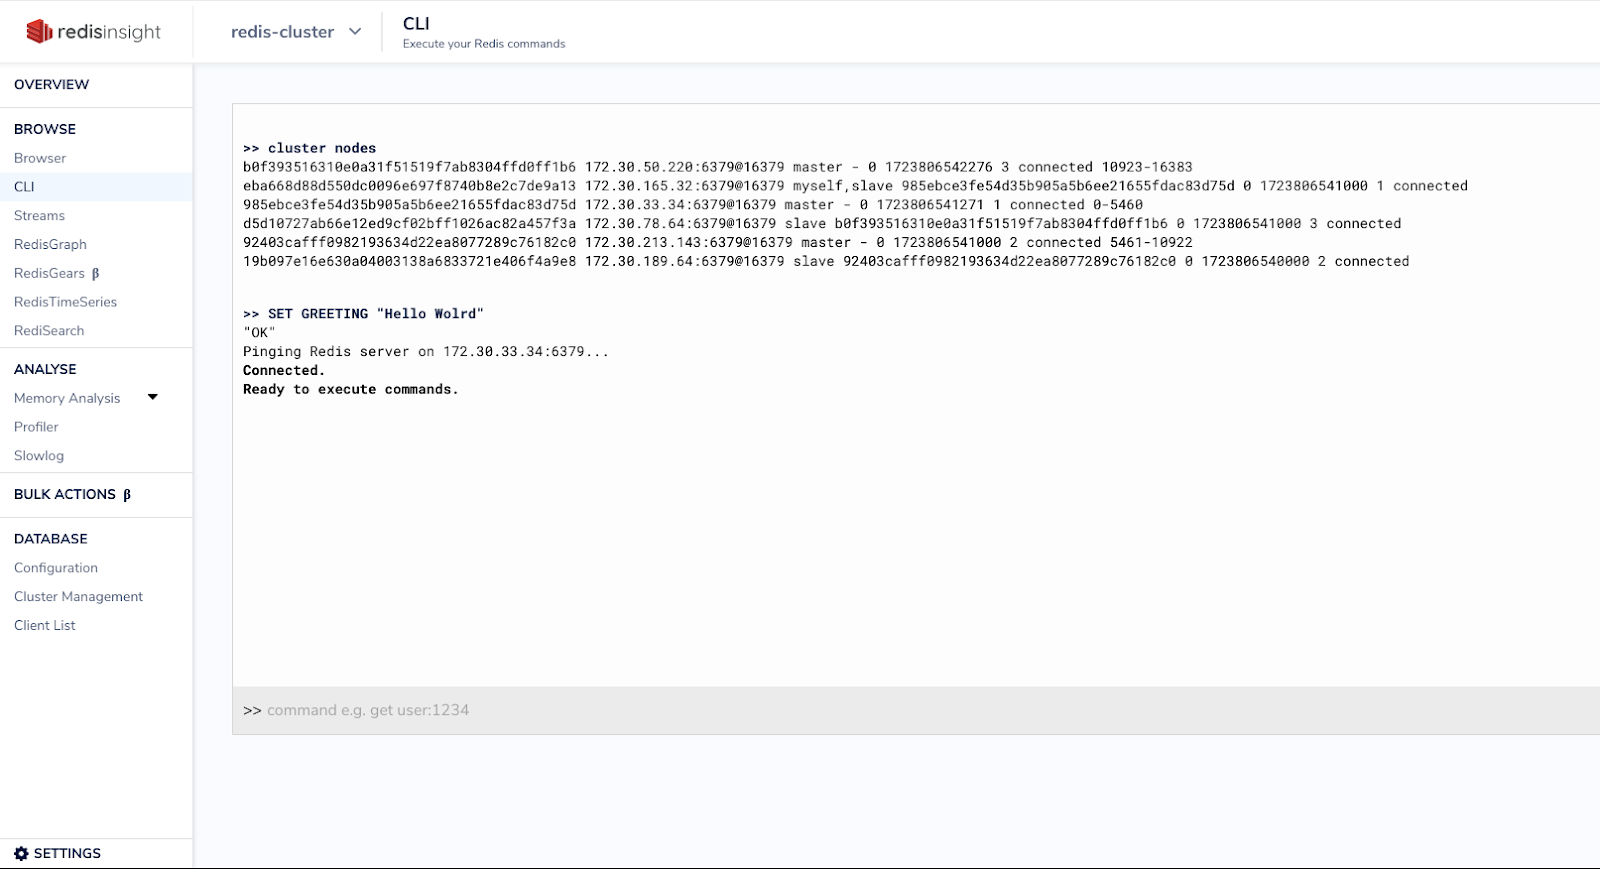
After adding the Redis cluster, you can explore its overview in Redis Insights. Navigating to the CLI tab, you can execute commands like CLUSTER NODES. See Figure 4. This command will display a detailed breakdown of all cluster nodes, including their roles (primary/secondary) and the connected node, as shown in Figure 5.

Test the Redis cluster
To test the Redis cluster, create a new key-value pair using the following CLI command:
SET GREETING "Hello World"Figure 6 shows this command being executed inside the CLI.
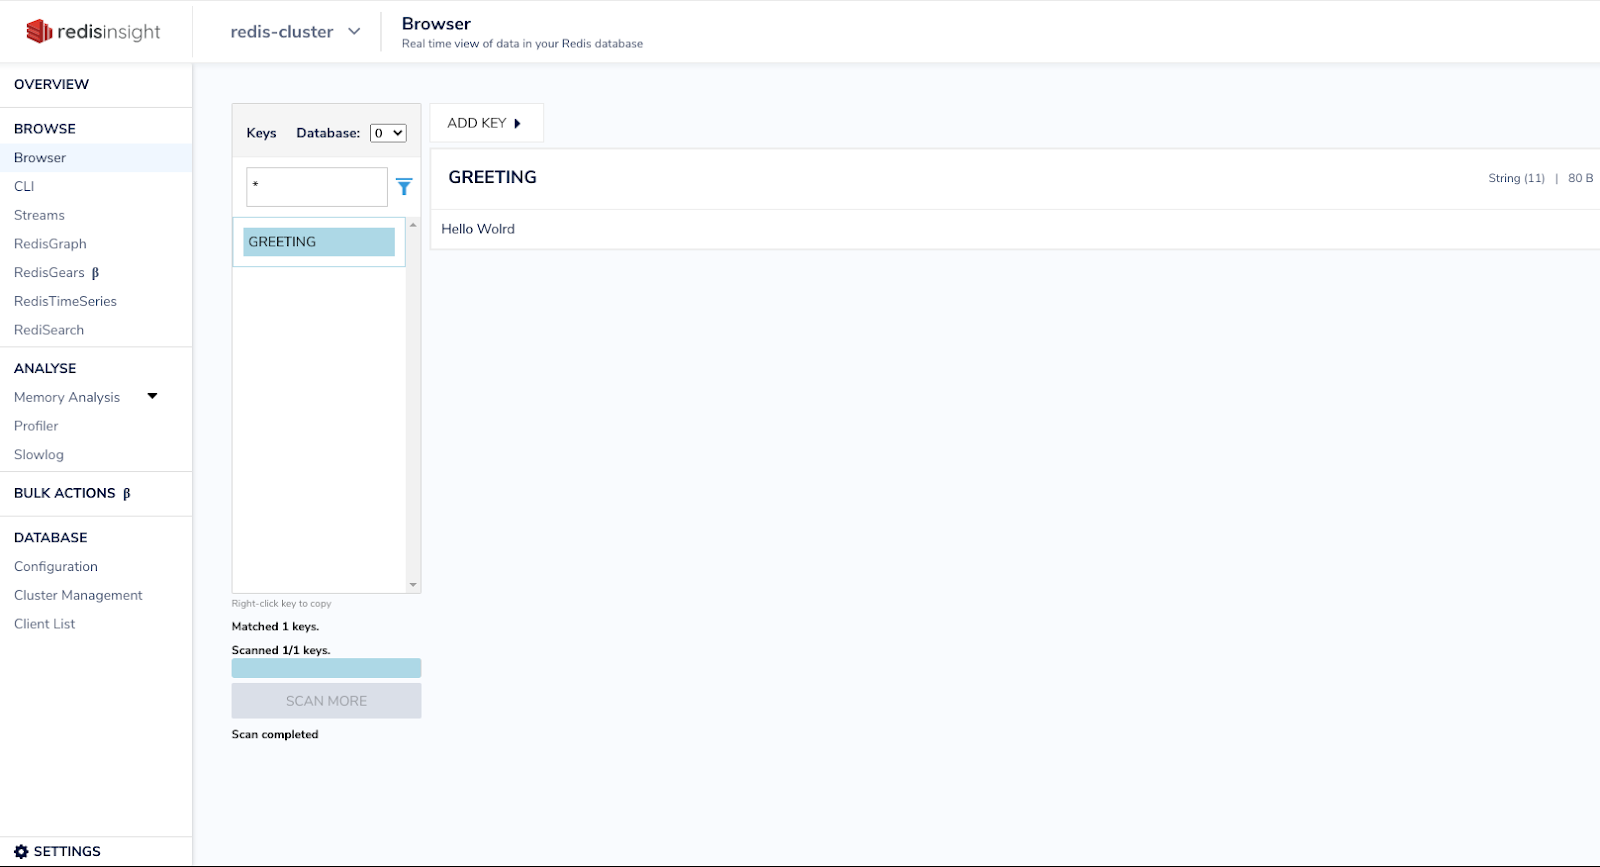
Returning to the browser tab, you can explore your cluster data by clicking the GREETING key. This will reveal the value you set, Hello World. See Figure 7.
Conclusion
This article has demonstrated how to create a Redis cluster running on VMs powered by OpenShift Virtualization. We've showcased the effective use of OpenShift Services for managing node-to-node communication within the Redis cluster. Additionally, we've explored basic operations like cluster health checks and data manipulation using redis-cli and Redis Insights.