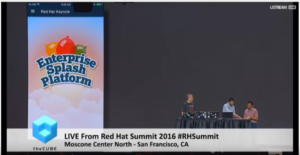
This year’s middleware keynote address at Red Hat Summit talked about microservices, the power of the pipeline, and how developers and devops can work together to release code to production at a much higher rate.
The keynote also demonstrated how releases can be shipped so you can switch from the existing deployment to a new deployment (blue/green deployments), and demonstrated how to roll out a canary deployment to a subset of users to test out new features. (If the canary "dies", roll the deployment back. If it lives, gradually ramp up the release of the deployment until all users receive the new code. )
To show all of this off, we needed to create something visual, where users could see the deployments change right in front of their eyes. That’s where the Red Hat Keynote Mobile Application came in.
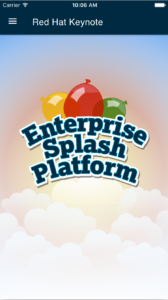
The keynote application was built for the web, designed to show users what it might look like to see a blue/green deployment or a canary deployment and have the user interface immediately show the impact of a code change. The app also sent transactions from the browser, through a series of microservices, to then populate a leaderboard and a scoreboard that updated in real-time. We wanted to make it fun --- that’s why we built a game. We called it, "The Enterprise Splash Platform."
During the keynote address, over 830 people played simultaneously, over 300,000 transactions passed through our backend microservices, and over 600 selfies were submitted through our pipeline --- pretty impressive numbers for a live demo with no safety net.
Over the next few sections I’d like to explain how we built the app, and talk about some of the decisions we made to deliver an app that would load quickly and give us the functionality we needed to demonstrate microservices and the pipeline.
Finally, I’ll talk about the lessons I learned and what I’d do different next time. First decision, and it’s a biggie, mobile web app or native app?
Mobile Web App vs Native App
The big question for me this year was mobile web app or native app. With the game that we were building, I knew that a mobile web app would work well; however, the part of the app that made me hesitate was the bit where users take selfies and upload their images --- would we be able to access the device camera reliably across browsers and operating systems?
We wouldn’t have had any issues if we built a native application, but I didn’t want all of the headaches that accompany native application development: separate app-stores, approval processes, submitting updates, etc. We could’ve used a “write once, deploy everywhere” technology like Cordova or React Native to keep development easy. But in the end, I wanted to give mobile web a shot. I just needed to be sure that accessing the camera was going to work.
It turns out, after a few Google searches, I was worried for no reason:
<input type="file" capture="camera" accept="image/*">
That bit of HTML worked great across iOS and Android. I tested on an array of iOS and Android devices and they all seemed to work.
The behavior is a bit different between iOS and Android (iOS users are prompted to choose from an existing photo or use their camera where Android goes straight to the camera), but it seemed to be the answer that I was looking for. Yet, this lead me to my next question: In a conference setting with bad Wi-Fi and a flaky network, could we make the app load fast enough in the browser without having the files on local disk? A native app would be pre-downloaded and would not bear this risk.
My goal was to keep the initial load time of the app under five seconds, or at least give the perception that the app loaded in under five seconds. Due to an issue with the size of the bundled javascript, which I’ll talk about later, I ended up building a loading screen that loaded in about one second and gave the perception of a fast loading app. In reality, the app took anywhere from five to fifteen seconds to load under conference network conditions. It wasn't quite where I wanted it to be, but it was good enough.
The Mobile App
I built the app using Angular 2 with the Angular 2 CLI, Material Design Lite for basic layout and styles, Sass to keep styling easy, Phaser for the game engine, Javascript Load Image for help with selfie part of the app, and web sockets to handle most of the communications between the app and the server.
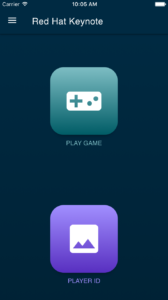
Building with Angular 2 and the Angular 2 CLI was great. I was able to keep things very modular and focus on building reusable components. Using Sass was also super easy due to the fact that the Angular 2 CLI has built in support for all the major CSS preprocessors. The framework and tools gave me the foundation to build out the two main screens of the app: the Game, and Player ID.
The Game
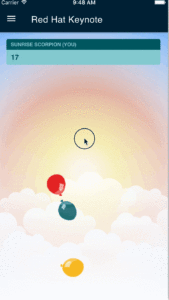
We needed to build a simple game that would be the visual manifestation of all the changes to the app that were running through our pipeline --- that’s how we ended up with Enterprise Splash Platform. It was a "Fruit Ninja" like game where the player must pop as many water balloons as possible to score points and obtain achievements along the way.
The foundation of the game was Phaser, a great open source HTML5 cross-browser game engine that uses canvas or WebGL and achieved a stellar sixty frames per second on most devices. Now, if you haven’t had a chance to checkout Phaser, I’d highly recommend it. It’s easy to get up and running and you’ll be a game developer in no time.
To handle all of the state changes in the game (yellow, blue, and green background changes, balloon size changes, global pause and play) we used a websocket that was hooked into our Vert.x gamebus.
Each time a player would pop a balloon, the app would send a websocket message to our gamebus, which would then send a message our Red Hat JBoss BRMS rules and scoring engine. The BRMS instance would then aggregate team scores and determine if the player had obtained an achievement. Once the scores were aggregated, BRMS would then send a message back to our gamebus, then back to our client where we would notify the player of any achievements. BRMS would also send messages to our leaderboard and scoreboard applications to show live updates on individual scores and team scores.
Player ID (aka Selfie)
Any concerns with accessing the device camera, the file size of the picture and then sending that over the network? Perhaps.
The second main screen of the mobile app was the Player ID where a user could take a selfie and upload through our pipeline which would populate a mosaic that we displayed to the audience.
I previously addressed how I handled accessing the device’s camera using HTML and the input tag, but the next big issue was handling the size of the image. "Canvas" solved that problem for me.
After we captured the image, I wrote the image to Canvas. When the user was ready to upload the image, I wrote the image to a data URL and reduced the quality from 1.0 to 0.1.
let image = this.canvas.toDataURL('image/jpeg', 0.1);
All I had to do was post the image as a string and convert it back to an image on the backend. Pretty easy. This method also addressed my file size concern because I was taking large images from the camera and save them down to about 5 or 6 KB.
I understand that I severely degraded the quality of the image, but the images were just going to populate a giant mosaic so the quality wasn’t too much of a concern for me. The only thing I cared about was file size.
If I had to do it all over again
I probably wouldn’t have used Angular 2 as the framework. My reasons for choosing Angular 2 were that I’ve spent the last few years working with Angular, release candidate 2 for Angular 2 was out, and the Angular team had just released their new CLI. So it must be ready for production, right? Well, not quite.
One of the main reasons for me using Angular 2 was the CLI. It definitely sped up my development and I was finally able to keep pace with all those Ember developers who have been using a CLI for their development for a long time now.
The one command I was really excited about was “ng build -prod”. I had been struggling with finding a good solution for building Angular 2 projects and here was the Angular team giving me a tool that just took care of it. So, when I was ready to put a build out, I committed the code, waited for Jenkins to pick up the changes on GitHub and run “ng build -prod” for me. Easy! But not all was right in Angular 2 paradise.
After viewing the build on our site on a desktop browser, things were great. It was a different story on my mobile device with a 4G connection --- it took forever to load, and I’m talking anywhere from 4 to 30 seconds to load. That was not going to work for our demo and especially under conference Wi-Fi and mobile service conditions.
Upon further investigation using Chrome DevTools, my main javascript bundle was 1.1 MB! That’s a lot of javascript. Too much javascript for such a simple app.
I was using a CDN for Phaser and Material Design so it was clear that it was just Angular 2. Long story short, we stopped using Amazon S3 to serve the app as static files and moved it to NGINX with gzip and compression. We were able to get the file size down to about 250 KB gzipped. Not terrible, but we felt we could’ve done better.
Looking back, I could have just used Angular 1 or Polymer (I know those frameworks well). But I made my choice and needed to stick with it because a re-write late in the game could’ve been costly. Or, if the Red Hat Summit occurred later in the year, the Angular 2 team might have been able to get the bundle size down --- I know this is something they are actively working on.
Overall, I’m thrilled that we went with a mobile web app instead of native and everything worked great. I was very happy with the performance of the app and I intend to keep building mobile web apps to hopefully help make the web a better experience for everyone.
Last updated: January 22, 2024


