Using circuit breakers in Node.js applications helps mitigate failures when an application calls external services. For example, if the application calls a service to get a list of movies, and that service is not running, the circuit breaker helps the application fall back and find a different way to satisfy the request—or at least inform the user that the movie list is unavailable.
In a previous article, I showed how to use circuit breakers with Node.js. Using circuit breakers with Red Hat OpenShift Serverless Functions introduces a new challenge, which we can solve with a slightly different implementation. I'll explain the issue first, then show you how to solve it.
Note: I introduced the circuit breaker pattern for Node.js in my article Fail fast with Opossum circuit breaker in Node.js.
Circuit breakers in serverless functions
When an application uses OpenShift Serverless Functions, the number of running instances can scale to zero. This ensures you don’t pay for resources you aren’t using. The problem is that when a serverless function uses a circuit breaker, such as Opossum for Node.js, the circuit's state and statistics are lost every time the function scales to zero. As a result, you don’t get the benefits of the circuit breaker.
The latest release of Opossum, version 6.2.0, addresses this problem by allowing a circuit to be re-initialized based on the previous state and statistics. For this to work, we need a persistent database.
Failing fast with Opossum 6.2.0
Here is a very simple example of what a circuit might look like when using the Opossum module in Node.js:
const CircuitBreaker = require('opossum');


function asyncFunctionThatCouldFail(x, y) {

  return new Promise((resolve, reject) => {

    // Do something, maybe on the network or a disk

  });

}


const options = {

  timeout: 3000, // If our function takes longer than 3 seconds, trigger a failure

  errorThresholdPercentage: 50, // When 50% of requests fail, trip the circuit

  resetTimeout: 30000 // After 30 seconds, try again.

};

const breaker = new CircuitBreaker(asyncFunctionThatCouldFail, options);


breaker.fire(x, y)

  .then(console.log)

  .catch(console.error);
This example illustrates a function call that could fail. The call could be anything, but it's usually a call to a network service. We'll use this function and a few basic options to create a new circuit breaker instance. Then, using that new circuit breaker instance, we'll call the fire method to execute the protected function.
To learn more about Opossum and circuit breaking in general, check out Opossum’s Readme file.
Using Opossum with Node.js serverless functions
The example that we are going to use can be found at the Opossum with Functions example site. The example is created with the kn command along with the func plugin:
$ kn func create
The example is a very basic function application that returns a greeting when called. You can run it locally or in a Red Hat OpenShift cluster with the serverless operator installed. For this article, I'll show how to run the application both ways. For an introduction to serverless functions on OpenShift, see Create your first serverless function with Red Hat OpenShift Serverless Functions.
Install the Opossum circuit breaker
You can add modules to the example application the same way you would with any Node.js application. Here's the npm install command to install the Opossum circuit breaker:
$ npm install opossum
As stated earlier, we want to be able to initialize our circuit to a previous state that we have saved. For this example, we are going to make a call to the database when the function starts up to find the latest record. If one is there, we can use it when creating the circuit:
const result = await cruds.find(circuitName);


    if (result.rowCount !== 0) {

      circuitExport = JSON.parse(result.rows[0].circuit);

      console.log('init export state', circuitExport.state);

    }


 // Set some circuit breaker options

  const circuitOptions = {

    name: circuitName,

    timeout: 3000, // If name service takes longer than .3 seconds, trigger a failure

    errorThresholdPercentage: 50, // When 50% of requests fail, trip the circuit

    resetTimeout: 10000, // After 10 seconds, try again.

    ...circuitExport // the saved off status/state if any

  };


  // Use a circuit breaker for the external service and define fallback function

  circuit = new Opossum(externalService, circuitOptions);

  circuit.fallback(_ => 'Fallback');
Opossum emits various status messages, so we can either write to the database during these events to save the state of the circuit breaker, or write to the database each time the function is called. The choice depends on your application. For this application, I’ve chosen to save the circuit's state after a call to the function:
async function handle({ name }) {

  // log out the current circuit

  outputCircuitOptions('invoke circuit state before', circuit);


  const result = await circuit.fire();


   // Write to the DB async, so we don't need to hold up the return of the function

  cruds.create(JSON.stringify(circuit.toJSON()), circuitName);


  return `Hello ${result}!`;

}
Set up the database
Whether the application runs locally or in an OpenShift cluster, you need a database where the circuit stores its state. The example uses a PostgreSQL database. We can start an instance of the database relatively easily by using Docker. The command might look something like this:
docker run --name opossum-postgres-db -e POSTGRES_USER=luke -e POSTGRES_PASSWORD=secret -e POSTGRES_DB=opossum -d -p 5432:5432 postgres
Let’s break down some of the options we are passing to the docker command:
POSTGRES_USERis the user we use to access the database, in this caseluke.POSTGRES_PASSWORDis the password, which is set tosecret.POSTGRES_DBis set toopossum.- The
-p 5432option looks for the database on port 5432. postgresis the Docker image that is used.
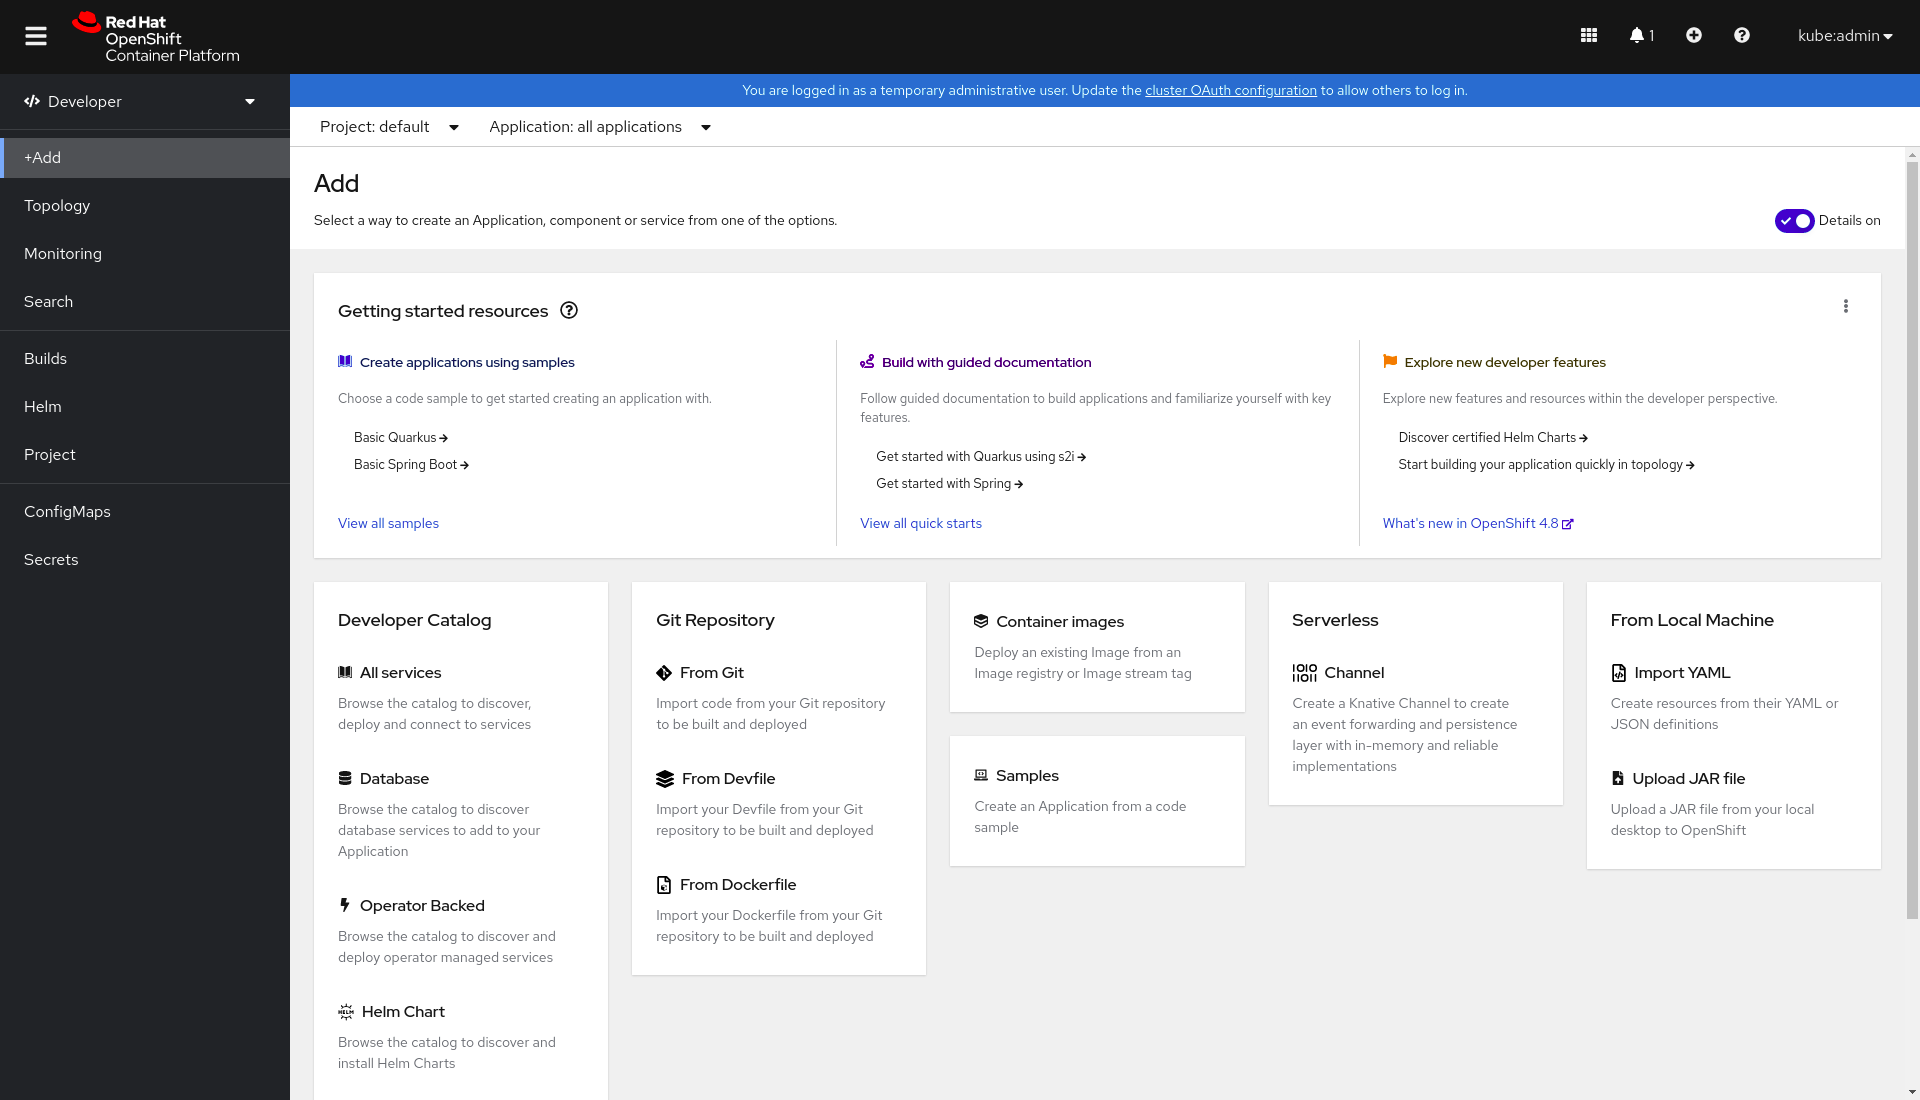
You can set up the database on an OpenShift cluster using just a few clicks in the developer console. First, click on the +Add link in the left sidebar shown in Figure 1.
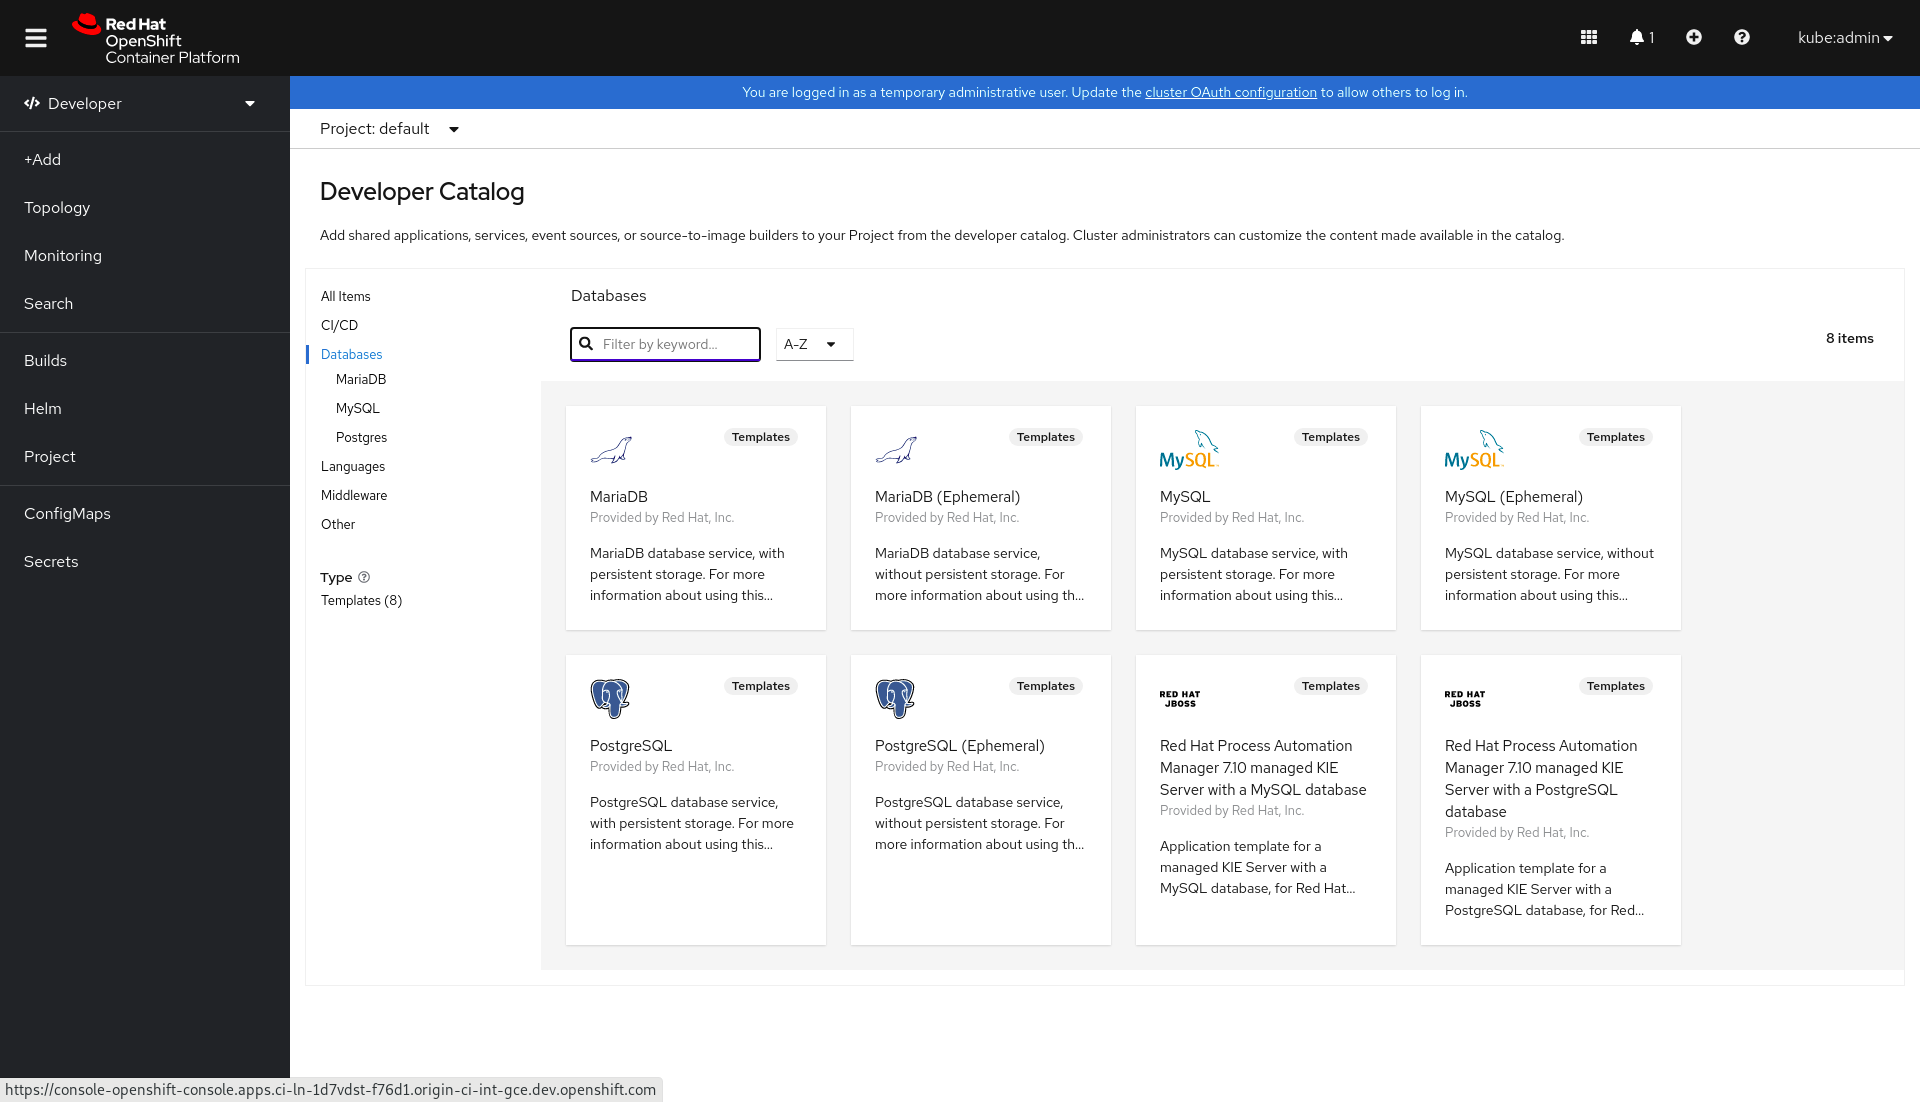
Then, select Database from the Developer Catalog and choose PostgreSQL (Ephemeral) for the database, as shown in Figure 2.
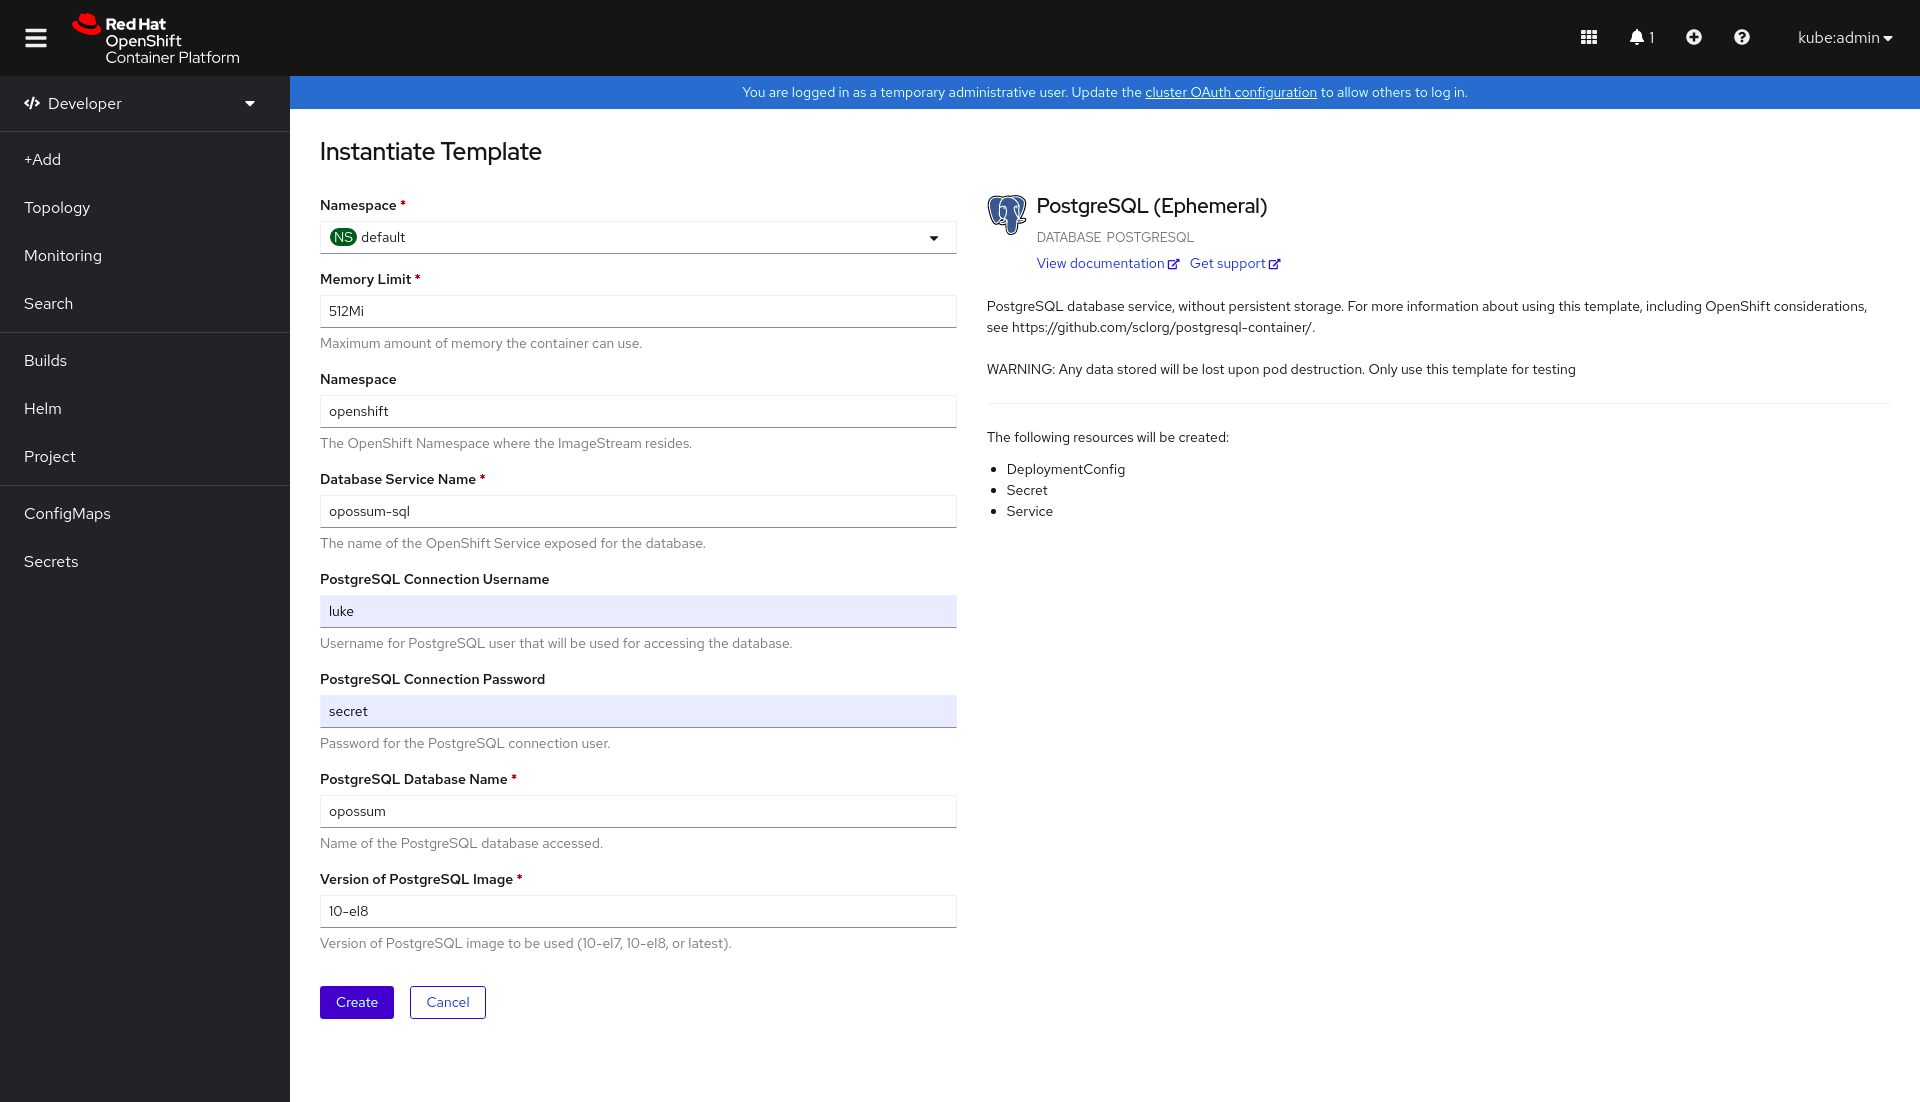
Click on Instantiate Template and use the same values that were used in the local installation for user, password, and database. Keep the defaults for the other values (Figure 3).
Run the function
Once the database has been created, you can run the application locally by issuing an npm run local command. This will start a Node.js process that can be accessed at http://localhost:8080. Each visit to that URL displays the current state of the circuit. The example also listens for various events emitted by Opossum and logs the state of the circuit each time. The output might look something like this:
{

  name: 'funtimes',

  enabled: true,

  closed: false,

  open: true,

  halfOpen: false,

  warmUp: false,

  shutdown: false

}
The "external" function called here is a simple function that returns either a resolved or a rejected promise. You can change the state of this external function by navigating to the http://localhost:8080?service=true endpoint (which reports a running circuit) or the http://localhost:8080?service=false endpoint (which reports a failed circuit).
To see how Opossum re-initializes itself, visit http://localhost:8080?service=false to fail the service and then visit http://localhost:8080 a few times to invoke it. You will see that the function is failing and falling back.
The next step is to restart the Node.js process. When it comes back up, the initial state in the logs should show that the circuit is open:
{

...

Open: true

...

}
Deploy and test the function
You can deploy the function to OpenShift with the kn func deploy command, and test it by interacting with the application just as with the local version. When you enter the URLs, instead of the hostname you used on your system (http://localhost), you have to use the hostname assigned within your cluster.
Conclusion
This article showed how to use a circuit breaker such as Opossum inside a Node.js serverless function and persist and reload its state. See the following resources to learn more about serverless functions and Node.js:
- For more about OpenShift Serverless Functions, visit the OpenShift Serverless Functions page.
- For a hands-on introduction to serverless functions, see Create your first serverless function with Red Hat OpenShift Serverless Functions.
- To do more with serverless functions in Node.js, check out the series: Node.js serverless functions on Red Hat OpenShift.
- For more about what Red Hat is up to with Node.js, visit the Node.js page on Red Hat Developer.