Page
Storing and managing files in Red Hat OpenShift Service for AWS clusters
In this section, we will execute a simple example of using persistent storage by creating a file that will be stored on a Persistent Volume in our cluster and then confirming that it will "persist" across pod failures and recreation.
Red Hat OpenShift Service on AWS (ROSA) supports both Elastic Block Store (EBS) and Elastic File System (EFS) for Persistent Volumes. For more information, see the following resources:
- Setting up AWS EFS for Red Hat OpenShift Service on AWS
- Persistent storage about using Elastic Block Store (EBS)
What will you learn?
- Viewing persistent volume claims
- Storing files within a pod
- Checking for files after a pod crash
What do you need before starting?
- Fully deployed application on OpenShift Service for AWS cluster
Steps for storing and managing files in OpenShift Service for AWS clusters
- Inside the OpenShift web UI click Storage in the left menu then Persistent Volume Claims.
- You will see a list of all persistent volume claims that our application has made. In this case, there is just one called "ostoy-pvc". If you click on it you will see other pertinent information such as whether it is bound or not, size, access mode, and storage class.
Note: RWO (Read-Write-Once) means that the volume can only be mounted to one node, but the pod(s) can both read and write to that volume. This option for Persistent Volumes in OpenShift Service for AWS is backed by EBS; thus it only supports RWO.
- You will see a list of all persistent volume claims that our application has made. In this case, there is just one called "ostoy-pvc". If you click on it you will see other pertinent information such as whether it is bound or not, size, access mode, and storage class.
- In the OSToy app, click Persistent Storage in the left menu.
- In the Filename field shown in Figure 14, enter a filename for the file you will create (e.g., test-pv.txt). Be sure to use a .txt extension so that the file will be visible in the browser.
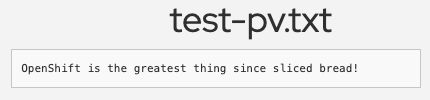
- In the File Contents box, enter text to be stored in the file (e.g., "OpenShift is the greatest thing since sliced bread!" or "test"). Then click Create file.

- You will then see the file you created appear above, under "Existing files". Click on the file and you will see the filename and the contents you entered as shown in Figure 15.
Crash the pod and recover the file
- Click on Home in the left menu.
- Click on the Crash pod button. (You can enter a message if you'd like).
- Once the pod is back up, click Persistent Storage in the left menu.
- You will see the file you created is still there; you can open it to view its contents to confirm.
Confirm via the container
- Now let's confirm that it's actually there by using the CLI and checking if it is available to the container. If you looked inside the deployment YAML file, we mounted the directory /var/demo_files to our PVC. So get the name of your front-end pod through the following:
oc get pods - Then get an SSH session into the container:
oc rsh <podname> -
Then enter the following:
cd /var/demo_files -
If you enter ls, you can see all the files you created. Next, let's open the file we created and see the contents:
cat test-pv.txt -
You should see the text you entered in the UI. The whole flow would look like the following:
$ oc get pods NAME READY STATUS RESTARTS AGE ostoy-frontend-5fc8d486dc-wsw24 1/1 Running 0 18m ostoy-microservice-6cf764974f-hx4qm 1/1 Running 0 18m $ oc rsh ostoy-frontend-5fc8d486dc-wsw24 $ cd /var/demo_files/ $ ls lost+found test-pv.txt $ cat test-pv.txt OpenShift is the greatest thing since sliced bread! -
Then exit the session by typing exit. You will then be in your CLI.
You are now ready to configure your application.
Get more support
- Red Hat OpenShift Service on AWS frequently asked questions
- Troubleshoot with Red Hat support
- Troubleshoot with AWS support