Page
Checking application health in Red Hat OpenShift Service on AWS clusters
In this section, we will learn how to crash our pods, as well as make a pod non-responsive to the liveness probes and see how Kubernetes behaves. We will first intentionally crash our pod and see that Kubernetes will self-heal by immediately spinning it back up.
Then we will trigger the health check by stopping the response on the /health endpoint in our app. After three consecutive failures Kubernetes should kill the pod and then recreate it.
What will you learn?
- How to crash pods in clusters
- View self-healing of apps
What do you need before starting?
- Deployed application within a Red Hat OpenShift Service on AWS cluster
Steps for conducting health checks
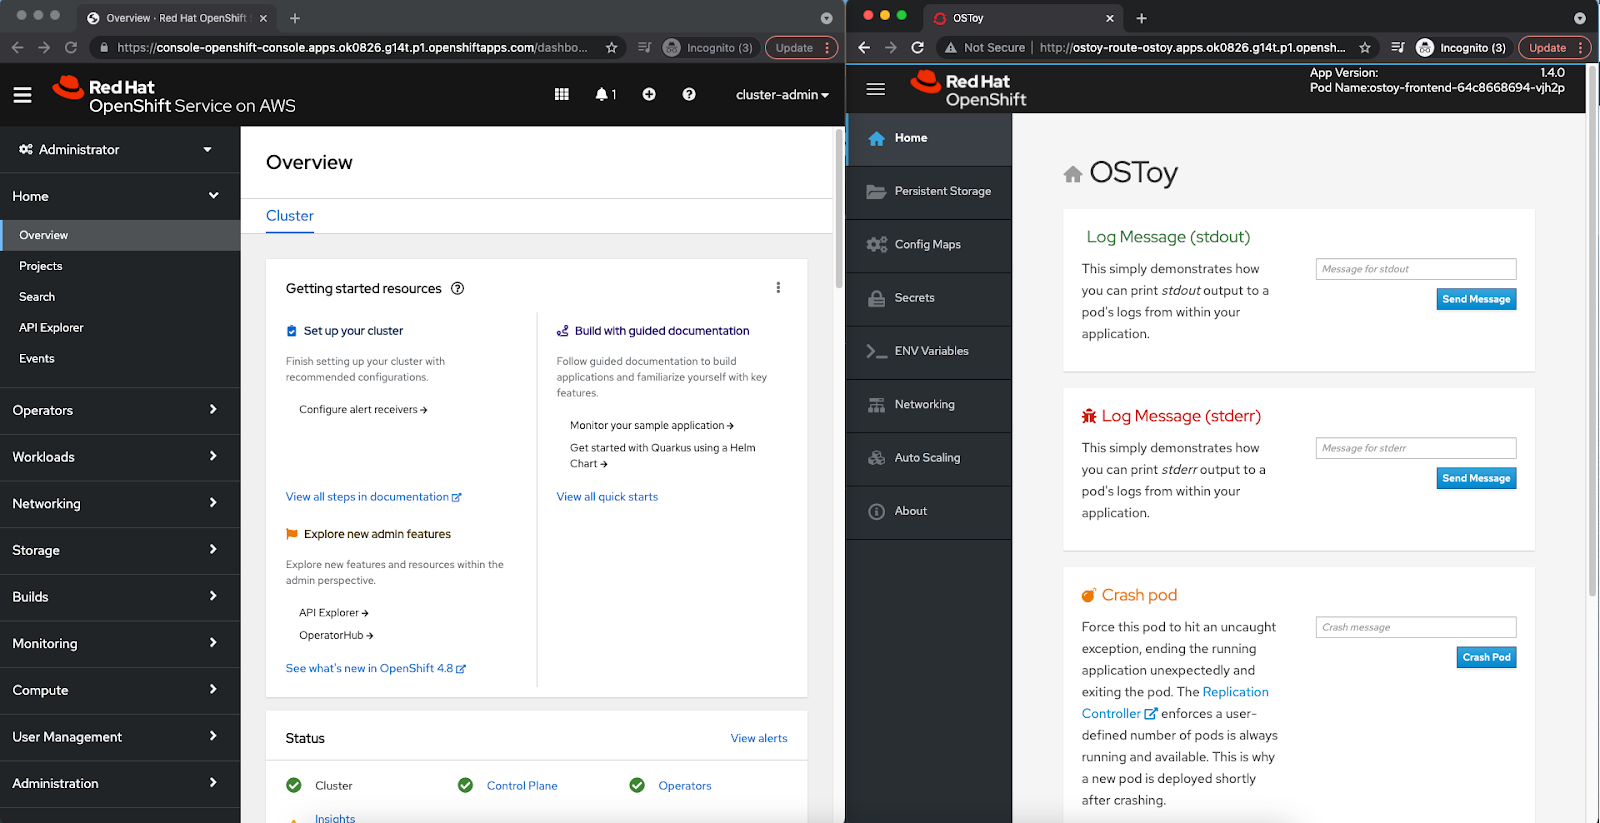
- It would be best to prepare by splitting your screen between the OpenShift Web UI and the OSToy application so that you can see the results of our actions immediately (see Figure 6).
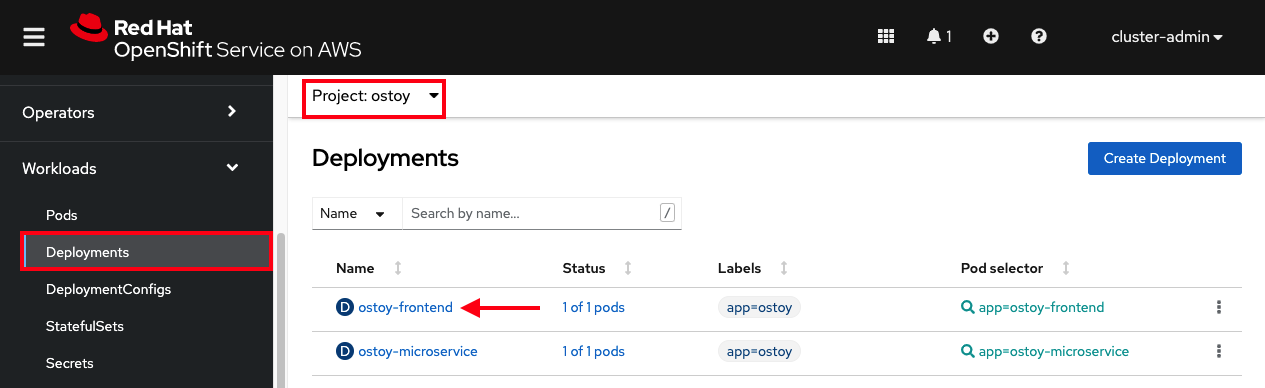
- To get to this deployment in the OpenShift web console, make sure you've selected "ostoy" for the project and in the left menu. Go to:
Workloads > Deployments > "ostoy-frontend"
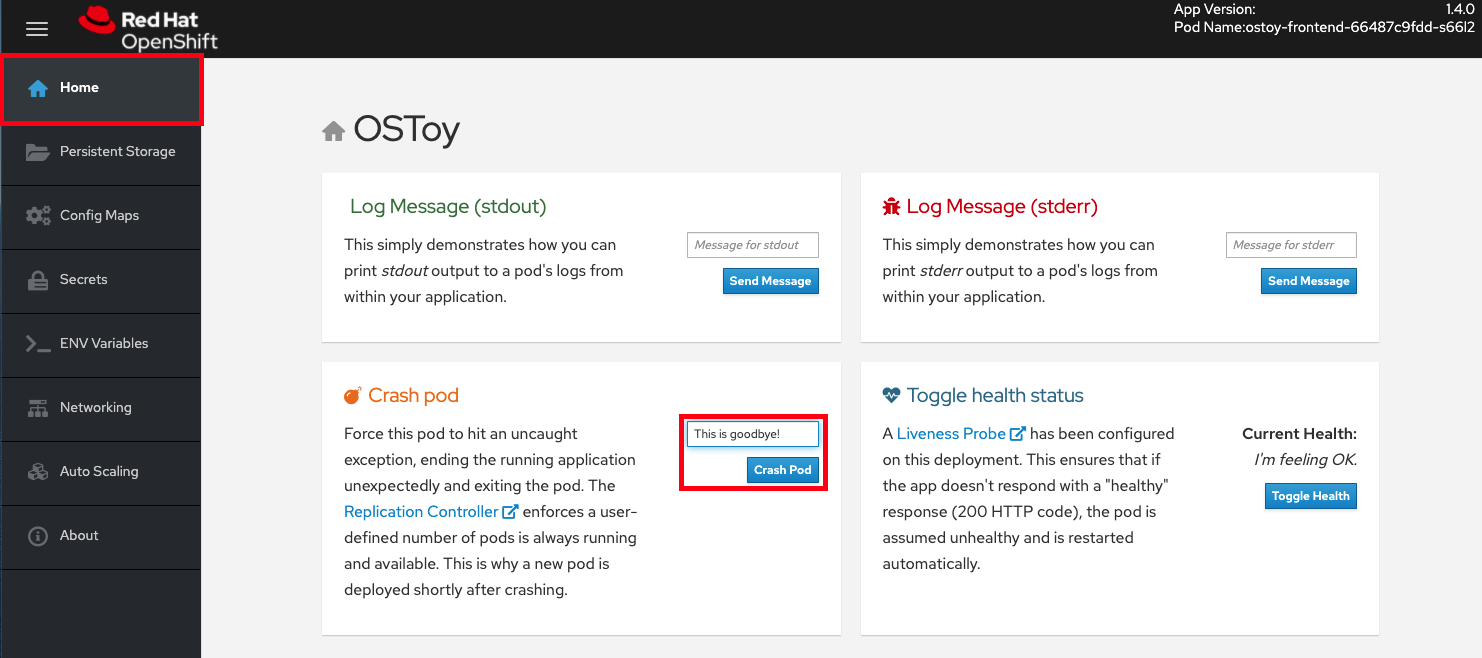
- Go to the OSToy app, click on Home in the left menu, and enter a message in the Crash pod tile (e.g.:, "This is goodbye!"-see Figure 7). Then click the Crash Pod button.
- This will cause the pod to crash, and Kubernetes should restart the pod. After you click the button, you will see a message similar to Figure 8:

- To view the revival, quickly switch to the Deployments screen (from step 1). You will see that the pod turns yellowish, meaning it is down, but it should quickly come back up and show blue (Figure 9).
Note: It happens quickly so you might miss it.

- Confirm the crash and revival by checking the pod events (Figure 10). Click on the Pods sub-tab > ostoy-frontend-xxxxxxx-xxxx. This will change to the pods screen.

- Click the Events sub-tab and further verify that the container has crashed and been restarted Figure 11).

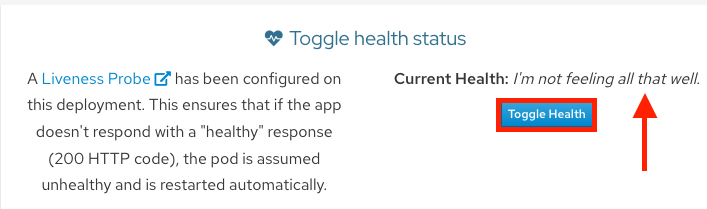
- In the OSToy app, click the Toggle Health button in the Toggle Health Status tile. You will see the Current Health switch to "I'm not feeling all that well." This will intentionally make the app malfunction.
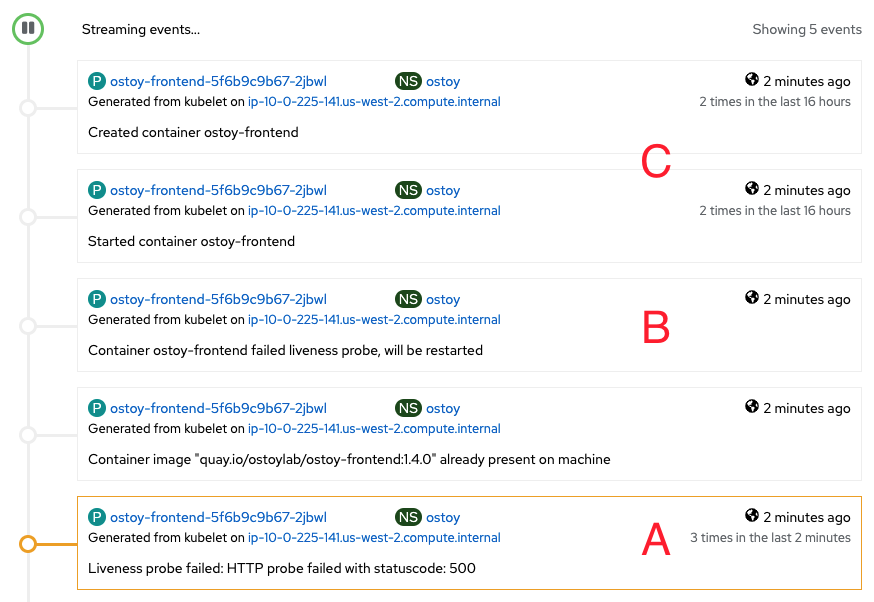
- This will cause the app to stop responding with a 200 HTTP code. After three such consecutive failures (marked with an "A" in Figure 13), Kubernetes will kill the pod ("B") and restart it ("C"). Quickly switch back to the pod events tab and you will see that the liveness probe failed and the pod being restarted.
You are now ready to learn about persistent storage and how to create files within the application pods.
Get more support
- Red Hat OpenShift Service on AWS (ROSA) frequently asked questions
- Troubleshoot with Red Hat support
- Troubleshoot with AWS support