Kubernetes and Apache Kafka are becoming de-facto platforms for developing and deploying microservice architectures.
Kafka is a distributed data streaming platform that enables applications to publish, subscribe to, store, and process streams of messages (or events) in real-time.
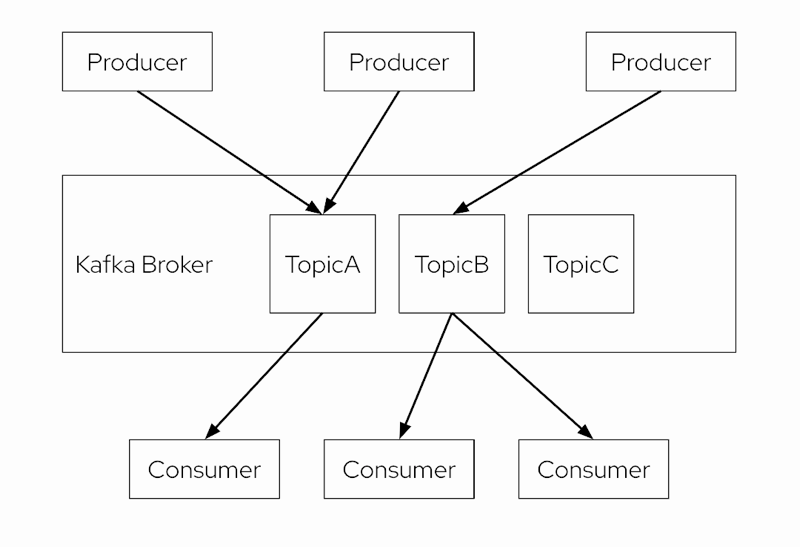
These messages are stored inside Kafka topics. A topic is a set of messages you aim to organize for consumption. Each topic is stored on disk, replicated across brokers to ensure fault tolerance, and messages within the topic are retained for a designated time. Figure 1 shows an overview of a Kafka cluster.
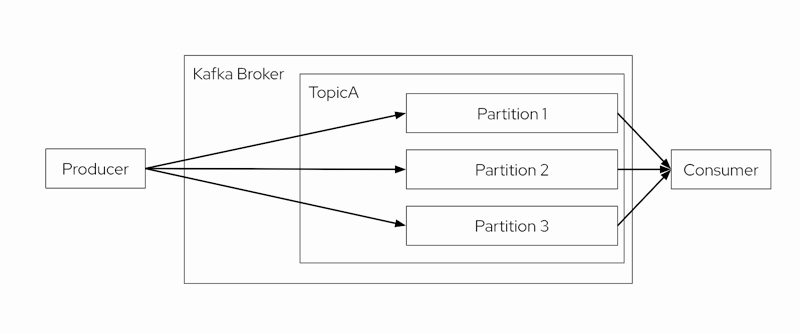
We can consider topics as a logical grouping for messages. A Kafka topic, however, is further divided into one or more partitions, where the produced messages are stored.
Fresh messages are appended to one of the topic partitions, and Kafka can only provide ordering guarantees to consumers for messages consumed from a single partition. Employing multiple partitions enhances performance in high data volume, data distribution, and redundancy scenarios.
In essence, a topic combines all the events stored within its partitions.
Figure 2 shows in more detail a topic with its partitions.
Consumers and producers
Let’s explore the two elements not covered yet in these diagrams: the producers and the consumers.
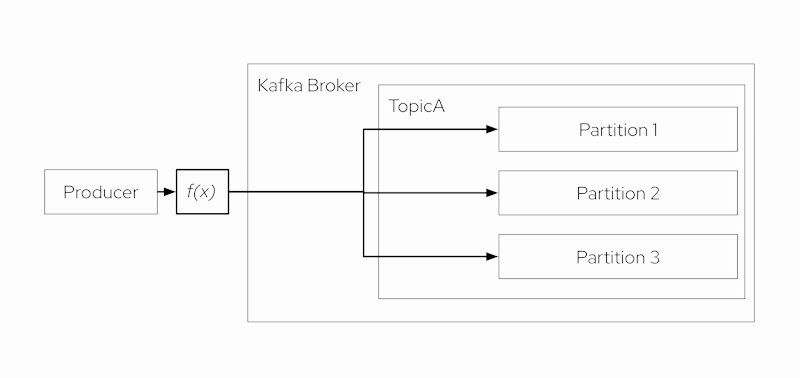
Producers publish messages to a topic, where each message is added to the tail of a partition. By default, when a message includes a key, the hashed key value determines the partition that will receive the message. Without a key, the sticky partitioner is employed to distribute messages evenly among all available partitions for storage.
You can also use custom logic to route messages to specific partitions using a custom partitioning strategy.
Figure 3 summarizes the Producer interaction with partitions.
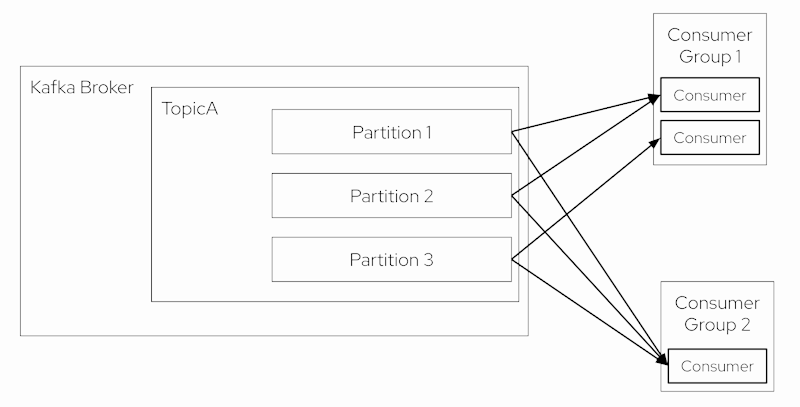
Each message published on a topic is delivered to a consumer that has subscribed to that topic.
In most cases, a consumer advances its offset linearly, but it could start at any offset and read messages in any order. The consumer will typically “commit” its offset back to the Apache Kafka cluster so the consumer can resume from where it left off, for example, in case it restarts.
Each consumer belongs to a consumer group, a list of consumer instances that ensures fault tolerance and scalable message processing. When a consumer group contains only one consumer, that consumer is responsible for processing all messages of all topic partitions. With multiple consumers in a group, each consumer receives messages from only a subset of the partitions. Thus, if you add more consumers to a consumer group than the number of partitions for a topic, the extra consumers stay idle without receiving any messages.
Figure 4 summarizes the consumer architecture.
As you can see, all Kafka elements have been designed with fault tolerance and scalability. But let’s see how producers and consumers work in a Kubernetes cluster so we can easily scale the consumers and verify how their consuming behavior changes.
Developer Sandbox for Red Hat OpenShift
You can use any Kubernetes or Red Hat OpenShift cluster. For this example, we will use the Developer Sandbox for Red Hat OpenShift, a no-cost shared OpenShift and Kubernetes cluster, so no local Kubernetes cluster is required.
Deploying Kafka
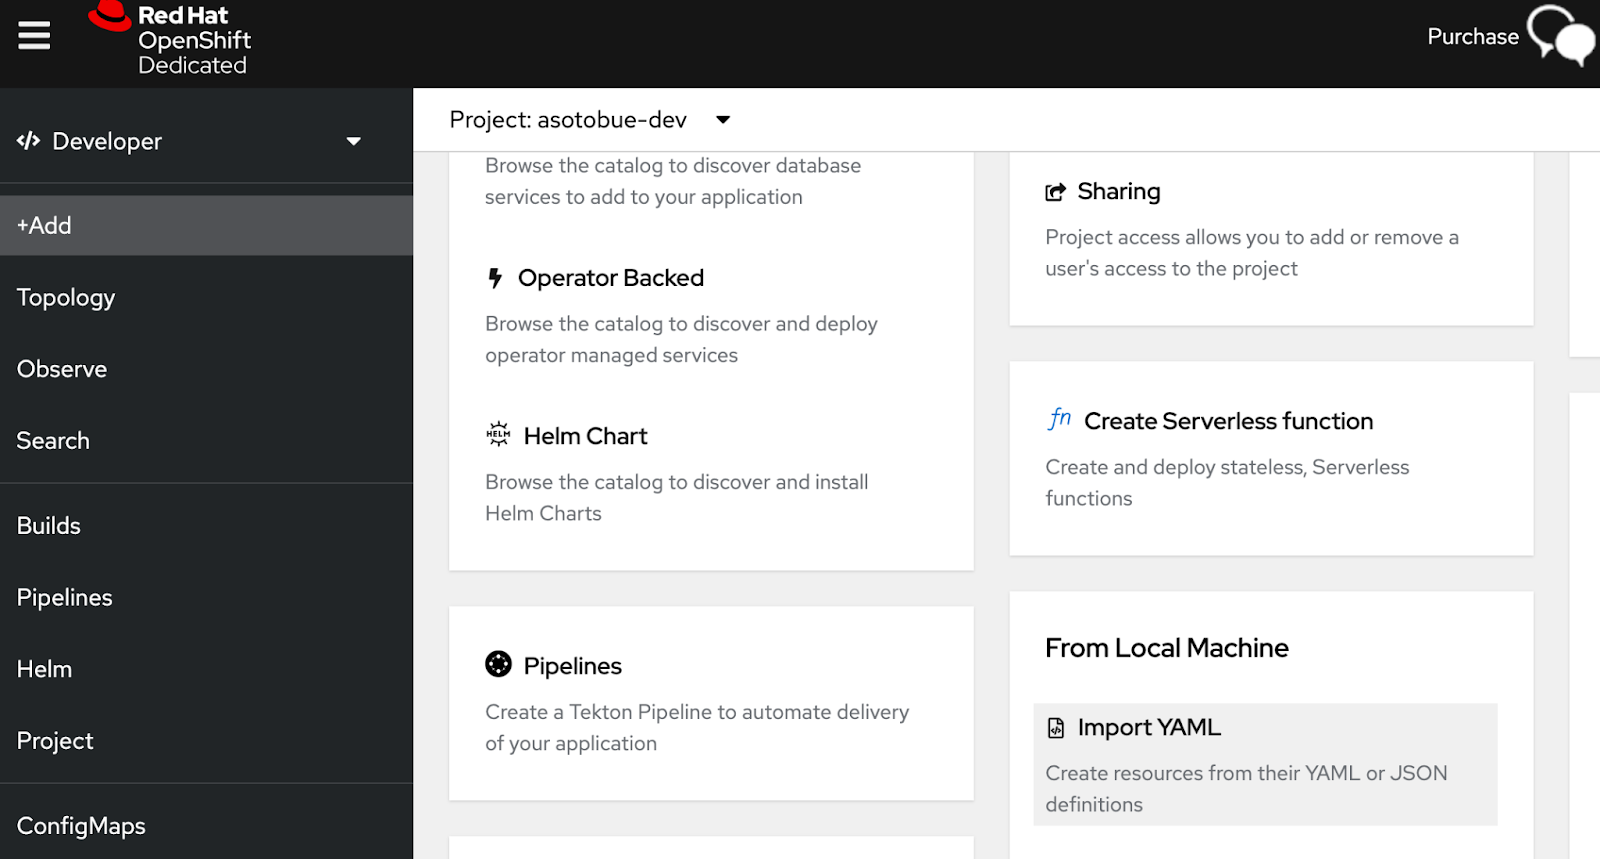
Log in into your Developer Sandbox account, click on the Add option, and select Import YAML, as shown in Figure 5.
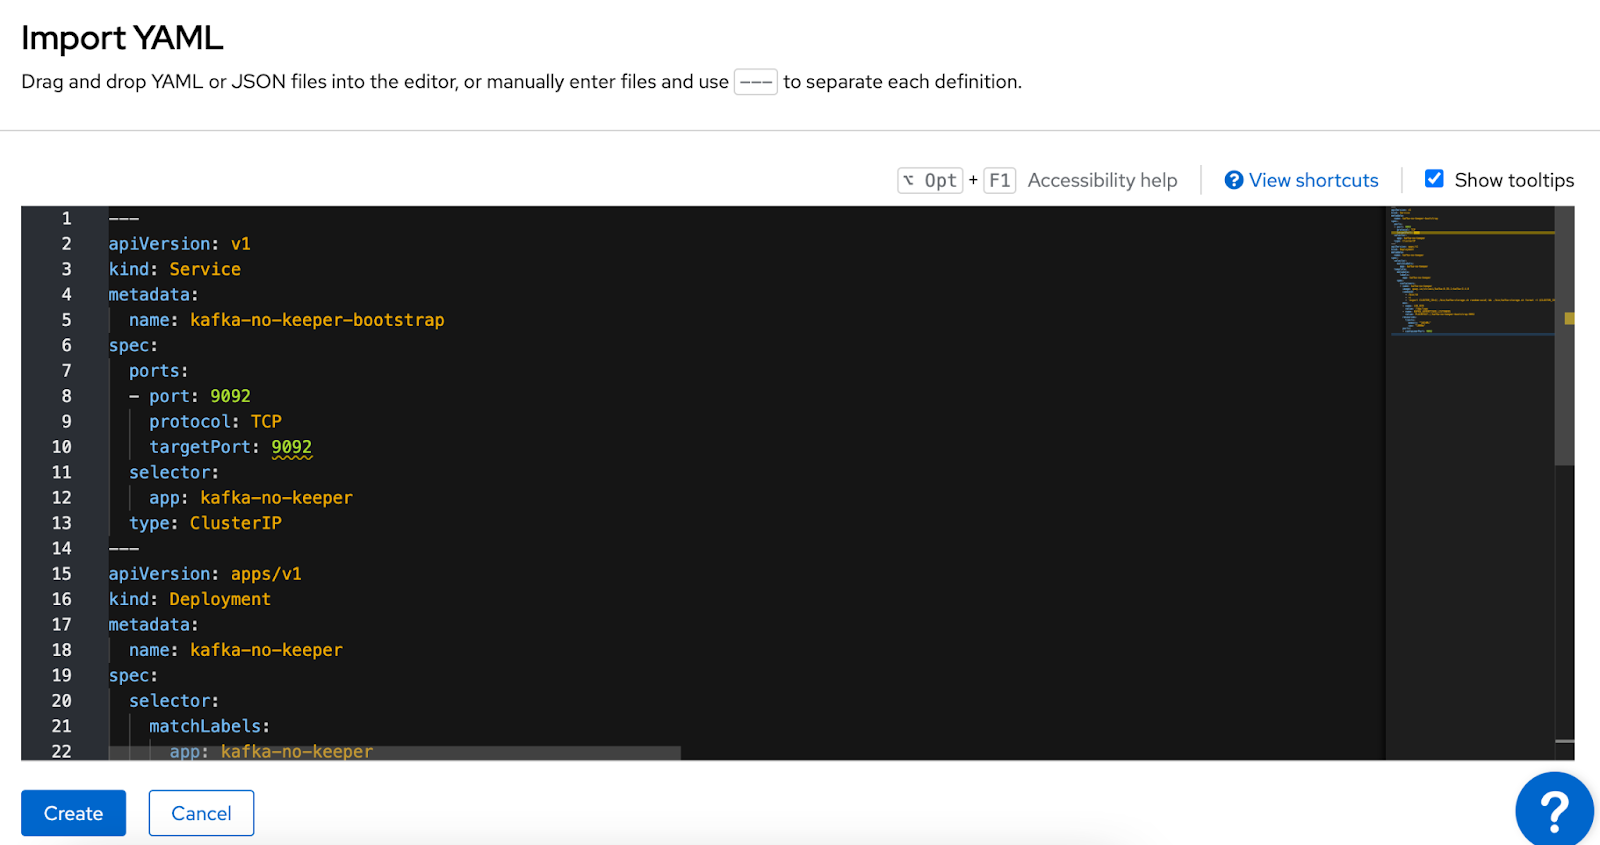
Then copy the following YAML document and push the Create button to apply the manifests (see Figure 6):
apiVersion: v1

kind: Service

metadata:

 name: kafka-no-keeper-bootstrap

spec:

 ports:

 - port: 9092

   protocol: TCP

   targetPort: 9092

 selector:

   app: kafka-no-keeper

 type: ClusterIP

---

apiVersion: apps/v1

kind: Deployment

metadata:

 name: kafka-no-keeper

spec:

 selector:

   matchLabels:

     app: kafka-no-keeper

 template:

   metadata:

     labels:

       app: kafka-no-keeper

   spec:

     containers:

     - name: kafka-no-keeper

       image: quay.io/strimzi/kafka:0.35.1-kafka-3.4.0

       command:

         - /bin/sh

         - -c

         - 'export CLUSTER_ID=$(./bin/kafka-storage.sh random-uuid) && ./bin/kafka-storage.sh format -t $CLUSTER_ID -c ./config/kraft/server.properties && ./bin/kafka-server-start.sh ./config/kraft/server.properties --override advertised.listeners=${KAFKA_ADVERTISED_LISTENERS}'

       env:

       - name: LOG_DIR

         value: /tmp/logs

       - name: KAFKA_ADVERTISED_LISTENERS

         value: PLAINTEXT://kafka-no-keeper-bootstrap:9092

       resources:

         limits:

           memory: "1024Mi"

           cpu: "1000m"

       ports:

       - containerPort: 9092
After a few seconds, Kafka is up and running. Repeat the same process but apply a YAML file that creates a topic named “names” with two partitions.
apiVersion: batch/v1

kind: Job

metadata:

 name: topic-create-kube

spec:

 template:

   spec:

     containers:

     - name: topic-create

       image: quay.io/strimzi/kafka:0.35.1-kafka-3.4.0

       command: ["./bin/kafka-topics.sh", "--bootstrap-server", "kafka-no-keeper-bootstrap:9092", "--create", "--if-not-exists", "--topic", "names", "--partitions", "2"]

       resources:

         limits:

           cpu: 500m

           memory: 500Mi

     restartPolicy: Never
Now, with Kafka running and a topic created, let’s deploy a producer.
Deploying the producer
This producer is a simple Quarkus application that emits some names to the names topic created earlier:
@Channel("names")

Emitter<Record<String, String>> emitter;

@GET

public void generate() {

    NAMES.stream()

    .map(n -> Record.of(Integer.toString(n.hashCode()), n))

    .forEach(record -> emitter.send(record));

}
So open the Import YAML option in the Developer Sandbox again and apply the following YAML file to deploy the producer:
---

apiVersion: v1

kind: Service

metadata:

 annotations:

   app.quarkus.io/commit-id: 7a259635c304c8b8d5e1caf76ea80bd4139af6fe

   app.quarkus.io/build-timestamp: 2023-12-01 - 13:33:45 +0000

 labels:

   app.kubernetes.io/name: kafka-producer

   app.kubernetes.io/version: producer

   app.kubernetes.io/managed-by: quarkus

 name: kafka-producer

spec:

 ports:

   - name: http

     port: 80

     protocol: TCP

     targetPort: 8080

 selector:

   app.kubernetes.io/name: kafka-producer

   app.kubernetes.io/version: producer

 type: ClusterIP

---

apiVersion: apps/v1

kind: Deployment

metadata:

 annotations:

   app.quarkus.io/commit-id: 7a259635c304c8b8d5e1caf76ea80bd4139af6fe

   app.quarkus.io/build-timestamp: 2023-12-01 - 13:33:45 +0000

 labels:

   app.kubernetes.io/managed-by: quarkus

   app.kubernetes.io/name: kafka-producer

   app.kubernetes.io/version: producer

 name: kafka-producer

spec:

 replicas: 1

 selector:

   matchLabels:

     app.kubernetes.io/name: kafka-producer

     app.kubernetes.io/version: producer

 template:

   metadata:

     annotations:

       app.quarkus.io/commit-id: 7a259635c304c8b8d5e1caf76ea80bd4139af6fe

       app.quarkus.io/build-timestamp: 2023-12-01 - 13:33:45 +0000

     labels:

       app.kubernetes.io/managed-by: quarkus

       app.kubernetes.io/name: kafka-producer

       app.kubernetes.io/version: producer

   spec:

     containers:

       - env:

           - name: KUBERNETES_NAMESPACE

             valueFrom:

               fieldRef:

                 fieldPath: metadata.namespace

         image: quay.io/lordofthejars/kafka-producer:producer

         imagePullPolicy: Always

         name: kafka-producer

         ports:

           - containerPort: 8080

             name: http

             protocol: TCP
Producer is deployed but will only generate content once we query the/produces endpoint.
Deploying the consumer
But before producing some content, let’s deploy a single consumer.
This consumer prints the topic's content into the terminal with the partition where the message is stored.
@Incoming("names")

public CompletionStage<Void> consume(Message<String> message) {

    Optional<IncomingKafkaRecordMetadata> x = message.getMetadata(IncomingKafkaRecordMetadata.class);

    x.ifPresent(m -> System.out.println("Partition: " + m.getPartition()));

    System.out.println("Message: " + message.getPayload());

    return message.ack();

}
So open the Import YAML option in Sandbox again and apply the following YAML file to deploy the consumer:
---

apiVersion: v1

kind: Service

metadata:

 annotations:

   app.quarkus.io/build-timestamp: 2023-11-07 - 12:03:16 +0000

 labels:

   app.kubernetes.io/name: kafka-consumer

   app.kubernetes.io/version: 1.0.0-SNAPSHOT

   app.kubernetes.io/managed-by: quarkus

 name: kafka-consumer

spec:

 ports:

   - name: http

     port: 80

     protocol: TCP

     targetPort: 8080

 selector:

   app.kubernetes.io/name: kafka-consumer

   app.kubernetes.io/version: 1.0.0-SNAPSHOT

 type: ClusterIP

---

apiVersion: apps/v1

kind: Deployment

metadata:

 annotations:

   app.quarkus.io/build-timestamp: 2023-11-07 - 12:03:16 +0000

 labels:

   app.kubernetes.io/managed-by: quarkus

   app.kubernetes.io/version: 1.0.0-SNAPSHOT

   app.kubernetes.io/name: kafka-consumer

 name: kafka-consumer

spec:

 replicas: 1

 selector:

   matchLabels:

     app.kubernetes.io/version: 1.0.0-SNAPSHOT

     app.kubernetes.io/name: kafka-consumer

 template:

   metadata:

     annotations:

       app.quarkus.io/build-timestamp: 2023-11-07 - 12:03:16 +0000

     labels:

       app.kubernetes.io/managed-by: quarkus

       app.kubernetes.io/version: 1.0.0-SNAPSHOT

       app.kubernetes.io/name: kafka-consumer

   spec:

     containers:

       - env:

           - name: KUBERNETES_NAMESPACE

             valueFrom:

               fieldRef:

                 fieldPath: metadata.namespace

         image: quay.io/lordofthejars/kafka-consumer:1.0.0-SNAPSHOT

         imagePullPolicy: Always

         name: kafka-consumer

         ports:

           - containerPort: 8080

             name: http

             protocol: TCP
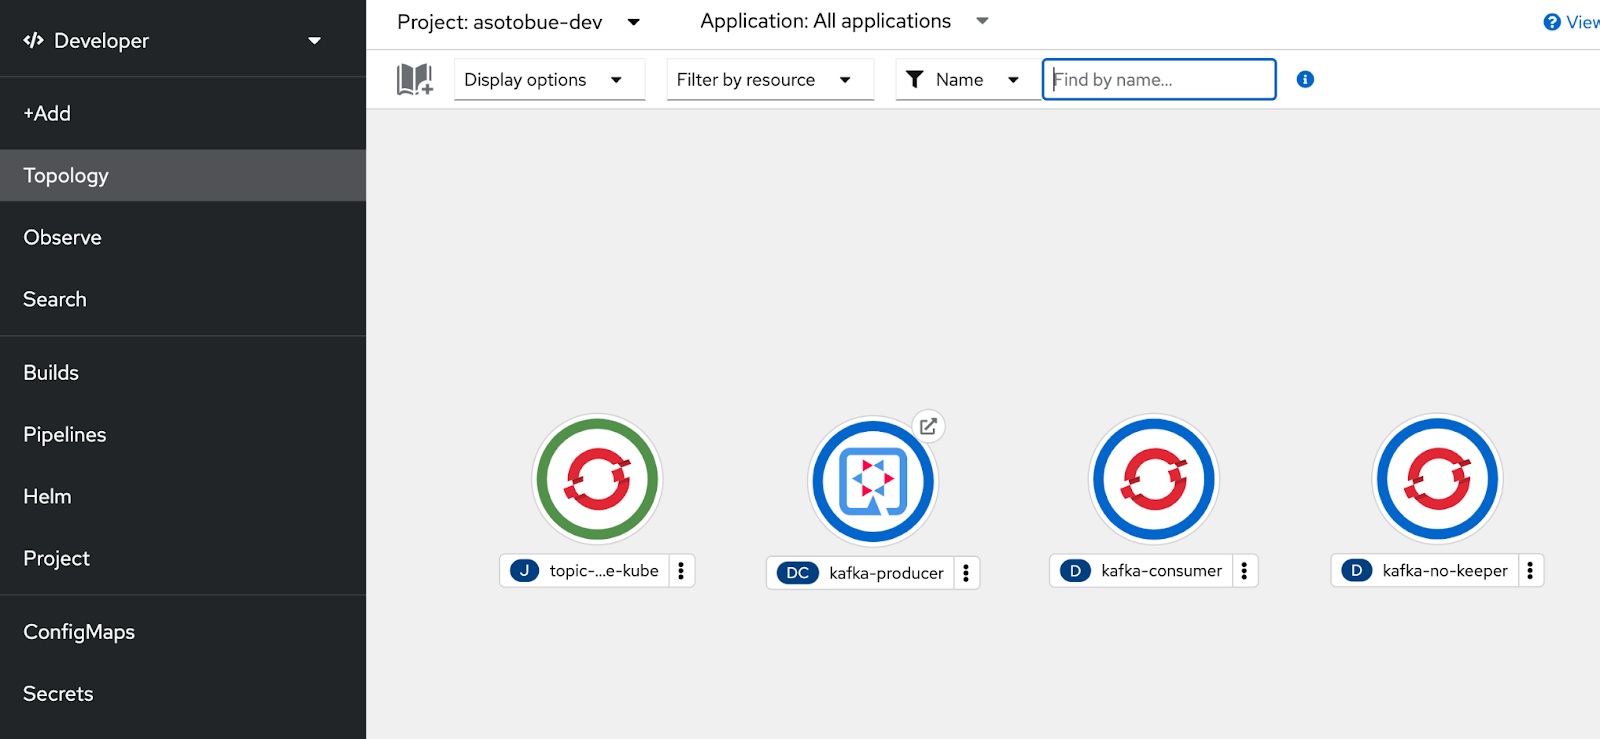
If you go to the Topology option (Figure 7), you should see all the application elements, and the producer has a special icon at the top-right position. This icon is the public route URL to access the service outside the cluster.
Generating traffic
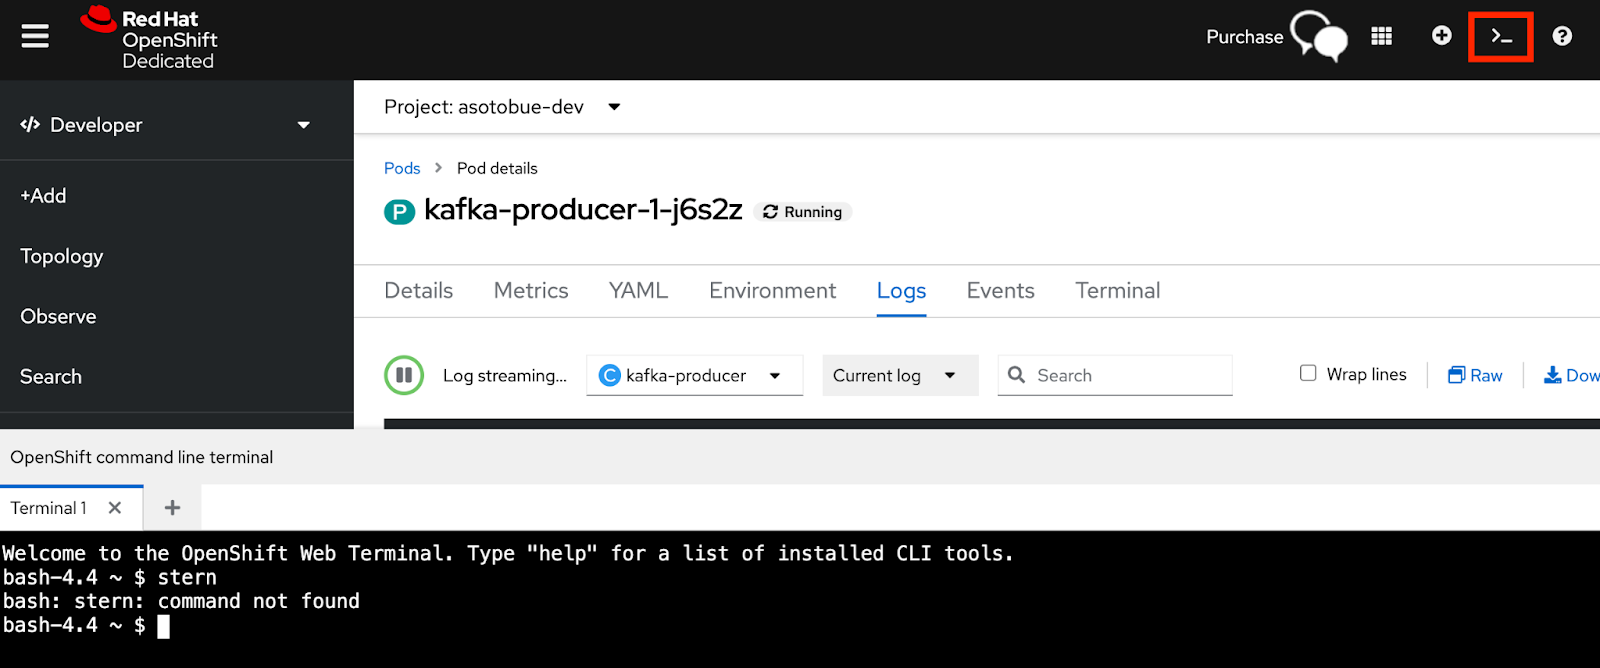
Now, let’s send a request to the producer so it generates some content for Kafka. Open the web terminal by clicking the >_ icon in the upper-right, as shown in Figure 8.
Inside the web terminal window, run the following command:
curl kafka-producer:80/produces -v
This will emit some content to the names topic.
Finally, inspect the consumer logs to validate that content has been consumed from both partitions. Run the following commands in the web terminal:
kubectl get pods
Then use the kafka-consumer pod name to inspect the logs:
NAME                                         READY   STATUS      RESTARTS   AGE

kafka-consumer-d4df74879-8c684               1/1     Running     0          38m

kafka-no-keeper-6d8dd649f8-54zvf             1/1     Running     0          41m

kafka-producer-1-deploy                      0/1     Completed   0          38m

kafka-producer-1-j6s2z                       1/1     Running     0          38m

topic-create-kube-qhlf6                      0/1     Completed   0          40m

workspaceec72309dcae94fe6-699598bbc7-vhlm6   2/2     Running     0          13m

kubectl logs kafka-consumer-d4df74879-8c684
The logs will show that this consumer processed all events from both partitions. The reason is that there was only one consumer connected to both partitions.
Partition: 1

Message: Geuss

Partition: 0

Message: Rogler

Partition: 0

Message: Spillan

Partition: 0

Message: Hamden

Partition: 1

Message: Casucci

Partition: 1

Message: Sorter
Scaling the consumer
Let’s scale the consumer app to two pods. When doing so, each consumer app instance will be responsible for processing the events of one of the two topic partitions.
In the web terminal, run the following command:
kubectl scale deployment kafka-consumer --replicas=2
Generate again some events by executing the previous command:
curl kafka-producer:80/produces -v
Finally, list the pods and inspect their logs.
kubectl get pods

NAME                                         READY   STATUS      RESTARTS   AGE

kafka-consumer-d4df74879-8c684               1/1     Running     0          116m

kafka-consumer-d4df74879-cwtlr               1/1     Running     0          60s

kafka-no-keeper-6d8dd649f8-54zvf             1/1     Running     0          119m

kafka-producer-1-deploy                      0/1     Completed   0          117m

kafka-producer-1-j6s2z                       1/1     Running     0          117m

topic-create-kube-qhlf6                      0/1     Completed   0          119m

workspaceec72309dcae94fe6-699598bbc7-ggm2b   2/2     Running     0          9m40s
You’ll notice that each Pod only consumes events from one partition:
kubectl logs kafka-consumer-d4df74879-8c684

Message: Krivenko

Partition: 0

Message: Zabkar

Partition: 0

Message: Pace

Partition: 0

Message: Rogler

Partition: 0

Message: Spillan

Partition: 0

Message: Hamden

Kubectl logs kafka-consumer-d4df74879-cwtlr


Message: Mofield

Partition: 1

Message: Sefchick

Partition: 1

Message: Werling

Partition: 1

Message: Geuss

Partition: 1

Message: Casucci

Partition: 1

Message: Sorter
You can experiment with scaling to three consumers and generate traffic to validate that the third consumer becomes idle because the number of consumers exceeds the topic partitions.
The source code of the article is located at: https://github.com/lordofthejars/kafka-consumer-producer-rhsandbox
Conclusion
In this article, you’ve seen two of the most important features of Apache Kafka: scalability and fault tolerance. Consumers can be scaled to process more events in parallel, limited to the number of topic partitions. If any of these consumers go down, the remaining consumers take over the workload automatically.
Thanks to Kubernetes, scaling consumers is as easy as scaling a Pod, so Kubernetes and Kafka make a perfect match.