The world of software development is changing quickly, and it is no different for the Java developer who needs to learn new skills to manage Java containers.
In the traditional Java development world, it was rather typical to build a Java artifact (whether it be a .jar, .war, or .ear), and "throw it over the wall" for the middleware and operations people to take care of. It kind of made sense, too, because configuring and running enterprise application servers was not always that easy, and in the end, the developer's laptop would probably not match the specs of staging or production environments so that the configuration would be different anyway. We all know the "It works on my machine" cliché, after all.
These days, things need faster and better delivery, and production issues often require resolution in a very timely manner because every second of downtime could potentially cause revenue loss for an organization. New ways of delivering applications have been conceived—and with it, cloud-native applications, containers, and DevOps—and the "but it worked on my machine" excuse is no longer valid.
Java developers need to be able to work with containers because it is a practical way to test applications in a production-like environment on their local machine. Some developers and organizations choose to take development off the local machine and right into the cloud with the IDE itself running in a reproducible, containerized environment for even greater consistency. Red Hat OpenShift Dev Spaces is one way you can do this, but it is out of the scope of this article.
Building containers with Java
Building and managing containers can become overwhelming rather quickly for the Java developer, though. At the face of it, it's "just" a matter of creating a Dockerfile with instructions to copy the artifact into a base image and doing a Docker build. However, in reality, creating a container image from an application requires many more considerations than that.
Choosing a base image
To start with, you will need a base image: do you start from scratch, adding every dependency individually, or use a base image that already has a Java Virtual Machine (JVM) implementation included? Or maybe you've opted to do a native build of the application and don't need a JVM running in your container. Either way, you will need to find a trusted source that provides tested, secured, ideally signed, Open Container Initiative (OCI)-compliant, and stable images for the particular Java version you are targeting. And hopefully, this source can provide support and maintain and backport patches going forward. The base image will likely need tuning as well to optimize performance, not something every developer is familiar with.
Red Hat's Universal Base Images (UBI) are a good starting point for building container images. UBIs are free to use, and they are at the core a subset of the Red Hat Linux (RHEL) distribution, providing a stable, secure, optimized and reliable base for building containers. There are several JVM-based UBI images available, as well as micro UBIs for deploying native binaries.
Building the container image
Once you have decided on a base image, you will need a way to build the container image. The best-known way is to create a Dockerfile (or Containerfile as the more agnostic way of naming such a file) and then build it with Docker.
This is certainly not the only way to build containers, though. You can use the same Containerfile to build an image with Podman, a fully open source container engine with actually quite a few more features than the Docker engine. You could also use Buildah, another open source tool specifically created for building container images.
There are alternative ways of building containers without needing a Containerfile. There are build tools such as Source2Image (S2I), Buildpacks, Jib, and many more. These vary in complexity, but each one aims to streamline the container build process, particularly for developers.
Jib, for example, is a build tool specifically created for building container images with Java. S2I is a tool that take can take source code, do an introspection to see what kind of application it is (e.g., the presence of a pom.xml would indicate that it is a Java application), and then build a container image from the application's source code using build images that are predefined by the S2I tool, or custom build images provided by the user. Buildpacks work similarly but require a buildpack builder image.
The downside is that you will need to install a specific command line interface (CLI) program for each of these container build tools and understand how to use them. Moreover, you will need to know what base images these build tools use (if applicable) or supply your own and figure out whether they are safe to use.
For further information on container terminology, Scott McCarty wrote a comprehensive introduction in this article.
How Quarkus helps with Containerfiles
Quarkus is a Java stack that aims to make cloud-native development easier for the Java developer. Quarkus will supply Containerfiles from the moment the developer bootstraps a Quarkus application, whether it is through the Quarkus CLI's command quarkus create app, by generating a starter project on code.quarkus.io, or by using one of the Quarkus plug-ins in VS Code or IntelliJ.
By bootstrapping a new Quarkus application, a folder is created in src/main/docker with prebaked Containerfiles (named Dockerfile.* in this case) based on the UBI images previously mentioned in this article (Figure 1).
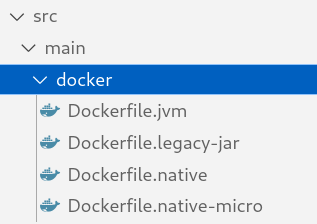
Quarkus supplies 4 different Containerfiles for different use cases:
Dockerfile.jvmis used by default to build a Java container that runs the Quarkus application in JVM mode.Dockerfile.legacy-jaris used if for the legacy-jar packaging type (more information on legacy vs fast-jar in Quarkus).Dockerfile.nativeuses a UBI without JVM for running natively compiled Quarkus apps.Dockerfile.native-microis a custom built micro UBI image to run native Quarkus apps.
These Containerfiles can be used with regular Docker or Podman commands, but Quarkus also enables building container images directly from build tools such as Maven or Gradle. Basically, you can build an image with, for example, mvn package quarkus:image-build and Quarkus will automatically build a container image using, by default, the Dockerfile.jvm that came with the Quarkus project.
Similarly, to build an image without a JVM that runs a natively compiled binary, one must simply add the --Dnative parameter to the command (in this case, Maven) , e.g., mvn package quarkus:image-build -Dnative.
There's one caveat with the latter command. You will need to install the GraalVM Native Image Builder executable (called native-image). Quarkus, however, has an alternative way to leverage GraalVM's Native Image Build without installing the native-image executable locally. Quarkus will, in fact, detect the absence of the native-image executable and attempt to download a container image that contains the bits to do a native Java compilation and actually build the native binary in a container (provided you have Docker or Podman installed, of course). The native binary builder image is based on Mandrel, a downstream distribution of the GraalVM community edition whose main goal is to provide a native-image release specifically to support Quarkus.
More CLI magic with Quarkus
The Quarkus CLI is, in essence, a convenience wrapper around the Maven or Gradle build tools that let you create projects, start Quarkus in dev and test mode, manage extensions and do essential build, dev, and even deploy. It provides a way to control the full inner-loop development experience without having to switch tools.
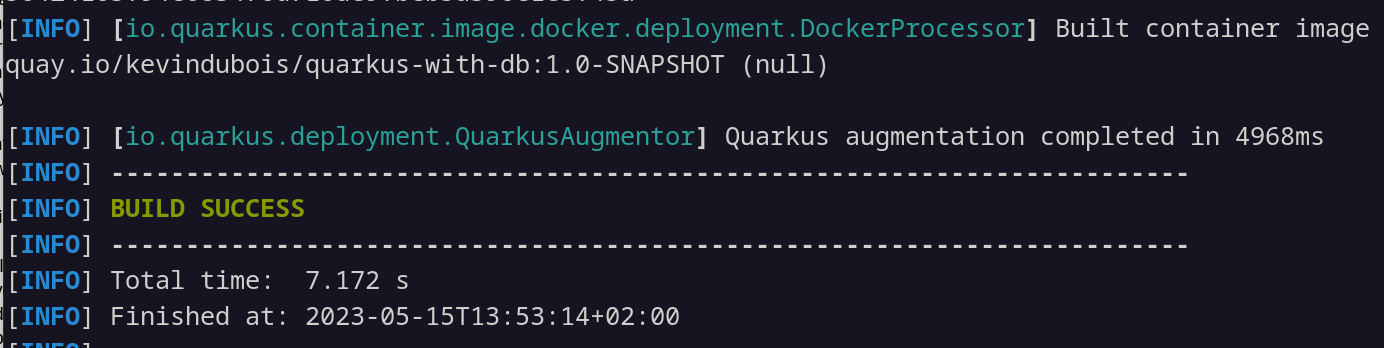
Thanks to the Quarkus CLI, you can execute simple commands that are easy to remember, such as quarkus image build. Behind the scenes, Quarkus will invoke the chosen build tool, package the application, and build a container image using the previously mentioned Containerfiles and a local Docker or Podman instance (as shown in Figure 2).
Similarly, to use either Jib or Buildpacks, you can run the same command and append the container build tool of your preference, e.g., quarkus image build jib, or quarkus image build buildpack.
The Quarkus CLI lets you push a container image to a registry as well with quarkus image push. In fact, the application build, container build, and container push can be done in one go by adding the --also-build flag, e.g., quarkus image push --also-build. Or, as a natively compiled binary, quarkus image push --also-build --native.
Managing and running your container with Podman Desktop
Once the container image has been built, you will likely want to run the container to make sure it actually works, or perhaps to use it with other applications. You could learn how to use Podman or Docker commands such as podman run or docker run; however, you will need to have at least some expertise in these tools to expose ports, mount volumes, execute commands, etc.
Podman Desktop is a UI tool that makes running and managing containers much easier with an intuitive user experience. You can install it on Windows (with WSL), macOS, and Linux, and it will install the underlying Podman utility as well, if needed.
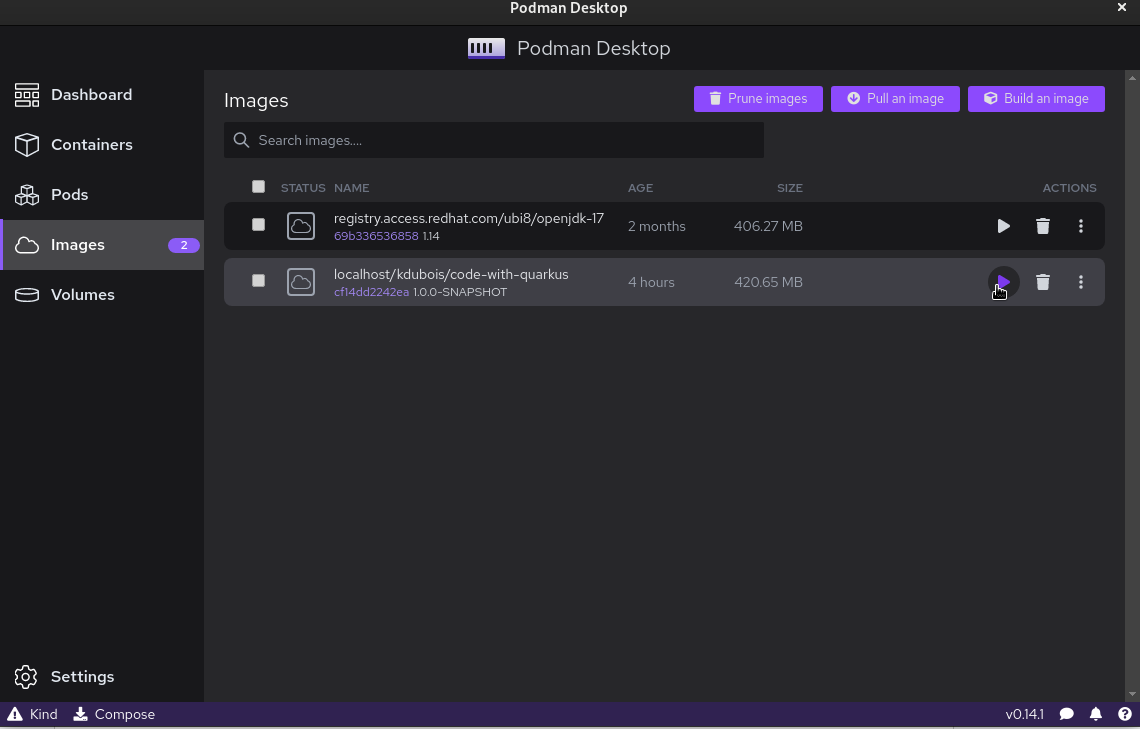
You can spin up a container from the images view by clicking the play button next to the container image, as shown in Figure 2. You can then customize the container runtime configuration or let Podman automatically map the container's external port to the app's internal port based on the EXPOSE value of the image (by default, 8080 in Quarkus). Podman can automatically figure out if another process on the machine is already using that port and reassign the container's external port to use a different one instead. This is an impressive feature, in contrast to having to manually figure out if a port is being used on your machine with a command such as netstat or lsof, which is typically more in the realm of a system administrator.
More Podman Desktop features
Podman Desktop can do more than just run containers. For example, you might want to ssh into a container to do debugging or access or even modify settings. Using the CLI, you would have to find out the name of your container (e.g., with podman ps) and then remember a command like podman exec -it CONTAINER_ID /bin/bash. With Podman Desktop, it's as simple as selecting the container in the container view and clicking the Terminal tab.
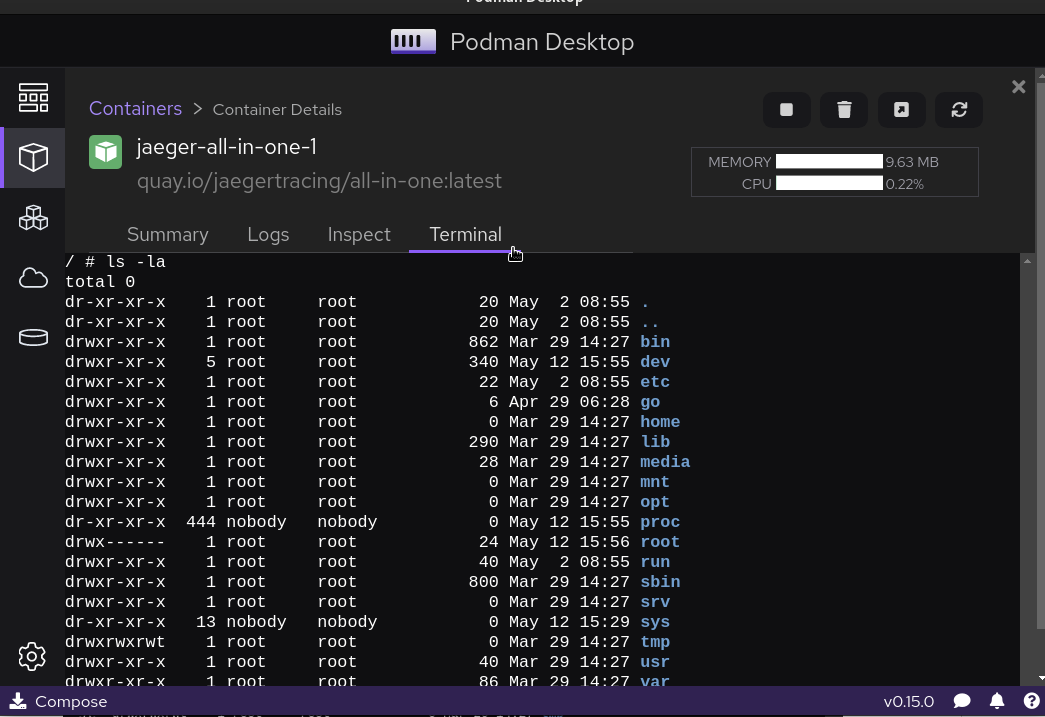
Similarly, if you want to access the logs of a container, you can click the Logs tab, or if you want to inspect the state of a container—e.g., to see what file systems it's using, what environment variables are set, etc.—then you could just click Inspect.
Using pods outside of Kubernetes
Podman Desktop, as its name implies, can also run containers as pods. You could, for example, run another container, such as a caching database (Redis or Infinispan), and combine it with the application's container into a pod resulting in a single deployable and scalable unit that shares networking, just like one would run a pod on Kubernetes.
Kubernetes and Podman Desktop
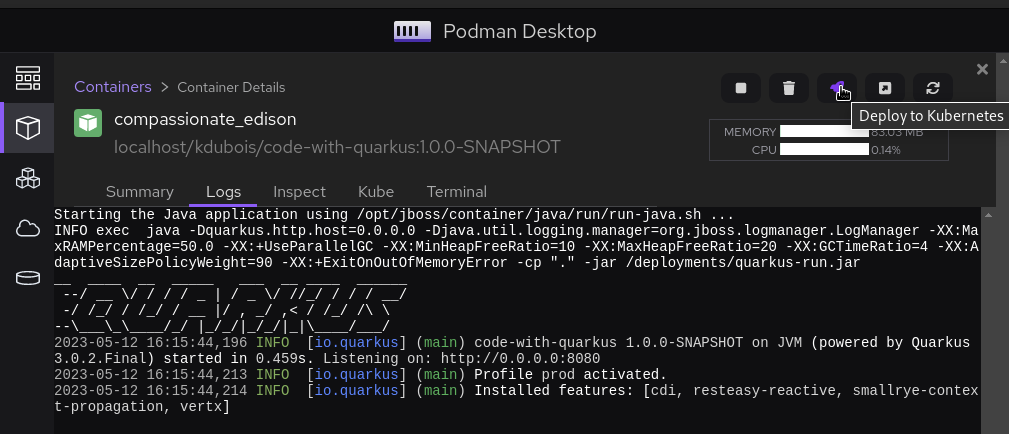
It is possible to deploy containers or pods from Podman Desktop directly to a Kubernetes instance as well (Figure 3). To do so, simply click the rocket icon in the top right of the Podman Desktop view. Podman Desktop will detect a Kubernetes context (provided you are logged in to a Kubernetes cluster using, e.g., kubectl login) and proceed to deploy the container(s) on a cluster as pods.
If a Kubernetes cluster is unavailable, Podman Desktop can start a Kubernetes-in-Docker (Kind) cluster through the Kind extension, available in the Podman Desktop settings.
Another alternative is to create a no-cost Developer Sandbox for Red Hat OpenShift instance. You can provision one by visiting developers.redhat.com/developer-sandbox and following the Create a free OpenShift Sandbox instance. This gives you a fully functional Kubernetes instance you can use to deploy your containerized application(s) to, and perhaps even expose the application to the world with!
Get started today
Building and running Java containers has become much easier over the years. Using frameworks such as Quarkus and tools like Podman Desktop and OpenShift make it simple to start working with containers, even for Java developers who have are new to the cloud-native world.
Try it today by creating a Quarkus application, building it into a container image, and running it on Podman Desktop.
Additional resources
- What is Podman Desktop? A developer's introduction
- Podman Desktop 1.0: Local container development made easy
- Tutorial: Deploy and test Kubernetes containers using Podman Desktop
- Kubernetes-native inner loop development with Quarkus
- Learn Quarkus faster in the Developer Sandbox for Red Hat OpenShift
- Build your first Java serverless function using a Quarkus quick start
- Quarkus for Spring developers: Kubernetes-native design patterns