Java developers are usually required to take many actions before we can begin developing and deploying cloud-native microservices on Kubernetes. First, we have to configure everything from the integrated development environment (IDE) to build tools such as Maven or Gradle. We also need to configure the command-line tools used for containerization and generating the Kubernetes manifest. If we don’t want to spin up a Kubernetes cluster locally, we also must connect to a remote Kubernetes cluster for continuous testing and deployment.
Developers should spend less time on configuration and more time accelerating the inner-loop development cycle of building, testing, and deploying our applications. Ideally, we should be able to continuously develop applications in a pre-configured Kubernetes environment.
This article is a guide to configuring Java applications using Quarkus quick starts in the Developer Sandbox for Red Hat OpenShift. As you'll see, using quick starts in the developer sandbox lets you focus on the inner loop of development, without needing to configure the Kubernetes cluster or development tools.
Developers using the developer sandbox have access to a shared, multi-tenant Red Hat OpenShift 4 cluster with a set of pre-installed developer tools such as a web-based IDE and Red Hat CodeReady Workspaces. You can get started in less than five minutes with a free Red Hat developer account. To learn more about the developer sandbox, click here.
Step 1: Launch your developer sandbox
Assuming you have set up and signed into your Red Hat developer account, you can start your OpenShift environment in the developer sandbox. Go to the Get started in the Sandbox page, then click on Start using your Sandbox, as shown in Figure 1.
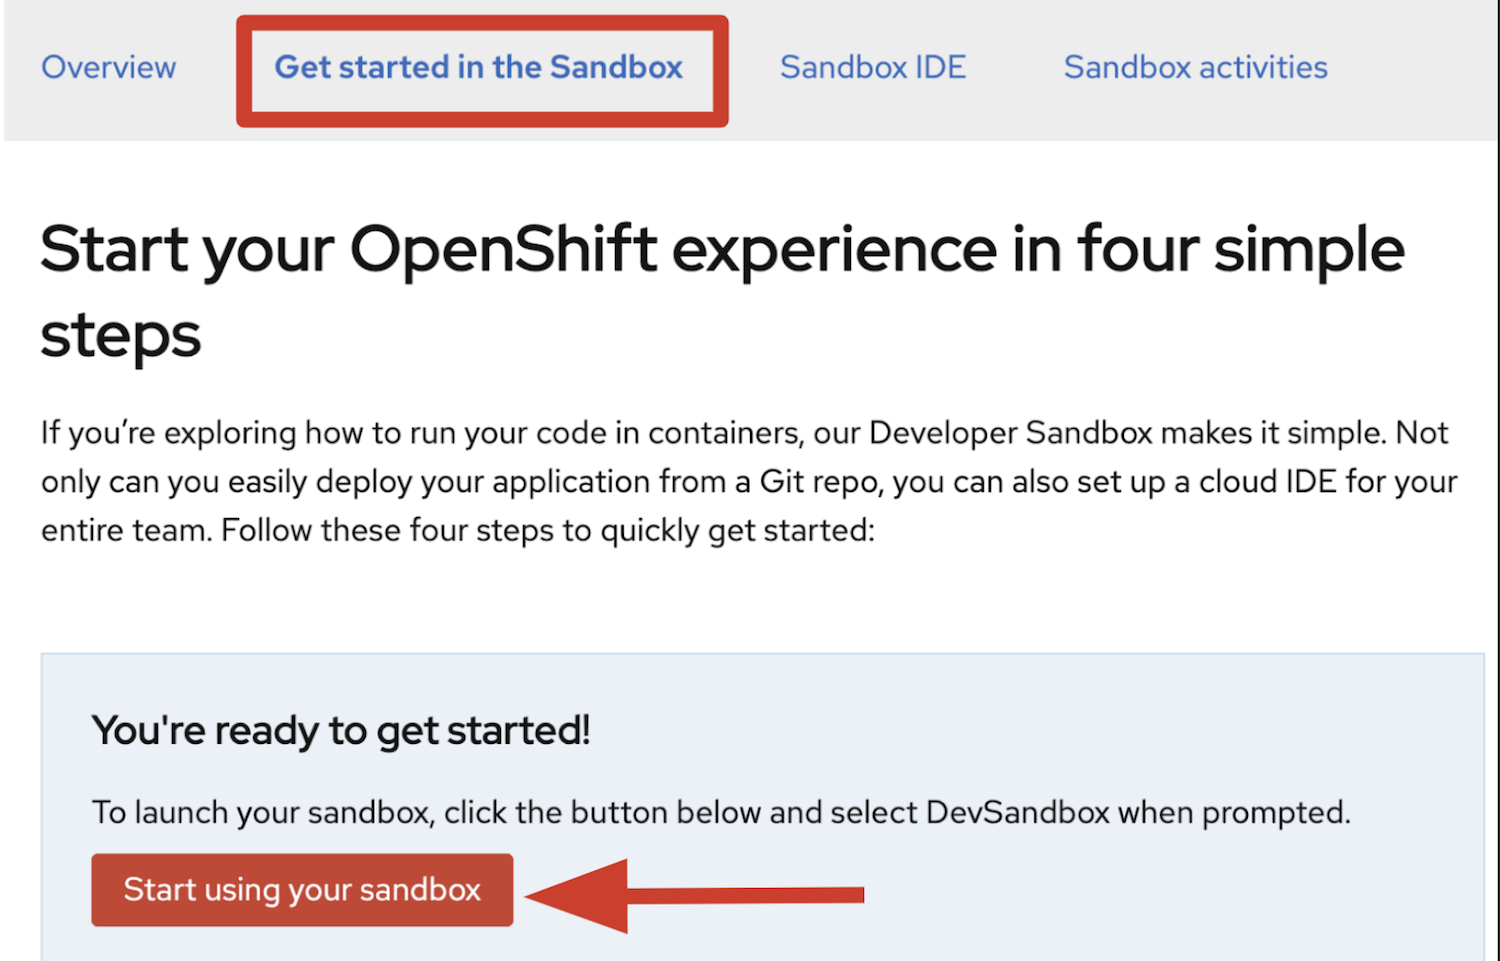
Note: You must choose DevSandbox to log into the cluster.
Step 2: Explore Quarkus quick starts
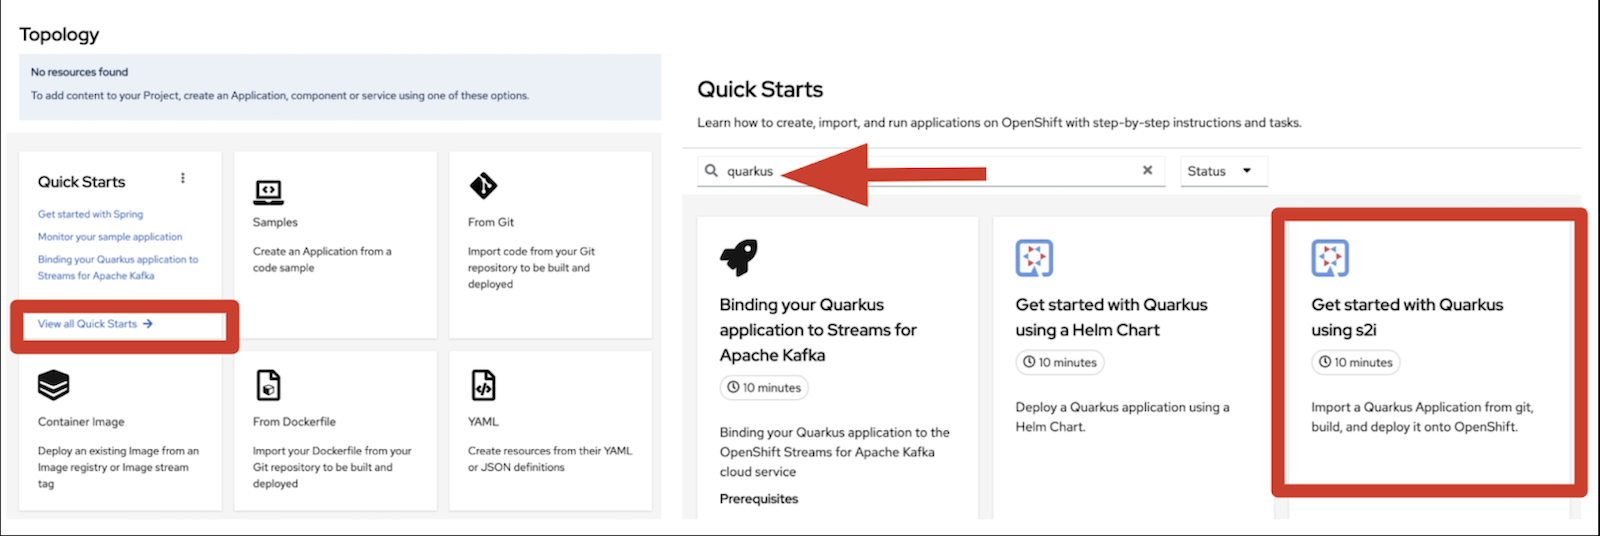
Once you log in, you will arrive at the OpenShift topology view. Click View all Quick Starts then enter a search for "Quarkus." You will see the three quick starts shown in Figure 2.
Step 3: Open your first Quarkus quick start
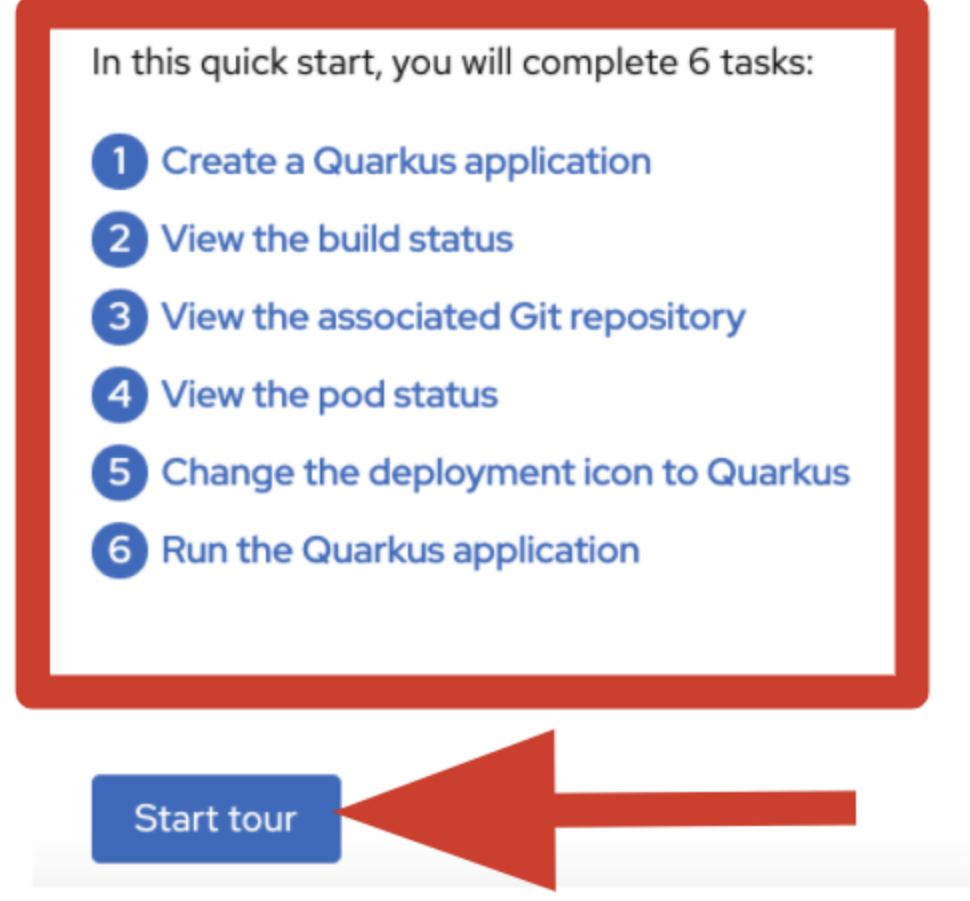
Select the "Get started with Quarkus using S2I" quick start shown in Figure 2. This 10-minute quick start takes you through the six tasks to create and deploy a Quarkus application on OpenShift using a source-to-image (S2I) approach:
- Create the Quarkus application.
- View the build status.
- View the associated Git repository.
- View the pod status.
- Change the deployment icon to Quarkus.
- Run the Quarkus application.
Note: The Quarkus project is automatically created for you in the sandbox environment, so you can skip the first task and complete the quick start faster.
Step 4: Run the 'Get started with Quarkus using S2I' quick start
When you are ready, click Start tour, as shown in Figure 3.
The tour guides you through the step-by-step instructions to complete the tasks in this quick start. You can skip the first task because it has already been done automatically for you, as shown in Figure 4.
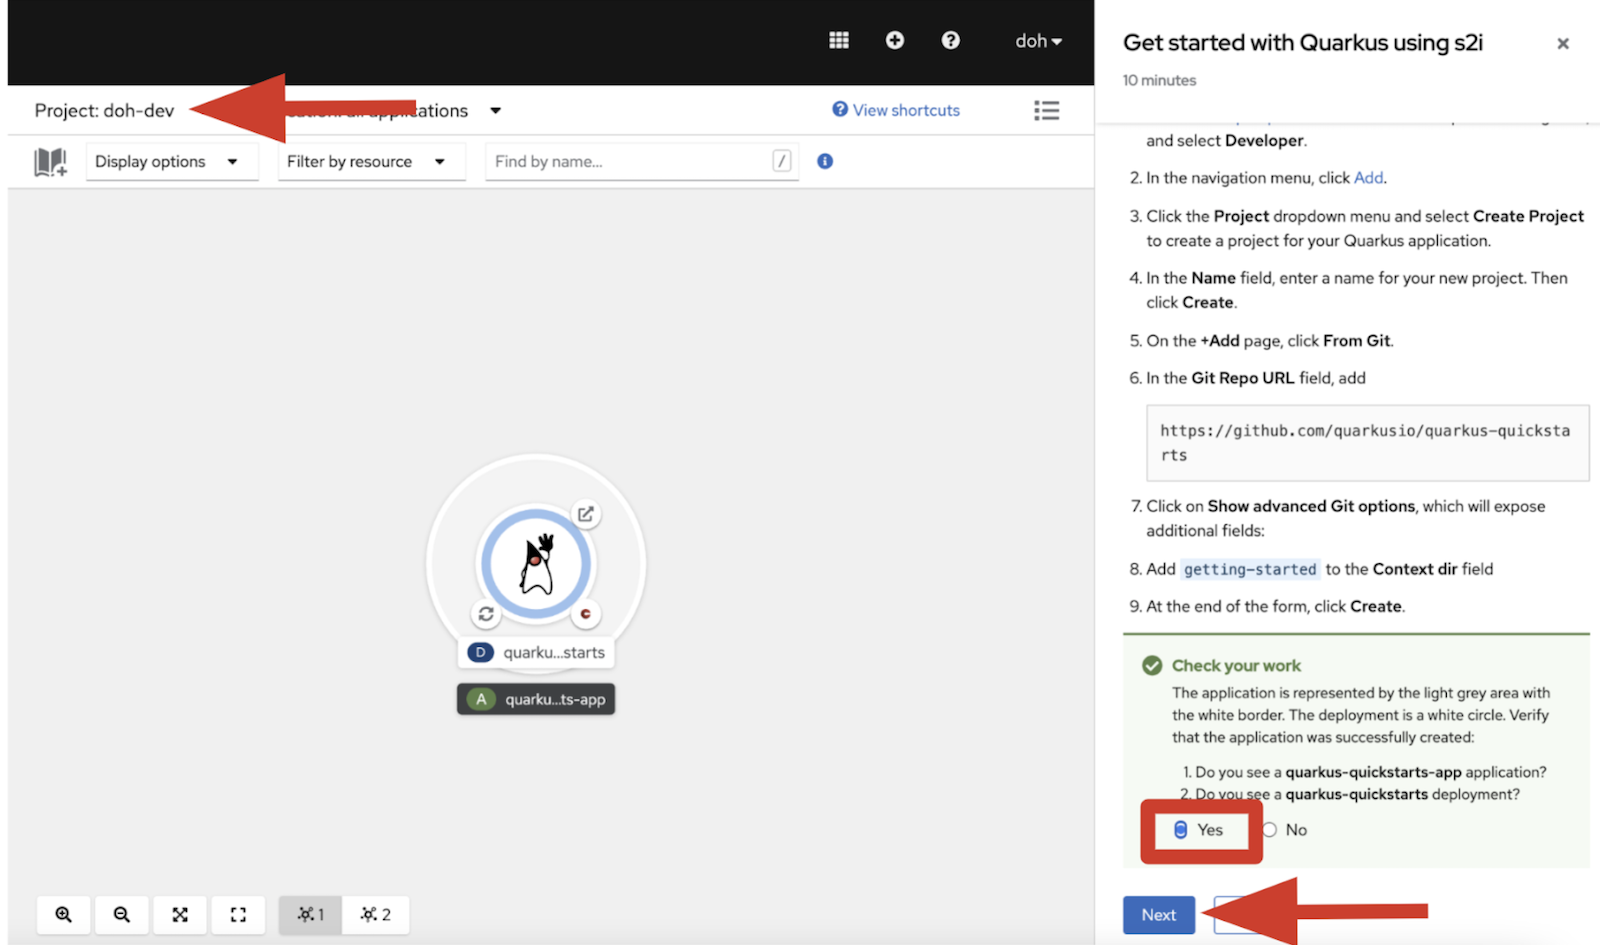
When you complete each step, click Next to verify your work. If you have accomplished the task without any issues, click Yes, then click Next again.
Most tasks in this quick start are self-explanatory, but a couple of them are worth exploring.
Task 3: View the associated Git repository
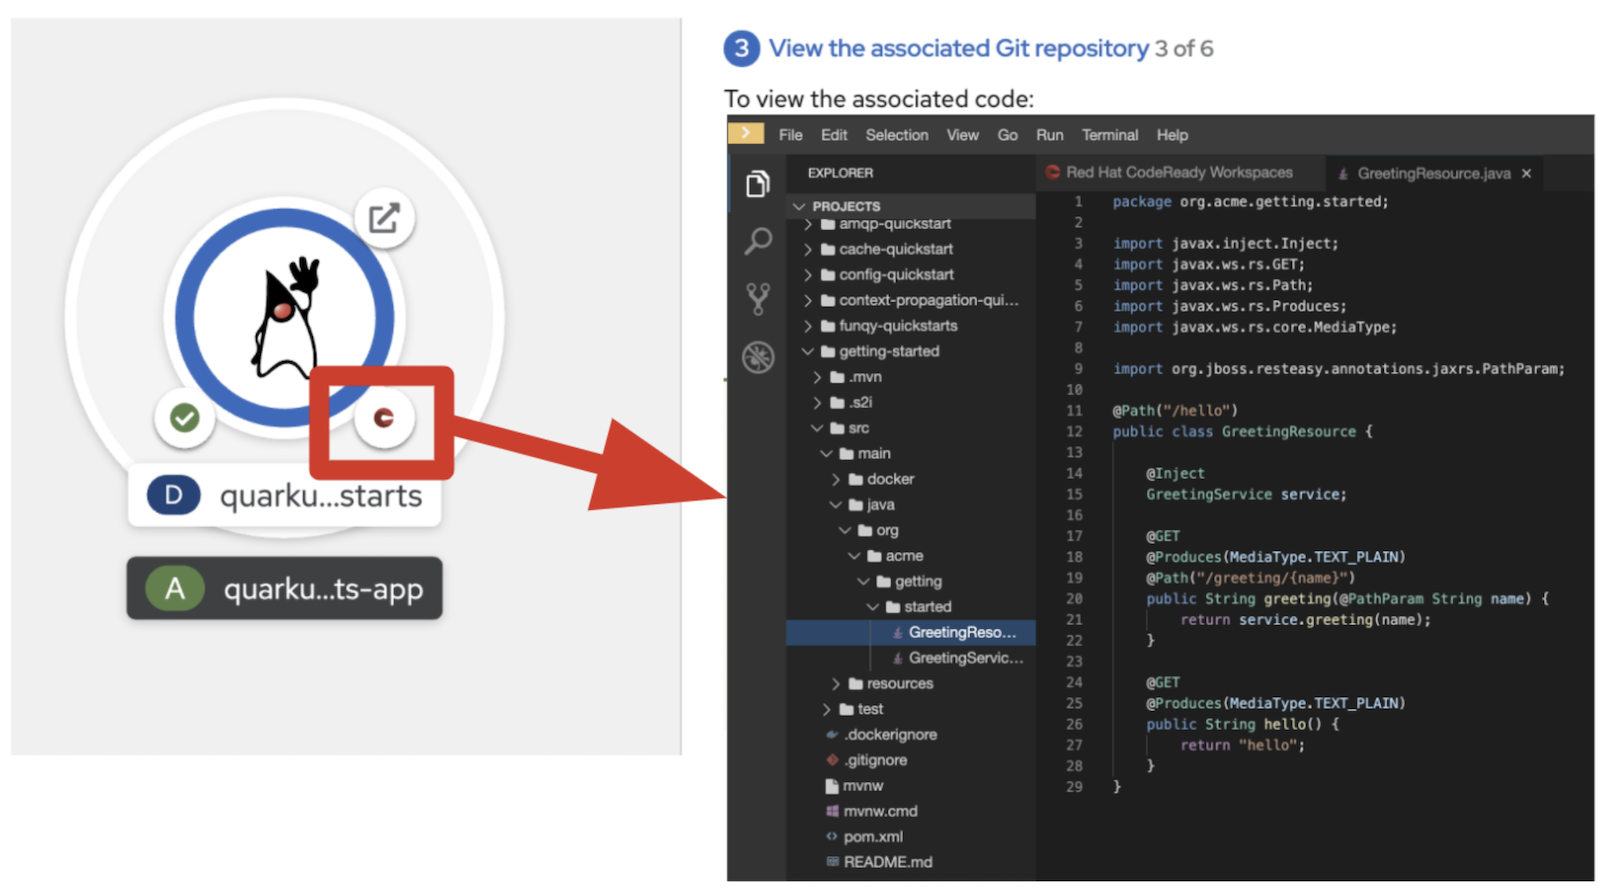
The developer sandbox lets developers change application code directly using CodeReady Workspaces instead of navigating to the Git repository from a local IDE. This makes pre-configuring the application easier, as I mentioned earlier. You also can run the "getting started" application in Quarkus development mode, which lets you use Quarkus's live coding feature for continuous development.
When you click the CodeReady Workspaces icon in the bottom-right quadrant of the quarkus-quickstarts deployment, it brings you to CodeReady Workspaces, as shown in Figure 5.
Task 6: Run the Quarkus application
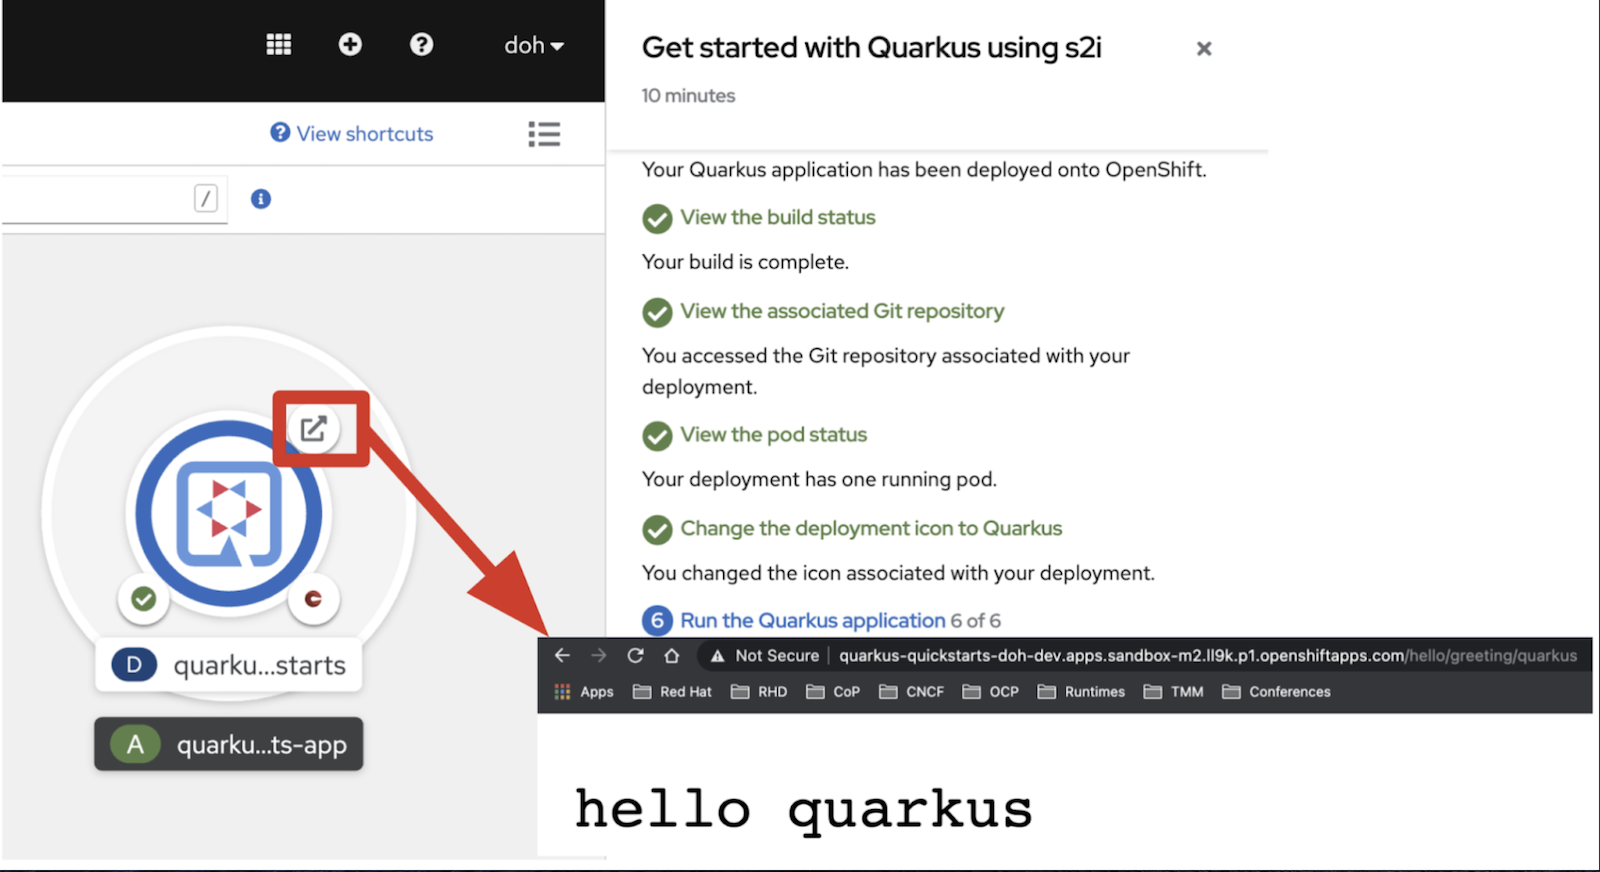
In Task 6, you can access the Quarkus application's REST API. Click the external link icon to open the URL and run the application in a new browser tab, as shown in Figure 6.
Step 5: Finish the quick start
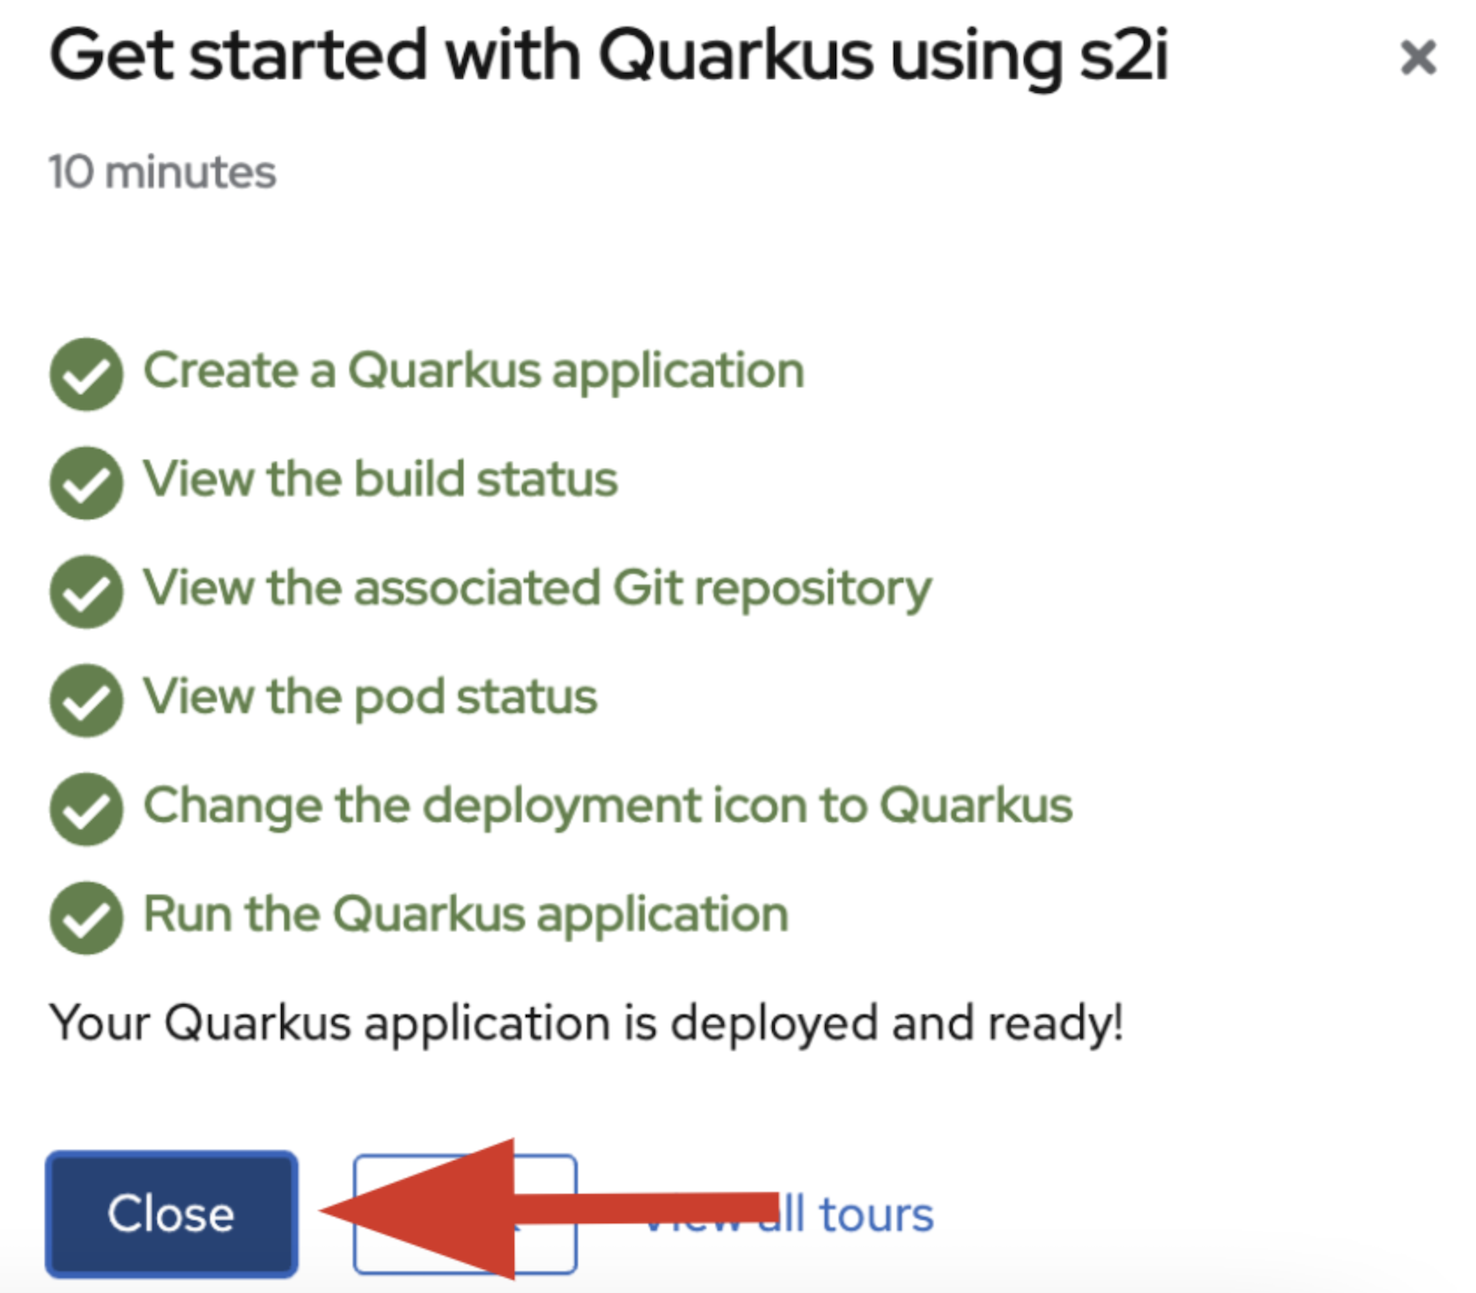
When you have completed all six tasks you will see the green checkmarks shown in Figure 7.
Great job! Now, you can tour another quick start or repeat this one as a learning practice.
Watch the Quarkus quick starts video demonstration
If you want further instruction, this video demonstration guides you through two of the three available Quarkus quick starts: "Get started with Quarkus using S2I" and "Get started with Quarkus using a Helm chart."
Conclusion
In this article, you've learned how much faster you can get started with Quarkus application development and deployment using Quarkus quick starts in the Developer Sandbox for Red Hat OpenShift. The sandbox is free for all business application developers who are interested in cloud-native microservices development using Quarkus. The sandbox lets you use a modern web-based IDE for development and deploy your cloud-native microservices applications to a Red Hat OpenShift cluster seamlessly. Use the self-service learning portal here to learn more about Java application development with Quarkus.
Last updated: November 8, 2023