With the release of Red Hat OpenShift 4.18, user-defined networks (UDNs) have graduated to Generally Available (GA). UDNs can be utilized for containerized pods and virtual machines (VMs) from OpenShift based workloads. UDNs allow OpenShift users to create isolated tenant networks for their workloads. By leveraging UDNs, administrators can create secure networks, workload isolation, streamlined IP management, and access to advanced networking features.
Traditionally, Red Hat OpenShift Virtualization VMs connected to the default pod network utilize a built-in NAT where the VM IP is allocated from the pod network. However, the actual IP of all the VMs is by default 10.0.2.2/24 at the guest OS level. This has proven to be a challenge in scenarios where NATing is an issue, such as services that require clustering and VM discovery via IPs as well as backup or monitoring agents that register the guest using the discovered IP at the guest OS level.
UDNs can be leveraged to overcome that challenge and create isolated pre-defined network segments for OpenShift Virtualization VMs. Each namespace can have its own isolated network via UDNs where VMs can be assigned deterministic IP settings from the defined UDN subnet. This article will demonstrate how to create a UDN for OpenShift Virtualization workloads.
Namespace creation and labeling
In order to utilize UDNs, a namespace project must be labeled with the “k8s.ovn.org/primary-user-defined-network” label to connect to a primary UDN. Ideally, this label should be added during namespace creation, as follows.
apiVersion: project.openshift.io/v1
kind: Project
metadata:
  labels:
    k8s.ovn.org/primary-user-defined-network:
  name: my-vms
UDN creation
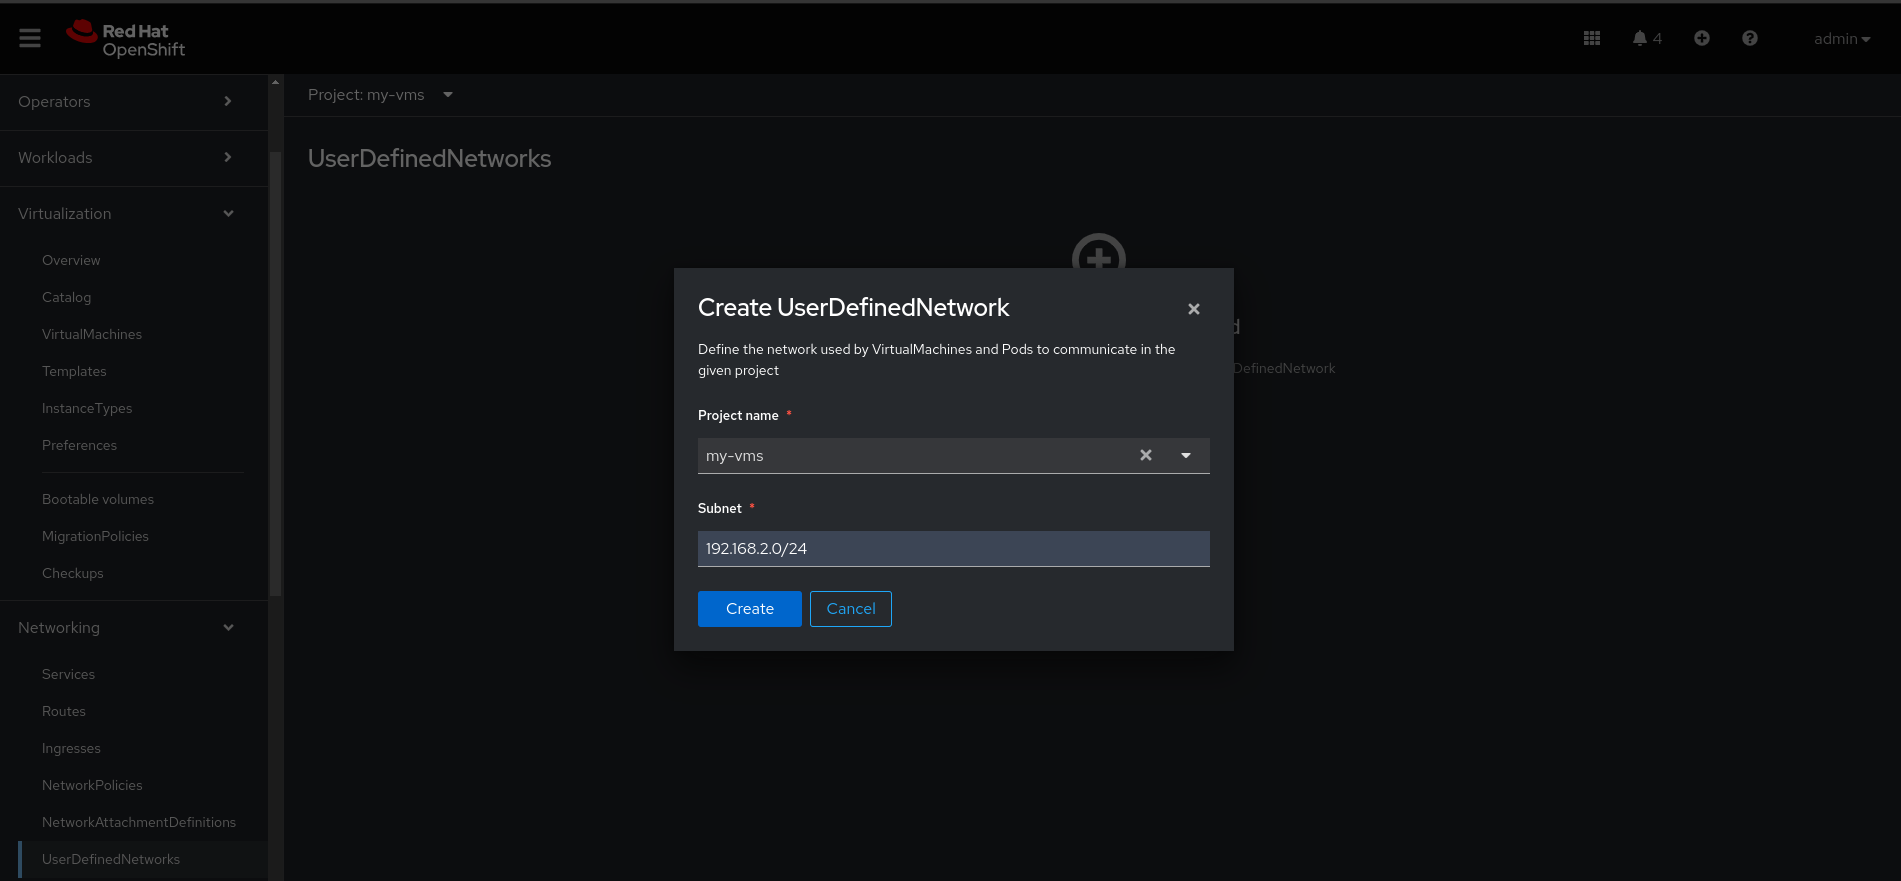
Once you create the namespace, you can proceed to create the UDN. With OpenShift 4.18, you can easily create UDNs via the web console by navigating to Networking -> User Defined Networks. In my example, I have created a namespace scoped UDN using a 192.168.2.0/24 subnet for the “my-vms” namespace. This means pods/VMs that connect to this UDN will have an IP allocated from this UDN network (Figure 1).
Creating VMs
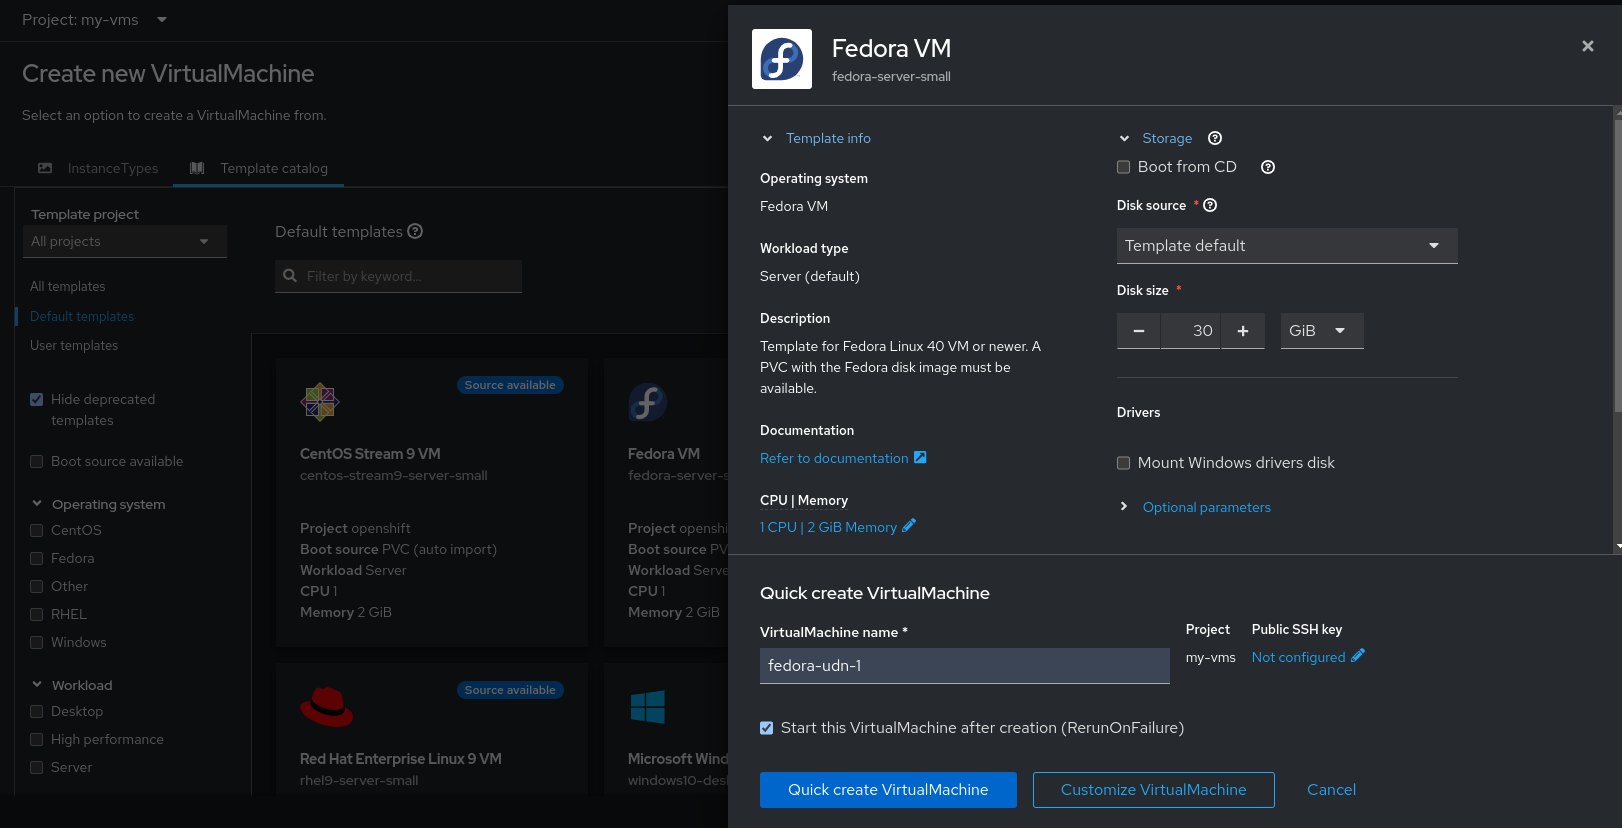
With the namespace and UDN ready, we can proceed to create a VM in the namespace. We can navigate to the Virtualization section of the web console and follow the prompts for creating a VM. I have used a Fedora based template for this example.
If a primary UDN exists within the namespace, the VM will automatically have its main network interface connected to the primary UDN. This can be viewed by clicking on Customize Virtual Machine and navigating to the Network tab (Figure 2).
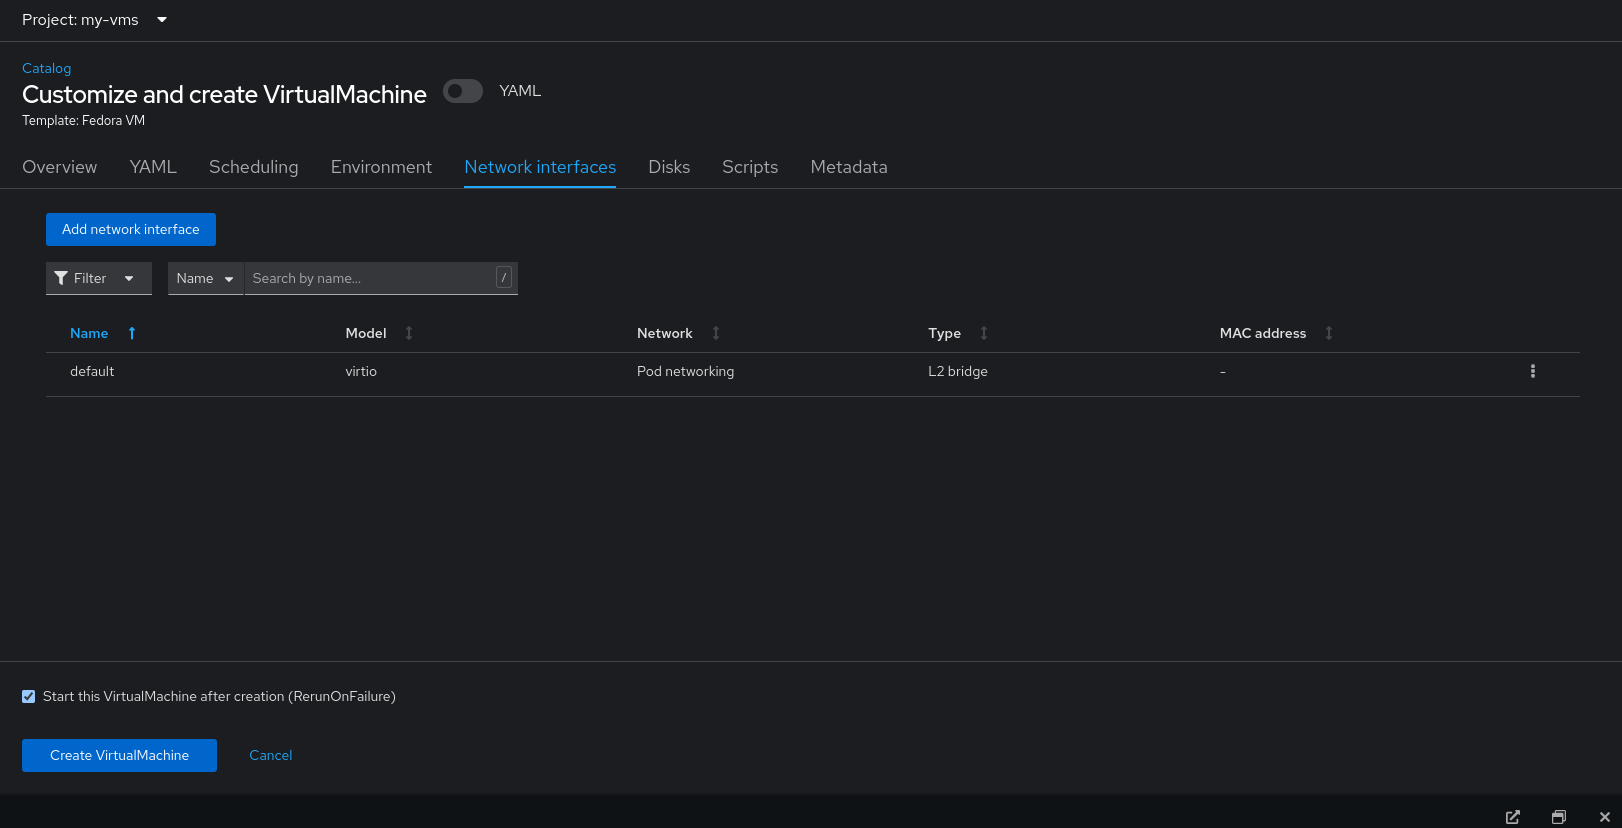
We can see under “Type” in the interface settings “l2bridge” is selected as the binding plugin that allows for the VM to connect to the primary UDN (Figure 3).
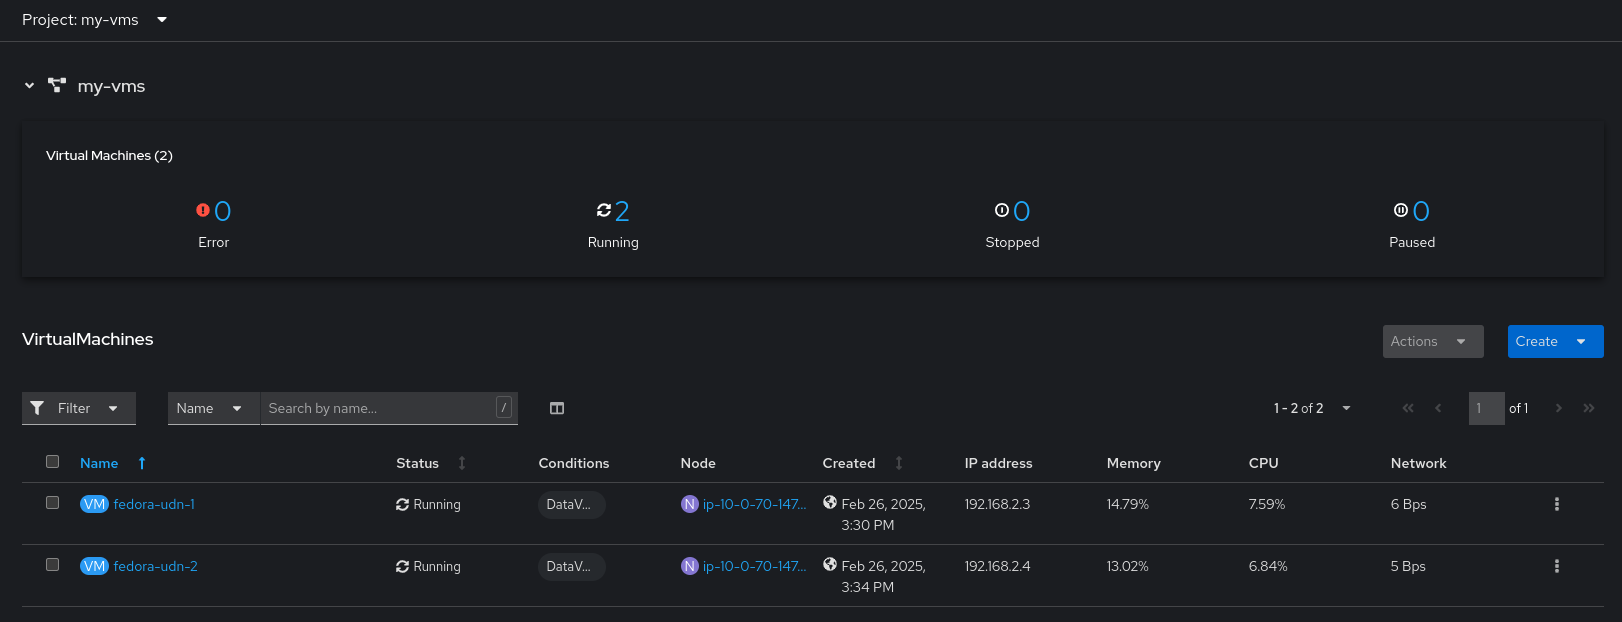
After reviewing the settings, we can create the VM and launch its console to validate the IP configuration assigned to it. In my example, I have created two VMs “fedora-udn-1” and “fedora-udn-2” for testing connectivity between the VMs (Figure 4).
Testing the connection
Once we have created the VMs, we can connect to the console of the first VM and validate the IP settings at the guest OS level. As we can see in the following settings, the “fedora-udn-1” VM has been configured with “192.168.2.3/24.”
fedora@fedora-udn-1:~$ ip a
1: lo: <LOOPBACK,UP,LOWER_UP> mtu 65536 qdisc noqueue state UNKNOWN group default qlen 1000
    link/loopback 00:00:00:00:00:00 brd 00:00:00:00:00:00
    inet 127.0.0.1/8 scope host lo
       valid_lft forever preferred_lft forever
2: enp1s0: <BROADCAST,MULTICAST,UP,LOWER_UP> mtu 1500 qdisc noqueue state UP group default qlen 1000
    link/ether 0c:7b:25:95:fc:22 brd ff:ff:ff:ff:ff:ff
    inet 192.168.2.3/24 brd 192.168.2.255 scope global dynamic noprefixroute enp1s0
       valid_lft 219737sec preferred_lft 219737sec
fedora@fedora-udn-2:~$ ip a
1: lo: <LOOPBACK,UP,LOWER_UP> mtu 65536 qdisc noqueue state UNKNOWN group default qlen 1000
    link/loopback 00:00:00:00:00:00 brd 00:00:00:00:00:00
    inet 127.0.0.1/8 scope host lo
       valid_lft forever preferred_lft forever
2: enp1s0: <BROADCAST,MULTICAST,UP,LOWER_UP> mtu 1500 qdisc noqueue state UP group default qlen 1000
    link/ether 0c:7b:27:96:fc:22 brd ff:ff:ff:ff:ff:ff
    inet 192.168.2.4/24 brd 192.168.2.255 scope global dynamic noprefixroute enp1s0
       valid_lft 219737sec preferred_lft 219737sec
To test connectivity across the VMs via UDNs, I will start a light weight python server on VM1 and proceed to connect to it from VM2 via curl. From VM1, I have executed the following command to start a Python webserver over port 8000.
python -m http.server 8000From VM2, I will connect to the web server on VM1 via curl using the following command.
curl http://192.168.2.3:8000The following is the output.
fedora@fedora-udn-1:~$ python3 -m http.server
Serving HTTP on 0.0.0.0 port 8000 (http://0.0.0.0:8000/) ...
192.168.2.4 - - [28/Mar/2025 10:37:25] "GET / HTTP/1.1" 200 -
As we can see from this example, VM2 “fedora-udn-2” was able to connect to the webserver on VM1 “fedora-udn-1,”
fedora@fedora-udn-2:~$ curl http://192.168.2.3:8000 -I
HTTP/1.0 200 OK
Server: SimpleHTTP/0.6 Python/3.12.0
Date: Fri, 28 Mar 2025 06:38:20 GMT
Content-type: text/html; charset=utf-8
Content-Length: 2637
Now we can validate the successful response as well as the webserver access logs on the stdout.
Test the connection with network policies
You can utilize network policies in conjunction with UDNs to allow or deny traffic between workloads over specific ports. In the same namespace, I have created a deny-all network policy that denies any type of traffic between workloads in the namespace.
kind: NetworkPolicy
apiVersion: networking.k8s.io/v1
metadata:
 name: deny-all
 namespace: my-vms
spec:
 podSelector: {}
 policyTypes:
   - Ingress
If we try the previous scenario after applying the network policy, we can see that VM2 will not be able to connect to VM1 due to the deny all policy.
fedora@fedora-udn-2:~$ curl http://192.168.2.3:8000 -I
curl: (28) Failed to connect to 192.168.2.3 port 8000 after 135010 ms: Couldn't connect to server
In the presence of a deny-all network policy, we must define an additional network policy that allows the connection to the webserver port. The following policy allows communication between all workloads in the project over port “8000”.
kind: NetworkPolicy
apiVersion: networking.k8s.io/v1
metadata:
 name: allow-all-8000
 namespace: my-vms
spec:
 podSelector: {}
 ingress:
   - ports:
       - protocol: TCP
         port: 8000
     from:
       - podSelector: {}
 policyTypes:
   - Ingress
After applying the allow-all-8000 network policy, we can validate that the connection between VM2 “fedora-udn-2” and VM1 “fedora-udn-2” has been re-established and can successfully connect.
fedora@fedora-udn-2:~$ curl http://192.168.2.3:8000 -I
curl: (28) Failed to connect to 192.168.2.3 port 8000 after 135010 ms: Couldn't connect to server
fedora@fedora-udn-2:~$ curl http://192.168.2.3:8000 -I
HTTP/1.0 200 OK
Server: SimpleHTTP/0.6 Python/3.12.0
Date: Fri, 28 Mar 2025 06:43:20 GMT
Content-type: text/html; charset=utf-8
Content-Length: 2637
Summary
This article demonstrated how to create UDNs for OpenShift Virtualization VMs. Using UDNs solves the previous challenges of the pod network NATing for all the VMs using 10.0.2.2/24. Each VM can have a unique IP from the associated UDN. Additionally, you can utilize network policies to further control the traffic between VMs connected to a UDN.
Check out the following resources to learn more: