Are you looking for the shortest path or cheatsheet to bring your Java application into a serverless platform based on Kubernetes? Perhaps you don't have enough time to stand up relevant infrastructure and configure settings for both the application and the platform. This article is a guide to developing Java serverless functions using a Quarkus quick start in the Developer Sandbox for Red Hat OpenShift. As you'll see, using quick starts in the Developer Sandbox lets you focus on the application development without needing to configure Knative.
The Developer Sandbox provides a shared, multi-tenant Red Hat OpenShift 4 cluster with a cloud IDE tool called Red Hat CodeReady Workspaces. All you need is a free account on Red Hat to get access for a limited time to a sandbox. Following the four steps in this article, you can stand up your own cluster in 10 minutes.
Step 1. Launch your sandbox
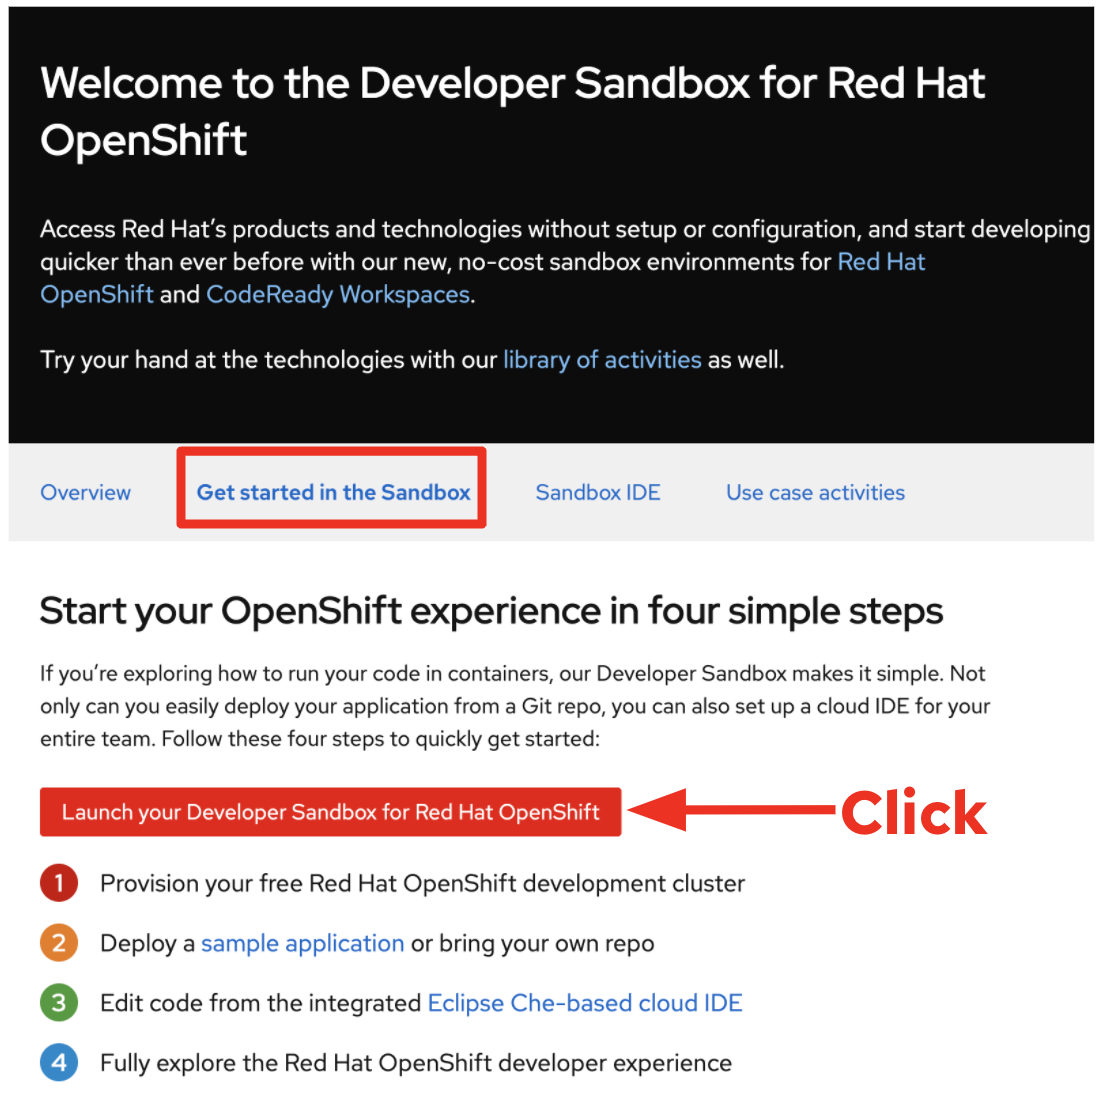
Go to the Welcome page for Developer Sandbox, then click the red Launch button shown in Figure 1. Log in using your Red Hat account.
Step 2. Choose the Quarkus serverless functions quick start
Once you are logged in to the sandbox, go to the +Add view in the Developer perspective. Click View all quick starts, then type serverless into the search box. Choose the Get started with Quarkus serverless functions quick start, as shown in Figure 2.

Step 3. Start the development of your serverless functions using Quarkus
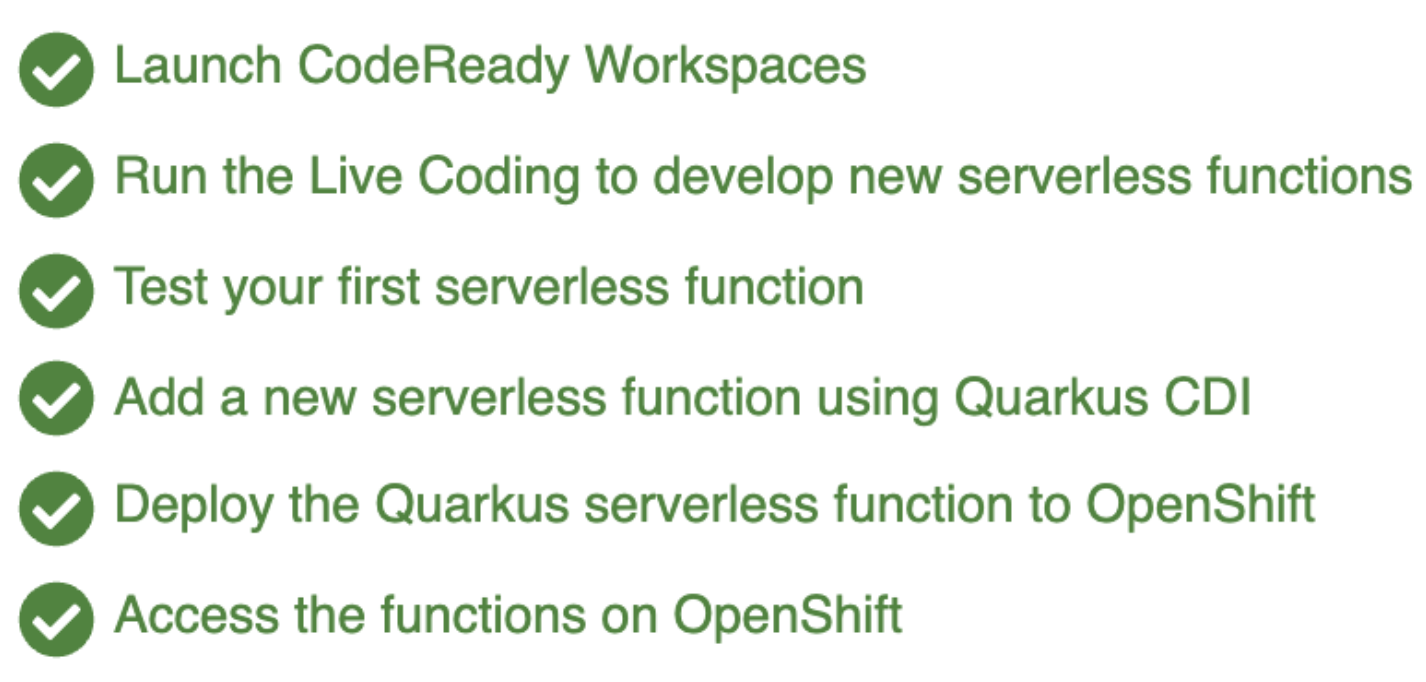
This 10-minute quick start develops some serverless functions in CodeReady Workspaces and deploys the functions to OpenShift using Quarkus extensions. The quick start takes you through the following tasks:
- Launch CodeReady Workspaces
- Run the Live Coding to develop new serverless functions
- Test your first serverless function
- Add a new serverless function using Quarkus CDI
- Deploy the Quarkus serverless function to OpenShift
- Access the functions on OpenShift
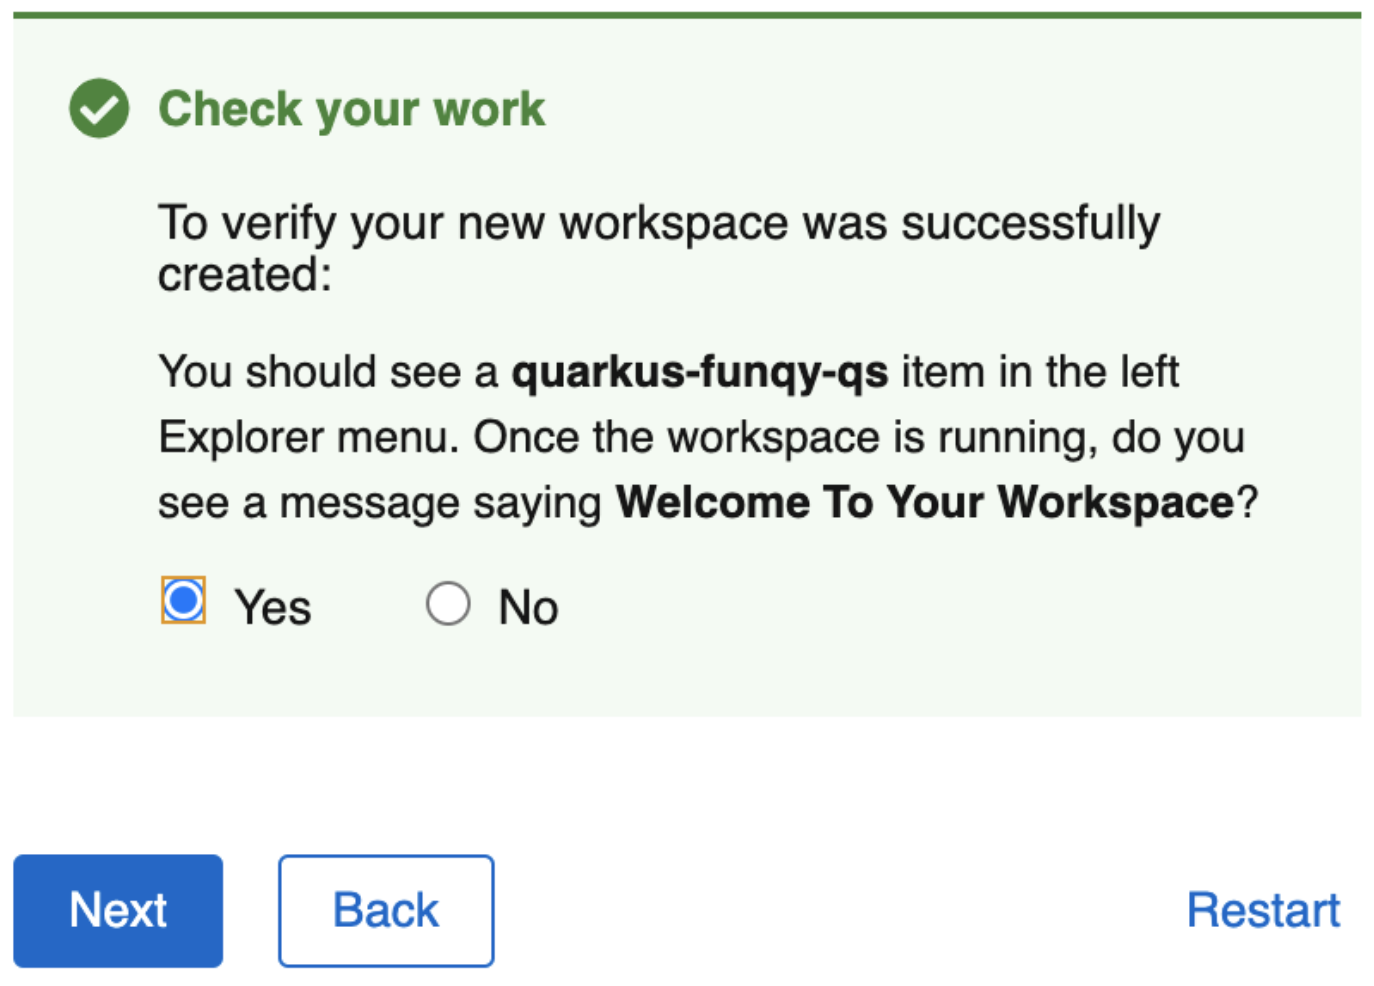
The quick start guides you through the step-by-step instructions to complete the tasks. When you complete each task, click Next to verify your work. If you have accomplished the task without any issues, click Yes and then Next to move forward to the next task, as shown in Figure 3.
Most tasks in this quick start are self-explanatory, but a couple of them are worth exploring.
Task 3: Add a new serverless function using Quarkus CDI
Quarkus simplifies bean discovery using the @Inject annotation, which is based on the Contexts and Dependency Injection (CDI) specification. You can also use this bean discovery while you're developing serverless functions, as in the following code:
@Inject
MyFunctionsService myFunctionsService;

@Funq
public String greeting(String name) {

    return myFunctionsService.greeting(name);

}
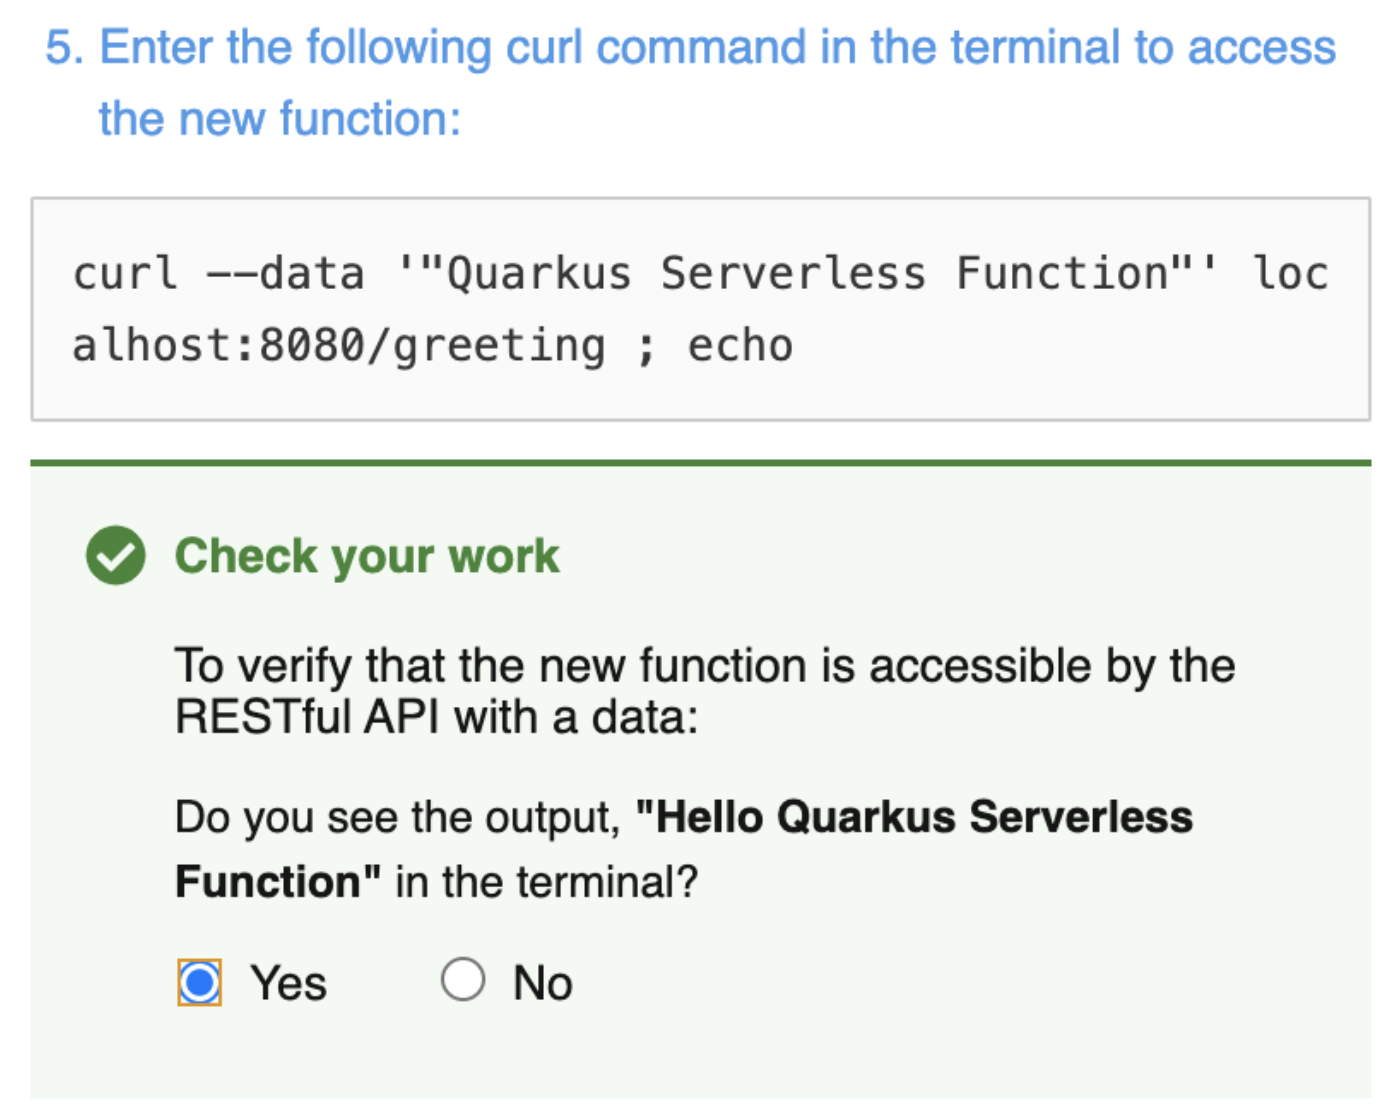
When you check your work using the curl command-line tool, you don't even need to save the source file, recompile, and restart the application after changing the code. Quarkus development mode updates the running application through Live Coding, as shown in Figure 4. The conveniences of this learning environment let you focus on serverless functions development.
Task 5: Deploy the Quarkus serverless function to OpenShift
This quick start uses the Quarkus Funqy extension to make your serverless function (greeting) portable across multiple serverless platforms, including Red Hat OpenShift Serverless, AWS Lambda, Azure Functions, Google Cloud Platform, and Knative.
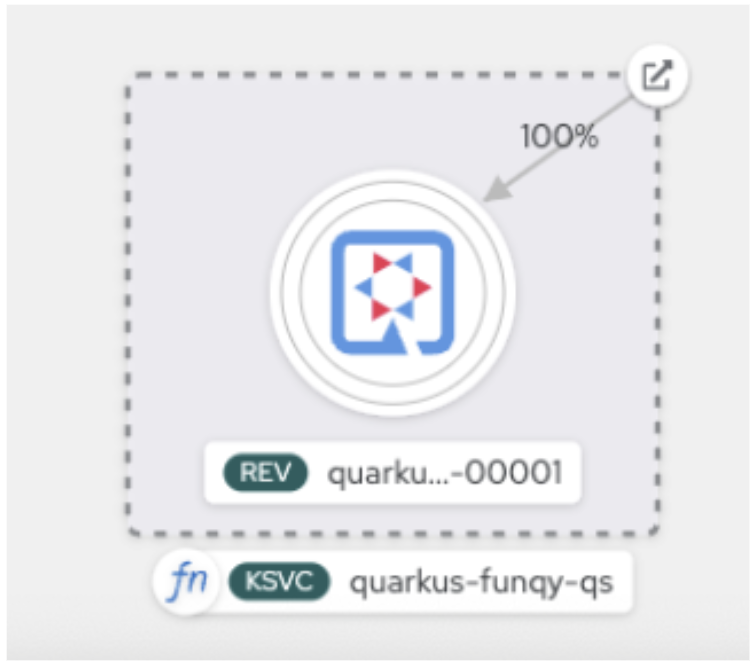
All required configurations are set in the application.properties file except the quarkus.container-image.group value. You need to replace USERNAME with your account (e.g., doh). Then deploy the Quarkus application using the Maven command-line tool. In the end, the Topology view displays the pod with a function icon, as shown in Figure 5.
The function pod might scale down to zero if there's no incoming traffic to the pod for 30 seconds.
When you have completed all six tasks, you will see the green checkmarks shown in Figure 6.
Conclusion
In this article, you've learned how quickly you can get started with the development and deployment of Java serverless functions using a Quarkus quick start in the Developer Sandbox for Red Hat OpenShift. The sandbox also provides an out-of-the-box IDE environment for those developers who want to begin cloud-native microservices development on day 1. Visit the Developing with Quarkus self-service learning portal to learn more about Java application development using Quarkus.
Last updated: October 31, 2023