As artificial intelligence (AI) adoption increases across industries, particularly through machine learning (ML), the job of integrating the often disparate tools, libraries, packages, and dependencies also increases in complexity. This makes development and operations (DevOps) a daunting task that both organizations and open source communities are actively working on. To quote the authors of Hidden Technical Debt in Machine Learning Systems, "developing and deploying ML systems is relatively fast and cheap, but maintaining them over time is difficult and expensive."
If you are in the throes of tackling DevOps for AI/ML (MLOps), two open source projects worth your attention are the upstream Kubeflow and the downstream Open Data Hub (ODH). The goal of these projects is to provide machine learning toolkits that handle the complex parts of orchestration that traditional software DevOps does not.
Note: For more about MLOps, see, Dotscience on OpenShift: Enabling DevOps for MLOps.
As the name indicates, Kubeflow is based on Kubernetes. In this article, we'll show it running on Red Hat OpenShift Container Platform and include an Istio service mesh.
Objective
Use this article as a startup procedure to install a default Kubeflow toolkit on an OpenShift Container Platform instance to explore the tools and capabilities. Figure 1 shows the Kubeflow dashboard running on OpenShift Container Platform, providing access to a suite of machine learning tools that span the system life cycle.
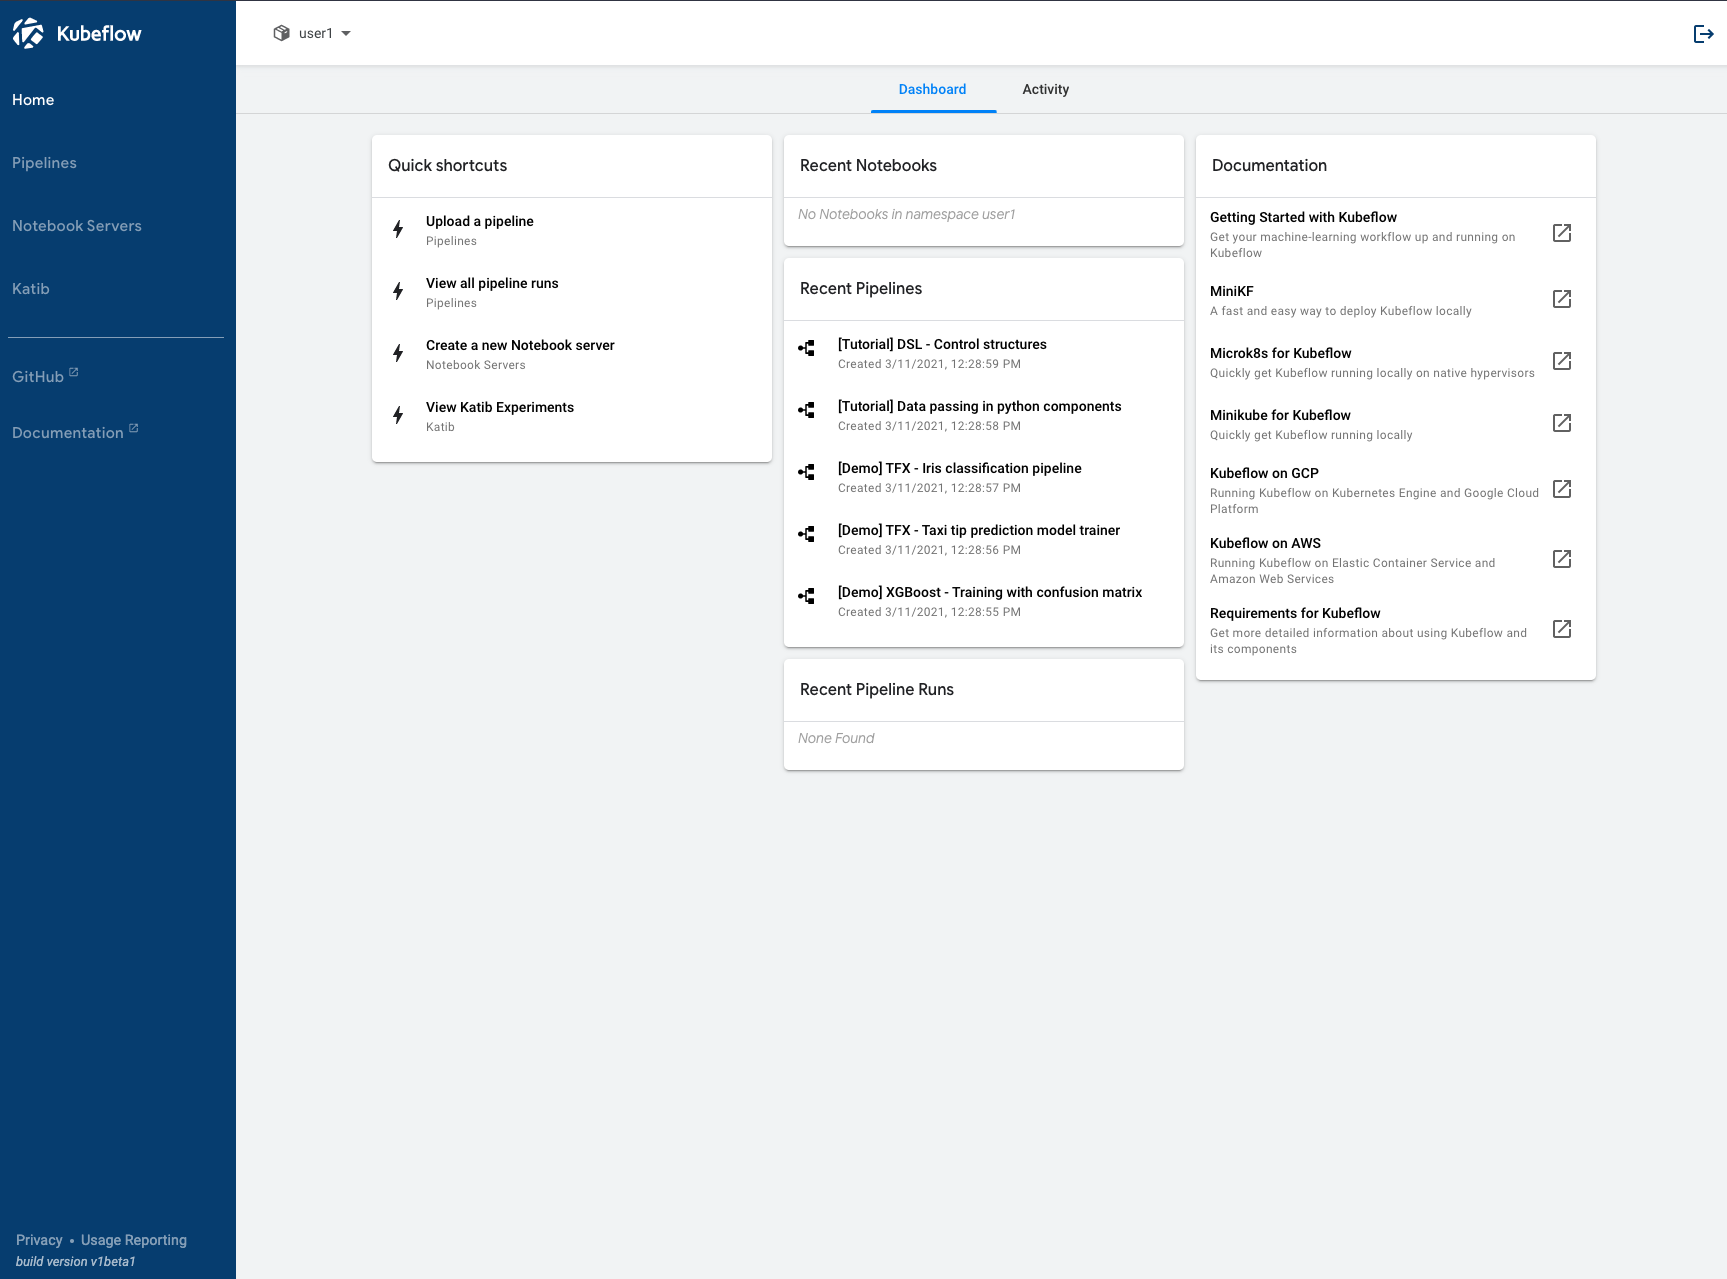
Note: The latest release of Kubeflow at the time of this writing incorporates changes to the file structure for distribution-specific platforms, such as OpenShift. If you are interested in the details, you can read the source pull request that explains the reason for the change.
Overview of major steps
The following list summarizes the steps needed to get Kubeflow running on OpenShift Container Platform:
- Install the Open Data Hub Operator.
- Create the Kubeflow project.
- Install Kubeflow.
- Monitor the installation.
- Access the Kubeflow user interface (UI).
Requirements
To use Kubeflow as shown in this article, please note the following requirements:
- You must have an OpenShift Container Platform cluster 4.2+ installed with cluster admin privileges.
- You should not have an existing Istio service mesh, because it will lead to name collisions.
- You should nothave an existing project named
istio-systemas Kubeflow deploys Istio along with configurations. - You must not have remaining mutating webhooks or validating webhooks from prior tests.
-
You must not deploy Kubeflow in a project or namespace other than
kubeflow.
Running on an OpenShift cluster
Here are some options for getting access to an OpenShift cluster to run through the procedure in this article. Getting a cluster running is beyond the scope of the tutorial, but the resources in this section offer a starting point.
On your local machine cluster (recommended)
Red Hat CodeReady Containers is designed to run on a local computer to simplify setup and testing. The product emulates the cloud development environment with all of the tools needed to develop container-based applications.
On a 60-minute temporary cluster (only for learning)
Katacoda offers an OpenShift cluster as a playground that can be used to perform this installation, as long as you complete the task in an hour or less. It can be done.
More options
See the OpenShift trial page for other options.
Installing the Open Data Hub Operator
Kubeflow should be installed on OpenShift using the Open Data Hub Operator from the OpenShift Operators catalog. The upstream Kubeflow Operator from OperatorHub.io will not run successfully on OpenShift because it is intended for a general-purpose Kubernetes cluster.
As an administrator from the OpenShift web console, do the following:
- Go to Operators.
- Go to OperatorHub.
- Search for "Open Data Hub."
- Click the Open Data Hub Operator button.
- Click the Continue button.
- Click the Install button.
- Accept the default installation strategy, which uses the following settings:
- Update Channel: beta
- Installation mode: All namespaces on the cluster (default)
- Installed Namespace:
openshift-operators - Approval strategy: Automatic
- Click the Install button.
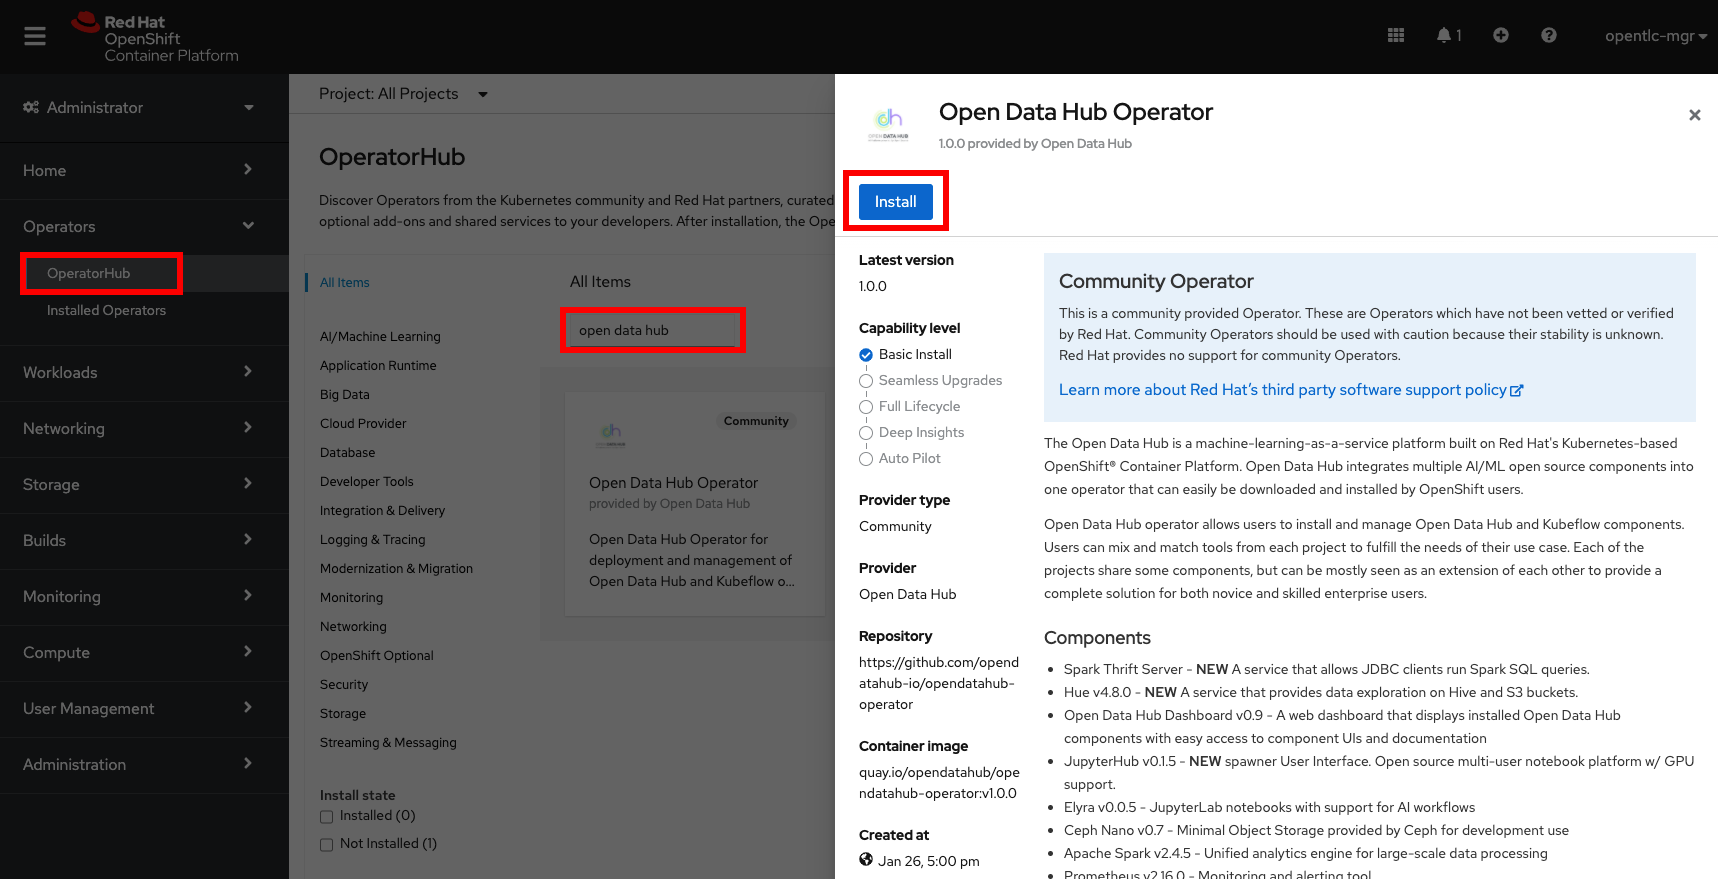
Figure 2 illustrates the Open Data Hub Operator selection from the OpenShift OperatorHub.
Creating the Kubeflow project
Kubeflow must be installed in a namespace called kubeflow. A request for an alternative namespace is an open issue at the time of this writing.
As an administrator from the OpenShift web console, do the following:
- Go to Home.
- Go to Projects.
- Click the Create Project button.
- Set the following values:
- Name:
kubeflow(cannot be altered) - Display Name:
kubeflow(unlike the previous name, you can choose another value here) - Description: Kubeflow ML toolkit (you can choose another value)
- Name:
- Change to the
kubeflowproject. - Go to Operators—>Installed Operators.
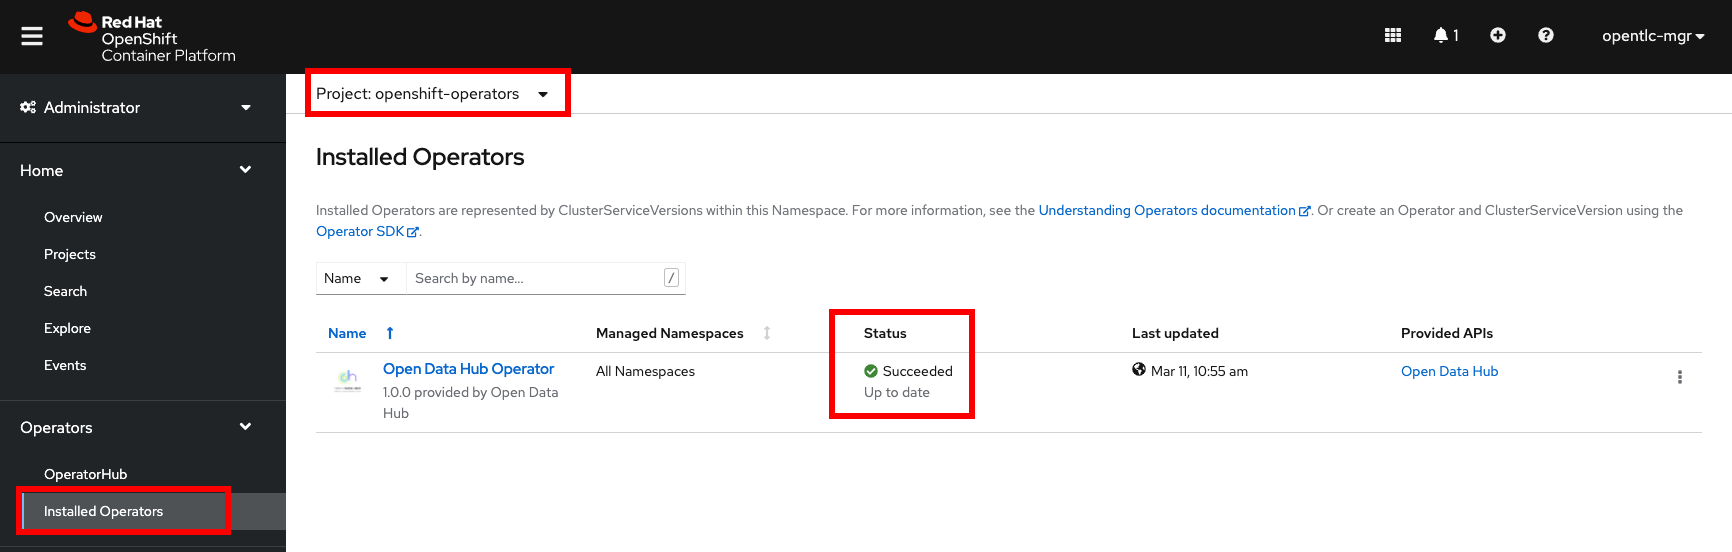
- Wait for the Operator to display "Succeeded" in the Status field.
Figure 3 displays the expected result when the operator is completely installed.
Installing Kubeflow
By default, the Open Data Hub Operator includes a manifest that lets you try out different components for MLOps. Because the toolset used in this article is different from the one in the default manifest, you should paste in a different manifest.
As an administrator from the OpenShift web console, do the following:
- Click the Open Data Hub Operator button.
- Click the Open Data Hub link under Provided APIs.
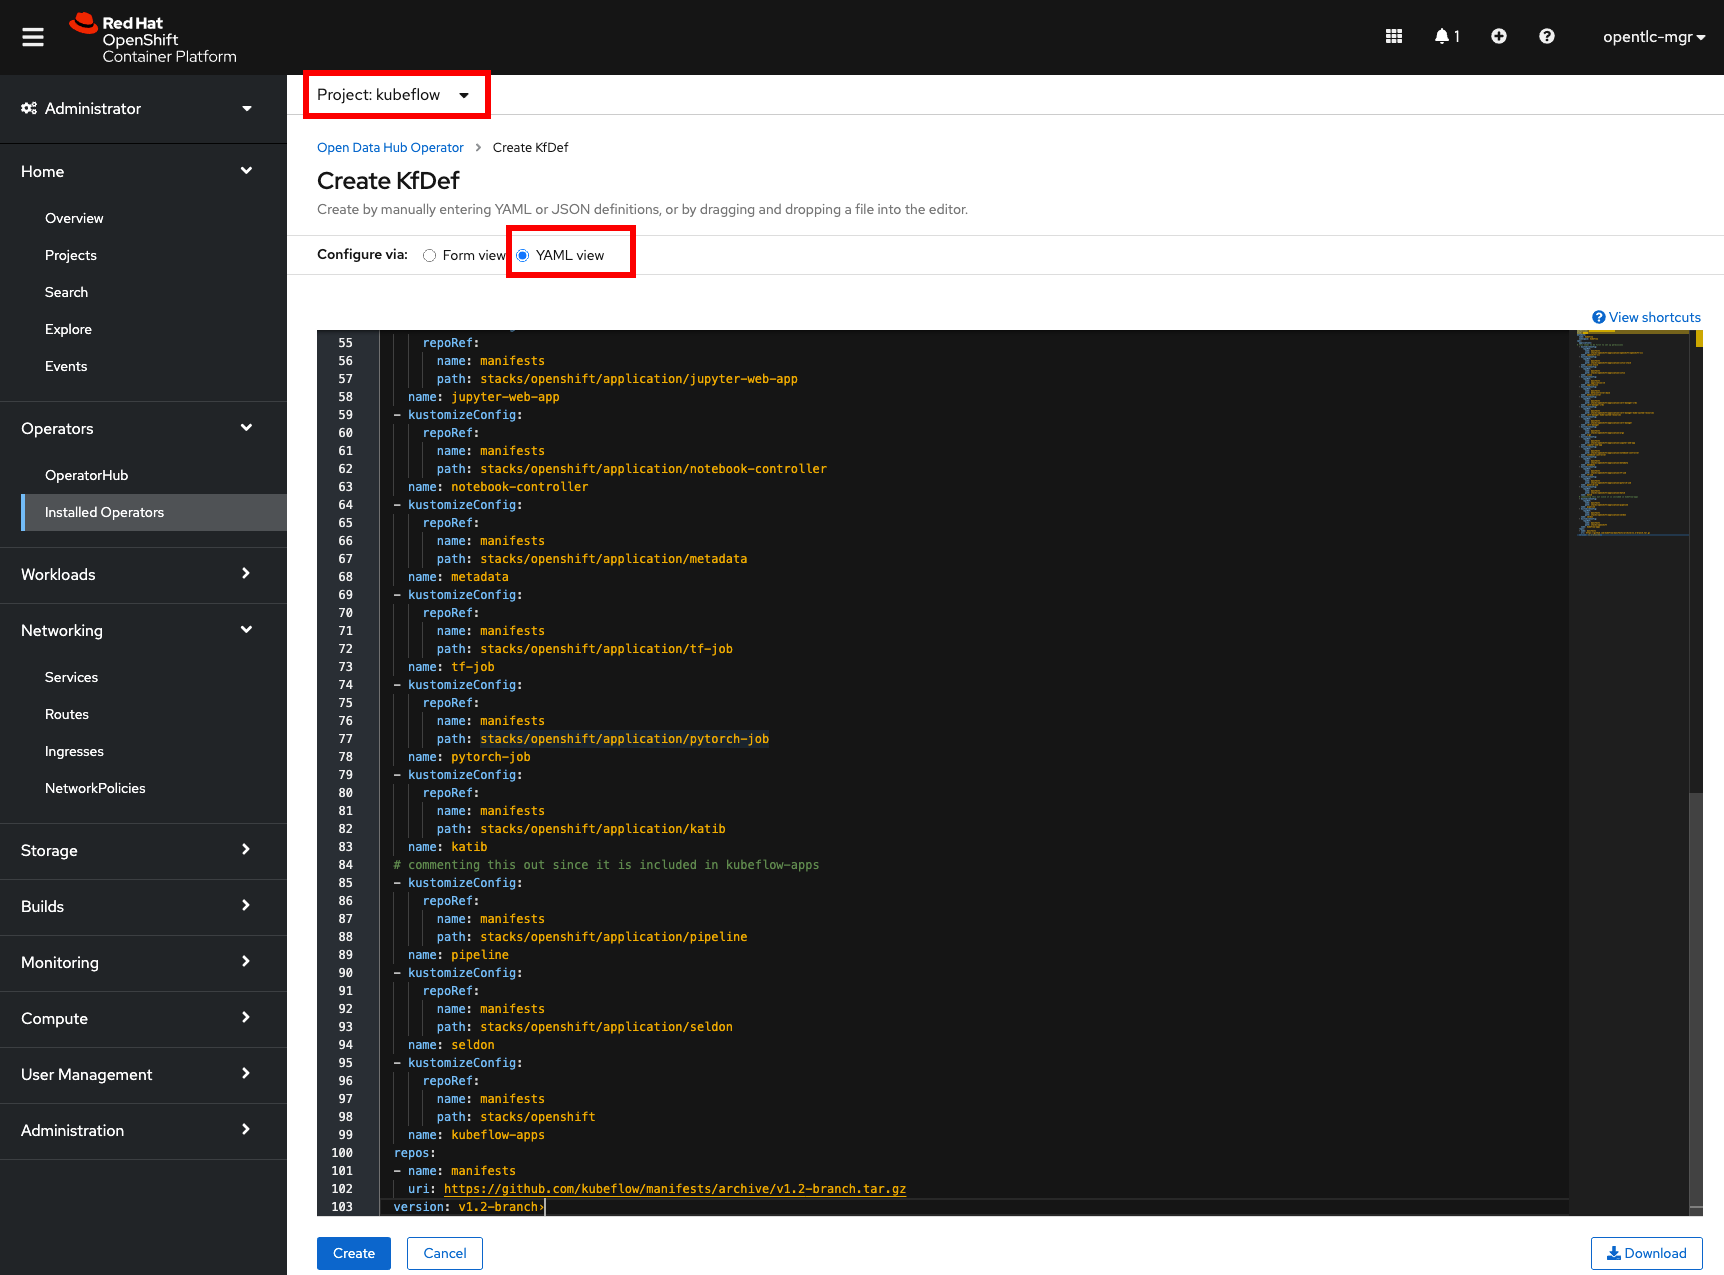
- Click the Create KfDef button.
- Click the YAML View radio button.
- Delete all the YAML code.
- Copy and paste in all the YAML code from kfctl_openshift.v1.2.0.yaml.
Note: For reference, the HTML version can be found on Kubeflow GitHub manifests.
- Click the Create button.
Figure 4 shows the Provided APIs selection.
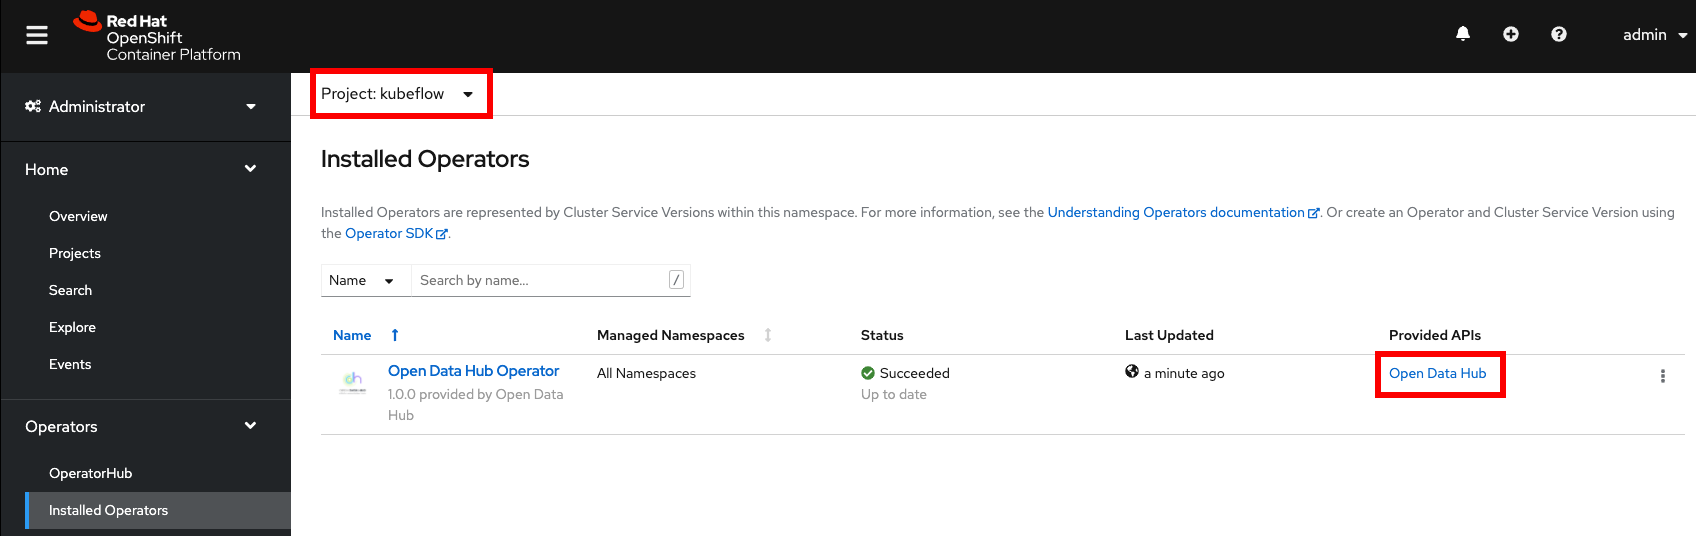
Figure 5 shows the YAML code you will replace.
Monitoring the installation
In the background, the Open Data Hub Operator performs the commands a system administrator would execute on the command line to install Kubeflow, such as kfctl build -f... and kfctl apply -f... The web console doesn't show when the installation is complete, so this section shows a few ways to monitor the installation. If all the pods are running without errors, the installation is complete.
Monitoring from the administrator perspective
Streaming events are a great way to get a sense of what major activity is occurring after an action such as a deployment. To view the events:
- Go to Home.
- Section the project: either
kubeflowto see just events for Kubeflow, or "All projects" to see the multiple projects being updated during installation. - Go to Events to monitor the deployment events stream.
Figure 6 shows the events streaming during an installation in the kubeflow project.

Workload status and alerts are a quick way to understand how progress is going. To view the workloads:
- Under Home, click Projects.
- Click the
kubeflowproject link. - Click the Workloads menu item in the body of the screen to review pods.
- Investigate workloads that don't self-correct (give them time to auto-correct).
Figure 7 shows workloads from the project overview page. Workloads in the project are also viewable from the vertical menu.

A project called cert-manager gets created during installation. Its events and pods provide good insight. To view these events or pods:
- Select Project: cert-manager.
- Under Home, click Events to review events. Under Workloads, click Pods to review pods.
Figure 8 shows the pods for cert-manager.

Another important project, istio-system, is created during installation. This project hosts the Istio service mesh that handles all the networking between the services. To view the project:
- Select Project: istio-system.
- Under Home, click Events to review events. Under Workloads, click Pods to review pods. Under Networking, click Routes to access the URL to the Kubeflow central dashboard.
Figure 9 shows the routes in the project.

Monitoring from the developer perspective
In addition to the administrator perspective, a developer perspective abstracts infrastructure features out of view to leave an uncluttered developer experience. To see this perspective:
- Go to the developer perspective.
- Select Project: kubeflow.
- Go to Topology.
Figure 10 shows the results.

If there are no errors across the projects and the Kubeflow UI launches, the installation has succeeded.
Accessing the Kubeflow UI
This section offers two ways to access the Kubeflow central dashboard from the web console. For reference, a command-line query would look like:
# oc get routes -n istio-system istio-ingressgateway -o jsonpath='http://{.spec.host}/'
Going to the dashboard from the administrator perspective
From the administrator perspective, do the following:
- Select Project: istio-system.
- Go to Networking.
- Go to Routes.
- Click the location URL
http://istio-ingressgateway....
Figure 11 shows how to find the location URL.

Going to the dashboard from the developer perspective
From the developer perspective, do the following:
- Select Project: istio-system.
- Go to Topology.
- Search for "istio-ingressgateway."
- Click the Open URL arrow icon, or click the
istio-ingressgatewaypod and the URL under Resources—>Routes.
Figure 12 shows the location of the URL.

Viewing the Kubeflow central dashboard
Once you complete the registration process and create a namespace, you will see a dashboard like the one in Figure 13.
Uninstalling Kubeflow
No proper installation procedure is truly complete without an uninstallation procedure.
As an administrator from the OpenShift web console, do the following:
- Select Project kubeflow.
- Click the Open Data Hub Operator.
- Click the Open Data Hub link under Provided APIs.
- Click the Kebab button (the one with three vertical dots) for your
kubeflowinstance. - Click Delete KfDef to begin the delete process for your
kubeflowinstance.
Summary
The procedure in this article illustrates a best practice you can follow to install Kubeflow on Red Hat OpenShift using the Open Data Hub Operator. The manifest file used provides an example toolkit from the Kubeflow project that you can fork, modify, and update to fit your production MLOps needs. Furthermore, the Operator framework simplifies installation, operations, and maintenance as the community continues to publish enhancements to both the operator and machine learning tooling in conjunction with the overall benefits of AI/ML on Red Hat OpenShift.
Last updated: November 8, 2023