Page
Build the application inside OpenShift
Now it's time to build your application.
In order to get full benefit from taking this lesson, you need to:
- Have an OpenShift cluster from the Developer Sandbox
In this lesson, you will:
- Learn how to build the application
- Learn how to test the application
Building the application inside OpenShift
Now that the application code is working, you’re ready to package it as a container image and run it directly in OpenShift as a service that you will be able to call from any other application. You can access the OpenShift Dedicated dashboard from the application switcher in the top bar of the OpenShift AI dashboard (Figure 16).
Open your OpenShift UI and switch to the Developer view from the menu on the top left:
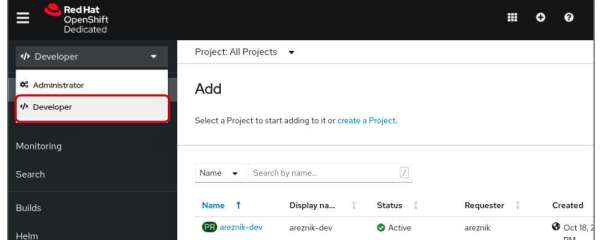
Figure 16: Switch to the developer view. From the +Add menu, click the From Git option (Figure 17):
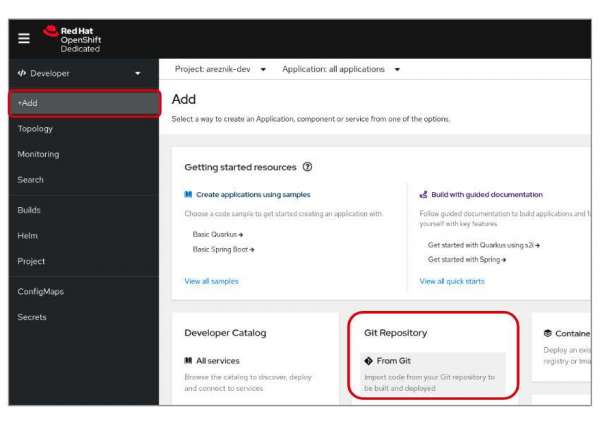
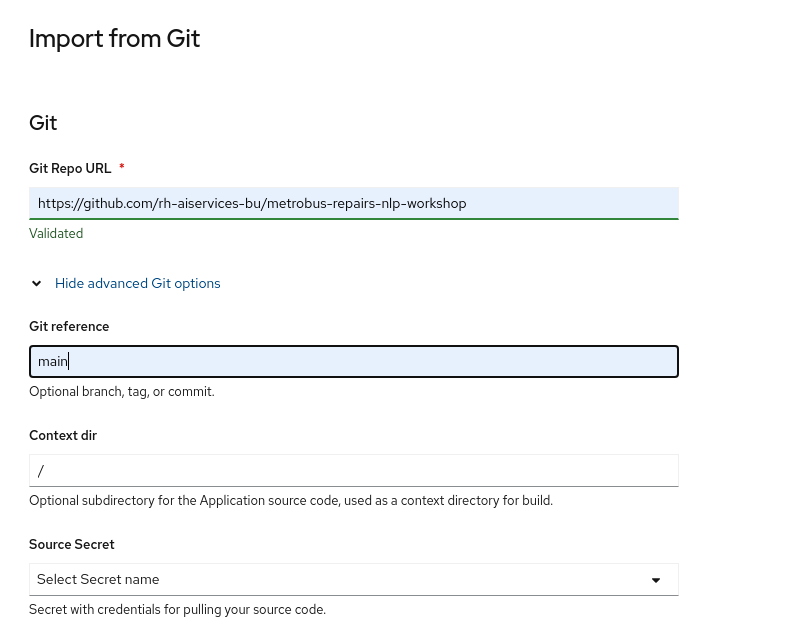
Figure 17: Choose the "From Git" option. In the GitHub Repo URL field, enter https://github.com/rh-aiservices-bu/metrobus-repairs-nlp-workshop.git (Figure 18):
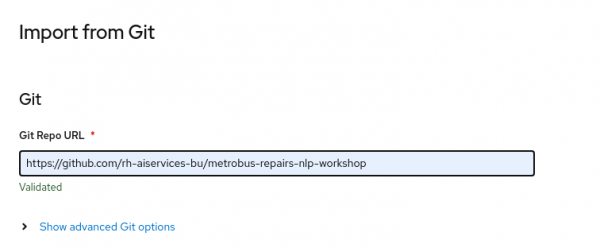
Figure 18: In the GitHub Repo URL field, enter the repository URL. Don’t overlook this step. Click Show advanced Git options, and in the GitHub reference field, enter main because this is the branch to use in our GitHub project (Figure 19).

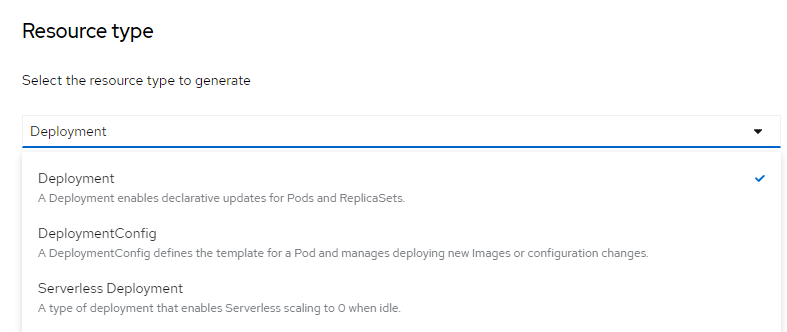
Figure 19: Click "Show advanced Git Options" and choose "main." Next, you will need to scroll to the bottom and expand the Resource Type section and select Deployment as the type of resource to be generated (Figure 20).
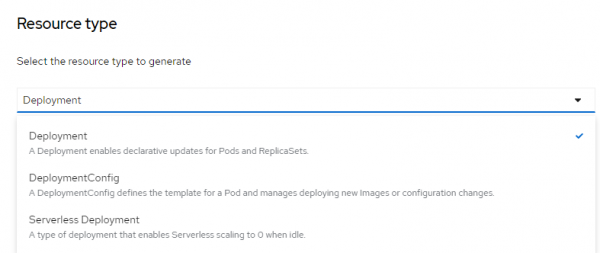
Figure 20: Resource type to generate is Deployment. Click the Create button and the build process will begin (Figure 21). If you do not see the details panel on the right side, simply click the center of the application box on the Python logo.

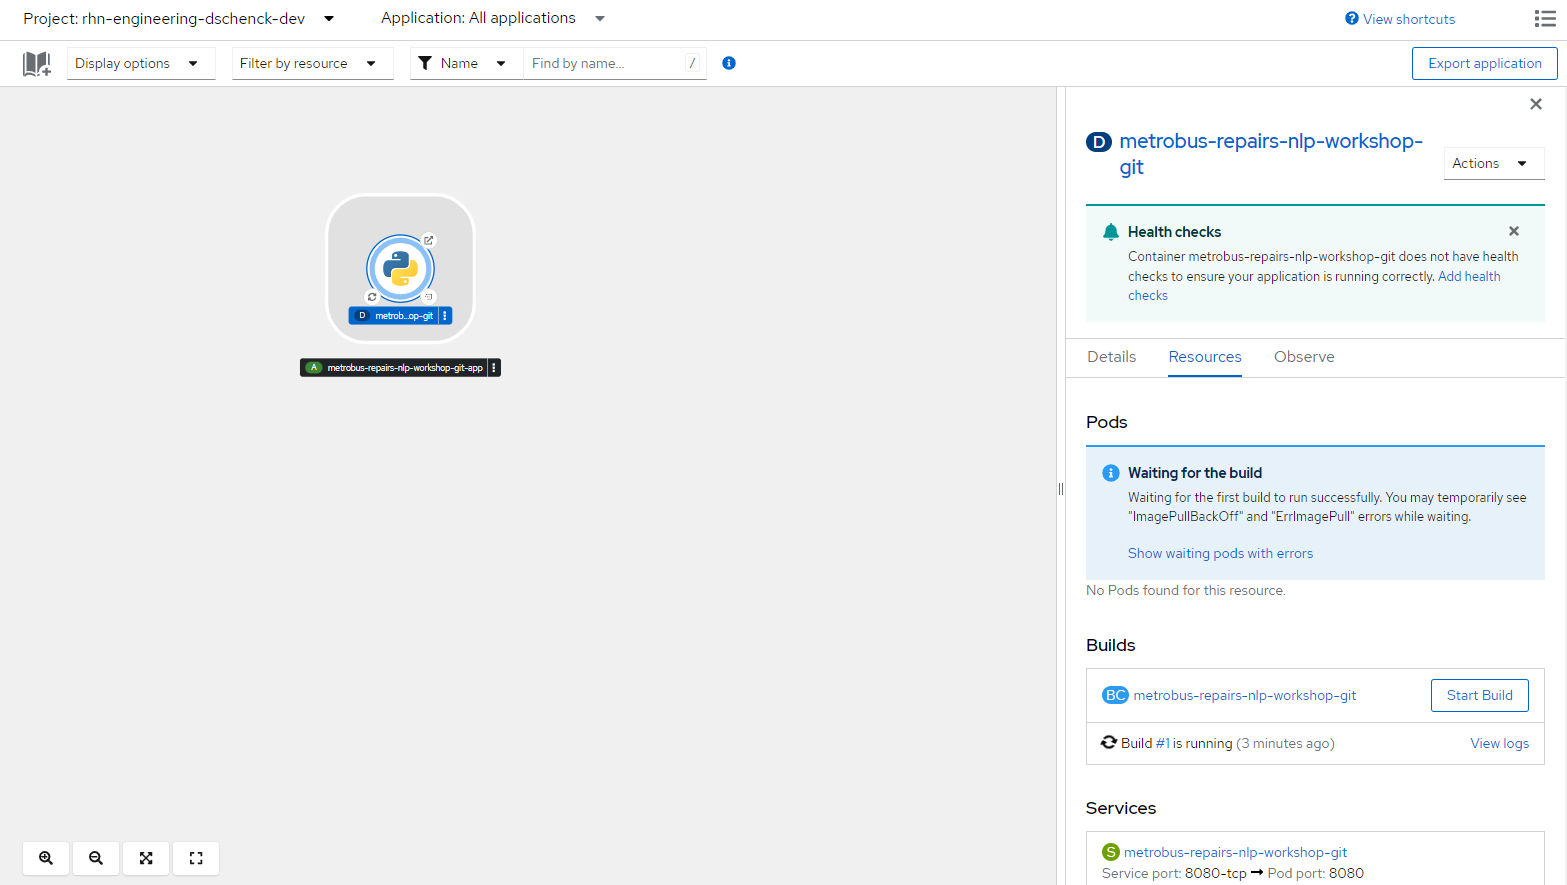
Figure 21: Build in process. The automated build process will take a few minutes. Some alerts may appear if OpenShift tries to deploy the application while the build is still running, but that’s OK. OpenShift will then deploy the application (rollout), and in the Topology view, you should obtain a screen similar to Figure 22.
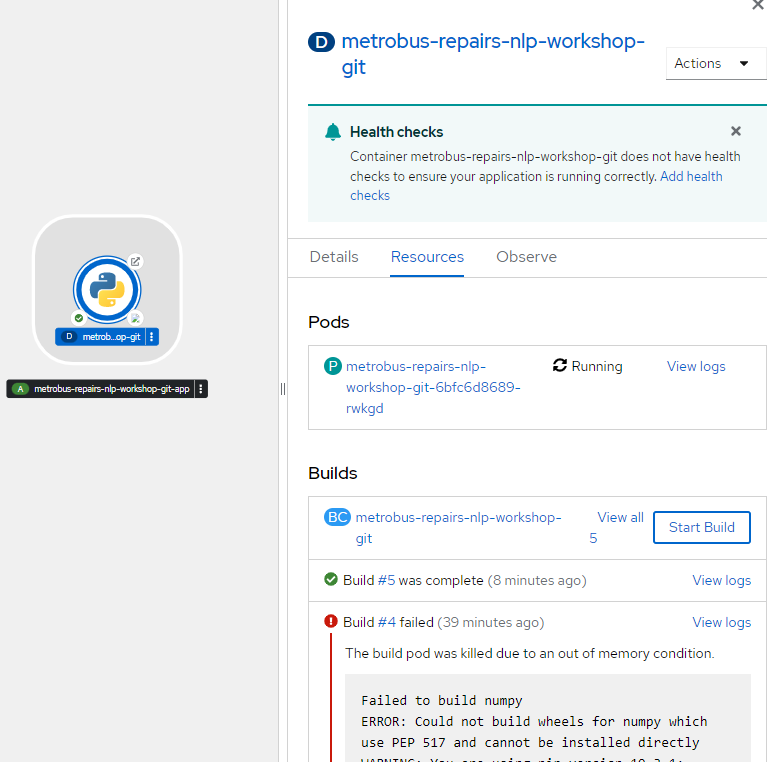
Info alert:Note: If the build fails — as in the example here — simply click the Start Build button and try again. It may take multiple attempts, but it will eventually succeed. This behavior is caused by the limits of the free OpenShift Sandbox. In a regular cluster, you will not have an out of memory condition.
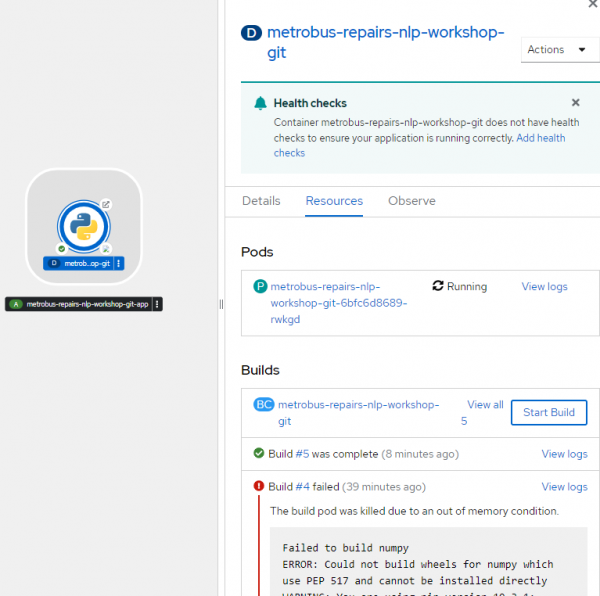
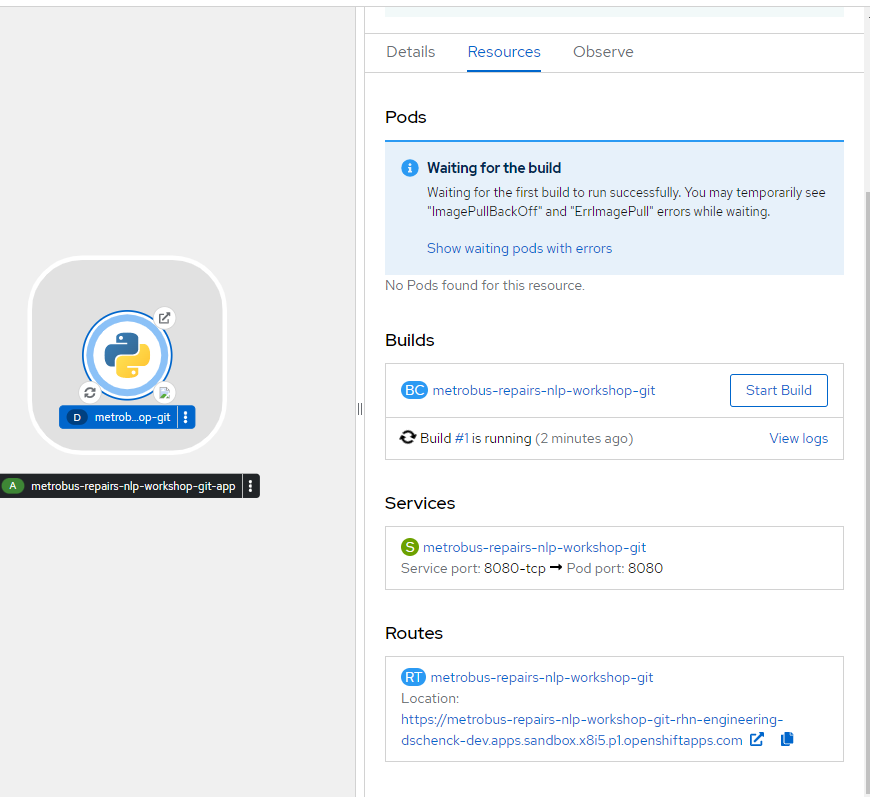
Figure 22: The topology view of your rollout. Scroll to the bottom of the details panel to see the Routes value. This is the URL of your service (Figure 23).
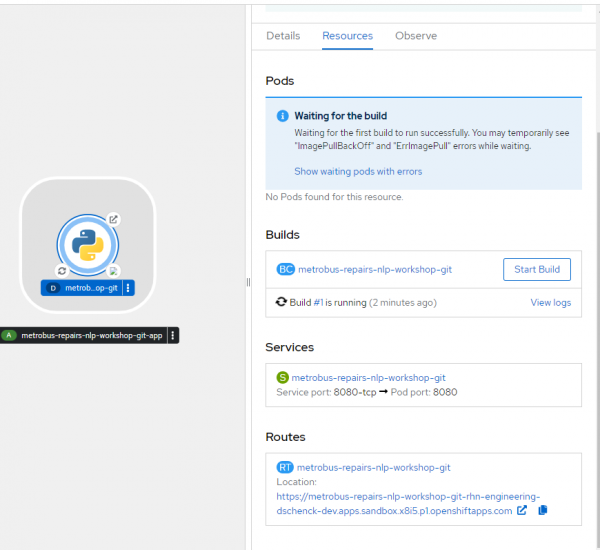
Figure 23: The route to your service.


Test the application
You now have an application—what’s known as an OpenShift service—listening at the route that was created during the deployment. You're probably eager to try out the application — and that is what we are going to do next.
Because our application is now a REST API endpoint, there are multiple ways to upload test data to it. Here are a few.
You can test the application by simply clicking on the route's link, or by copying and pasting the link into your browser (Figure 24).

Figure 24: Test the route's link, or copy and paste it into your browser. cURL from a terminal session:
You can use the OpenShift Web Terminal to access your service from a command line. Select the Web Terminal option (Figure 25, Callout 1) and a command line will appear (Figure 25, Callout 2):

Figure 25: To access your service from a command line, select the Web Terminal option. In the terminal shell, enter a cURL command with sample text like,
I turn the key and nothing happensas shown in Figure 26. Replace thelocalhostin the command with the right hostname for the route, and make sure to include /prediction:
Figure 26.: Enter a cURL command and replace the localhost. From Python code:
Send a RESTful post request with sample text like,
I turn the key and nothing happensas shown in Figure 27. Replace thelocalhostin the command with the right hostname for the route, and make sure to include /prediction:
Figure 27: Send a RESTful post request and replace the localhost with the right hostname. From a notebook:
You can also test the REST API endpoint from a Jupyter Notebook. Open the notebook named
05_MBR_enter_repair.ipynb. In the first cell, replace the placeholders with the text as shown in Figure 28.- The repair text to be categorized
- The route to the service
The repair text goes in the my_text field in the file, and the route in the my_route field, as follows:

Figure 28: Open the notebook and replace the placeholders. Run both cells and see the result. (Figure 29)
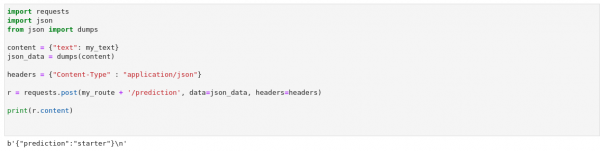
Figure 29: The result of running both cells.


Conclusion
We hope you have enjoyed this activity! You have experienced firsthand how Red Hat OpenShift AI can simplify the onboarding of your AI/ML projects, and provides an easy-to-use solution for your data scientists and data engineers.
To learn more about Red Hat OpenShift AI, please visit the Red Hat OpenShift AI product page.
