Page
Access your Developer Sandbox account
Let's get started. Your first step in creating an NLP application is getting and logging into your Developer Sandbox account.
In order to get full benefit from taking this lesson, you need to:
- Have an OpenShift cluster from the Developer Sandbox
In this lesson, you will:
- Learn how to set up your Developer Sandbox
- Learn how to open a Red Hat OpenShift AI session
- Learn how to launch Jupyter and start a notebook
Access your Developer Sandbox account
Start by accessing your account. If you don’t have one, create one (Figure 1). The page is here: Developer Sandbox.

Open the Red Hat OpenShift AI session
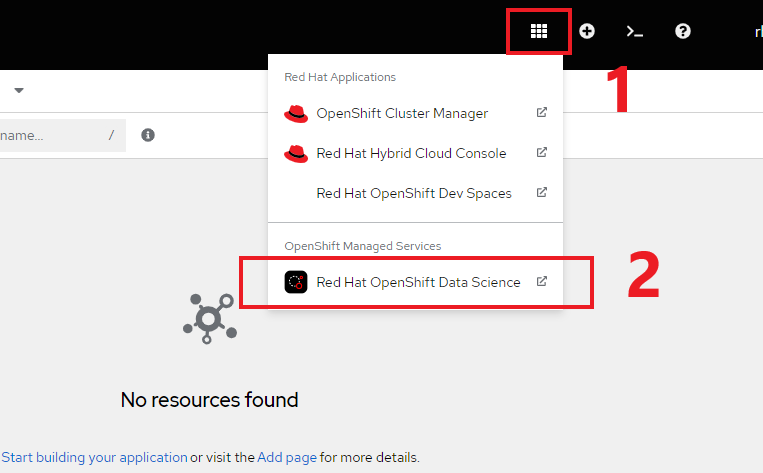
From the sandbox dashboard, open your session by selecting the Red Hat OpenShift AI option in the upper right corner of the screen and clicking on the link (Figure 2).
You're now logged into OpenShift AI and are presented with the dashboard.
OpenShift AI brings you on-demand Jupyter Notebook environments. Don’t worry if you’ve never used notebooks before because this activity includes a small tutorial about what they are and how to use them.
Launch Jupyter
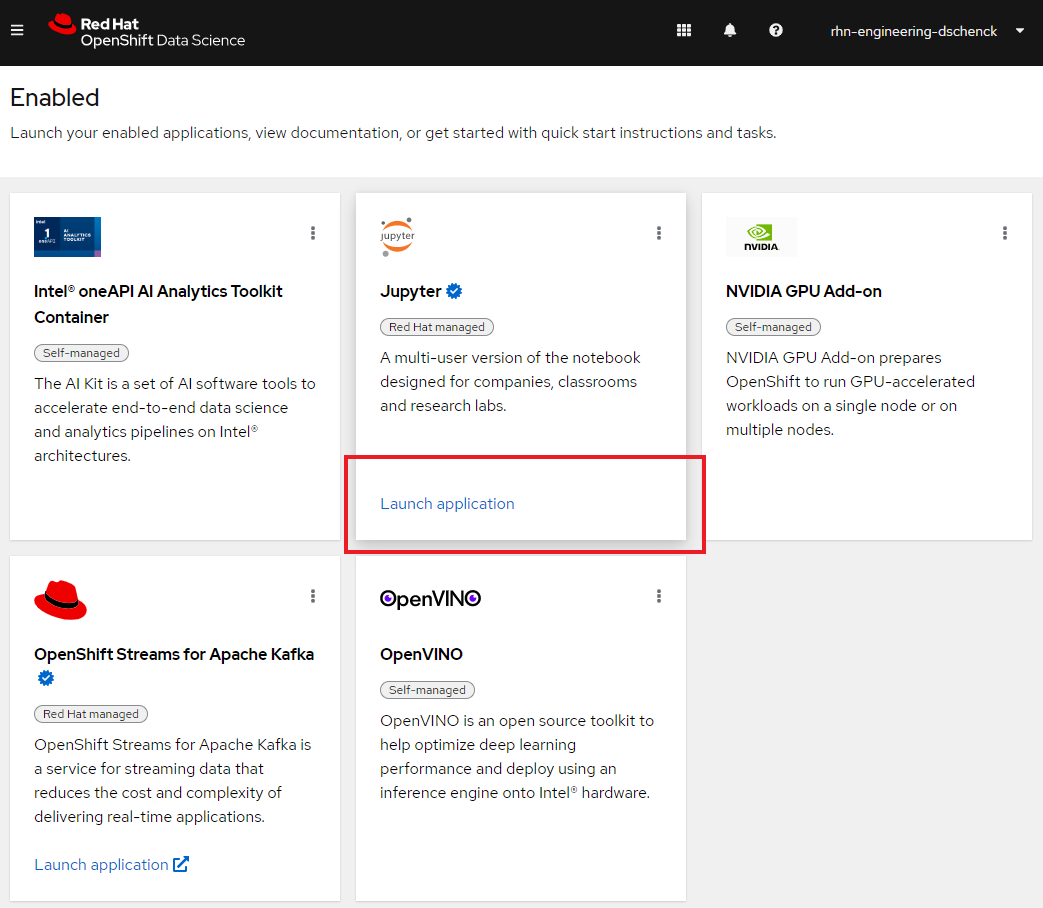
Now that you are logged in to OpenShift AI, select Launch application on the Jupyter card (Figure 3).
If this is the first time you’re launching Jupyter, you will go to a page that requires you to log in and that asks you for permission to use your user account to authenticate to Jupyter. You should, of course, allow this access if you want to do the workshop.
Start a notebook server
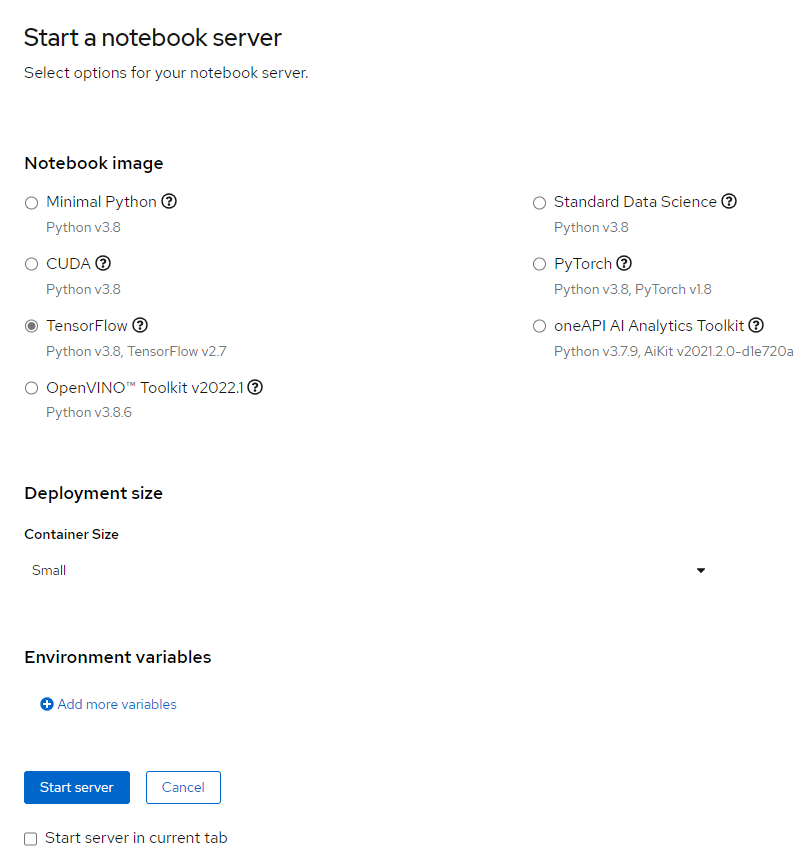
Make sure the TensorFlow notebook image is selected, then select the Start server button at the bottom of the page (Figure 4).
Once the Jupyter server has started, open it.
About the Jupyter environment
You are now inside your Jupyter environment. It’s a web-based environment, but everything you do here is in fact happening on the OpenShift AI cluster. This means that without having to install and maintain anything on your own computer, and without tying up lots of local resources such as CPU and RAM, you can conduct your AI work in this powerful and stable managed environment. The file-browser window you’re in right now contains the files and folders saved inside OpenShift AI.
Now that you have set up your sandbox environment, it's time for Lesson 2 where you get to clone a GitHub repo into your environment.
