This is the first in a series of articles that demonstrate the OpenShift AI tuning capabilities on a variety of AI accelerators. This post focuses on NVIDIA GPUs, and a follow-up article covers the latest generation AMD accelerators.
On July 23, 2024, Meta AI released Llama 3.1 models, their most capable LLMs to date, which are broadly available for a wide variety of use cases, from conversational assistants to agentic systems with APl calling capabilities. These models come in a herd of Llamas (pun intended) of three different sizes (8B, 70B, and 405B parameters), are trained on a corpus of about 15 trillion multilingual tokens, and provide an extended context window of up to 128 thousand tokens (a 250-page book, approximately).
These new models close the gap between closed-source and open-weights models (the data for training Llama 3.1 models hasn’t been disclosed), scoring an average of 86% on the Massive Multitask Language Understanding (MMLU) benchmark for the Llama 3.1 70B model, and of 88.6% for the 405B parameters version, only slightly below the state-of-the-art top score of 90% achieved by Gemini Ultra ~1760B.
While the Llama 3.1 herd of models already include instruction-tuned versions for multi-turn conversation prompting style, you might need to further customize these models to adapt them to your applications and use cases. However, it remains a challenge to apply proven methods like supervised fine-tuning (SFT) for these large language models on a single device/node given how compute and memory intensive they are, even when applying techniques like LoRA (Low-Rank Adaptation) or QLoRA (Quantized LoRA).
Accelerating AI workloads with Ray and OpenShift AI
Earlier this year, Red Hat announced the general availability of Ray in Red Hat OpenShift AI. Ray is an industry-leading distributed computing framework, and KubeRay (the Kubernetes operator for Ray) makes it easy to provision resilient and secure Ray clusters that can leverage the compute resources available on your hybrid cloud infrastructure.
This how-to article adapts the Fine-tuning Llama models with DeepSpeed, Accelerate, and Ray Train example provided by the Ray community to demonstrate how straightforward it is for data scientists to run and scale the Llama 3.1 models’ supervised fine-tuning jobs with OpenShift AI.
Let’s get started!
Prerequisites
To perform the steps in the next sections of this tutorial, you need to have access to a Red Hat OpenShift cluster (version 4.12 or higher) with the following platform components:
- The OpenShift AI Operator (OpenShift AI 2.10 or higher), with the workbenches, ray, dashboard and codeflare components enabled.
- The Node Feature Discovery Operator with a default NodeFeatureDiscovery resource.
- The NVIDIA GPU Operator with a default ClusterPolicy resource.
- Enough worker nodes with NVIDIA GPUs (for this tutorial, Red Hat recommends Ampere-based nodes).
You’ll also need an AWS S3 bucket to be able to store checkpoints and experimentation results.
Create a workbench
Start by creating a workbench. This is a Jupyter notebook that’s hosted on OpenShift, and provides a convenient way to provision a Ray cluster for running Llama 3.1 fine-tuning jobs.
Go to the OpenShift AI dashboard, which you can access from the navigation menu at the top of the OpenShift web console, as shown in Figure 1.

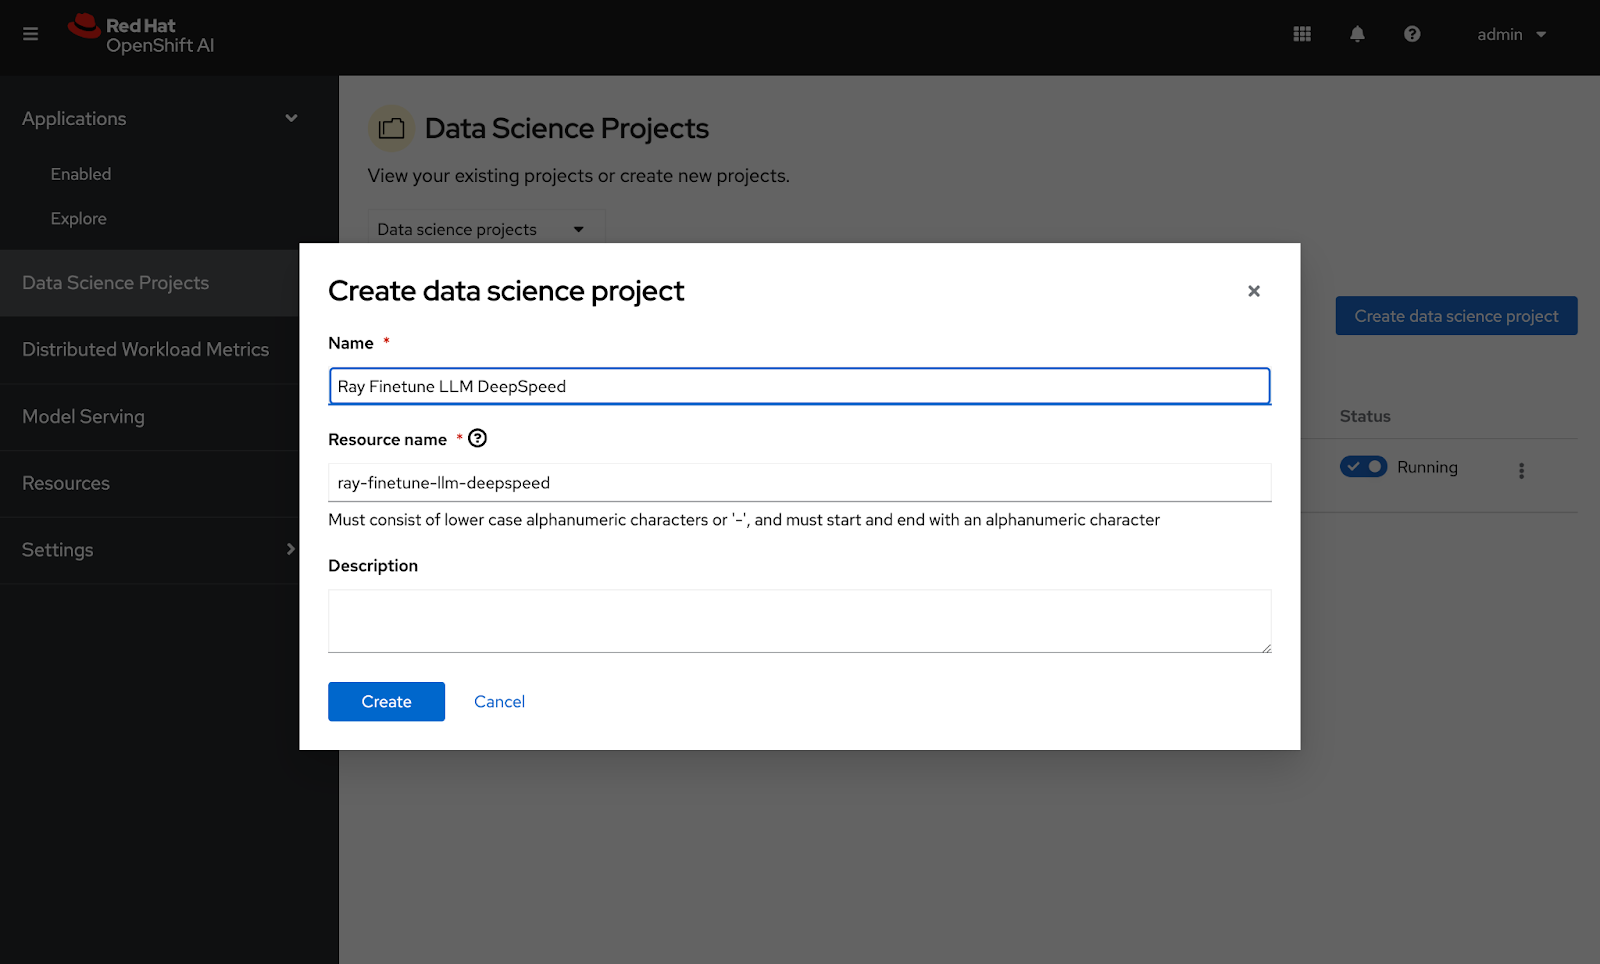
After logging into the dashboard with your OpenShift credentials, click the Data Science Projects tab and create a new project, as shown in Figure 2.
After you create your project, click the Create a workbench button. You can then select the container image, size, and data connection details for your workbench (see Figures 3 and 4).

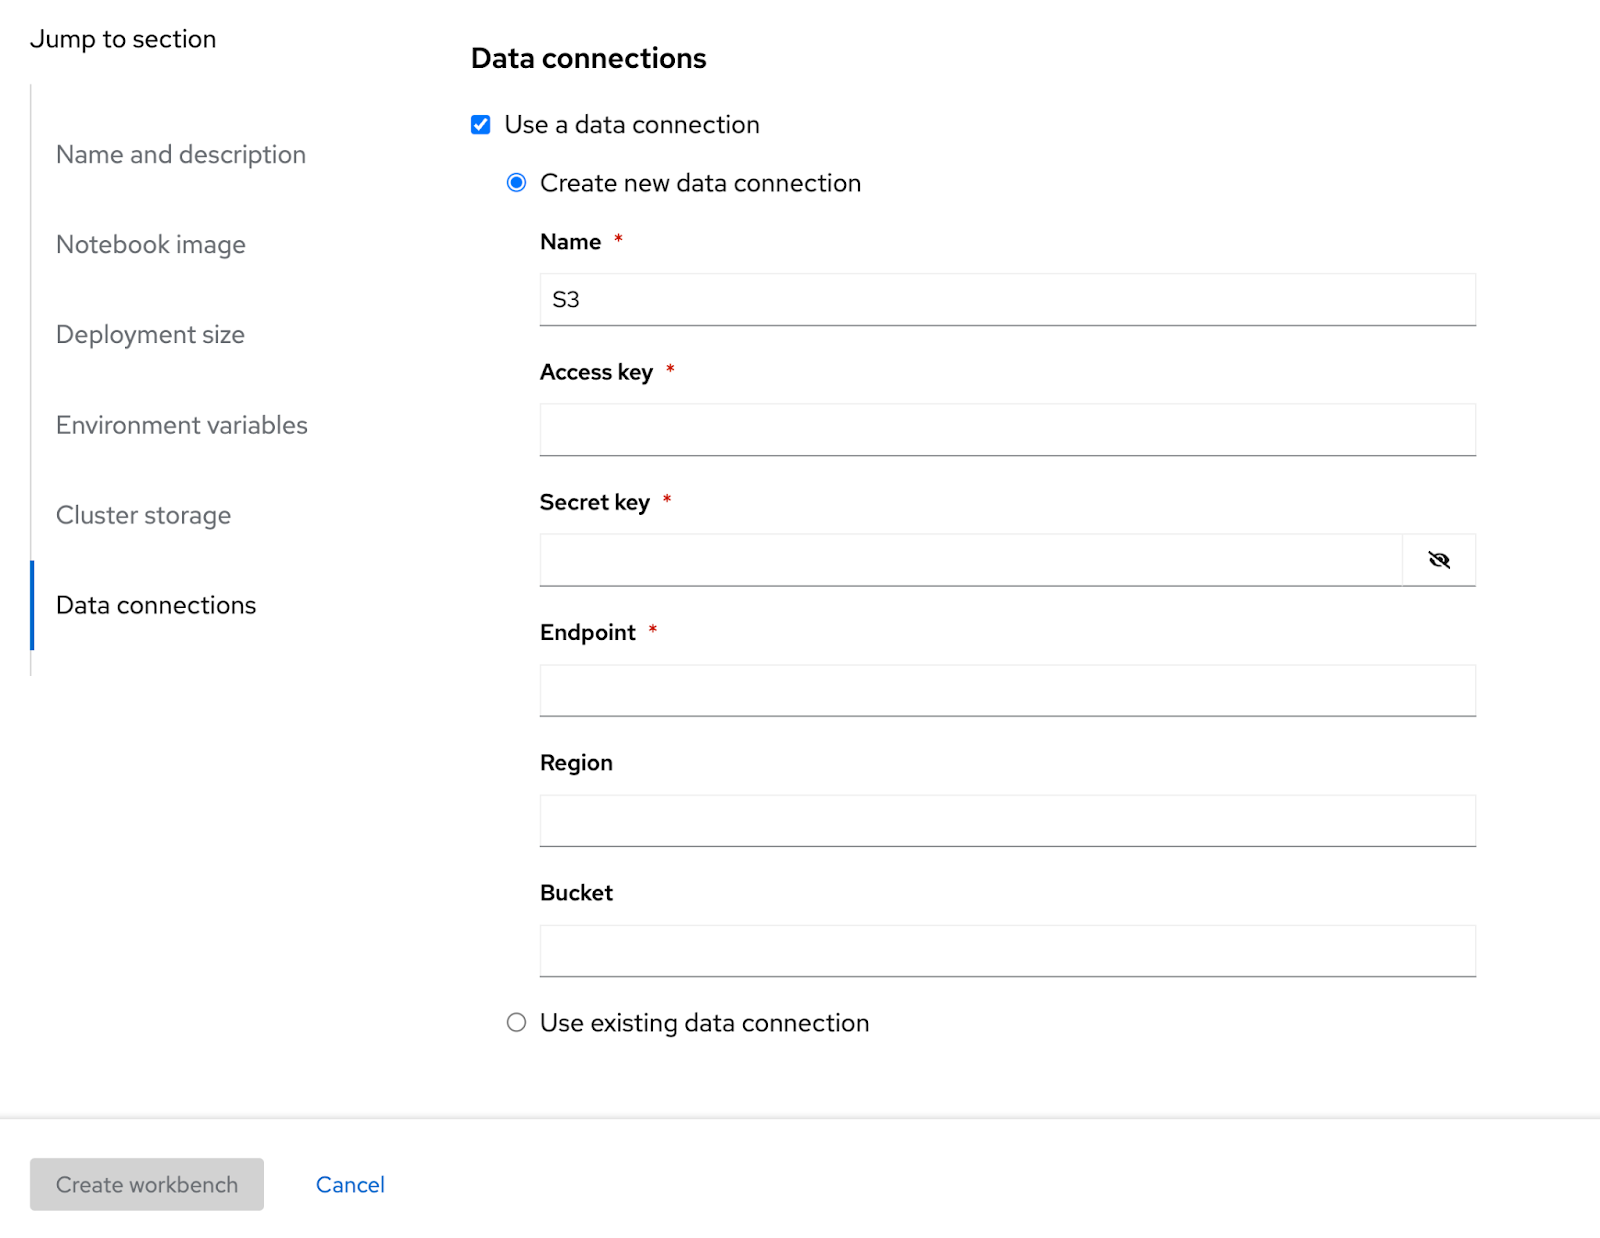
You can reuse an existing data connection, if you already have one configured for S3.
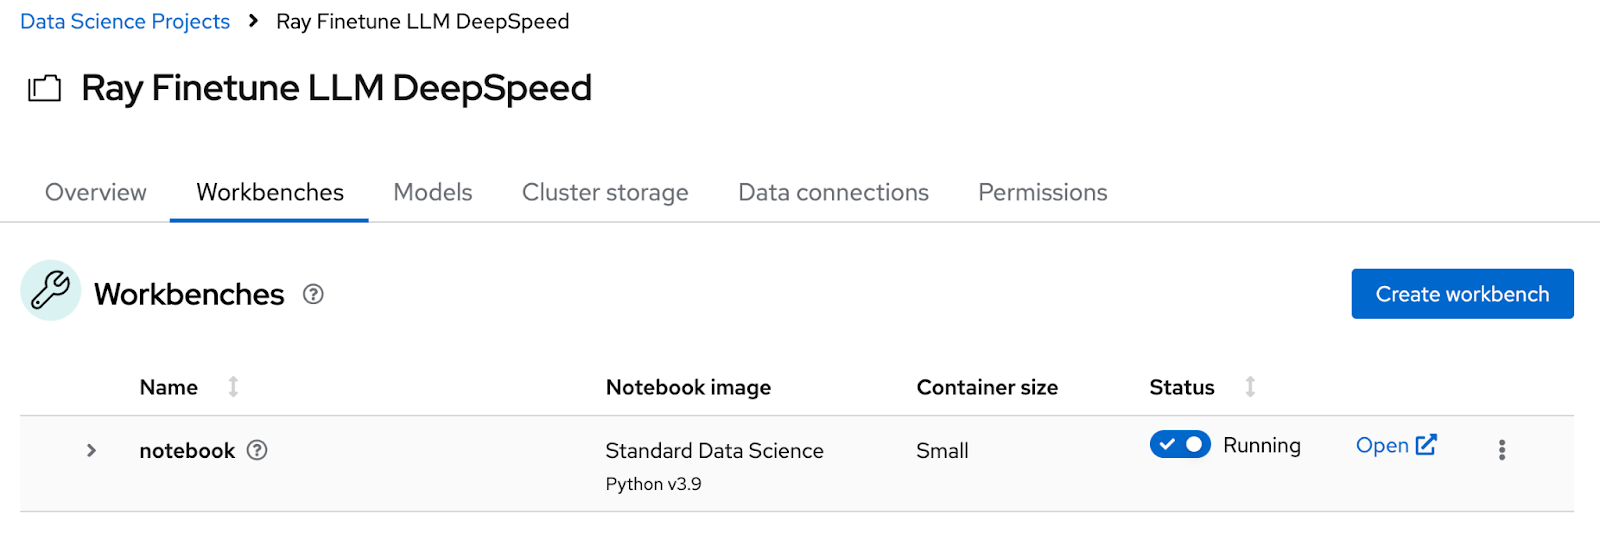
Click the Create workbench button to provision your notebook environment. Once it’s ready, you can click the Open link to access it (Figure 5).
Fine-tuning Llama 3.1 models
Now we'll walk through fine-tuning the models.
Clone the supervised fine-tuning (SFT) example
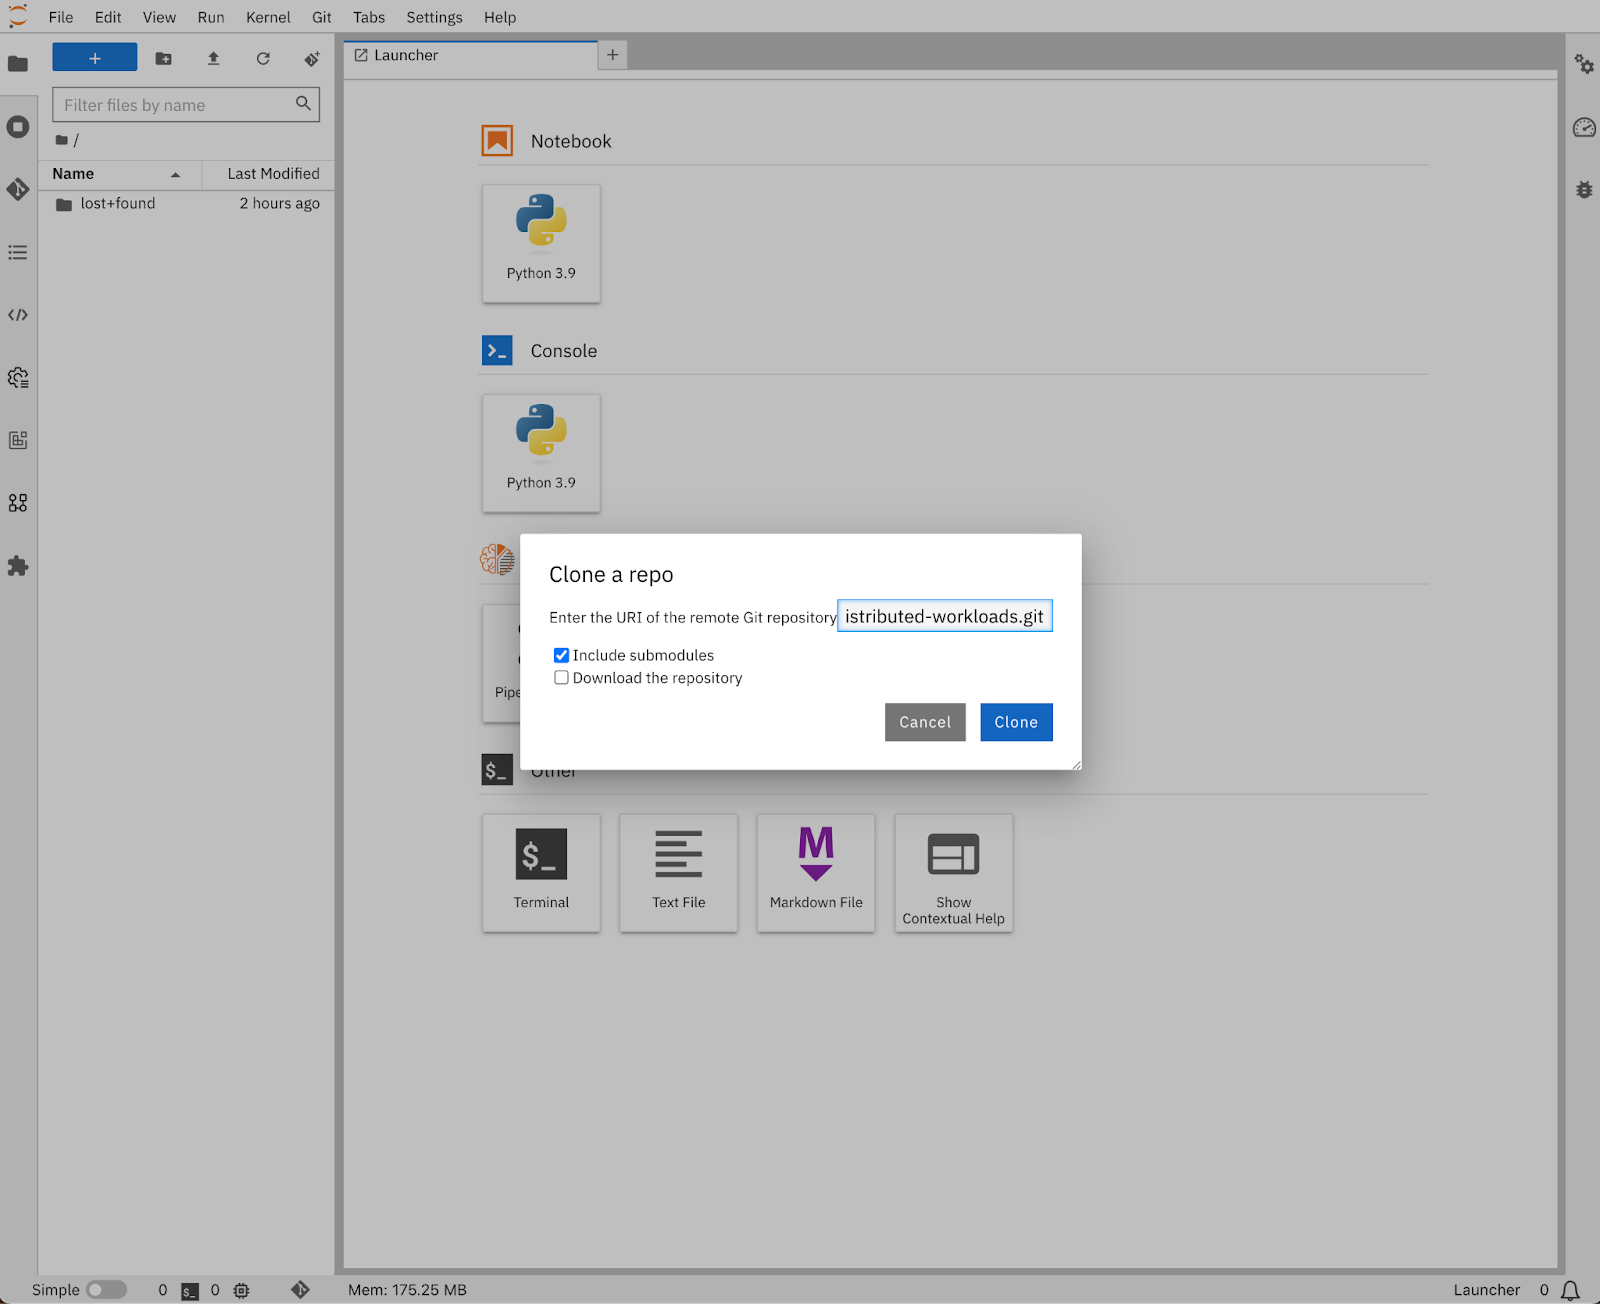
Now that you’ve accessed your Jupyter notebook server, you can clone the Fine-tune Llama models with Ray and DeepSpeed on OpenShift AI example. To do this, click the Git icon on the left column of the dashboard, paste the https://github.com/opendatahub-io/distributed-workloads URI into the text box, and then click the Clone button (Figure 6).
Alternatively, from the launcher, you can open a terminal and run the following command:
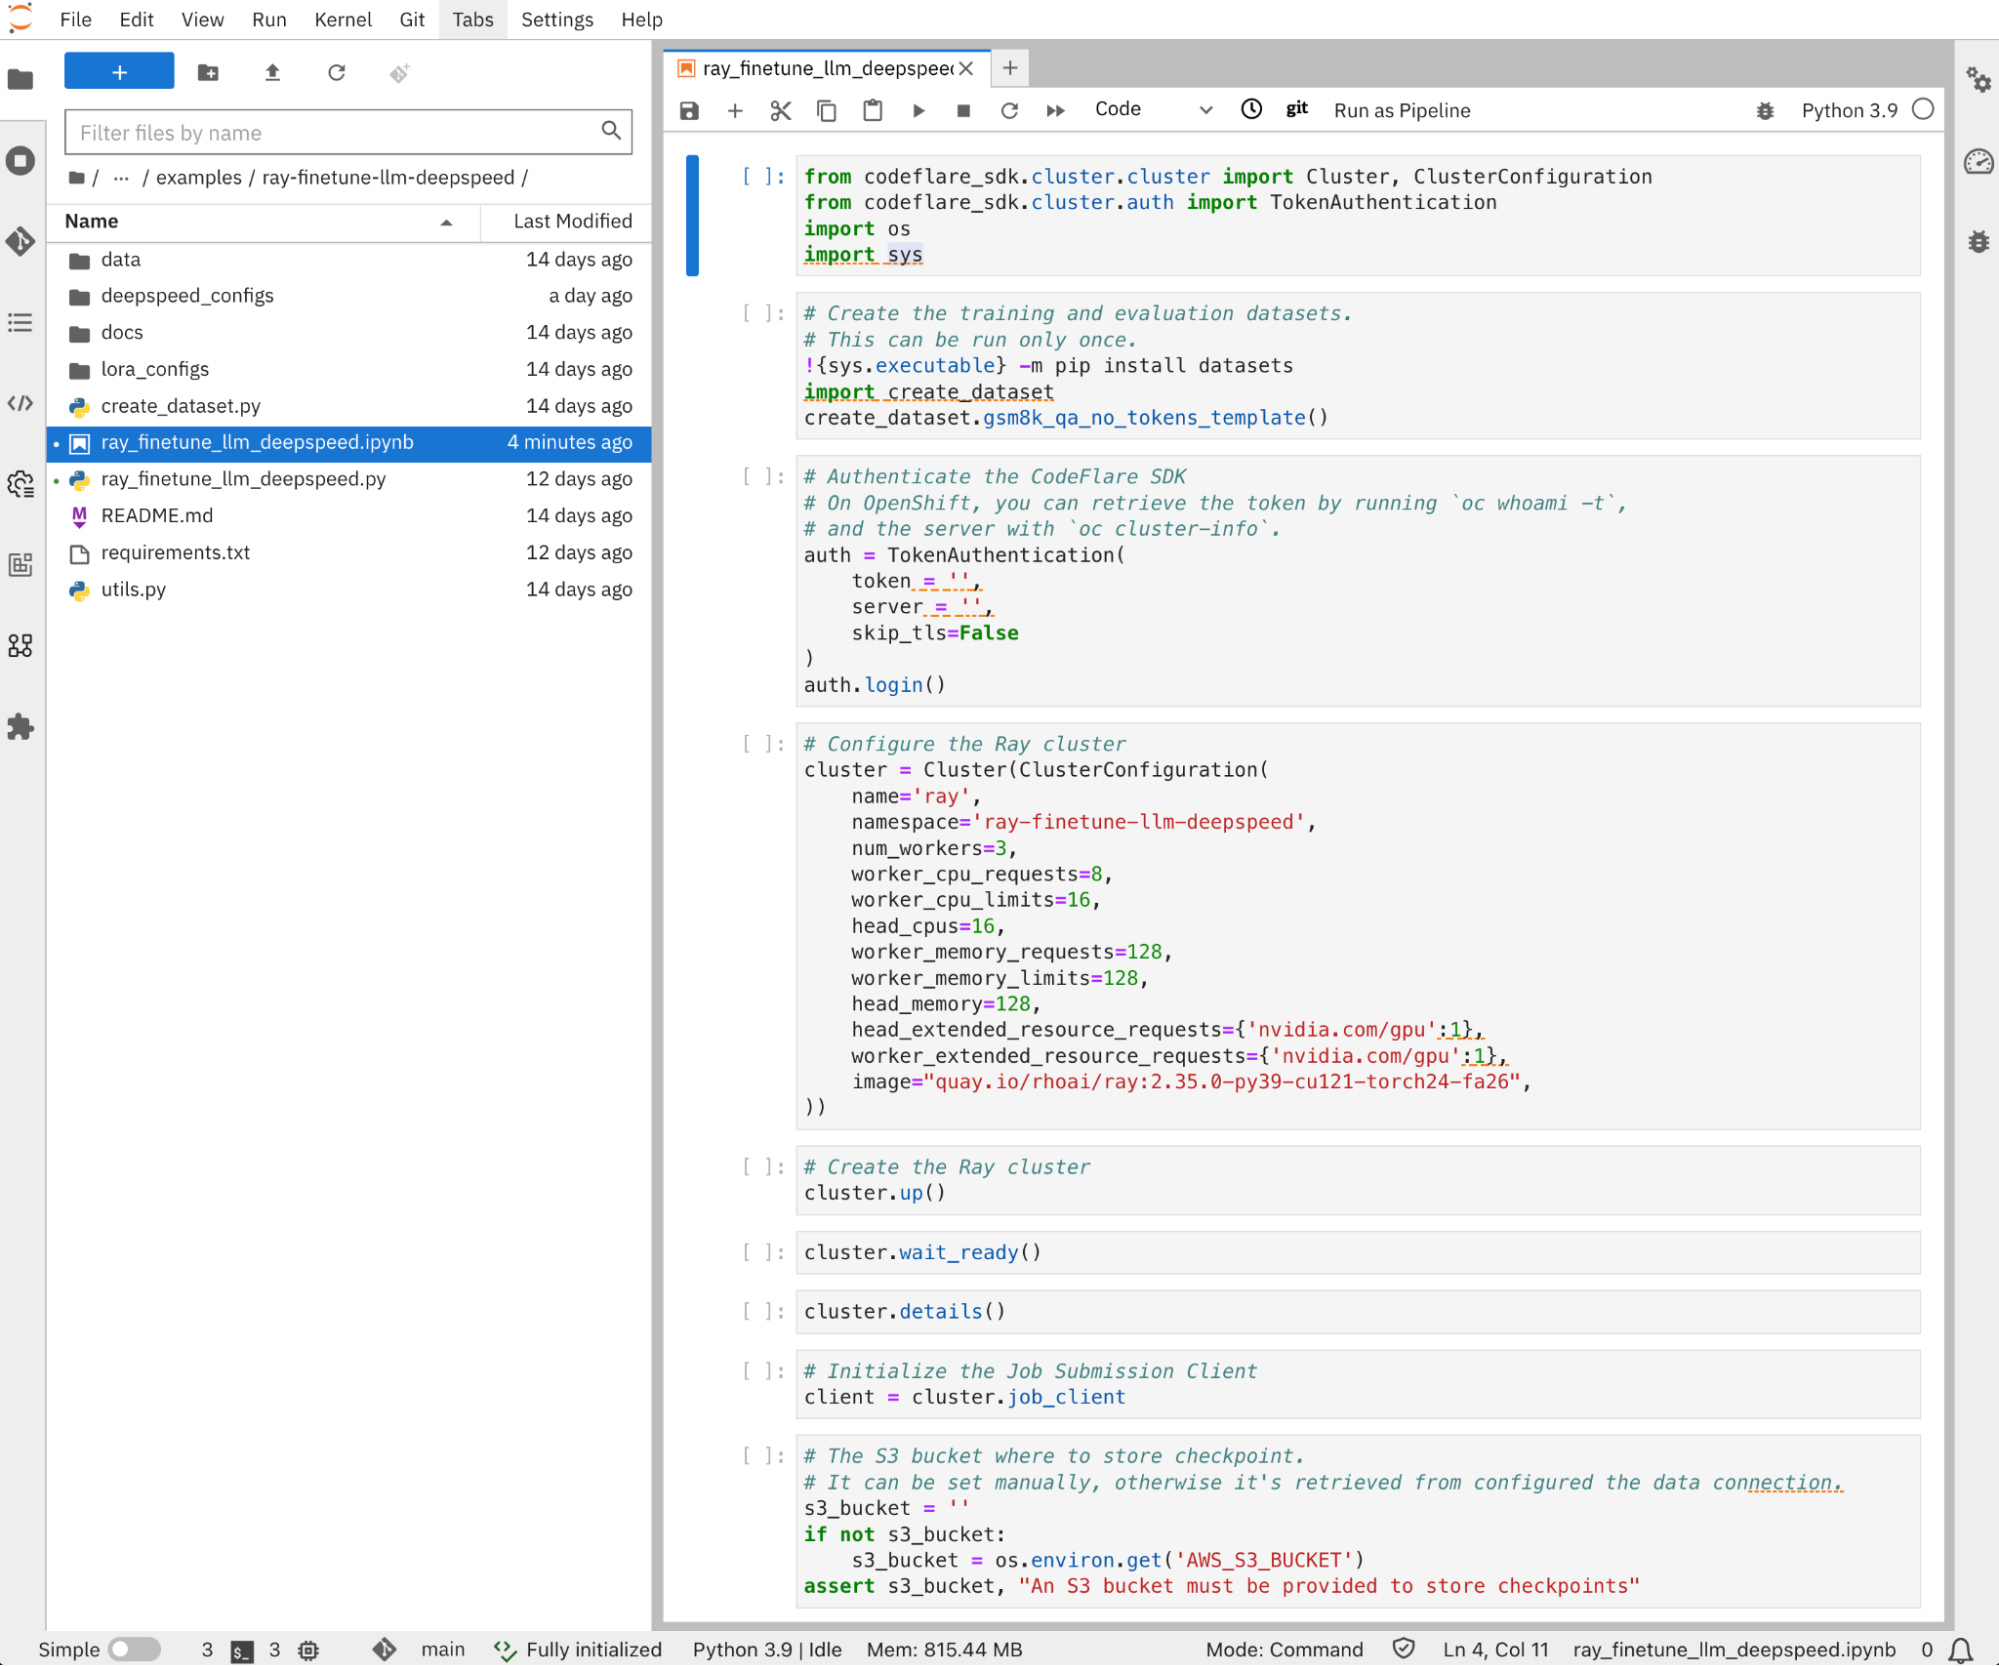
git clone https://github.com/opendatahub-io/distributed-workloadsYou can now navigate to the distributed-workloads/examples/ray-finetune-llm-deepspeed directory, and open the ray_finetune_llm_deepspeed notebook (Figure 7).
Prepare the dataset
This example uses the Hugging Face Transformers library to load the Llama 3.1 models.
The dataset providing the domain knowledge that’ll be used to perform the supervised fine-tuning needs to be prepared in a certain format. The pre-trained Llama 3.1 models do not impose any specific prompt format, so the template used for the dataset preprocessing can follow any prompt-completion style. The instruction-tuned models (Meta-Llama-3.1-{8,70,405}B-Instruct) use a multi-turn conversation prompt format that structures the conversation between the users and the models.
By default, this example relies on the chat template that’s provided by the model tokenizer's configuration file (the chat_template field from the tokenizer_config.json file). See the following simplified example of the multi-turn conversion template that’s configured for the instruction-tuned models (without the tool-calling elements):
<|begin_of_text|><|start_header_id|>system<|end_header_id|>

{{ system_prompt }}<|eot_id|><|start_header_id|>user<|end_header_id|>

{{ user_message_1 }}<|eot_id|><|start_header_id|>assistant<|end_header_id|>
You can prepare your dataset by executing the following cell once:
# Create the training and evaluation datasets.
# This can be run only once.
!{sys.executable} -m pip install datasets
import create_dataset
create_dataset.gsm8k_qa_no_tokens_template()
This example is configured by default to fine-tune the Llama 3.1 8B pre-trained model on the GSM8K dataset, using a simple Q&A style template. You can change it to rely on the default chat template provided by the model tokenizers, and by calling the gsm8k_hf_chat_template function instead for preparing the dataset, in case you want to fine-tune the instruct models.
You can also adapt the create_dataset.py script to your needs, for example, by using another dataset from the Hugging Face Hub, or even better, by bringing your own private dataset!
Logging in
In this example, the CodeFlare SDK is used to create the RayCluster resource that KubeRay uses as the configuration for creating the Ray cluster pods. For the SDK to authenticate to the OpenShift API server, and be granted the permission to create that RayCluster resource, you need to provide a bearer token in the following cell of the notebook before executing it:
auth = TokenAuthentication(
    token = '<API_SERVER_BEARER_TOKEN>',
    server = '<API_SERVER_ADDRESS>',
    skip_tls=False,
)
auth.login()
You can retrieve this bearer token and the server address by selecting Copy login command from the drop-down menu located in the top right corner of the OpenShift web console (Figure 8).

Create the Ray cluster
Before creating the Ray cluster, make sure to review its configuration and adapt it to your environment and available compute resources. Create the cluster by executing the following cells:
# Configure the Ray cluster
cluster = Cluster(ClusterConfiguration(
    name='ray',
    num_workers=7,
    worker_cpu_requests=16,
    worker_cpu_limits=16,
    head_cpu_requests=16,
    head_cpu_limits=16,
    worker_memory_requests=128,
    worker_memory_limits=256,
    head_memory_requests=128,
    head_memory_limits=128,
    # Use the following parameters with NVIDIA GPUs
    image="quay.io/rhoai/ray:2.35.0-py39-cu121-torch24-fa26",
    head_extended_resource_requests={'nvidia.com/gpu':1},
    worker_extended_resource_requests={'nvidia.com/gpu':1},
))

# Create the Ray cluster
cluster.up()
You can also execute the following cells to make sure that the Ray cluster is ready before running the fine-tuning job:
cluster.wait_ready()
You can run the following cell to display the cluster details:
cluster.details()
                        🚀 CodeFlare Cluster Details 🚀

 ╭───────────────────────────────────────────────────────────────────────────╮
 │   Name                                                                    │
 │   ray                                                          Active ✅  │
 │                                                                           │
 │   URI: ray://ray-head-svc.ray-finetune-llm-deepspeed.svc:10001            │
 │                                                                           │
 │   Dashboard🔗                                                             │
 │                                                                           │
 │                       Cluster Resources                                   │
 │   ╭── Workers ──╮  ╭───────── Worker specs(each) ─────────╮               │
 │   │  # Workers  │  │  Memory      CPU         GPU         │               │
 │   │             │  │                                      │               │
 │   │  7          │  │  128G~256G   16          1           │               │
 │   │             │  │                                      │               │
 │   ╰─────────────╯  ╰──────────────────────────────────────╯               │
 ╰───────────────────────────────────────────────────────────────────────────╯
This displays the Ray cluster dashboard link, which you can click to access the cluster web console.
Run the fine-tuning job
You’re almost ready to submit the fine-tuning job. Adjust the job configuration according to your environment, and then execute the following cell:
submission_id = client.submit_job(
    entrypoint="python ray_finetune_llm_deepspeed.py "
               "--model-name=meta-llama/Meta-Llama-3.1-8B "
               "--lora "
               "--num-devices=8 "
               "--num-epochs=5 "
               "--ds-config=deepspeed_configs/zero_3_offload_optim_param.json "
               f"--storage-path=s3://{s3_bucket}/ray_finetune_llm_deepspeed/ "
               "--batch-size-per-device=32 "
               "--eval-batch-size-per-device=32 ",
    runtime_env={
        "env_vars": {
            'AWS_ACCESS_KEY_ID': os.environ.get('AWS_ACCESS_KEY_ID'),
            'AWS_SECRET_ACCESS_KEY': os.environ.get('AWS_SECRET_ACCESS_KEY'),
            'AWS_DEFAULT_REGION': os.environ.get('AWS_DEFAULT_REGION')
        },
        'pip': 'requirements.txt',
        'working_dir': './',
        "excludes": ["/docs/", "*.ipynb", "*.md"]
    },
)
This uses LoRA (Low-Rank Adaptation) by default. LoRA is configured in the lora_configs/lora.json file, and you can update it to experiment with different parameters:
{
    "r": 8,
    "lora_alpha": 16,
    "lora_dropout": 0.05,
    "target_modules": ["q_proj", "v_proj", "k_proj", "o_proj", "gate_proj", "up_proj", "down_proj", "embed_tokens", "lm_head"],
    "task_type": "CAUSAL_LM",
    "modules_to_save": [],
    "bias": "none",
    "fan_in_fan_out": false,
    "init_lora_weights": true
}
LoRA makes fine-tuning more resource efficient. For more information about the different LoRA parameters, see the Hugging Face PEFT library documentation.
You can also disable LoRA to perform full fine-tuning instead, although this significantly increases the number of trainable parameters. For example, the default configuration yields 23 million trainable parameters for Llama 3.1 8B models, which represents less than 0.3% of the total trainable parameters when performing full fine-tuning.
To go even further into tuning hyper-parameters, you can change the default configuration for DeepSpeed in the deepspeed_configs directory.
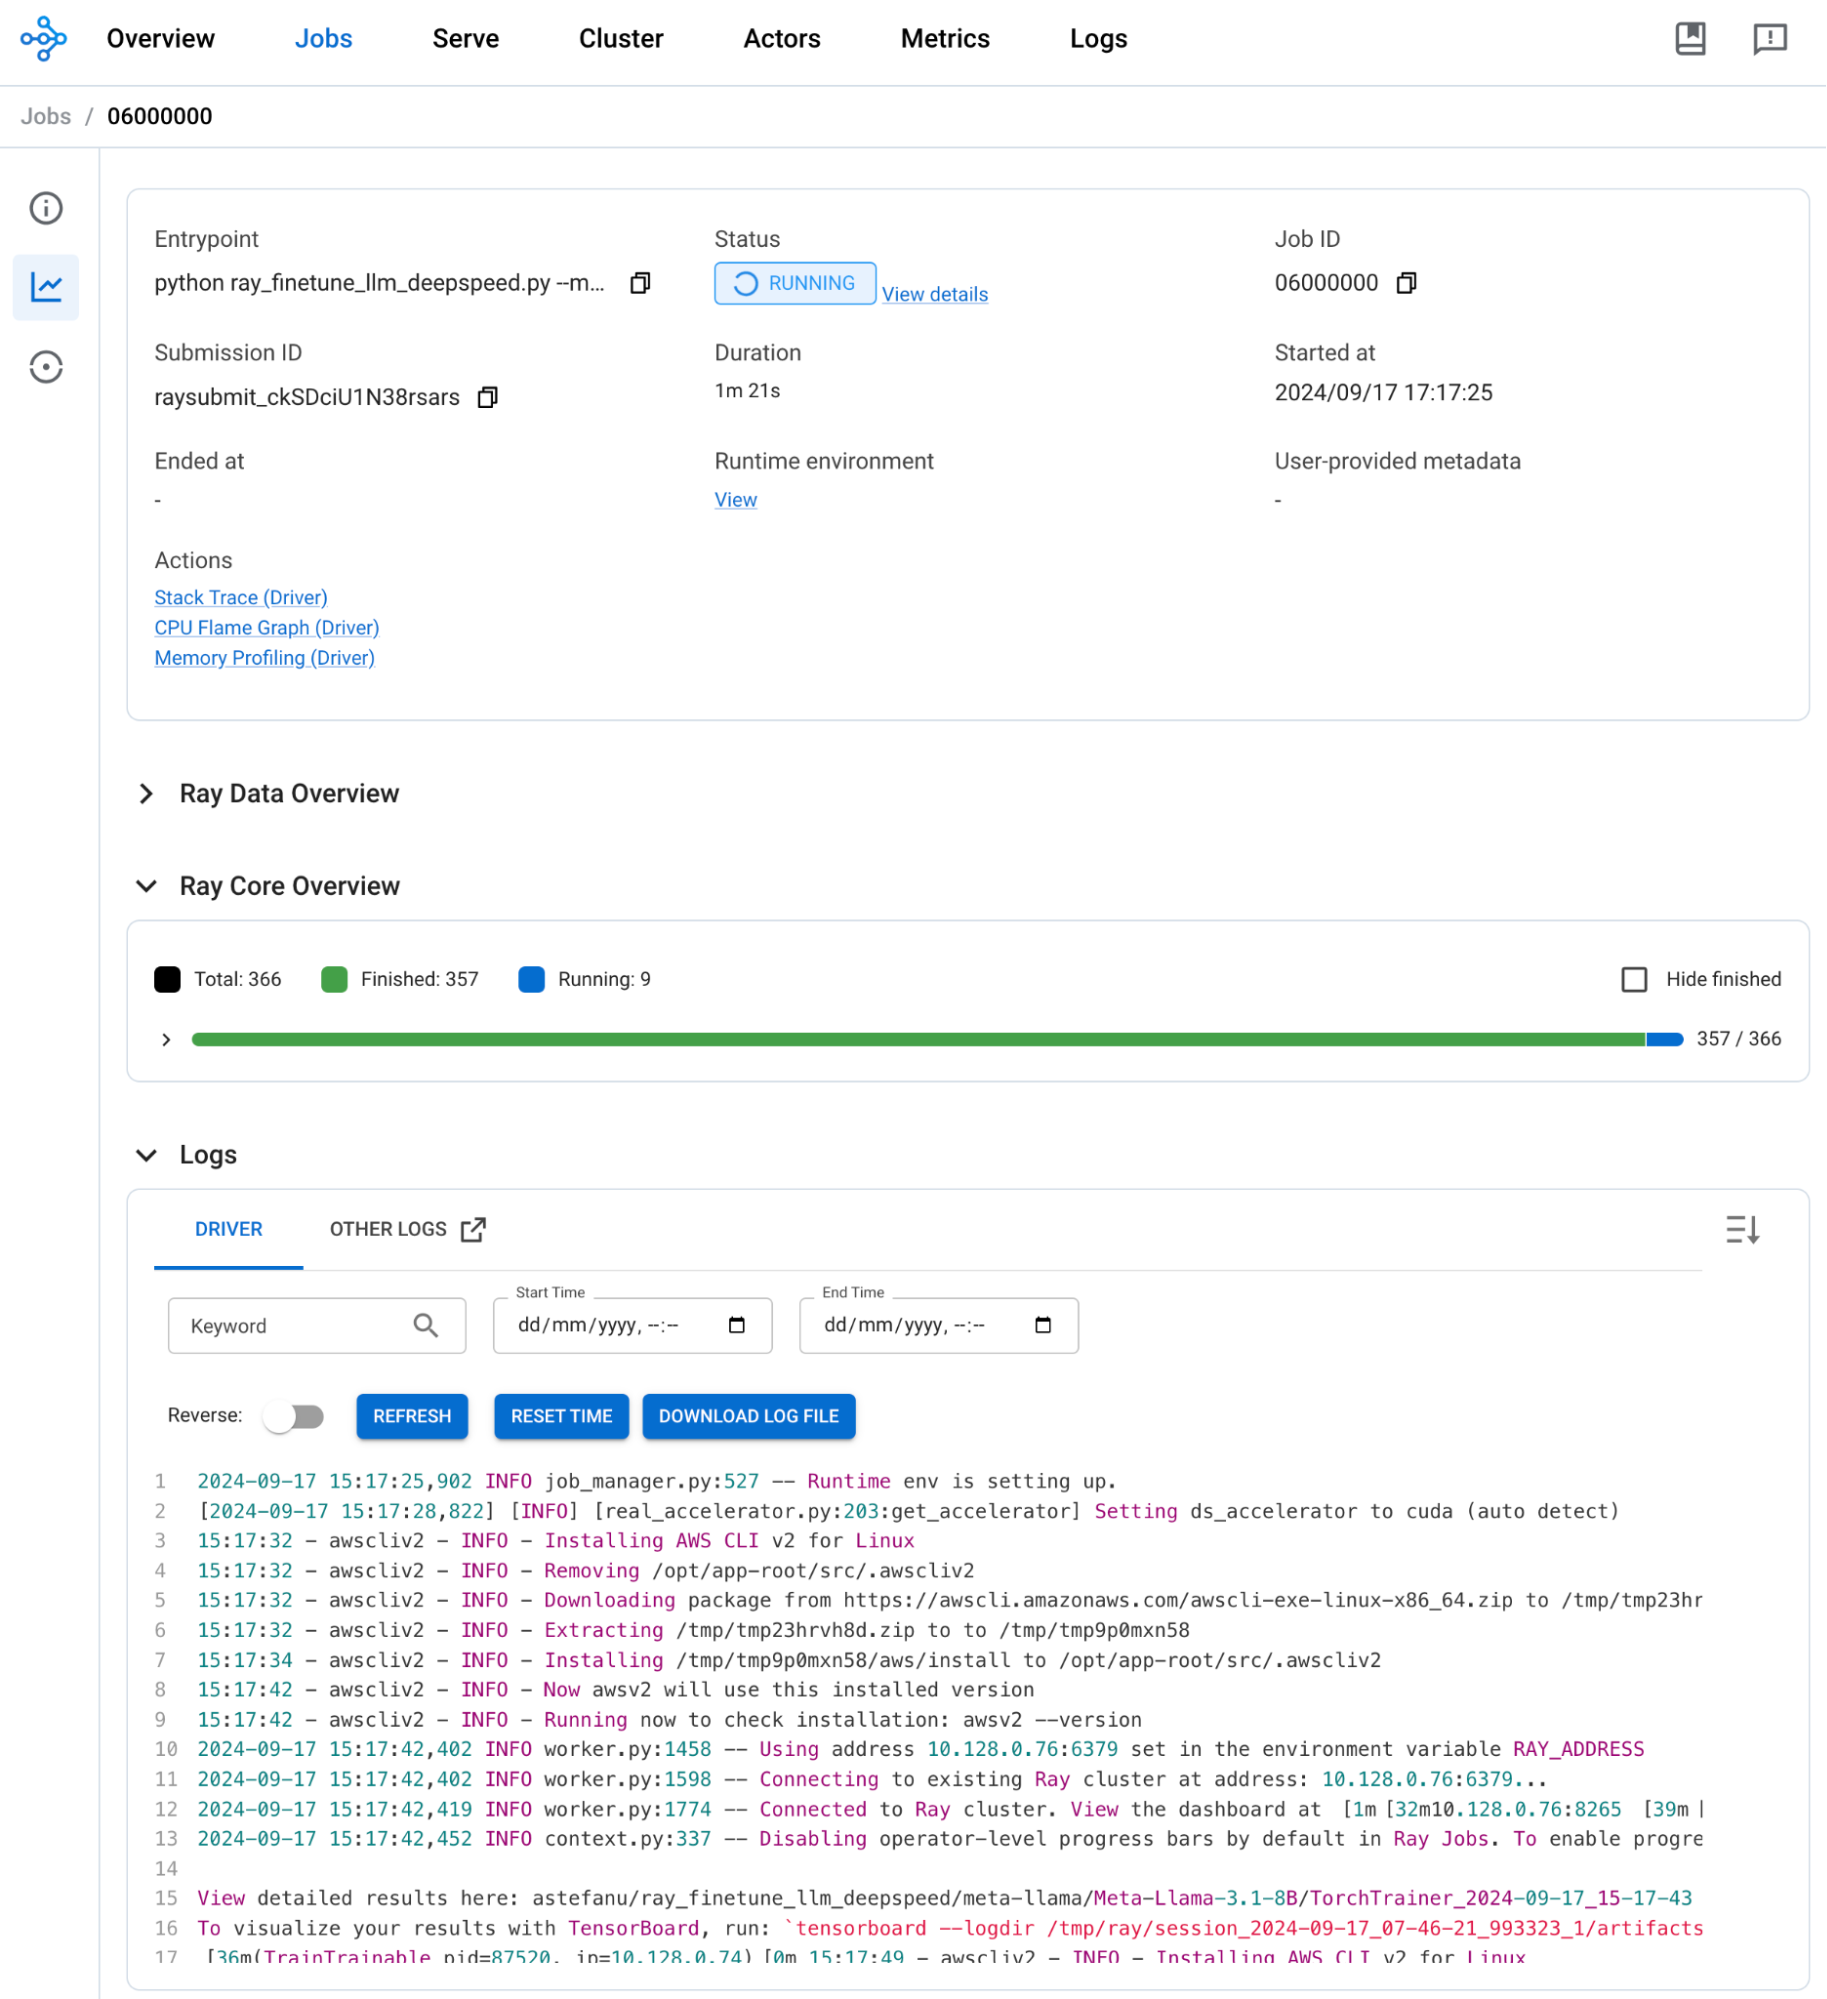
After you submit the job, you can access the Ray dashboard and monitor its progress, as shown in Figure 9.
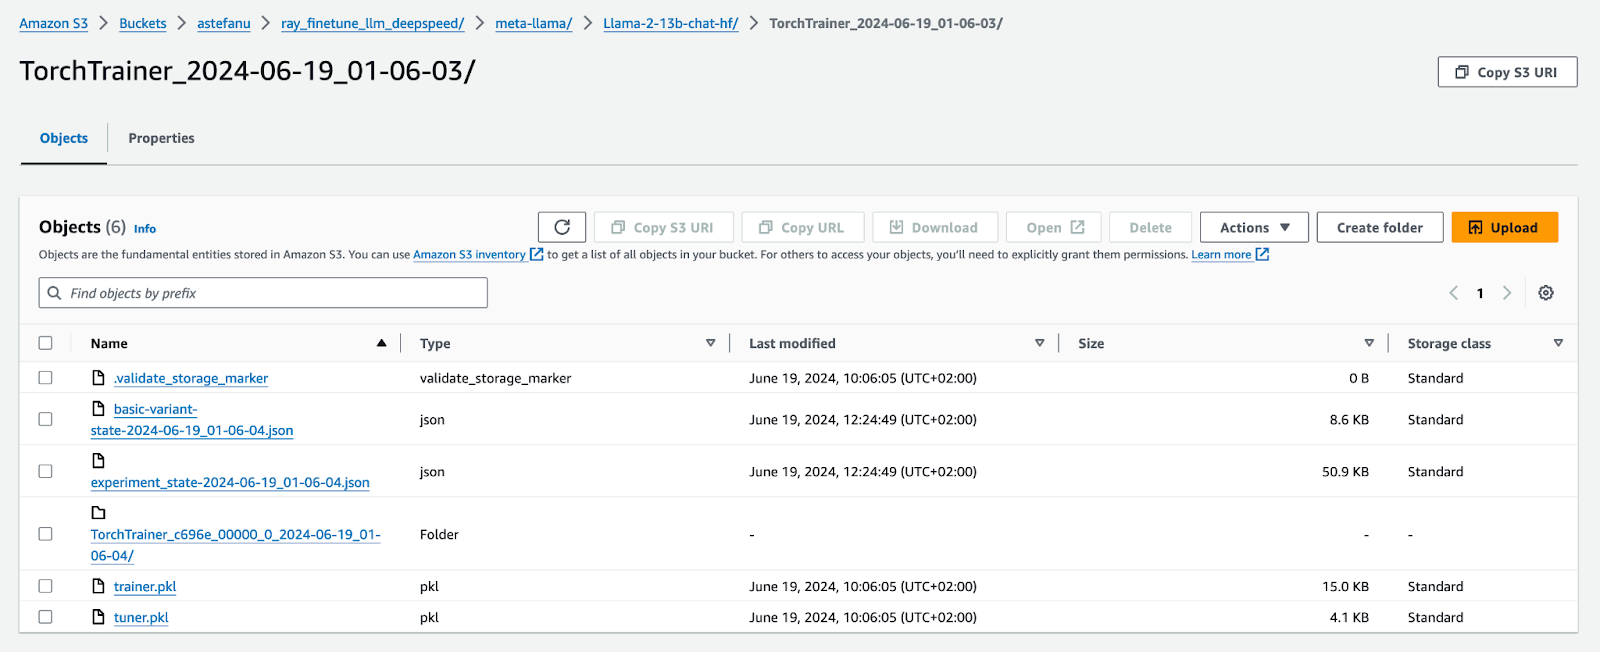
By default, a checkpoint is saved at the end of each epoch and uploaded in the configured S3 bucket (Figure 10).
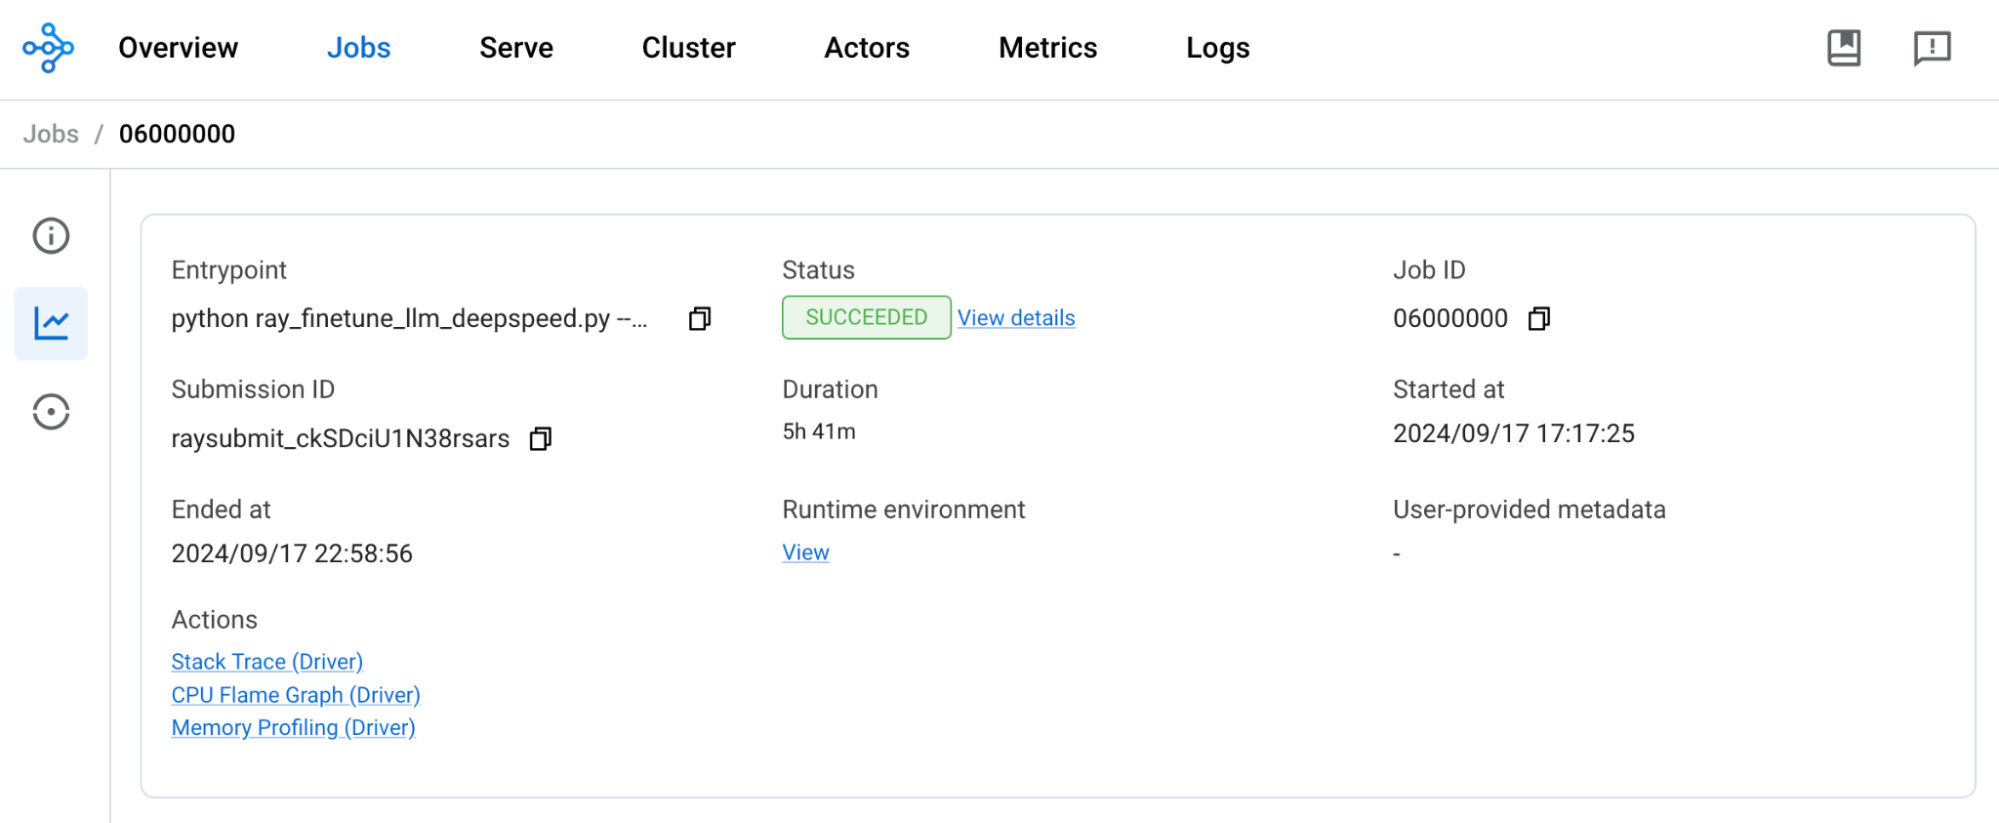
Depending on your configuration, the fine-tuning will eventually complete. Figure 11 shows a snapshot that was taken after the fine-tuning of pre-trained Llama 3.1 8B model with LoRA, a batch size of 8, and a context length of 512, over 5 epochs using 8x NVIDIA A10 GPUs on OpenShift AI 2.12 successfully completed after about 6 hours.
Experimenting with TensorBoard
In the early days of what is now called deep learning, some considered it foolish to apply gradient-based optimization despite the non-linearity of neural networks, leading to non-convex loss functions, with no guarantee that the iterative learning procedure would converge towards their global minima.
In retrospect, this hasn’t proven to be a fundamental issue. In practice, though, it’s useful to be able to monitor whether the learning is converging or not. Nobody likes to waste very expensive resources such as high-end GPU cycles for nothing and realize it only many hours or even days after.
A learning process that’s iterative and controlled by numerous hyperparameters offers a way to shorten the feedback loop and speed up the trial-and-error cycle.
You can easily set up TensorBoard, a popular visualization tool, along with Ray. Ray automatically exports training metrics such as evaluation loss and perplexity out-of-the-box, in the format that TensorBoard expects.
From your local machine, open a terminal and run the following commands:
Install TensorBoard in the Ray head node:
kubectl exec `kubectl get pod -l ray.io/node-type=head -o name` -- pip install tensorboardStart TensorBoard:
kubectl exec `kubectl get pod -l ray.io/node-type=head -o name` -- tensorboard --logdir /tmp/ray --bind_all --port 6006Port forward the TensorBoard UI on your local machine:
kubectl port-forward `kubectl get pod -l ray.io/node-type=head -o name` 6006:6006You need to be granted permissions to execute commands into pods to be able to perform the above steps.
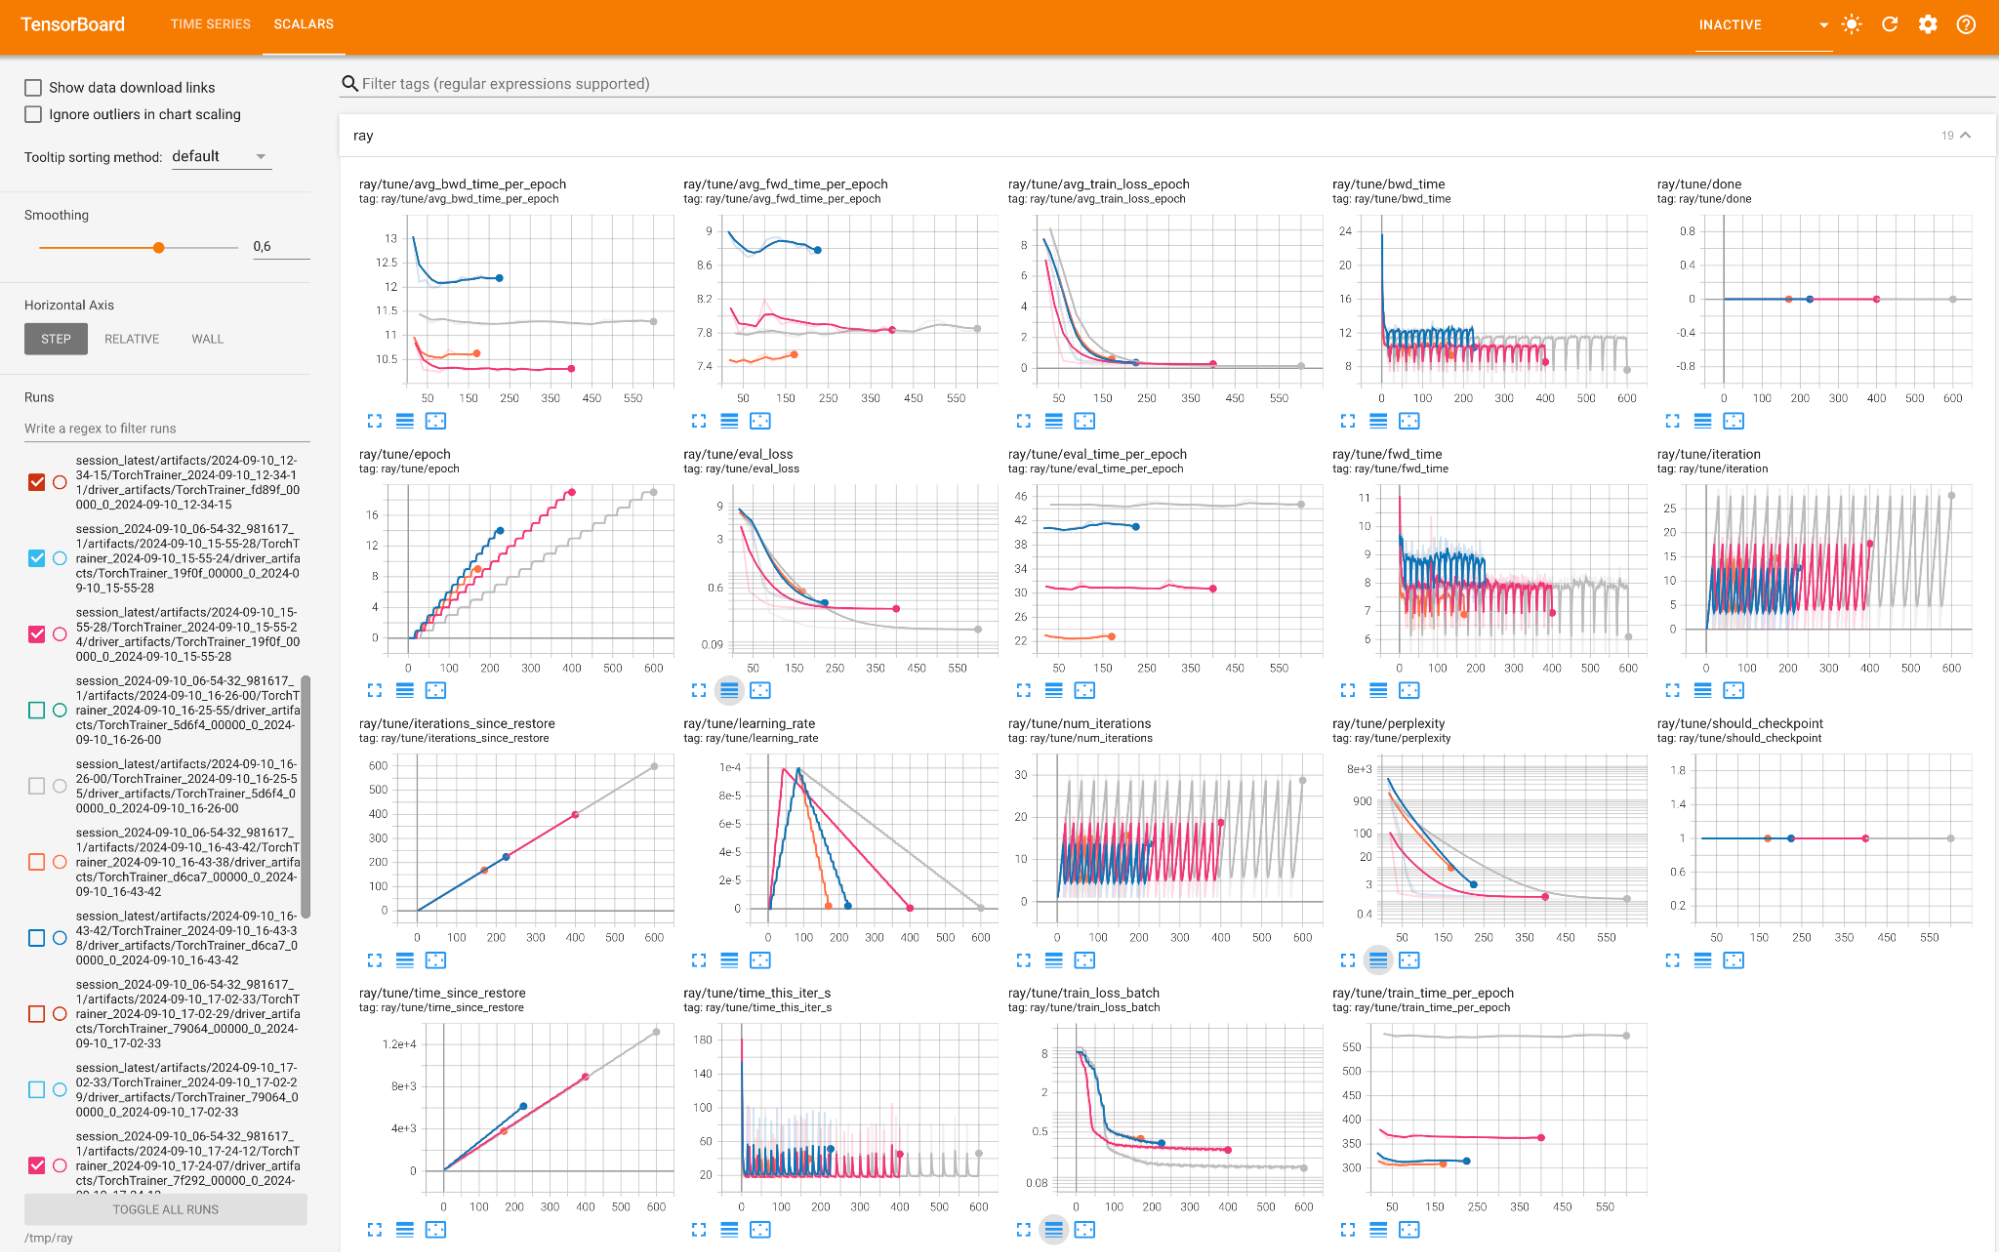
You can then access TensorBoard from your web browser at http://localhost:6006, compare different experimentations simultaneously, and understand how different hyper-parameters affect the learning.
Figure 12 compares the training metrics for a selection of fine-tuning jobs, with different values for hyperparameters like batch size, context length, and gradient accumulation, and how these variations affect the convergence of the learning process. For example, training loss, evaluation loss, epoch and duration.
TensorBoard is not a part of OpenShift AI and is not officially supported by Red Hat.
Conclusion
This article walked you through applying supervised fine-tuning to Llama 3.1 models using Ray on OpenShift AI.
We ran a number of experiments ourselves for the preparation of this article, using NVIDIA GPUs like A10 GPUs during the development phase, fine-tuning the 8B parameters models, and A100 40GB GPUs during the validation phase, with the 70B parameters models.
In the next post in this series, you’ll find out about our work to support the latest generation of AMD GPUs for fine-tuning on OpenShift AI, and the exciting opportunities ahead of us all along the way to unlock the potential of generative AI. Read it here: How AMD GPUs accelerate model training and tuning with OpenShift AI
Visit the OpenShift AI product page to learn more. You can also check out the AI on OpenShift site for reusable patterns and recipes.
Last updated: October 18, 2024