Stable Diffusion is an AI model to generate images from text description. It uses a diffusion process to iteratively de-noise random Gaussian noise into coherent images. This is a simple tutorial for creating images using Stable Diffusion model using Red Hat OpenShift AI (RHOAI) (formerly Red Hat OpenShift Data Science), which is our OpenShift platform for AI/ML projects lifecycle management, running on a Red Hat OpenShift Services on AWS (ROSA) cluster, which is our managed service OpenShift platform on AWS, with NVIDIA GPU enabled.
What you'll be doing
Once we logged in to the cluster as cluster admin, we will first set up the GPU environment by first creating the machine pools and installing Node Feature Discovery (NFD) operator, which will detect hardware and system configuration of the nodes. We will then create NFD instance to automatically label nodes which is important for GPU-aware scheduling. Then, we will install the NVIDIA GPU operator, which will handle the management of all NVIDIA software components needed to provision GPU-enabled containers, and we’ll wrap up the GPU setup by creating ClusterPolicy and fine-tuning the configuration to ensure proper setup for NVIDIA GPUs in the OpenShift environment.
Afterward, we will set up the RHOAI environment by installing the RHOAI operator, which automates management of AI/ML tools and services on OpenShift, creating a DataScienceCluster (DSC) instance to set up the necessary services and tools for AI/ML tasks, and we will also enable GPU accelerator for RHOAI. And finally, we will generate images by running the Stable Diffusion model on RHOAI's Jupyter notebook.
Note that the installation process in this tutorial is all completed through the CLI, so please make sure that you are logged in to the cluster with a cluster admin access prior to running the tutorial. If you prefer to install the RHOAI operator via console and/or save the models/images on Amazon S3 buckets, you can follow the other tutorial. If you do so, however, please be sure to enable the GPU accelerator prior to launching the Jupyter notebook. In addition, the RHOAI operator version used in this tutorial is version 2.10.0 and please note that as RHOAI undergoes ongoing development and refinement, certain features may evolve or change over time.
Disclaimer
When using Stable Diffusion or other open source image generation models, please be aware that while these tools include certain content filters and safety features, these are not foolproof. Therefore, it is your responsibility to use this tool in a safe manner, ensure the prompts you input are appropriate, and verify that the generated images are suitable for your intended audience. Neither the author of this tutorial nor the infrastructure providers can be held responsible for any inappropriate or unwanted results you may generate. By proceeding with this tutorial, you acknowledge that you understand the potential risks and agree to use the tool responsibly. Remember that the output of AI image generation models can sometimes be unpredictable and thus it is important to review all the generated images before sharing or using them in any context.
1. Prerequisites
- Classic or HCP (hosted control planes) ROSA cluster.
- Classic: I ran this tutorial on a classic single-AZ ROSA 4.15.17 cluster with
m6a.4xlargenode with auto-scaling enabled up to 10 nodes. The cluster has 80 vCPUs with ~339Gi memory. - HCP: I also ran this tutorial on an HCP ROSA 4.16.3 cluster with
m5.xlargenode with 28 vCPUs and ~108Gi memory. - Either classic or HCP, be sure that you have cluster admin access to the cluster.
- Classic: I ran this tutorial on a classic single-AZ ROSA 4.15.17 cluster with
oc cli.rosa cli.
2. Setting up GPU environment
To begin, let's set up the GPU environment.
2.1 Creating GPU machine pools
In this tutorial, I'm using g5.4xlarge node for the GPU machine pools with auto-scaling enabled up to 4 nodes. Replace your-cluster-name with the name of your cluster:
rosa create machinepool --cluster=<your-cluster-name> --name=gpu-pool --instance-type=g5.4xlarge --min-replicas=1 --max-replicas=4 --enable-autoscaling --labels='gpu-node=true' --taints='nvidia.com/gpu=present:NoSchedule'2.2 Installing NFD operator
Next, run the below script to install the NFD operator:
# create the openshift-nfd namespace
oc create namespace openshift-nfd

# apply the OperatorGroup and Subscription
cat <<EOF | oc apply -f -
apiVersion: operators.coreos.com/v1
kind: OperatorGroup
metadata:
  generateName: openshift-nfd-
  name: openshift-nfd
  namespace: openshift-nfd
spec:
  targetNamespaces:
  - openshift-nfd
---
apiVersion: operators.coreos.com/v1alpha1
kind: Subscription
metadata:
  name: nfd
  namespace: openshift-nfd
spec:
  channel: "stable"
  installPlanApproval: Automatic
  name: nfd
  source: redhat-operators
  sourceNamespace: openshift-marketplace
EOF

echo "Waiting for NFD Operator to be deployed..."

# wait for the NFD Operator deployment to be available
while ! oc get deployment -n openshift-nfd | grep -q nfd-controller-manager; do
  sleep 5
done

# wait for the deployment to be ready
oc wait --for=condition=available --timeout=300s deployment/nfd-controller-manager -n openshift-nfd

# check if the deployment is ready
if [ $? -eq 0 ]; then
  echo "NFD Operator is deployed and ready."
else
  echo "Timeout waiting for NFD Operator to be ready. Please check the deployment status manually."
fi

# display the pods in the openshift-nfd namespace
echo "Pods in openshift-nfd namespace:"
oc get pods -n openshift-nfd
2.3 Creating NFD instance
Follow the script below to create an NFD instance:
# apply the NodeFeatureDiscovery configuration
cat <<EOF | oc apply -f -
kind: NodeFeatureDiscovery
apiVersion: nfd.openshift.io/v1
metadata:
  name: nfd-instance
  namespace: openshift-nfd
spec:
  operand:
    servicePort: 12000
EOF

echo "Waiting for NFD instance to be created..."
timeout 300 bash -c 'until oc get nodefeaturediscovery nfd-instance -n openshift-nfd &>/dev/null; do sleep 5; done'

if [ $? -eq 0 ]; then
    echo "NFD instance has been successfully created."
else
    echo "Timed out waiting for NFD instance to be created."
    exit 1
fi
2.4 Installing GPU operator
Now that we have the NFD operator installed and NFD instance created, we will now install the GPU operator:
# fetch the latest channel
CHANNEL=$(oc get packagemanifest gpu-operator-certified -n openshift-marketplace -o jsonpath='{.status.defaultChannel}')

# fetch the latest CSV
STARTINGCSV=$(oc get packagemanifests/gpu-operator-certified -n openshift-marketplace -o json | jq -r --arg CHANNEL "$CHANNEL" '.status.channels[] | select(.name == $CHANNEL) | .currentCSV')

# create namespace if it doesn't exist
oc create namespace nvidia-gpu-operator 2>/dev/null || true

# apply the OperatorGroup and Subscription
cat << EOF | oc apply -f -
apiVersion: operators.coreos.com/v1
kind: OperatorGroup
metadata:
  name: nvidia-gpu-operator-group
  namespace: nvidia-gpu-operator
spec:
 targetNamespaces:
 - nvidia-gpu-operator
---
apiVersion: operators.coreos.com/v1alpha1
kind: Subscription
metadata:
  name: gpu-operator-certified
  namespace: nvidia-gpu-operator
spec:
  channel: "${CHANNEL}"
  installPlanApproval: Automatic
  name: gpu-operator-certified
  source: certified-operators
  sourceNamespace: openshift-marketplace
EOF

# wait for the CSV to be available
echo "Waiting for ClusterServiceVersion to be available..."
while ! oc get csv -n nvidia-gpu-operator ${STARTINGCSV} &>/dev/null; do
    sleep 5
done

# apply the ClusterPolicy
oc get csv -n nvidia-gpu-operator ${STARTINGCSV} -ojsonpath='{.metadata.annotations.alm-examples}' | jq '.[0]' | oc apply -f -

echo "GPU Operator installation completed successfully."
2.5 Updating ClusterPolicy object
And next, let's update the ClusterPolicy:
# apply the ClusterPolicy for the GPU operator
cat <<EOF | oc apply -f -
apiVersion: nvidia.com/v1
kind: ClusterPolicy
metadata:
  name: gpu-cluster-policy
spec:
  operator:
    defaultRuntime: crio
  daemonsets:
    enabled: true
  dcgm:
    enabled: true
  dcgmExporter:
    enabled: true
  devicePlugin:
    enabled: true
  driver:
    enabled: true
  gfd:
    enabled: true
  migManager:
    enabled: true
  nodeStatusExporter:
    enabled: true
  toolkit:
    enabled: true
EOF

echo "Waiting for ClusterPolicy to be ready..."
if oc wait clusterpolicy/gpu-cluster-policy --for=condition=Ready --timeout=300s -n gpu-operator-resources; then
    echo "ClusterPolicy has been successfully created and is ready."
    echo "ClusterPolicy status:"
    oc get clusterpolicy -n gpu-operator-resources
else
    echo "Timed out waiting for ClusterPolicy to be ready."
    exit 1
fi
3. Setting up the OpenShift AI environment
Next, we will install the RHOAI operator.
3.1 Installing RHOAI operator
Run the following command to begin the installation:
# apply the RHOAI Operator configurations
cat << EOF | oc apply -f -
---
apiVersion: v1
kind: Namespace
metadata:
  name: redhat-ods-operator
---
apiVersion: operators.coreos.com/v1
kind: OperatorGroup
metadata:
  name: rhods-operator
  namespace: redhat-ods-operator
---
apiVersion: operators.coreos.com/v1alpha1
kind: Subscription
metadata:
  name: rhods-operator
  namespace: redhat-ods-operator
spec:
  name: rhods-operator
  channel: stable
  source: redhat-operators
  sourceNamespace: openshift-marketplace
EOF

echo "RHOAI Operator configurations applied. Waiting for the operator to be ready..."

# check if the RHOAI Operator pod is ready
check_rhoai_operator_pod() {
    local pod_status=$(oc get pods -n redhat-ods-operator -l name=rhods-operator --no-headers -o custom-columns=":status.phase")
    if [[ "$pod_status" == "Running" ]]; then
        return 0
    else
        return 1
    fi
}

# wait for RHOAI Operator pod to be ready with a timeout
timeout=600
end_time=$((SECONDS + timeout))
while ! check_rhoai_operator_pod; do
    if [ $SECONDS -ge $end_time ]; then
        echo "Timeout waiting for RHOAI Operator pod to be ready."
        break
    fi
    echo "Waiting for RHOAI Operator pod to be ready... ($(($end_time - $SECONDS))s remaining)"
    sleep 30
done

# display the RHOAI Operator pod status
echo "RHOAI Operator pod status:"
oc get pods -n redhat-ods-operator

# check the CSV (ClusterServiceVersion) status
echo "Checking RHOAI Operator CSV status:"
oc get csv -n redhat-ods-operator

# check the Subscription status
echo "Checking RHOAI Operator Subscription status:"
oc get subscription -n redhat-ods-operator rhods-operator -o jsonpath='{.status.state}{"\n"}'

# final check for operator readiness
if check_rhoai_operator_pod; then
    echo "RHOAI Operator is ready and running."
else
    echo "RHOAI Operator deployment might have issues. Please check the pod logs and events for more information."
fi
3.2 Creating DSC instance
Now let's create a DSC instance:
# apply the DataScienceCluster configuration
cat <<EOF | oc apply -f -
apiVersion: datasciencecluster.opendatahub.io/v1
kind: DataScienceCluster
metadata:
  name: default-dsc
spec:
  components:
    dashboard:
      managementState: Managed
    datasciencepipelines:
      managementState: Managed
    kserve:
      managementState: Managed
    modelmeshserving:
      managementState: Managed
    workbenches:
      managementState: Managed
EOF

echo "Waiting for DataScienceCluster to be created..."
timeout 300 bash -c 'until oc get datasciencecluster default-dsc -n redhat-ods-operator &>/dev/null; do sleep 5; done'

if [ $? -eq 0 ]; then
    echo "DataScienceCluster has been successfully created."
    echo "DataScienceCluster status:"
    oc get datasciencecluster -n redhat-ods-operator
else
    echo "Timed out waiting for DataScienceCluster to be created."
    exit 1
fi
3.3 Enabling GPU as RHOAI accelerator
Next, let's enable the GPU as the accelerator by deleting the migration-gpu-status ConfigMap:
echo "Checking for migration-gpu-status configmap..."
if oc get configmap migration-gpu-status -n redhat-ods-applications &>/dev/null; then
    echo "migration-gpu-status configmap found. Deleting..."
    oc delete configmap migration-gpu-status -n redhat-ods-applications
else
    echo "migration-gpu-status configmap not found. Continuing with dashboard restart."
fi

echo "Restarting rhods-dashboard deployment..."
oc rollout restart deployment/rhods-dashboard -n redhat-ods-applications
echo "Waiting for rhods-dashboard rollout to complete..."

oc rollout status deployment/rhods-dashboard -n redhat-ods-applications
echo "Script completed successfully. GPU acceleration should now be enabled."
echo "Please verify in the RHOAI dashboard that GPU options are available for your workbenches."
4. Deploying Stable Diffusion model
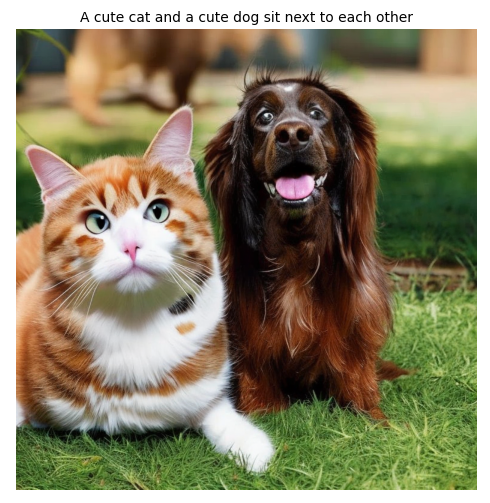
In this tutorial, we'll use the Stable Diffusion 2.1 model from Stability AI to generate images based on text prompts. We'll generate three images based on prompts about cats and dogs, using 50 inference steps and a guidance scale of 7.5. These images are then displayed vertically using matplotlib, with each image titled by its corresponding prompt.
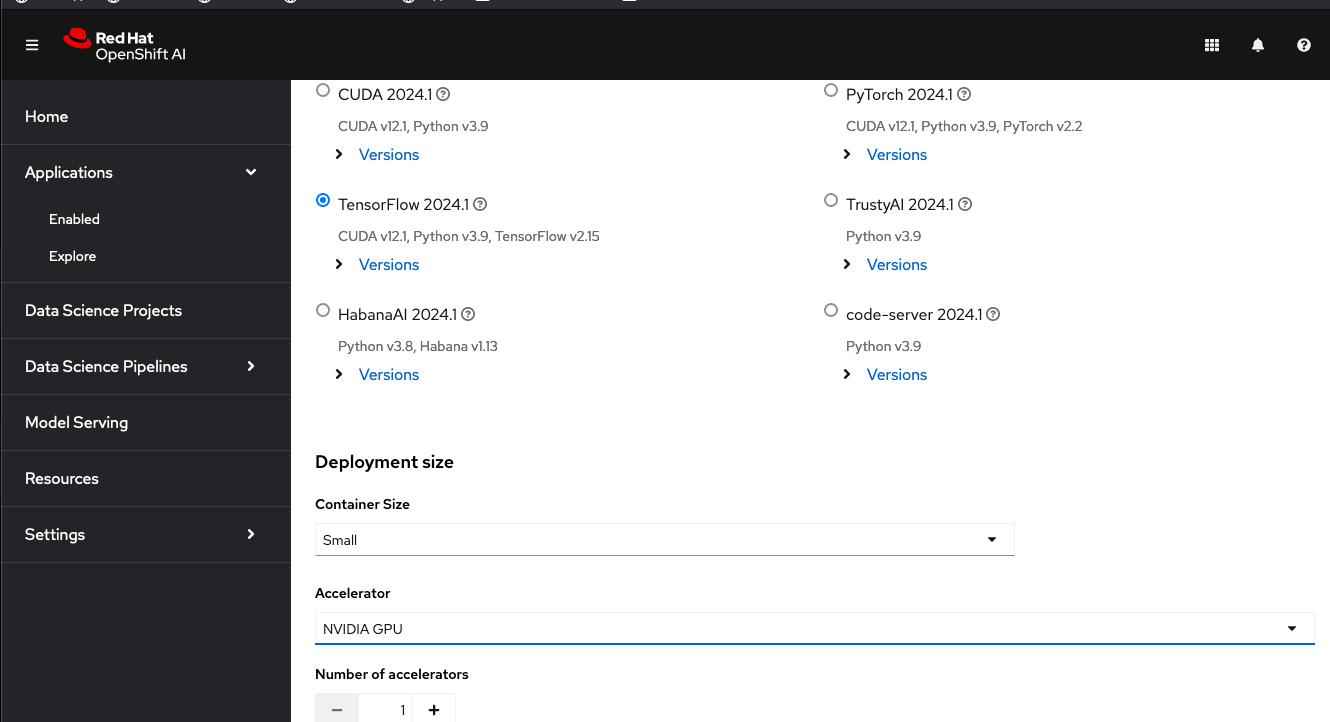
Now that we have the environment ready, let's go to the console and go to the RHOAI dashboard links (select it from the 9-box icon on the upper right side of the console). Then once you're at the RHOAI dashboard console, from the navigator pane on the left hand side, select Applications and click Enabled, which will then lead you to launch a Jupyter notebook.
Click Launch application and then select TensorFlow 2024.1 notebook. You can leave the container size to Small. Then select NVIDIA GPU as the accelerator from the dropdown option. See Figure 1.
Click the Start server button and wait until the notebook is ready, and click Open in new tab. Once you're routed to the Jupyter notebook, click Python 3.9 notebook button on top, and run the following script in a single cell:
# install the necessary dependencies and libraries
!pip install --upgrade diffusers transformers torch accelerate matplotlib datasets torchvision
import torch
from diffusers import StableDiffusionPipeline
from datasets import load_dataset
import random
from torchvision import transforms
from PIL import Image
import matplotlib.pyplot as plt
import gc
# clean up memory and reset CUDA cache
def cleanup_memory():
gc.collect()
torch.cuda.empty_cache()
if torch.cuda.is_available():
torch.cuda.reset_peak_memory_stats()
# load the Stable Diffusion model
def load_model(model_id):
pipeline = StableDiffusionPipeline.from_pretrained(model_id, torch_dtype=torch.float16)
pipeline = pipeline.to("cuda" if torch.cuda.is_available() else "cpu")
return pipeline
# generate the images
def generate_images(pipeline, prompts, num_images_per_prompt=1, num_inference_steps=50, guidance_scale=7.5):
images = []
for prompt in prompts:
batch = pipeline(
prompt,
num_images_per_prompt=num_images_per_prompt,
num_inference_steps=num_inference_steps,
guidance_scale=guidance_scale,
output_type="pil"
)
images.extend(batch.images)
cleanup_memory()
return images
# display the images
def display_images(images, prompts):
rows = len(images)
fig, axs = plt.subplots(rows, 1, figsize=(15, 5*rows))
if rows == 1:
axs = [axs]
for img, ax, prompt in zip(images, axs, prompts):
ax.imshow(img)
ax.set_title(prompt, fontsize=10)
ax.axis('off')
plt.tight_layout()
plt.show()
# execute the script
if __name__ == "__main__":
try:
pipeline = load_model('stabilityai/stable-diffusion-2-1')
prompts = [
"A cute cat",
"A cute dog",
"A cute cat and a cute dog sit next to each other"
]
num_images_per_prompt = 1
generated_images = generate_images(pipeline, prompts, num_images_per_prompt, num_inference_steps=50, guidance_scale=7.5)
display_images(generated_images, prompts)
except Exception as e:
print(f"An error occurred: {str(e)}")
finally:
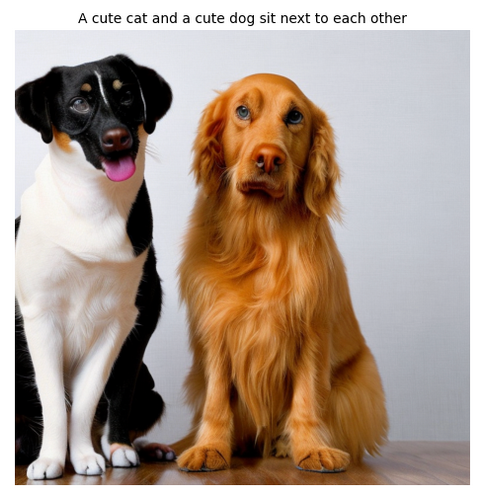
cleanup_memory()Here are some pictures that I've gotten from my run (Figures 2-4). Note that the pictures may vary every run.
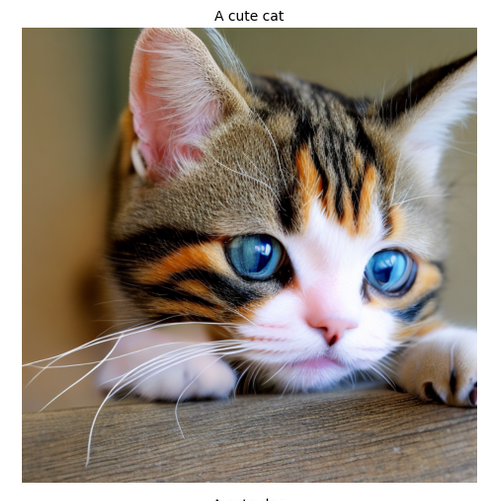
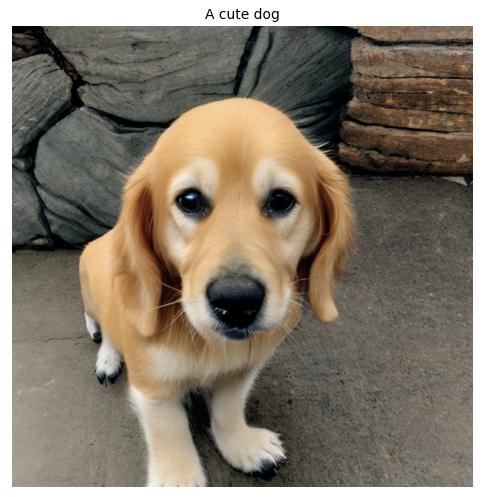
Note that these prompts, e.g., “A cute cat”, “A cute dog”, and “A cute cat and a cute dog sit next to each other”, are just examples, and you can modify your prompts to your liking by modifying the prompts in the main function.
If you experience hung kernel or something similar, erestart/refresh RHOAI dashboard and relaunch the notebook. Alternatively, if you were using an HCP cluster, you might also want to add more nodes into the machine pool.
Note that you might encounter the following warning messages, which are informational and generally harmless:
- "The cache for model files in Transformers v4.22.0 has been updated…": This is just an informational message that can be safely ignored once the cache migration is complete.
- "Unable to register cuDNN/cuFFT/cuBLAS factory...": These messages indicate that these CUDA libraries are being initialized multiple times.
- "This TensorFlow binary is optimized to use available CPU instructions...": This is also just an informational message that TensorFlow installation is working but could potentially be optimized further.
- "TF-TRT Warning: Could not find TensorRT": This warning indicates that TensorRT is not available, which might affect performance but not functionality.
5. Future research
Note that this is a simple tutorial intended to guide you through the necessary environment set up once you have a ROSA cluster spun up and followed by a simple deployment of generating images using the Stable Diffusion model. If you happen to get unsatisfactory results, i.e., inaccurate images, there are many ways you can go about improving them, such as by adjusting the parameters and using more specific prompts.
In one of my runs, I noticed that the model generated an inaccurate image of a cat and a dog (for the third prompt) as shown in Figure 5.
So here I adjusted the num_inference_steps from 50 to 75, guidance_scale from 7.5 to 8.5, and modified the last prompt into “A cute cat and a cute dog sitting next to each other, both faces and bodies are in the same image and background”. And thus, I got Figure 6 as a result (note that results may vary).
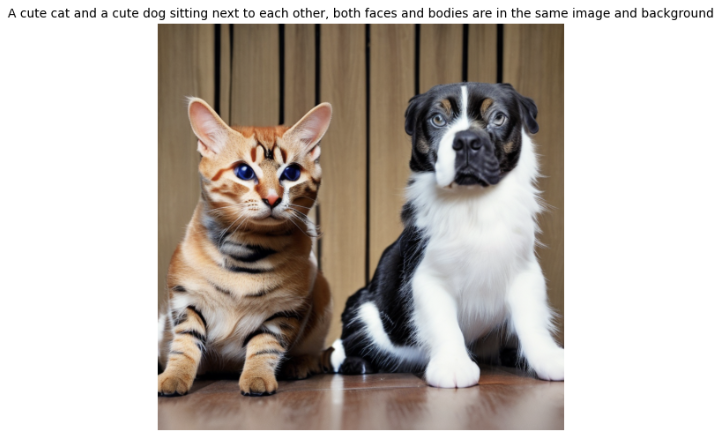
Increasing num_inference_steps will allow the model more iterations to refine the image, adjusting guidance_scale can lead to images that are more closely matching the prompt, and using more detailed prompts can help guide the model better.
However, note that even with these optimizations, generating images with multiple specific elements can be tricky due to the inherent nature of generative models. You might still need to run the code multiple times to get the desired results.
Note that there are many other ways to improve the accuracy that I’m not going to delve further in this blog, such as using negative prompts to exclude what you don’t want to see in the image, fine-tuning the model, using another model, increasing the batch size, etc. These are all potential topics for future research.
Last updated: July 8, 2025