Podman is a popular tool for developers because of its ability to package applications into containers, making it simple to develop and scale across platforms. It's a daemonless container engine (doesn't require a daemon to be running in the background), can be used in rootless mode, and is compatible with Docker (due to the Open Container Initiative). Now with Podman Desktop, it's even easier to work with your images and containers, giving you a powerful desktop GUI that supports both Podman and Docker!
While the open source project is available on Linux and macOS, let's take a look at how to install and use Podman Desktop on Windows. This tutorial walks through the following steps:
- Install Podman Desktop.
- Enable the Windows Subsystem for Linux (WSL) to launch your containers.
- Install Podman as a container engine on Windows.
About Podman Desktop
With containerization becoming essential to a developer's toolkit, Podman Desktop is a container management tool to create, manage, and deploy containers on your local machine. It simplifies the configuration of containers through a graphical interface and features support for working with Pods using Podman, as well as deploying to Kubernetes environments (or local ones using Kind).
Can I run Podman in Windows?
Yes. While "containers are Linux," Podman also runs on Mac and Windows, where it provides a native CLI and uses a guest Linux system to launch your containers (known as a Podman machine).
What is the difference between Podman and Podman Desktop?
Podman is a daemonless, open source, Linux native tool designed to make it easy to find, run, build, share and deploy containerized applications, where as Podman Desktop is a visual application for Windows, macOS, and Linux, to work with containers and Kubernetes from your local environment seamlessly.
What are the system requirements to run Podman and Podman Desktop on Windows?
In order to run Podman Desktop on your Windows system, you'll need the following:
- Windows 10 or Windows 11.
- 6 GB of RAM.
- Windows Subsystem for Linux (if you haven't already installed it, Podman Desktop will walk you through the process).
Because Podman uses WSL, you need a recent release of Windows 10 or Windows 11. If you are running Windows on a VM, you must have a VM that supports nested virtualization. You can view the other prerequisites on via the Podman Desktop documentation.
Install Podman Desktop on Windows
It's simple to install Podman Desktop on Windows. While I'll show the process of installing using the Windows installer, there's also a portable executable and support for package managers like Chocolately, Scoop, and Winget.
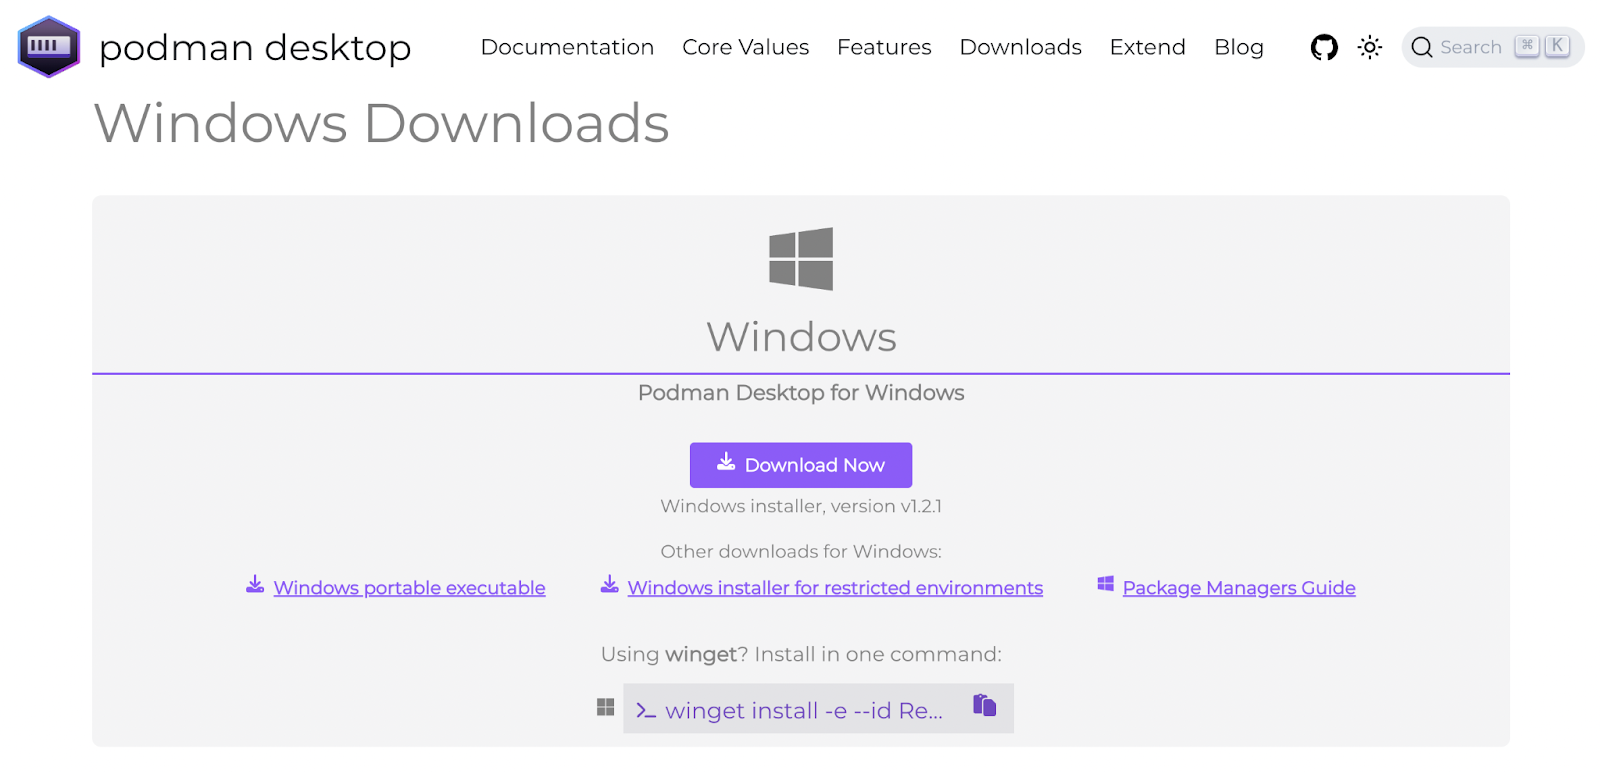
First, head to podman-desktop.io to download Podman Desktop for Windows. You should see the Windows download page, where you can also select other downloads for Windows. Click the large Download Now button to go ahead and download the installer (Figure 1).
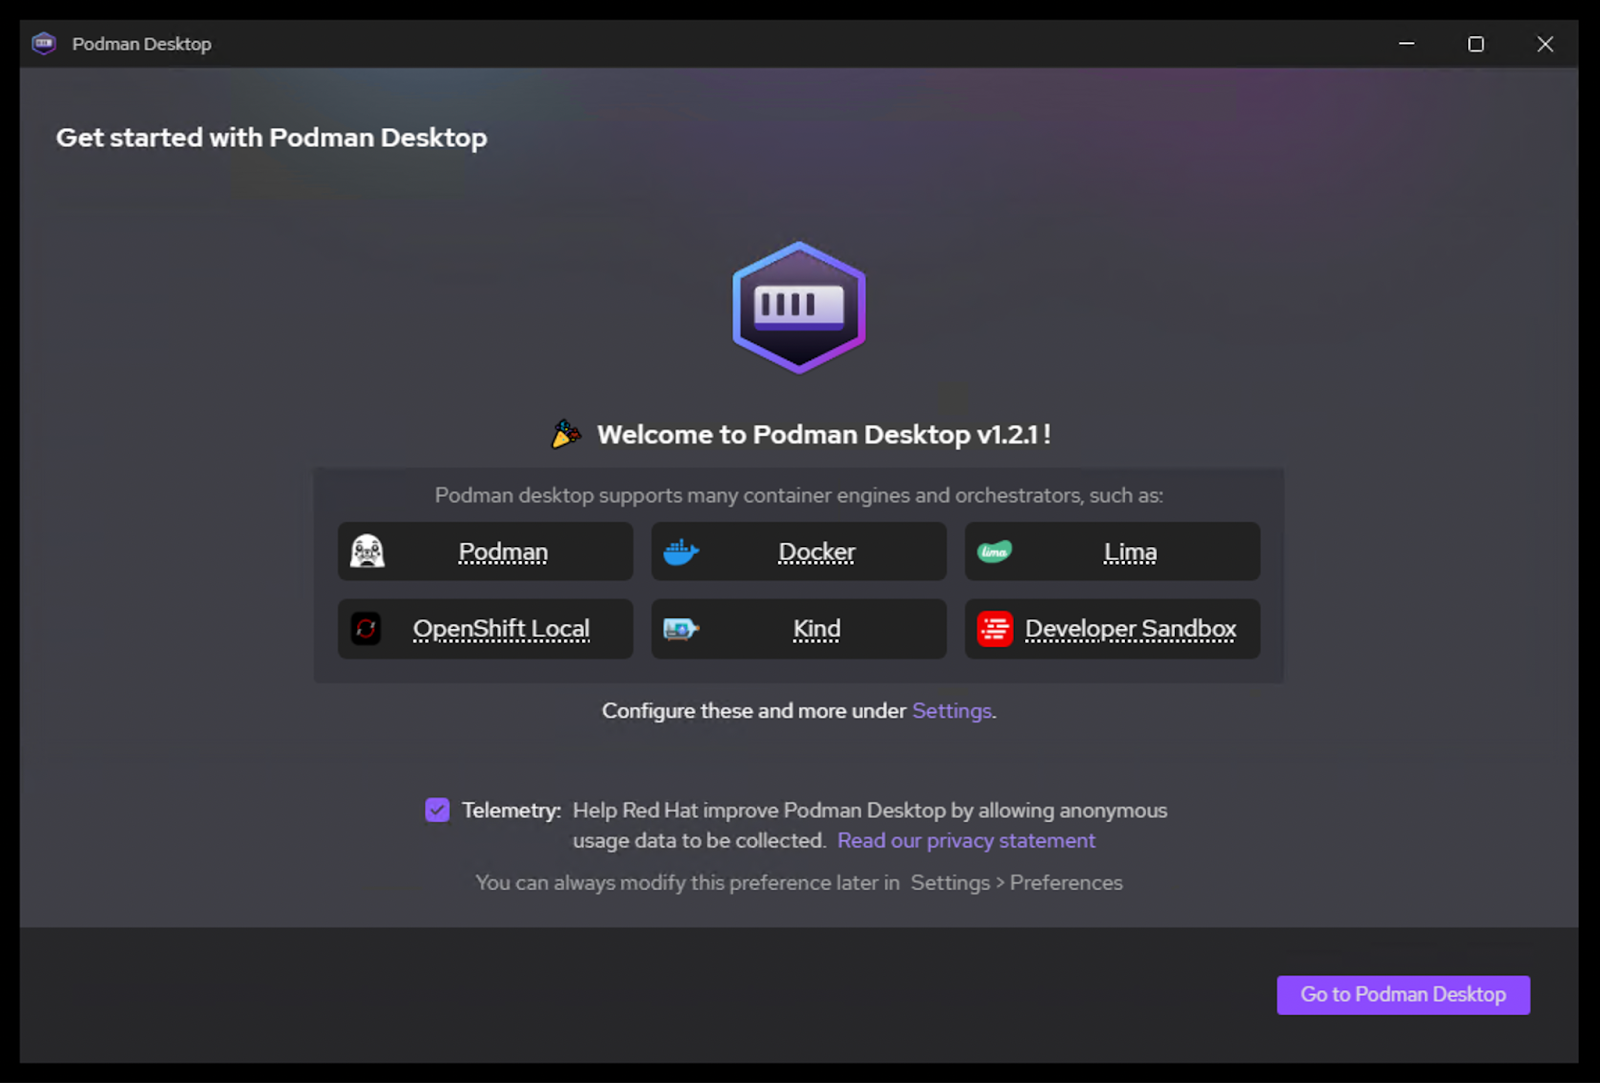
Now, with the .exe installer downloaded, start the installer to install Podman Desktop. Once finished, it'll start automatically and add a handy shortcut to your Desktop. As soon as Podman Desktop starts up for the first time, we can see the supported engines (such as Podman, Docker, and Lima) as well as Kubernetes orchestrators (OpenShift Local, Kind, Developer Sandbox, and your Kubernetes cluster from a KubeConfig file). See Figure 2.
If you have already installed Podman on your Windows machine, you are ready to leverage Podman Desktop's features for building, running, and managing containers. But in case you still need to install Podman as a container engine, let's walk through how to install Podman on Windows with guidance from Podman Desktop.
Installing Podman on Windows
Let's install the Podman container engine on Windows so we can start easily deploying and managing containers. Now, on Windows, running the Podman engine requires running a Linux distribution on a virtual machine. Fortunately, Podman Desktop can easily assist you in installing the Podman container engine in a Fedora distribution of Linux, powered by the Windows Subsystem for Linux.
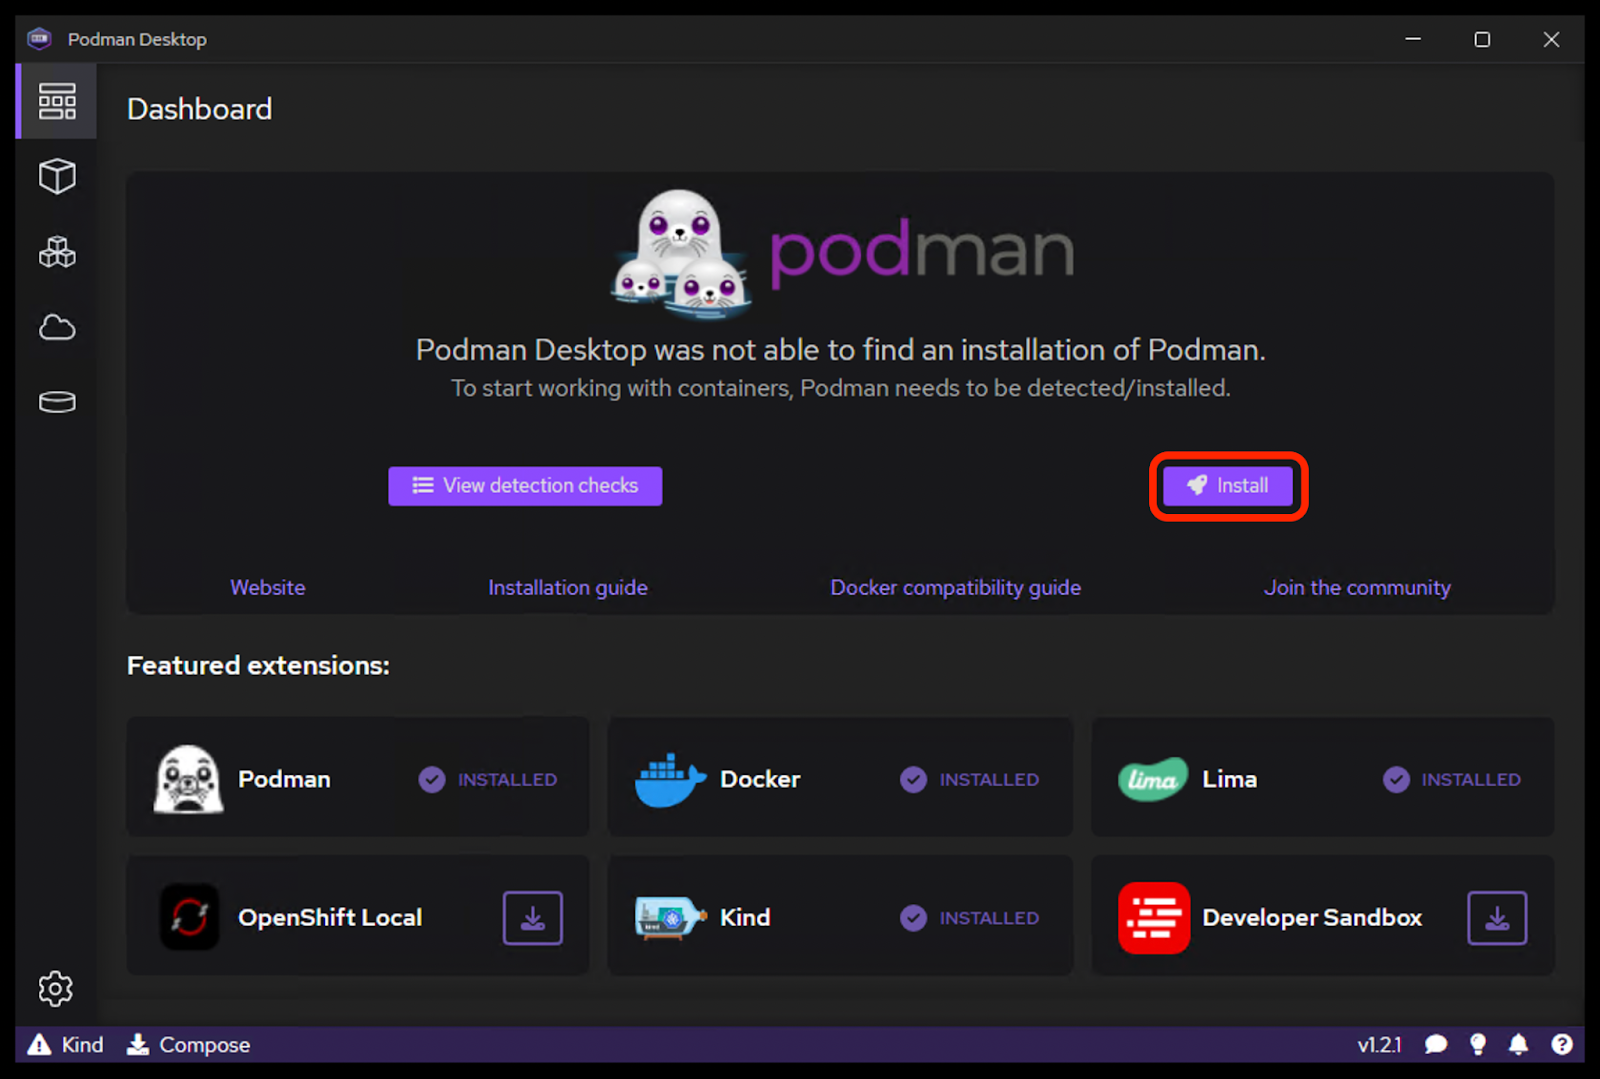
You can click View detection checks to see where you can expect to find Podman on your PATH system variable, but let's select Install on Podman Desktop to begin this process (Figure 3).
As the installation begins, Podman Desktop will check for prerequisites such as 6 GB of available RAM on your system, and WSL prerequisites such as admin privileges, a 64-bit version of Windows, and whether you are running Windows 10 or 11. Now, if you've already installed and are using the Window Subsystem for Linux (WSL), you'll breeze past this section automatically and be prompted to install Podman. But for the purposes of this tutorial, let's go through the process of enabling WSL.
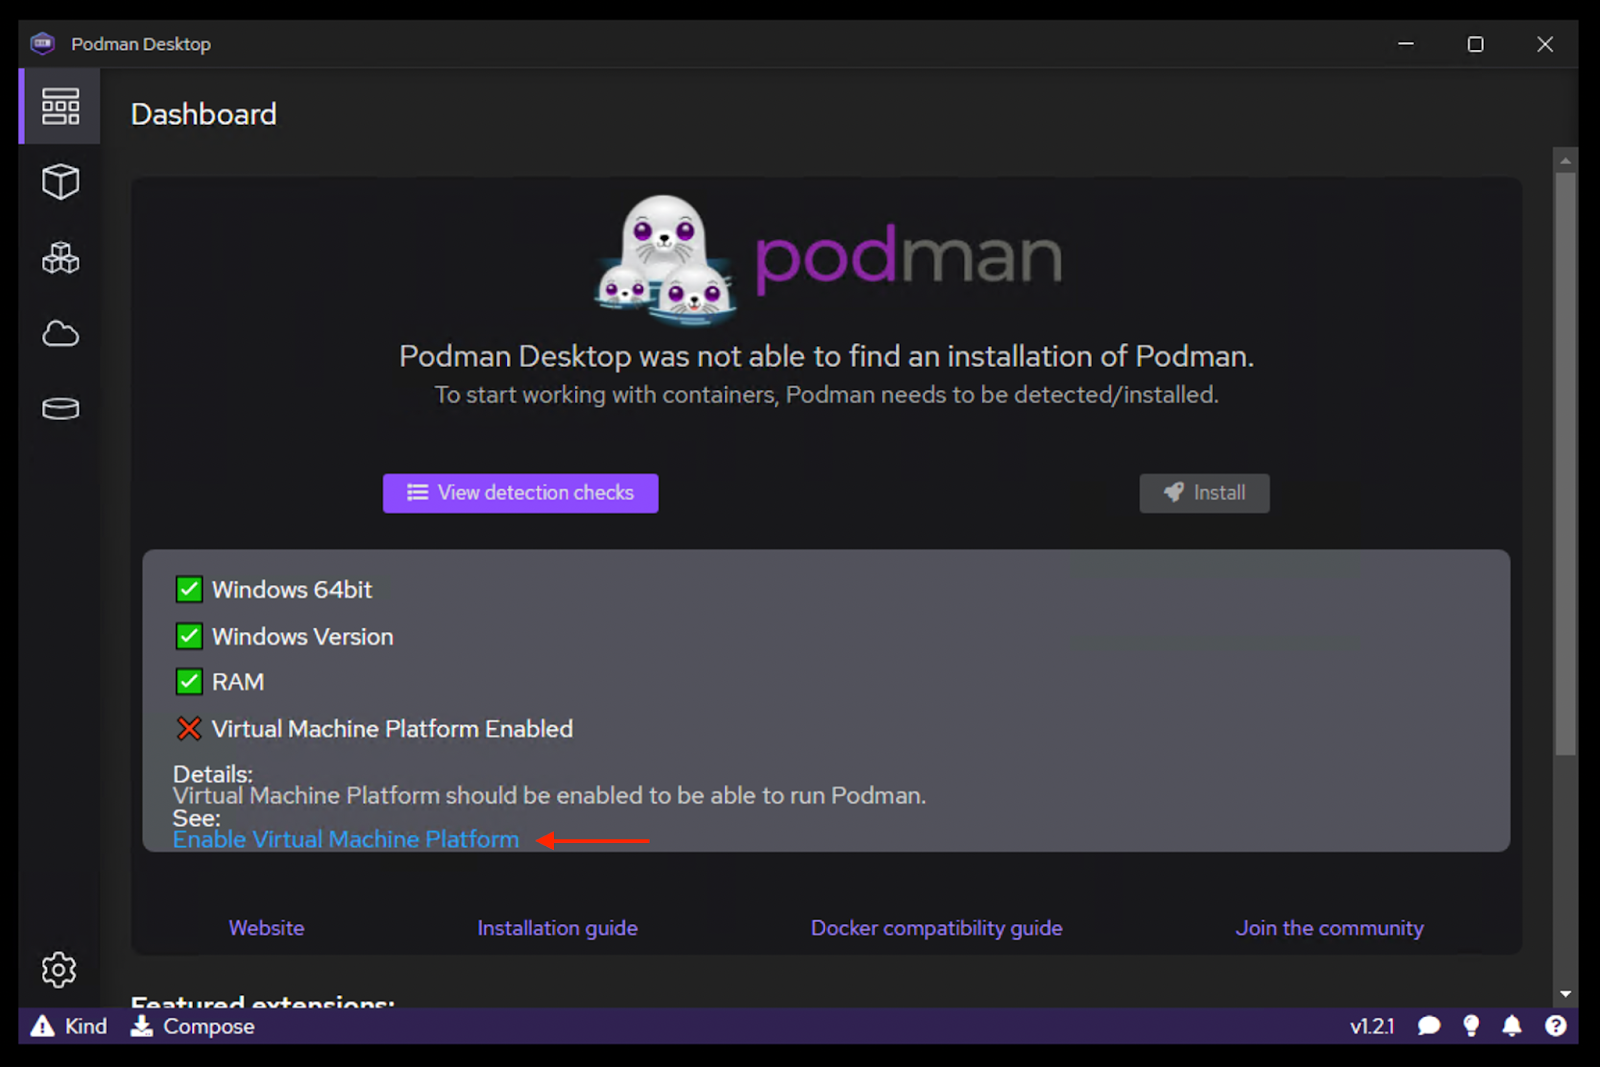
Select the option to Enable Virtual Machine Platform from Podman Desktop, as shown in Figure 4 (you'll be prompted to open a Microsoft documentation page).
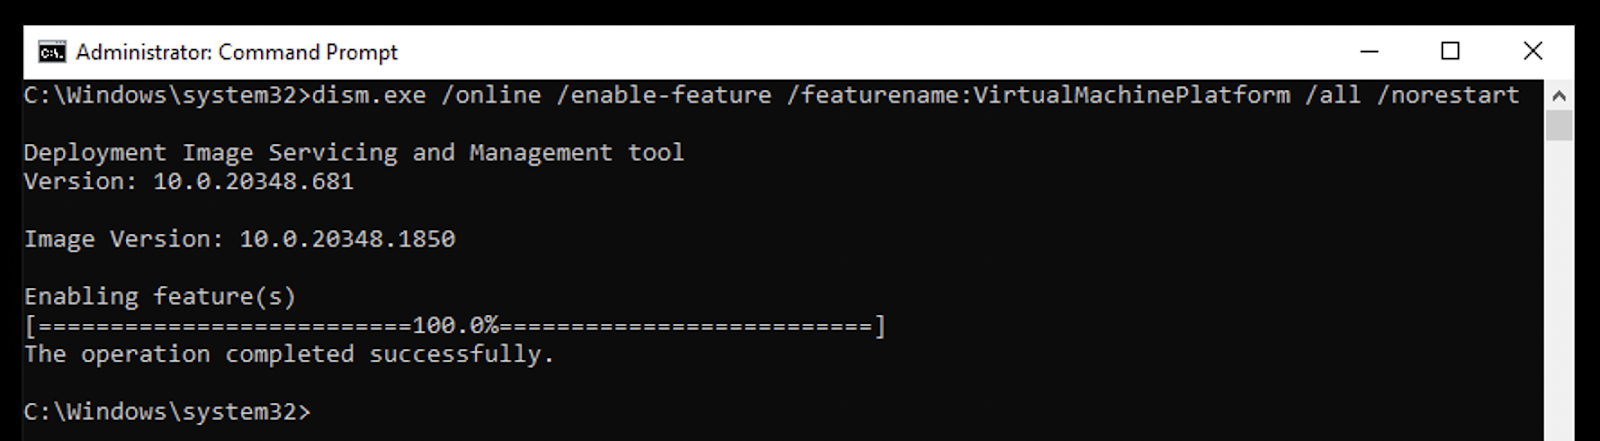
As shown in the Microsoft documentation page, to set up the virtual machine feature on your Windows system, open a command prompt (as shown in Figure 5) or PowerShell terminal with Administrative privileges and run the following command:
dism.exe /online /enable-feature /featurename:VirtualMachinePlatform /all /norestart
Next, return to Podman Desktop to finish installing WSL and the Podman container engine. Continue the process by clicking Install again (you might need to restart Podman Desktop). You'll now see that while the Virtual Machine Platform is enabled, your last step is enabling WSL. Again, you can do this in the command prompt using the following command, as shown in Figure 6 (and feel free to use the flag --no-distribution to skip installing a distribution of Linux; Podman will handle that):
wsl --install --no-distribution

Congratulations! You've installed WSL and can access the power of both Windows and Linux at the same time on a Windows machine. You are now ready to install Podman back on Podman Desktop.
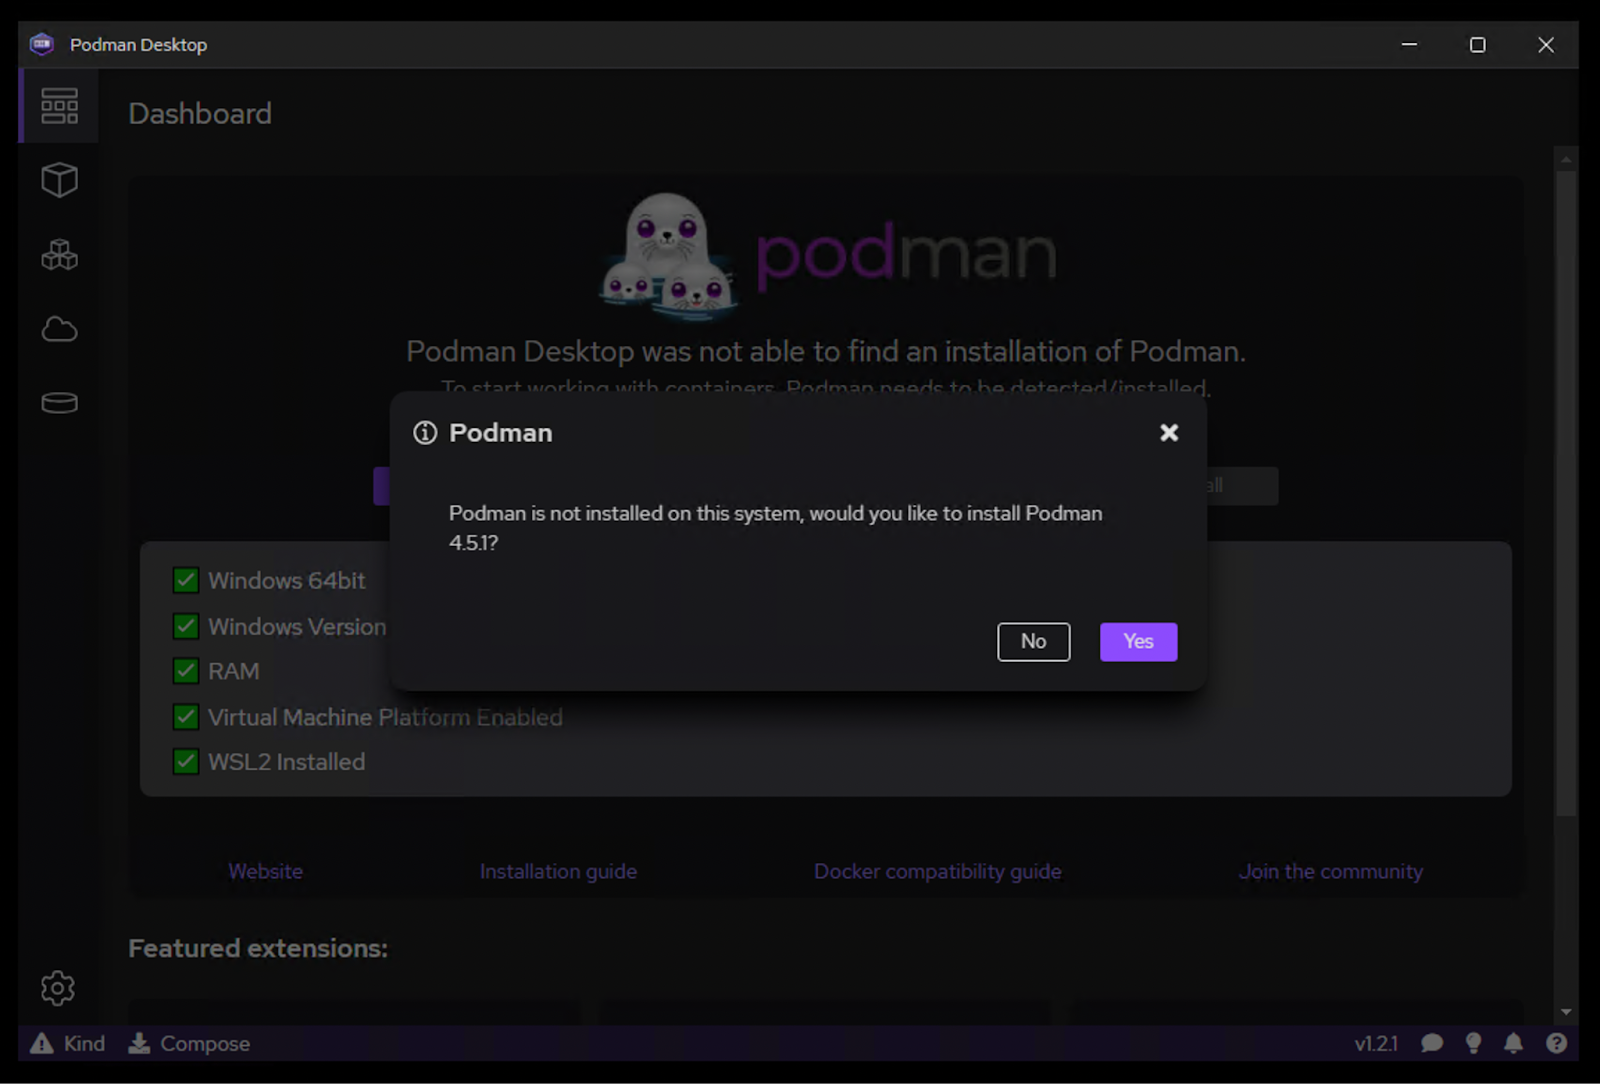
Click Install one last time from the Podman Desktop dashboard, and you should see a prompt asking if you'd like to install the latest release of Podman to your Windows machine (Figure 7). Let's select Yes.
This will automatically download the installer for Podman on your system, where you'll have the option to install WSL if not present (although no need to, as we already did so using the command prompt). After you select Install, wait a few seconds, and Close to return to Podman Desktop with Podman installed (Figure 8).

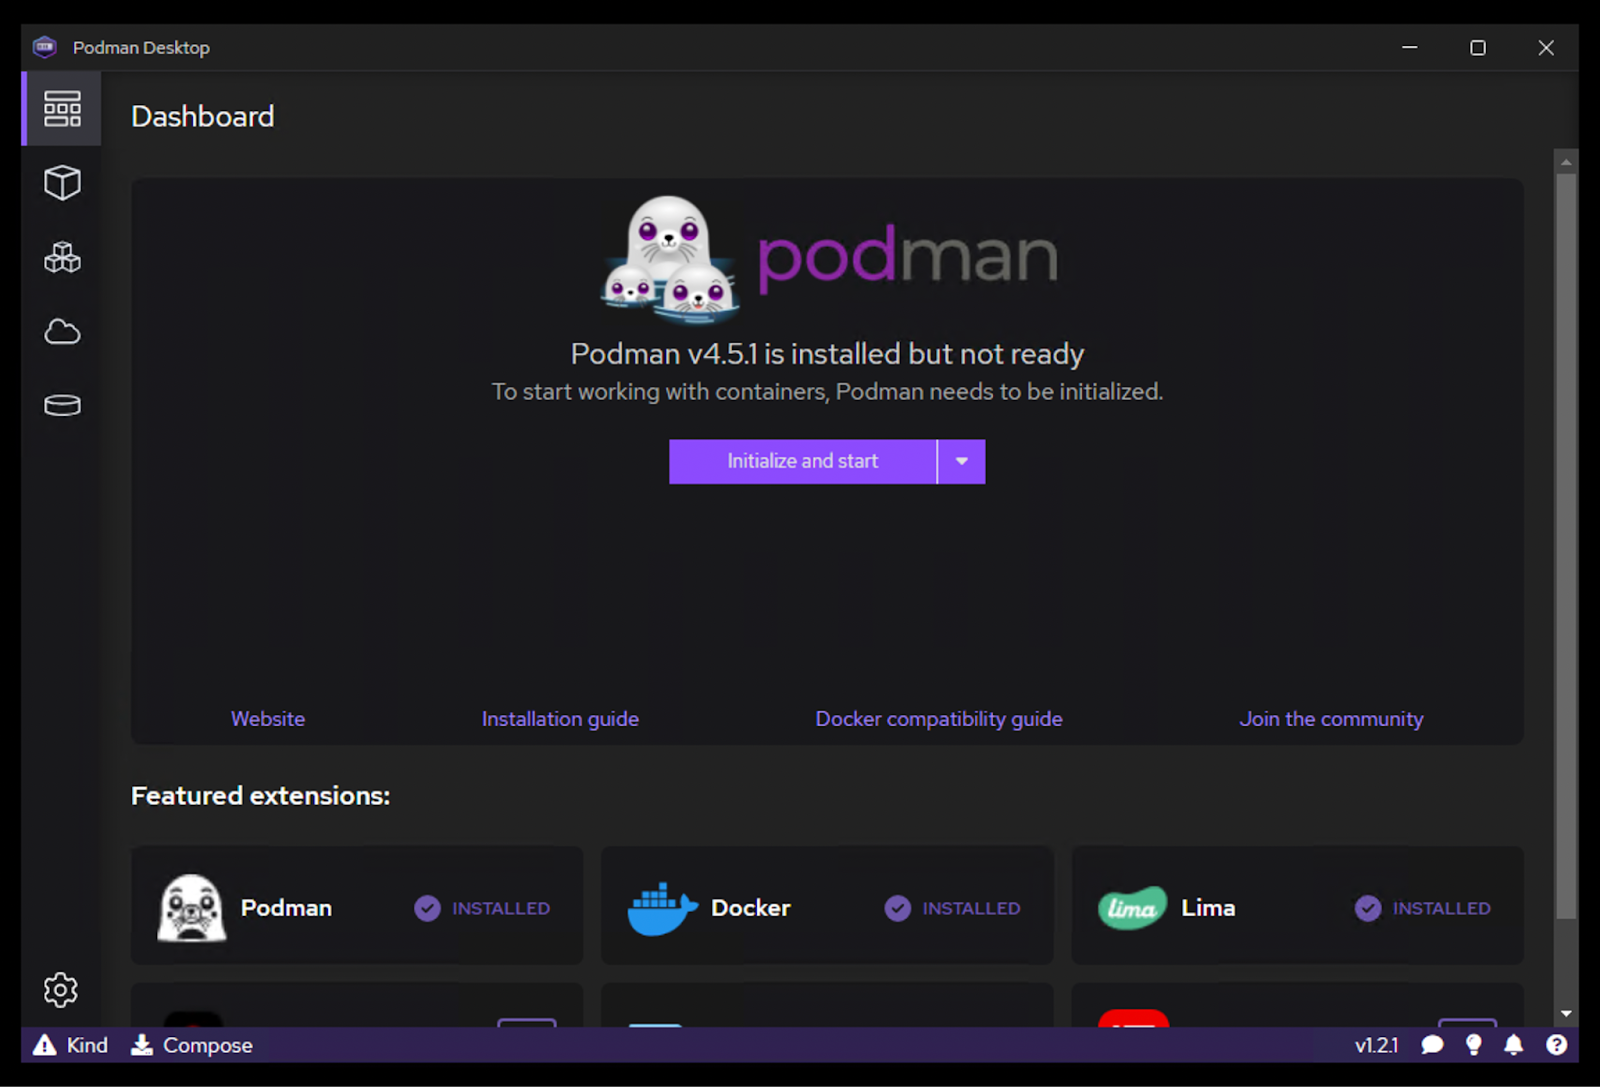
The last step is to initialize and start Podman on your Windows system, which is as simple as clicking the Initialize and start button on the dashboard of Podman Desktop (Figure 9). This automatically installs a minimal version of Fedora and customizes it to run Podman using a feature known as podman machine.
You'll see "Podman is initializing" on your dashboard, and after a few minutes, in addition to being able to use Podman Desktop, you'll also be able to use the podman command directly from our command prompt or PowerShell terminal (which is communicating in the background to Podman running in WSL).
Getting started with Podman Desktop
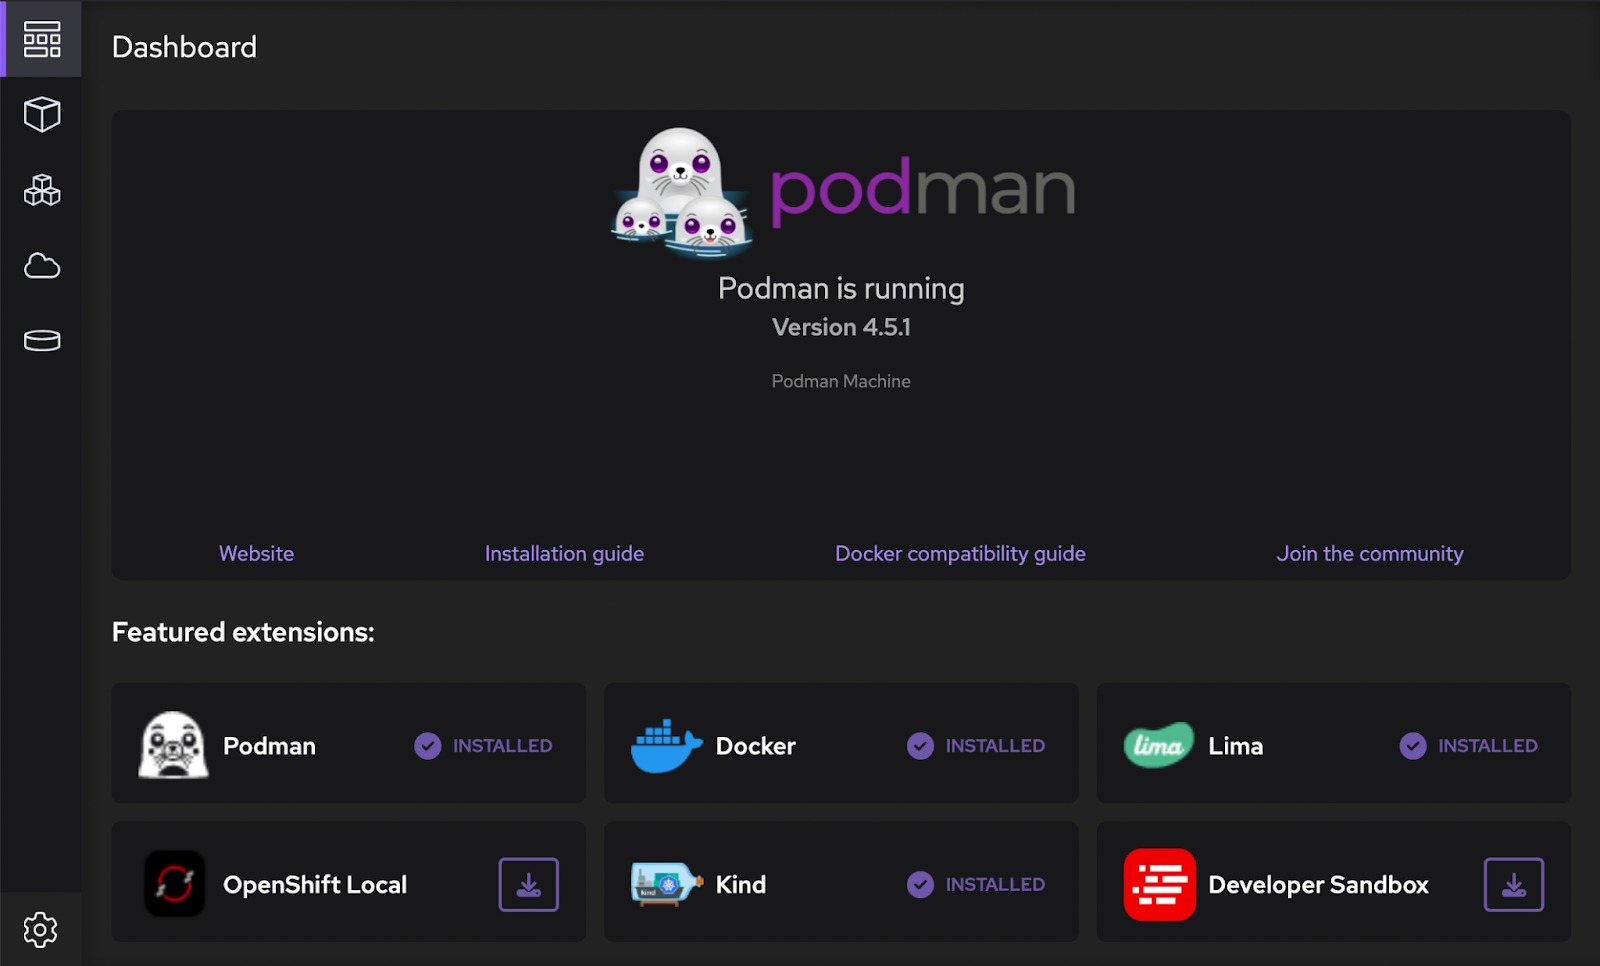
With Podman Desktop installed on our Windows system using Podman as a container engine, we can leverage all of Podman's lightweight and daemonless features as we work with images, containers, and deployment with Kubernetes. If you've worked with Docker Desktop, you'll find Podman Desktop similar and intuitive, with support for its own plug-ins as well as Docker Desktop extensions. Let's take a quick look at working with the Podman Desktop dashboard (Figure 10) and explore some of its capabilities.
Running containers with Podman Desktop
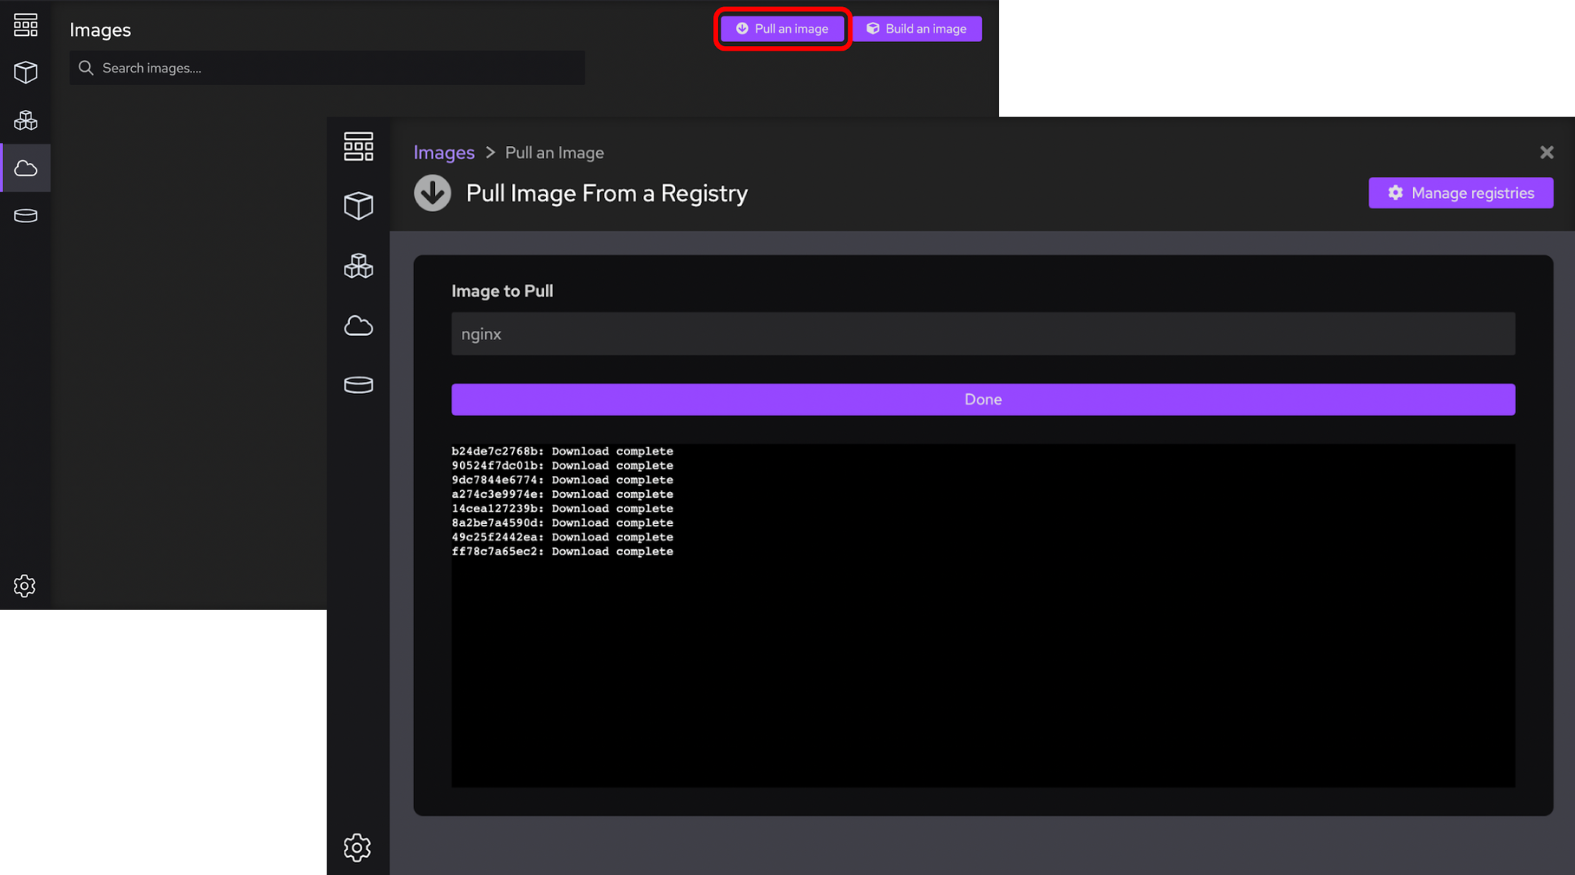
Let's use Podman Desktop to quickly pull an Nginx image and run it as a container, which we can initiate from the Images section of Podman Desktop. Once here, we'll simply pull down the nginx image from our default container registry, which is Docker Hub (Figure 11). (Or you can configure others by going to Settings → Registries for Red Hat Quay, GitHub, Google Artifact Registry, and more).
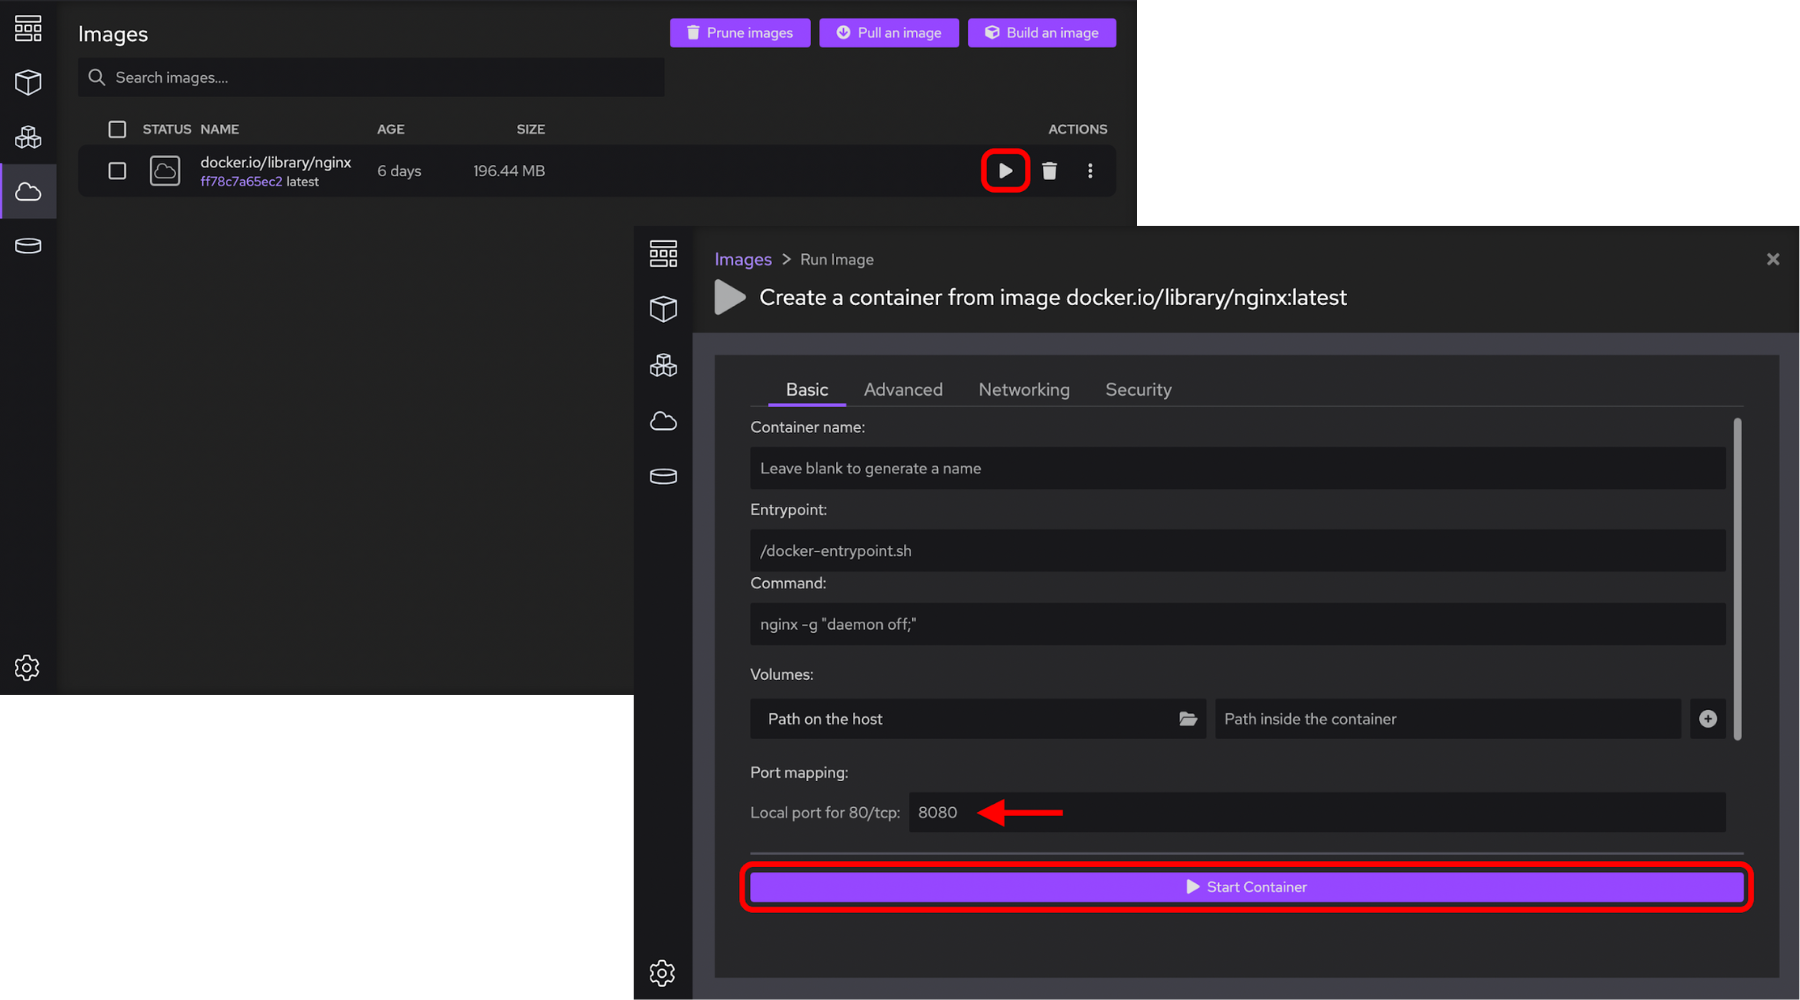
Now, with the image pulled to our local image registry, let's run it using Podman Desktop back in the Images section by selecting the Run icon on the right-hand side of the image, as shown in Figure 12. Here we have the option to map ports (let's map port 8080 on our host to port 80 on the container), mount volumes, and much more.
With our nginx container now running on our system, let's select the container from the containers section and check out the logs, SSH access, and filesystem, conveniently provided by Podman Desktop.
Wrapping up
As this tutorial has shown, working with containers on your Windows machine is as simple as downloading Podman Desktop, setting up WSL on your system, and installing the Podman container engine. From there, you can work with images, containers, volumes, logs, pods, and more with a single desktop application.
Be sure to visit podman-desktop.io to give Podman Desktop a try on your machine (or Linux and macOS), and best of luck on your containerization journey!
Last updated: January 29, 2024