Quite some time ago, Keycloak deprecated its adapters, including OpenID connect for Java adapters. For Spring Boot developers, this means we need to use Spring Security for OpenID and OAuth2 connectivity with Keycloak instead of relying on Keycloak adapters.
This tutorial demonstrates how to create a Java application on top of Spring Boot 3 and protect it by using Spring Security and Keycloak, without having to use Keycloak adapters. It walks through the following steps:
- Install Keycloak.
- Define the Spring Boot version.
- Define the Keycloak integration.
- Create the Java files.
- Test the application.
Install Keycloak
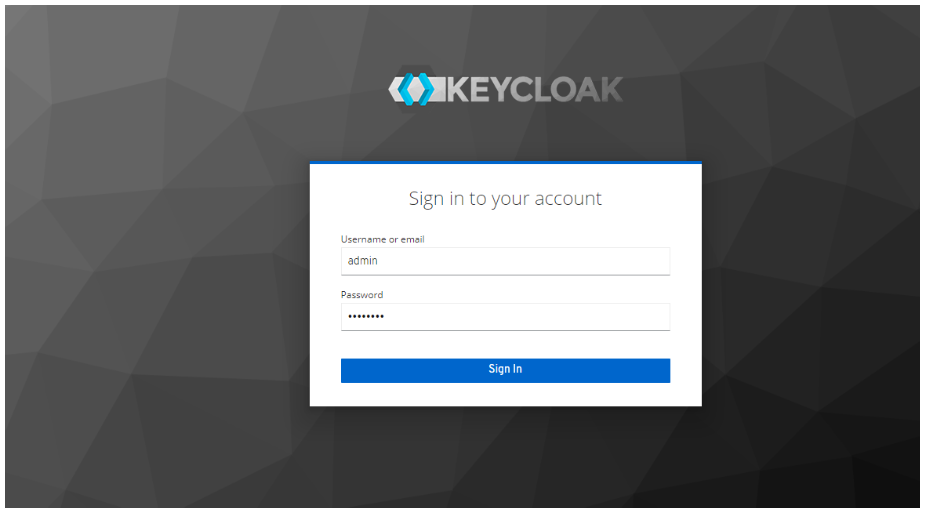
First, you need to install Keycloak to our system. In this example, we are using Keycloak 17 and installing it using a container. Here we've used admin as the administrator username and password as its password.
$ docker pull keycloak/keycloak:17.0.0
$ docker run -p 8080:8080 \
    -e KEYCLOAK_ADMIN=admin \
    -e KEYCLOAK_ADMIN_PASSWORD=password \
    keycloak/keycloak:17.0.0  start-dev
You can open the login page and input the credentials there (Figure 1).
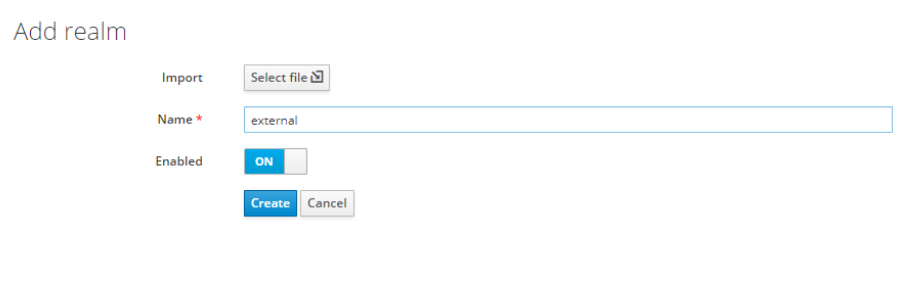
After login, create a new "realm" with the name External (Figure 2).
Once the realm has been created, create a Keycloak client with the name external-client (Figure 3).
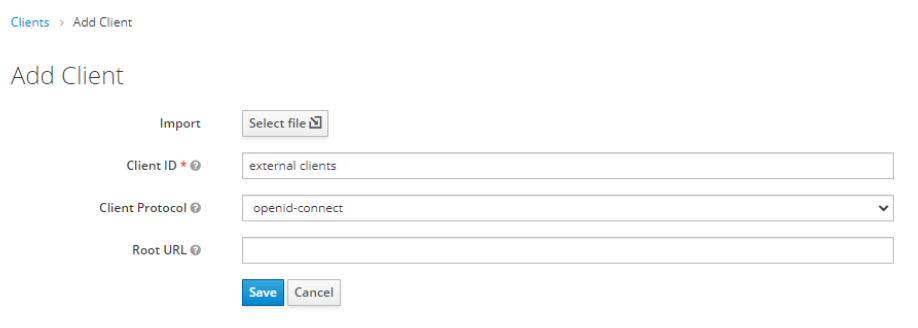
Make sure to configure the client as follows:
- Client ID:
external-client - Enabled: On
- Client Protocol:
openid-connect - Access type: Confidential
- Standard flow enabled: On
- Direct access grants enabled: On
- Valid redirects URI:
http://localhost:8081/*
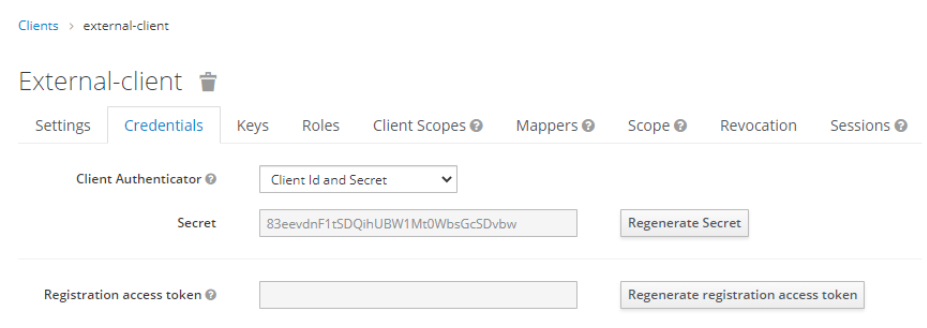
Capture the client secret, as shown in Figure 4.
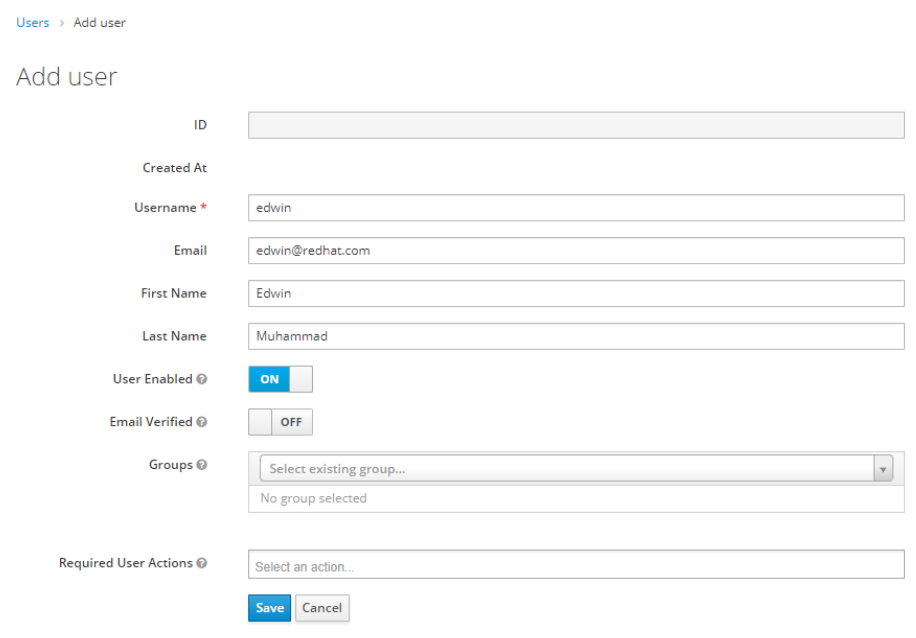
Next, create a new user for this realm (Figure 5).
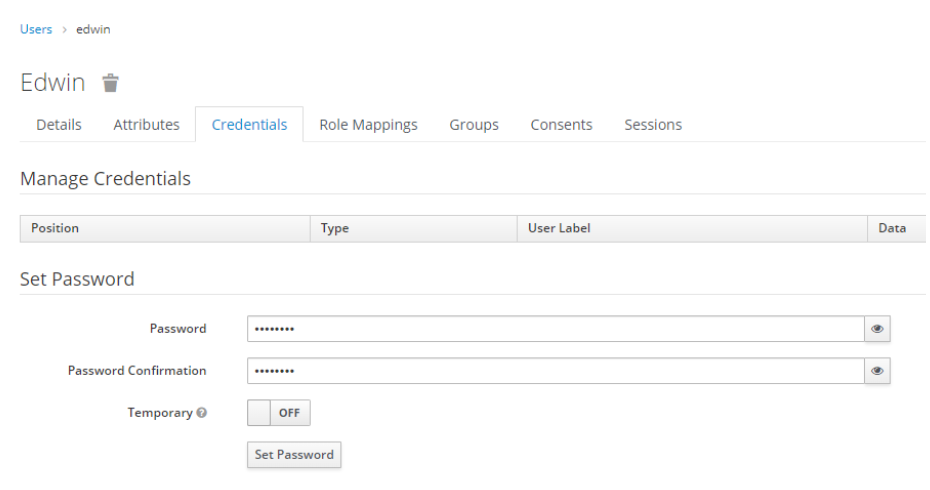
After that, you can create a password for this user (Figure 6).
Once you have completed all of the preceding steps, you are ready to proceed to the next section.
Define the Spring Boot version
First, define the Spring version in your pom.xml file. In this example, we are using Spring 3.0.4 and Java 17.
<?xml version="1.0" encoding="UTF-8"?>
<project xmlns="http://maven.apache.org/POM/4.0.0"
         xmlns:xsi="http://www.w3.org/2001/XMLSchema-instance"
         xsi:schemaLocation="http://maven.apache.org/POM/4.0.0 http://maven.apache.org/xsd/maven-4.0.0.xsd">
    <modelVersion>4.0.0</modelVersion>

    <groupId>com.edw</groupId>
    <artifactId>spring-3-keycloak</artifactId>
    <version>1.0-SNAPSHOT</version>

    <parent>
        <groupId>org.springframework.boot</groupId>
        <artifactId>spring-boot-starter-parent</artifactId>
        <version>3.0.4</version>
        <relativePath/> <!-- lookup parent from repository -->
    </parent>

    <properties>
        <project.build.sourceEncoding>UTF-8</project.build.sourceEncoding>
        <maven.compiler.source>17</maven.compiler.source>
        <maven.compiler.target>17</maven.compiler.target>
    </properties>

    <dependencies>
        <dependency>
            <groupId>org.springframework.boot</groupId>
            <artifactId>spring-boot-starter-web</artifactId>
        </dependency>
        <dependency>
            <groupId>org.springframework.boot</groupId>
            <artifactId>spring-boot-starter-oauth2-client</artifactId>
        </dependency>
        <dependency>
            <groupId>org.springframework.boot</groupId>
            <artifactId>spring-boot-starter-security</artifactId>
        </dependency>

        <dependency>
            <groupId>org.springframework.boot</groupId>
            <artifactId>spring-boot-starter-test</artifactId>
            <scope>test</scope>
        </dependency>
    </dependencies>

    <build>
        <plugins>
            <plugin>
                <groupId>org.springframework.boot</groupId>
                <artifactId>spring-boot-maven-plugin</artifactId>
            </plugin>
        </plugins>
    </build>
</project>
Define the Keycloak integration
Define your Keycloak integration by setting them in the application.properties:
### server port
server.port=8081
spring.application.name=Spring 3 and Keycloak

## logging
logging.level.org.springframework.security=INFO
logging.pattern.console=%d{dd-MM-yyyy HH:mm:ss} %magenta([%thread]) %highlight(%-5level) %logger.%M - %msg%n

## keycloak
spring.security.oauth2.client.provider.external.issuer-uri=http://localhost:8080/realms/external

spring.security.oauth2.client.registration.external.provider=external
spring.security.oauth2.client.registration.external.client-name=external-client
spring.security.oauth2.client.registration.external.client-id=external-client
spring.security.oauth2.client.registration.external.client-secret=(put your client secret here)
spring.security.oauth2.client.registration.external.scope=openid,offline_access,profile
spring.security.oauth2.client.registration.external.authorization-grant-type=authorization_code
Create the Java files
Once you've define your configuration, the next step is to create your Java files. We can start with our security configuration:
import org.springframework.context.annotation.Bean;
import org.springframework.context.annotation.Configuration;
import org.springframework.security.config.annotation.web.builders.HttpSecurity;
import org.springframework.security.config.annotation.web.configuration.EnableWebSecurity;
import org.springframework.security.config.http.SessionCreationPolicy;
import org.springframework.security.web.SecurityFilterChain;

@Configuration
@EnableWebSecurity
public class SecurityConfiguration {

    @Bean
    public SecurityFilterChain configure(HttpSecurity http) throws Exception {
        http
                .oauth2Client()
                    .and()
                .oauth2Login()
                .tokenEndpoint()
                    .and()
                .userInfoEndpoint();

        http
                .sessionManagement()
                .sessionCreationPolicy(SessionCreationPolicy.ALWAYS);

        http
                .authorizeHttpRequests()
                            .requestMatchers("/unauthenticated", "/oauth2/**", "/login/**").permitAll()
                            .anyRequest()
                                .fullyAuthenticated()
                .and()
                    .logout()
                    .logoutSuccessUrl("http://localhost:8080/realms/external/protocol/openid-connect/logout?redirect_uri=http://localhost:8081/");

        return http.build();
    }
}
Next, we'll create our controller and main Java files:
package com.edw.controller;

import org.springframework.security.core.context.SecurityContextHolder;
import org.springframework.security.oauth2.core.user.OAuth2User;
import org.springframework.web.bind.annotation.GetMapping;
import org.springframework.web.bind.annotation.RestController;

import java.util.HashMap;

@RestController
public class IndexController {

    @GetMapping(path = "/")
    public HashMap index() {
        // get a successful user login
        OAuth2User user = ((OAuth2User)SecurityContextHolder.getContext().getAuthentication().getPrincipal());
        return new HashMap(){{
            put("hello", user.getAttribute("name"));
            put("your email is", user.getAttribute("email"));
        }};
    }


    @GetMapping(path = "/unauthenticated")
    public HashMap unauthenticatedRequests() {
        return new HashMap(){{
            put("this is ", "unauthenticated endpoint");
        }};
    }
}
package com.edw;

import org.springframework.boot.SpringApplication;
import org.springframework.boot.autoconfigure.SpringBootApplication;

@SpringBootApplication
public class Main {
    public static void main(String[] args) {
        SpringApplication.run(Main.class, args);
    }
}
Test the application
We can directly open our Java application's URL located in port 8081 and be automatically redirected to our Keycloak login page. You can also use a cURL command to check what is happening behind the scenes:
$ curl -v http://localhost:8081/
*   Trying ::1:8081...
* TCP_NODELAY set
* Connected to localhost (::1) port 8081 (#0)
> GET / HTTP/1.1
> Host: localhost:8081
> User-Agent: curl/7.65.0
> Accept: */*
>
* Mark bundle as not supporting multiuse
< HTTP/1.1 302
< Set-Cookie: JSESSIONID=D002DC6523769DB2D4D0559D851575E6; Path=/; HttpOnly
< X-Content-Type-Options: nosniff
< X-XSS-Protection: 0
< Cache-Control: no-cache, no-store, max-age=0, must-revalidate
< Pragma: no-cache
< Expires: 0
< X-Frame-Options: DENY
< Location: http://localhost:8081/oauth2/authorization/external
< Content-Length: 0
< Date: Mon, 27 Mar 2023 07:08:27 GMT
<
* Connection #0 to host localhost left intact


$ curl -v  http://localhost:8081/oauth2/authorization/external
*   Trying ::1:8081...
* TCP_NODELAY set
* Connected to localhost (::1) port 8081 (#0)
> GET /oauth2/authorization/external HTTP/1.1
> Host: localhost:8081
> User-Agent: curl/7.65.0
> Accept: */*
>
* Mark bundle as not supporting multiuse
< HTTP/1.1 302
< Set-Cookie: JSESSIONID=73BF322BC83966BF49C39398ACD20DAB; Path=/; HttpOnly
< X-Content-Type-Options: nosniff
< X-XSS-Protection: 0
< Cache-Control: no-cache, no-store, max-age=0, must-revalidate
< Pragma: no-cache
< Expires: 0
< X-Frame-Options: DENY
< Location: http://localhost:8080/realms/external/protocol/openid-connect/auth?response_type=code&client_id=external-client&scope=openid%20offline_access%20profile&state=5wK6GouLBPi3DU1hu_AqcoDHefWNt67G5sPfGxfjZtk%3D&redirect_uri=http://localhost:8081/login/oauth2/code/external&nonce=5A8TcFCXueHsf2xBXJQ_NXEjmOtK4BwRh4uvI-kvvIs
< Content-Length: 0
< Date: Mon, 27 Mar 2023 07:08:58 GMT
<
* Connection #0 to host localhost left intact
You can see that all requests to the root URL have a 302 HTTP response, indicating that our application is protected by the Keycloak login page. However, we can test our whitelist insecure URL and see that we can access it directly without having to log in first.
$ curl -v  http://localhost:8081/unauthenticated
*   Trying ::1:8081...
* TCP_NODELAY set
* Connected to localhost (::1) port 8081 (#0)
> GET /unauthenticated HTTP/1.1
> Host: localhost:8081
> User-Agent: curl/7.65.0
> Accept: */*
>
* Mark bundle as not supporting multiuse
< HTTP/1.1 200
< Set-Cookie: JSESSIONID=22CA2E6EE6B79F7FD649592D87405C71; Path=/; HttpOnly
< X-Content-Type-Options: nosniff
< X-XSS-Protection: 0
< Cache-Control: no-cache, no-store, max-age=0, must-revalidate
< Pragma: no-cache
< Expires: 0
< X-Frame-Options: DENY
< Content-Type: application/json
< Transfer-Encoding: chunked
< Date: Mon, 27 Mar 2023 07:13:00 GMT
<
* Connection #0 to host localhost left intact

{"this is ": "unauthenticated endpoint"}
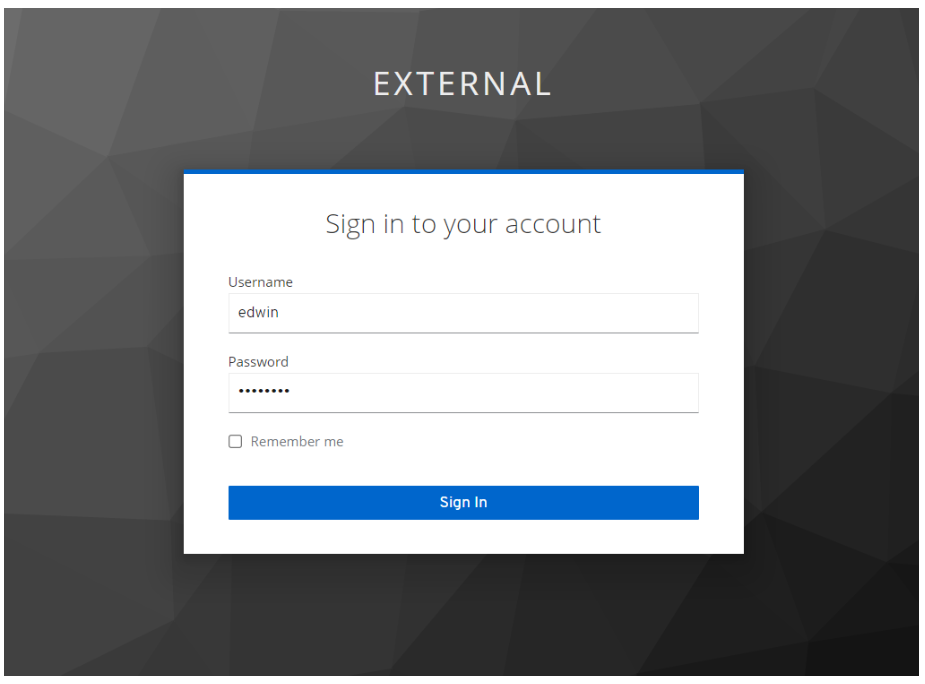
Let's try to insert the username and password into the login page, as shown in Figure 7.
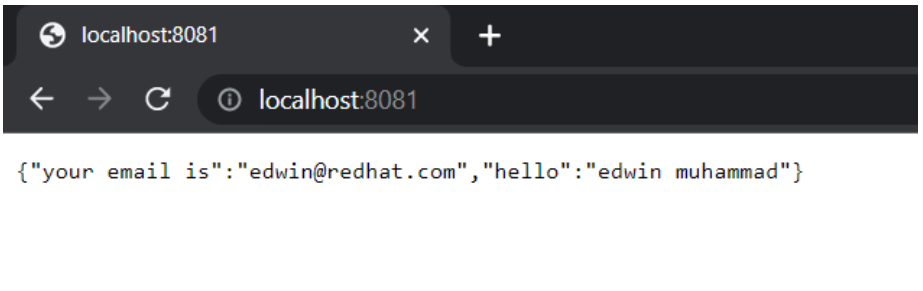
The result after login is illustrated in Figure 8.
Summary
This article showed how Spring Boot 3 and Spring Security can connect to Keycloak using the default Oauth2 client library that comes with Spring Boot (spring-boot-starter-oauth2-client).
Code for this project can be accessed at https://github.com/edwin/spring-3-keycloak.
Last updated: April 14, 2025