This article is the fourth installment in our series on Ansible for middleware. In this article, you'll use Ansible to simplify and automate the installation of Keycloak, a popular open source tool to implement single sign-on for Web applications. The previous articles in this series are:
- Automate Red Hat JBoss Web Server deployments with Ansible
- Automate and deploy a JBoss EAP cluster with Ansible
- Deploy Infinispan automatically with Ansible
The tutorial in this article builds on an Ansible Collection named middleware_automation.keycloak, which has been specifically designed for this endeavor.
Prerequisites
To make use of this tutorial, you need a Red Hat Enterprise Linux or Fedora system, along with version 2.9 or higher of Ansible (preferably the latest version).
Install the collection
The very first step, of course, is to install the collection itself, so that Ansible can use its content inside playbooks:
$ ansible-galaxy collection install middleware_automation.keycloak
Starting galaxy collection install process
Process install dependency map
Starting collection install process
Downloading https://galaxy.ansible.com/download/middleware_automation-keycloak-1.0.0.tar.gz to /root/.ansible/tmp/ansible-local-24nzydu97b/tmpaql0qbek/middleware_automation-keycloak-1.0.0-8yma1_vi
Installing 'middleware_automation.keycloak:1.0.0' to '/root/.ansible/collections/ansible_collections/middleware_automation/keycloak'
Downloading https://galaxy.ansible.com/download/middleware_automation-redhat_csp_download-1.2.1.tar.gz to /root/.ansible/tmp/ansible-local-24nzydu97b/tmpaql0qbek/middleware_automation-redhat_csp_download-1.2.1-4po4eg4w
middleware_automation.keycloak:1.0.0 was installed successfully
Installing 'middleware_automation.redhat_csp_download:1.2.1' to '/root/.ansible/collections/ansible_collections/middleware_automation/redhat_csp_download'
Downloading https://galaxy.ansible.com/download/middleware_automation-wildfly-1.0.1.tar.gz to /root/.ansible/tmp/ansible-local-24nzydu97b/tmpaql0qbek/middleware_automation-wildfly-1.0.1-ayf0n_nq
middleware_automation.redhat_csp_download:1.2.1 was installed successfully
Installing 'middleware_automation.wildfly:1.0.1' to '/root/.ansible/collections/ansible_collections/middleware_automation/wildfly'
middleware_automation.wildfly:1.0.1 was installed successfully
The collection has the following dependencies:
middleware_automation.redhat_csp: This collection allows Ansible to connect to the Red Hat Customer Portal to download Red Hat's single sign-on technology, which is a productized and supported version of Keycloak. We won't use this feature in this article.middleware_automation.wildfly: Keycloak runs on top of the Wildfly application server, including Red Hat JBoss Enterprise Application Platform (JBoss EAP), which is the version of Wildfly supported by Red Hat. For more details about this collection, please refer to the second article in this series, Automate and deploy a JBoss EAP Cluster with Ansible.
Depending on the configuration of the machine used as the Ansible controller, you might need to add some Python dependencies so that Ansible will have the libraries required to make use of the collection. Install them by running the following command:
# pip3 install lxml jmespath
Collecting lxml
  Downloading lxml-4.7.1-cp39-cp39-manylinux_2_17_x86_64.manylinux2014_x86_64.manylinux_2_24_x86_64.whl (6.9 MB)
     |████████████████████████████████| 6.9 MB 1.9 MB/s
Collecting jmespath
  Downloading jmespath-0.10.0-py2.py3-none-any.whl (24 kB)
Installing collected packages: lxml, jmespath
Successfully installed jmespath-0.10.0 lxml-4.7.1
Before going further, you should check to make sure that the collection has been successfully installed. To do so, run the following command from Ansible Galaxy that will list all the installed collections.
Note: This collection list feature is available in Ansible Galaxy 2.12, but not 2.9.
# ansible-galaxy collection list
#  /root/.ansible/collections/ansible_collections
Collection                                Version
----------------------------------------- -------
middleware_automation.keycloak            1.0.1
middleware_automation.redhat_csp_download 1.2.1
middleware_automation.wildfly             1.0.2
Now that the collection and its dependencies are installed, you can use it in an automation:
---
- name: Playbook for keycloak Hosts
  hosts: keycloak
  collections:
    - middleware_automation.keycloak
tasks:Note: In order for this playbook to perform the installation outlined here, Ansible must have sudo or root privileges on the target hosts.
Install Keycloak with Ansible
Thanks to the dedicated collection you just installed, automating the installation and configuration of Keycloak is easy. However, before you implement this inside your playbook, we should recap what we mean here by installing Keycloak. Indeed, this task encompasses quite a few operations that are performed on the target system:
- Creating appropriate operating system user and group accounts (the name is
keycloakfor both) - Downloading the installation archive from the Keycloak website
- Unarchiving the content while ensuring that all the files are associated with the appropriate user and groups along with the correct privileges
- Ensuring that the required version of the Java Virtual Machine (JVM) is installed
- Integrating the software into the host service management system (in our case, the Linux systemd daemon).
All of this is achieved and is fully automated by the following short playbook:
  - name: Playbook for Keycloak Hosts
    hosts: keycloak
    collections:
      - middleware_automation.keycloak
    tasks:
      - name: Include keycloak role
        ansible.builtin.include_role:
          name: middleware_automation.keycloak.keycloak
        vars:
          keycloak_admin_password: "changeme"
The playbook begins by defining a variable for the Keycloak server administrative user. Note that, because this variable is a password, it should really be secured using Ansible Vault or some other secrets management system. However, that task is beyond the scope of this article.
The configuration then adds the Ansible collection for Keycloak to the list used by the playbook and adds the associated middleware_automation.keycloak.keycloak role to the list of roles that the playbook uses.
Run this playbook as follows:
# ansible-playbook -i inventory playbook.yml

PLAY [Playbook for Keycloak Hosts] ***************************************************************************************************************************

TASK [Gathering Facts] ***************************************************************************************************************************************
ok: [localhost]

TASK [middleware_automation.keycloak.keycloak : Validating arguments against arg spec 'main'] ****************************************************************
ok: [localhost]

TASK [middleware_automation.keycloak.keycloak : Check prerequisites] *****************************************************************************************
included: /root/.ansible/collections/ansible_collections/middleware_automation/keycloak/roles/keycloak/tasks/prereqs.yml for localhost

TASK [middleware_automation.keycloak.keycloak : Validate configuration]
…
TASK [middleware_automation.keycloak.keycloak : Create keycloak admin user] **********************************************************************************
changed: [localhost]

TASK [middleware_automation.keycloak.keycloak : Restart keycloak] ********************************************************************************************
included: /root/.ansible/collections/ansible_collections/middleware_automation/keycloak/roles/keycloak/tasks/restart_keycloak.yml for localhost

TASK [middleware_automation.keycloak.keycloak : Restart and enable keycloak service] ************************************************************************
changed: [localhost]

TASK [middleware_automation.keycloak.keycloak : Wait until keycloak becomes active http://localhost:9990/health] *********************************************
FAILED - RETRYING: [localhost]: Wait until keycloak becomes active http://localhost:9990/health (25 retries left).
ok: [localhost]

PLAY RECAP ***************************************************************************************************************************************************
localhost                  : ok=44   changed=2    unreachable=0    failed=0    skipped=14   rescued=1    ignored=0
More than forty tasks from the included role have been executed, taking care of all the requirements mentioned earlier: user and group creation, the software download, installing the required JVM, etc.
Check for successful installation
Once the playbook finishes its execution, you can confirm that Keycloak is now running as a service by verifying the status of the service:
# ● keycloak.service - Keycloak Server
   Loaded: loaded (/etc/systemd/system/keycloak.service; enabled; vendor preset: disabled)
   Active: active (running) since Mon 2022-03-21 08:06:08 UTC; 3min 36s ago
  Process: 1553 ExecStop=/opt/keycloak/keycloak-service.sh stop (code=exited, status=0/SUCCESS)
  Process: 1571 ExecStart=/opt/keycloak/keycloak-service.sh start (code=exited, status=0/SUCCESS)
 Main PID: 1636 (java)
    Tasks: 79 (limit: 1638)
   Memory: 1012.8M
   CGroup: /system.slice/keycloak.service
           ├─1574 /bin/sh /opt/keycloak/keycloak-15.0.2/bin/standalone.sh -Djboss.bind.address=0.0.0.0 -Djboss.http.port=8080 -Djboss.https.port=8443 -Djboss.management.http.port=9990 -Djboss.management.https.port=9993 -Djboss.node.name=>
           └─1636 java -D[Standalone] -server -Xms1024m -Xmx2048m -Dorg.jboss.boot.log.file=/opt/keycloak/keycloak-15.0.2/standalone/log/server.log -Dlogging.configuration=file:/opt/keycloak/keycloak-15.0.2/standalone/configuration/loggi>

Mar 21 08:06:17 7efa2c53bfe8 keycloak-service.sh[1571]: 08:06:17,566 INFO  [org.jboss.resteasy.resteasy_jaxrs.i18n] (ServerService Thread Pool -- 65) RESTEASY002220: Adding singleton resource org.keycloak.services.resources.RobotsResourc>
Mar 21 08:06:17 7efa2c53bfe8 keycloak-service.sh[1571]: 08:06:17,567 INFO  [org.jboss.resteasy.resteasy_jaxrs.i18n] (ServerService Thread Pool -- 65) RESTEASY002210: Adding provider singleton org.keycloak.services.util.ObjectMapperResolv>
Mar 21 08:06:17 7efa2c53bfe8 keycloak-service.sh[1571]: 08:06:17,567 INFO  [org.jboss.resteasy.resteasy_jaxrs.i18n] (ServerService Thread Pool -- 65) RESTEASY002220: Adding singleton resource org.keycloak.services.resources.WelcomeResour>
Mar 21 08:06:17 7efa2c53bfe8 keycloak-service.sh[1571]: 08:06:17,567 INFO  [org.jboss.resteasy.resteasy_jaxrs.i18n] (ServerService Thread Pool -- 65) RESTEASY002220: Adding singleton resource org.keycloak.services.resources.RealmsResourc>
Mar 21 08:06:17 7efa2c53bfe8 keycloak-service.sh[1571]: 08:06:17,650 INFO  [org.wildfly.extension.undertow] (ServerService Thread Pool -- 65) WFLYUT0021: Registered web context: '/auth' for server 'default-server'
Mar 21 08:06:17 7efa2c53bfe8 keycloak-service.sh[1571]: 08:06:17,728 INFO  [org.jboss.as.server] (ServerService Thread Pool -- 43) WFLYSRV0010: Deployed "keycloak-server.war" (runtime-name : "keycloak-server.war")
Mar 21 08:06:17 7efa2c53bfe8 keycloak-service.sh[1571]: 08:06:17,764 INFO  [org.jboss.as.server] (Controller Boot Thread) WFLYSRV0212: Resuming server
Mar 21 08:06:17 7efa2c53bfe8 keycloak-service.sh[1571]: 08:06:17,766 INFO  [org.jboss.as] (Controller Boot Thread) WFLYSRV0025: Keycloak 15.0.2 (WildFly Core 15.0.1.Final) started in 9864ms - Started 596 of 873 services (584 services are>
Mar 21 08:06:17 7efa2c53bfe8 keycloak-service.sh[1571]: 08:06:17,768 INFO  [org.jboss.as] (Controller Boot Thread) WFLYSRV0060: Http management interface listening on http://127.0.0.1:9990/management
Mar 21 08:06:17 7efa2c53bfe8 keycloak-service.sh[1571]: 08:06:17,768 INFO  [org.jboss.as] (Controller Boot Thread) WFLYSRV0051: Admin console listening on http://127.0.0.1:9990/code>
Note that the playbook execution itself verifies that the service is running and that the Keycloak server itself is also available:
…
TASK [middleware_automation.keycloak.keycloak : Restart and enable keycloak service] **************************************************
changed: [localhost]

TASK [middleware_automation.keycloak.keycloak : Wait until keycloak becomes active http://localhost:9990/health] ***********************
ok: [localhost]
However, for the sake of being thorough, you should double-check that the Keycloak port is indeed accessible:
# curl -I http://localhost:9990/health
HTTP/1.1 200 OK
Connection: keep-alive
Content-Type: application/json
Content-Length: 283
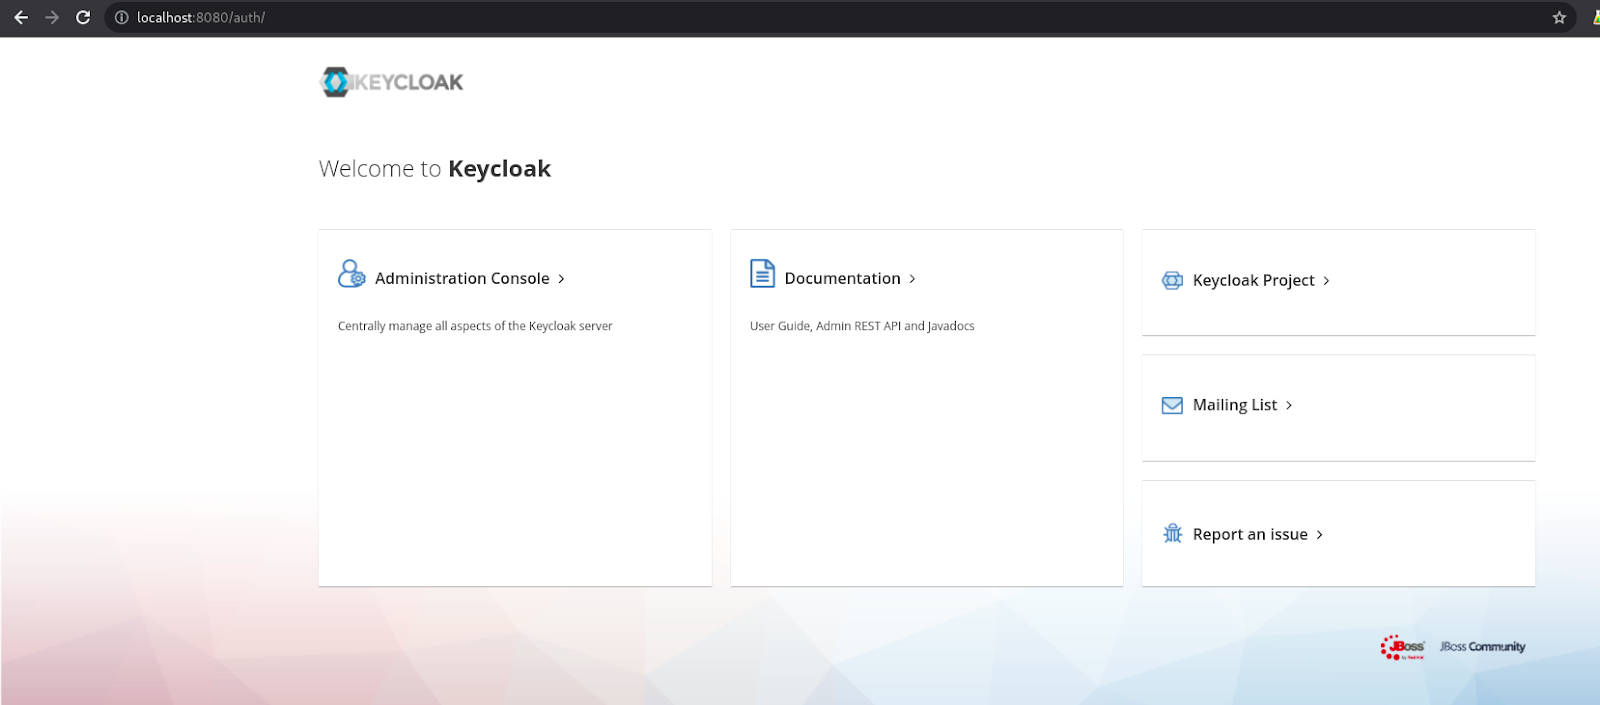
Date: Fri, 18 Mar 2022 09:38:00 GMTIf you navigate to http://localhost:8080/, you will have access to your fully ready installation of Keycloak (Figure 1).
To summarize, at the end of this playbook execution, you'll have a running systemd service managing an instance of Keycloak.
Conclusion
By using Ansible and the Ansible Collection for Keycloak as outlined in this article, you can fully automate the deployment of a single sign-on server. In this article, Ansible has performed all the heavy lifting: downloading software, preparing the operating system (user, group, firewall), deploying the binary files and the configuration, setting up the service (systemd), and even preparing the required administrative account. The Ansible Collection for Keycloak allows you to streamline the installation and configuration of Keycloak, thus enabling you to scale deployments as necessary and ensure repeatability across them all.
In an upcoming article, we'll discuss how to further automate Keycloak's single sign-on service by creating realms and their members using Ansible.
Last updated: October 8, 2024