Redhat Developers  Logo
  • Products

    Platforms

    • Red Hat Enterprise Linux
      Red Hat Enterprise Linux Icon
    • Red Hat AI
      Red Hat AI
    • Red Hat OpenShift
      Openshift icon
    • Red Hat Ansible Automation Platform
      Ansible icon
    • View All Red Hat Products

    Featured

    • Red Hat build of OpenJDK
    • Red Hat Developer Hub
    • Red Hat JBoss Enterprise Application Platform
    • Red Hat OpenShift Dev Spaces
    • Red Hat OpenShift Local
    • Red Hat Developer Sandbox

      Try Red Hat products and technologies without setup or configuration fees for 30 days with this shared Openshift and Kubernetes cluster.
    • Try at no cost
  • Technologies

    Featured

    • AI/ML
      AI/ML Icon
    • Linux
      Linux Icon
    • Kubernetes
      Cloud icon
    • Automation
      Automation Icon showing arrows moving in a circle around a gear
    • View All Technologies
    • Programming Languages & Frameworks

      • Java
      • Python
      • JavaScript
    • System Design & Architecture

      • Red Hat architecture and design patterns
      • Microservices
      • Event-Driven Architecture
      • Databases
    • Developer Productivity

      • Developer productivity
      • Developer Tools
      • GitOps
    • Automated Data Processing

      • AI/ML
      • Data Science
      • Apache Kafka on Kubernetes
    • Platform Engineering

      • DevOps
      • DevSecOps
      • Ansible automation for applications and services
    • Secure Development & Architectures

      • Security
      • Secure coding
  • Learn

    Featured

    • Kubernetes & Cloud Native
      Openshift icon
    • Linux
      Rhel icon
    • Automation
      Ansible cloud icon
    • AI/ML
      AI/ML Icon
    • View All Learning Resources

    E-Books

    • GitOps Cookbook
    • Podman in Action
    • Kubernetes Operators
    • The Path to GitOps
    • View All E-books

    Cheat Sheets

    • Linux Commands
    • Bash Commands
    • Git
    • systemd Commands
    • View All Cheat Sheets

    Documentation

    • Product Documentation
    • API Catalog
    • Legacy Documentation
  • Developer Sandbox

    Developer Sandbox

    • Access Red Hat’s products and technologies without setup or configuration, and start developing quicker than ever before with our new, no-cost sandbox environments.
    • Explore Developer Sandbox

    Featured Developer Sandbox activities

    • Get started with your Developer Sandbox
    • OpenShift virtualization and application modernization using the Developer Sandbox
    • Explore all Developer Sandbox activities

    Ready to start developing apps?

    • Try at no cost
  • Blog
  • Events
  • Videos

Deploy an Operator via GitOps using Advanced Cluster Management

July 11, 2022
Sahil Sethi
Related topics:
GitOpsKubernetesOperatorsSecurity
Related products:
Red Hat Advanced Cluster Management for KubernetesRed Hat Advanced Cluster Security for KubernetesRed Hat OpenShift Container Platform

Share:

    GitOps is a strict discipline: Everything you code or manage should be specified through configuration files in your Git repositories, and applied automatically through CI/CD pipelines. This article shows you how to integrate security policies into GitOps so that they are applied consistently throughout your clusters. Security policies are part of Red Hat Advanced Cluster Management for Kubernetes, a platform that helps developers configure and deploy applications along with other useful services such as metrics. This article also uses Red Hat Advanced Cluster Security for Kubernetes. For background on Red Hat Advanced Cluster Management, read Understanding GitOps with Red Hat Advanced Cluster Management on the Red Hat Hybrid Cloud blog.

    Prerequisites

    Before beginning the exercise in this article, you'll need to install the following technologies:

    • Red Hat OpenShift Container Platform 4.9

    • Red Hat Advanced Cluster Management for Kubernetes

    • A policies repository to deploy with Red Hat Advanced Cluster Management and Red Hat Advanced Cluster Security

    Custom labels can be used to select policies in Red Hat Advanced Cluster Security Management. To take advantage of this feature, create two clusters on the Openshift Container Platform. Assign a label with the name env and the value dev to one cluster, and a label with the name env and the value test to the other.

    Deploy the Subscription-Admin policy

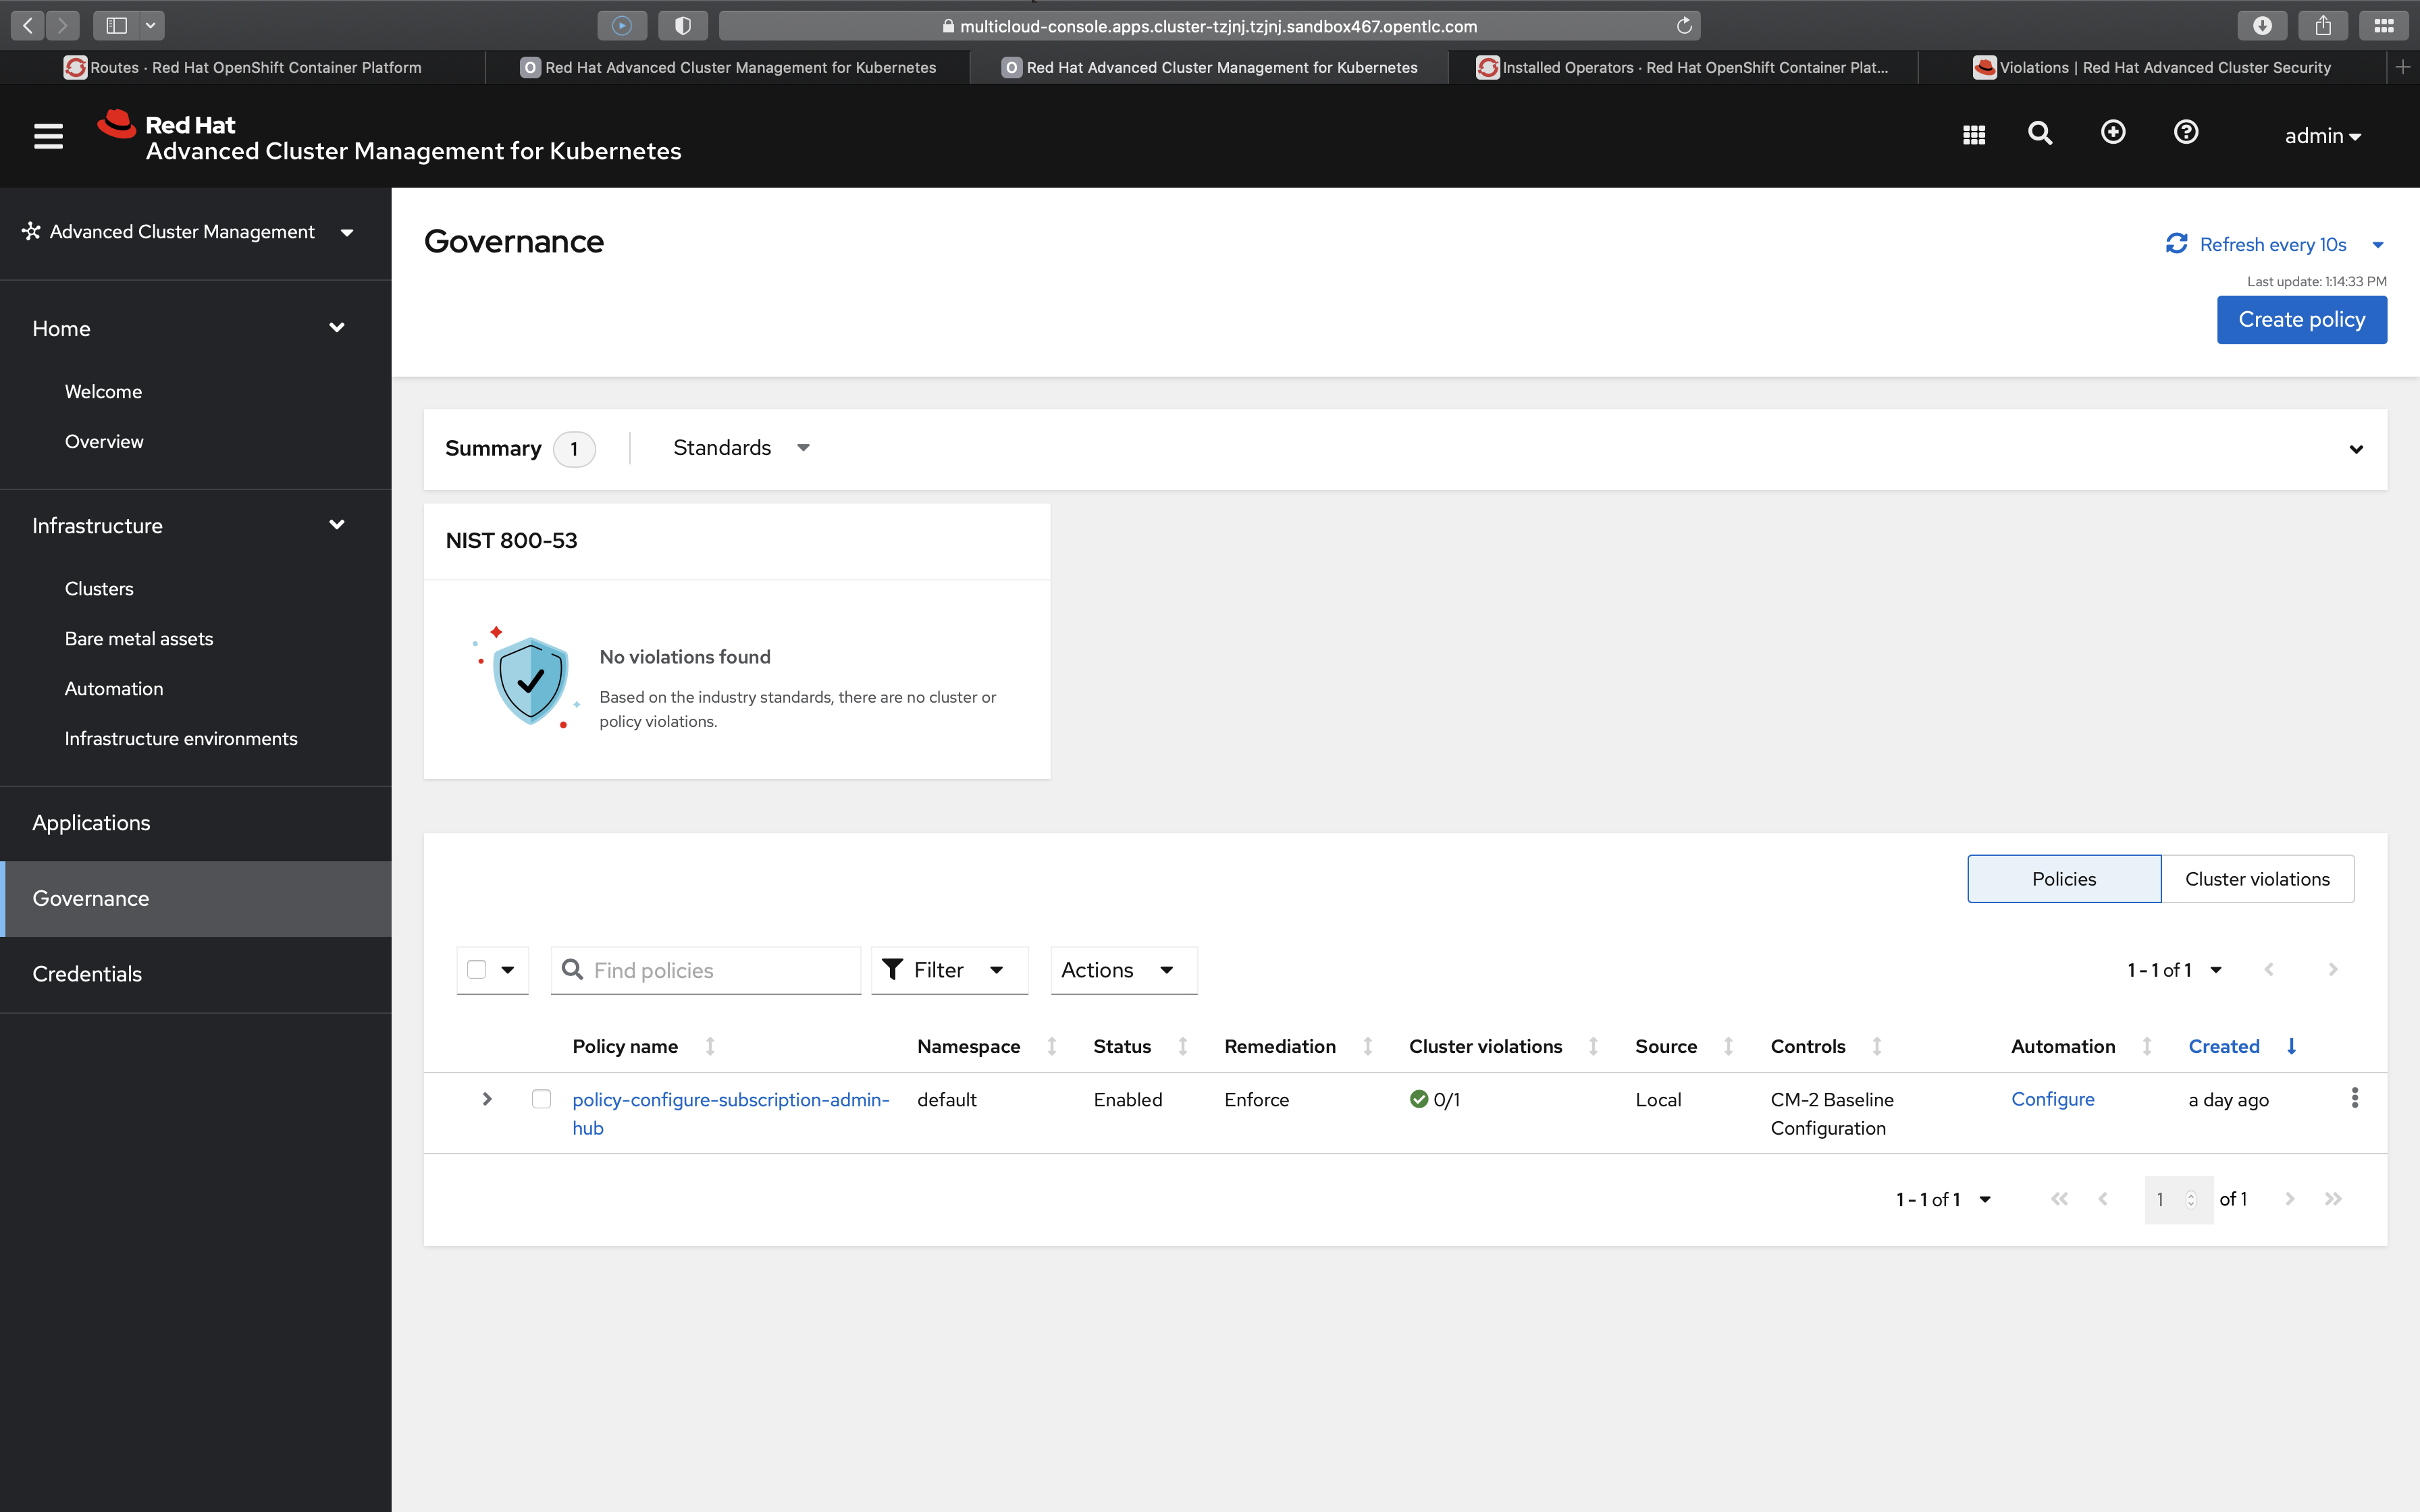
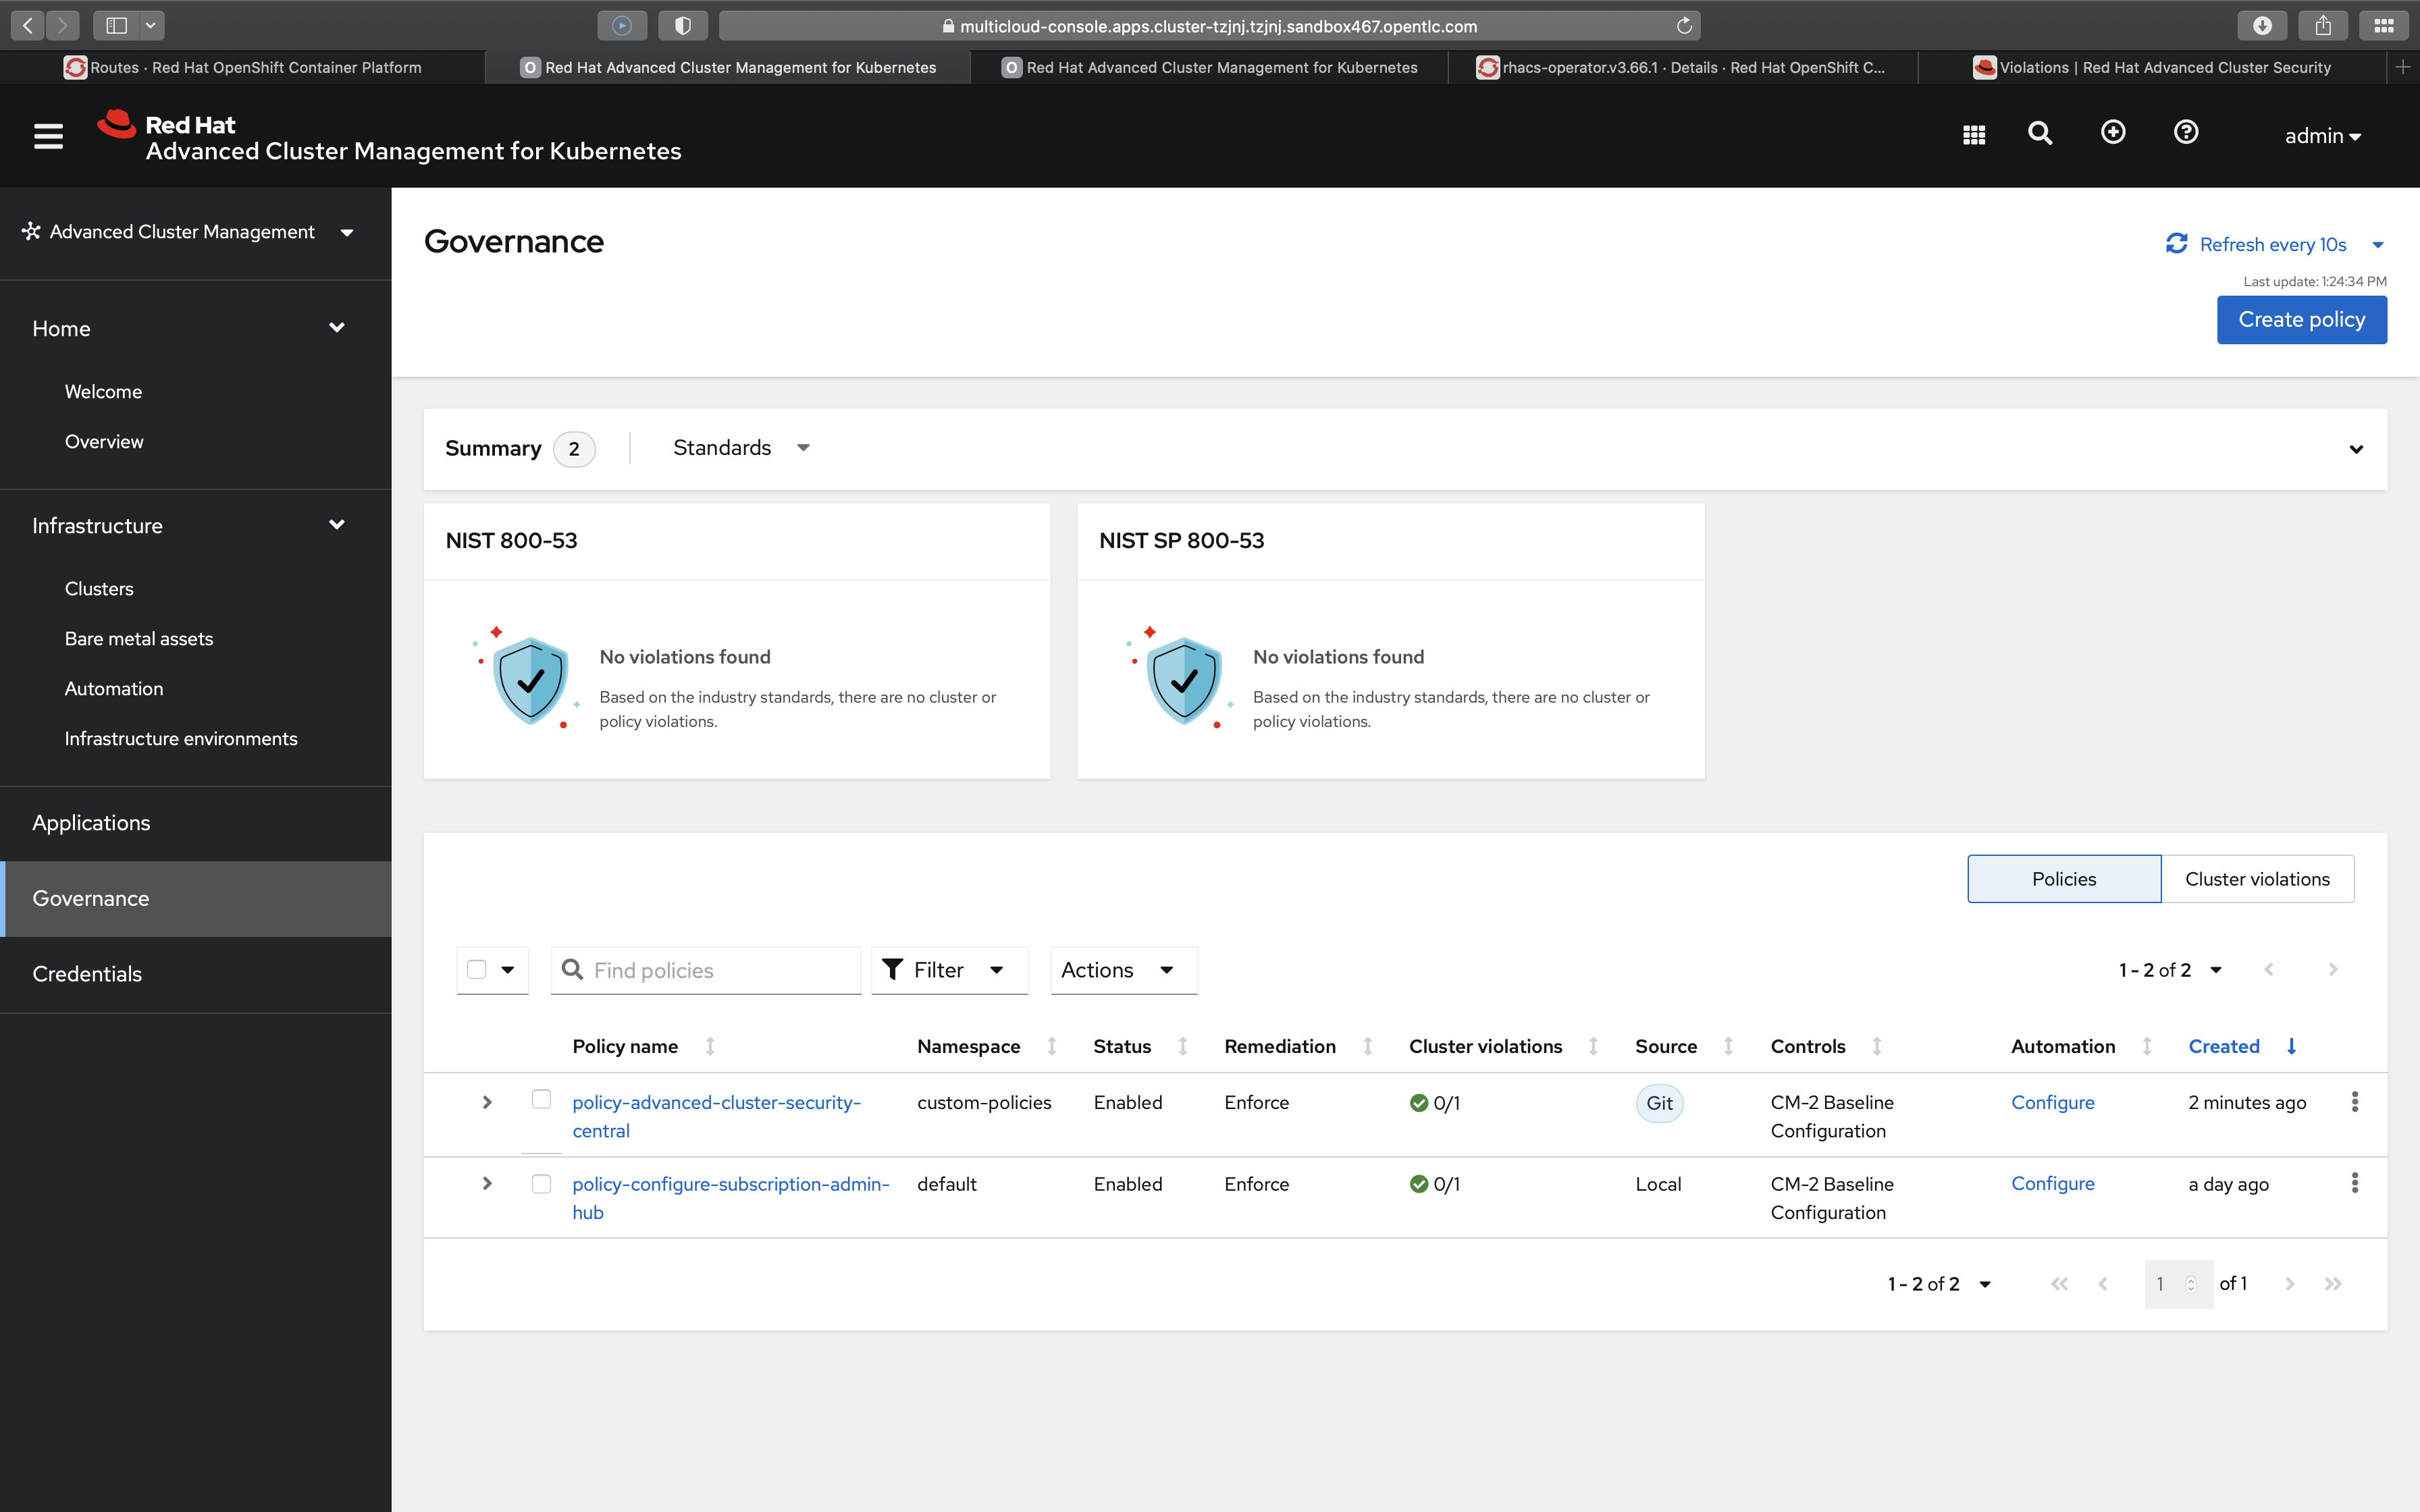
    The policies repository listed in the prerequisites contains a Subscription-Admin policy. To activate it, in the Red Hat Advanced Cluster Management console, navigate to Governance→Create Policy. Copy and paste the policy-configure-subscription-admin-hub.yaml file from the policies repository into the YAML view. Change the namespace to match the namespace of your cluster, and change the user name (which the file defines as kube:admin) to the username you use to log into Red Hat Advanced Cluster Management. Once you have created the policy, it will be shown in the Governance page in the console (Figure 1).

    Screenshow of the Governance page showing a policy after you successfully create it
    Figure 1: The Governance screen shows a policy after you successfully create it.
    Figure 1: The Governance page shows a policy after you successfully create it.

    Install the central policy

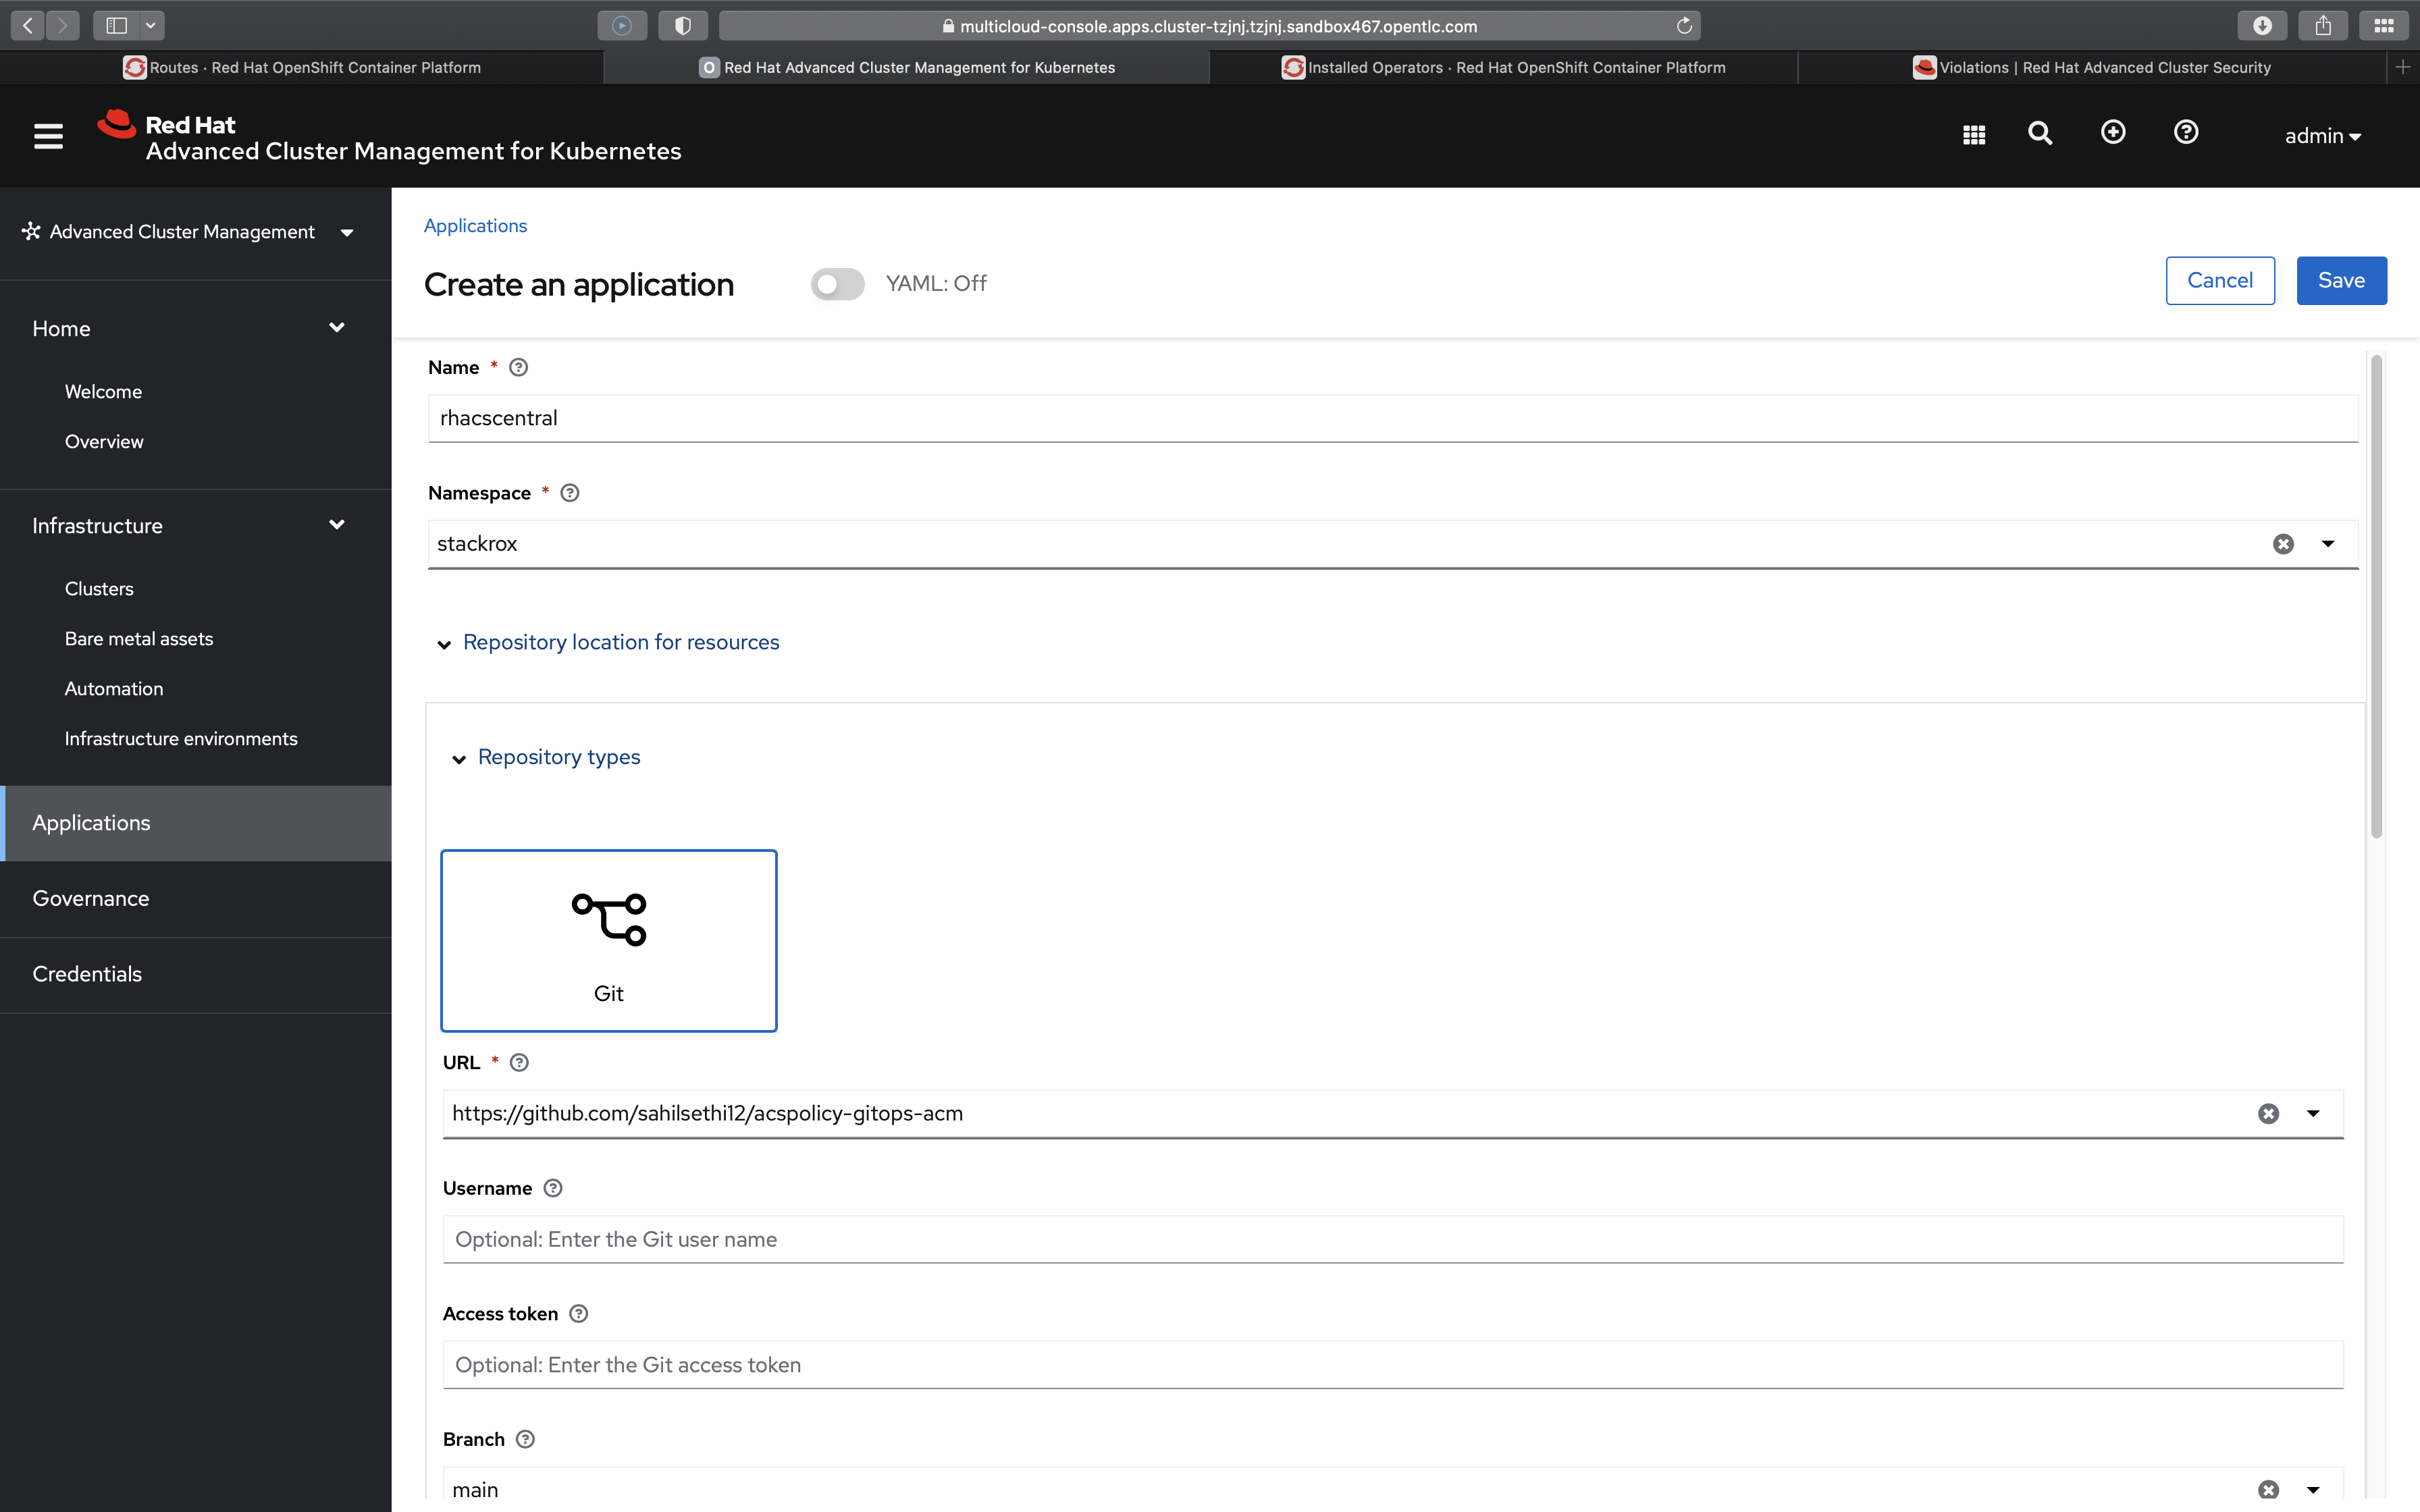
    Deploy Red Hat Advanced Cluster Security for Kubernetes by navigating to Applications→Create Application→Subscription and entering the information shown in Figure 2:

    • The name of your application
    • The namespace where you want to install the application
    • The URL of its repository
    • Your username
    • Your access token
    This picture shows the application details
    Figure 2: The "Create an application" screen asks for basic information.

    Also on the Create an application page, choose Deploy on local cluster (Figure 3).

    This picture shows the application details
    Figure 3: The "Create an application" screen lets you deploy the application on a local cluster.
    Figure 3: The 'Create an application' page lets you choose where to deploy the application.

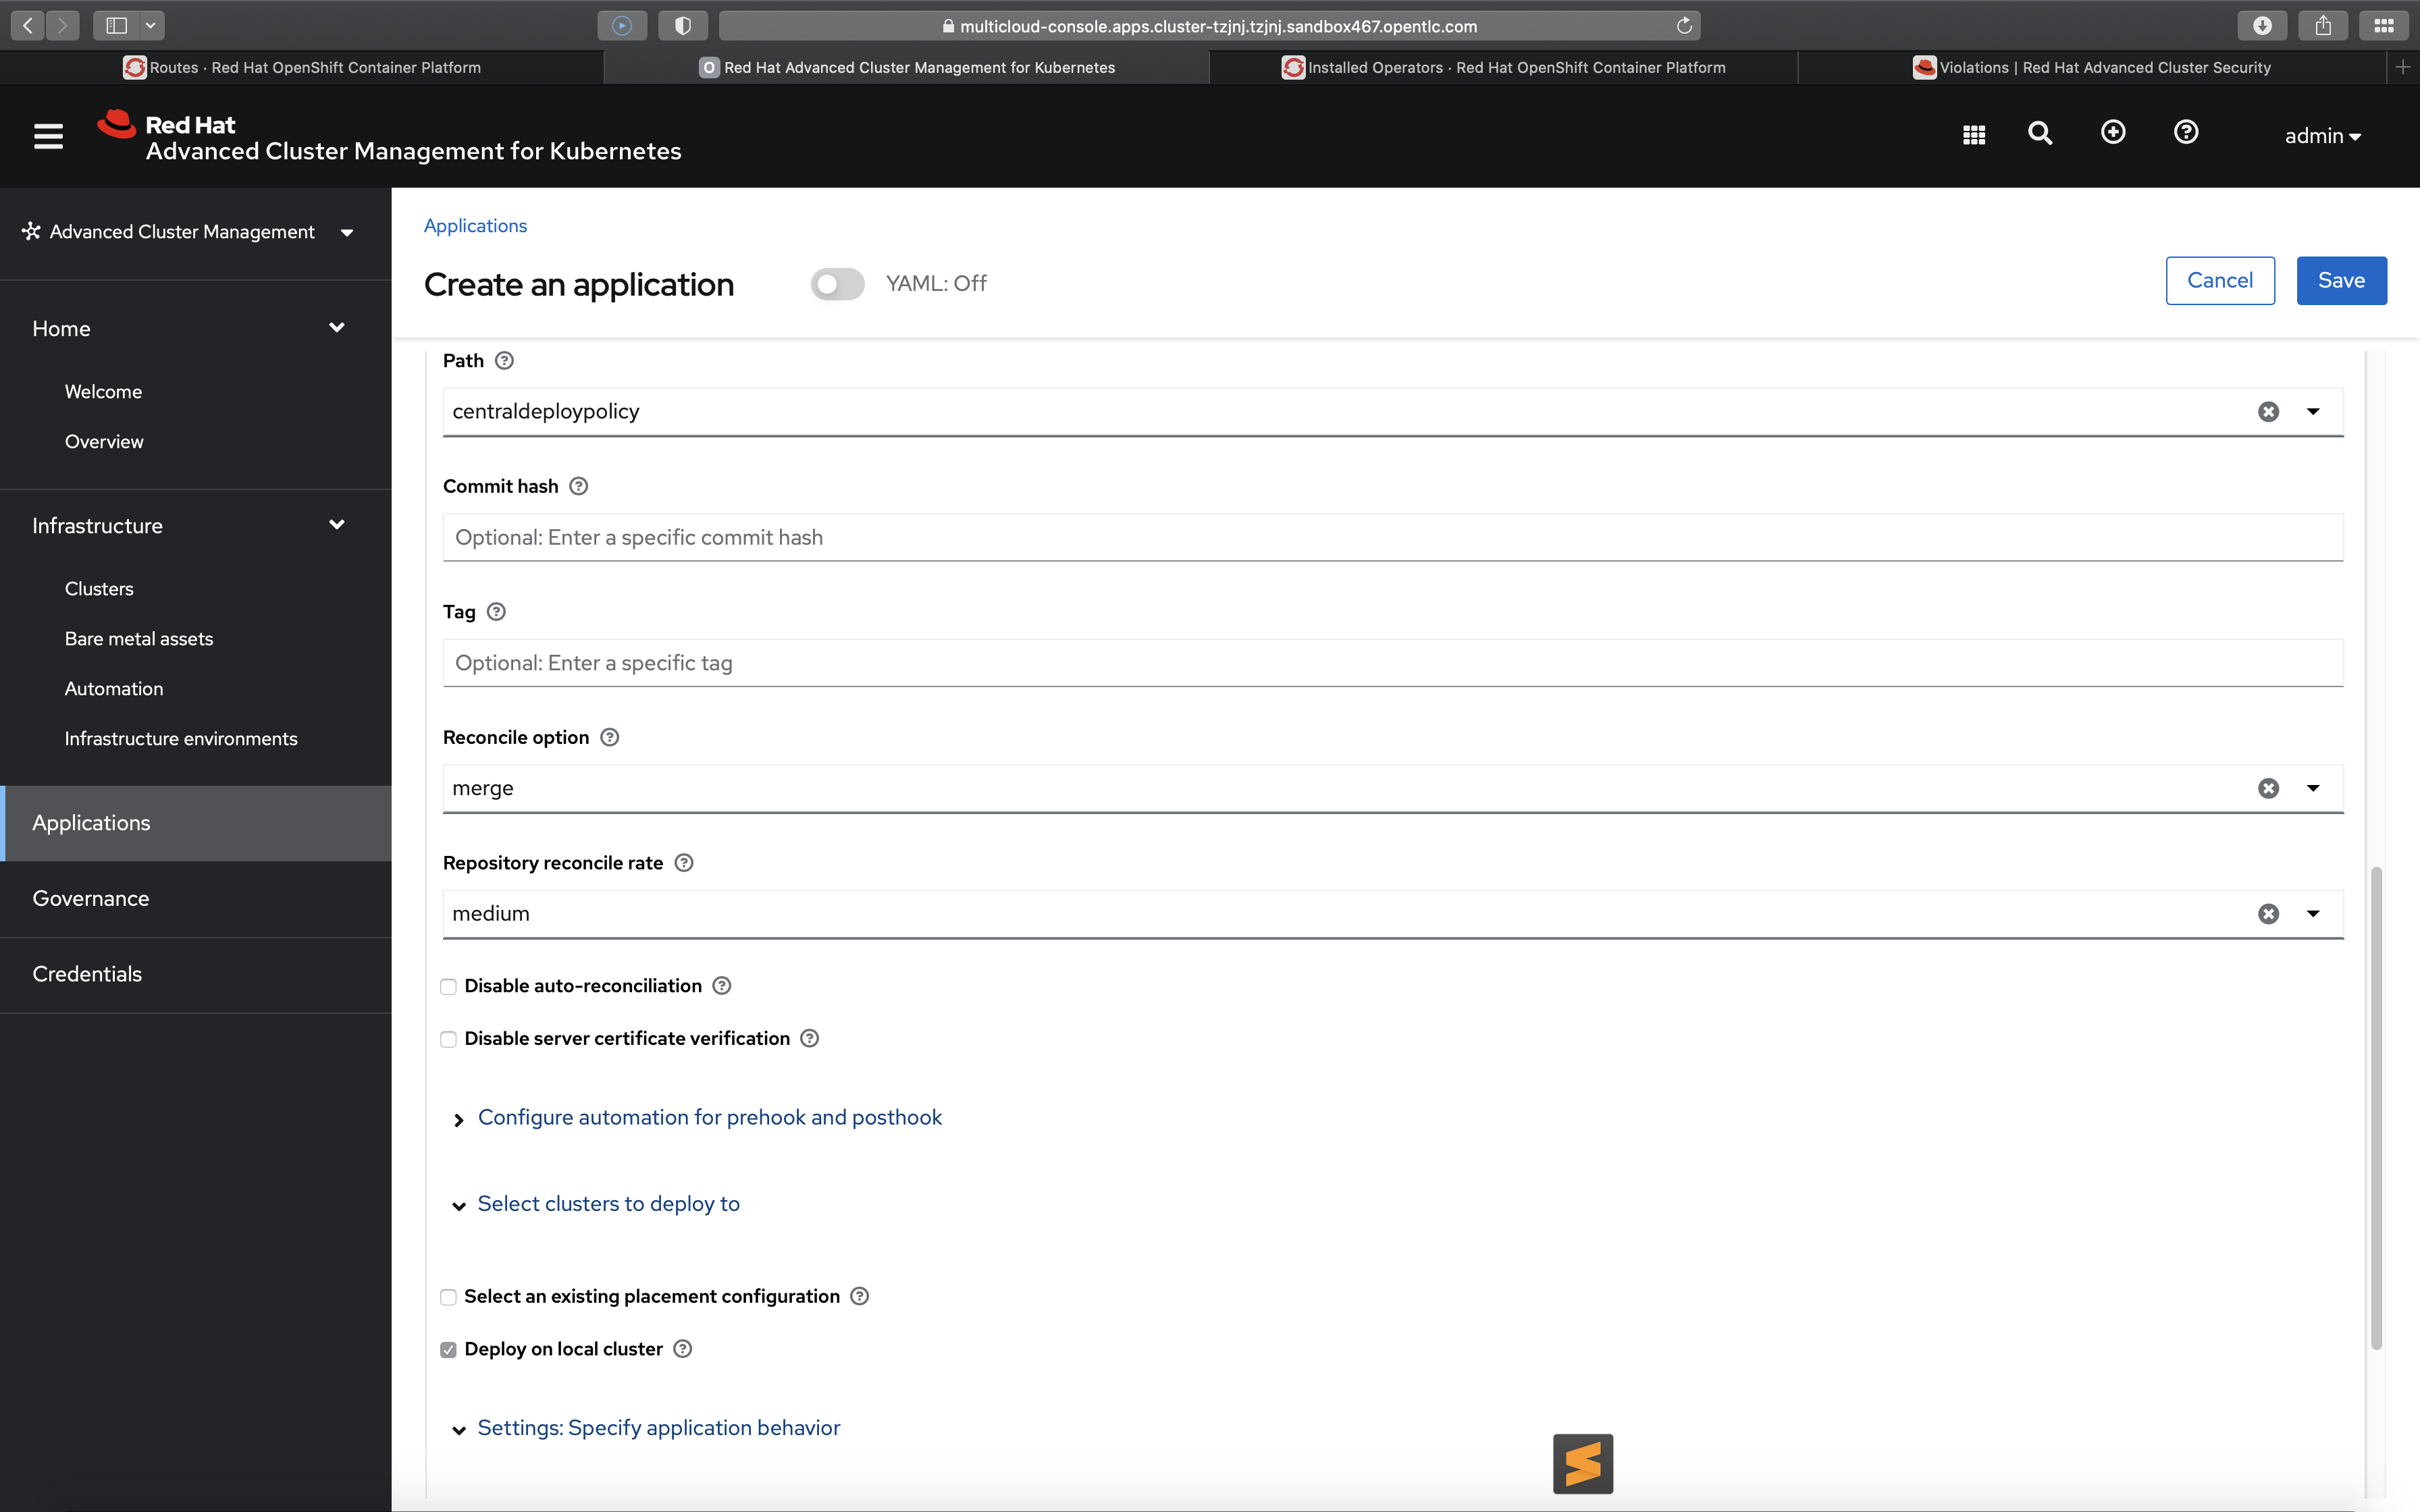
    The application needs a central policy, which must be located in only one of its environments. The policies repository linked to above defines a central policy with the name policy-advanced-cluster-security-central and places it in the test environment using a placement rule in one of the YAML configuration files.

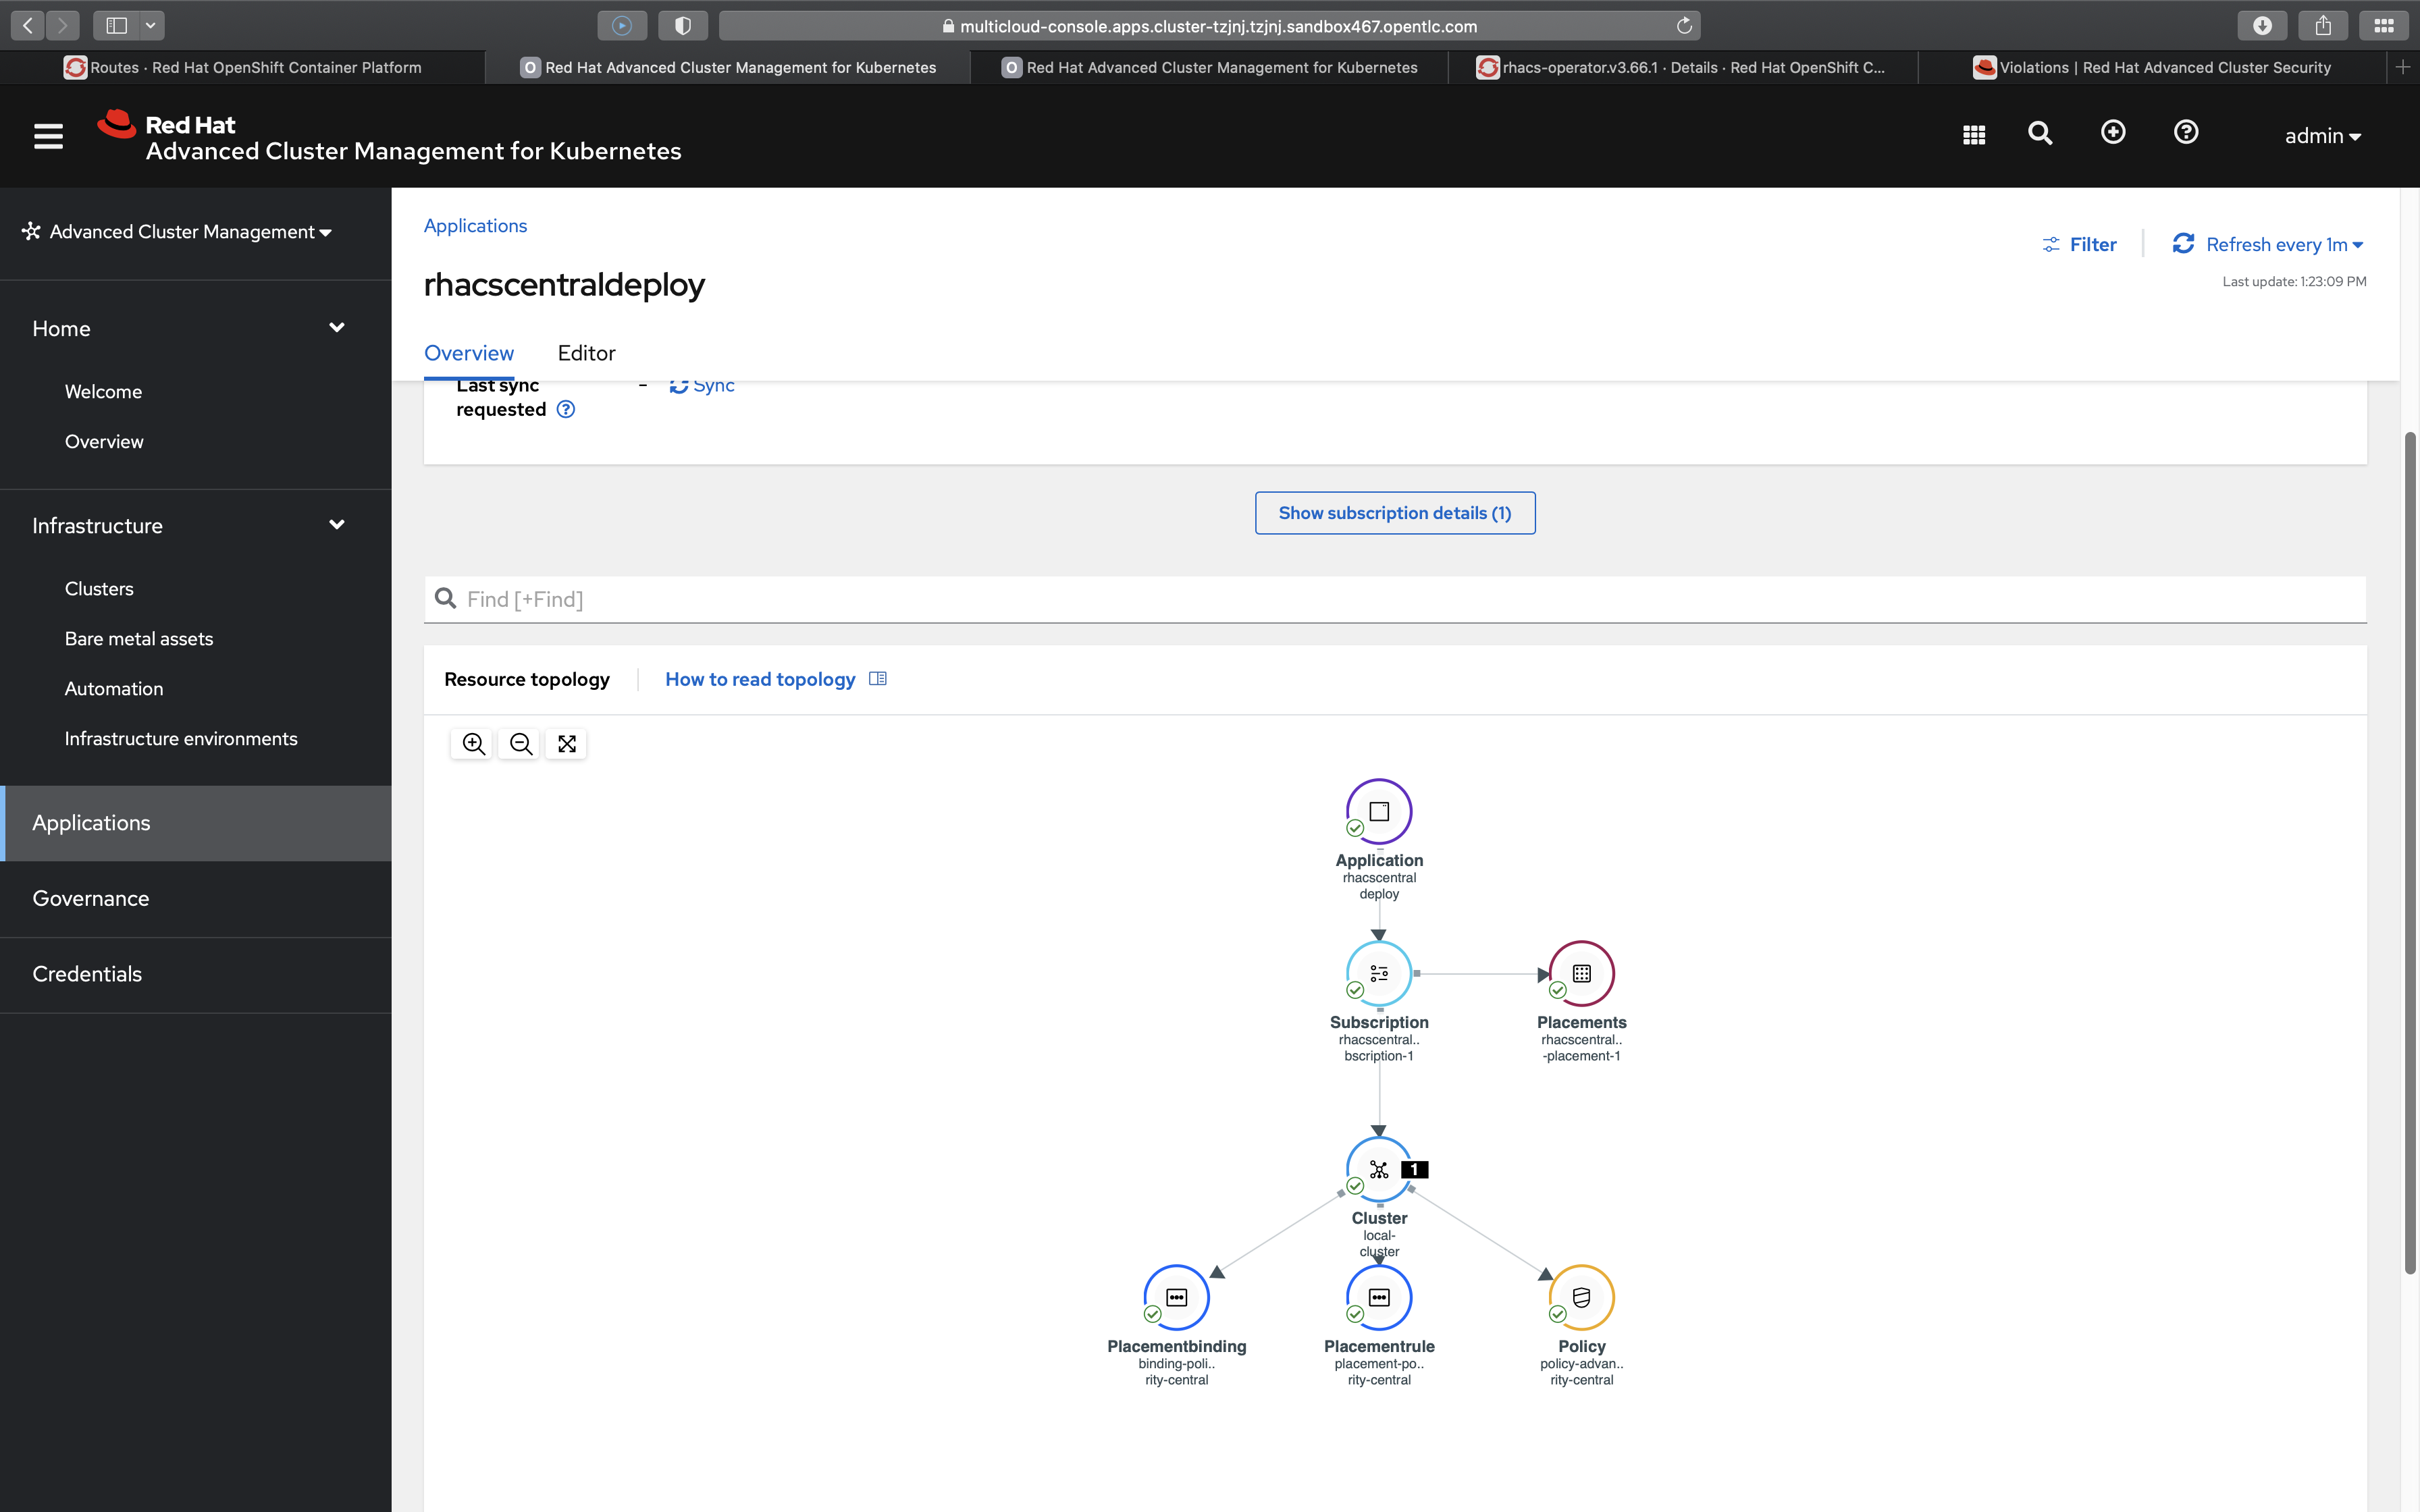
    Click Save Application. A successful creation takes you to the resource topology, a visual representation of the resources in your deployed application, including the Subscription-Application (Figure 4).

    Shows the Application and all Manifests  deployed  using the application
    Figure 4: The application's topology shows the application's resources.

    From the menu on the left, you can choose the Governance tab and see the new Subscription-Admin policy in effect (Figure 5).

    Shows the policies deployed via Manual as well as via Git
    Figure 5: The Governance screen now shows the Subscription-Admin policy.

    Generate the init bundle for the cluster and deploy it via the application

    From the test cluster, get the URL of the central endpoint. Enter this URL into your browser and log into the stackrox namespace. (The policies repository assigned the name stackrox because StackRox is the upstream project from which Red Hat Advanced Cluster Security for Kubernetes evolved, but you can use any name of your choice.) Your password will be picked from the secret named central-htpasswd in the namespace.

    Navigate to Platform Configuration→Integrations→Cluster Init Bundle→<your_cluster_name>. Click generate→Download kubernetes Secret file. Replace the automatically generated file with the contents of this file.

    Now you have to create an application to deploy the generated secret file in both the dev and test clusters. Follow these steps for each cluster:

    • Navigate to Applications→Create Application→Subscription.
    • Enter the name of the application and the namespace where you want to install it. Choose centralSecrets as the Git path.
    • Instead of choosing a local cluster, choose the labels for which the cluster needs to be deployed. As shown in Figure 6, one label has the name env with the value test, and the other has the name env with the value dev.
    Shows the Application Creation Fields for Secret Manifest
    Figure 6: The "Create an application" screen shows the test and dev labels.

    Installing the secured cluster

    Each cluster runs an application. For simplicity, in this section you'll create two identical applications, one for the dev cluster and one for the test cluster. (Another approach would be to create one application and use templates to get the value for the cluster from the secrets, instead of hardcoding the value.)

    For the simple approach we'll use here, go through these steps on each cluster:

    • Navigate to Applications→Create Application→Subscription.
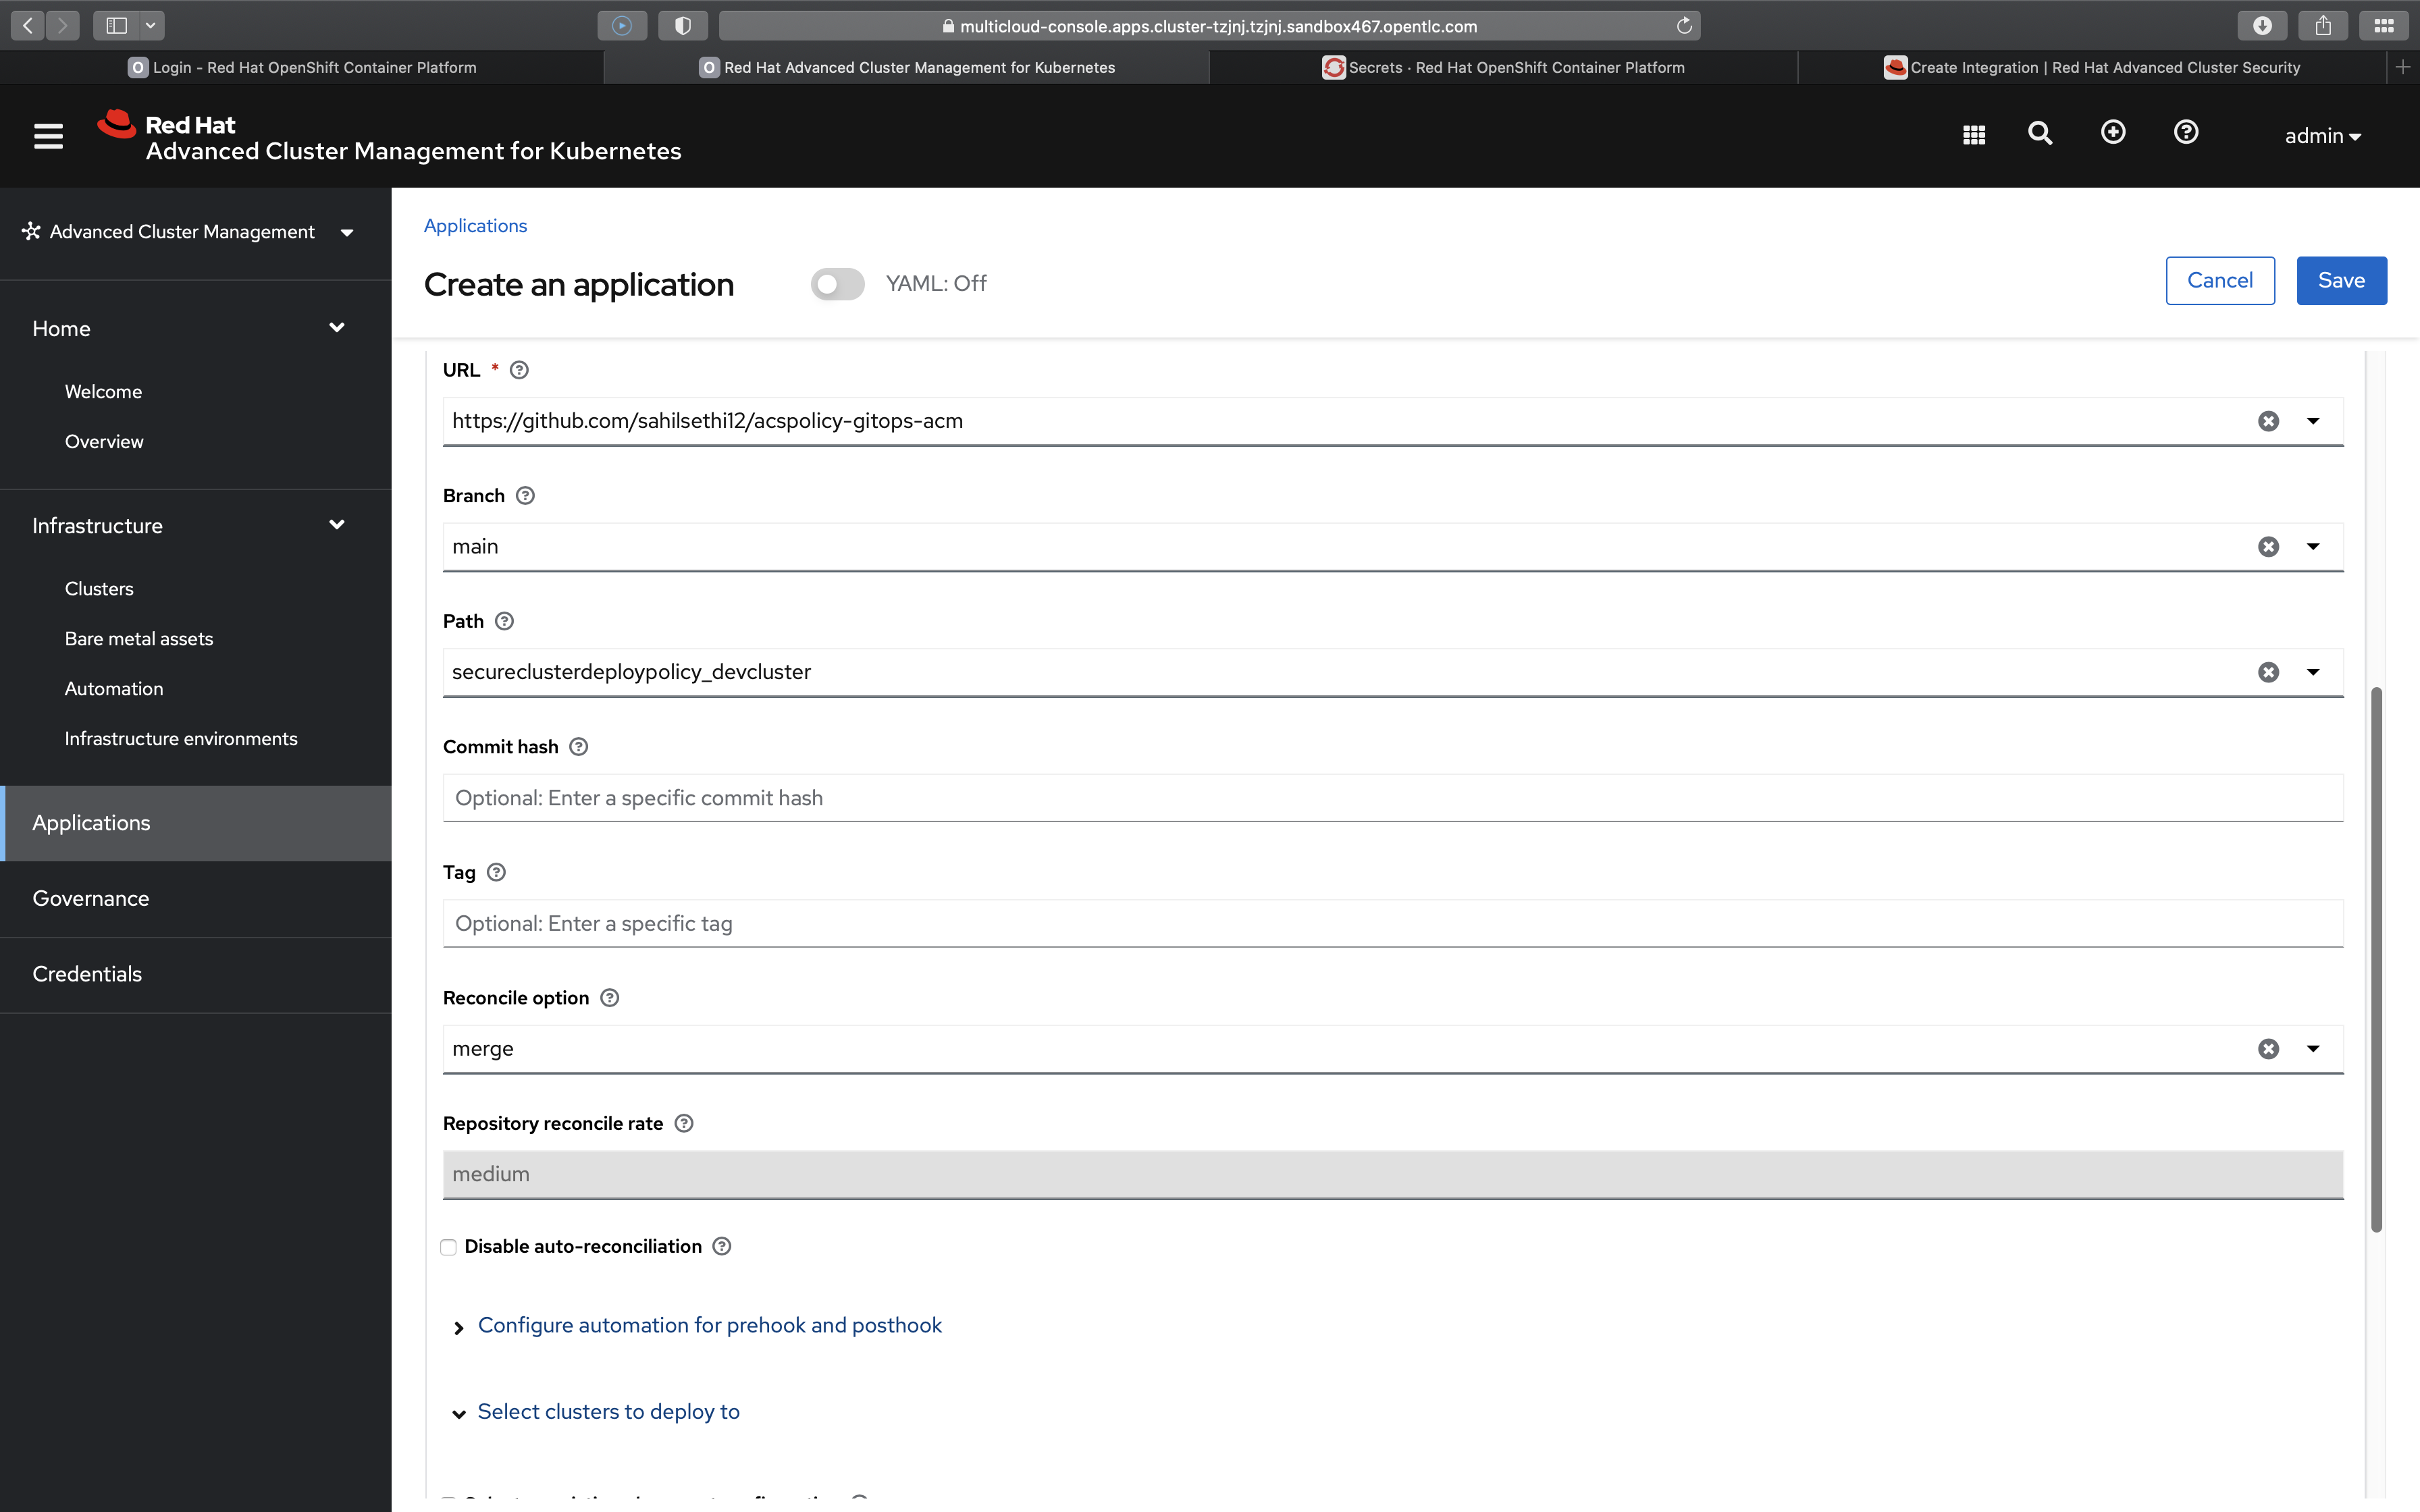
    • Enter the name of the application and the namespace where you want to install it. For the dev cluster, choose secureclusterdeploypolicy_devcluster as the Git path, and for the test cluster, choose secureclusterdeploypolicy_testcluster as the Git path.

    Figure 7 shows the values to enter.

    Shows the Application Creation Fields for Secured Cluster Installation
    Figure 7: The "Create an application" screen shows options for the dev cluster.

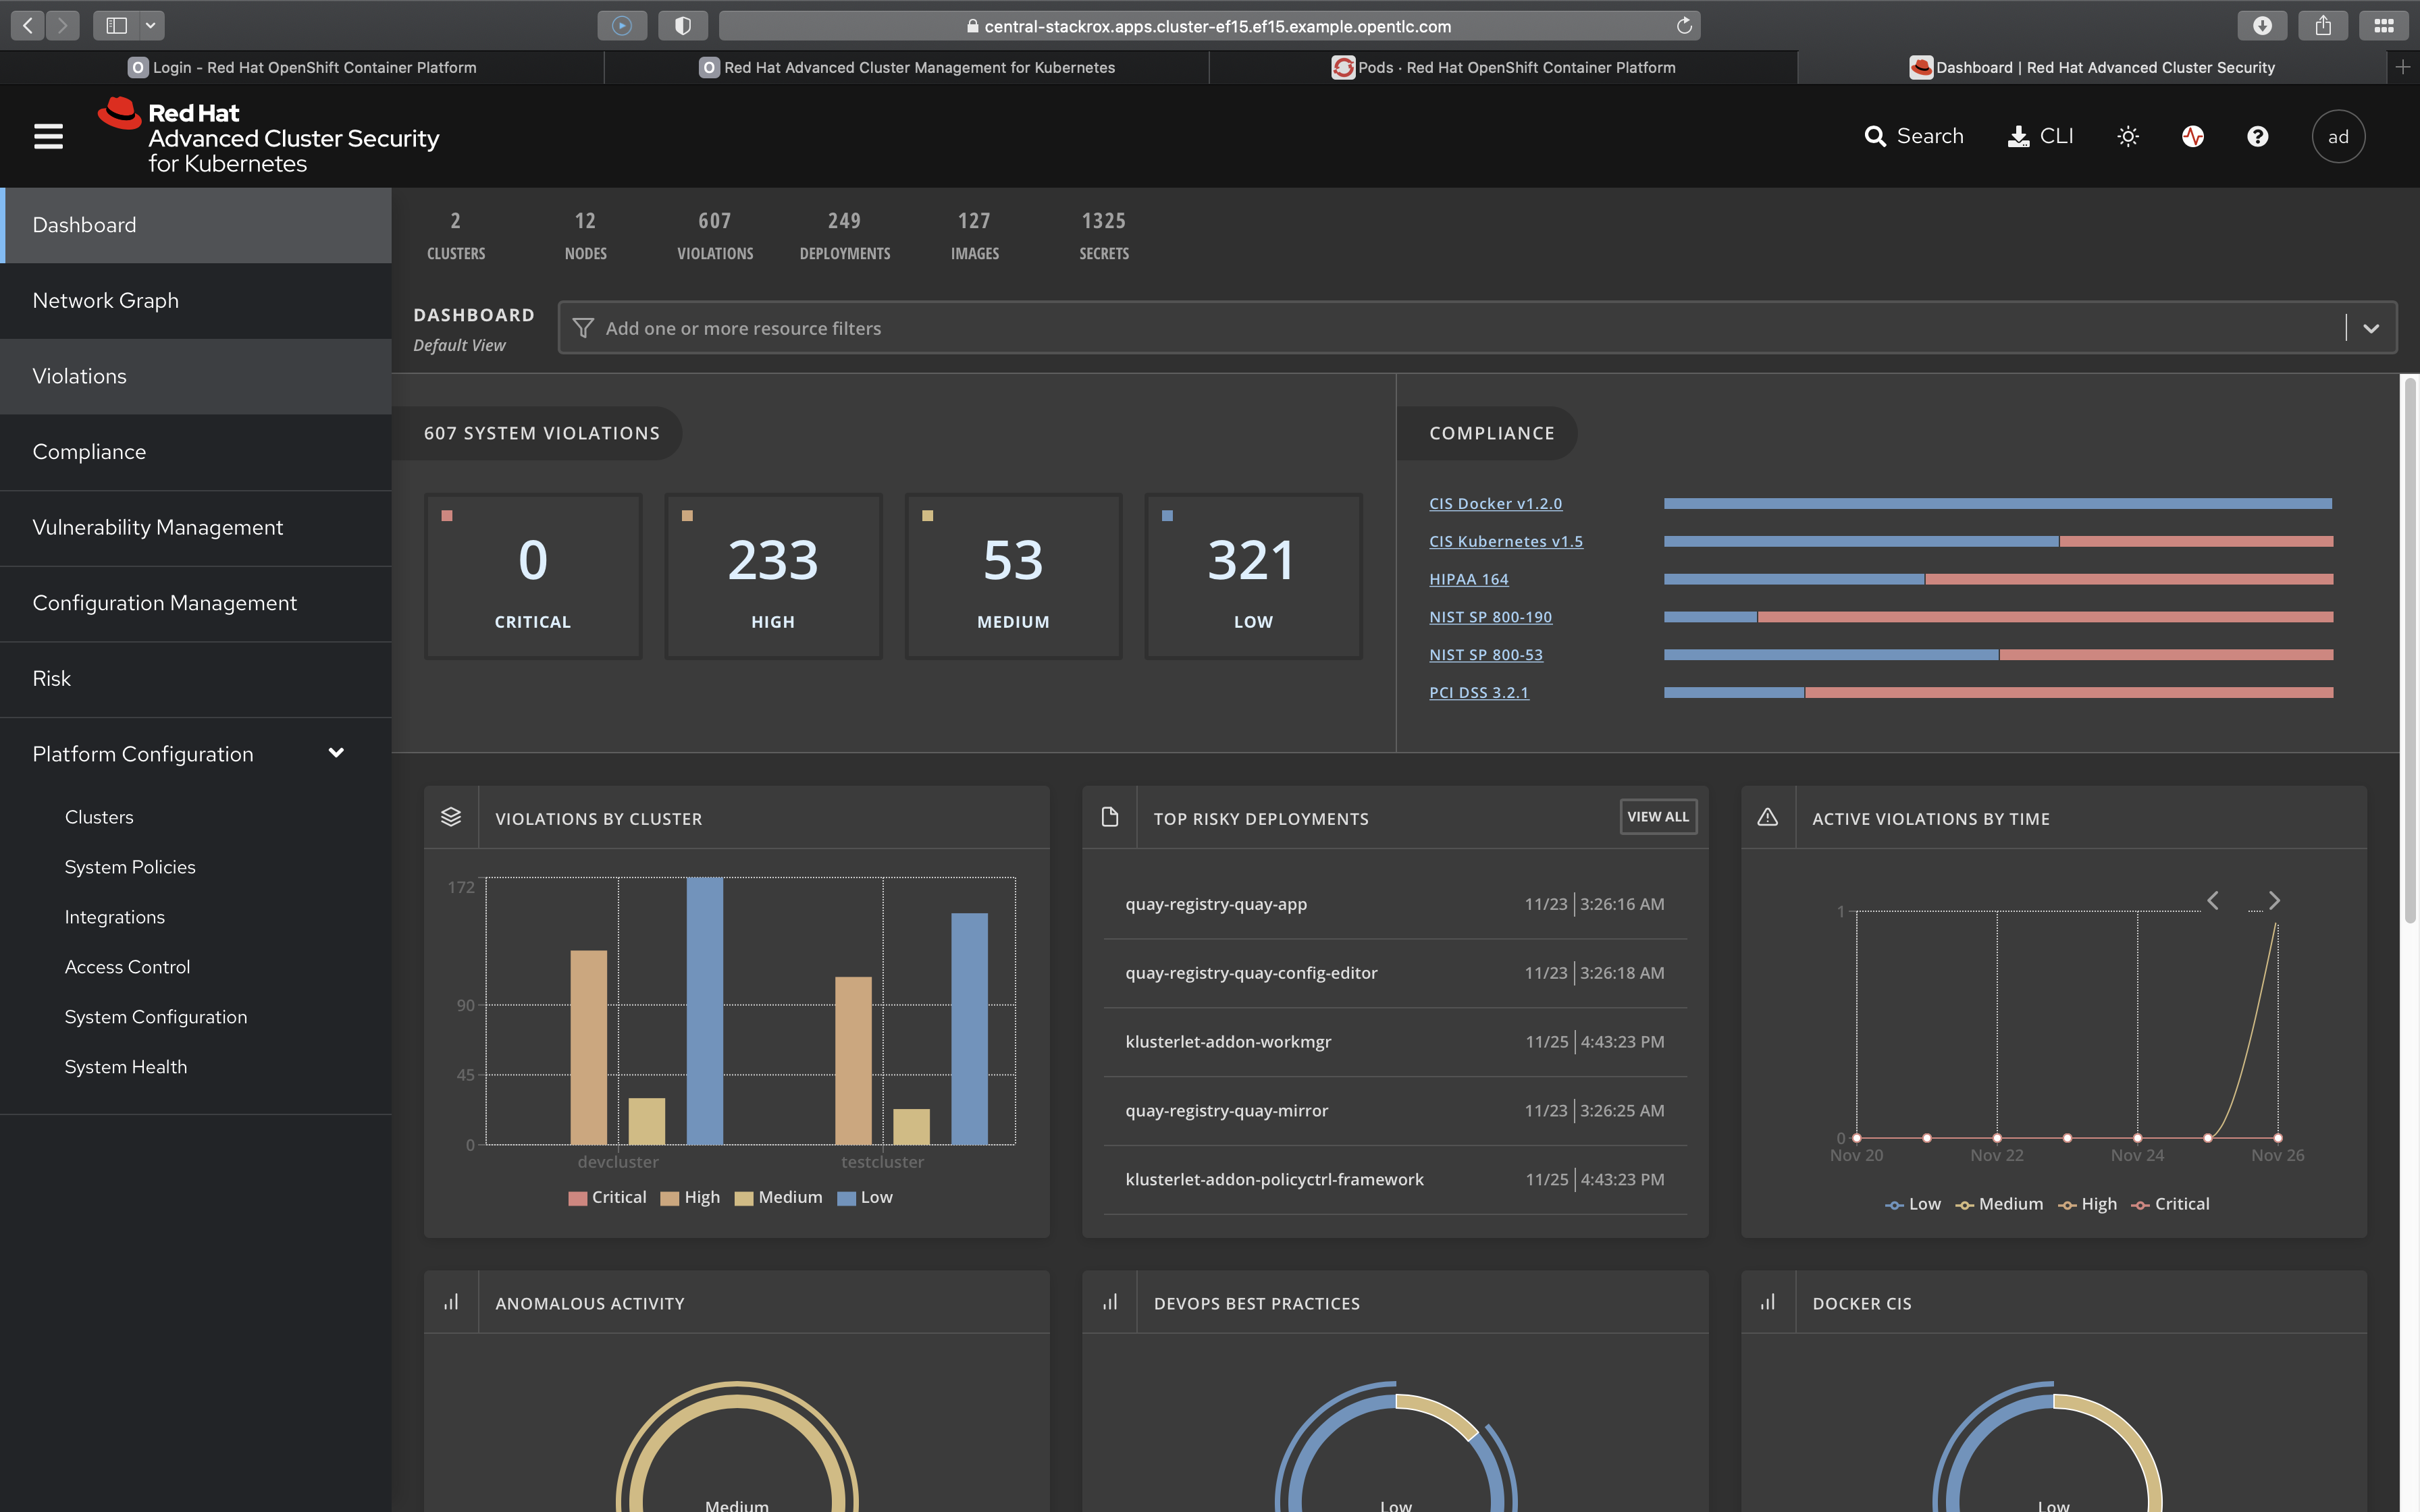
    Once everything is deployed, you can see the status of your clusters, along with some metrics, in the central server (Figure 8).

    Shows the RHACS Central UI
    Figure 8: The metrics dashboard shows the status and activites on your clusters.

    Conclusion

    This article has shown how configuration files and CI/CD pipelines can be used to manage security policies. The general principles can apply to other processes that you need to automate with GitOps.

    Last updated: September 20, 2023

    Recent Posts

    • Why some agentic AI developers are moving code from Python to Rust

    • Confidential VMs: The core of confidential containers

    • Benchmarking with GuideLLM in air-gapped OpenShift clusters

    • Run Qwen3-Next on vLLM with Red Hat AI: A step-by-step guide

    • How to implement observability with Python and Llama Stack

    What’s up next?

    Getting GitOps e-book card

    Learn how to navigate the complex world of modern container-based software development and distribution with Getting GitOps: A Practical Platform with OpenShift, Argo CD, and Tekton.

    Get the free e-book
    Red Hat Developers logo LinkedIn YouTube Twitter Facebook

    Products

    • Red Hat Enterprise Linux
    • Red Hat OpenShift
    • Red Hat Ansible Automation Platform

    Build

    • Developer Sandbox
    • Developer Tools
    • Interactive Tutorials
    • API Catalog

    Quicklinks

    • Learning Resources
    • E-books
    • Cheat Sheets
    • Blog
    • Events
    • Newsletter

    Communicate

    • About us
    • Contact sales
    • Find a partner
    • Report a website issue
    • Site Status Dashboard
    • Report a security problem

    RED HAT DEVELOPER

    Build here. Go anywhere.

    We serve the builders. The problem solvers who create careers with code.

    Join us if you’re a developer, software engineer, web designer, front-end designer, UX designer, computer scientist, architect, tester, product manager, project manager or team lead.

    Sign me up

    Red Hat legal and privacy links

    • About Red Hat
    • Jobs
    • Events
    • Locations
    • Contact Red Hat
    • Red Hat Blog
    • Inclusion at Red Hat
    • Cool Stuff Store
    • Red Hat Summit
    © 2025 Red Hat

    Red Hat legal and privacy links

    • Privacy statement
    • Terms of use
    • All policies and guidelines
    • Digital accessibility

    Report a website issue