Native support for NVIDIA NIM microservices is now generally available on Red Hat OpenShift AI to help streamline inferencing for dozens of AI/ML models on a consistent, flexible hybrid cloud platform. NVIDIA NIM, part of the NVIDIA AI Enterprise software platform, is a set of easy-to-use inference microservices for accelerating the deployment of foundation models and keeping your data secured.
With NVIDIA NIM on OpenShift AI, data scientists, engineers, and application developers can collaborate in a single destination that promotes consistency, security and scalability, driving faster time-to-market of applications.
This how-to article will help you get started with creating and delivering AI-enabled applications with NVIDIA NIM on OpenShift AI.
Enable NVIDIA NIM
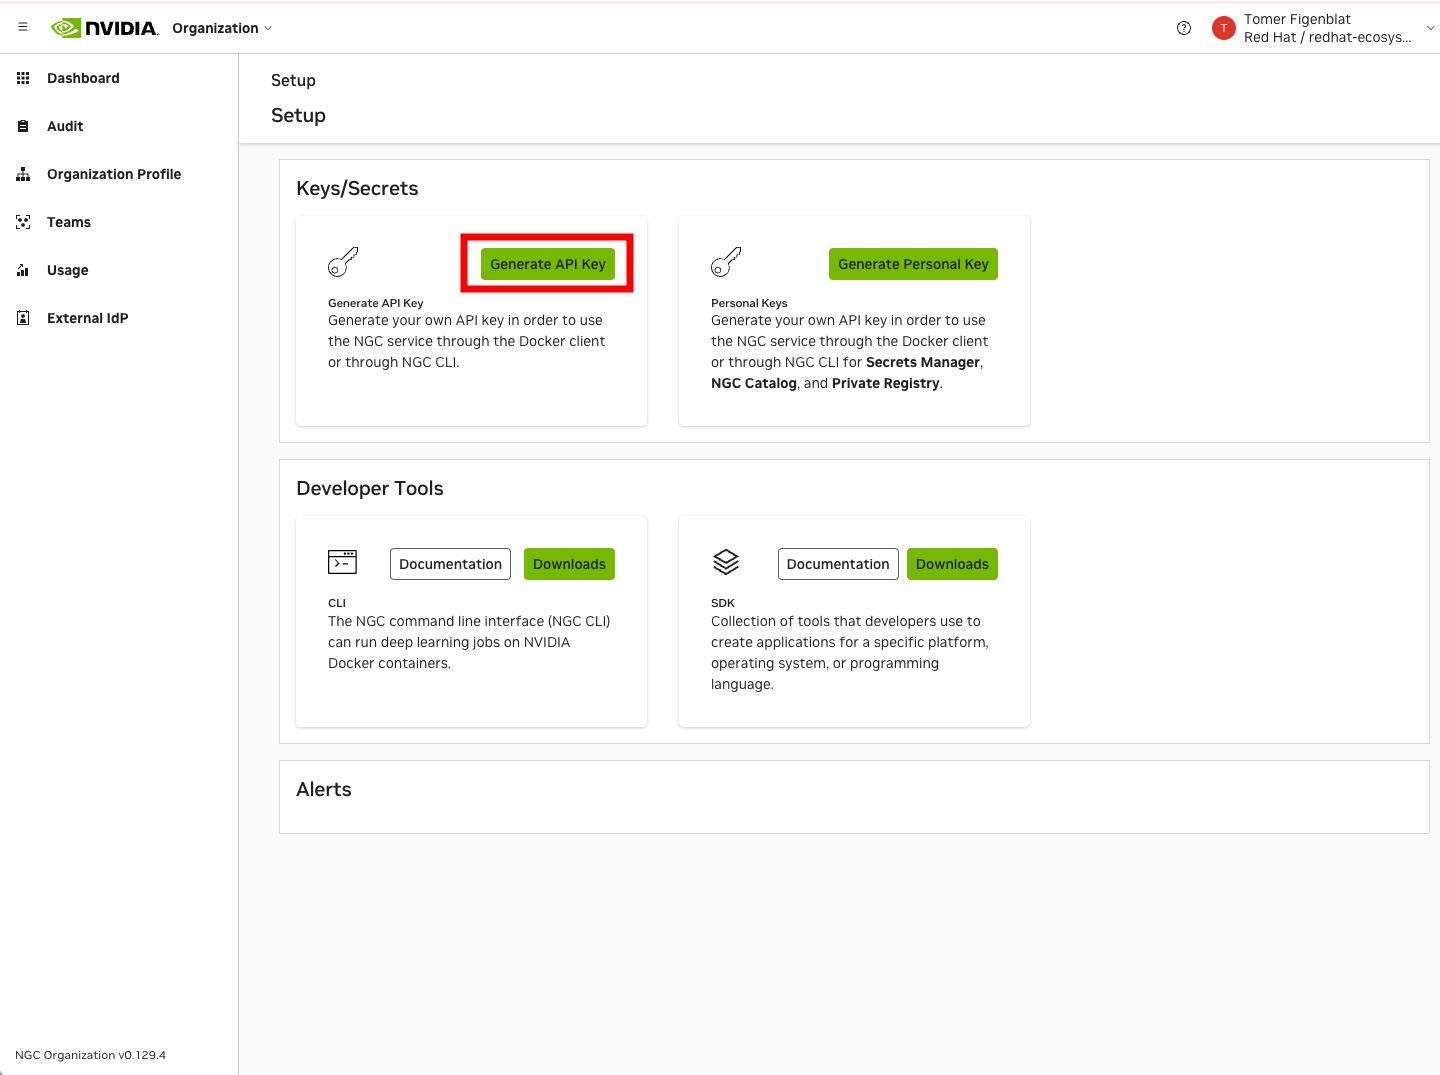
First, go to the NVIDIA NGC catalog to generate an API key. From the top right profile menu, select the Setup option and click to generate your API key, as shown in Figure 1.
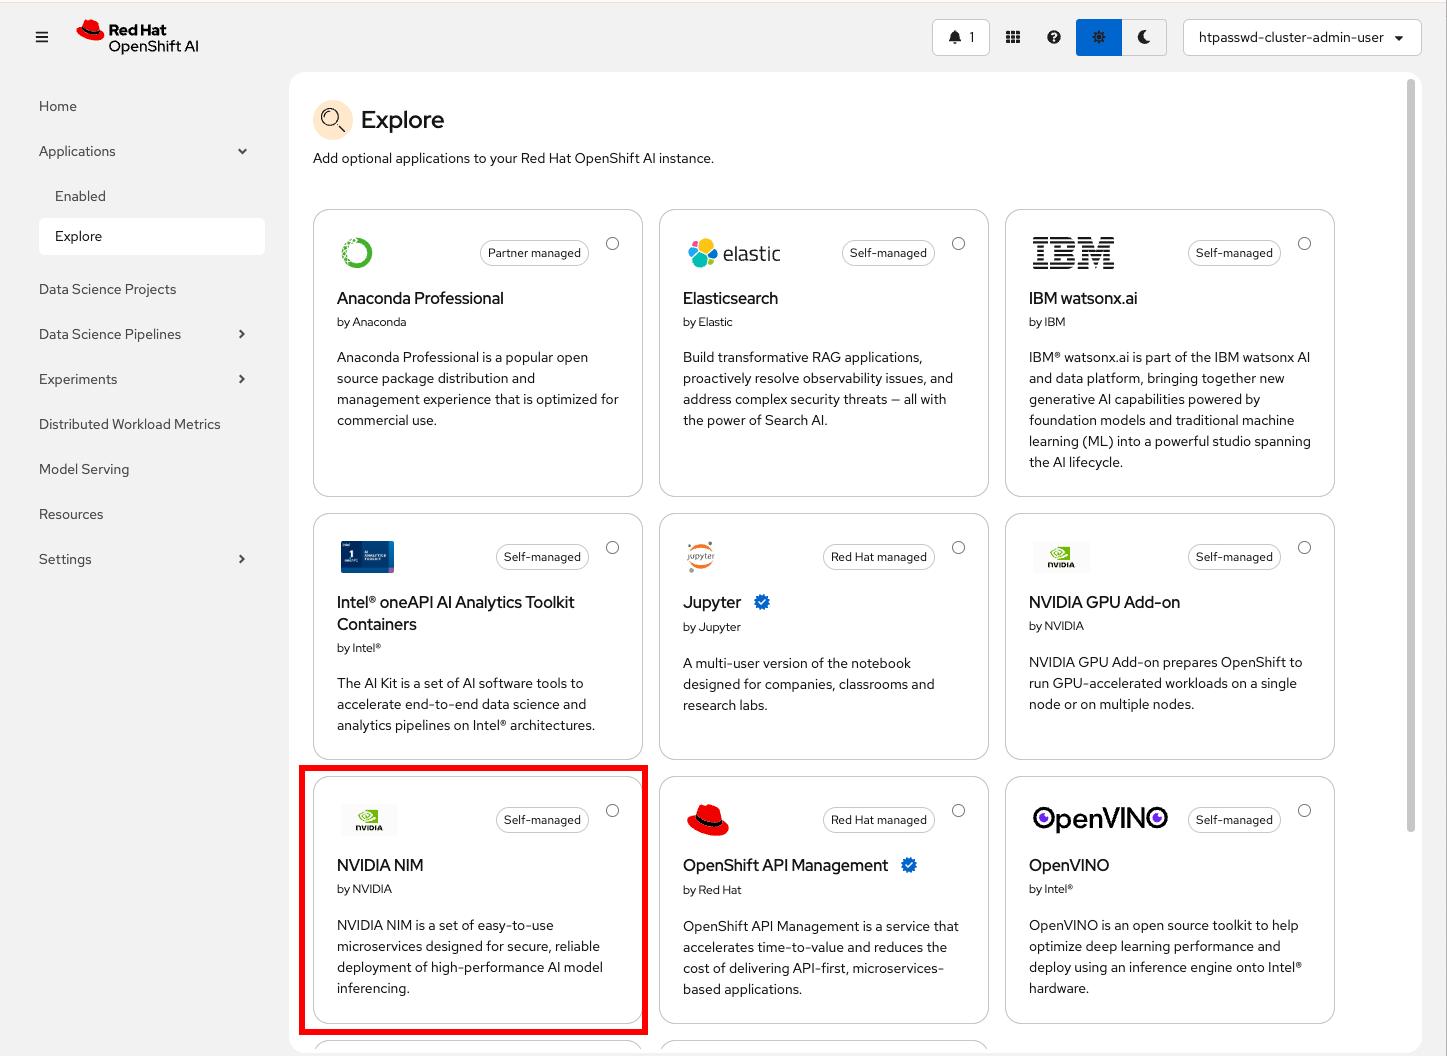
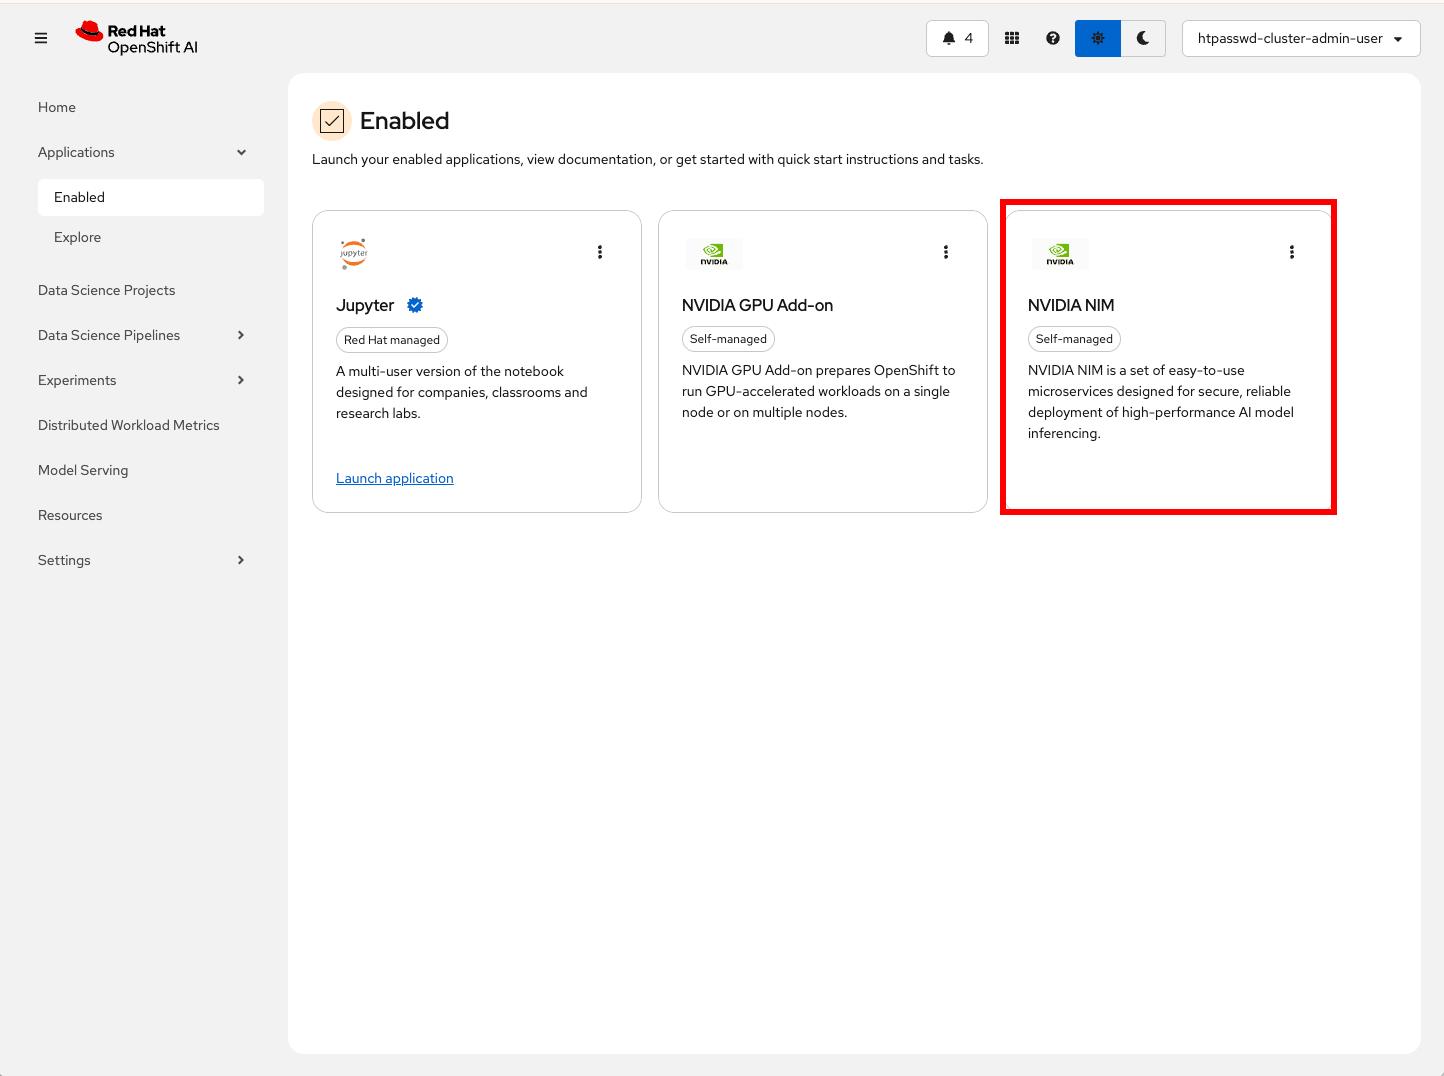
In your Red Hat OpenShift AI dashboard, locate and click the NVIDIA NIM tile. See Figure 2.
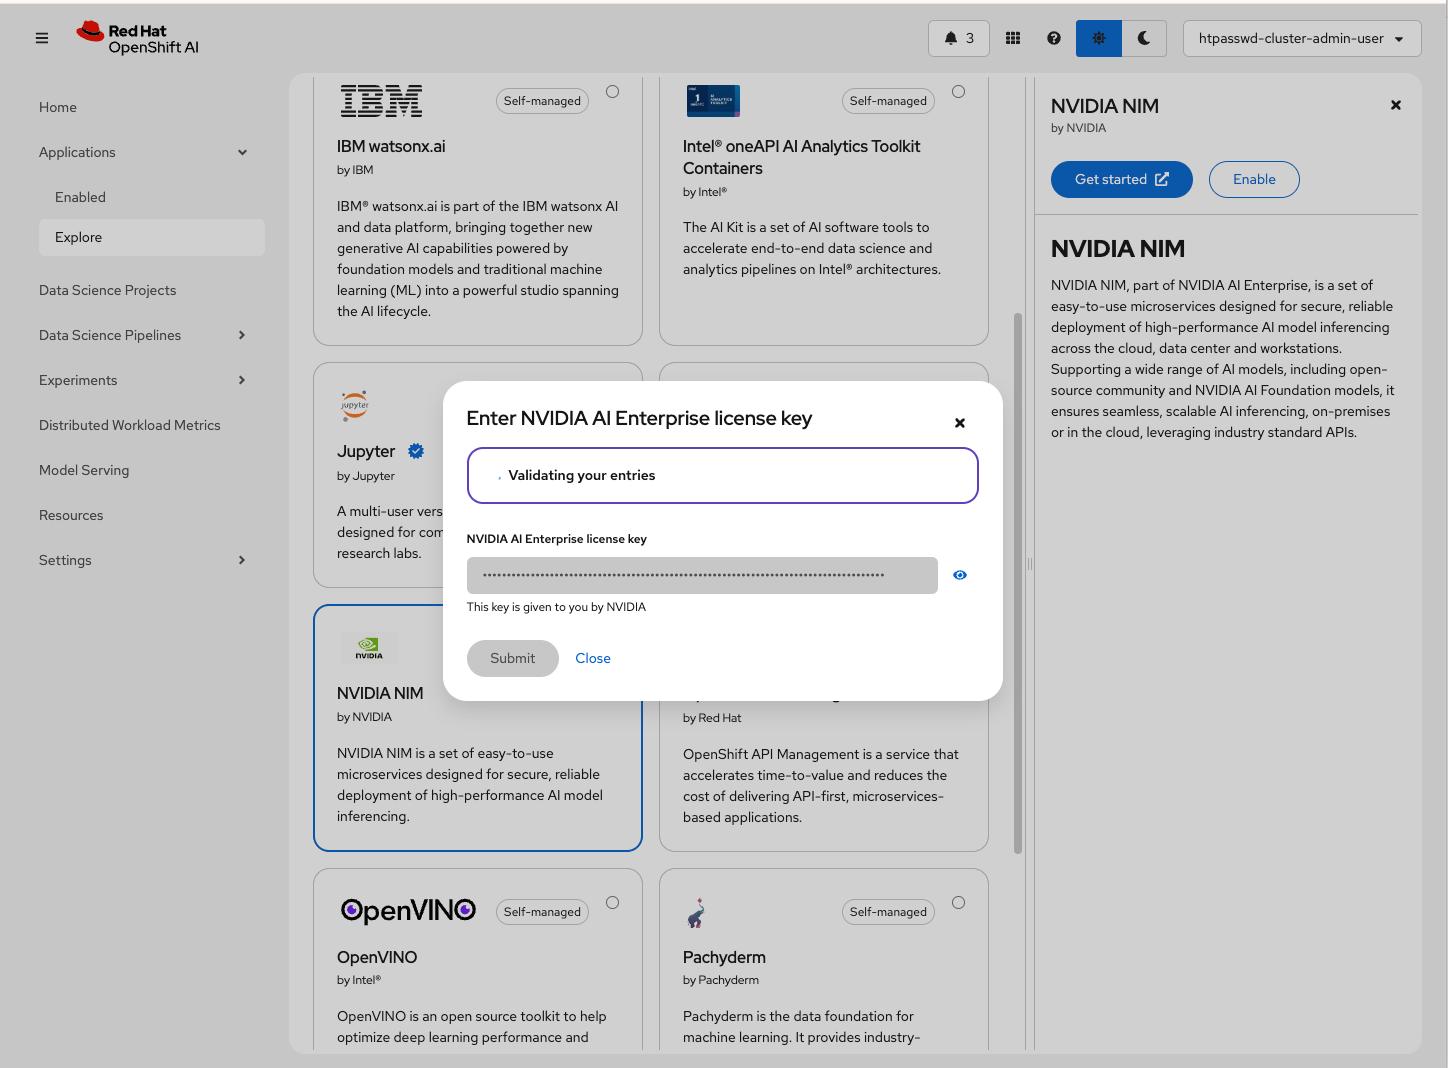
Next, click Enable and input the API key that you generated from the NVIDIA NGC catalog in the previous step (Figure 1), and click Submit to enable NVIDIA NIM. See Figure 3.
Note
Enabling NVIDIA NIM requires being logged in to OpenShift AI as a user with OpenShift AI administrator privileges.
Watch for the notification informing your API key was validated successfully. See Figure 4.
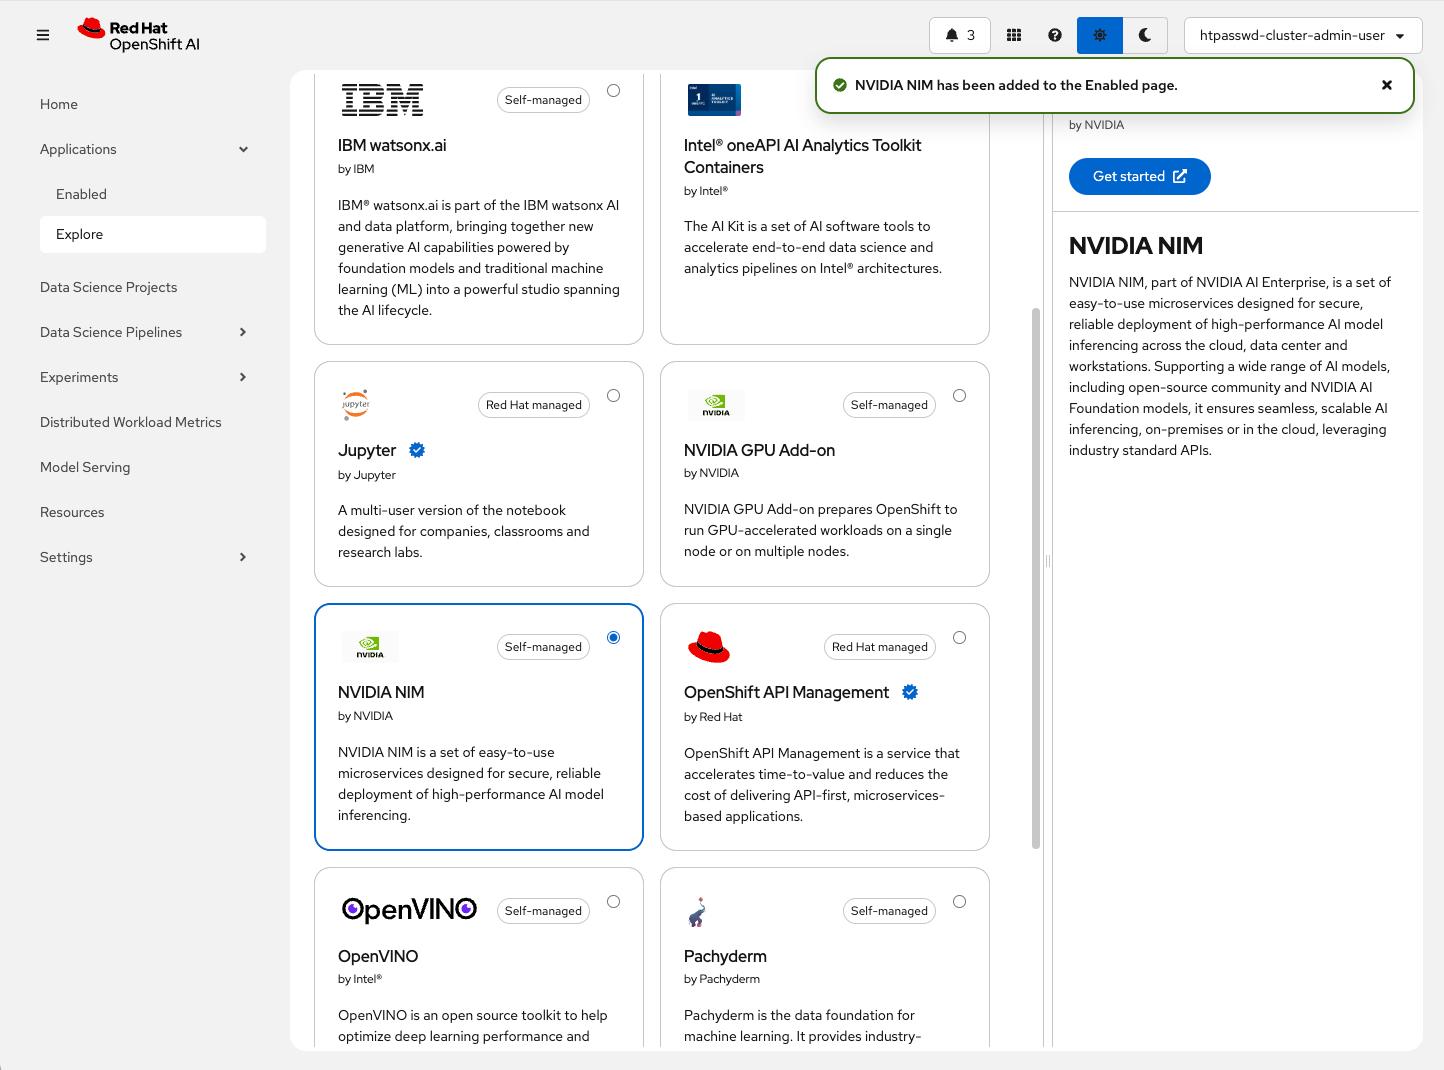
Verify the enablement by selecting the Enabled option from the left navigation bar, as marked in Figure 4. Note the NVIDIA NIM card as one of your apps. See Figure 5.
Create and deploy a model
Next, we will create a data science project. Data science projects allow you to collect your work—including Jupyter workbenches, storage, data connections, models, and servers—into a single project.
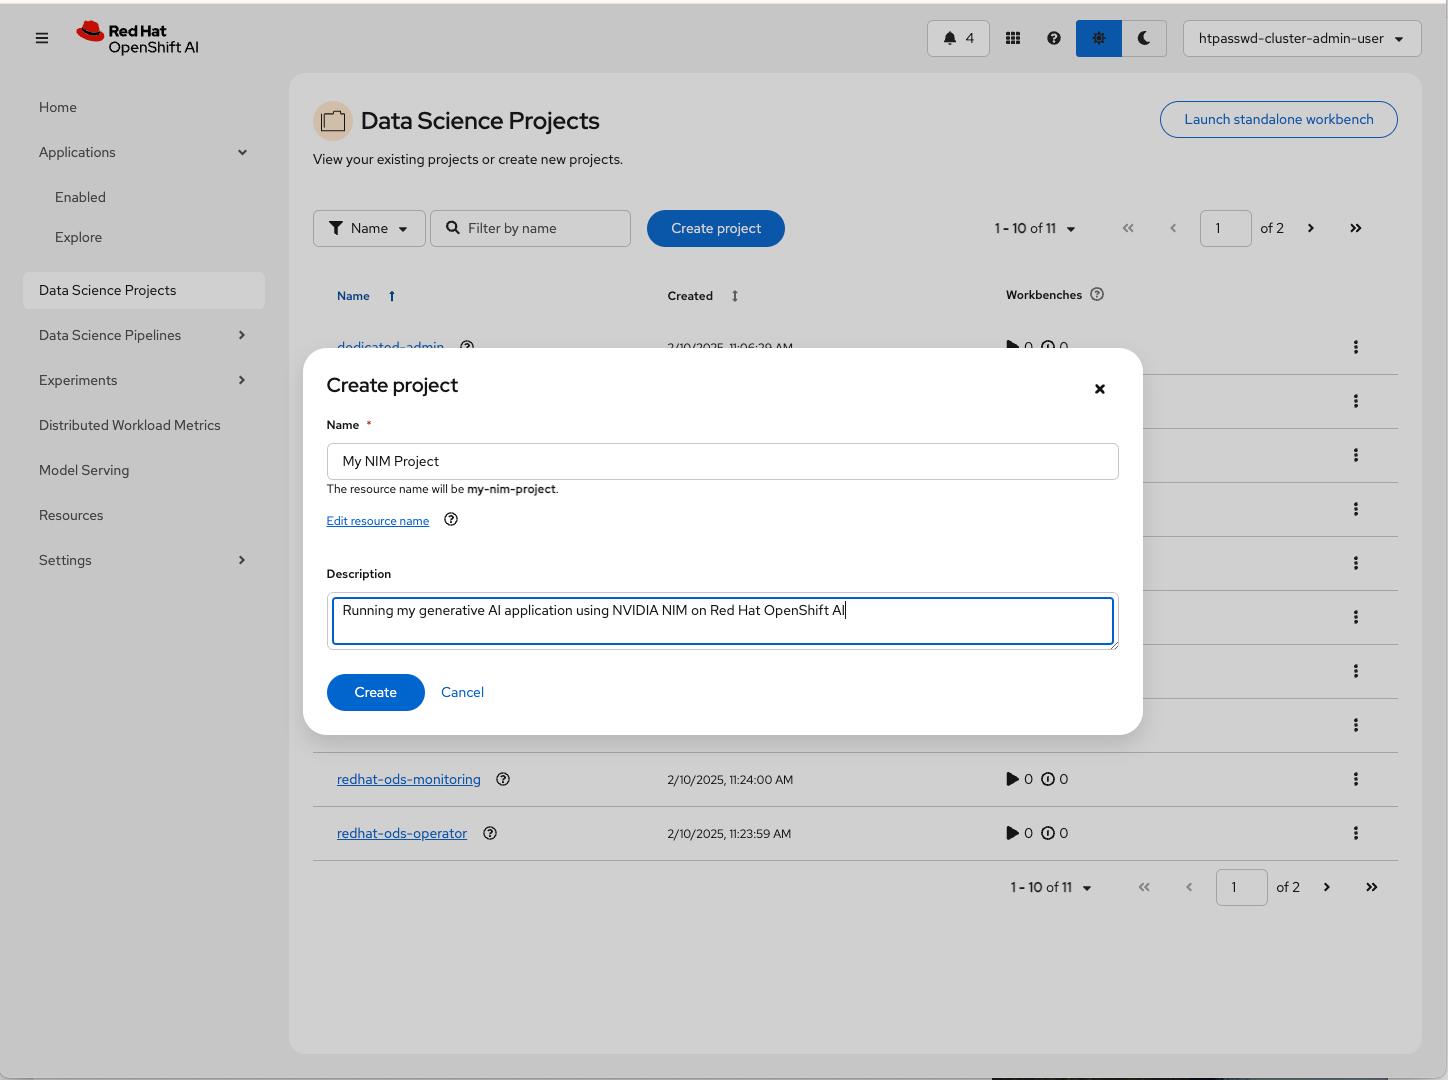
From the left navigation bar, select Data Science Projects, and click to create a project. Enter a project and description name, then click Create, as shown in Figure 6.
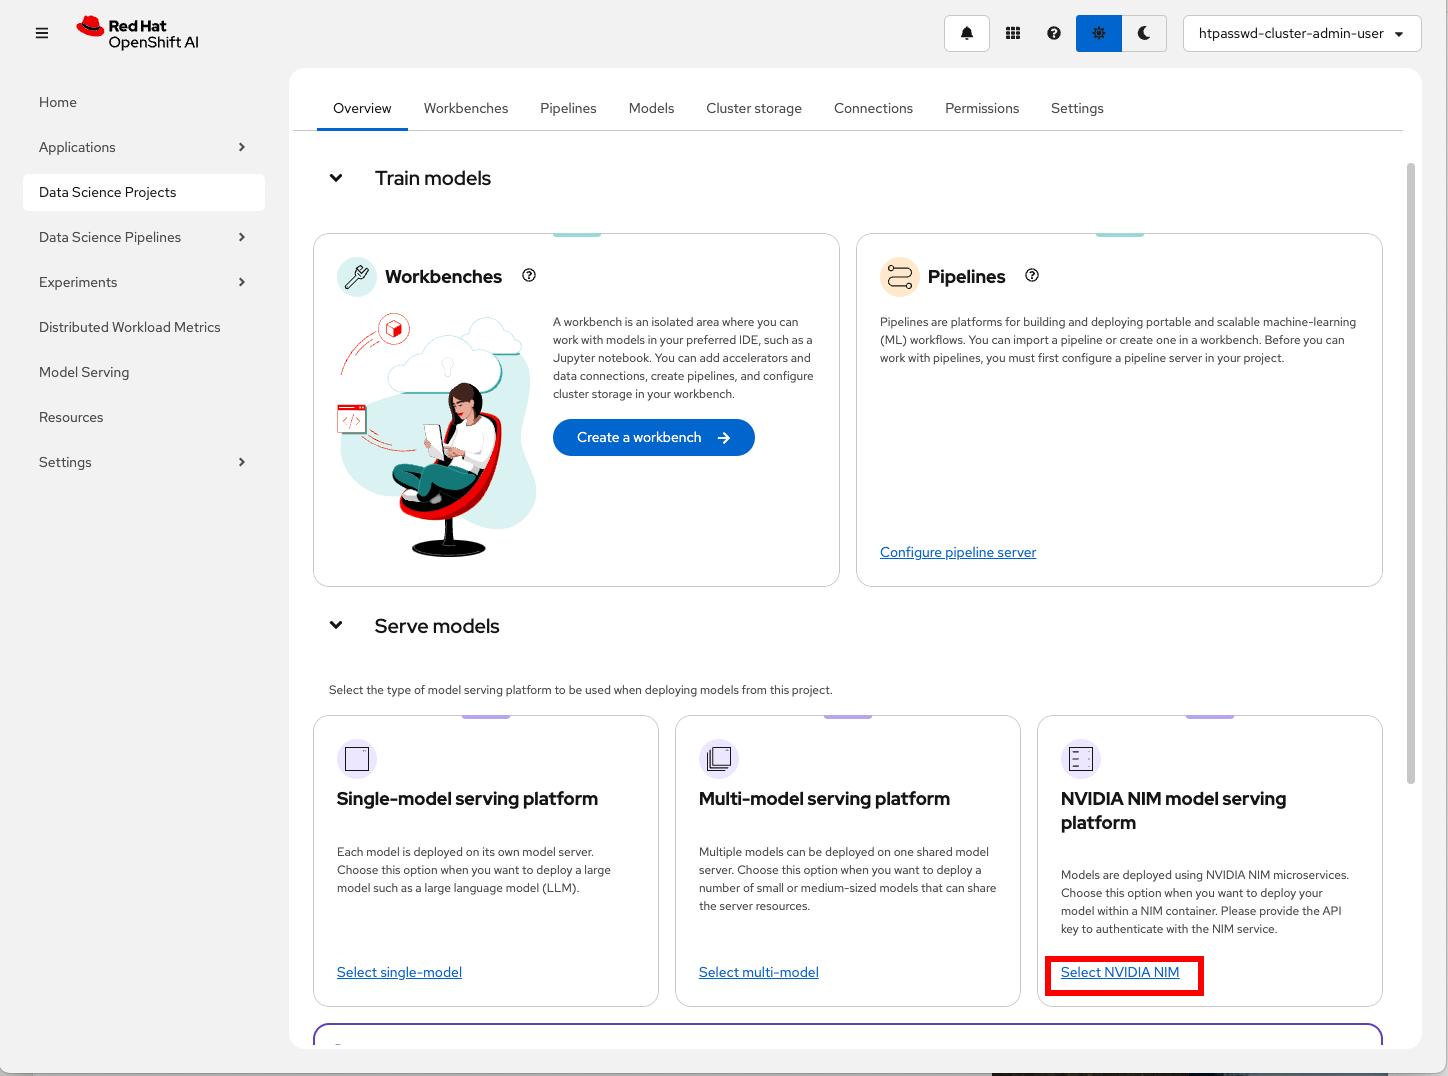
Once the project is created, select the model serving platform for your project, demonstrated in Figure 7.
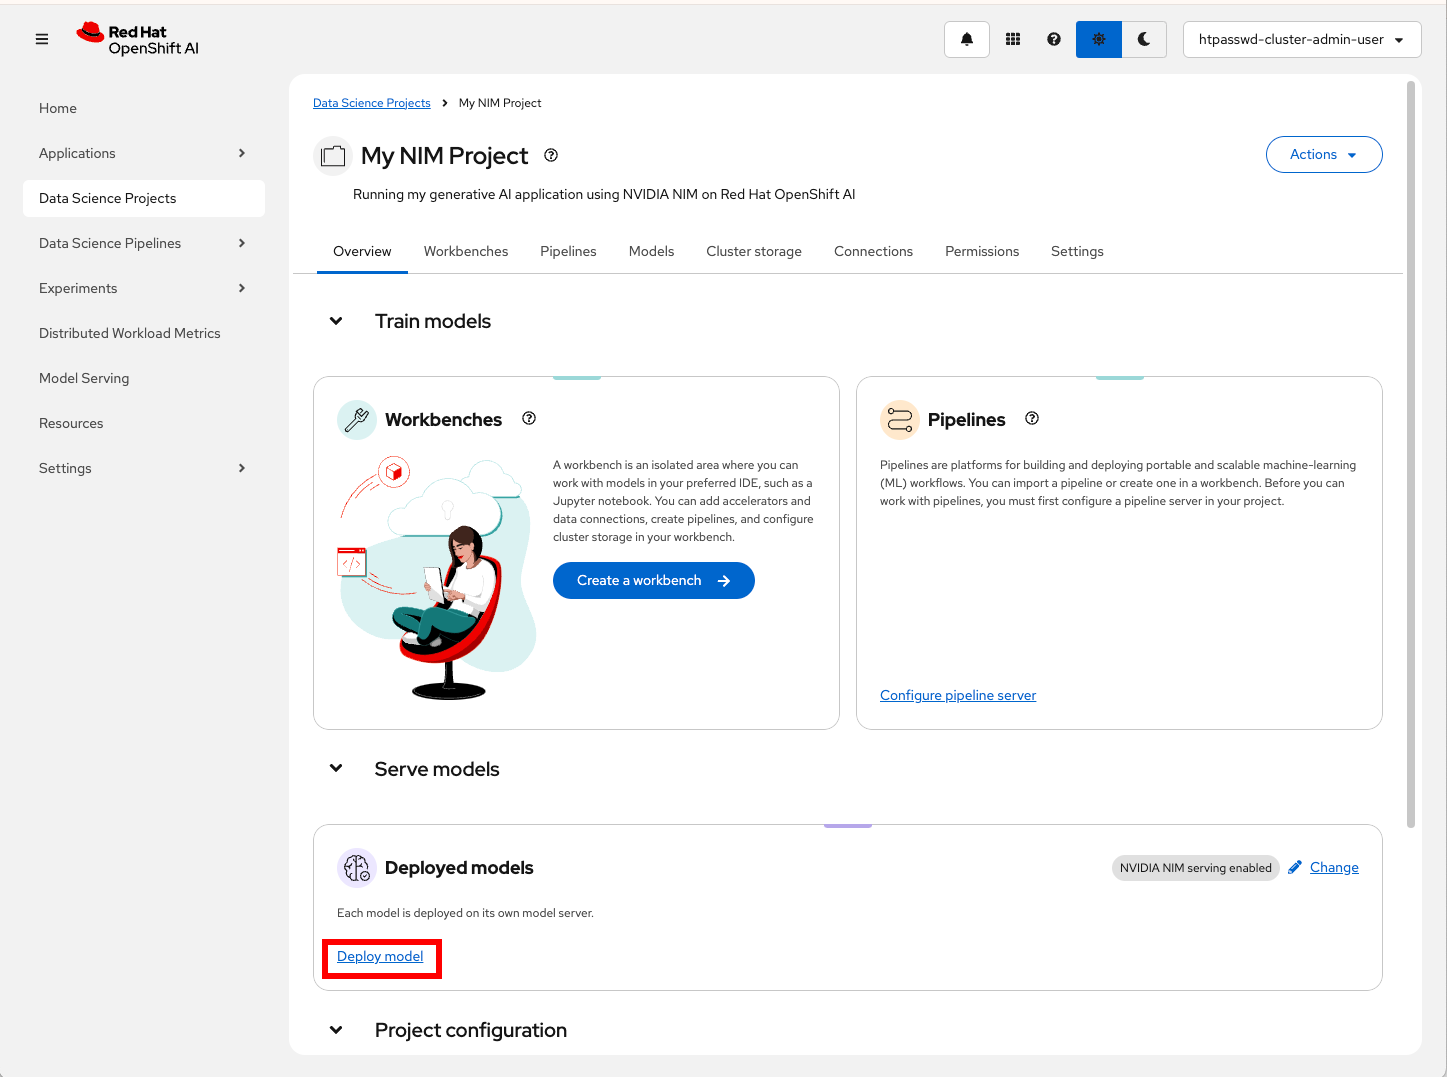
After selecting the platform, you will be able to click Deploy model; see Figure 8.
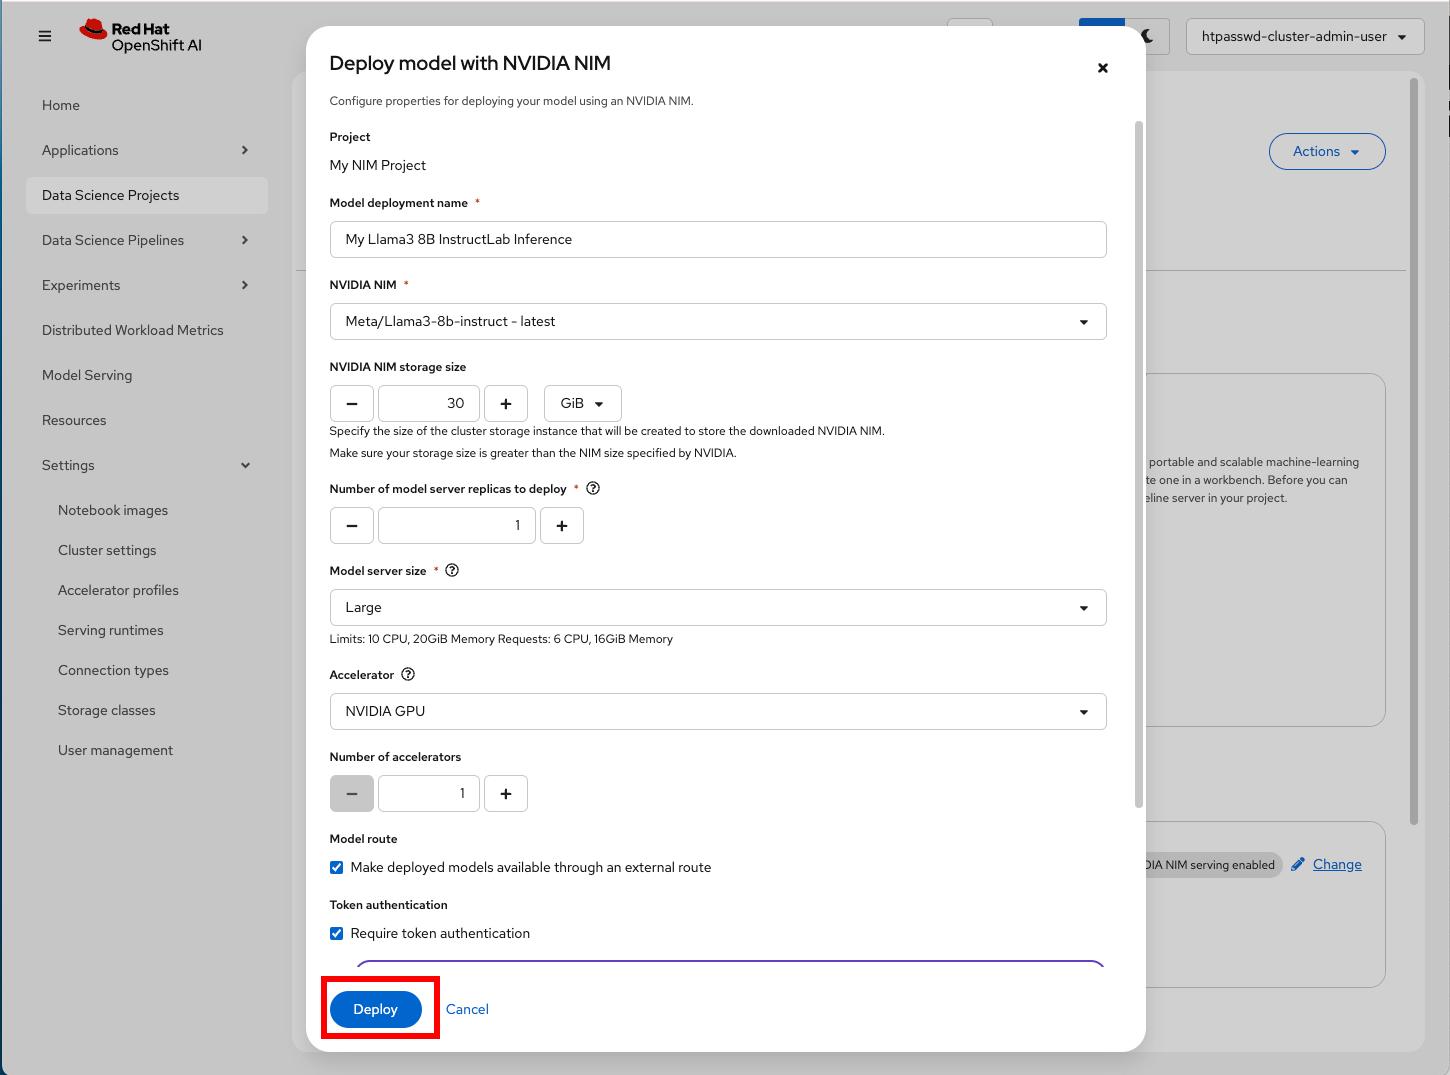
Select your desired model, configure your deployment, and click Deploy. Check Figure 9.
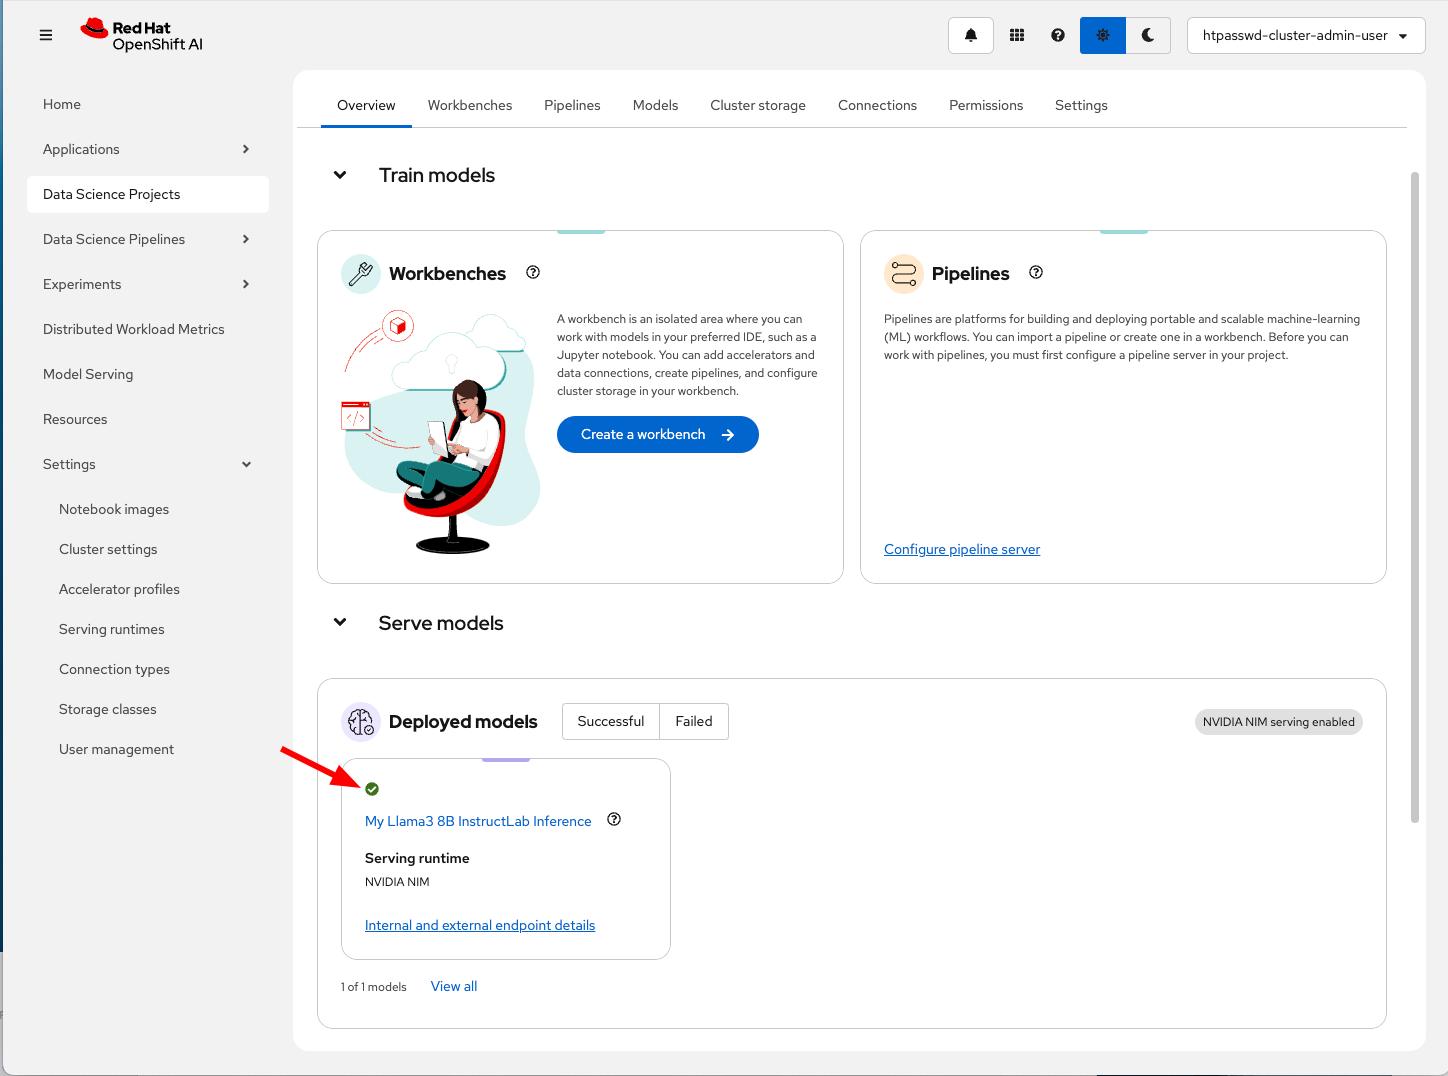
Wait for the model to be available. See Figure 10.
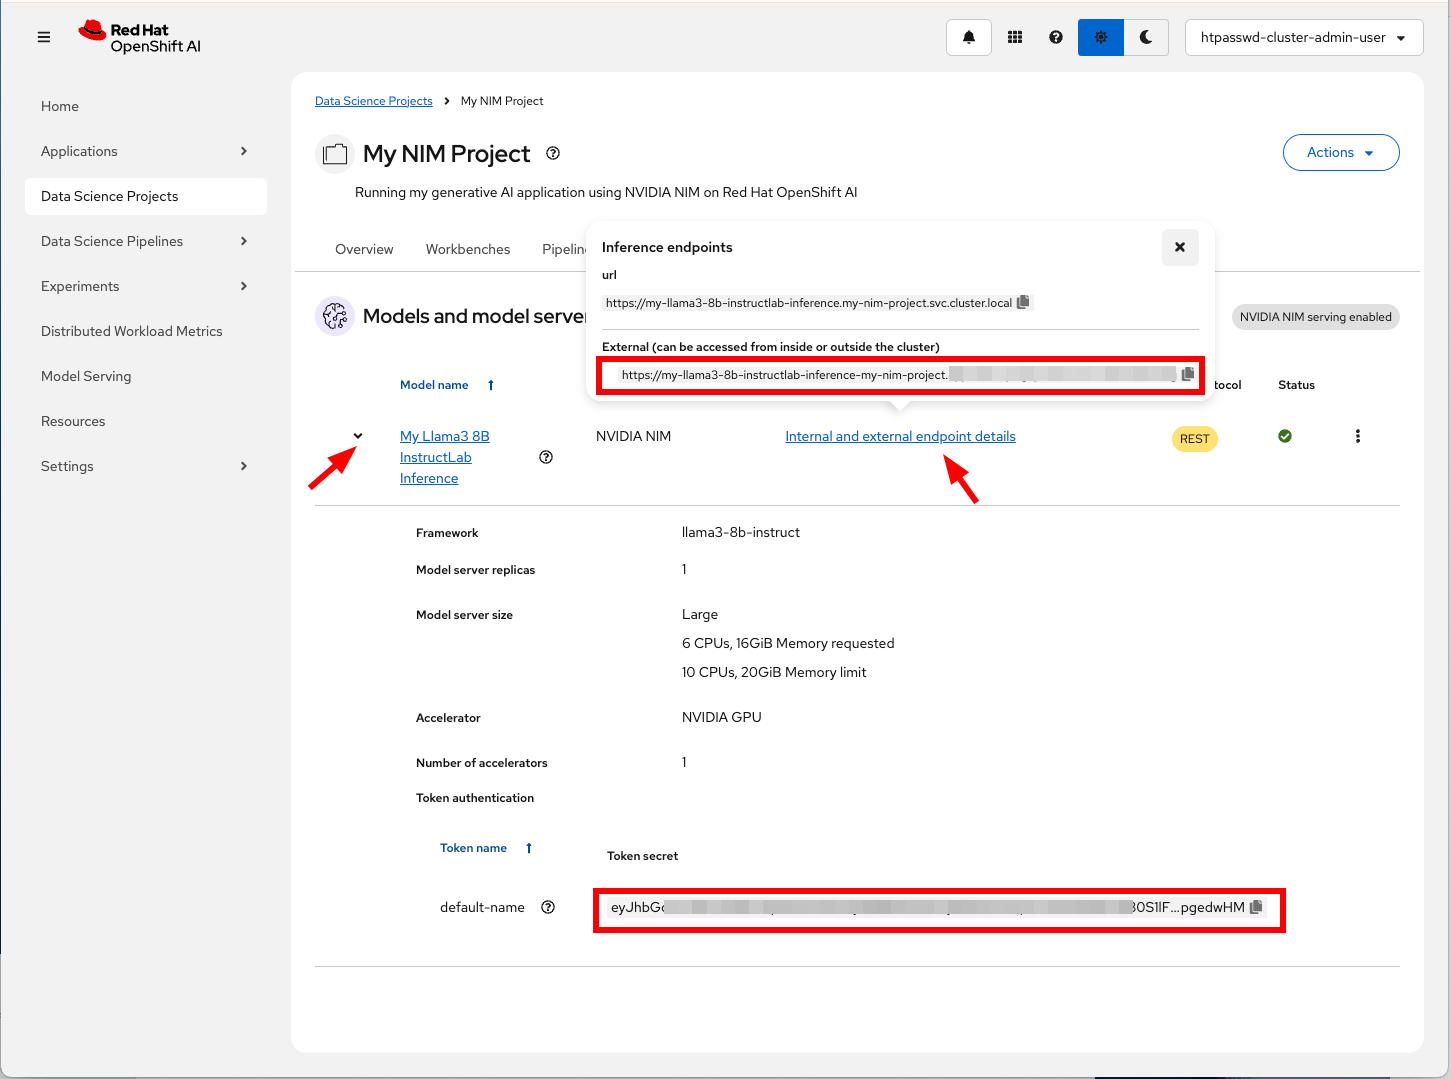
Switch over to the Models tab and take note of your external URL and access token. These are marked in Figure 11.
Configure and create a workbench
Now that the model is deployed, let’s create a workbench. A workbench is an instance of your development environment. In it, you'll find all the tools required for your data science work.
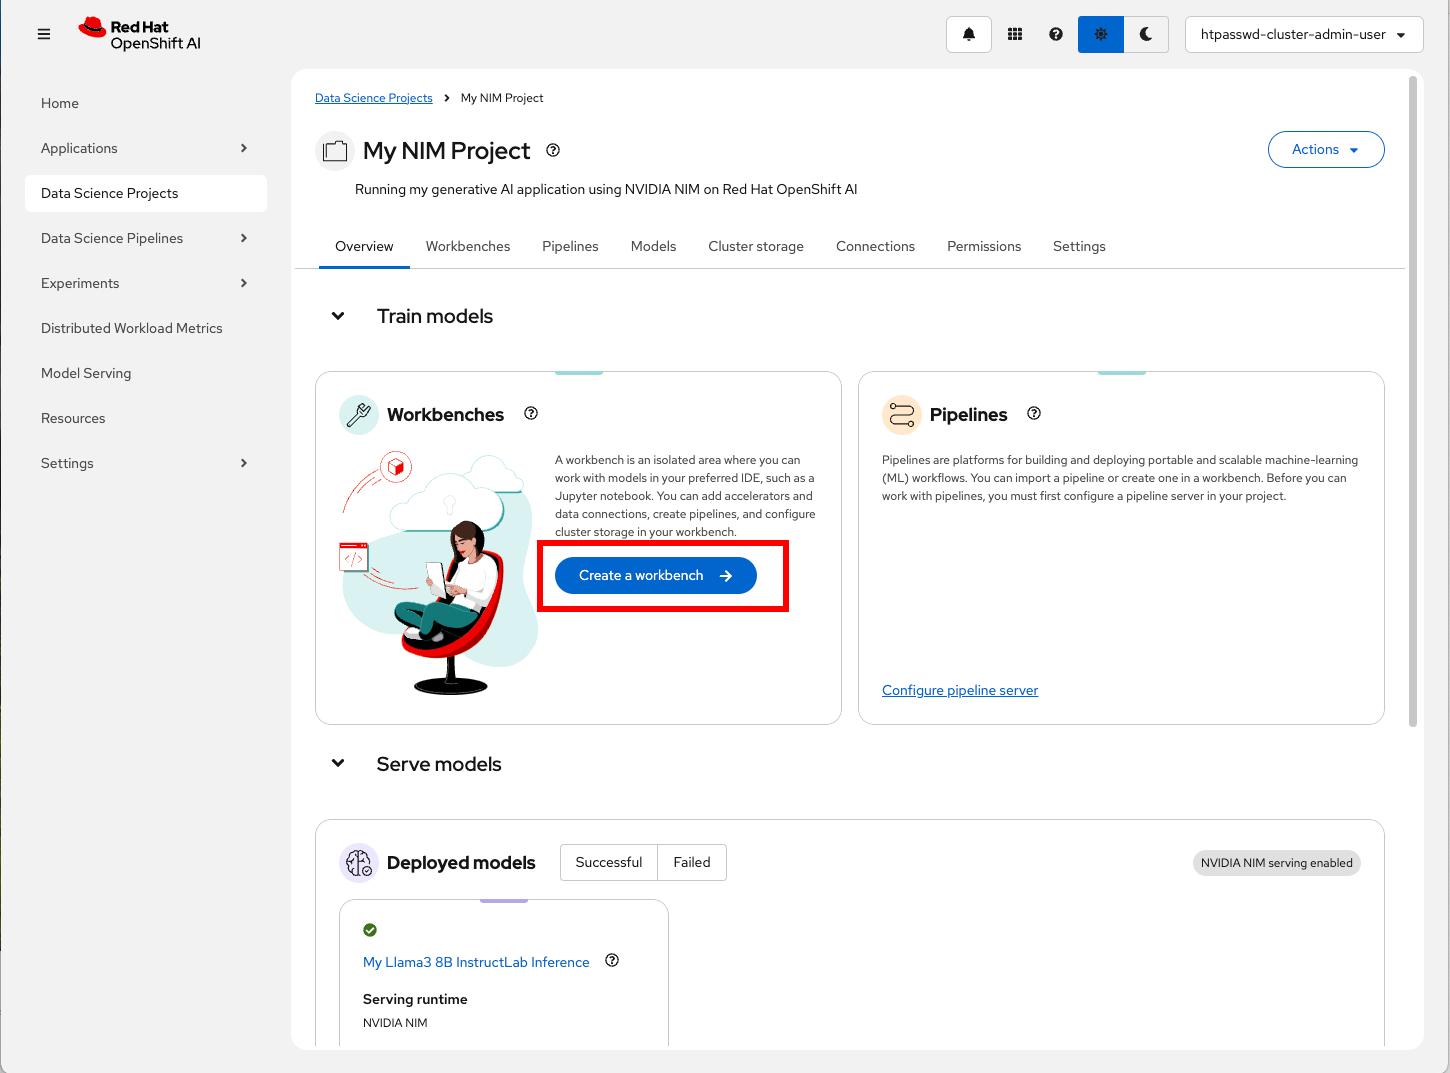
From the same Data Science Projects Overview tab (or the Workbenches tab), click Create a workbench, as shown in Figure 12.
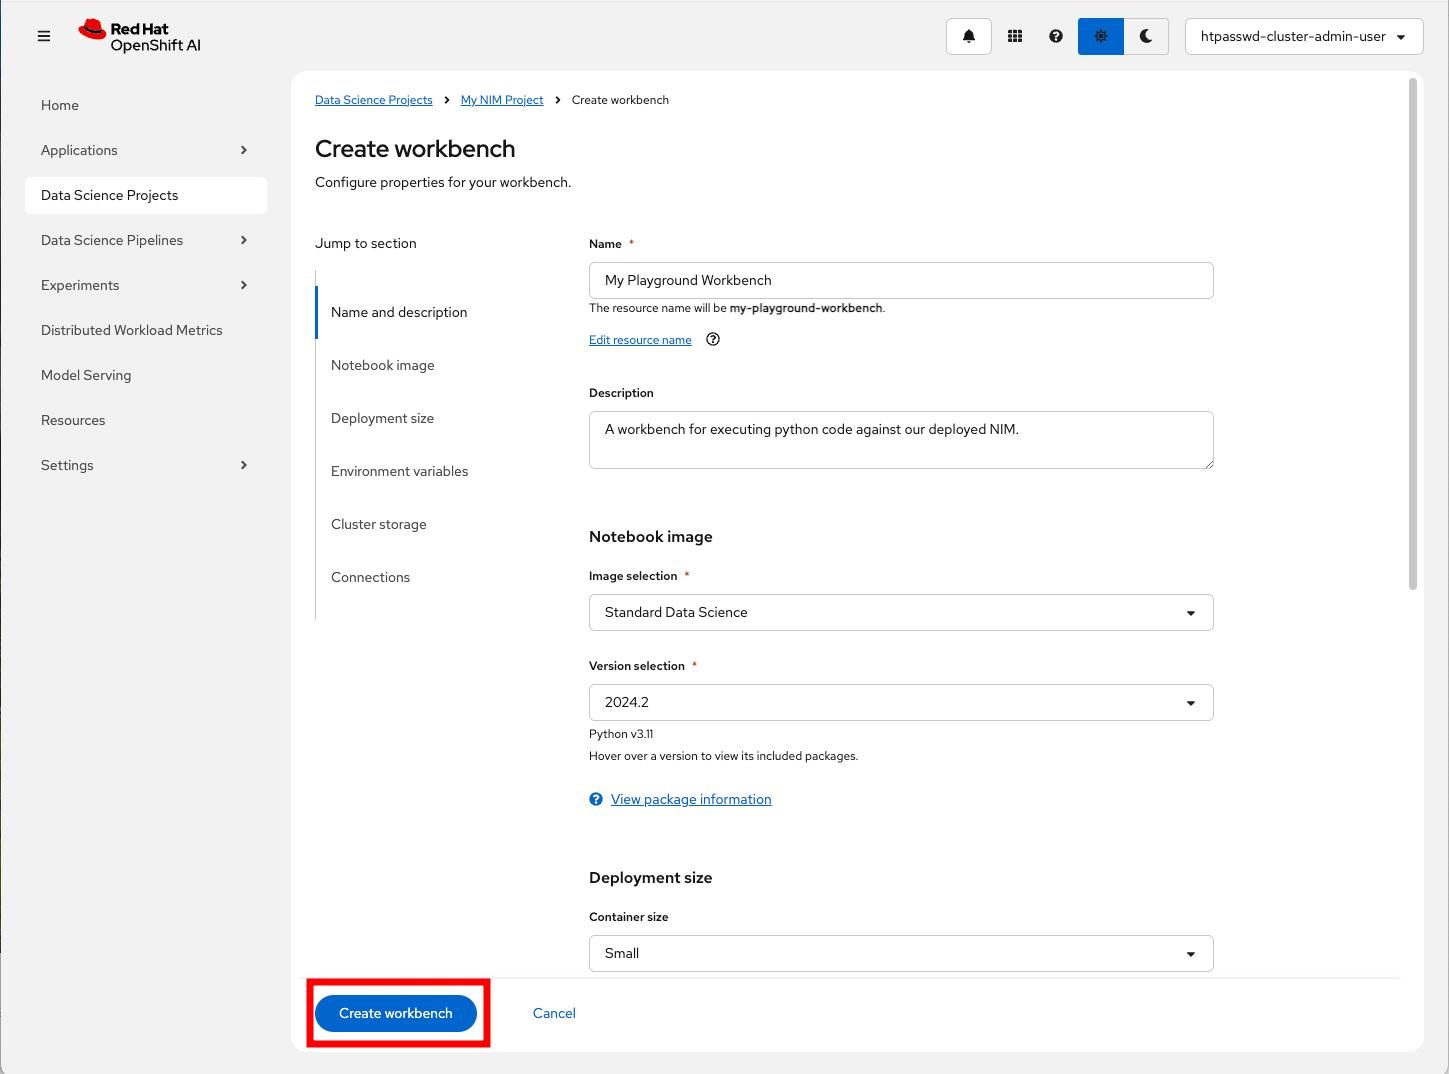
Describe and create your workbench. Follow Figure 13.
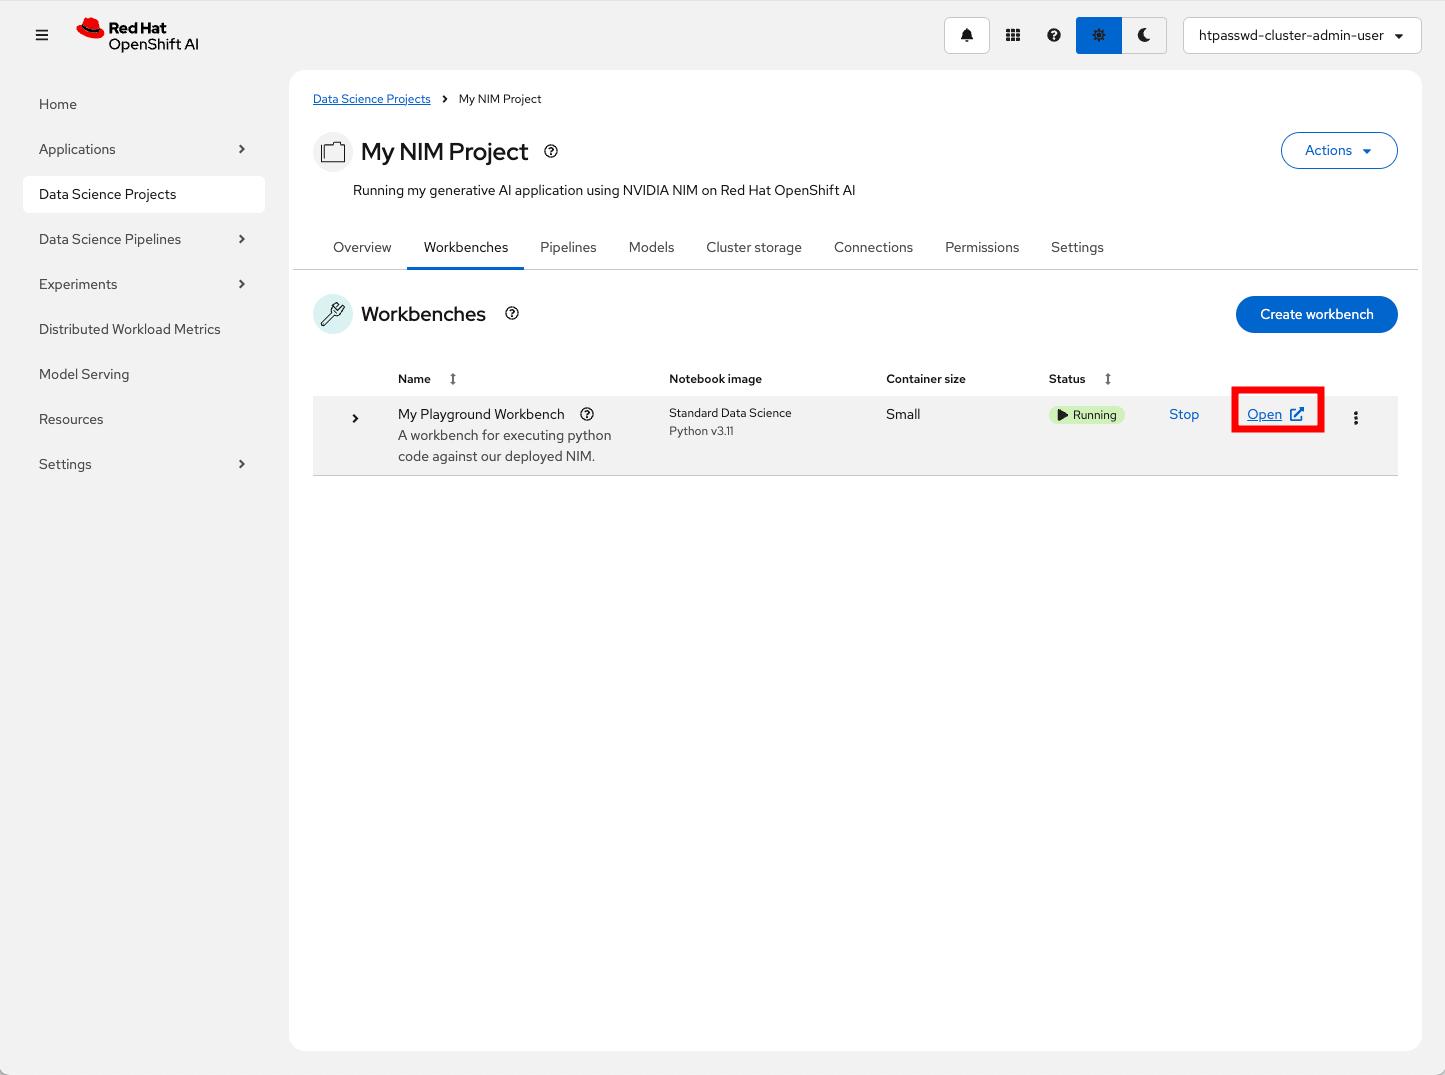
Wait for the workbench to be in a running state and click Open, as seen in Figure 14. You'll return to the opened workbench next.
Execute example code
To demonstrate the model accessibility, we'll use the code excerpt from NVIDIA's build cloud. We will use it from the workbench we previously created, replacing only the URL and the token in the excerpt with the ones from our deployed model.
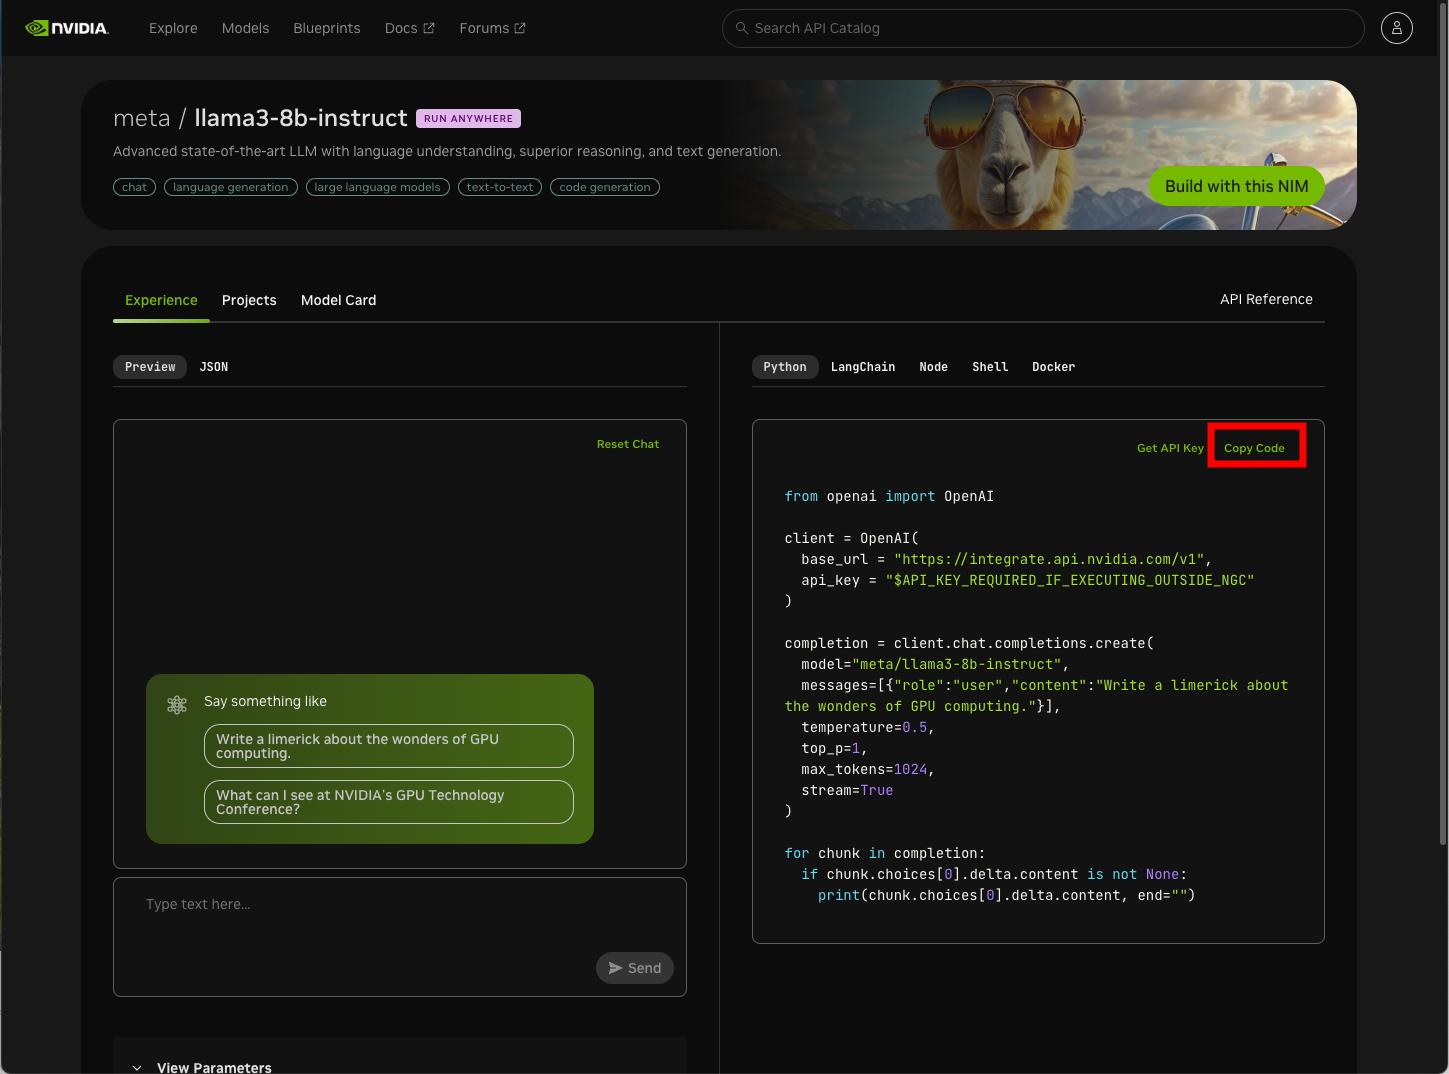
Locate your model of choice in NVIDIA build cloud and copy the example excerpt, demonstrated in Figure 15. Following Figure 15 is the code snippet used in this example.
from openai import OpenAI
client = OpenAI(
  base_url = "https://integrate.api.nvidia.com/v1",
  api_key = "$API_KEY_REQUIRED_IF_EXECUTING_OUTSIDE_NGC"
)
completion = client.chat.completions.create(
  model="meta/llama3-8b-instruct",
  messages=[{"role":"user","content":""}],
  temperature=0.5,
  top_p=1,
  max_tokens=1024,
  stream=True
)
for chunk in completion:
  if chunk.choices[0].delta.content is not None:
    print(chunk.choices[0].delta.content, end="")
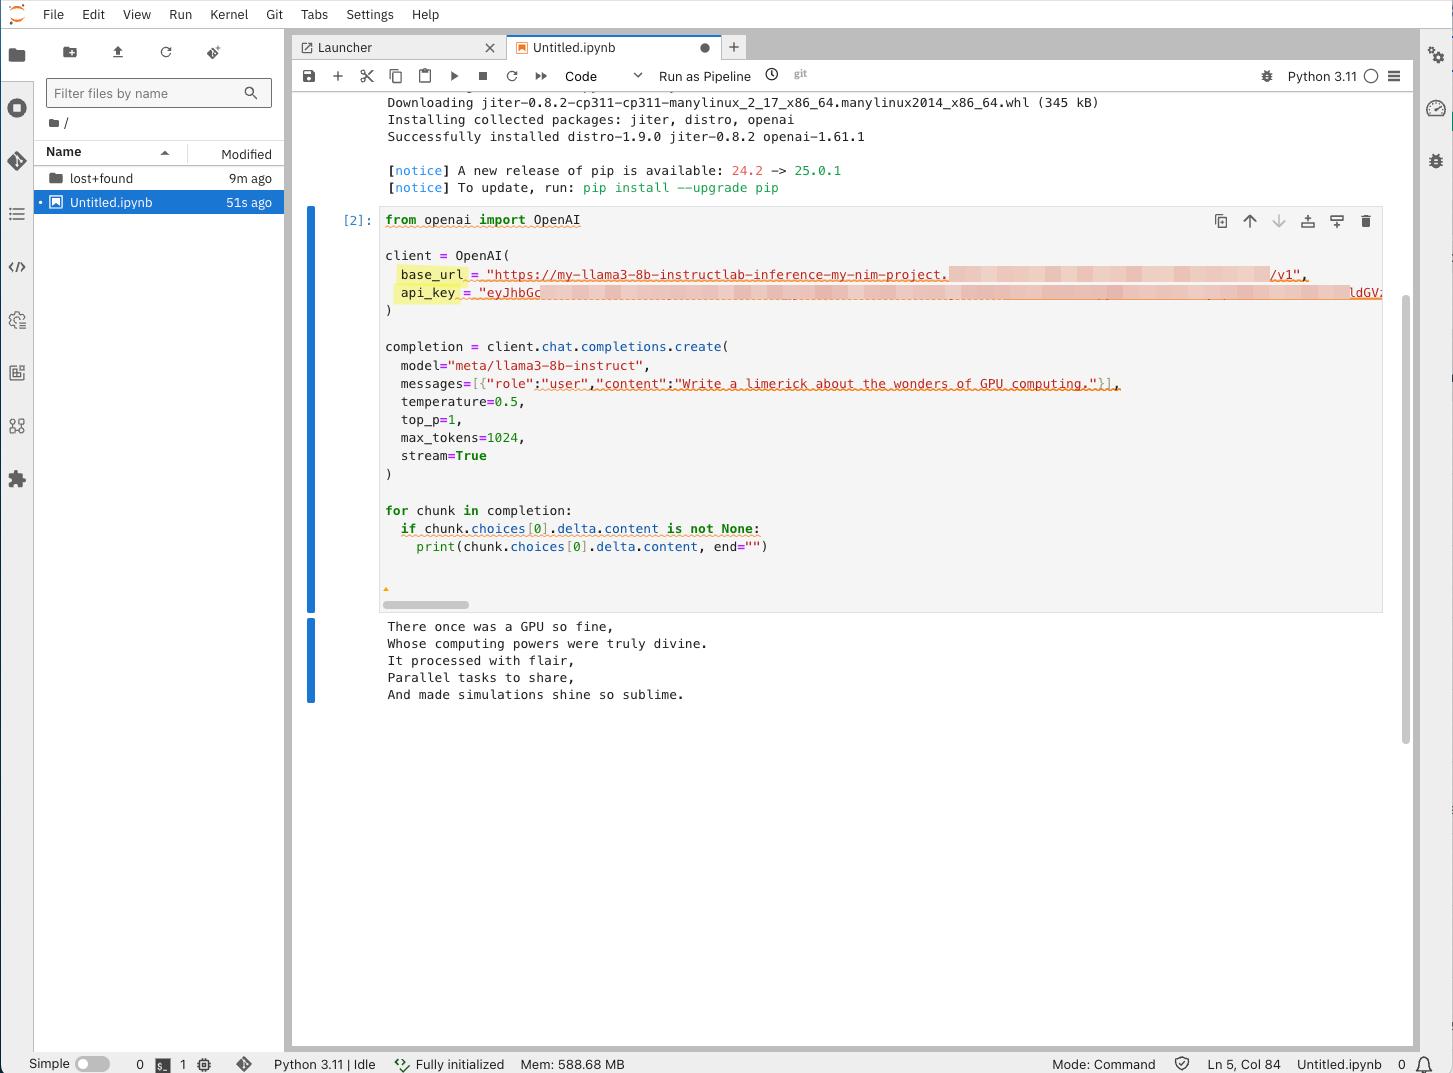
Switch to the workbench you opened in Figure 14, launch a new Python Notebook, and install the openai library required to run this example. See Figure 16 (again, the snippet will follow).
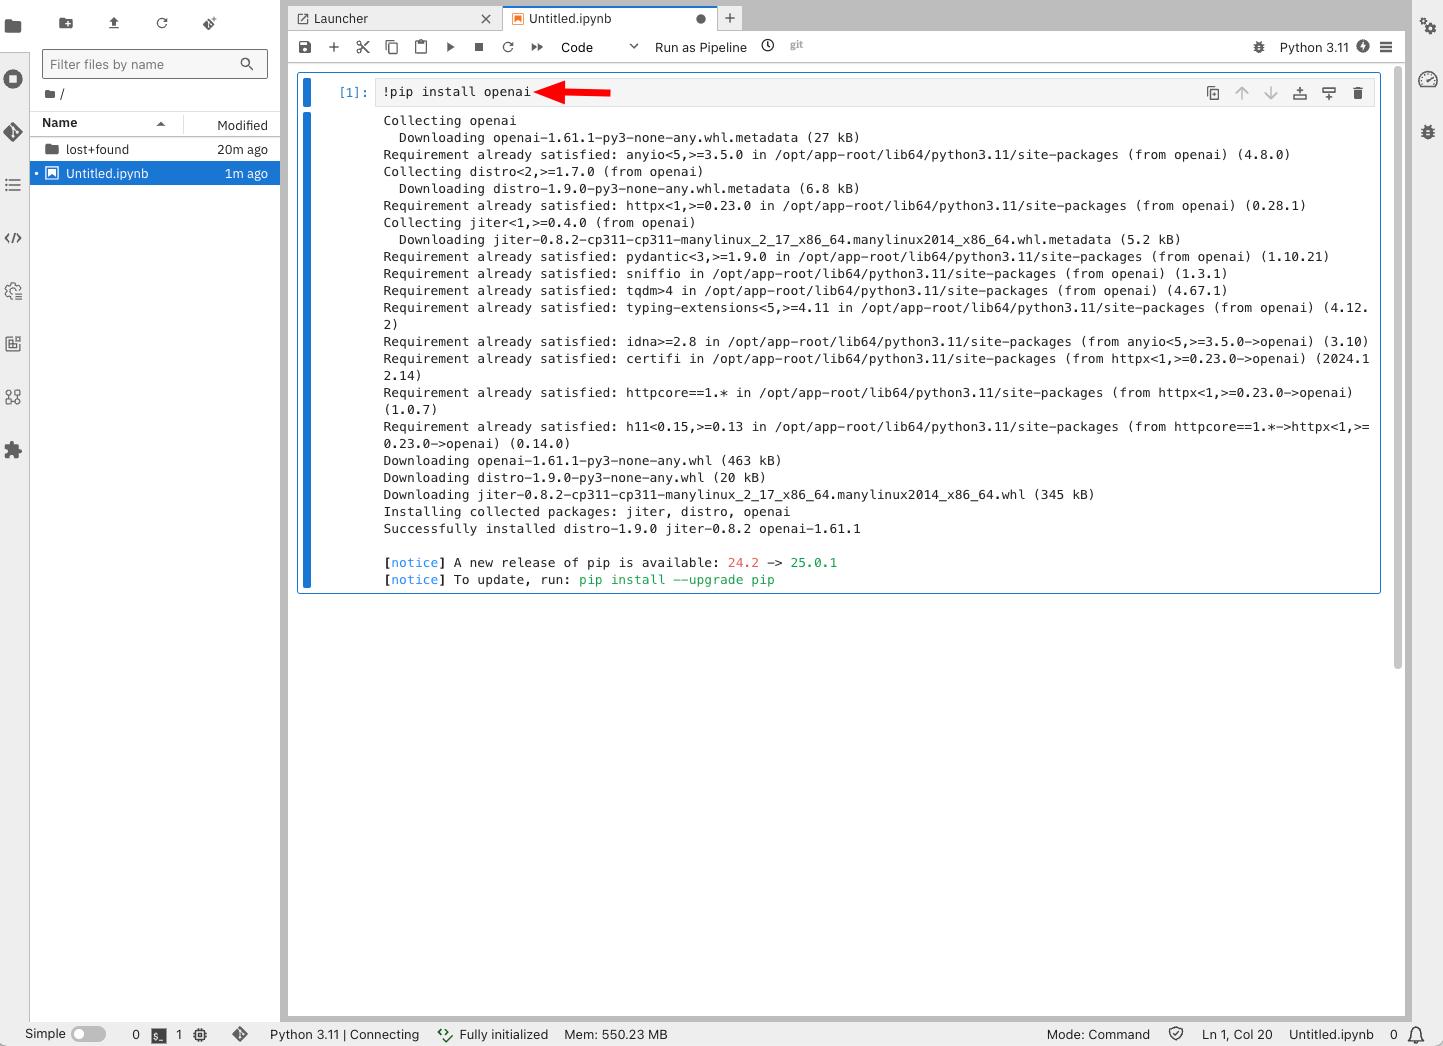
!pip install openaiIn the same notebook, paste the code excerpt from Figure 15, replacing base_url and api_key with the external URL and token you noted in Figure 11, and execute it. See example in Figure 17.
Observe metric graphs
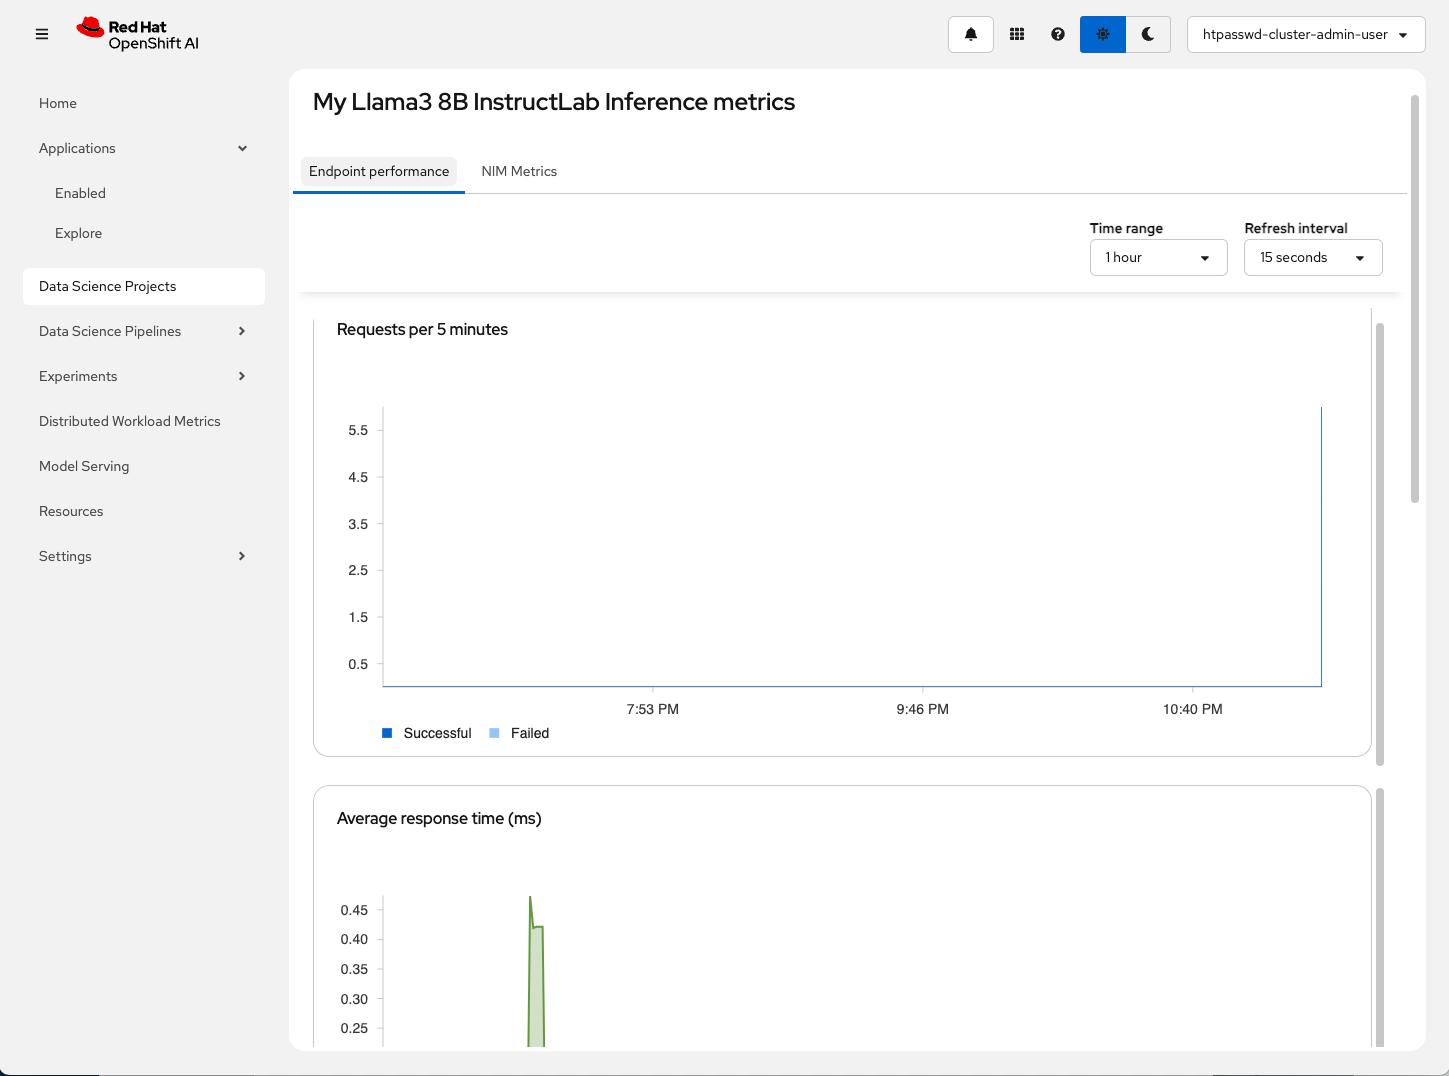
Now that your model is up and running, and you have an environment to work from, let's observe the model serving's performance.
From your project's Models tab, click the model's name, and observe the endpoint performance metric graphs shown in Figure 18.
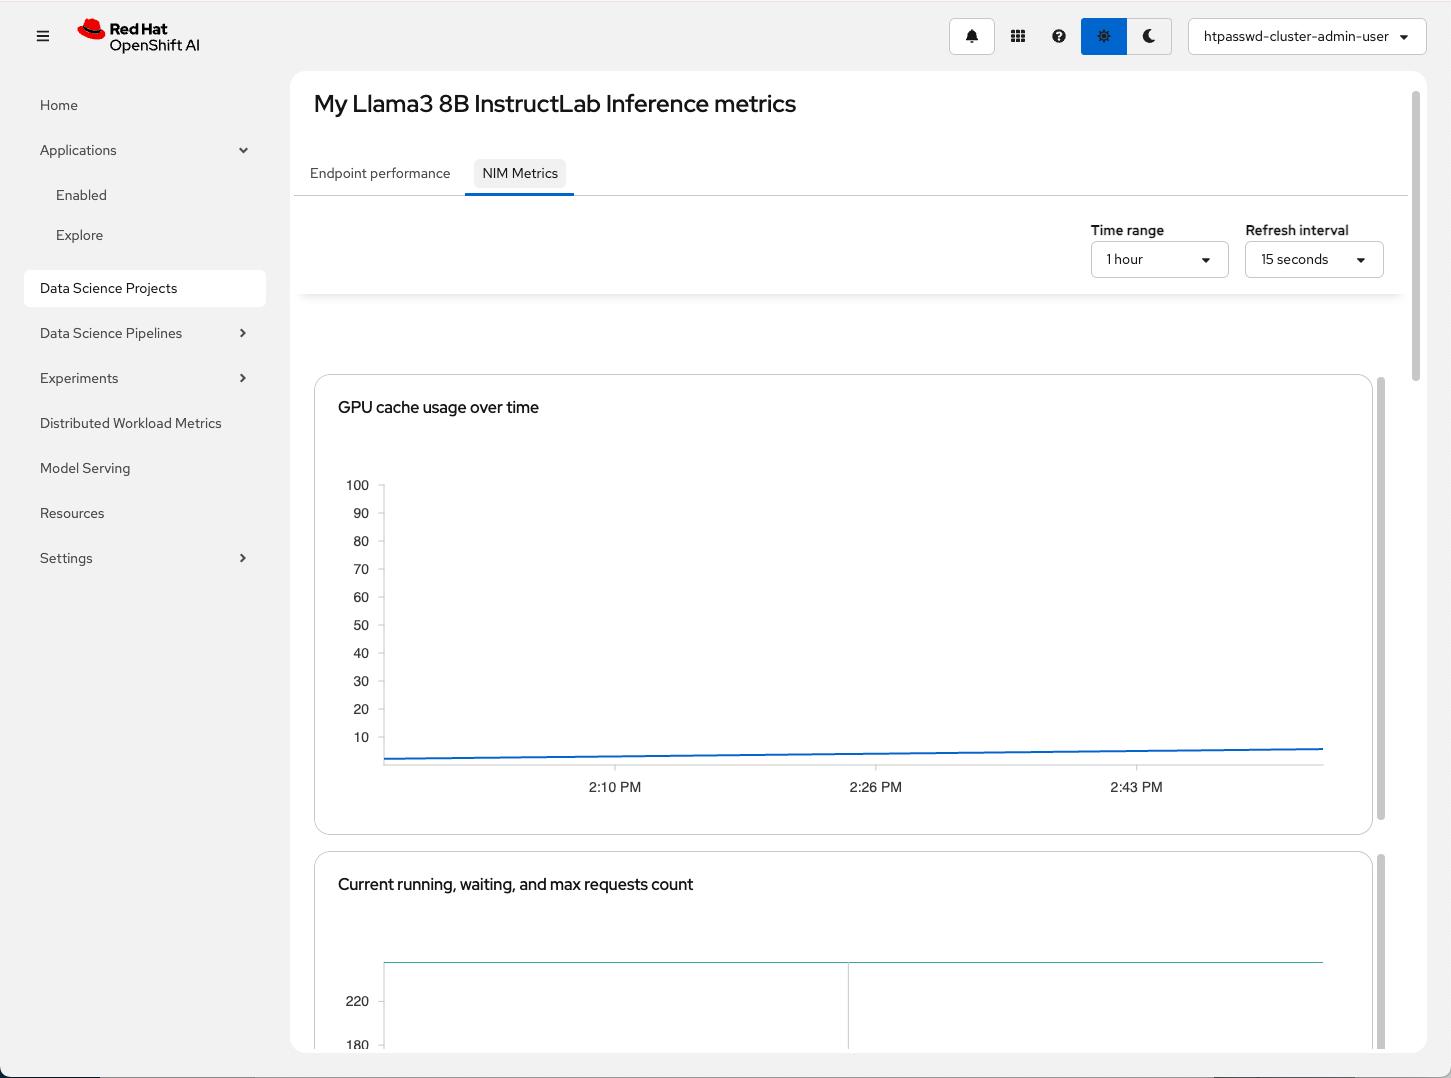
Switch to the NIM Metrics tab and observe NIM-specific inference-related metric graphs. See Figure 19.
Get started with NVIDIA NIM on OpenShift AI
We hope you found this short tutorial helpful!
NVIDIA NIM integration on Red Hat OpenShift AI is now generally available. With this integration, enterprises can increase productivity by implementing generative AI to address real business use cases like expanding customer service with virtual assistants, case summarization for IT tickets, and accelerating business operations with domain-specific copilots.
Get started today with NVIDIA NIM on Red Hat OpenShift AI. You can also find more information on the OpenShift AI product page.
Last updated: June 11, 2025