For microservices running in container environments, Java developers tend to want a self-contained image that incorporates the complete runtime environment needed to run an application. At the same time, developers want a minimally sized image for both efficiency and security. A bootable JAR can meet these requirements. This article describes how to create a bootable JAR using Red Hat JBoss Enterprise Application Platform (JBoss EAP) and Jakarta EE and incorporate useful extensions, particularly a PostgreSQL database and MicroProfile capabilities.
About the example application
For this demonstration, I have updated the application used in my previous series of articles. Like that series, this article runs the application on an instance of Red Hat OpenShift Container Platform, an open source Platform-as-a-Service (PaaS) based on Kubernetes. One of my priorities for all of these demonstrations is to optimize the consumption of resources that are the main factors in the costs charged by a PaaS vendor: image size, memory use, and CPU use.
The bootable JAR is a feature of WildFly, a lightweight runtime for building Java applications. We'll use JBoss EAP, a fully supported enterprise Java platform based on WildFly. We'll provision custom layers that expand the application's capabilities using Galleon feature-packs.
The source code for this application is available on my GitHub repository. To track the application's evolution, I created a new tag named Galleon_Runtime_EAP_XP_bootable_jar_version for the version used in this article. You can use the tags assigned to repository branches to analyze the configuration information through various iterations.
Prerequisites
You will need the following software to execute the example application:
- A Red Hat OpenShift installation (I used OpenShift 4.8)
- JBoss EAP 7.4
- JBoss EAP XP 3.0
- Apache Maven 3.8.2
- OpenJDK 11
- Git 2.31.1
Note: If you prefer, you could use Red Hat CodeReady Containers to run an OpenShift instance on your local system.
Get the source code
To install the source code from my GitHub repository, open a terminal, select a folder, and clone the repository using the following command:
$ git clone https://github.com/mvocale/JBoss_EAP_cloud_ready.git
Now, change into the directory for the project. Check out the Galleon_Runtime_EAP_XP_bootable_jar_version version, where I stored the code used to implement the bootable JAR running mode, using the following command:
$ git checkout tags/Galleon_Runtime_EAP_XP_bootable_jar_version
The weather-app-eap-cloud-ready subdirectory contains the main application, copied from an earlier version of the same application. The source code uses the Jakarta EE 8 and MicroProfile 3 specifications on top of JBoss EAP XP 3 in bootable JAR mode, employing Galleon to install only the required subsystems. The final container image was improved using the runtime version of OpenJDK 11.
The application needs a database to store information, so I chose PostgreSQL. The postgresql-database-layer subdirectory of the repository loads and configures the database. I could have simply used a feature-pack from the wildfly-datasources-galleon-pack project, which supports PostgreSQL as well as Microsoft SQL Server and Oracle. But one goal of this article is to show how to customize a JBoss EAP subsystem with features not supported by default, or how to change the behavior of a feature through a custom layer.
A shell script named deploy-openshift.sh contains all the instructions needed to install all the implemented components on top of OpenShift. If you don't want to perform every single step described, you can establish a connection to CodeReady Containers or an OpenShift remote cluster and run the script there.
Set up your environment
Now it's time to connect to OpenShift to deploy all the components needed by our application. If you are using CodeReady Containers, start it and log in as a developer using the following commands:
$ crc start
$ oc login -u developer -p developer https://api.crc.testing:6443
Otherwise, log into your OpenShift environment as follows, substituting your own appropriate values for $token and $server_url:
$ oc login --token=$token --server=$server_url
Create the project that will host the application:
$ oc new-project redhat-jboss-eap-cloud-ready-demo --display-name="Red Hat JBoss EAP Cloud Ready Demo"
Create and configure the PostgreSQL database:
# Import image related to Postgresql Database
$ oc import-image rhel8/postgresql-13:1-21 --from=registry.redhat.io/rhel8/postgresql-13:1-21 --confirm
# Create the Postgresql Database Application
$ oc new-app -e POSTGRESQL_USER=mauro \
   -e POSTGRESQL_PASSWORD=secret \
   -e POSTGRESQL_DATABASE=weather postgresql-13:1-21 \
   --name=weather-postgresql
Add the PostgreSQL icon to the database:
$ oc patch dc weather-postgresql --patch '{"metadata": { "labels": { "app.openshift.io/runtime": "postgresql" } } }'
Now, deploy a set of actors that will help you get the benefits of MicroProfile specifications:
To install these projects, switch to the weather-app-eap-cloud-ready directory that hosts the application source code and run the following:
# Import Jaeger image from catalog
$ oc import-image distributed-tracing/jaeger-all-in-one-rhel8:1.24.1-1 --from=registry.redhat.io/distributed-tracing/jaeger-all-in-one-rhel8:1.24.1-1 --confirm
# Create the Jaeger application
$ oc new-app -i jaeger-all-in-one-rhel8:1.24.1-1
# Expose the route in order to make the Jaeger application available outside of OpenShift
$ oc expose svc jaeger-all-in-one-rhel8 --port=16686

# Create the Prometheus environment used to collect the values provided by MicroProfile Metrics specifications. Import the Prometheus image from catalog
$ oc import-image openshift4/ose-prometheus:v4.8.0-202110011559.p0.git.f3beb88.assembly.stream --from=registry.redhat.io/openshift4/ose-prometheus:v4.8.0-202110011559.p0.git.f3beb88.assembly.stream --confirm
# Create the config map with the Prometheus configurations
$ oc create configmap prometheus --from-file=k8s/prometheus.yml
### Create the Prometheus application
$ oc create -f k8s/ose-prometheus.yaml

# Create the Grafana environment used to collect the values provided by MicroProfile Metrics specifications. Import Grafana image from catalog
$ oc import-image openshift4/ose-grafana:v4.8.0-202110011559.p0.git.b987e4b.assembly.stream --from=registry.redhat.io/openshift4/ose-grafana:v4.8.0-202110011559.p0.git.b987e4b.assembly.stream --confirm
# Create the config map with the Grafana configurations
$ oc create configmap grafana --from-file=k8s/datasource-prometheus.yaml --from-file=k8s/grafana-dashboard.yaml --from-file=k8s/jboss_eap_grafana_dashboard.json
# Create the Grafana application
$ oc create -f k8s/ose-grafana.yaml
Build a custom layer for JBoss EAP XP
The version of the application created in my previous articles used Source-to-Image (S2I) to define and configure the JDBC driver and data source used by the application (see the installation shell script for details). I had a folder named extensions where I defined:
- The
module.xmlfile and JAR file used by the JBoss EAP module - The
drivers.envfile, where I specified the driver properties - The
install.shfile to instruct the S2I build where to find the resources needed to configure the JBoss EAP driver and data source
The postgresql-database-layer subproject builds all the resources needed to provision and set up the JDBC driver and the data source subsystem. Let's change into this subproject:
$ cd postgresql-database-layer
This project creates a layer to provision and configure the driver module and the data source subsystem that manages the JDBC connection to the PostgreSQL database. Under the src/main/resources directory are two subdirectories:
layers/standalone: Contains the files needed to configure the driver (postgresql-driver) and the data source (postgresql-datasource).module/org/postgresql/main: Contains the file needed to manage the JBoss module used to interact with the PostgreSQL database.
In the postgresql-driver directory lies a layer-spec.xml file that contains the parameters used by the Galleon framework to provision and configure the JDBC driver:
<?xml version="1.0" ?>
<layer-spec xmlns="urn:jboss:galleon:layer-spec:1.0" name="postgresql-driver">
	<feature spec="subsystem.datasources">
    	    <feature spec="subsystem.datasources.jdbc-driver">
             <param name="driver-name" value="postgresql"/>
        	  <param name="jdbc-driver" value="postgresql"/>
        	  <param name="driver-xa-datasource-class-name" value="org.postgresql.xa.PGXADataSource"/>
        	  <param name="driver-module-name" value="org.postgresql"/>
    	     </feature>
	</feature>
	<packages>
    	    <package name="org.postgresql"/>
	</packages>
</layer-spec>
Under the postgresql-datasource directory lies a layer-spec.xml file that contains the parameters used by the Galleon framework to provision and configure the data source:
<?xml version="1.0"?>
<layer-spec xmlns="urn:jboss:galleon:layer-spec:1.0" name="postgresql-datasource">
	<dependencies>
    	<layer name="postgresql-driver" />
	</dependencies>
	<feature spec="subsystem.datasources.data-source">
    	<param name="use-ccm" value="true" />
    	<param name="data-source" value="WeatherDS" />
    	<param name="enabled" value="true" />
    	<param name="use-java-context" value="true" />
    	<param name="jndi-name" value="${env.DB_JNDI}" />
    	<param name="connection-url" value="jdbc:postgresql://${env.WEATHER_POSTGRESQL_SERVICE_HOST}:${env.WEATHER_POSTGRESQL_SERVICE_PORT}/${env.DB_DATABASE}" />
    	<param name="driver-name" value="postgresql" />
    	<param name="user-name" value="${env.DB_USERNAME}" />
    	<param name="password" value="${env.DB_PASSWORD}" />
    	<param name="validate-on-match" value="false"/>
    	<param name="valid-connection-checker-class-name" value="org.jboss.jca.adapters.jdbc.extensions.postgres.PostgreSQLValidConnectionChecker"/>
    	<param name="exception-sorter-class-name" value="org.jboss.jca.adapters.jdbc.extensions.postgres.PostgreSQLExceptionSorter"/>
    	<param name="background-validation" value="true" />
    	<param name="background-validation-millis" value="60000" />
    	<param name="flush-strategy" value="IdleConnections" />
    	<param name="statistics-enabled" value="${wildfly.datasources.statistics-enabled:${wildfly.statistics-enabled:true}}" />
	</feature>
</layer-spec>
Finally, under the src/main/resources/modules/org/postgresql/main directory is a module.xml file that configures the JBoss module:
<?xml version="1.0" encoding="UTF-8"?>
<module xmlns="urn:jboss:module:1.0" name="org.postgresql">
    <resources>
   	 <artifact name="${org.postgresql:postgresql}"/>
    </resources>
    <dependencies>
   	 <module name="javax.api"/>
   	 <module name="javax.transaction.api"/>
    </dependencies>
</module>
The pom.xml file in the postgresql-database-layer directory builds the custom feature-pack using the Maven Galleon plug-in:
<?xml version="1.0" encoding="UTF-8"?>
<project xmlns="http://maven.apache.org/POM/4.0.0" xmlns:xsi="http://www.w3.org/2001/XMLSchema-instance" xsi:schemaLocation="http://maven.apache.org/POM/4.0.0 https://maven.apache.org/xsd/maven-4.0.0.xsd">
   ...
   <properties>
      <version.org.postgresql>42.2.18.redhat-00001</version.org.postgresql>
      <version.wildfly.galleon.pack>3.0.0.GA-redhat-00005</version.wildfly.galleon.pack>
      <version.wildfly.galleon.maven.plugin>5.2.4.Final</version.wildfly.galleon.maven.plugin>
   </properties>

   <dependencies>
      <!-- Import the Postgresql JDBC driver -->
      <dependency>
         <groupId>org.postgresql</groupId>
         <artifactId>postgresql</artifactId>
         <version>${version.org.postgresql}</version>
      </dependency>
      <dependency>
         <groupId>org.jboss.eap</groupId>
         <artifactId>wildfly-galleon-pack</artifactId>
         <version>${version.wildfly.galleon.pack}</version>
         <type>zip</type>
      </dependency>
   </dependencies>

   <build>
      <plugins>
         <plugin>
            <groupId>org.wildfly.galleon-plugins</groupId>
            <artifactId>wildfly-galleon-maven-plugin</artifactId>
            <version>${version.wildfly.galleon.maven.plugin}</version>
            <executions>
               <execution>
                  <id>wildfly-datasources-galleon-pack-build</id>
                  <goals>
                     <goal>build-user-feature-pack</goal>
                  </goals>
                  <phase>compile</phase>
                  <configuration>
                     <translate-to-fpl>true</translate-to-fpl>
                  </configuration>
               </execution>
            </executions>
         </plugin>
      </plugins>
   </build>
</project>
The build-user-feature-pack goal in the Galleon Maven plug-in builds the custom layers.
Build a JBoss EAP XP 3 bootable JAR
Unlike the example in my previous articles, this example does not put the application into a JBoss EAP XP container image as a deployment artifact. Instead, we create a bootable JAR containing a server, a packaged application, and the runtime required to launch the application. The source code remains the same.
Using a bootable JAR for deployment changes the following aspects of the previous example:
- How we provision and configure database connectivity: We use the feature-pack implemented through the
postgresql-database-layersubproject. - How we build the application: We use the
wildfly-jar-maven-pluginMaven plug-in to create a bootable JAR. - How we build the application image: Instead of a JBoss EAP XP image, we use an OpenJDK image at build time and runtime, since we created a bootable JAR.
The wildfly-jar-maven-plugin plug-in is invoked in the pom.xml file in the weather-app-eap-cloud-ready subproject::
<?xml version="1.0" encoding="UTF-8"?>
<project xmlns="http://maven.apache.org/POM/4.0.0" xmlns:xsi="http://www.w3.org/2001/XMLSchema-instance" xsi:schemaLocation="http://maven.apache.org/POM/4.0.0 http://maven.apache.org/xsd/maven-4.0.0.xsd">
   ...
   <build>
      <plugins>
         <plugin>
            <groupId>org.wildfly.plugins</groupId>
            <artifactId>wildfly-jar-maven-plugin</artifactId>
            <version>${bootable.jar.maven.plugin.version}</version>
            <configuration>
               <feature-packs>
                  <feature-pack>
                     <location>org.jboss.eap:wildfly-galleon-pack:${version.wildfly.galleon.pack}</location>
                  </feature-pack>
                  <feature-pack>
                     <groupId>com.redhat.examples</groupId>
                     <artifactId>postgresql-layer</artifactId>
                     <version>1.0.0</version>
                  </feature-pack>
               </feature-packs>
               <layers>
                  <layer>jaxrs-server</layer>
                  <layer>microprofile-platform</layer>
                  <layer>postgresql-datasource</layer>
               </layers>
               <cloud />
            </configuration>
            <executions>
               <execution>
                  <goals>
                     <goal>package</goal>
                  </goals>
               </execution>
            </executions>
         </plugin>
      </plugins>
   </build>
</project>
Let's analyze the core elements of the Maven plug-in. The first important element is the <feature-pack> tag. The JBoss EAP JAR Maven plug-in uses Galleon's trimming capability to reduce the size and memory footprint of the server. Thus, you can configure the server according to your requirements, including only the Galleon layers that provide the capabilities you need.
To specify the layers we want, I use two feature-packs:
wildfly-galleon-pluginspecifies the layers provided by JBoss EAP XP.postgresql-layeris the custom layer that builds the data source subsystem described in the previous section. To refer to this layer, I use the Maven GAV coordinates (group ID, artifact ID, and version) specified in the project'spom.xmlfile.
Those two feature-packs are used by the Galleon framework to build JBoss EAP XP with only the requested subsystems. The <layers> tag specifies the required layers:
jaxrs-server: This layer contains the subsystem needed to implement the Servlet, JAX-RS, JPA, and CDI Jakarta EE specifications.microprofile-platform: This decorator layer adds the MicroProfile capabilities to the provisioned server.postgresql-datasource: This is my custom decorator layer that I created to manage the data source subsystem and the JDBC driver.
The <cloud/> tag appears in the <configuration> element of the plug-in configuration in the pom.xml file so that the JBoss EAP Maven JAR plug-in can recognize that you chose the OpenShift platform.
Run Maven locally to create the weather-app-cloud-ready-1.0-bootable.jar JAR file containing all you need to deploy the application into JBoss EAP XP inside OpenShift:
$ mvn clean package
Update the buildConfig
In Part 4 of my previous series, I showed how to create a chained build to produce a runtime image that contained only the resources needed to execute the application. Using the bootable JAR mode with JBoss EAP XP, we can follow the same approach. This time, we import the OpenJDK container images:
# Import image related to OpenJDK 11
$ oc import-image ubi8/openjdk-11:1.10-1 --from=registry.access.redhat.com/ubi8/openjdk-11:1.10-1 --confirm

# Import image related to OpenJDK 11 - Runtime
$ oc import-image ubi8/openjdk-11-runtime:1.10-1 --from=registry.access.redhat.com/ubi8/openjdk-11-runtime:1.10-1 --confirm
I have updated the buildConfig.yaml file under the k8s directory. That file now defines a chained build with two buildConfig objects: weather-app-eap-cloud-ready-build-artifacts and weather-app-eap-cloud-ready. The first object is a base platform image for building and running plain Java 11 applications, such as a fat JAR and a flat classpath. The container image contains S2I integration scripts for deployment on OpenShift.
The second object is a lean, runtime-only container designed to be a base for deploying prebuilt applications. The container does not contain the Java compiler, the JDK tools, or Maven. Here, I put my fat JAR containing the JBoss EAP XP server and the application:
kind: ImageStream
apiVersion: image.openshift.io/v1
metadata:
  name: weather-app-eap-cloud-ready-build-artifacts
  labels:
    application: weather-app-eap-cloud-ready-build-artifacts
---
kind: ImageStream
apiVersion: image.openshift.io/v1
metadata:
  name: weather-app-eap-cloud-ready
  labels:
    application: weather-app-eap-cloud-ready
---
kind: BuildConfig
apiVersion: build.openshift.io/v1
metadata:
  name: weather-app-eap-cloud-ready-build-artifacts
  namespace: redhat-jboss-eap-cloud-ready-demo
  labels:
    build: weather-app-eap-cloud-ready-build-artifacts
spec:
  output:
    to:
      kind: ImageStreamTag
      name: 'weather-app-eap-cloud-ready-build-artifacts:latest'
  resources: {}
  strategy:
    type: Source
    sourceStrategy:
      env:
        - name: ARTIFACT_DIR
          value: weather-app-eap-cloud-ready/target
      from:
        kind: ImageStreamTag
        namespace: redhat-jboss-eap-cloud-ready-demo
        name: 'openjdk-11:1.10-1'
  source:
    type: Binary
    binary: {}
---
kind: BuildConfig
apiVersion: build.openshift.io/v1
metadata:
  labels:
    application: weather-app-eap-cloud-ready
  name: weather-app-eap-cloud-ready
spec:
  output:
    to:
      kind: ImageStreamTag
      name: weather-app-eap-cloud-ready:latest
  source:
    images:
    - from:
        kind: ImageStreamTag
        name: weather-app-eap-cloud-ready-build-artifacts:latest
      paths:
      - sourcePath: /deployments
        destinationDir: ./deployments
    dockerfile: |-
      FROM openjdk-11:1.10-1
      COPY deployments /
      CMD  java -jar /deployments/weather-app-cloud-ready-1.0-bootable.jar
  strategy:
    dockerStrategy:
      imageOptimizationPolicy: SkipLayers
      from:
        kind: ImageStreamTag
        name: openjdk-11-runtime:1.10-1
        namespace: redhat-jboss-eap-cloud-ready-demo
    type: Docker
  triggers:
  - imageChange: {}
    type: ImageChange
Deploy the application
Now it's time to create the ImageStream instances and the chained buildConfig to build and deploy the application:
# Move to the project directory
$ cd weather-app-eap-cloud-ready

# Create the ImageStreams and the chained builds config to make the runtime image with JBoss EAP XP 3 and the application
$ oc create -f k8s/buildConfig.yaml

# Move to the project root
$ cd ..

# Start the build of the application on OpenShift
$ oc start-build weather-app-eap-cloud-ready-build-artifacts --from-dir=. --wait
I suggest checking when the second build is finished by using this command:
$ oc get build weather-app-eap-cloud-ready-1 --watch
After the status moves from Pending to Complete, you can create the weather application for JBoss EAP XP 3 and configure all the needed resources:
$ oc create -f k8s/weather-app-eap-cloud-ready.yaml
You can then test the application, using the steps described in the previous articles, to verify that it works. Although I revisited the way to build and deploy my application, the source code and the features remain the same. I can continue to use all the specifications provided by Jakarta EE and MicroProfile using the fat JAR mode, like the majority of Java cloud-friendly frameworks.
Resource optimization
Using the Galleon framework for a container runtime image reduces the use of expensive resources. In Part 4 of my previous series, I showed how you can save about 35% of the space in the memory image and about 28% of its memory footprint using this approach instead of the traditional container image with the full JBoss EAP XP framework and all the developer tools. I obtained the same result using the bootable JAR approach.
Figure 1 shows the size of the container image with OpenJDK and the bootable JAR (JBoss EAP XP plus the application).
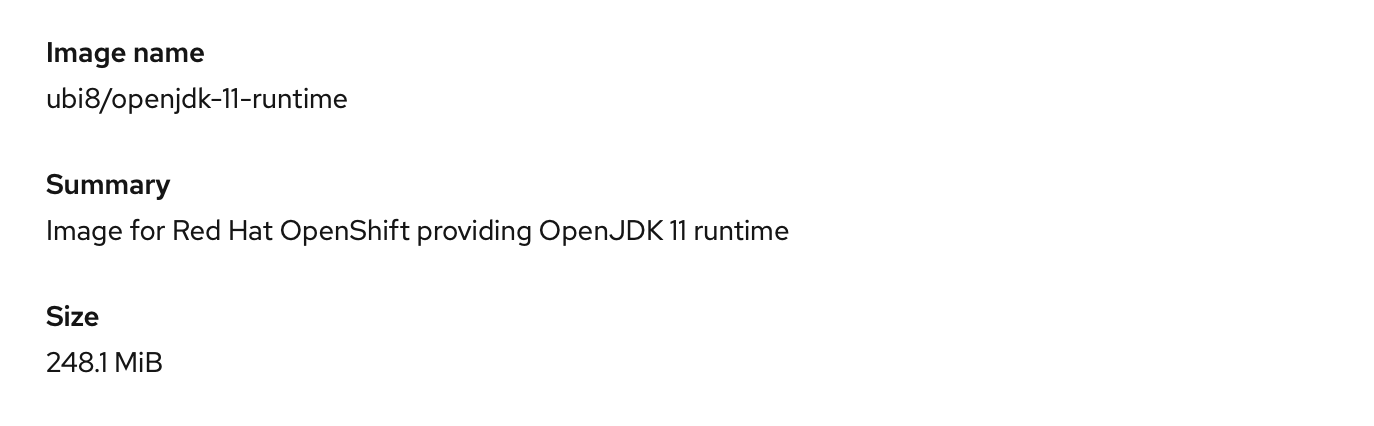
Figure 2 shows the memory footprint.

As these figures show, I obtained results similar to the previous series without changing my code.
Conclusion
This article shows how to modernize your application to run in the cloud while implementing the features provided by Jakarta EE and MicroProfile. I demonstrated an approach using a bootable JAR, like the majority of the Java frameworks aimed at cloud deployment, without needing to change any application code. You can start using this approach now or adopt it later.
The impact on your code is very minimal with this approach, so you can keep evolving your applications as you need to. Continuous improvement is key to the success of your architecture.
Last updated: November 8, 2023