Internet of Things (IoT) devices typically produce a lot of data, and Apache Kafka is a great tool for streaming that data. This article introduces Drogue IoT, a set of APIs and management tools that work with Kafka. You'll learn how to set up a Drogue IoT application using Red Hat OpenShift Streams for Apache Kafka.
IoT device management with Drogue IoT
Getting started with IoT is a fairly easy learning curve. Most developers use the MQTT protocol for device-to-cloud communication, but CoAP is also an option, and some even use HTTP.
Drogue IoT can help you keep your IoT experience simple while allowing it to grow with your use case. The Drogue project offers Drogue Device for managing your devices and Drogue Cloud to handle data on the backend.
On the cloud side, Drogue Cloud offers IoT-friendly APIs and uses the power of the cloud to handle the workload. The device management service allows you to register devices and distribute credentials in a scalable way through a web console or a REST API.
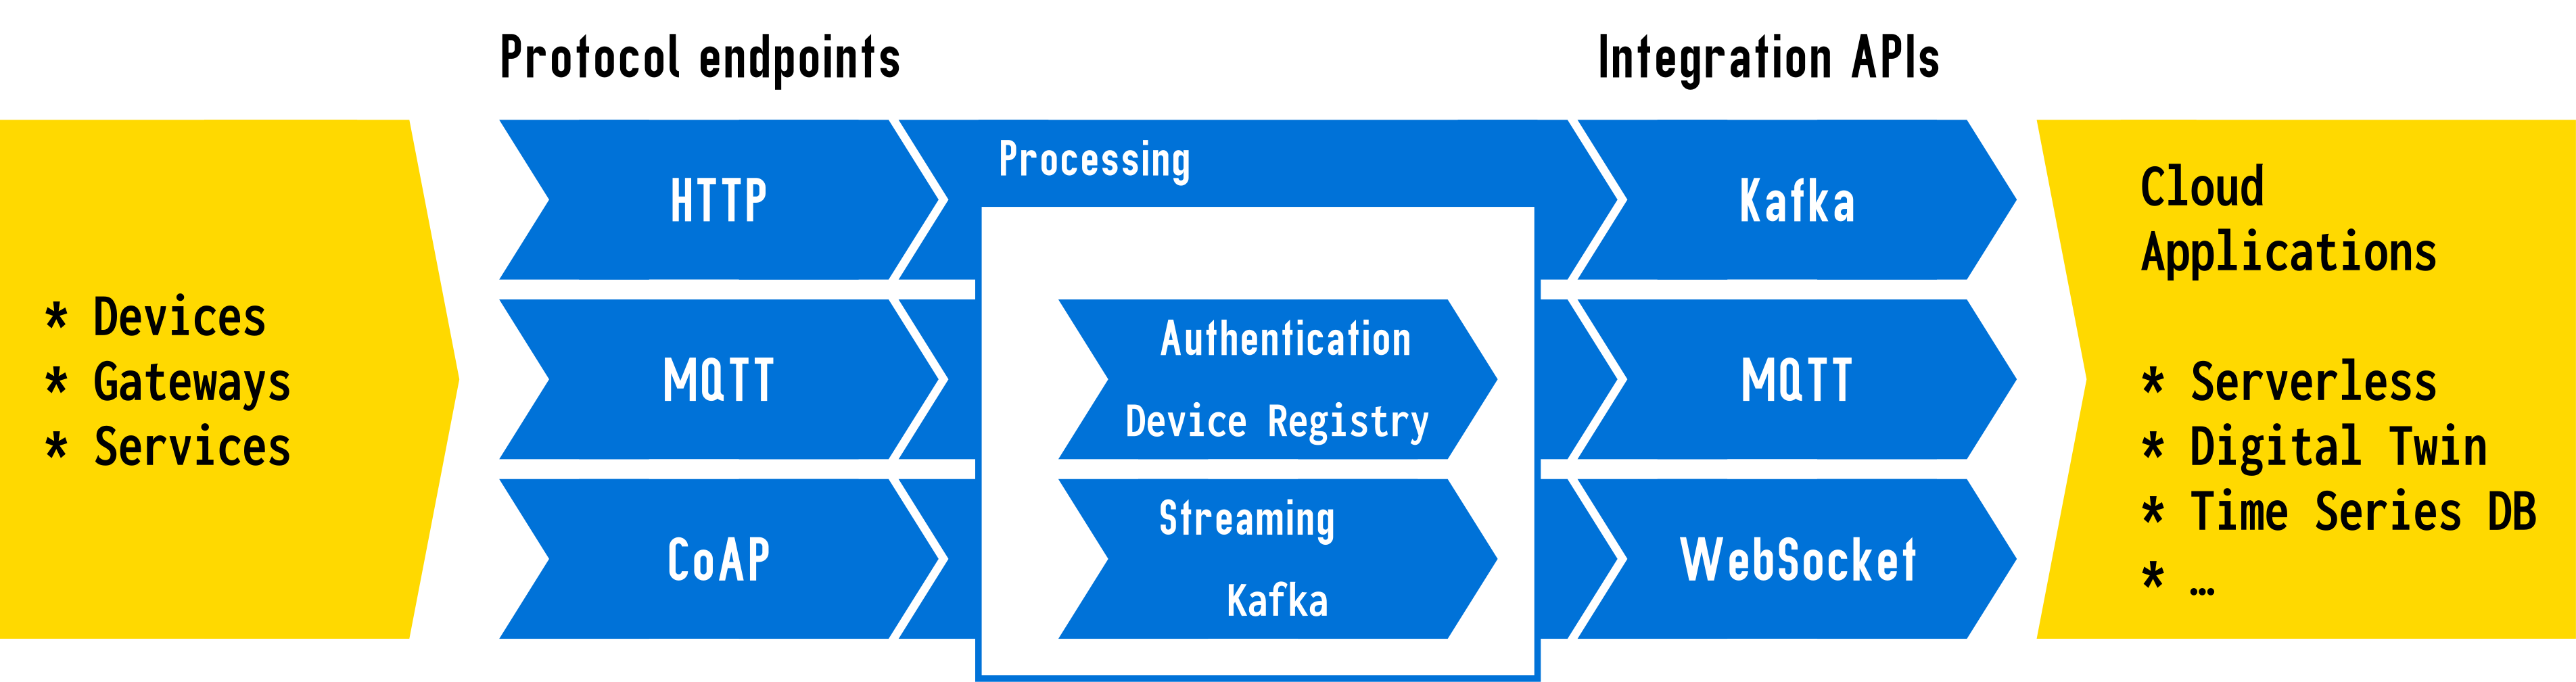
A core function of Drogue Cloud is to normalize IoT connectivity. Events that devices send messages to through any of the supported protocol endpoints (MQTT, CoAP, or HTTP) end up as CloudEvents messages in Kafka, ready for cloud-side applications to consume. And while those applications can directly consume from Kafka topics, it is also possible to use MQTT or WebSockets for that purpose. Figure 1 illustrates an IoT connectivity architecture with Drogue Cloud.
Use Drogue Cloud with OpenShift Streams for Apache Kafka
Apache Kafka is an ideal event streaming platform for IoT applications. The amount of data a single device sends might not be overwhelming, but if you are successful and scale up, you will need the high capacity of a tool like Kafka for the combined output of all of your devices.
Kafka is a core part of Drogue Cloud's underlying infrastructure, and Strimzi, the Kafka operator, is installed by default. This allows the device registry to provision Kafka topics as needed.
Using Strimzi puts you in charge of maintaining the Kafka instance in your Drogue IoT infrastructure, however. If you want to write applications to the IoT-friendly APIs for Kafka, but not manage the Kafka instance yourself, you could use OpenShift Streams for Apache Kafka instead.
OpenShift Streams for Apache Kafka is a fully hosted and managed Apache Kafka service, and perfect for a use case where you do not want to manage your own Kafka instance. In the following sections, you will see how to install Drogue Cloud using OpenShift Streams for Apache Kafka.
Set up a managed Kafka cluster
First, you need to create a new managed Kafka cluster. You can easily do this with the no-cost OpenShift Streams for Apache Kafka service.
If don't already have a Red Hat Developer account to access the Red Hat Hybrid Cloud Console, you will need to create one. Otherwise, you can just sign in to your existing account.
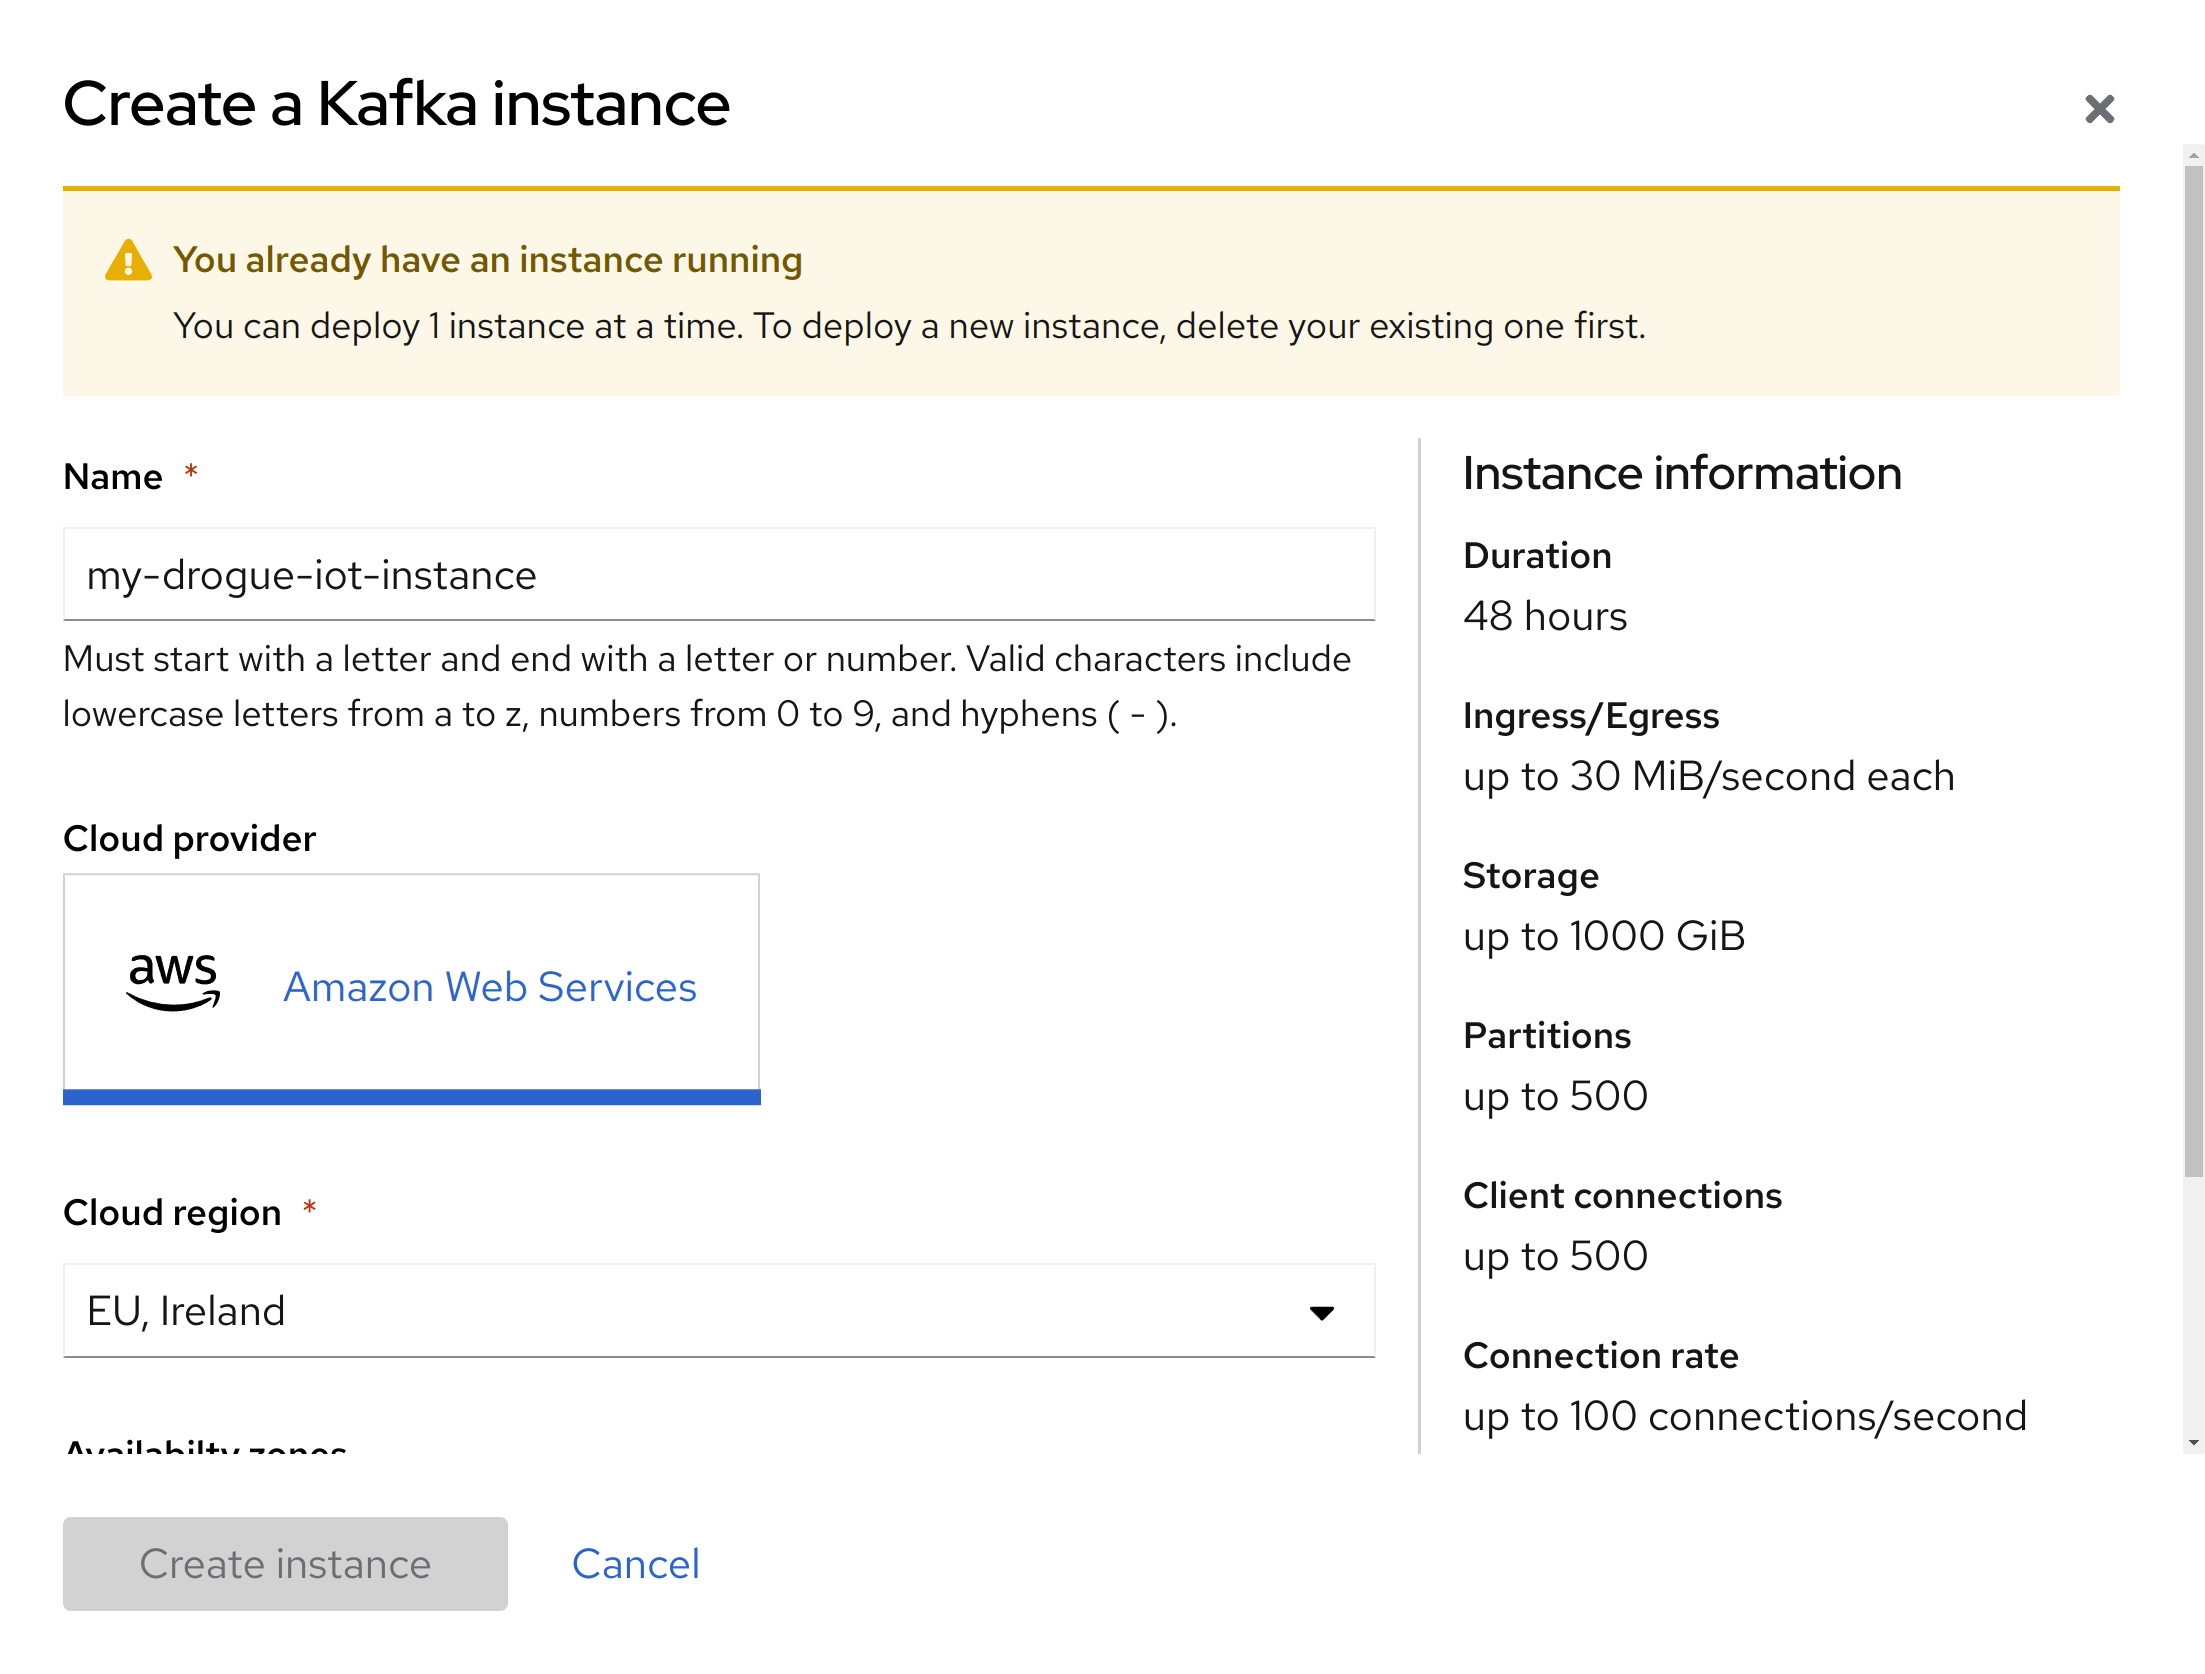
Next, you will create a new Kafka instance, using the dialog shown in Figure 2. Note that provisioning the new instance might take a few minutes.
Create a service account
Now that you have a Kafka instance, create a new service account. You could reuse an existing service account, but we recommend that you create a new one just for this use case.
Navigate to Service Accounts in the sidebar menu, then click Create service account. In the following dialog, enter a description into the Short description field to help you find the service account later, then click Create. You'll see results similar to Figure 3.
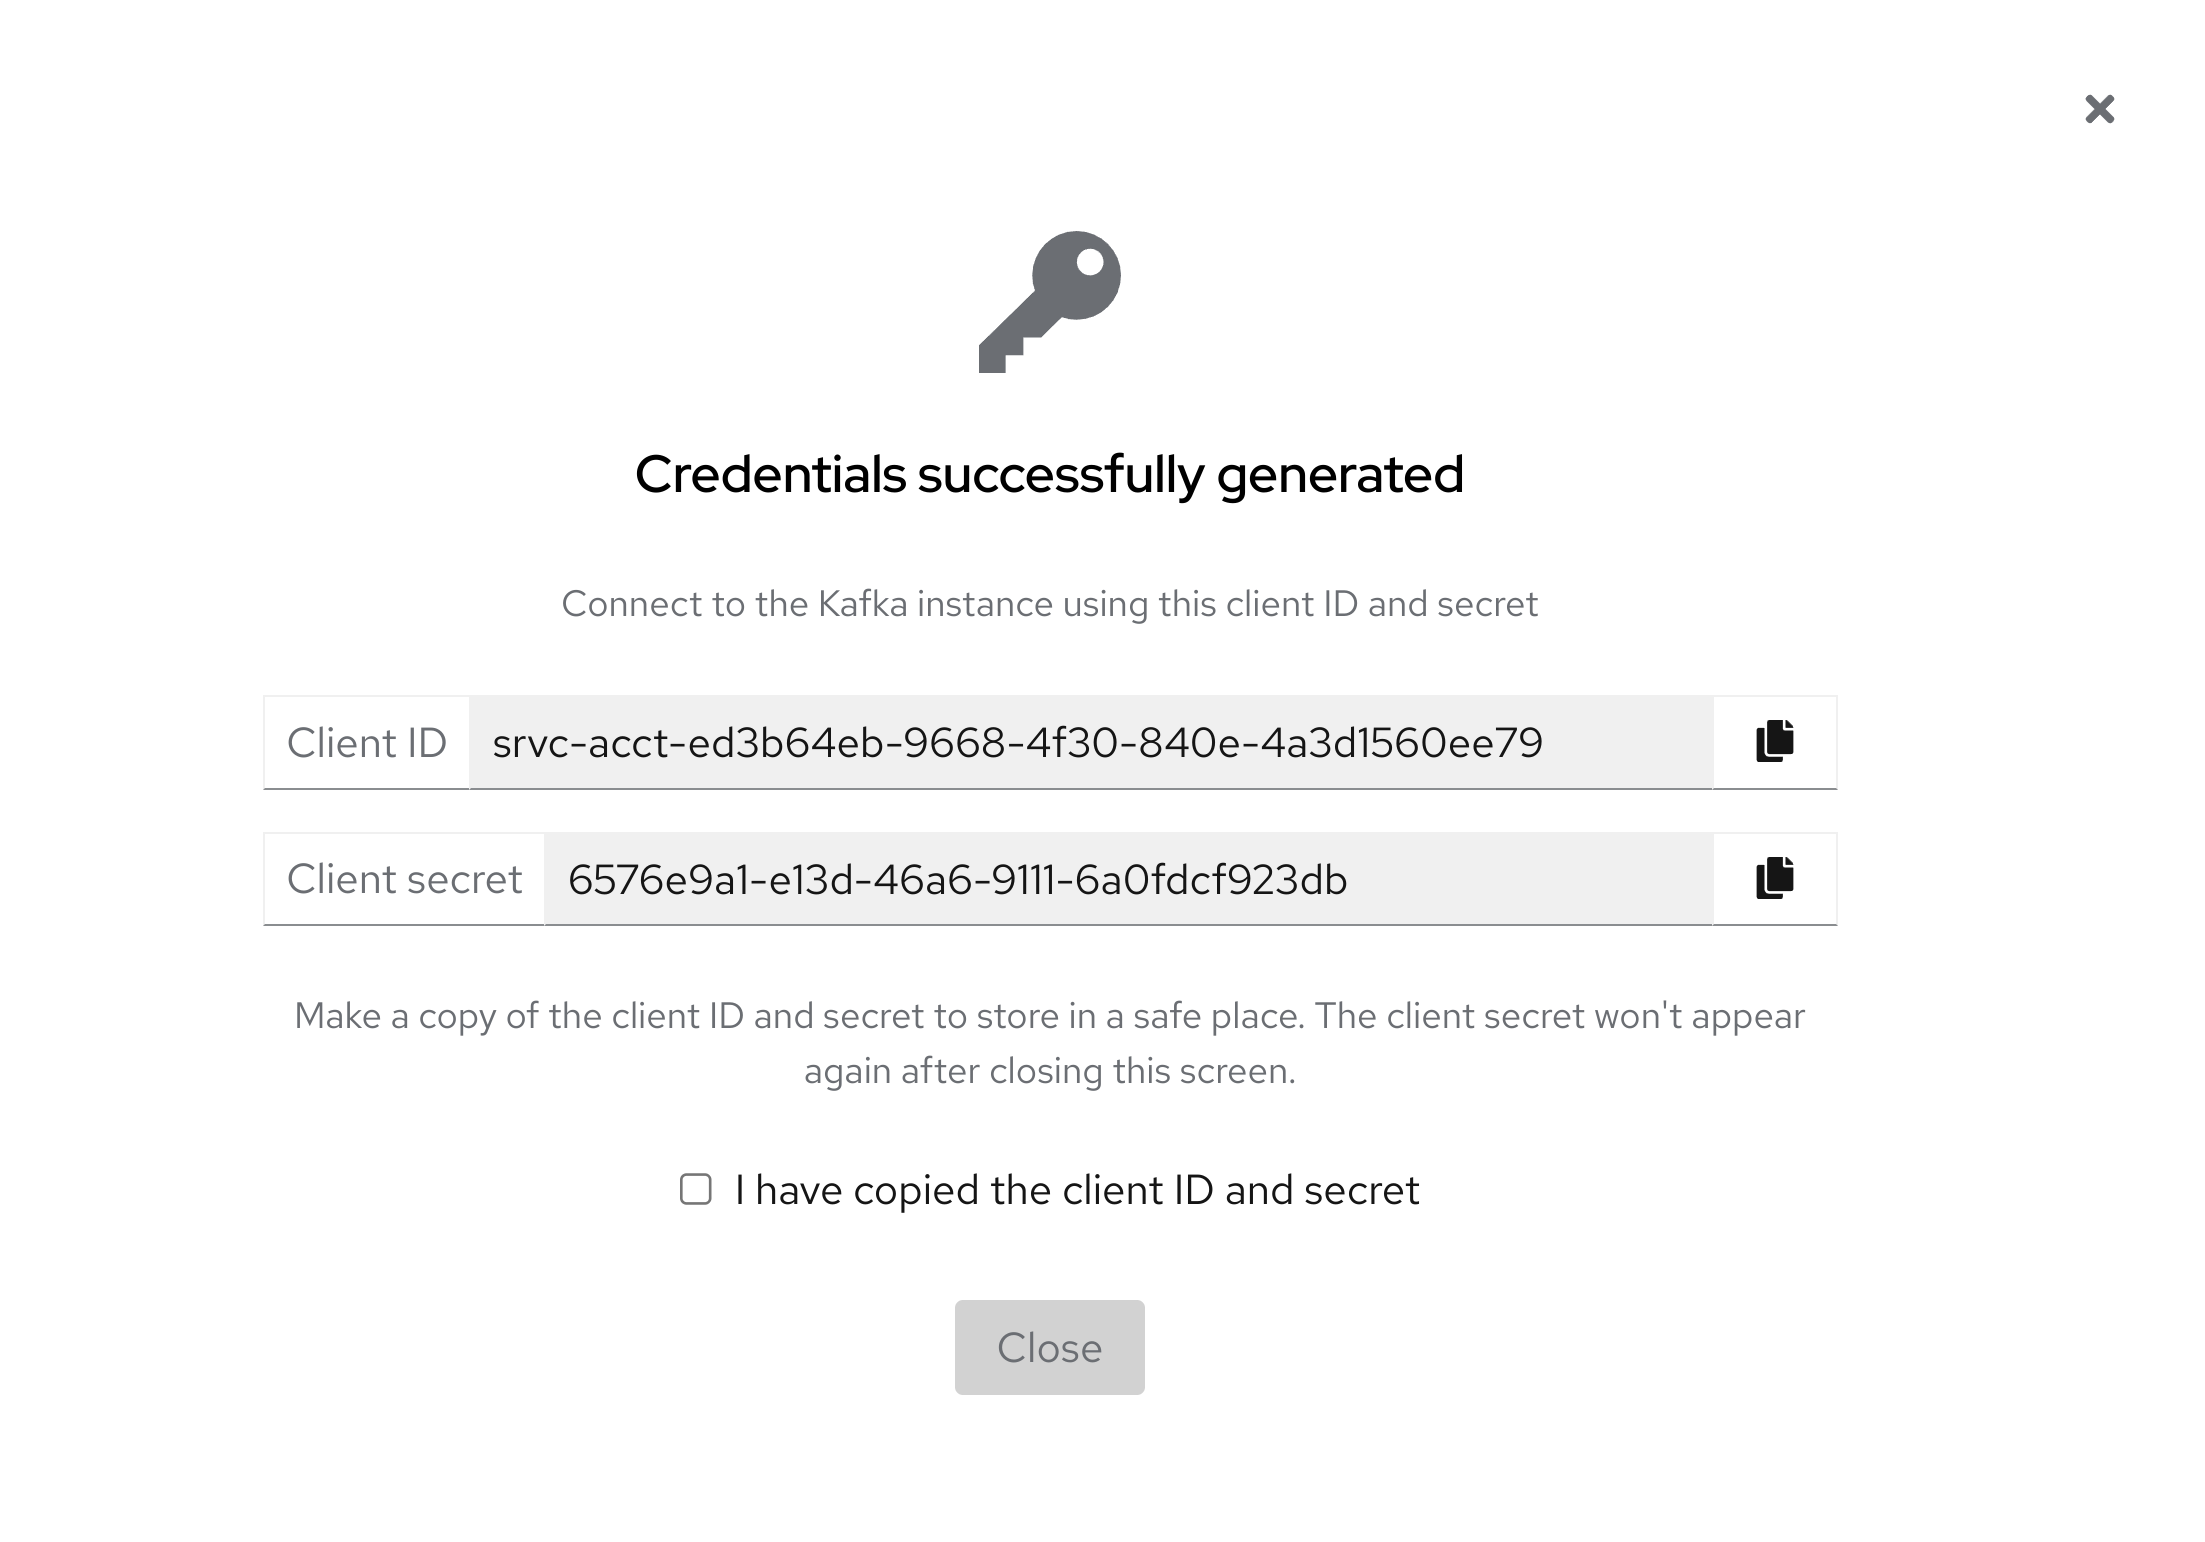
Be sure to write down the client ID and client secret for later use. If you lose them, you can reset them, but in that case you would also need to reconfigure the Drogue Cloud instance.
When you are done, check the I have copied the client ID and secret checkbox and close the dialog.
Create two Kafka topics
Next, create two Kafka topics manually, naming them iot-commands and registry. The first topic is for commands that should be sent to devices. These are short-lived messages where you don’t need a long retention time. The second topic is for change events coming from the device registry. These events are needed for the operators to perform additional changes, based on changes in the device registry. Unless you want to use those events in an additional use case, they are also short-lived, because the operators act on them immediately.
In order to create these topics, navigate to your Kafka instance, switch to the Topics tab, and click the Create button. This will take you to a wizard, shown in Figure 4, to aid you in creating each topic.
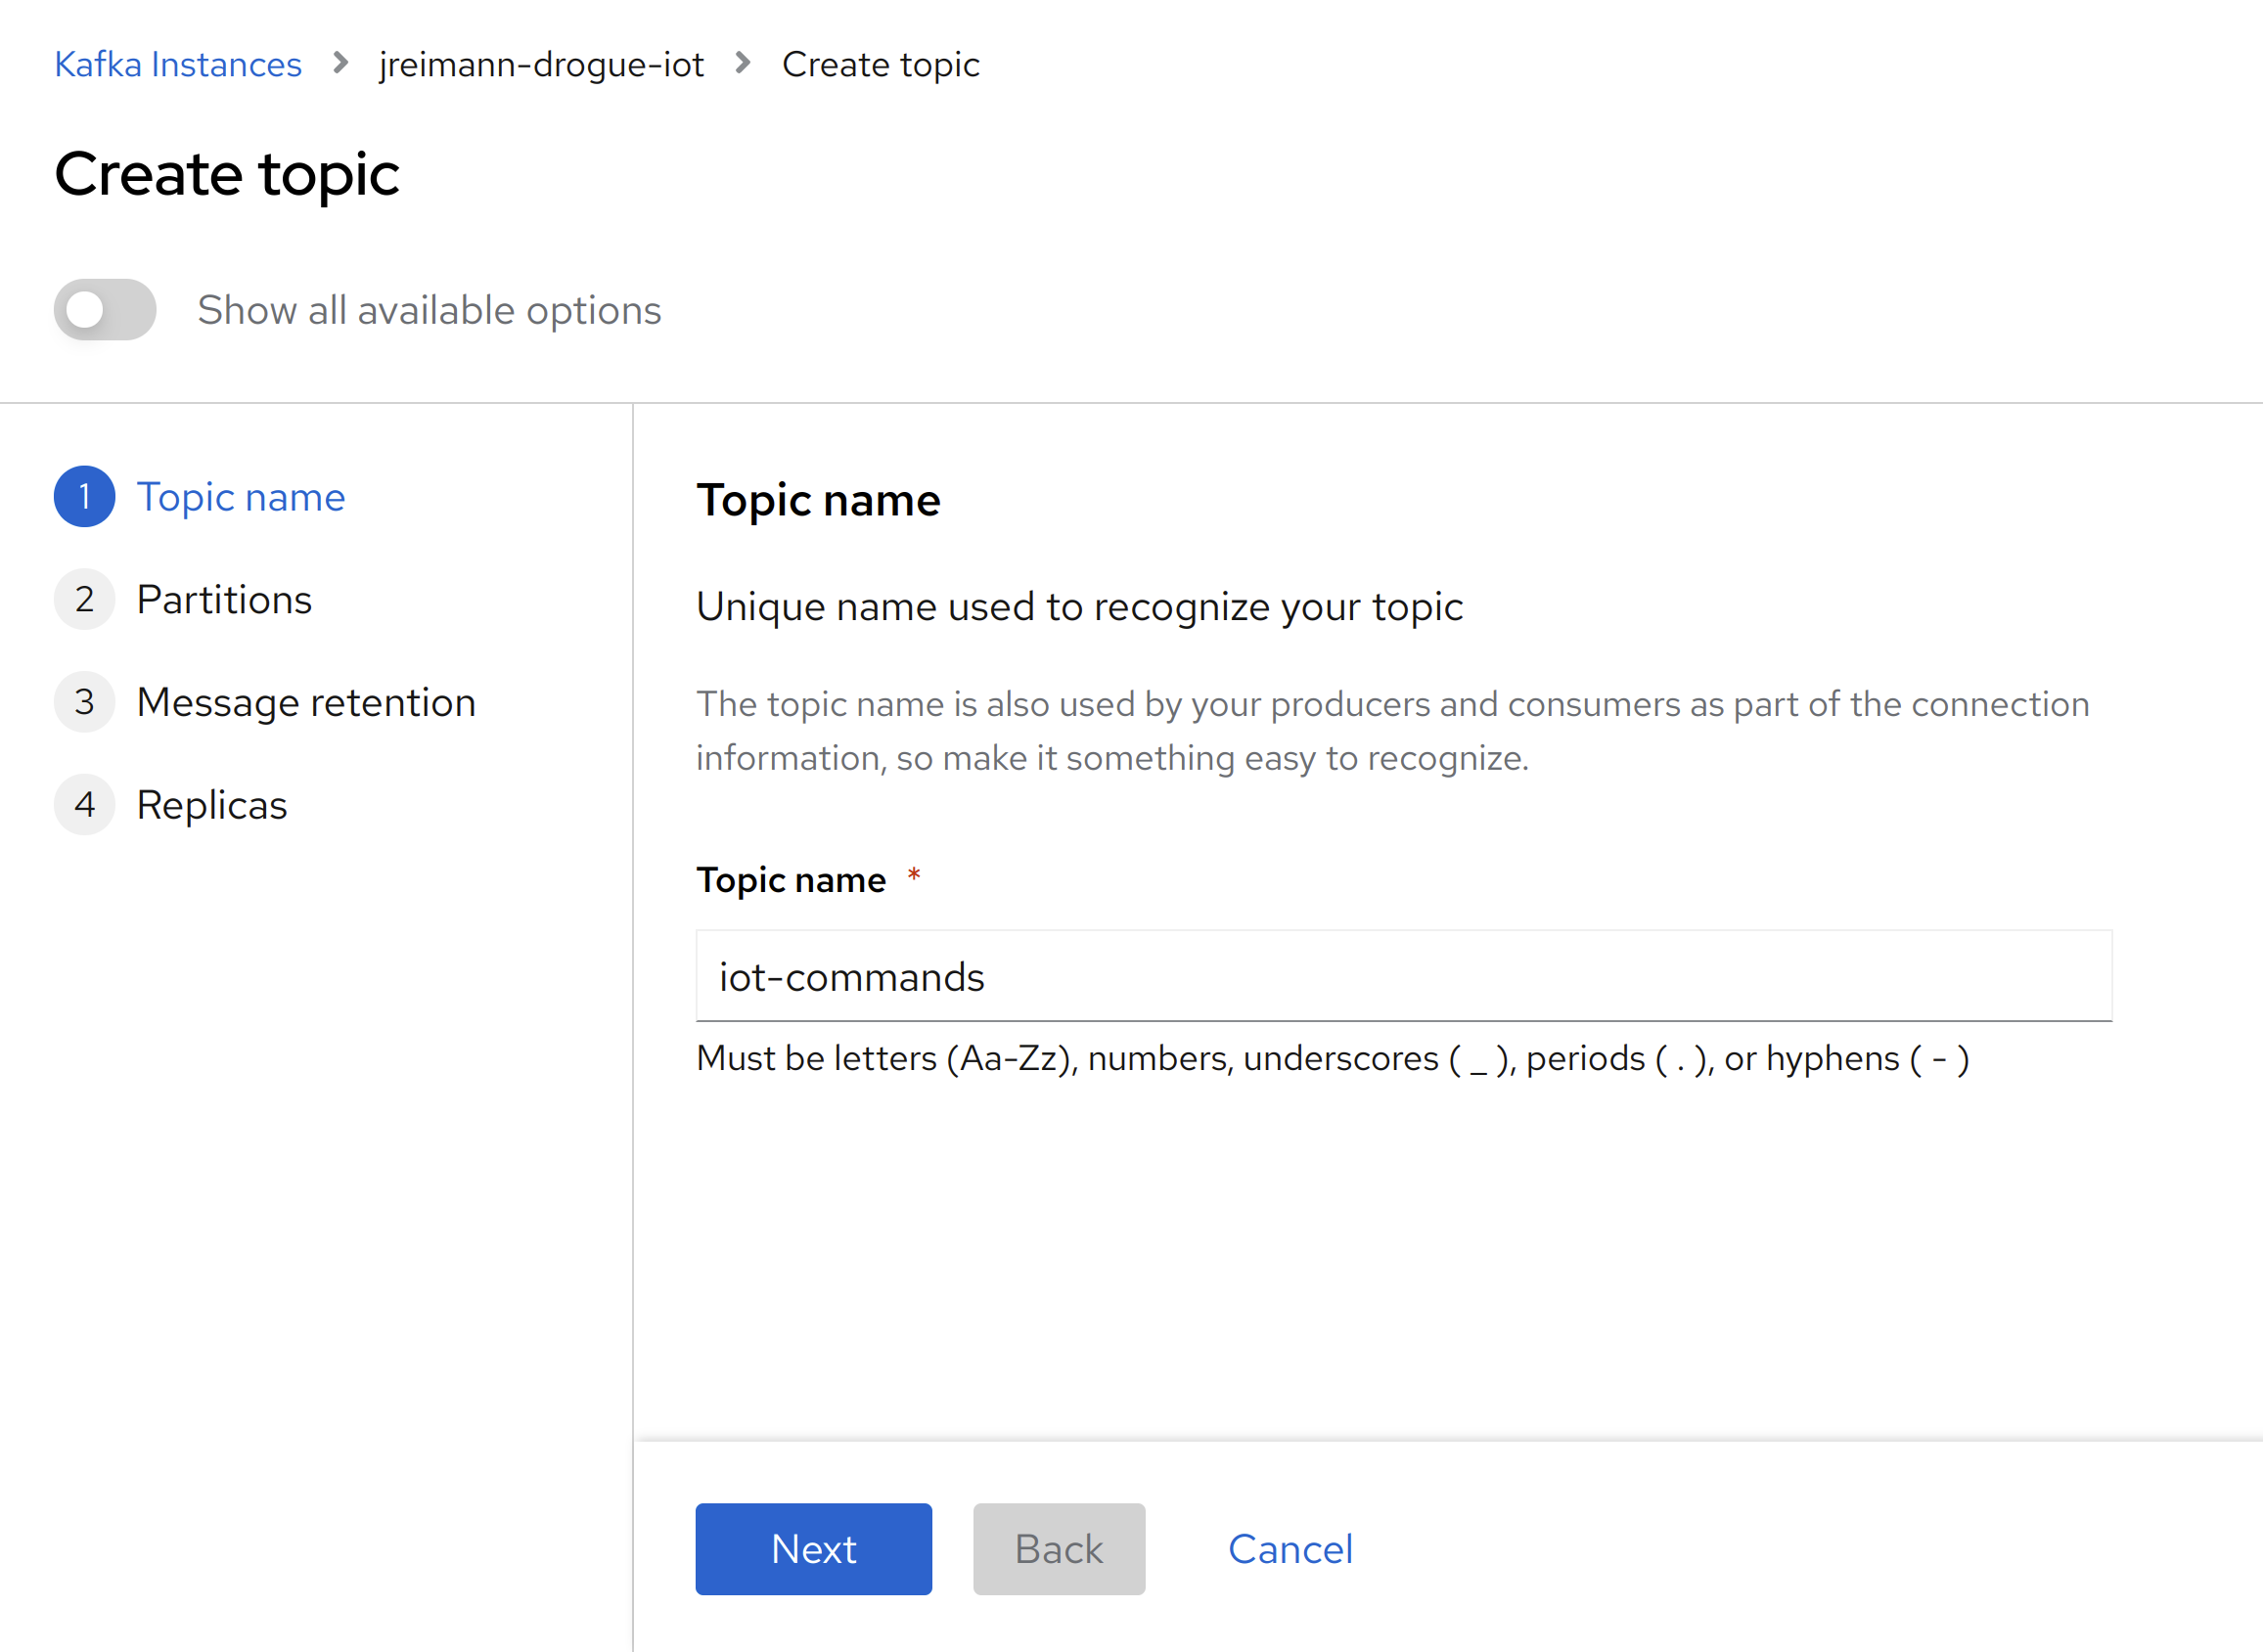
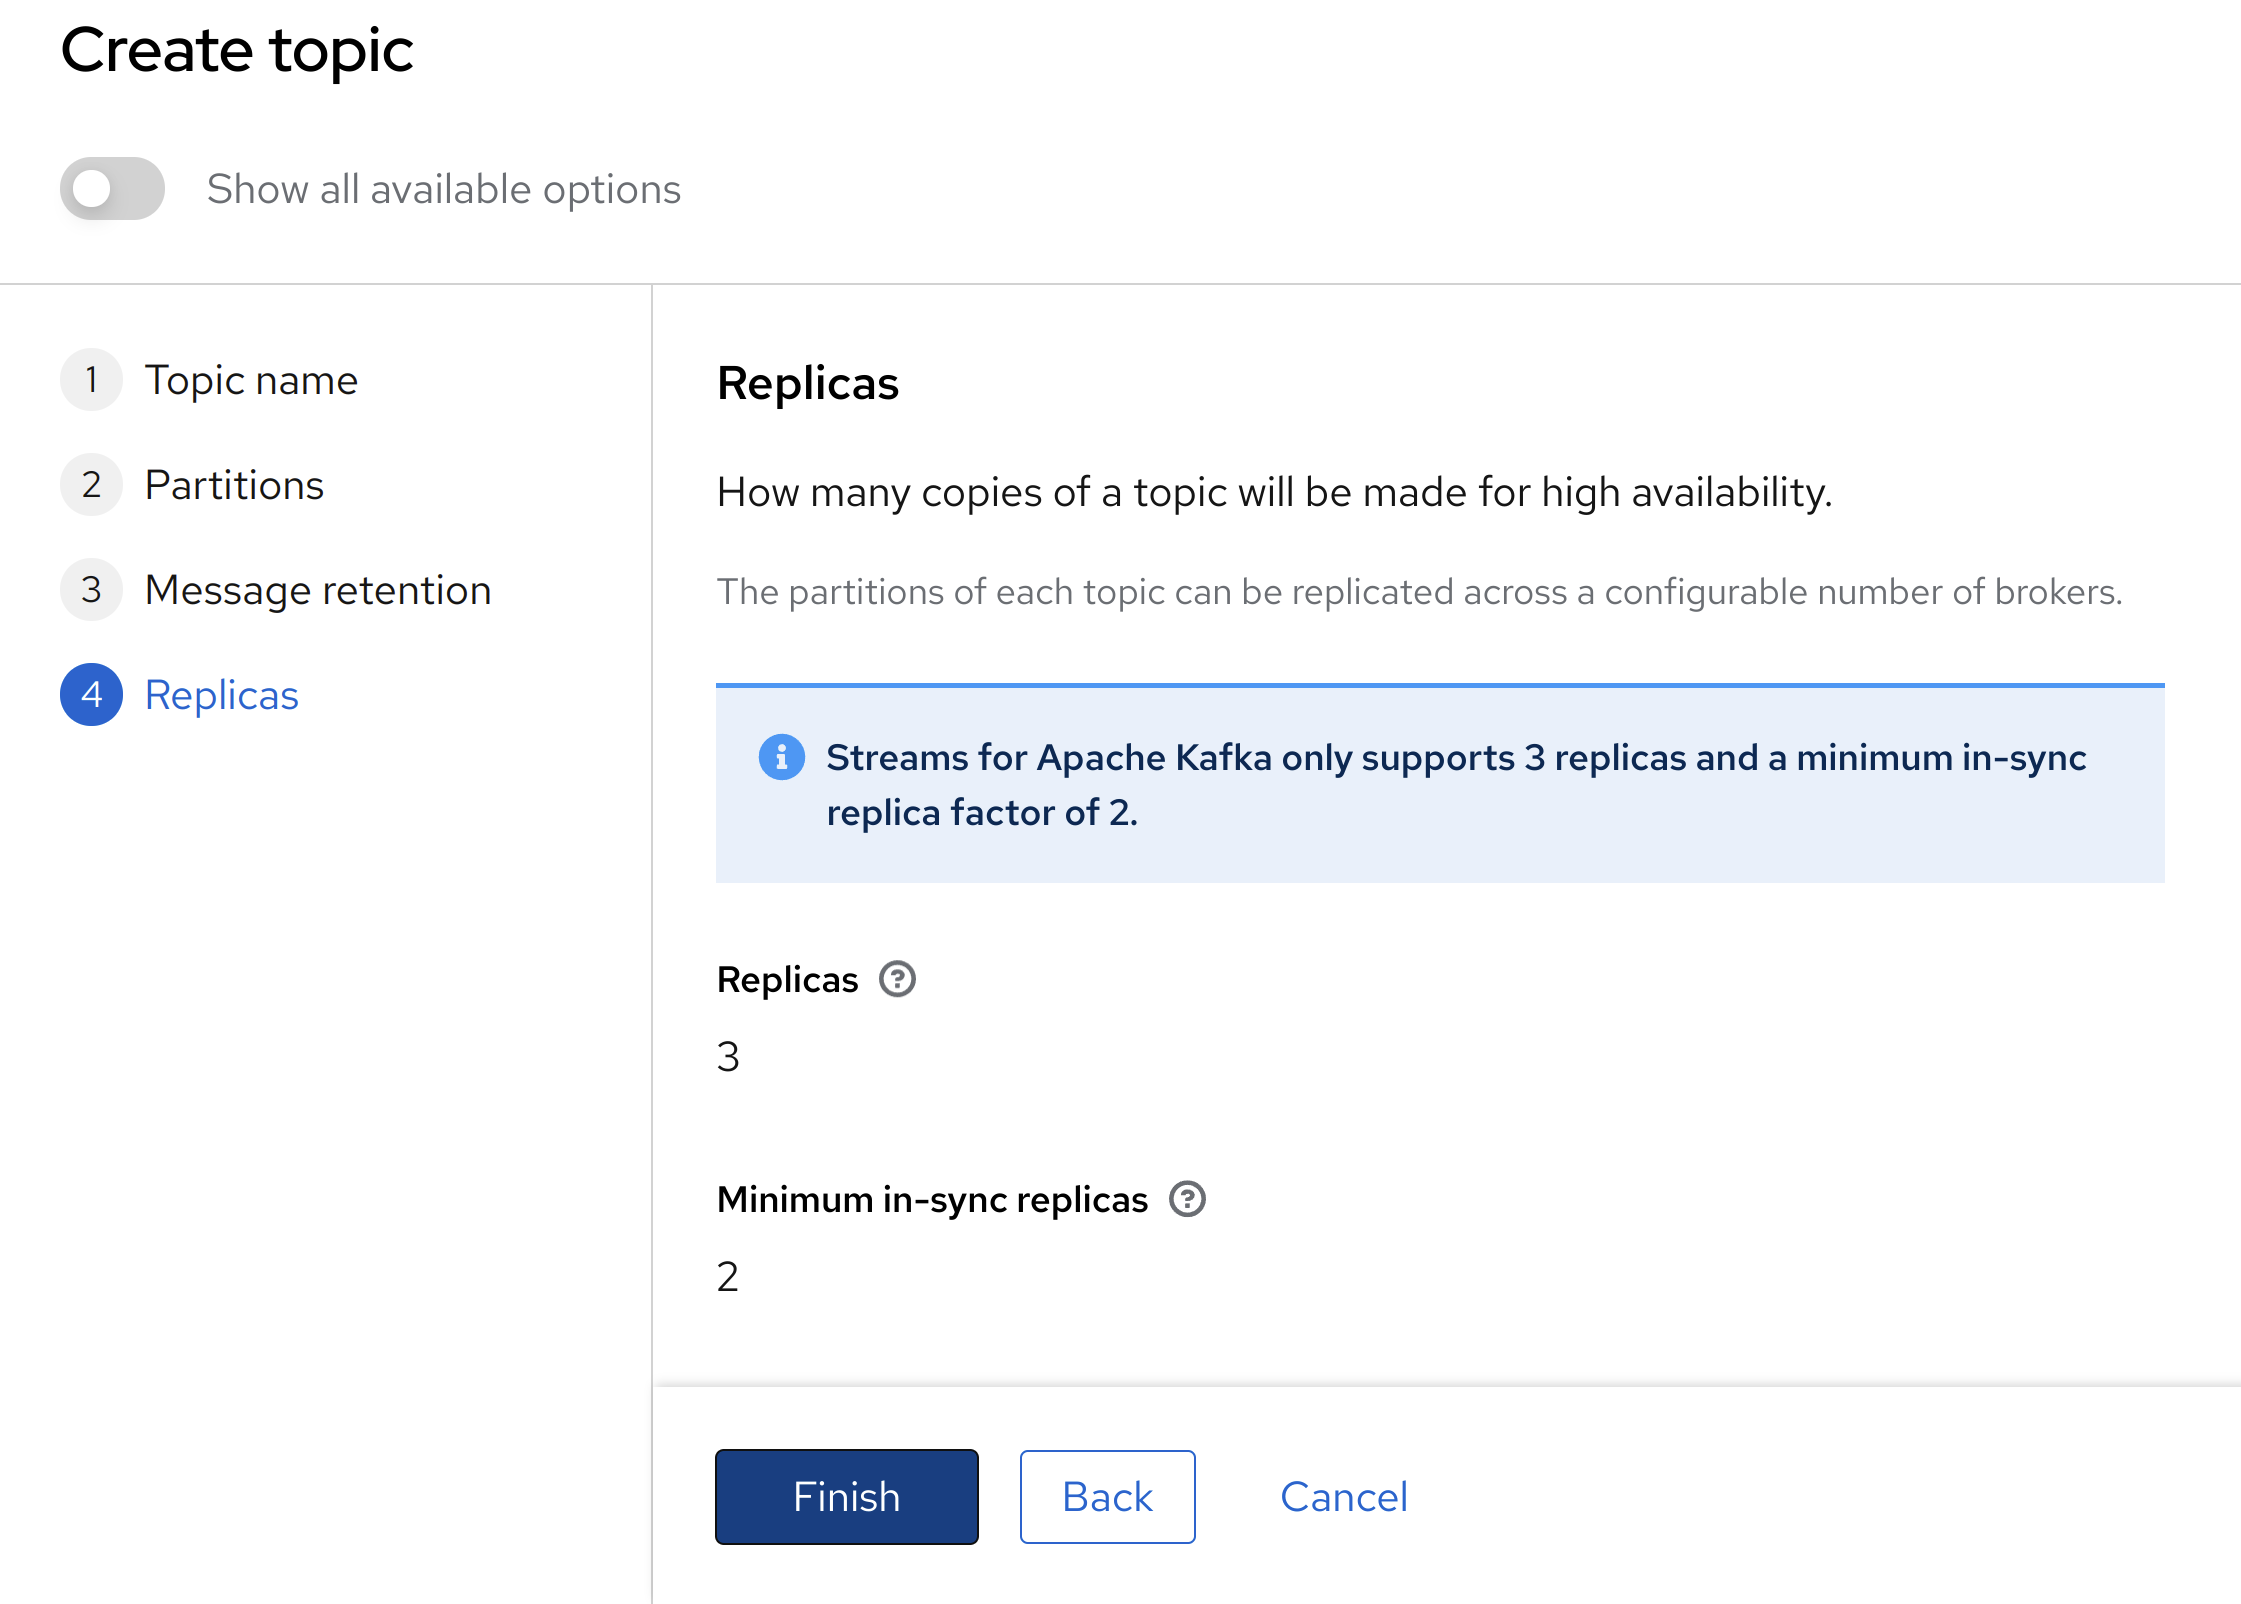
Enter the topic name and press Next. Keep the defaults for the following steps, then press Finish when you reach the last step, as shown in Figure 5.
Set permissions for the Kafka account
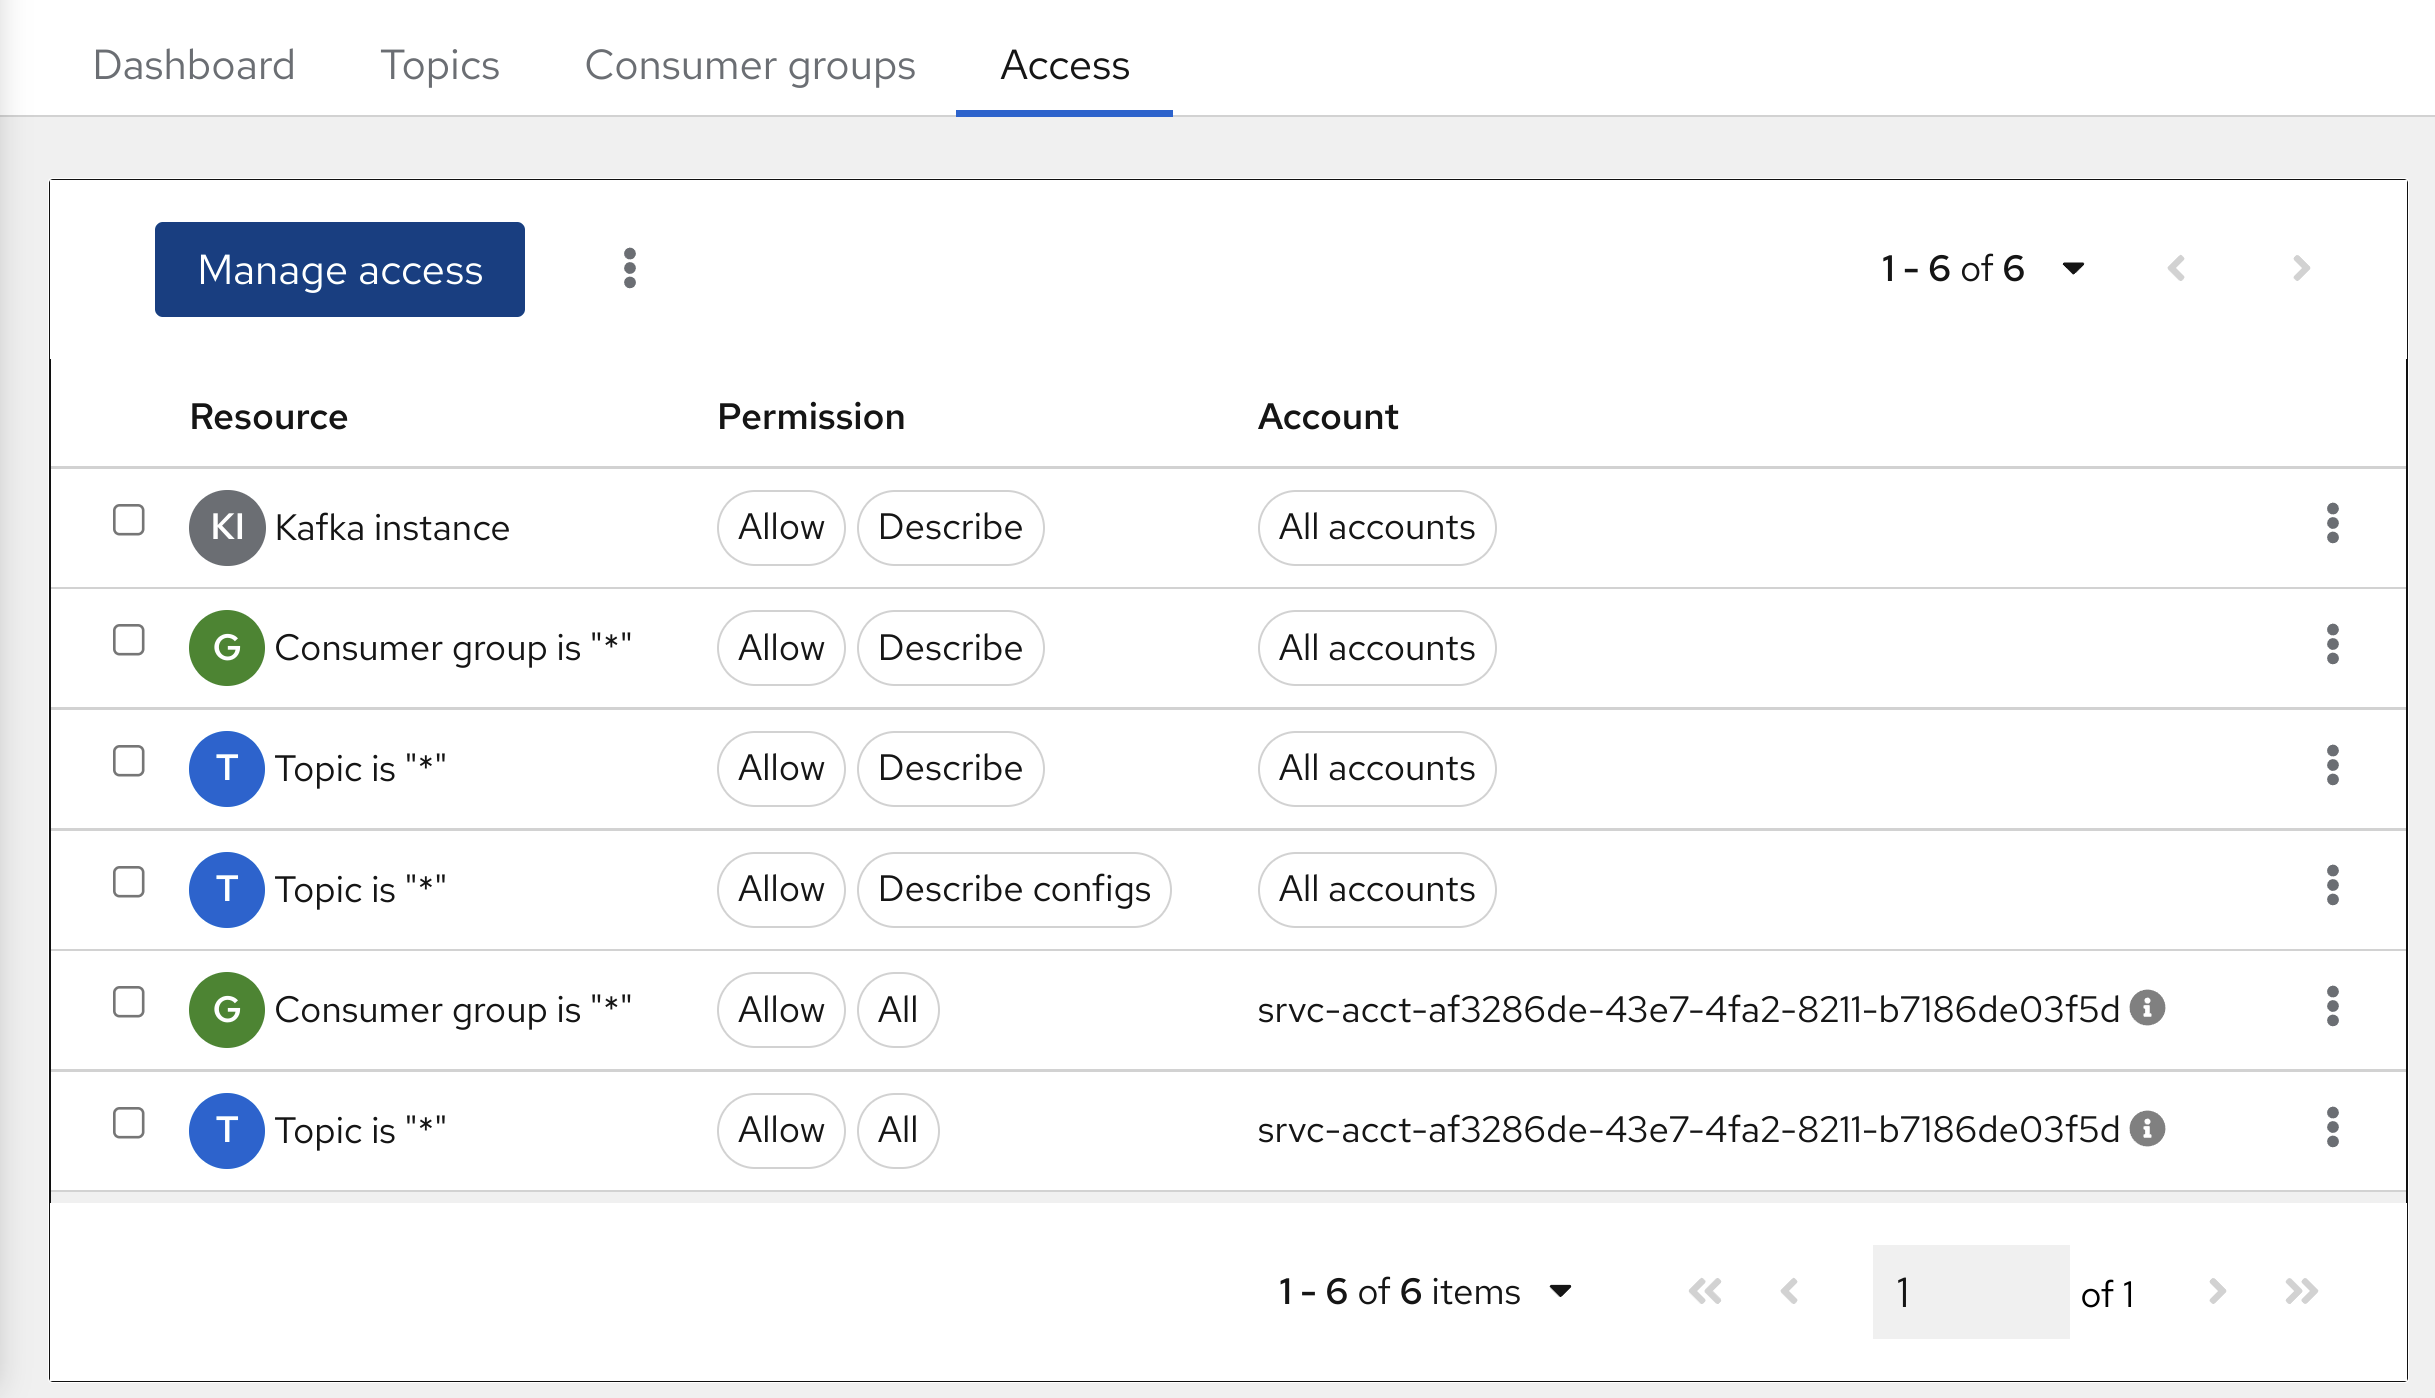
Now, you need to grant the service account user access to the resources. Be sure to apply the permissions in Table 1 in addition to the default ones.
| Resource | Permission | Account |
|---|---|---|
Consumer group is * | Allow All | <service account Client ID> |
Topic is * | Allow All | <service account Client ID> |
In the web console, the permissions might look something like Figure 6.
Get the connection information
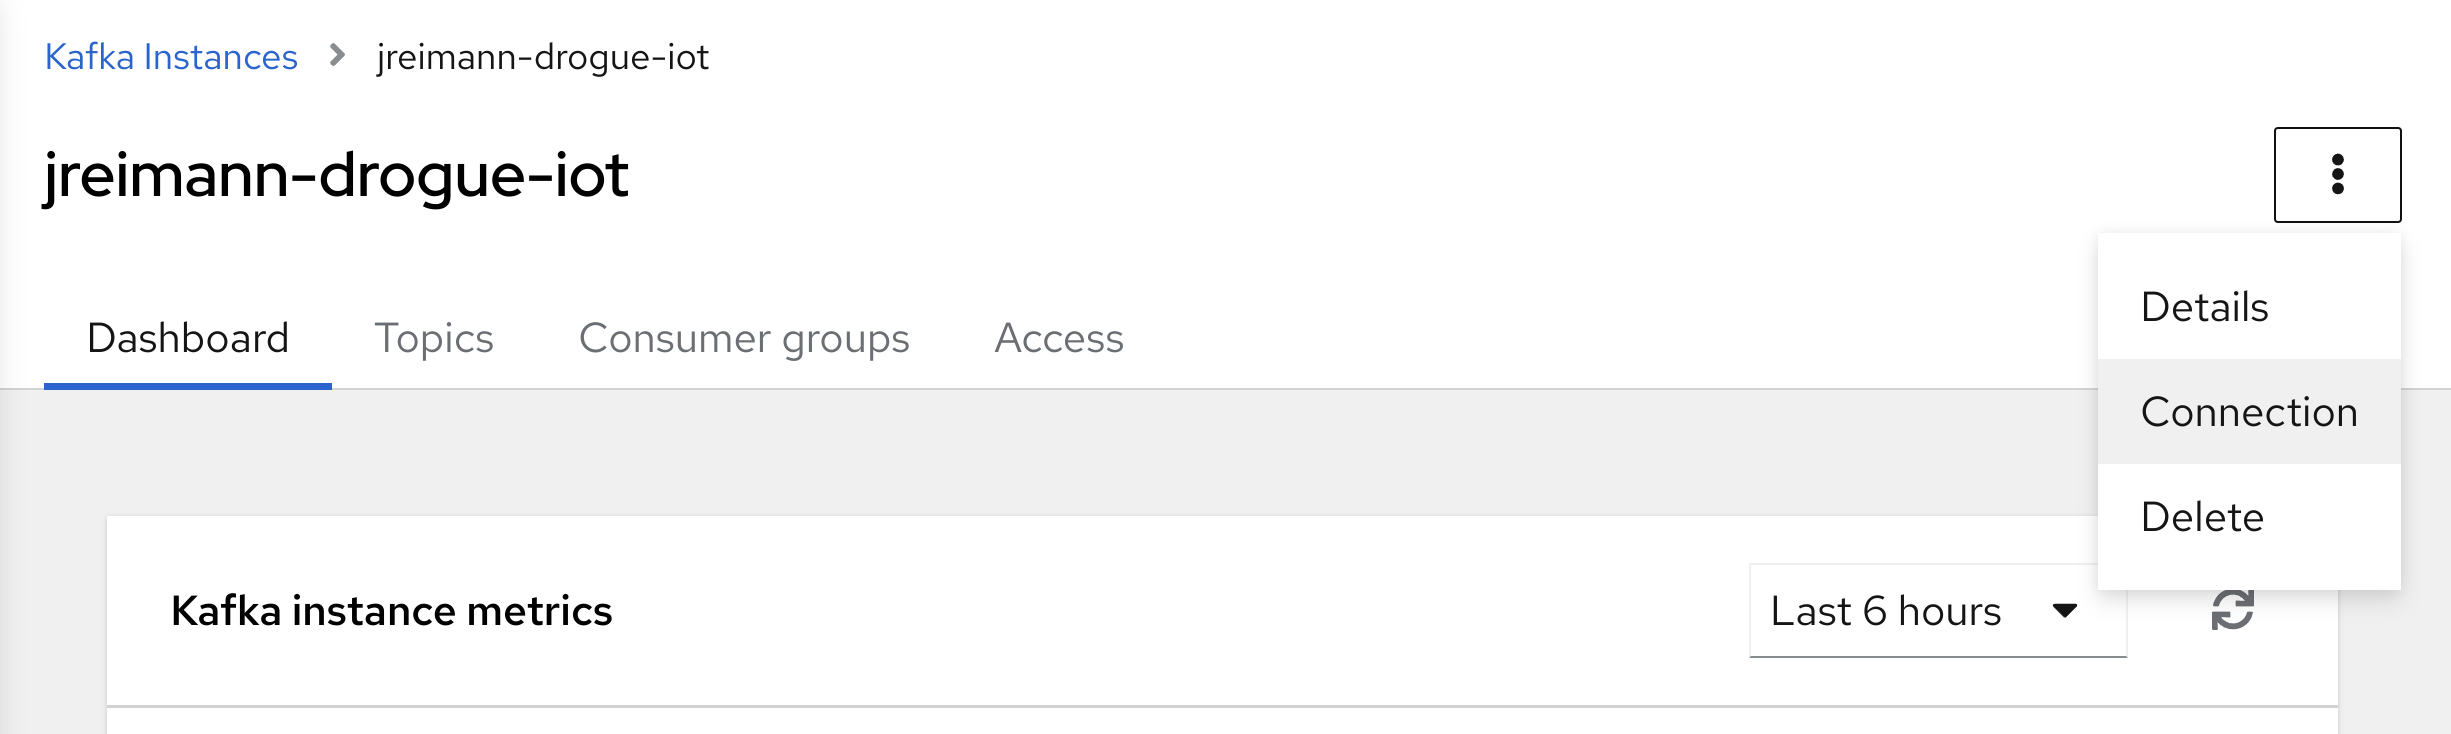
Finally, you need to get the connection information for your Kafka cluster. Click on the small menu at the top-right side of the page, as shown in Figure 7.
Switch to the Details view, shown in Figure 8, and note the value for the Bootstrap server.
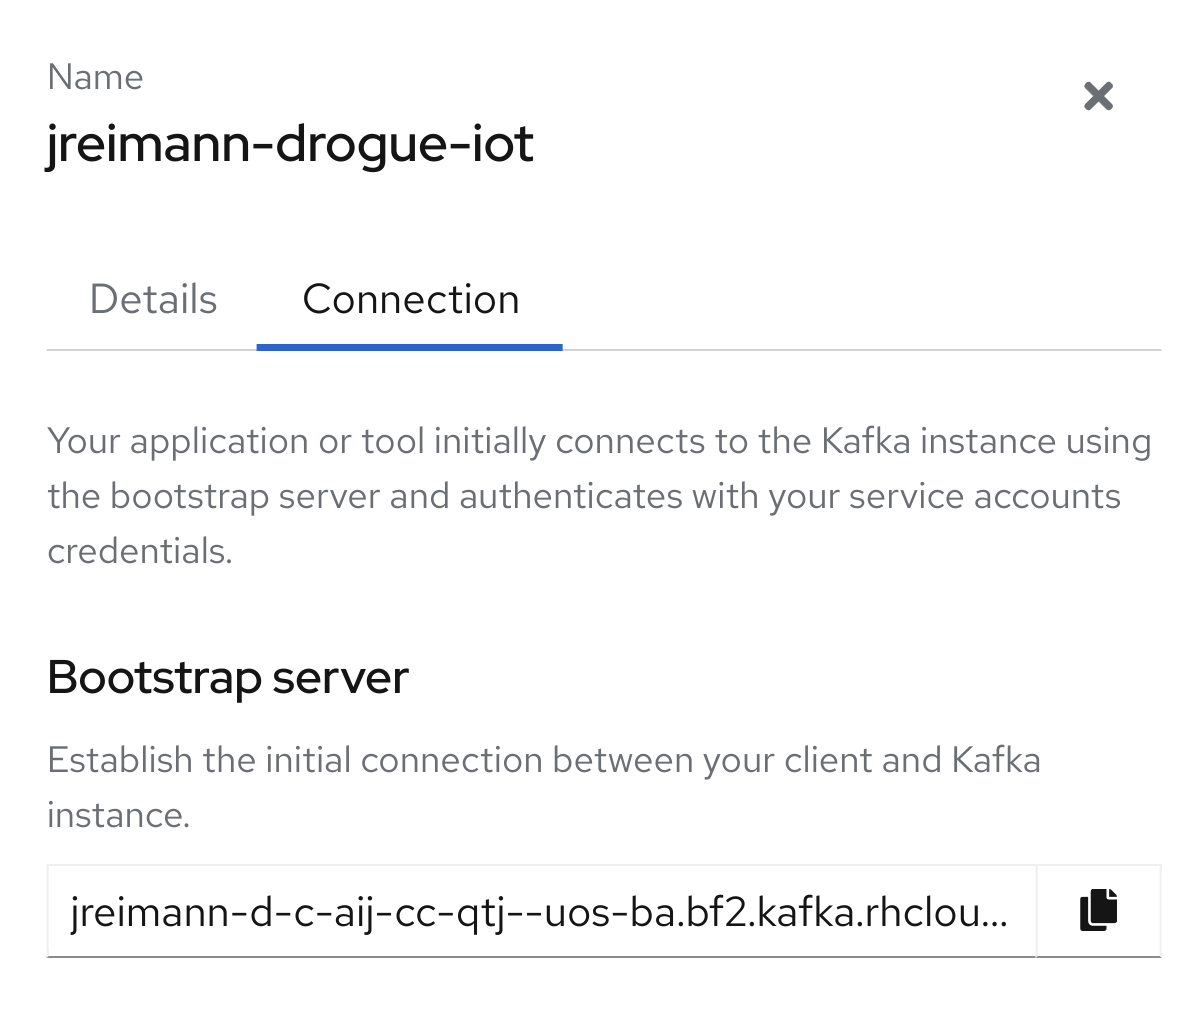
The bootstrap server most likely has a port number of 443. Traditionally, Kafka uses a different port number and port 443 is used for HTTPS. But 443 works here because TLS is being used to communicate with the Kafka cluster, and this endpoint is routed to the Kafka server internally.
With that, you have all the information you need for your managed Kafka cluster. You will pass that on to the Drogue Cloud installation in the next section.
Set up Drogue Cloud
You can install Drogue Cloud on any Kubernetes cluster. Using Red Hat OpenShift makes installation easier, but you still need to take care of load balancers and certificates. Another option is the Drogue Cloud all-in-one binary, which you can use to test certain functionalities outside of any cluster-style system. However, this binary also lacks a few bells and whistles.
For a relatively easy way to try out Drogue Cloud in a production-like environment, we recommend using Minikube or Kind on a local machine. We offer ready-to-go installer packs for both configuration tools.
Look up the installer that matches your cluster type for the Drogue Cloud 0.8.0 release on the Drogue Cloud releases page. Download and unpack the installer on your local machine. Be sure that your Kubernetes cluster is up and ready.
Normally, you would then just run:
$ ./drgadm deployHowever, in this case, you need to pass in some extra information to the underlying Helm charts, so that you direct it to the managed Kafka instance.
Although you can pass in all the values using arguments to the script, that might get complex on the command line. So, enter the values in the following Helm values file, naming it values.yaml:
drogueCloudCore:
  kafka: &external-kafka
    external:
      enabled: true
      bootstrapServer: jreimann-d-c-aij-cc-qtj--uos-ba.bf2.kafka.rhcloud.com:443
      tls:
        enabled: true
      sasl:
        enabled: true
        username: srvc-acct-2ca74514-4e00-11ec-9199-d45d6455d2cc
        password: 25ae4352-4e00-11ec-b00b-d45d6455d2cc
        mechanism: PLAIN
  services:
    registry:
      topicOperator:
        type: admin
        numberOfPartitions: 1
        numberOfReplicas: 3

drogueCloudExamples:
  kafka: *external-kafka
Then, run the installer using:
$ env INSTALL_STRIMZI=false ./drgadm deploy -f values.yaml
It will take a bit of time until the containers spin up. Once they are functioning, login information is printed on the console. You can then run the following command to show you a few examples of how to simulate a device publishing data:
$ ./drgadm examplesGive it a try, and maybe take a look at the Grafana dashboard showing the simulated temperature readings.
The Helm charts backing the installer script allow you to use either an integrated or a managed Kafka instance. For testing, a managed Kafka instance might be beneficial because it reduces the resource consumption of your testing setup. For production deployments, using a managed Kafka instance eliminates one more thing you would otherwise need to take care of yourself.
Note: Follow our Drogue IoT Workshops for more guidance on using Drogue IoT.
Conclusion
Drogue IoT simplifies IoT management by routing all device-to-cloud messages through a managed Kafka instance. Drogue IoT also routes change events in the device registry, such as when a new device is created. And while using managed Kafka to test Drogue Cloud can be pretty convenient, Drogue is a great candidate for production workloads, too.
Drogue IoT can easily add IoT-friendly APIs to your managed Kafka instance. Because it relies on CloudEvents, adding Knative serverless functions is straightforward. And of course, you can also consume the data on the cloud side using MQTT.
If you want to learn more, need some help, or want to contribute, please check out the Drogue IoT homepage or reach out to us in our Matrix channel.
Last updated: August 15, 2025