The article Why you should migrate your Java workloads to OpenShift described the benefits of moving a Java application to Red Hat OpenShift, and the tools that help in this effort. Now we'll walk through how to actually do the migration.
For this exercise, we're going to use the Red Hat JBoss Enterprise Application Platform (EAP) getting-started kitchen-sink application, but with some modifications to use MySQL as the database. You can find the source code in the eap-quickstarts GitHub repository.
Build the application
Before we analyze the application, we need to build it. To do this, check out the source code and enter the following command:
$ cd kitchensink && mvn clean package
This creates a kitchensink.war file in the location kitchensink/target.
Analyze the application
Now that you've built the application, make sure it is suitable for containerization. To do this, use the migration toolkit for applications.
When you launch the migration toolkit for applications, the first thing you need to do is create a project. We'll call our project kitchensink. Figure 1 shows the Create project page with that name entered.

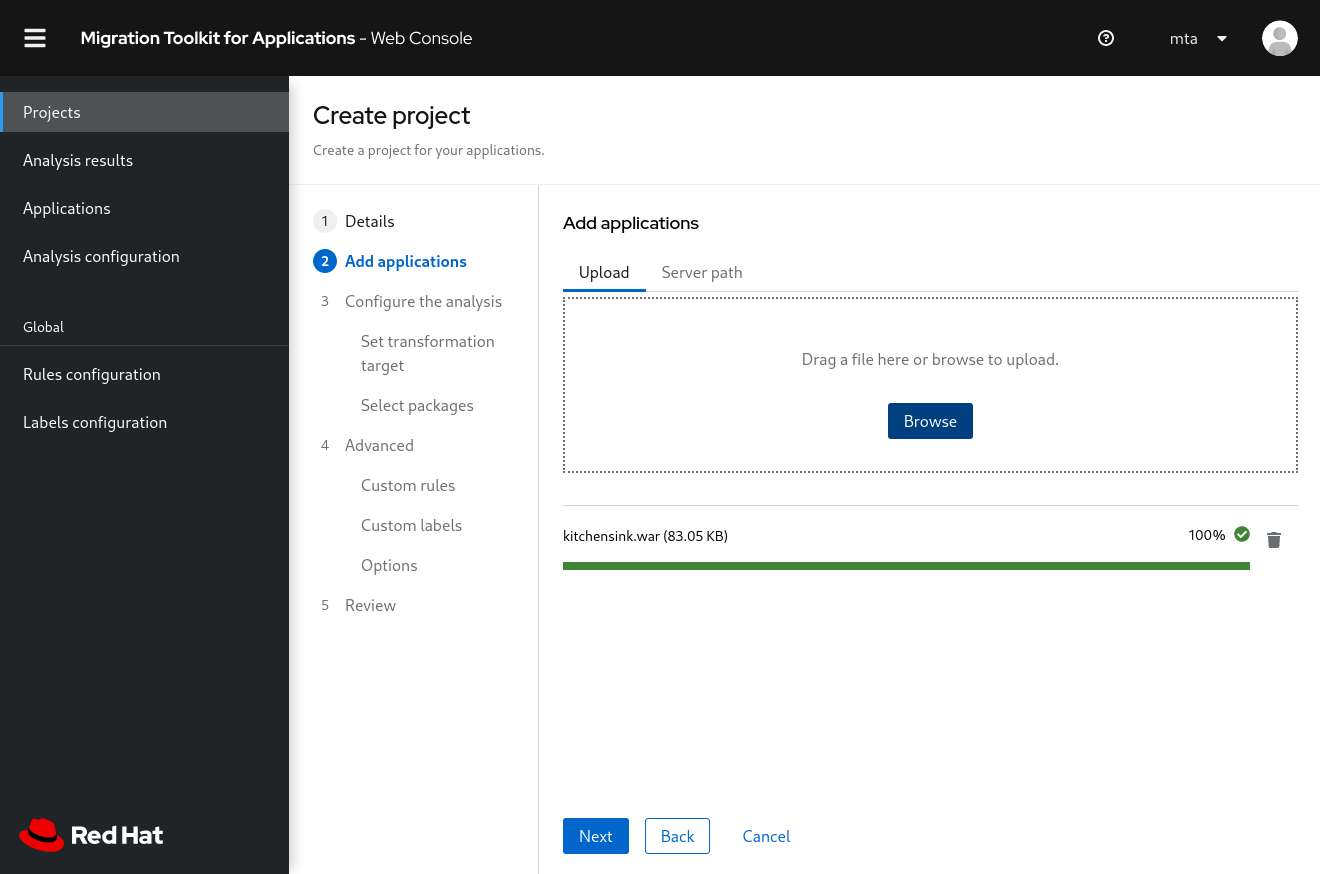
Clicking Next brings you to the form where you can upload your artifact to be analyzed. Select your kitchensink.war file, as shown in Figure 2.
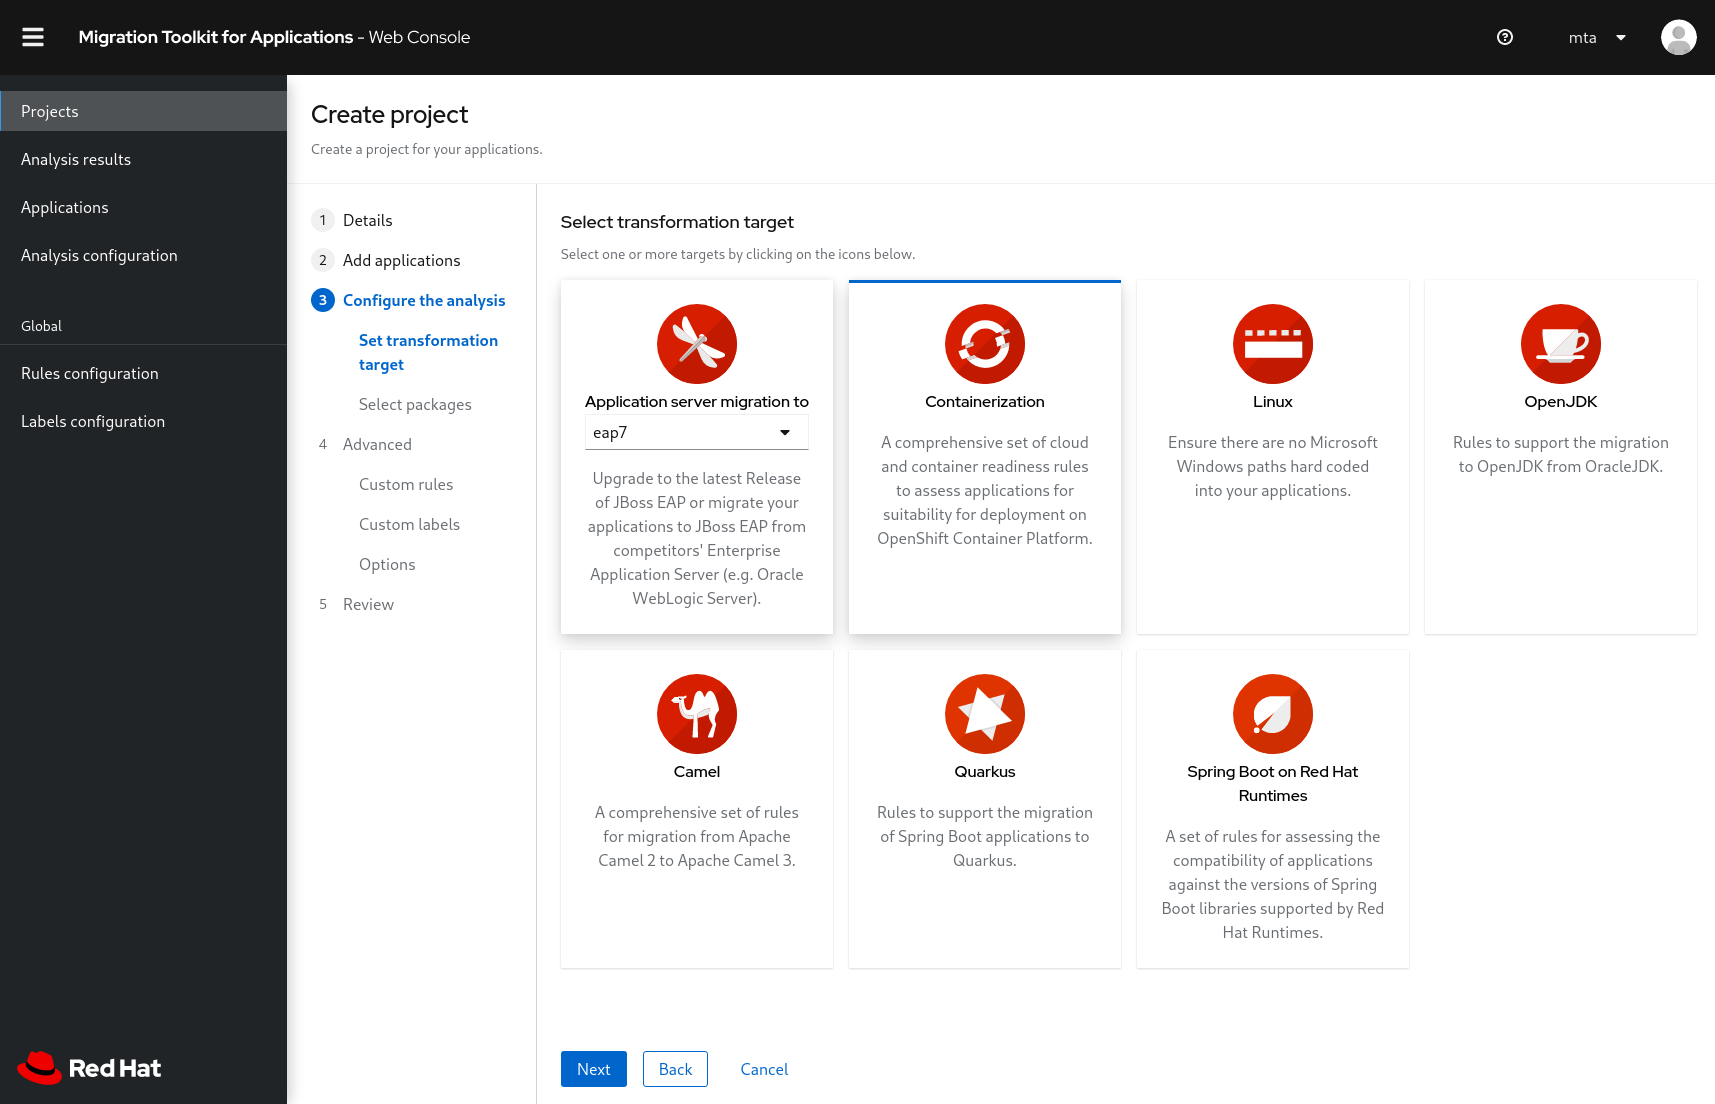
Clicking Next brings up the options for the type of analysis to perform. For this exercise, we're interested just in checking the requirements for containerization, so that's the only option we need to select. Figure 3 shows the migration toolkit for applications transformation target with Containerization selected.
Clicking Next brings you to the Select Packages page. Select the org package and add this to the "included packages" list. Figure 4 shows the page for package selection.

You can click through the next three pages because you're not adding any custom rules, labels, or options. You should finally get to the Review project details page (Figure 5).

Click Save and run to start the analysis. After a few seconds, the analysis should be complete. Figure 6 shows the Analysis Results page with the completed analysis.
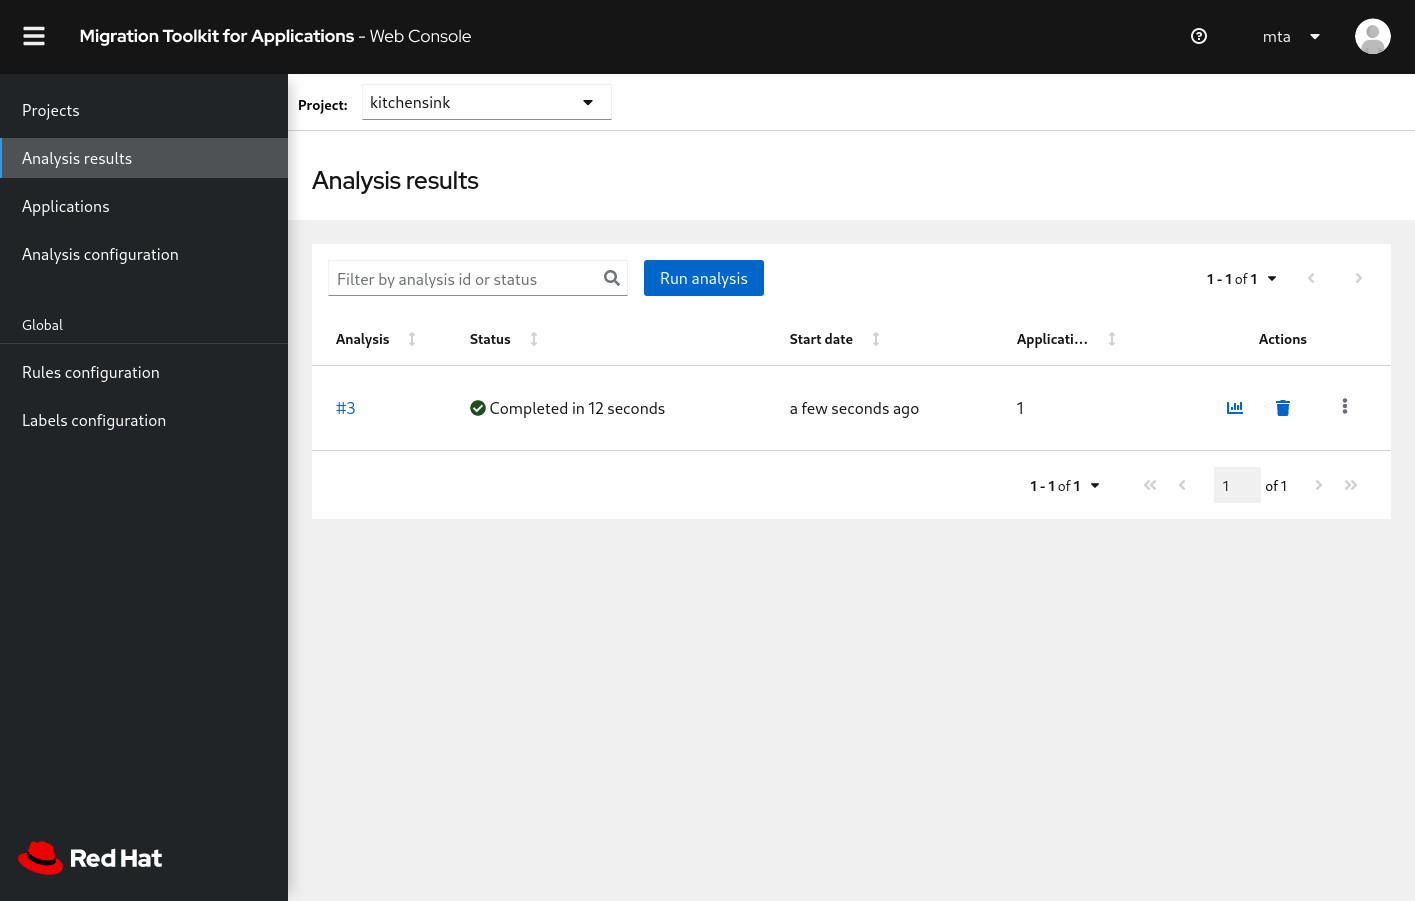
Click the reports icon—which looks like a small graph under the Actions column—to view the report. The next page shows the Application List page showing the kitchensink.war file (Figure 7).
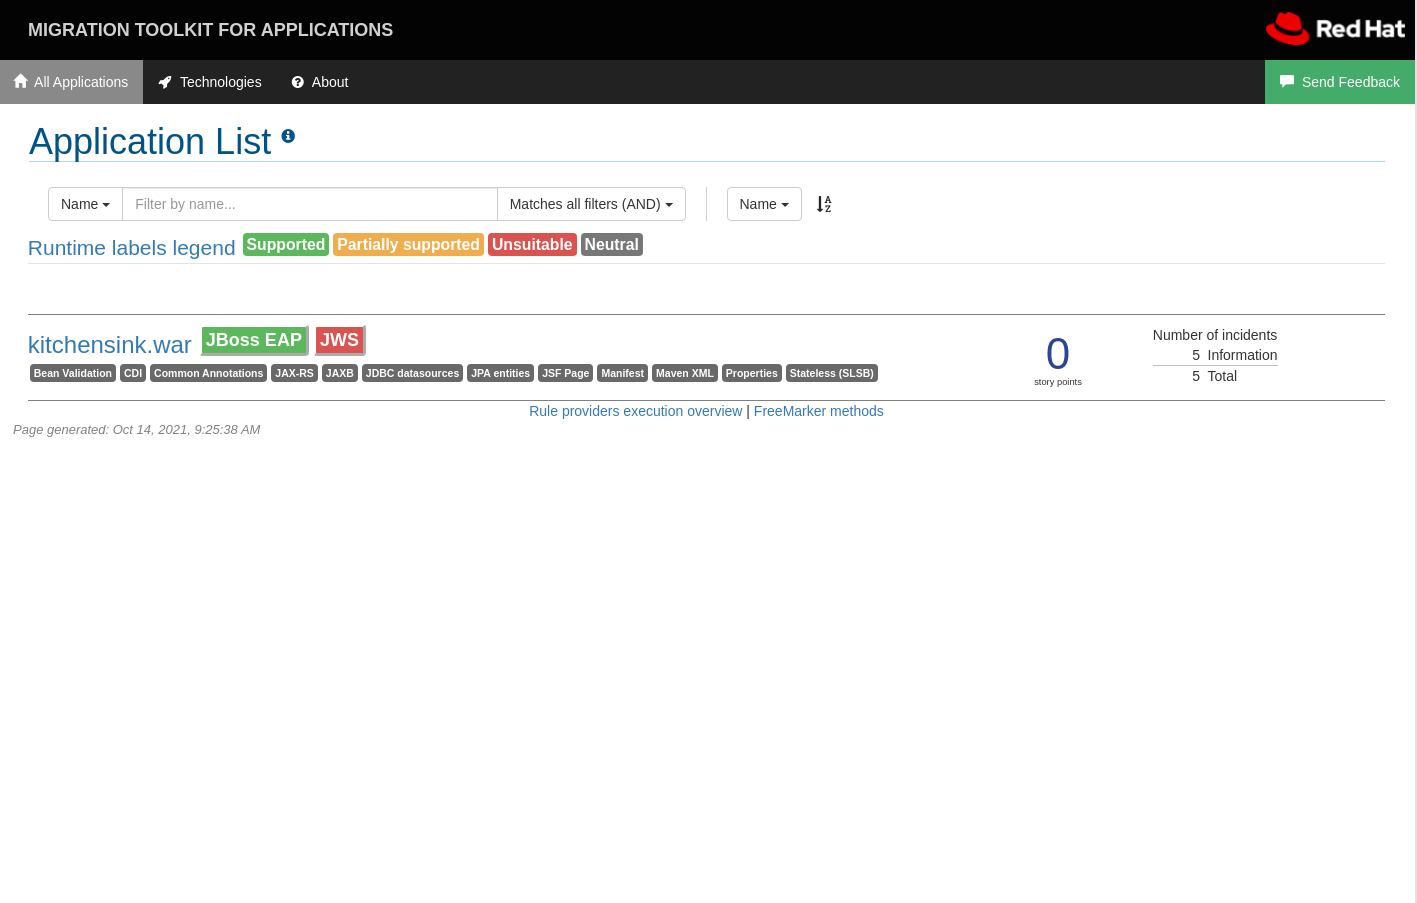
We can see on this page that things are looking good. There are zero story points shown in this analysis, with just five information items. Clicking the kitchensink.war link shows a more detailed view, again confirming that no mandatory changes are required to containerize this application. Figure 8 shows the dashboard with the analysis results.

So thanks to the migration toolkit for applications, we can be confident that this application is suitable for containerization and deployment to OpenShift.
Migrate the application
To migrate the application, we need to take a look at the existing JBoss EAP deployment. The kitchen-sink application didn't need to make any changes to the JBoss EAP configuration file, standalone.xml. In order to add the module for MySQL, this repository adds files to the modules directory. The directory structure and files added are shown in the following tree:
modules
└── com
└── mysql
└── main
└── module.xml
└── mysql-connector-java-8.0.26.jar
The contents of the module.xml file are:
<?xml version="1.0" ?>

<module xmlns="urn:jboss:module:1.1" name="com.mysql">

 <resources>

  <resource-root path="mysql-connector-java-8.0.26.jar"/>

 </resources>

 <dependencies>

  <module name="javaee.api"/>

  <module name="sun.jdk"/>

  <module name="ibm.jdk"/>

  <module name="javax.api"/>

  <module name="javax.transaction.api"/>

 </dependencies>

</module>
When JBoss EAP starts up, it will read the contents of this file and add the com.mysql module to the system.
When creating the repository, we ran a command using the JBoss command-line interface (CLI) to add the driver:
/subsystem=datasources/jdbc-driver=mysql:add(driver-name=mysql,driver-module-name=com.mysql)
And another command to create the data source connecting to a local instance of MySQL:
$ data-source add --name=mysql --jndi-name=java:/jdbc/mysql --driver-name=mysql --connection-url=jdbc:mysql://127.0.0.1:3306/books --user-name=root --password=root
Add the module
Things work a little differently when deploying JBoss EAP applications to OpenShift with regards to adding modules, drivers, and data sources. During the S2I image build, the contents of the /modules directory in the application repository are copied to kitchensink/modules. So in preparation for this migration, the modules directory has been added to the kitchensink repository, with the same contents as in the JBoss EAP deployment. The following tree shows the structure of the modules directory in the application repository:
modules
└── com
└── mysql
└── main
└── module.xml
└── mysql-connector-java-8.0.26.jar
Add the data source
Once the module has been added, a data source must be created. Typically, in a traditional JBoss EAP deployment, this would be done using the jboss-cli.sh tool. The JBoss EAP S2I image builder provides an alternative method to configure data sources.
To use this method, create an extensions directory, and in it create a file named drivers.env with the following contents:
#DRIVER

DRIVERS=MYSQL

MYSQL_DRIVER_NAME=mysql

MYSQL_DRIVER_MODULE=com.mysql

MYSQL_DRIVER_CLASS=com.mysql.cj.jdbc.Driver
Then create a file called install.sh with the following contents:
#!/bin/bash

if [ "${SCRIPT_DEBUG}" = "true" ] ; then

  set -x

  echo "Script debugging is enabled, allowing bash commands and their arguments to be printed as they are executed"

fi


injected_dir=$1

source /usr/local/s2i/install-common.sh

configure_drivers ${injected_dir}/drivers.env
When you trigger the S2I build, you specify this directory as a source for extensions. The S2I builder will run install.sh to configure the data source.
The data source is actually created through a runtime configuration, so we'll look at this when we deploy our application with the JBoss EAP Operator.
Build the JBoss EAP application image
Now that you've prepared your application, you can build the application image.
There are two options here: a Helm chart and a template. Both create the same Kubernetes objects: build configs, image streams, a service, etc. In the case of the Helm chart, deployment is optional, so we can use the Helm chart just to create the build objects. We will use the Operator to deploy the image, so the Helm chart is ideal for performing the build.
The instructions and objects required to build and deploy the image using Helm and the Operator are located in the eap-migration GitHub repository. This repository contains a Helm chart configuration (install-helm.yml), a config map to configure the MySQL connection (eap-cm.yml), the JBoss EAP Operator subscription (eap-operator.yml), and a WildFly server custom resource deployment (eap-deploy.yml).
Check out the repository and follow the steps in the subsections that follow to build and deploy the application to OpenShift.
Create the OpenShift project
Create a project by running:
$ oc new-project eap-kitchensink
Deploy MySQL
Deploy a simple MySQL database using the mysql-persistent template:
$ oc new-app -e MYSQL_DATABASE=eap -e MYSQL_PASSWORD=demo -e MYSQL_USER=eap mysql-persistent
Create a pull Secret with your registry.redhat.io credentials
Replace the $USERNAME, $PASSWORD, and $EMAIL variables with your registry.redhat.io credentials using the following command:
$ oc create secret docker-registry my-pull-secret --docker-server=registry.redhat.io --docker-username=$USERNAME --docker-password=$PASSWORD --docker-email=$EMAIL
Install the Helm CLI
To enable Helm commands, follow these instructions in the Helm documentation.
Install the Helm chart
When installing the Helm chart you're going to use a configuration file named install-helm.yml. This file specifies the Git URL, branch, and contextDir from which you will pull the application source code. This configuration file includes the pull Secret and S2I configuration settings, such as builder images.
To deploy the Helm chart using these configuration options, run:
$ helm install kitchensink -f install-helm.yml http://github.com/openshift-helm-charts/charts/releases/download/redhat-eap74-1.1.0/redhat-eap74-1.1.0.tgz
Wait for the two builds, eap_app_build_artifacts and eap_app, to complete. This process will take a few minutes.
Set up the MySQL data source
Create the config map with MySQL environment variables through the command:
$ oc create -f eap-cm.yml
Deploy the application using the JBoss EAP Operator
Install the JBoss EAP Operator by running:
$ oc create -f eap-operator.yml
Now deploy the instance of the application using the Operator by deploying the WildFly server object:
apiVersion: wildfly.org/v1alpha1

kind: WildFlyServer

metadata:

 name: kitchen-sink

spec:

 applicationImage: 'kitchensink:latest'

 envFrom:

  - configMapRef:

    name: eap-config

 replicas: 1
All you need to define in this object is the applicationImage, the name of the config map container environment variables, and the number of replicas. Then run:
oc create -f eap-deploy.yml
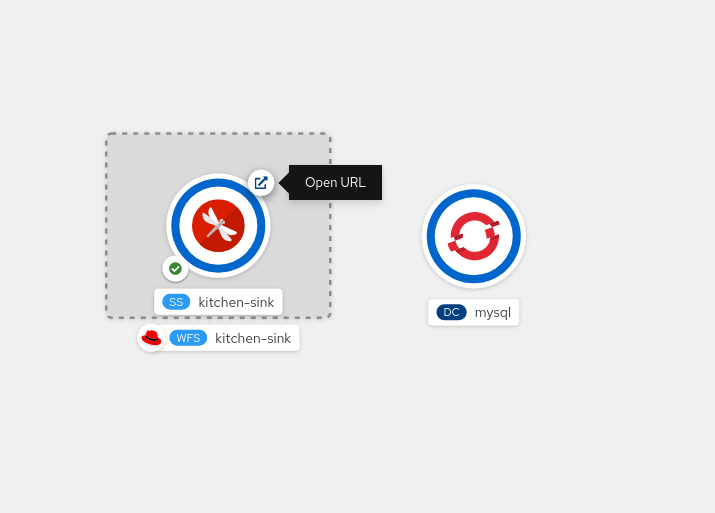
Once the application is deployed, the Topology view in the Developer UI shows the topology in Figure 9.
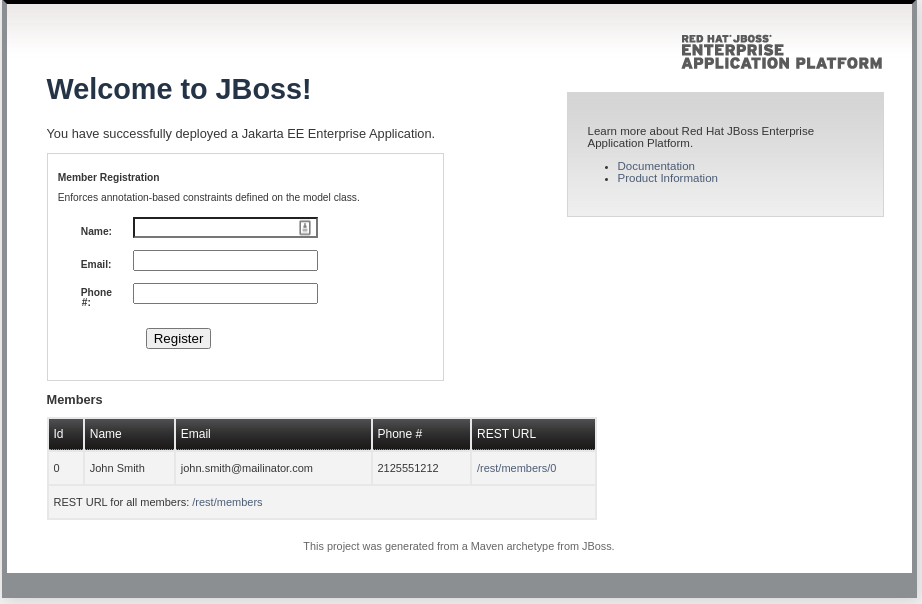
If you click on the route, you should see a running instance of your application. Figure 10 shows the kitchen-sink application with the default entry in the database.
Summary
This article has gone through the steps involved in analyzing, containerizing, and deploying a JBoss EAP application to OpenShift, connecting to an instance of MySQL.
With the EAP Source-to-Image (S2I) builder and Red Hat's migration toolkit for applications, analyzing applications and migrating these applications to container-based platforms such as OpenShift is straightforward. Both of these tools can be used in a standalone mode as described in this article or incorporated into pipelines for migration automation.
Last updated: September 20, 2023