Part 1 of this series introduced a simple approach to normalizing and connecting web services using Camel K, a lightweight cloud-integration platform based on Apache Camel that runs natively on Kubernetes. In this article, we'll walk through the Camel K implementation step-by-step. We'll also cover how to simplify data mapping with AtlasMap.
Note: Many organizations today face the challenge of using many different services, often as a result of partnerships or acquisitions. These systems are implemented with a range of technologies, each with its own access protocol. The previous article discussed how Apache Camel makes it easy to normalize the APIs in this scenario.
Camel K implementation
In Part 1, I presented the following list of key tasks needed to construct our Camel K implementation:
- Inspect the service interface for the backend core capability.
- Design an OpenAPI definition that simplifies and normalizes access.
- Create data mapping definitions for runtime execution.
- Define a Camel route that implements the end-to-end flow.
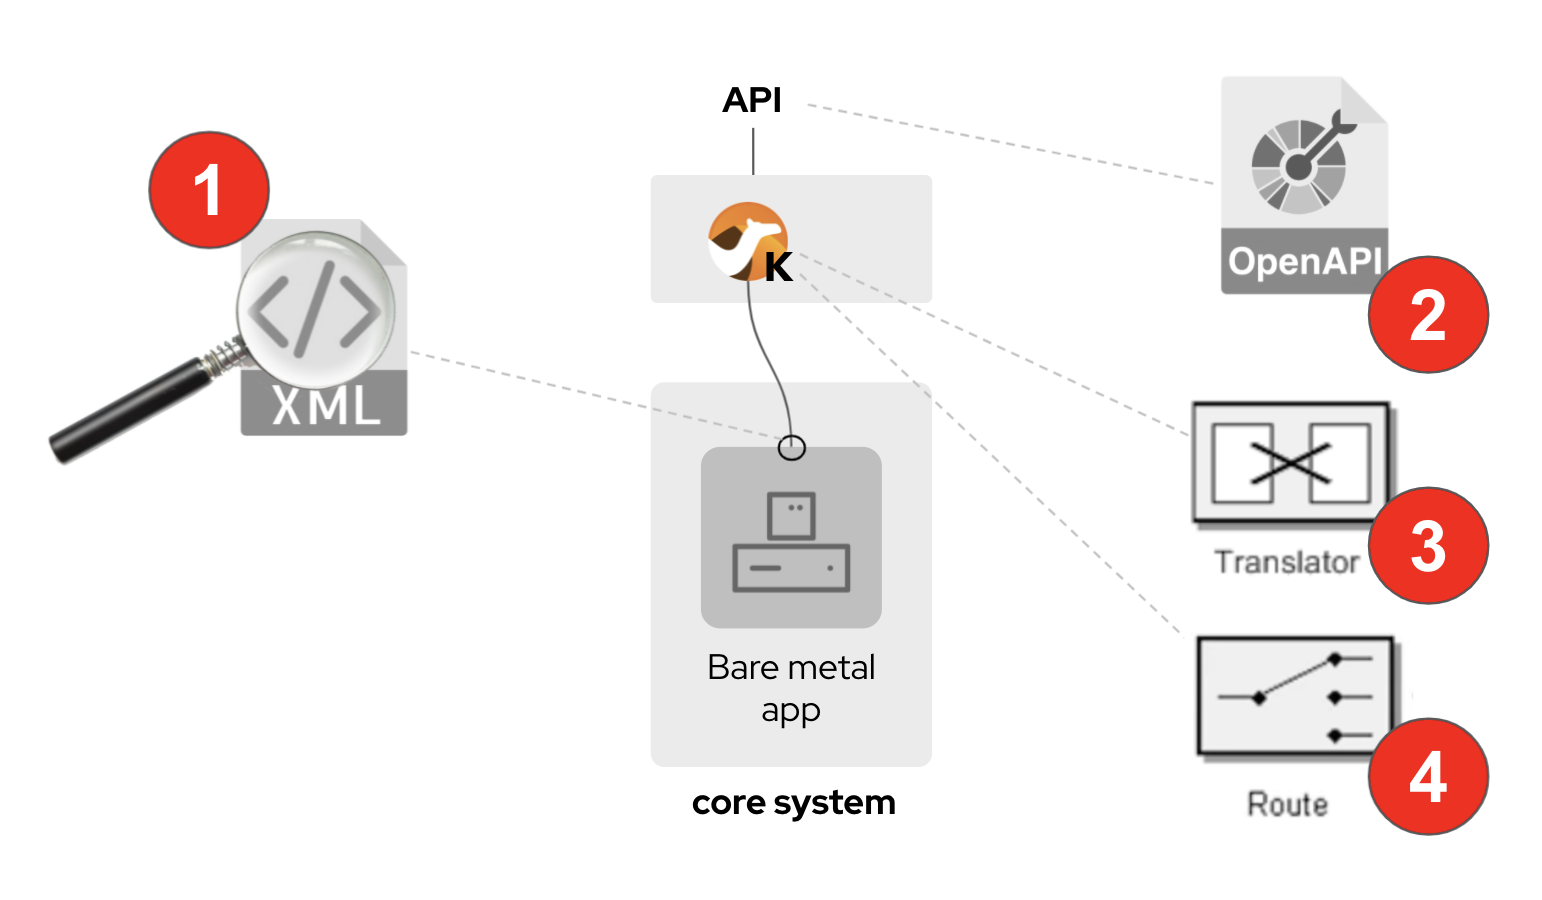
Let's discuss these tasks one at a time.
Task 1: Inspect the service interface
Our backend is implemented as an XML-over-REST service, returning subscriber details for a given identifier. Figure 2 illustrates a sample request/response interaction.
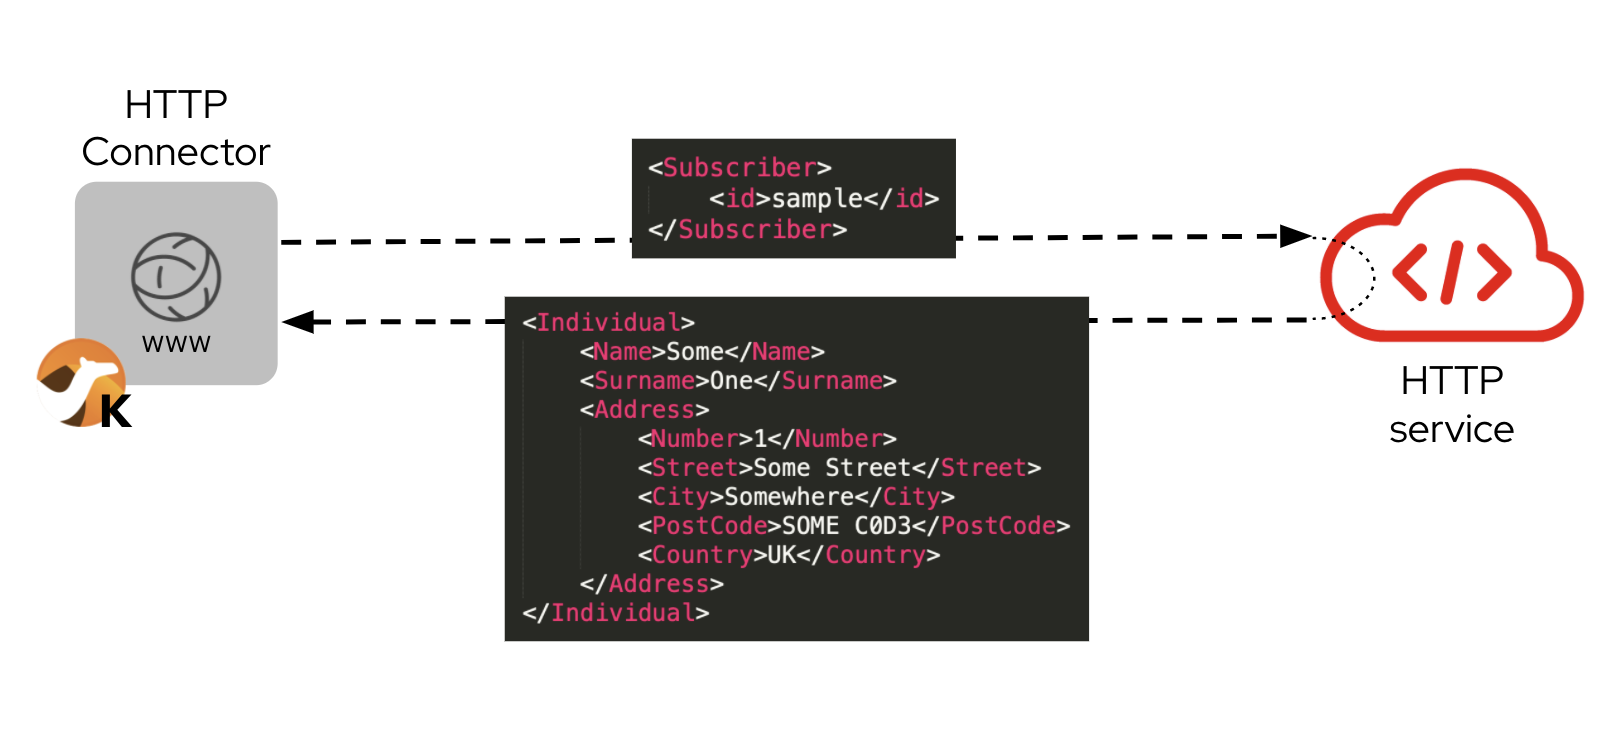
The example repository for this article includes a mock XML-based backend. This will allow us, later in the article, to execute an end-to-end interaction. The stub/end1/ directory in the GitHub repository provided with this article contains a simple endpoint that implements the backend, based on Camel K, along with instructions for running it.
Task 2: Design the OpenAPI definition
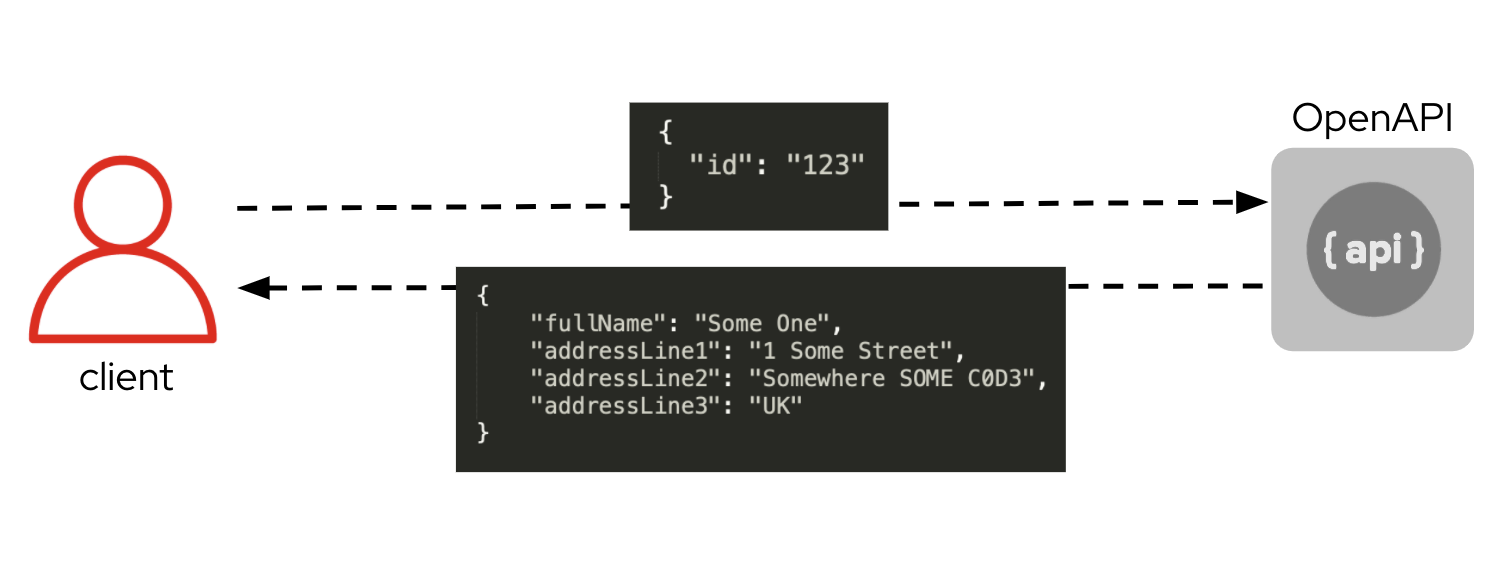
The front-facing API we need to define is based on the backend API, and also defines a subscriber service. The calling client obtains the details of a subscriber by providing its identifier, as Figure 3 illustrates.
Note: The base OpenAPI endpoint in this article was created using Apicurio, a graphical tool for designing APIs. We won't dive into the endpoint's definition, but you can explore its contents in the repository's camelk/api/openapi.json file.
Our new OpenAPI definition and the XML backend are very similar. In essence, they both hold information about the subscriber's full name and its associated postal address. The OpenAPI definition, however, has been simplified to present fewer fields and a flat structure.
Camel K parses the OpenAPI request and automatically configures REST behaviors, helping to speed up API implementation and make the developer's life that much easier. When running the service, you just need to indicate where to find the OpenAPI definition, using the following command-line option:
--open-api api/openapi.json
Camel K takes care of all the API preparations and leaves the developer to focus on the business logic implementation.
Task 3: Data transformation and mapping with AtlasMap
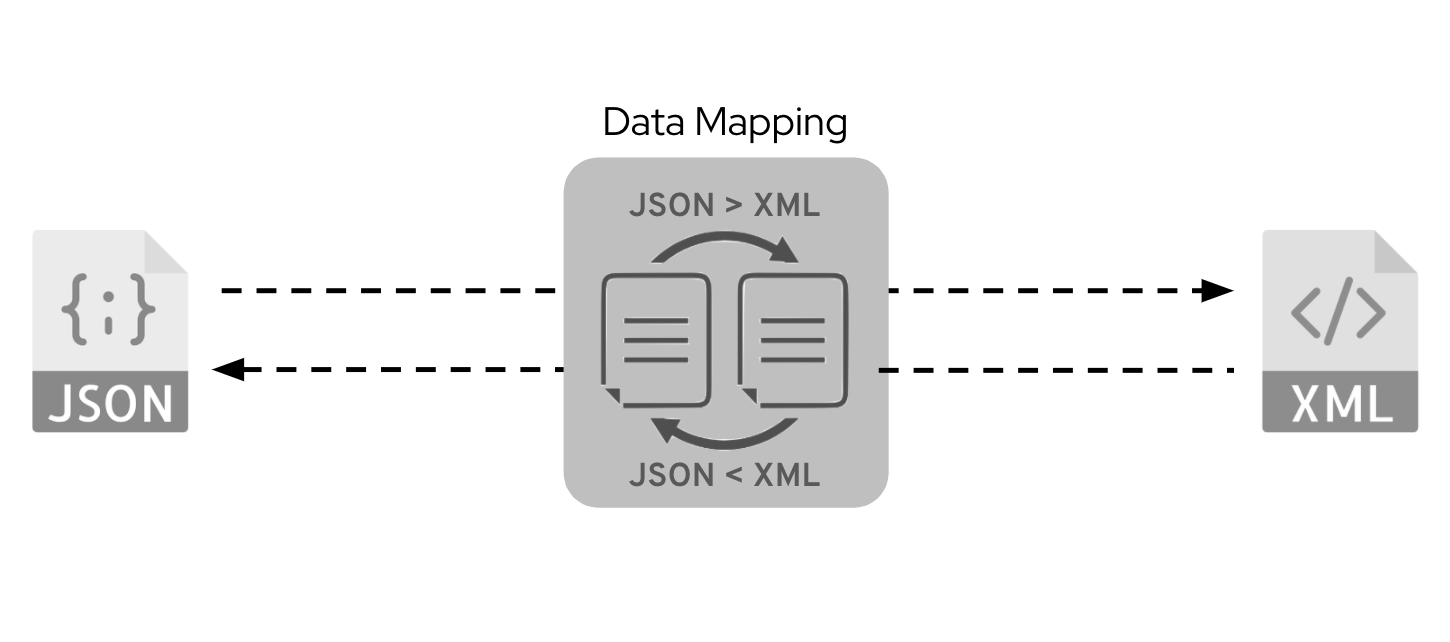
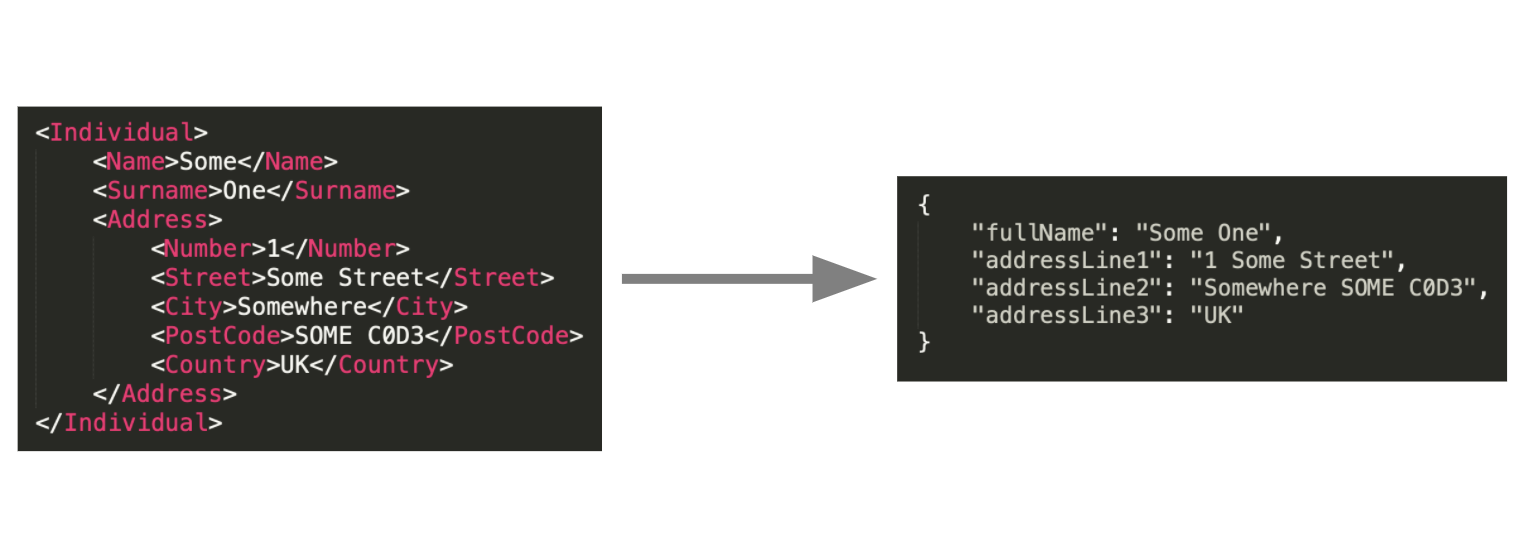
Often, services are almost identical except for their data transformations and the APIs they expose, which is somewhat the scene we're replicating. Data mapping is the central task, as shown in Figure 4.
Apache Camel offers a ton of functionality to transform data. Different coding strategies are appropriate, depending on the scenario. Coding options range from out-of-the-box, opinionated transformers to fully customizable ones where complete freedom is given to the developer when custom handling is necessary.
We won't dive into all the available options but will instead focus on a strategy that aligns with Camel K's. We want to allow the developer to worry less about the underlying mechanics and focus more on the problem at hand.
There are two distinctive tasks to undertake:
- Converting JSON to XML, and vice versa.
- Structural field mapping, because the shapes of the JSON and XML data differ.
Often these steps are implemented in separate stages. In our example, we encapsulate them as one action by defining AtlasMap transformations (Figure 5).
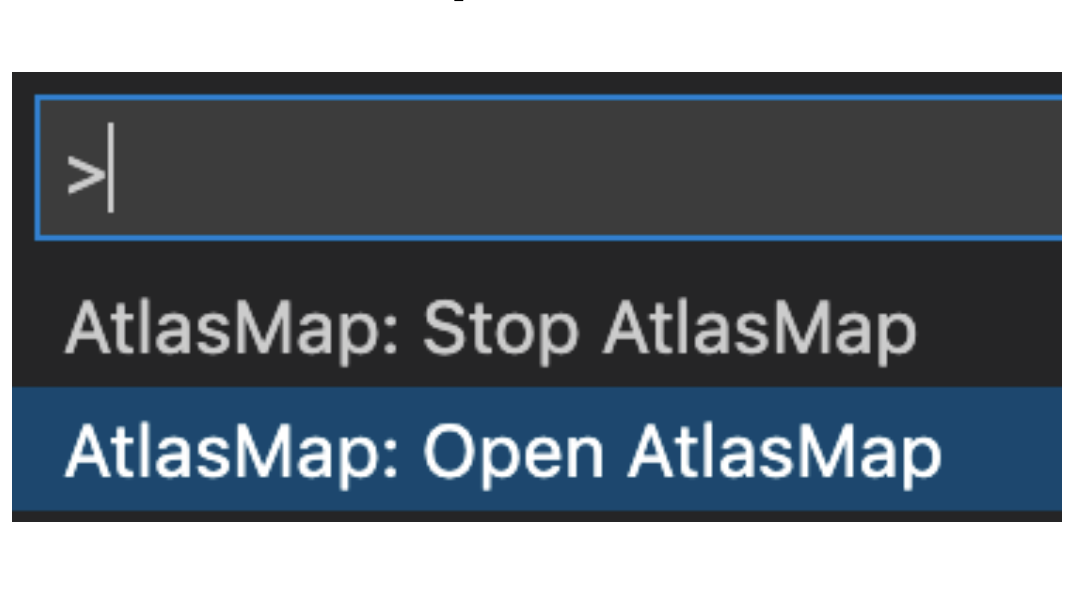
AtlasMap is a mapping tool that provides a graphical user interface (GUI) to define the data mappings. It can run embedded or standalone and has a convenient Visual Studio Code (VS Code) extension. The instructions that follow are based on this extension. With the extension installed, you can start and stop AtlasMap from the VS Code command palette (Figure 6).
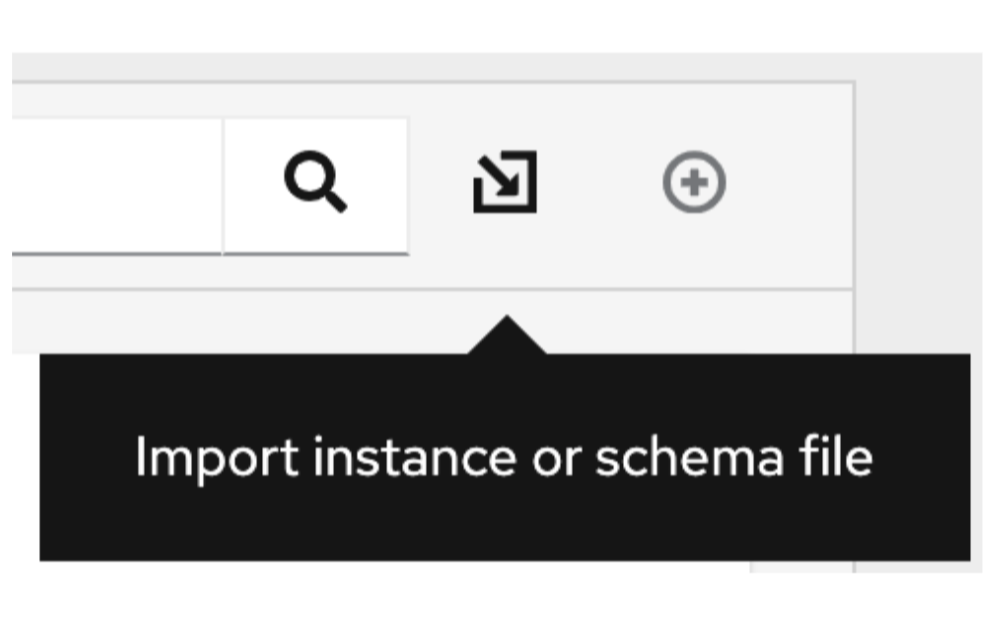
After you start AtlasMap, select the input and output data shapes to use in the graphical tool by clicking the Import instance or schema file button shown in Figure 7.
Each OpenAPI definition includes samples, but AtlasMap needs to keep them in separate local files. You can find them in the data directory of this article's GitHub repository. Use the following sample files to load the data shapes into AtlasMap:
subscriber-request.json(source)subscriber-request.xml(target)
The front-to-back transformation is trivial. Simply drag and drop, from left to right, the ID field to create the JSON-to-XML mapping as shown in Figure 8.

Note how AtlasMap indicates that the source is of type JSON and target of type XML.
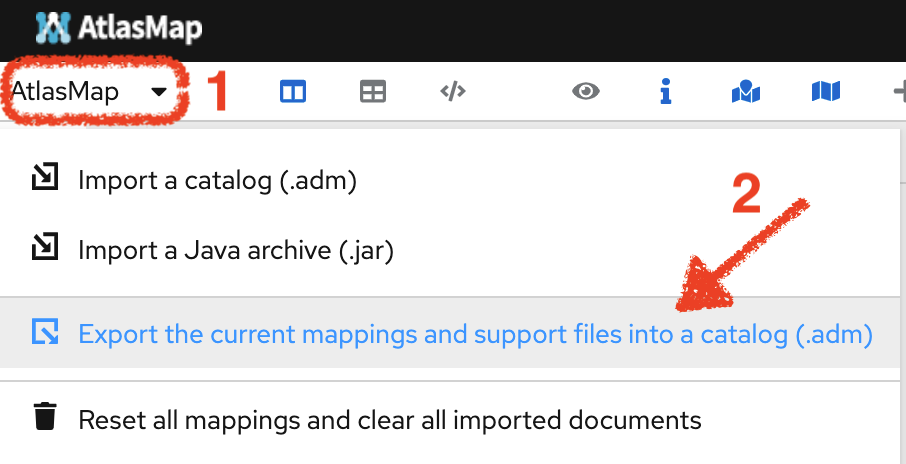
The data mapping definition is ready. Export it to your file system as indicated in Figure 9.
The back-to-front transformation (response flow) merges fields and flattens the data structure. Use the following sample files to load the data shapes into AtlasMap:
subscriber-response.xml(source)subscriber-response.json(target)
To merge the Name and Surname into the JSON fullName field, first drag and drop the Name from left to right, as shown in Figure 10.

Then, do the same for the Surname, as shown in Figure 11.

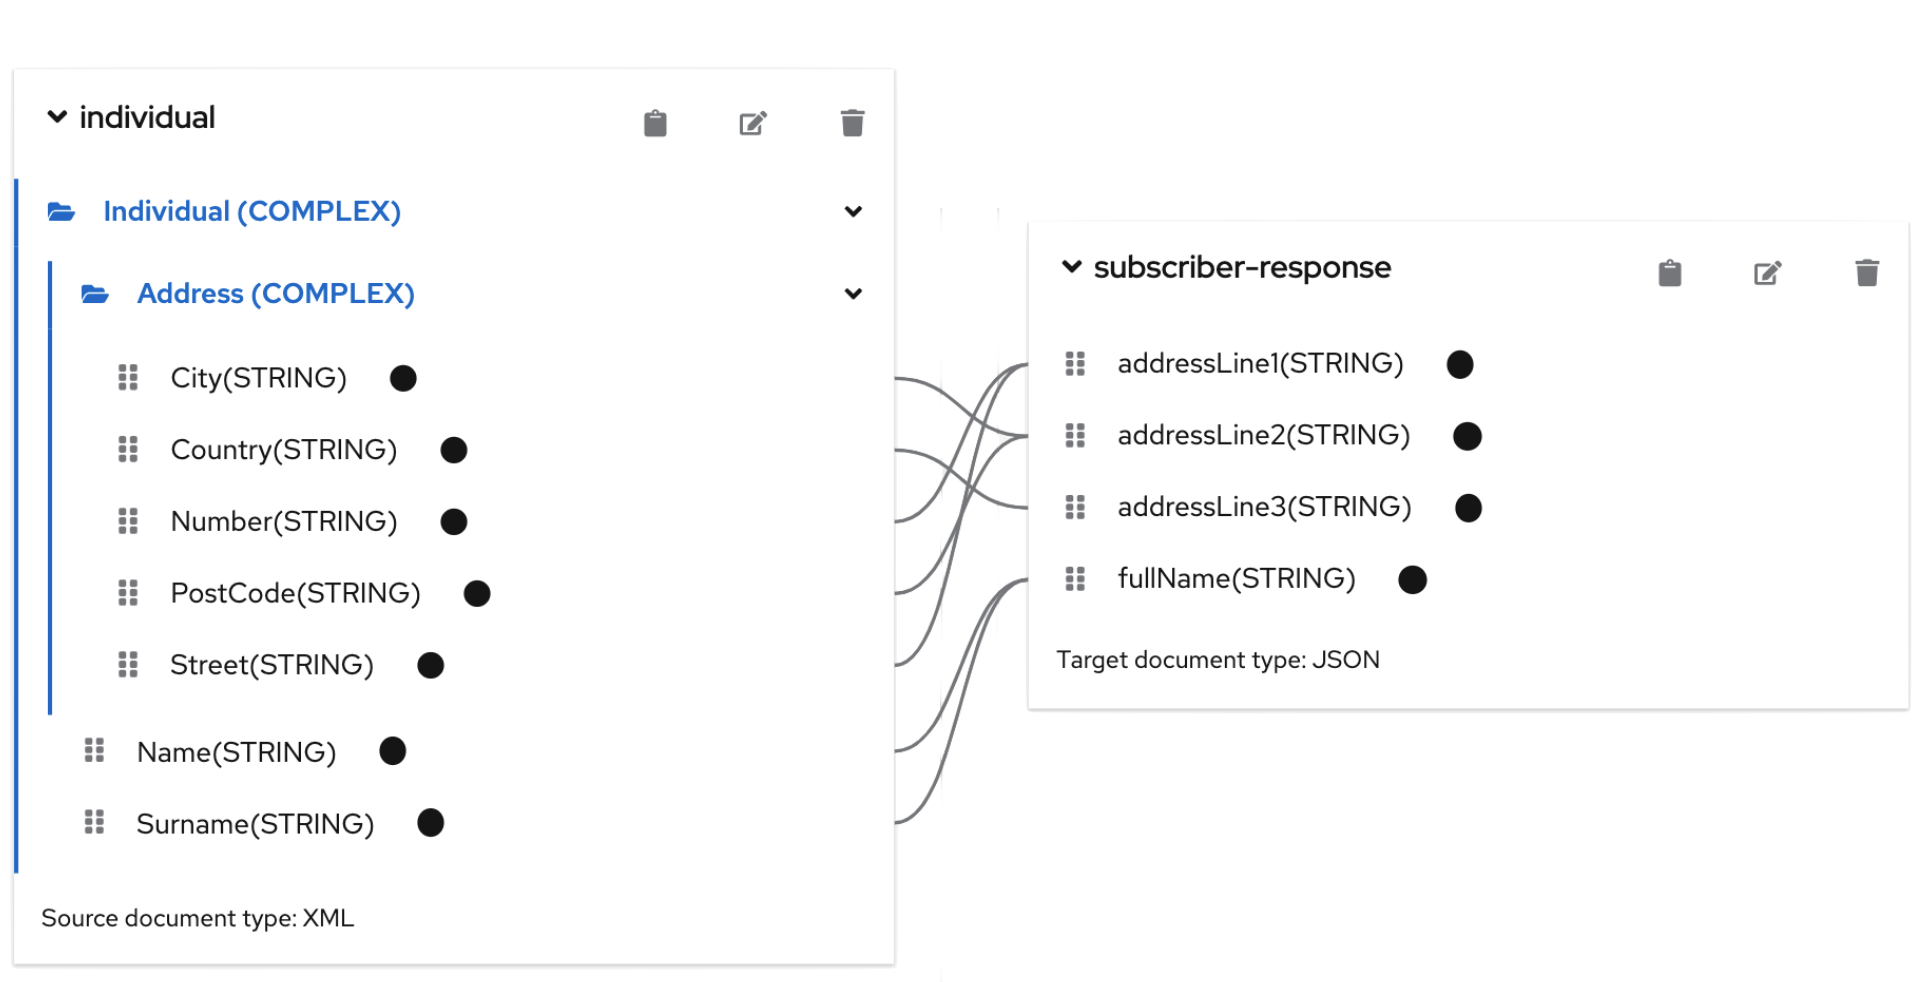
After you map all the fields with similar drag-and-drop actions, the completed definition should look like Figure 12. Export the mapping definition to your local file system.
Task 4: Define the Camel K route
The OpenAPI specification dedicates the operationId field to identify each REST operation. Camel K expects the developer to define a route that matches the operationId. We use Camel's direct component (for route-to-route invocations) to implement the listener to which Camel K directs incoming traffic.
The OpenAPI operation and the Camel direct naming need to be in sync as shown in Figure 13. The syntax in the figure uses XML, but Camel K also supports Java, YAML, Groovy, JavaScript, etc.

Inside the route, our first action to define is the data transformation. We use Camel's AtlasMap component as follows. A configurable property defines the path to the AtlasMap data model (ADM):
<!-- REQUEST TRANSFORMATION -->
<to uri="atlasmap:{{api.resources}}/request.adm"/>
In terms of request-flow processing actions, we're done. We just need to prepare the backend HTTP call by clearing preexisting headers from the incoming call, specifying the HTTP method and content type, and triggering the HTTP invocation:
<!-- CALL to BACKEND -->
<removeHeaders pattern="*"/>
<setHeader name="Exchange.HTTP_METHOD">
  <constant>POST</constant>
</setHeader>
<setHeader name="Exchange.CONTENT_TYPE">
  <constant>application/xml</constant>
</setHeader>
<to uri="http:{{api.backend1.host}}/camel/subscriber/details"/>
When Camel executes this code and obtains a response from the backend, it places the reply in the body data holder, and execution resumes in order to process the actions for the response.
All that is left to include in our flow is our response data transformation to convert the obtained XML response into JSON as per the OpenAPI definition. We use once again the AtlasMap component to define the data mapping:
<!-- RESPONSE TRANSFORMATION -->
<to uri="atlasmap:{{api.resources}}/response.adm"/>
That completes our API exposure service implementation.
Implementation overview
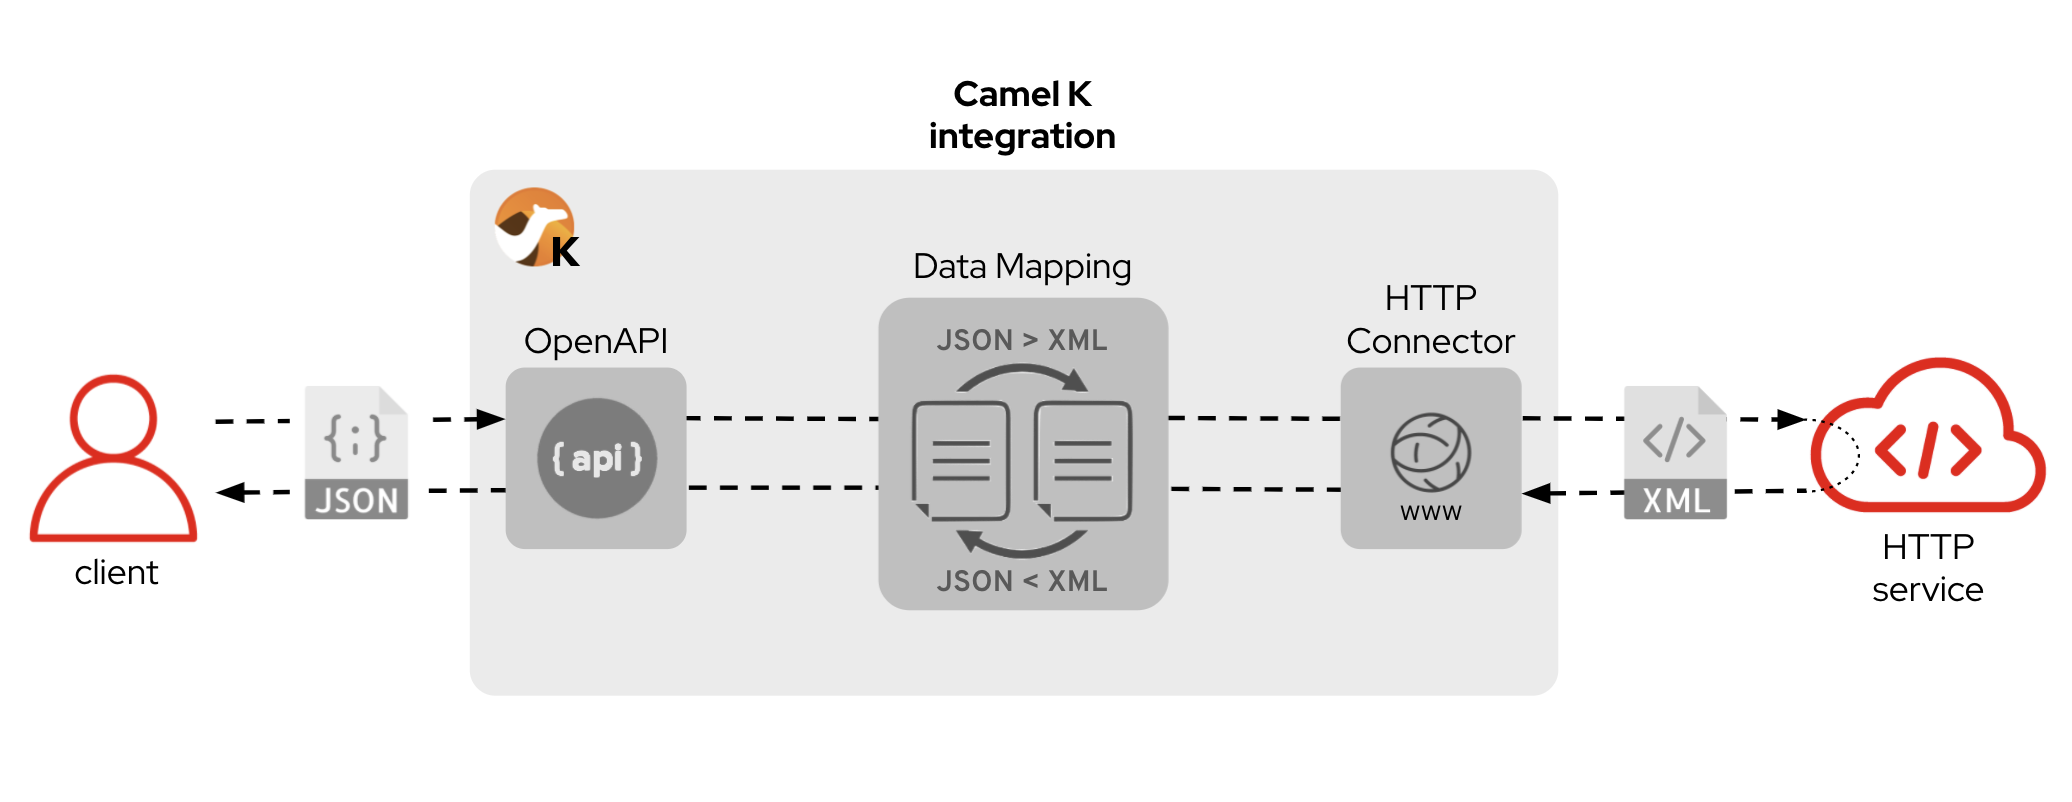
The flow diagram in Figure 14 shows the combined results of all the work in the four steps we performed. A client consumes (calls) the OpenAPI service, and Camel K acts as an API translator, which integrates with the existing XML service sitting behind. Because APIs carry out request/response flows, our process needs to implement both directions. Consequently, the integration requires a request conversion (JSON to XML) and a response conversion (XML to JSON).
Run the service
It is time to put our implementation in motion. Provided you've deployed the Camel K Operator in your Kubernetes platform and have created an integration platform (an instance to run Camel K integrations), the following command deploys and runs our Camel K API:
kamel run --dev --name api api-route.xml api-spec.xml \
--open-api api/openapi.json \
--resource file:api/openapi.json \
--property file:cfg/svc.properties \
--resource file:map/request.adm \
--resource file:map/response.adm
The options in the command show how the needed resources are specified, including the OpenAPI definition, the data mappings, and the configuration file.
An additional file in the repository, camelk/api-spec.xml, is an optional resource that helps the API to be discoverable.
When running the integration in Red Hat OpenShift, Camel K automatically creates a route to access the service externally.
To discover the API service and obtain its OpenAPI definition, run the following cURL command. The embedded oc command fills in the hostname by obtaining the route name from OpenShift:
curl http://`oc get route api-layer -o jsonpath='{..spec.host}'`/camel/openapi.json
To invoke the API as a client, run the following cURL command:
curl \
-H "content-type: application/json" \
-d '{"id":"123"}' \
http://`oc get route api-layer -o jsonpath='{..spec.host}'`/camel/subscriber/details
The previous command should produce the following response:
{
  "fullName": "Some One",
  "addressLine1": "1 Some Street",
  "addressLine2": "Somewhere SOME C0D3",
  "addressLine3": "UK"
}
Summary of the Camel K implementation
The scenario covered in this article is a very real one. Companies have to find a formula that provides them with simplicity, rapid development, and low-cost maintenance.
Our Camel K implementation is simple and easy to replicate. The developer's basic tasks are:
- Transform the request.
- Invoke the endpoint.
- Transform the response.
Camel K takes care of everything else. The Camel K Operator builds and natively deploys integrations in Kubernetes, relieving the developer from tedious tasks.
There is a big trend nowadays to embrace microservices, with many languages and frameworks available for implementing them. This article emphasizes the importance of strategically choosing one framework to provide a standard that ensures a sustainable API development methodology.
Camel K is the next-generation integration technology for cloud-native environments, bringing supercharged powers of performance, developer joy, no-code binding connectors, serverless capabilities, cloud-native connectivity, and more.
Next steps with Camel K
See the following resources to learn more about Camel K and Red Hat's support for it:
- A good place to start learning about Camel K is the Camel K landing page on Red Hat Developer.
- See the article Improve cross-team collaboration with Camel K for a fun use case using Camel K.
- Get a hands-on introduction to Camel K with our collection of interactive tutorials.
- Learn more about Camel K at the Apache Camel site.
- Be sure to visit the GitHub repository for the normalized API layer demo featured in this article.
- Review what you learned by watching the video associated with this article.
