The GitOps Application Manager command-line interface (CLI), kam, simplifies GitOps adoption by bootstrapping Git repositories with opinionated layouts for continuous delivery. It also configures Argo CD to sync configurations across multiple Red Hat OpenShift and Kubernetes environments. In this article, we show you how to generate a GitOps repository using the kam CLI to streamline your application delivery.
A GitOps approach to application deployment
Developers can adopt a GitOps approach to managing deployments into one or more environments. An environment is a namespace in a Kubernetes cluster that is used to perform quality, security, and performance checks. To ensure quality and expected behavior, teams deploy applications across various environments like development, testing, and staging, before running on the production cluster.
Currently, the kam CLI bootstrap command supports three fixed environments: dev, stage, and cicd. The cicd environment is where we keep our Tekton pipelines and tasks. The commands enable the user to deploy the application to only two environments: dev and stage.
One or more applications can be deployed into a given environment. An application is an aggregation of one or more services. The source code for each service (or microservice) is contained within a single Git repository. To minimize the risk of change after deployment, whether intended or not, we must maintain a reproducible, reliable, and auditable deployment process. The ultimate value of GitOps lies in its ability to simplify the way you manage infrastructure and application deployment, control change, and gain visibility into your environments.
The kam CLI generates a GitOps repository that contains the Kubernetes YAML configuration files required to deploy one or more applications into an environment. We use Kustomize to customize and configure resources based on their dependencies.
In this tutorial, we'll show you how to:
- Bootstrap a GitOps repository.
- Create two services in an environment and deploy them in a single application.
- Trigger the pipeline by making a small change in the service repository.
Prerequisites
To generate a GitOps repository using the kam CLI, you need to have the OpenShift GitOps Operator and OpenShift Pipelines Operator preinstalled on your OpenShift cluster. This tutorial also requires kam version 0.0.36 or later. Download the kam binary from GitHub.
Create the GitOps repository with 'kam bootstrap'
The kam bootstrap command generates the Tekton and Kubernetes resources required to deploy an application across different environments. The command also generates event listeners that can trigger the pipelines on pull requests. You can apply these generated resources to a Kubernetes cluster as follows:
$ kam bootstrap --service-repo-url https://github.com/ishitasequeira/taxi.git --gitops-repo-url https://github.com/ishitasequeira/gitops.git --image-repo quay.io/isequeir/image-repo --dockercfgjson ~/Downloads/isequeir-robot-auth.json --git-host-access-token $TOKEN
Let's break this down:
--gitops-repo-urlprovides a Git repository containing the Kubernetes YAML configuration files required to deploy one or more applications into an environment.--image-reposhould specify eitherregistry/username/repositoryto use Red Hat Quay or Docker Hub, orproject/appto use the Red Hat OpenShift internal image registry.--service-git-repocontains the service source code and the deployment path.
The command generates the repository layout and creates the required pipeline resources. The cicd environment is also created within the layout. The cicd environment is where we keep our Tekton pipelines and tasks. Two pipelines are created in the cicd environment: one for the GitOps repository and another for the applications that can be deployed in various environments.
An unencrypted secret is generated into the secrets folder, which is a sibling of the folder that contains the generated repository layout. Deploying this GitOps configuration without encrypting the secrets is insecure and is not recommended. One way to encrypt the secrets is by using the Sealed Secrets tool from Bitnami Labs. To encrypt and apply the generated secrets, follow the instructions linked here. Make sure to apply the secrets (encrypted or unencrypted) to the cluster every time a secret is generated (when the bootstrap or service add command is executed).
Create a new GitHub or GitLab project to host the GitOps repository (for example, https://github.com/ishitasequeira/gitops.git). Push the generated directory structure to the repository using the following commands (the directory structure is created in the current working directory):
$ git init .
$ git add .
$ git commit -m "Initial Commit"
$ git remote add origin <insert gitops repo>
$ git push -u origin main
This initializes the GitOps repository and starts your journey to deploying applications via Git.
We'll now bring up our deployment infrastructure. You only need to do this once at the beginning; the configuration will be self-hosted after that:
$ oc apply -k config/argocd/
Add services to the GitOps repository
For this demo, we will use a front-end service that deploys an Angular web application and a back-end service that deploys a Node.js REST API. The front-end service tries to connect to the back-end service via the REST APIs to fetch or update the data.
Let's add the services to our GitOps repository using the following commands:
$ kam service add --git-repo-url https://github.com/ishitasequeira/frontend-service.git --app-name full-stack  --env-name stage  --image-repo quay.io/isequeir/frontend-service --service-name frontend-service

$ kam service add --git-repo-url https://github.com/ishitasequeira/backend-service.git --app-name full-stack  --env-name stage  --image-repo quay.io/isequeir/backend-service --service-name backend-service
To break it down:
--git-repo-urlcontains the service source code and the deployment path.--app-nameis the name of the application folder that utilizes one or more services.--env-nameis the environment to which the service is being deployed.
For each service, an unencrypted secret will be generated into the secrets folder. Make sure to apply these secrets to the cluster. To encrypt this secret, follow the same steps here.
Next, push the newly created services to the GitOps repository and sync the applications on the Argo CD user interface (UI).
At this point, the applications in Argo CD should be synced and healthy. You may need to manually sync applications from the Argo CD web UI if any of the applications are out of sync.
You can log into the Argo CD instance from the application launcher in the OpenShift console, as shown in Figure 1.

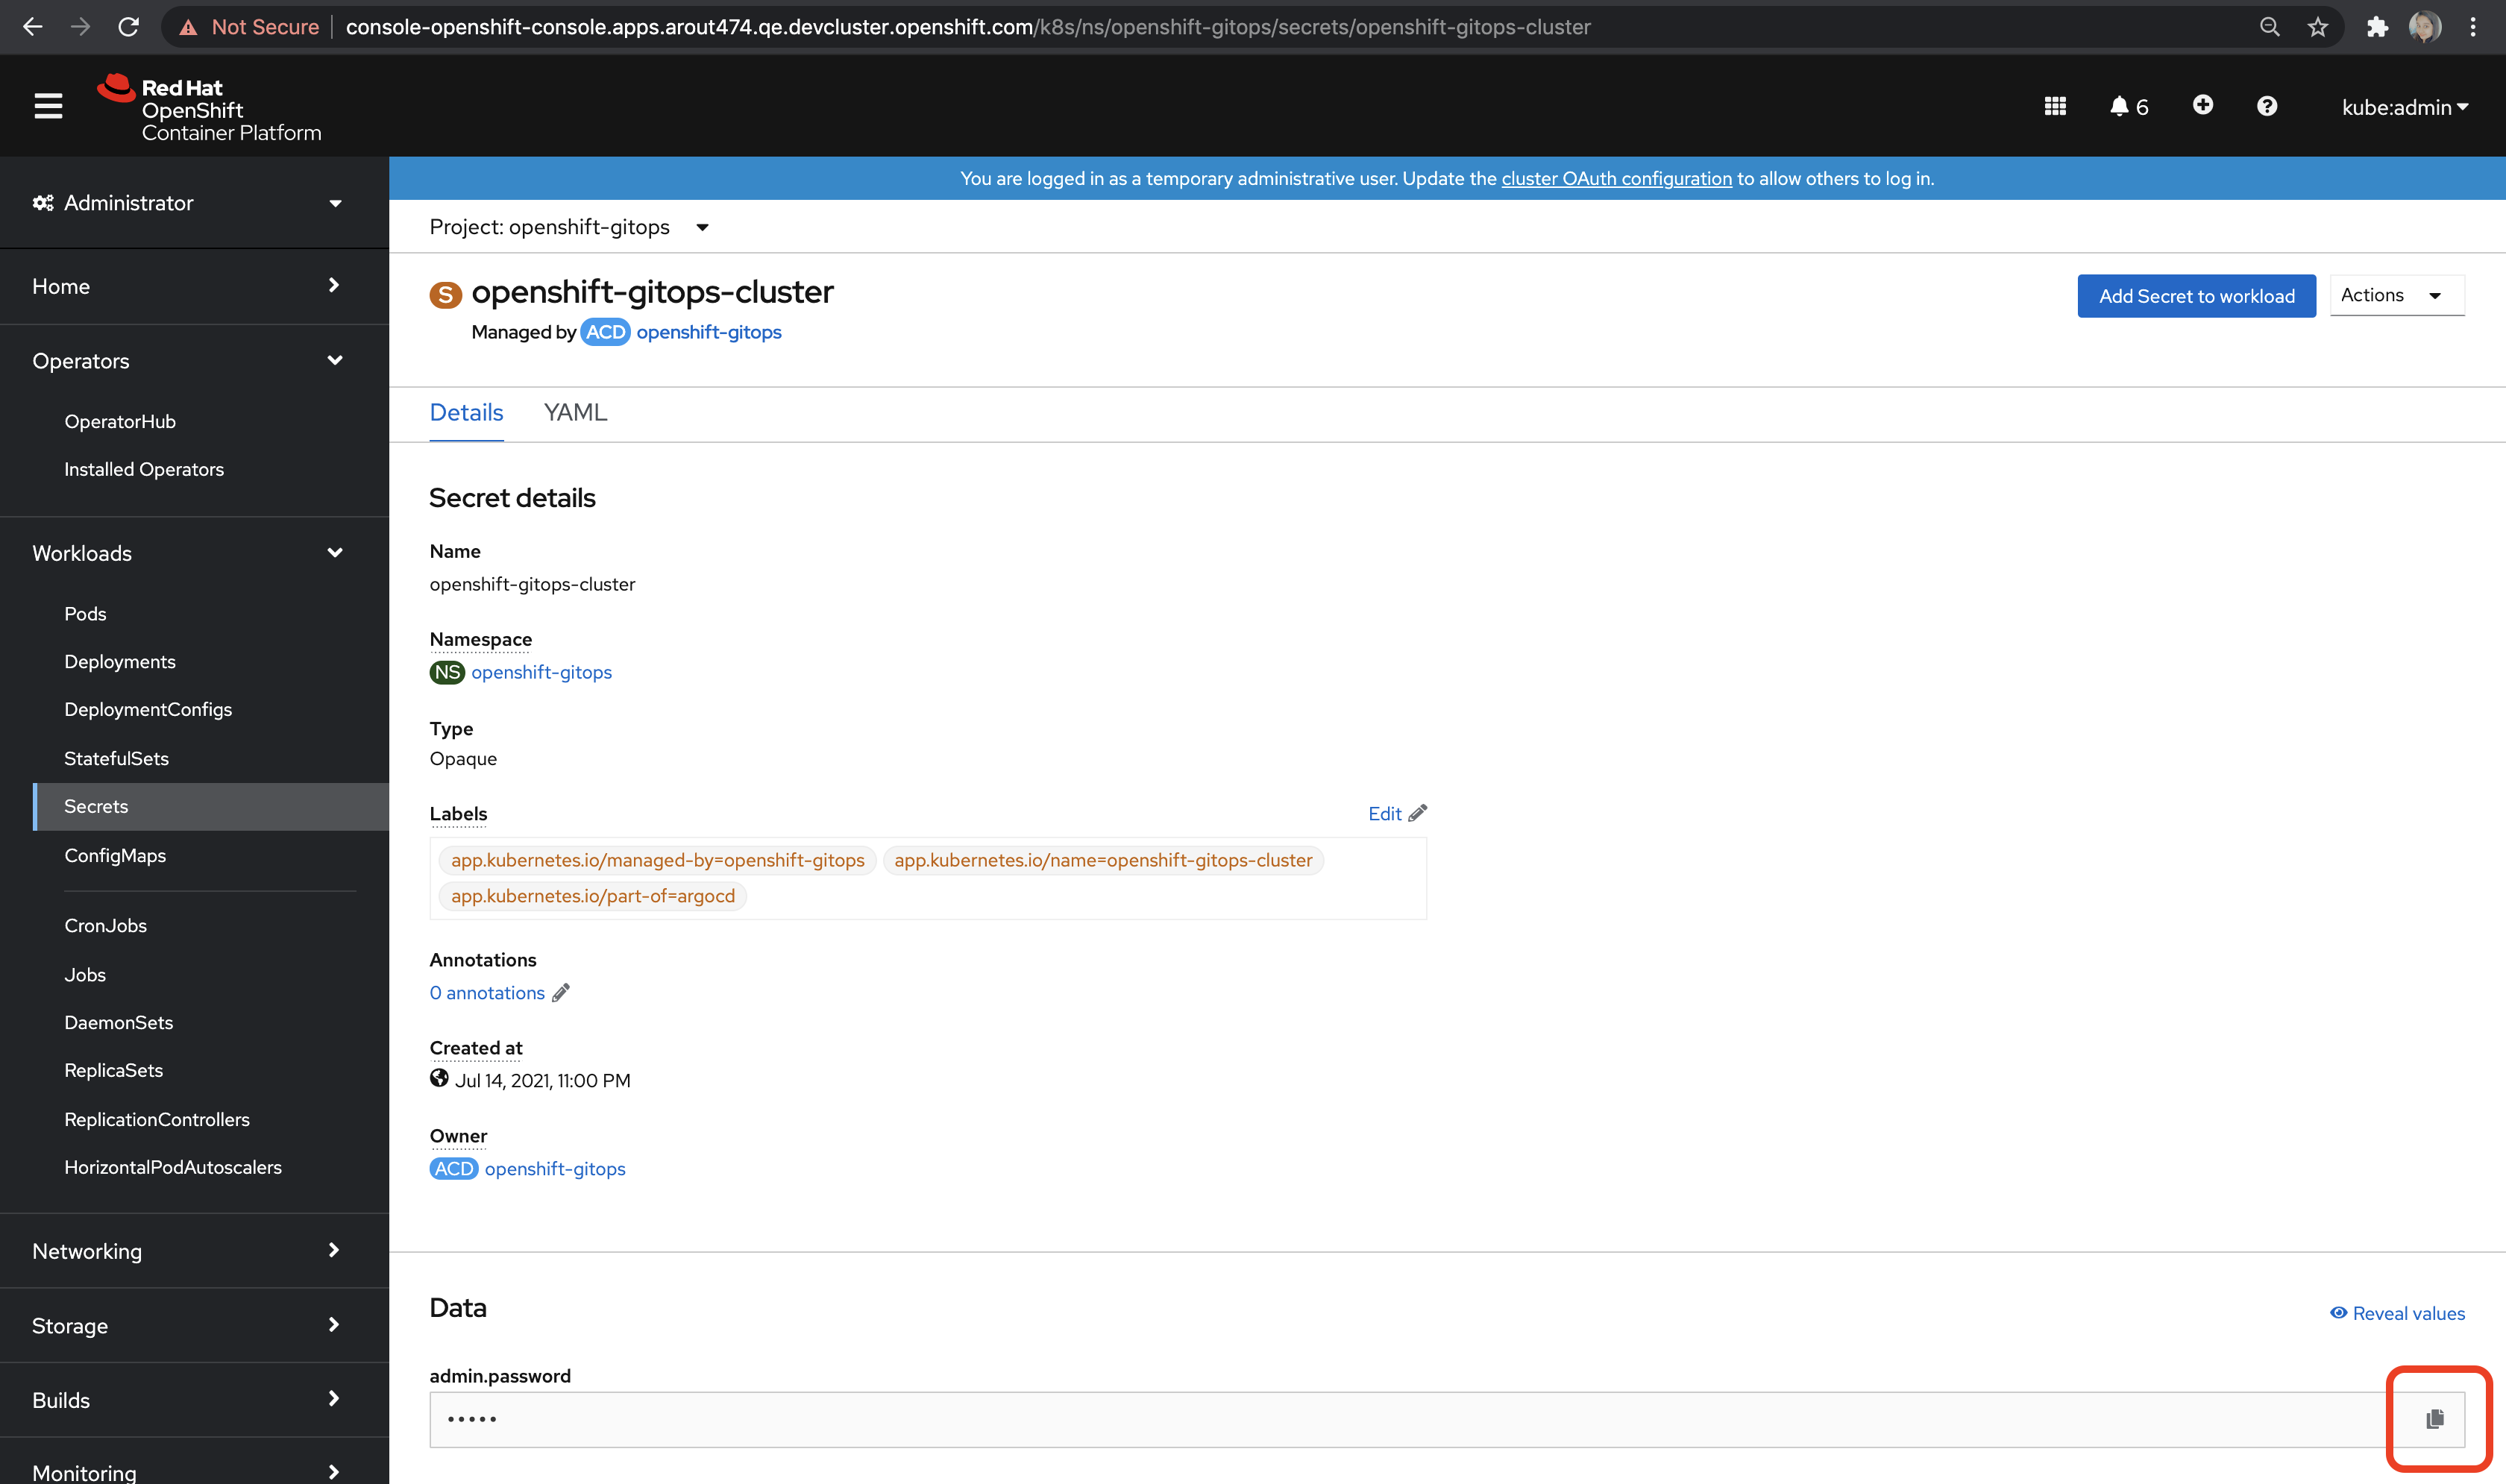
For the precreated Argo CD instance under the openshift-gitops project, you'll find the password to log into the Argo CD UI by navigating to Workloads → Secrets and selecting openshift-gitops-cluster, as shown in Figure 2.

Copy the secret at the bottom of the Secrets details page to your clipboard (see Figure 3) and paste it into the password field on the Argo CD login page. Use admin as the username.
Alternatively, you can fetch this password via the command line by running:
$ kubectl get secret openshift-gitops-cluster -n openshift-gitops -ojsonpath='{.data.admin\.password}' | base64 -d
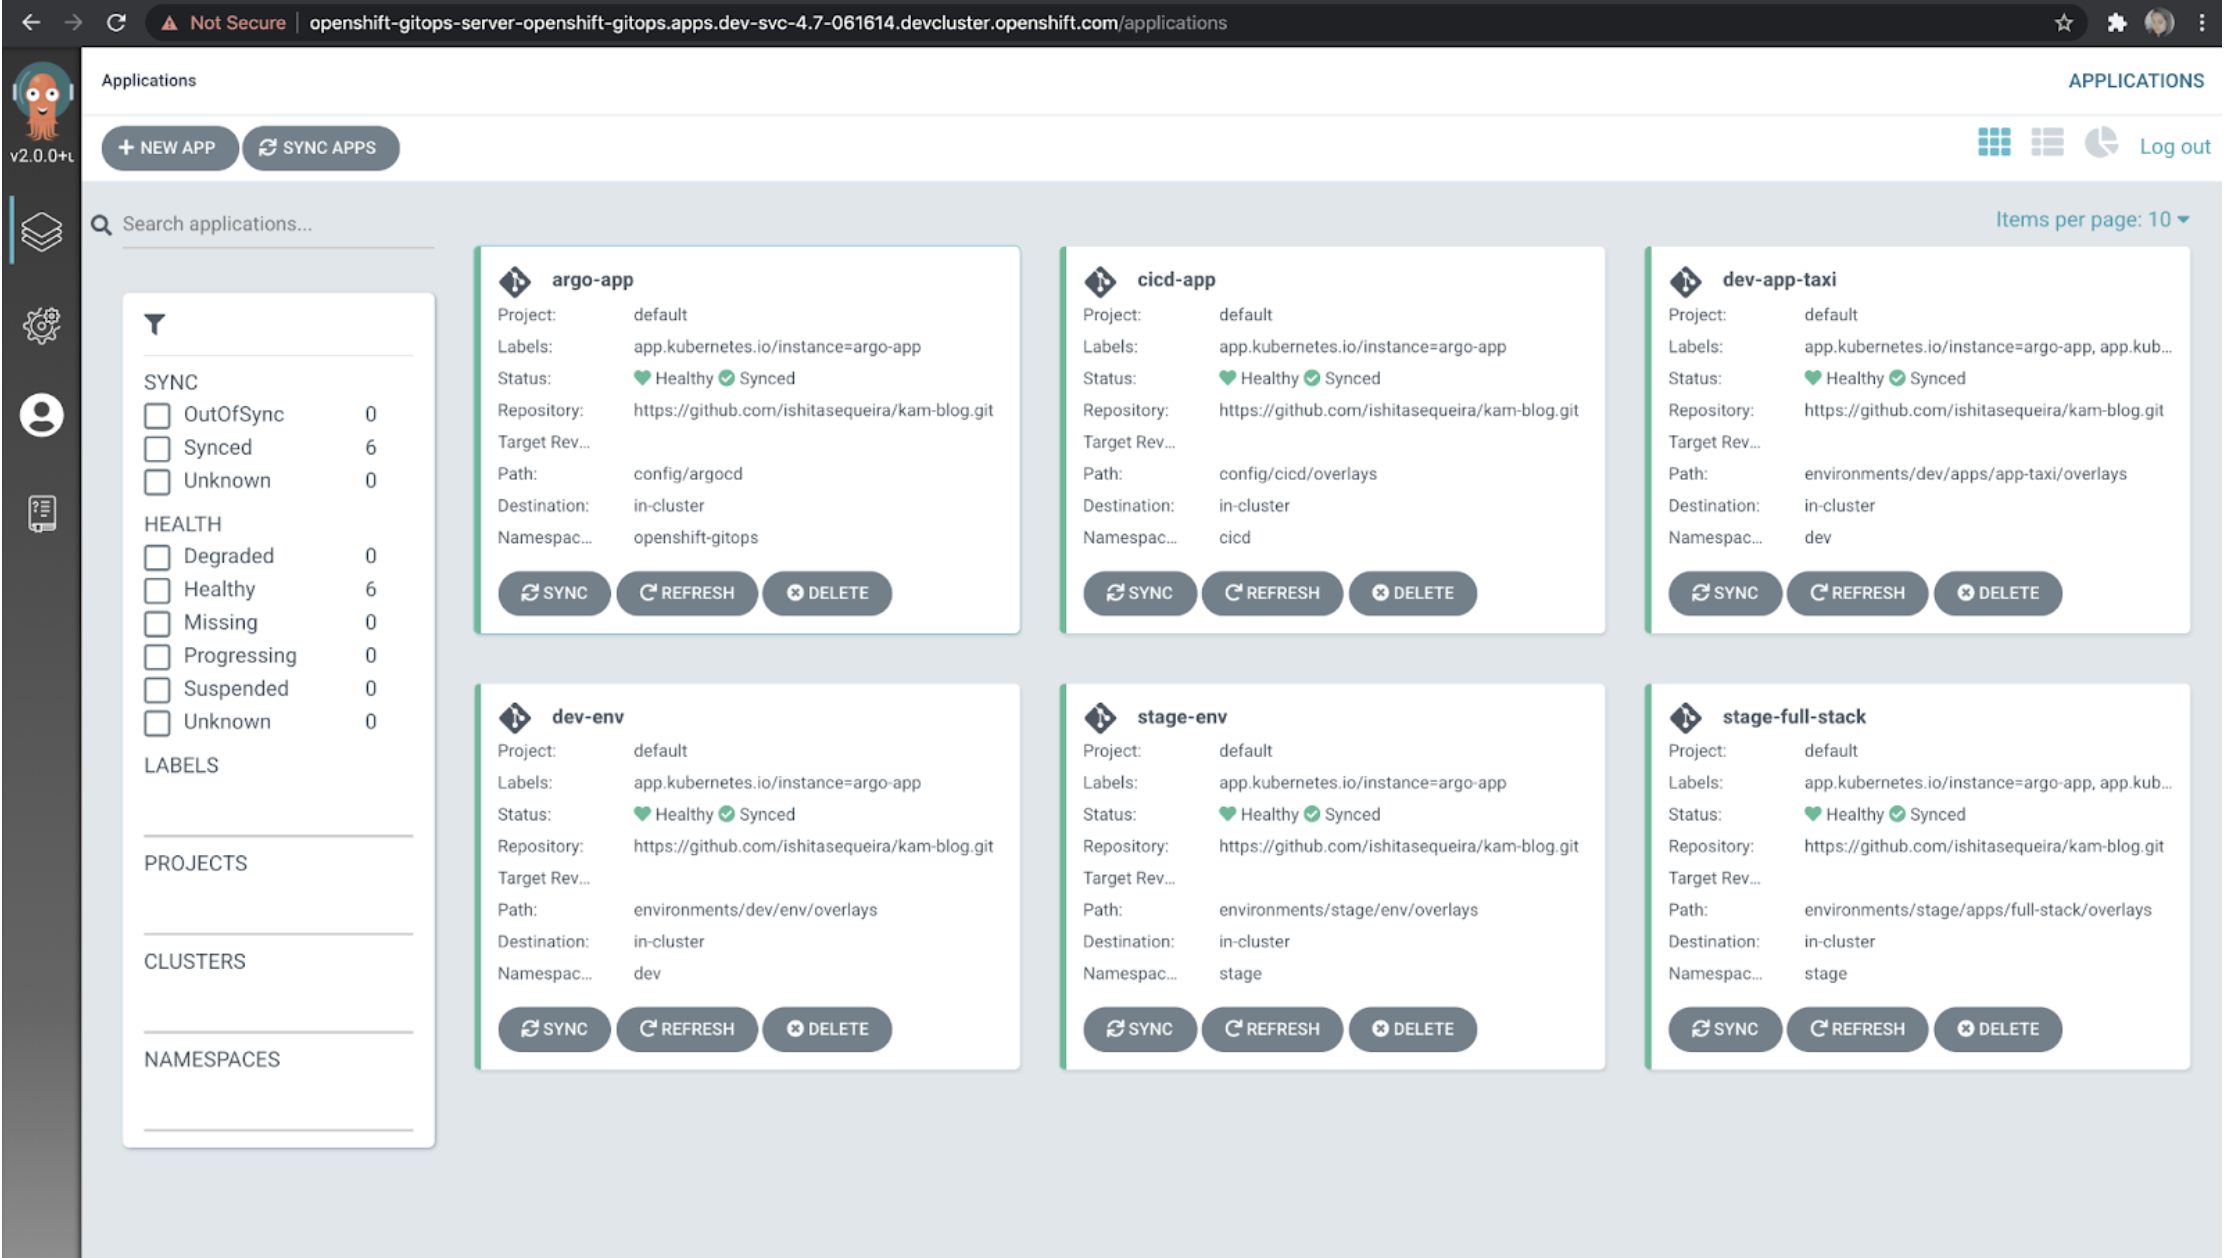
As you can see in Figure 4, the applications have been synced.
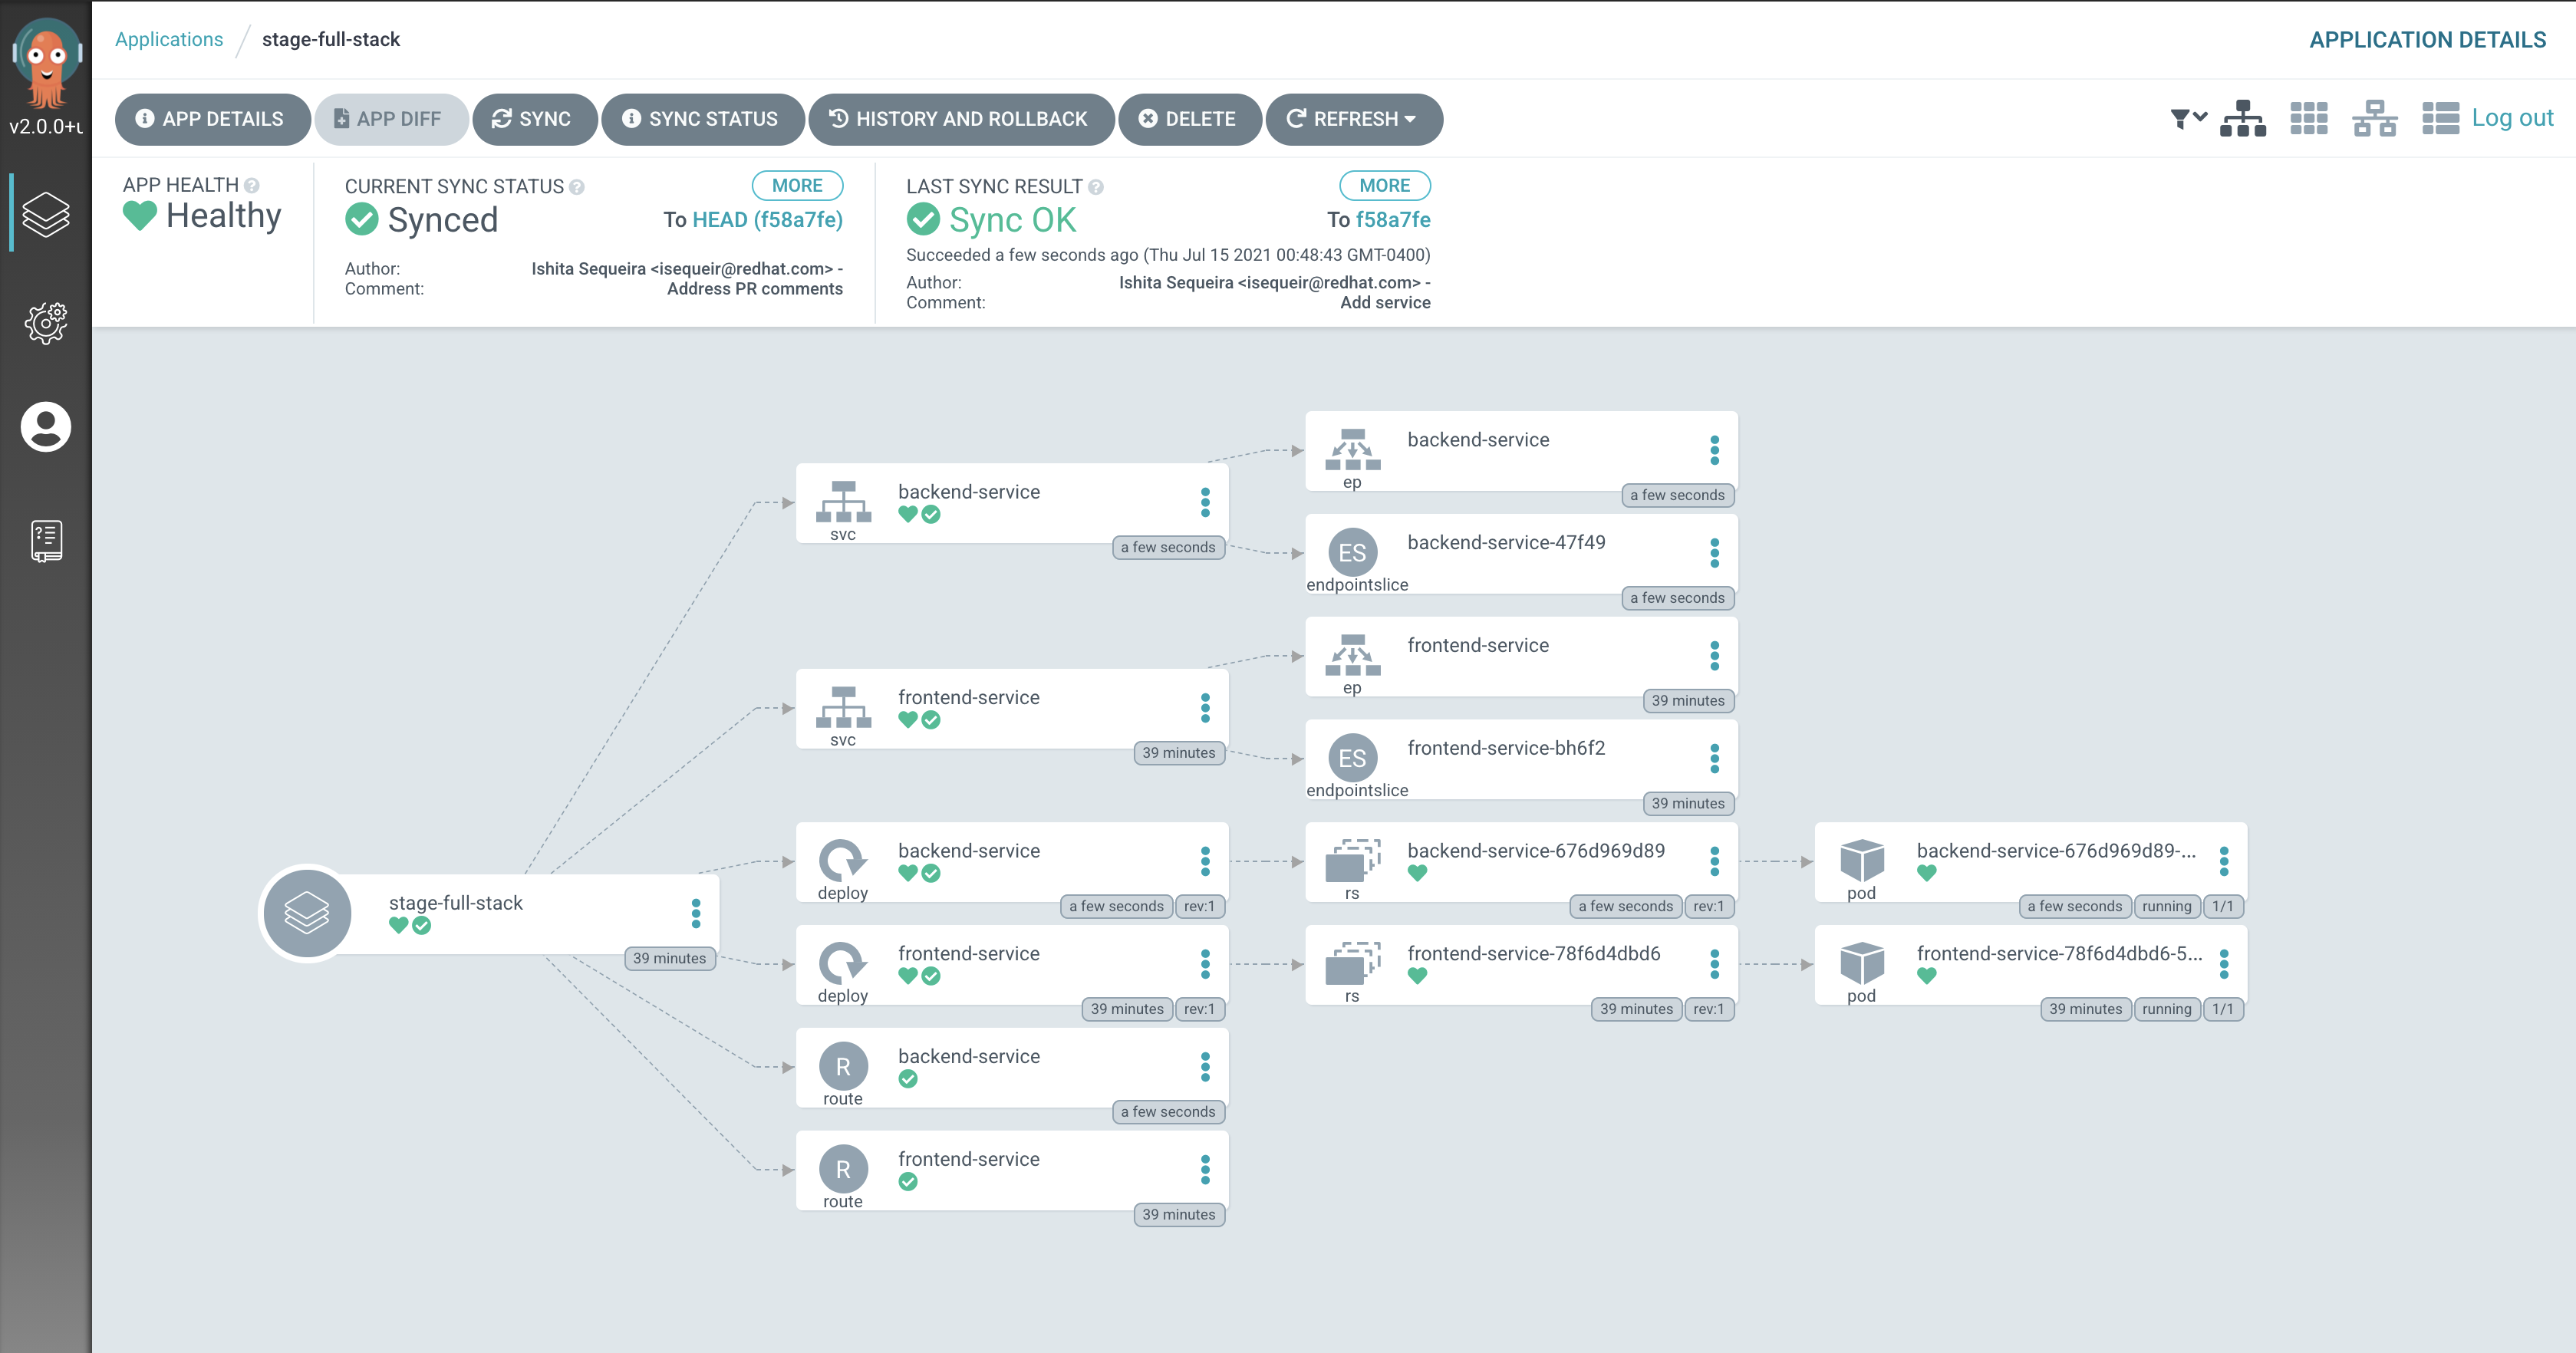
When you click the full-stack application (see Figure 5), there should be two services associated with it: the front-end service and the back-end service.
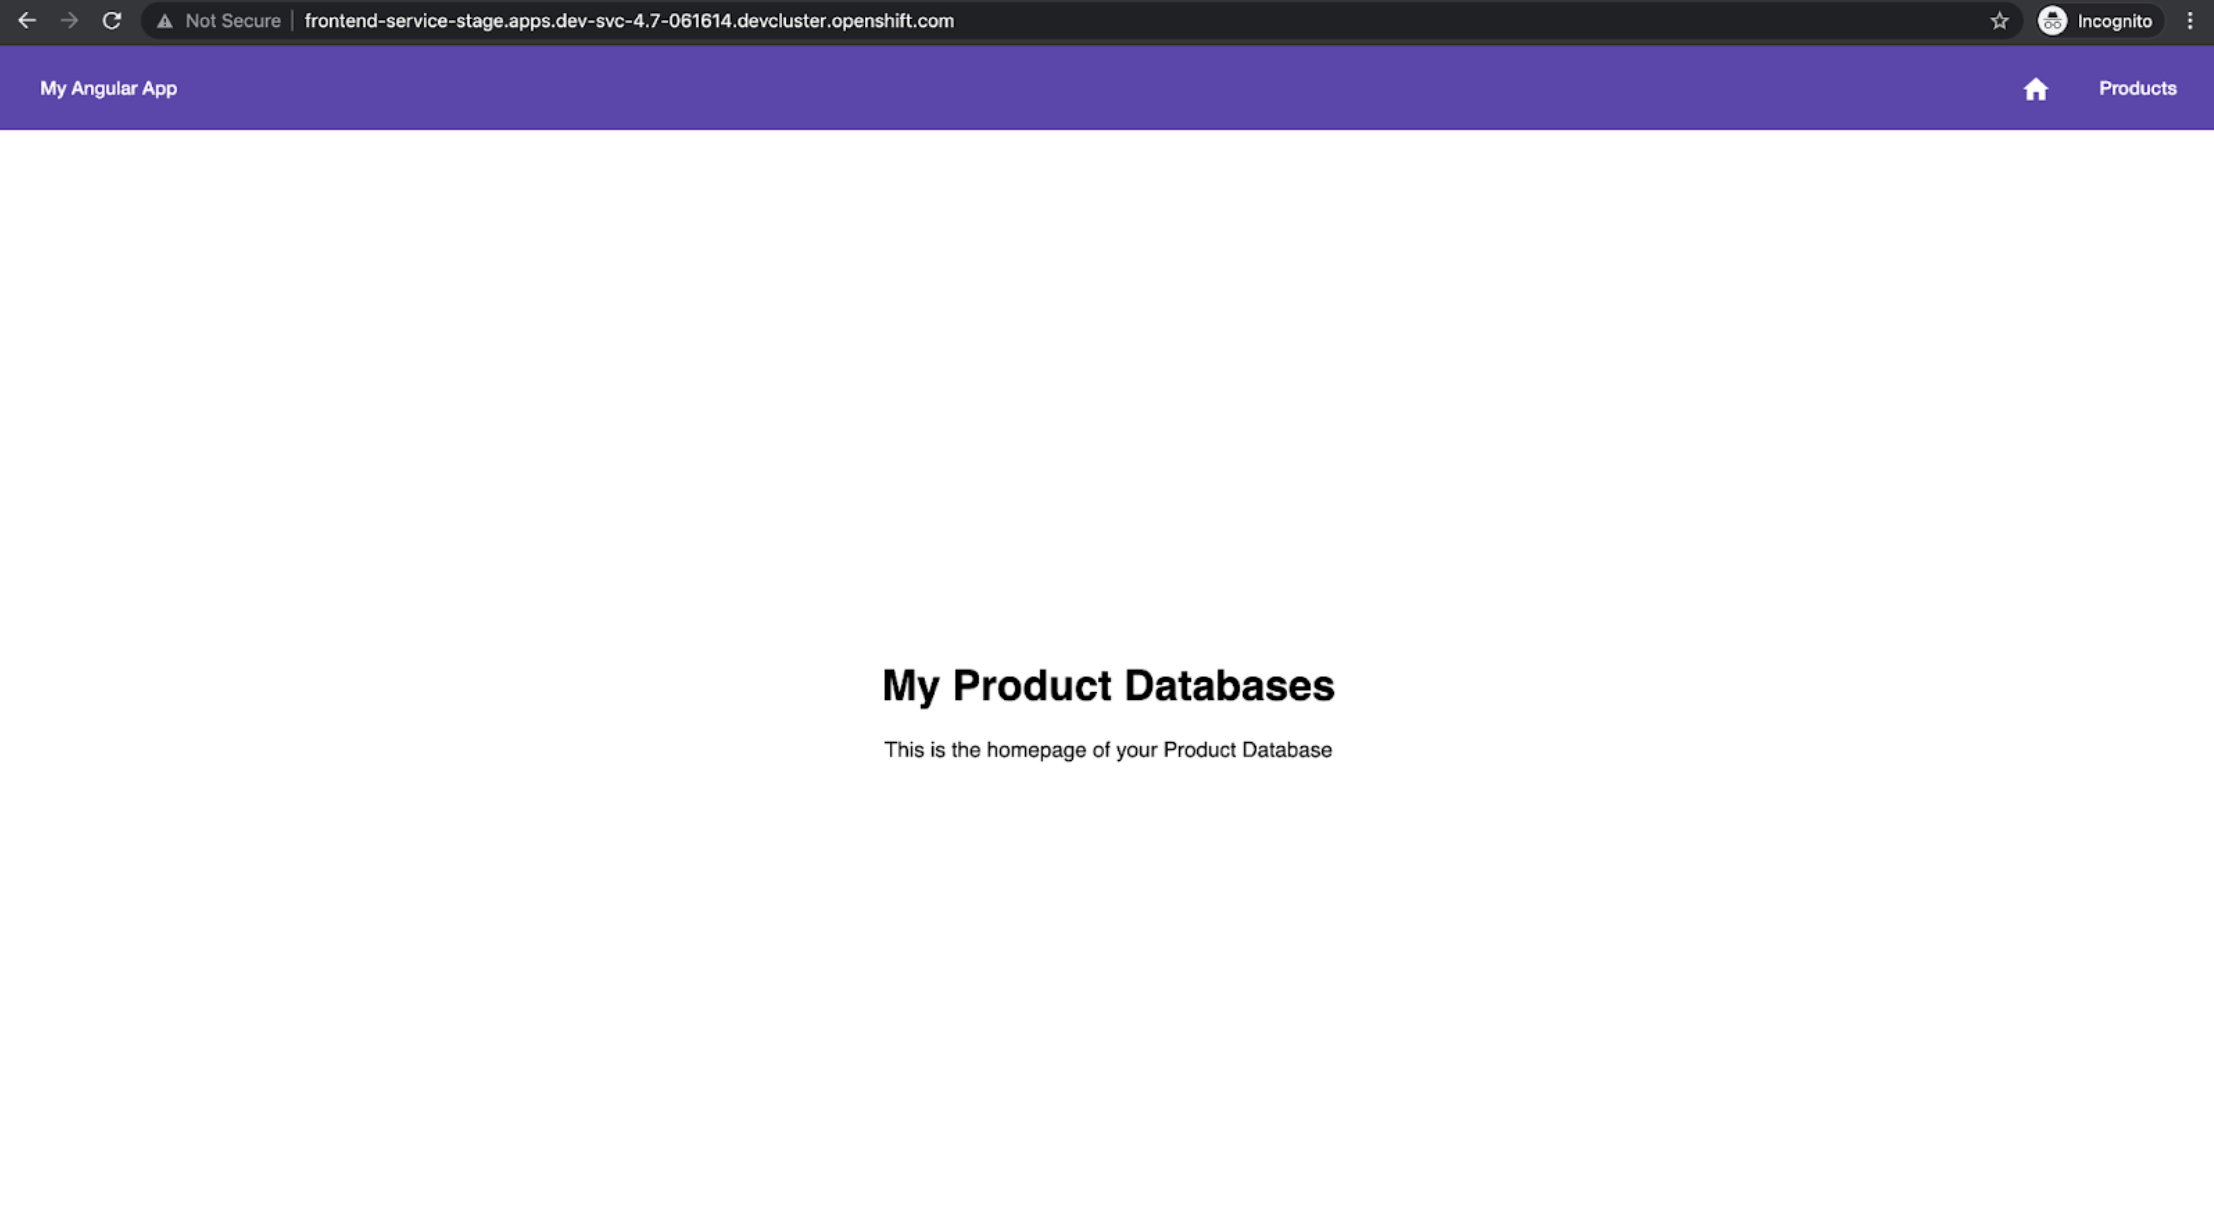
You can launch the front-end service by navigating to stage project → Topology and clicking the front-end service (see Figure 6).
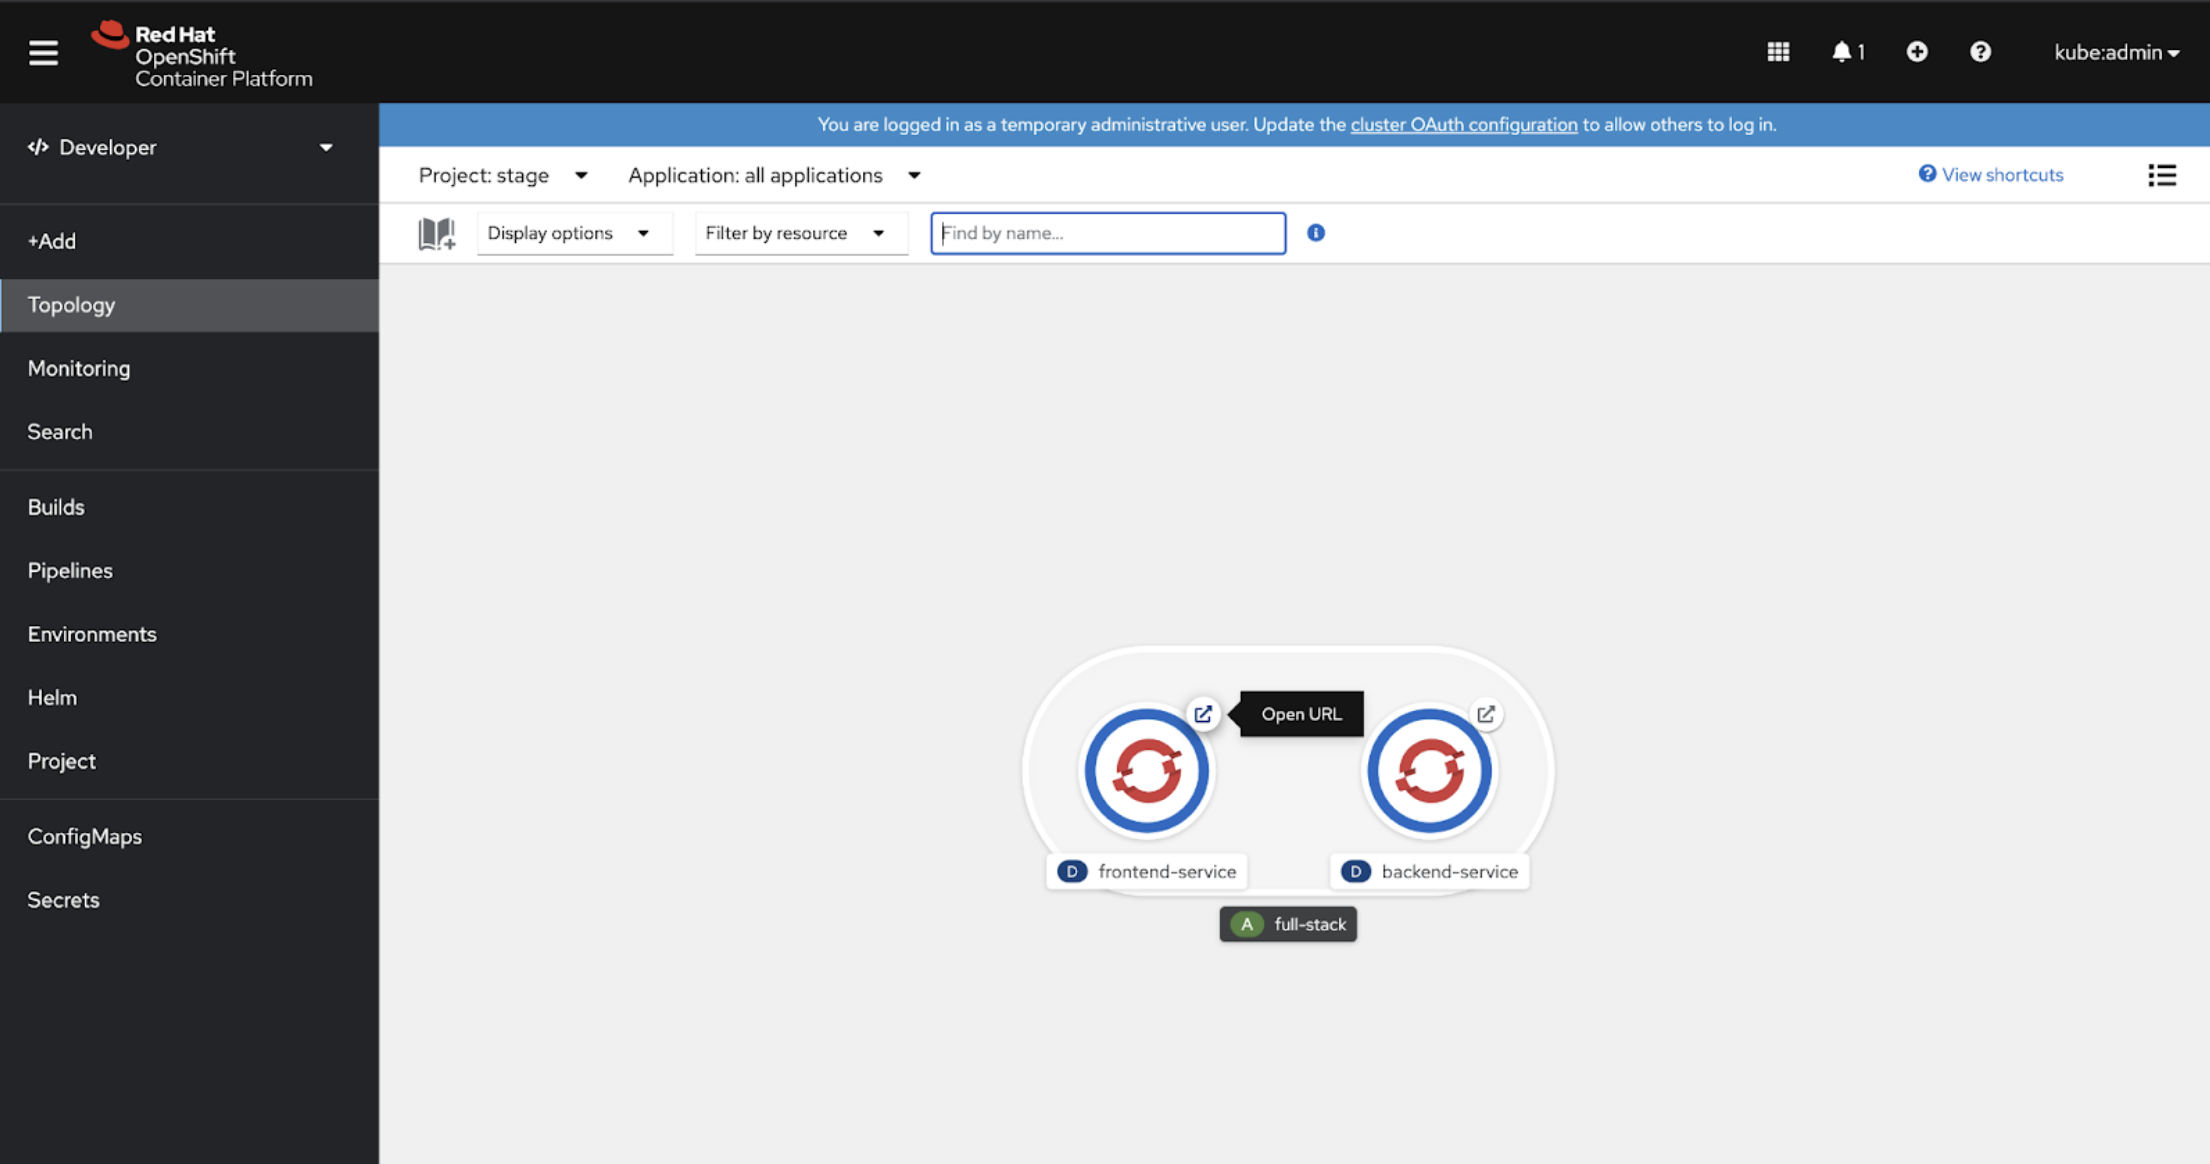
Doing this creates a route, which will serve the default image. The route is automatically created based on the name of your application source repository. When you open the front-end service URL, you will see the web page, as shown in Figure 7.
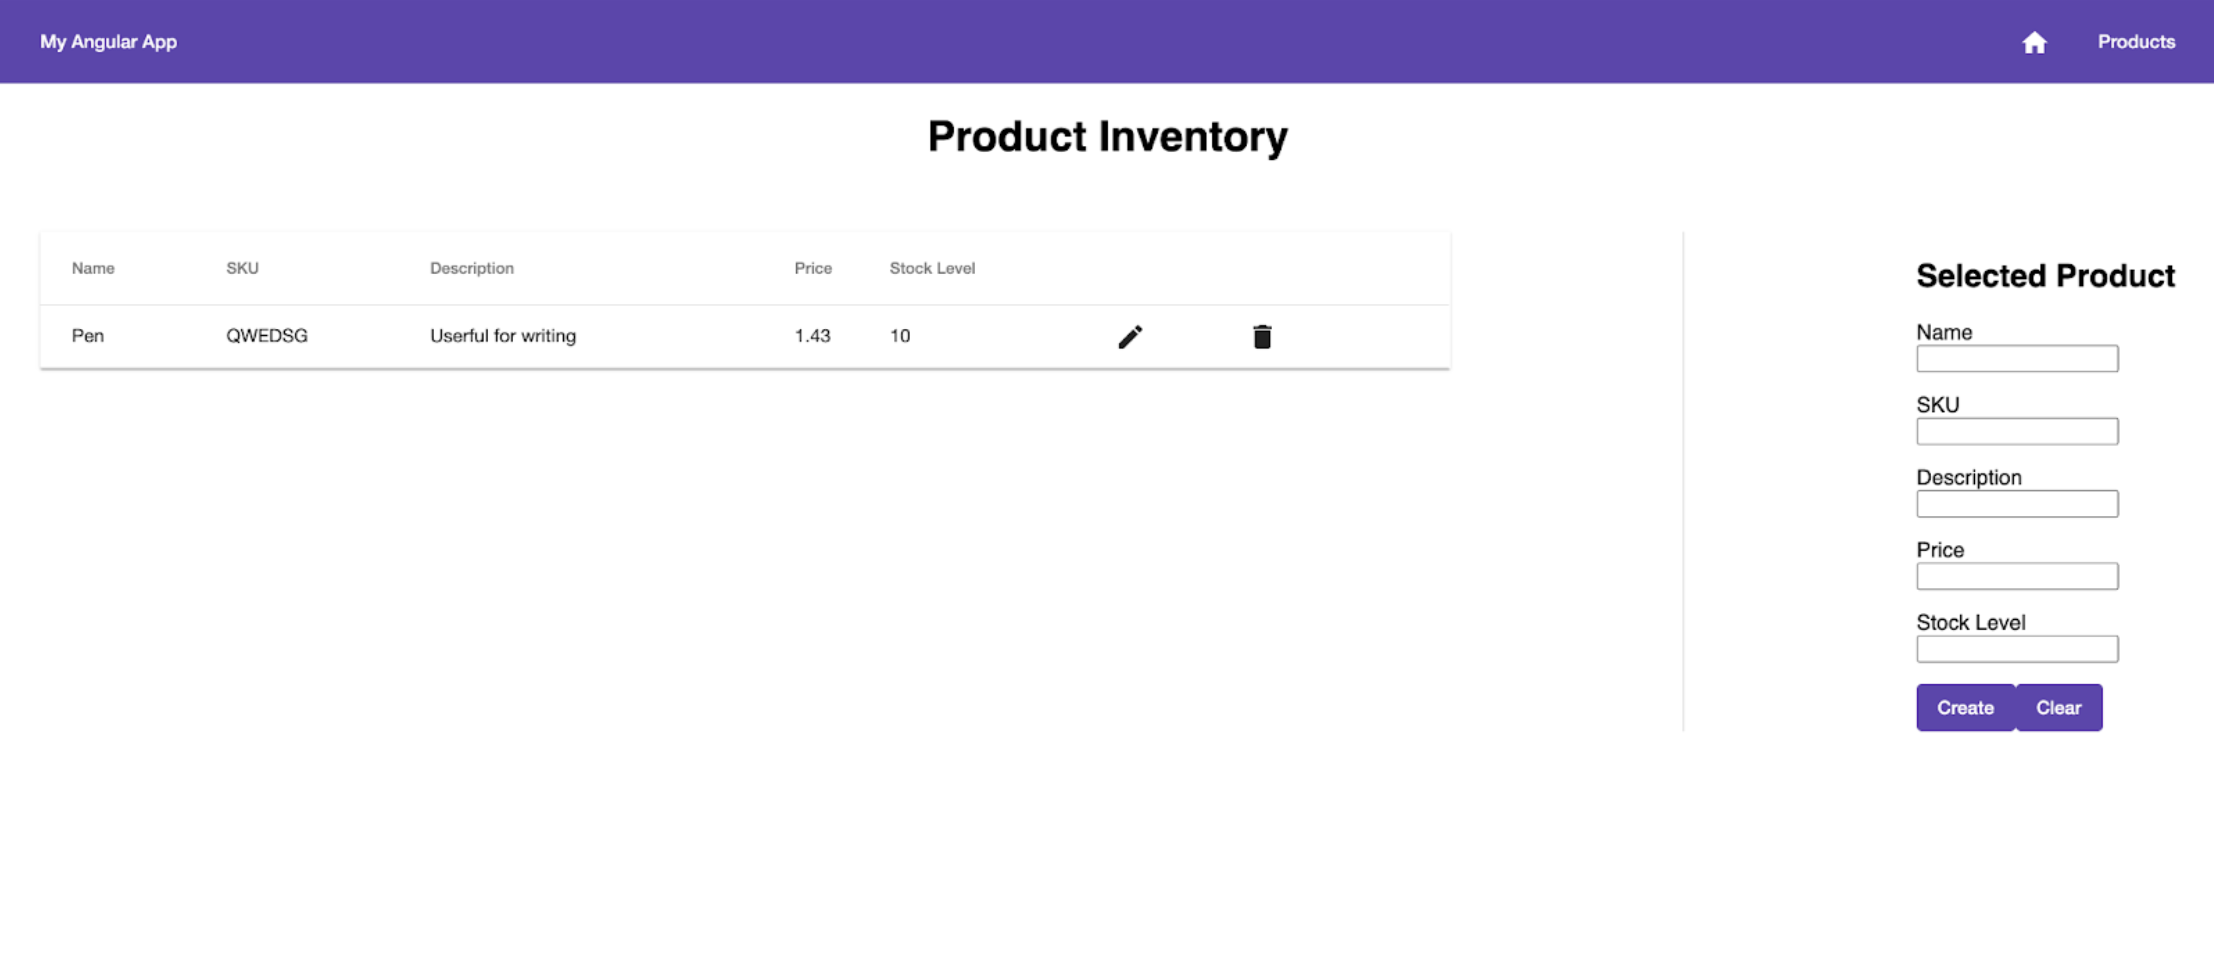
You can access the list of products fetched from the back-end service using the REST API calls by clicking the Products tab in the upper-right corner of the application (see Figure 8).
Add webhooks to the Git repository
We need to add a webhook to the Git repository once the resources are applied. The webhook's payload URL is the EventListener external address exposed by the OpenShift route. You can obtain the external address by displaying OpenShift routes in the cicd namespace. Simply run the following command:
$ oc get route --namespace cicd
You also need a webhook for your Git hosting service. This is used to trigger continuous integration (CI) pipeline runs automatically on pushes to your repositories. The address (host/port) retrieved from the command will be further added to the webhook secret of that repository. We can create webhooks for the added services and the GitOps repository.
For this demo, we will add a webhook to the front-end service:
$ kam webhook create --env-name stage --service-name frontend-service --git-host-access-token $TOKEN
Testing the pipeline
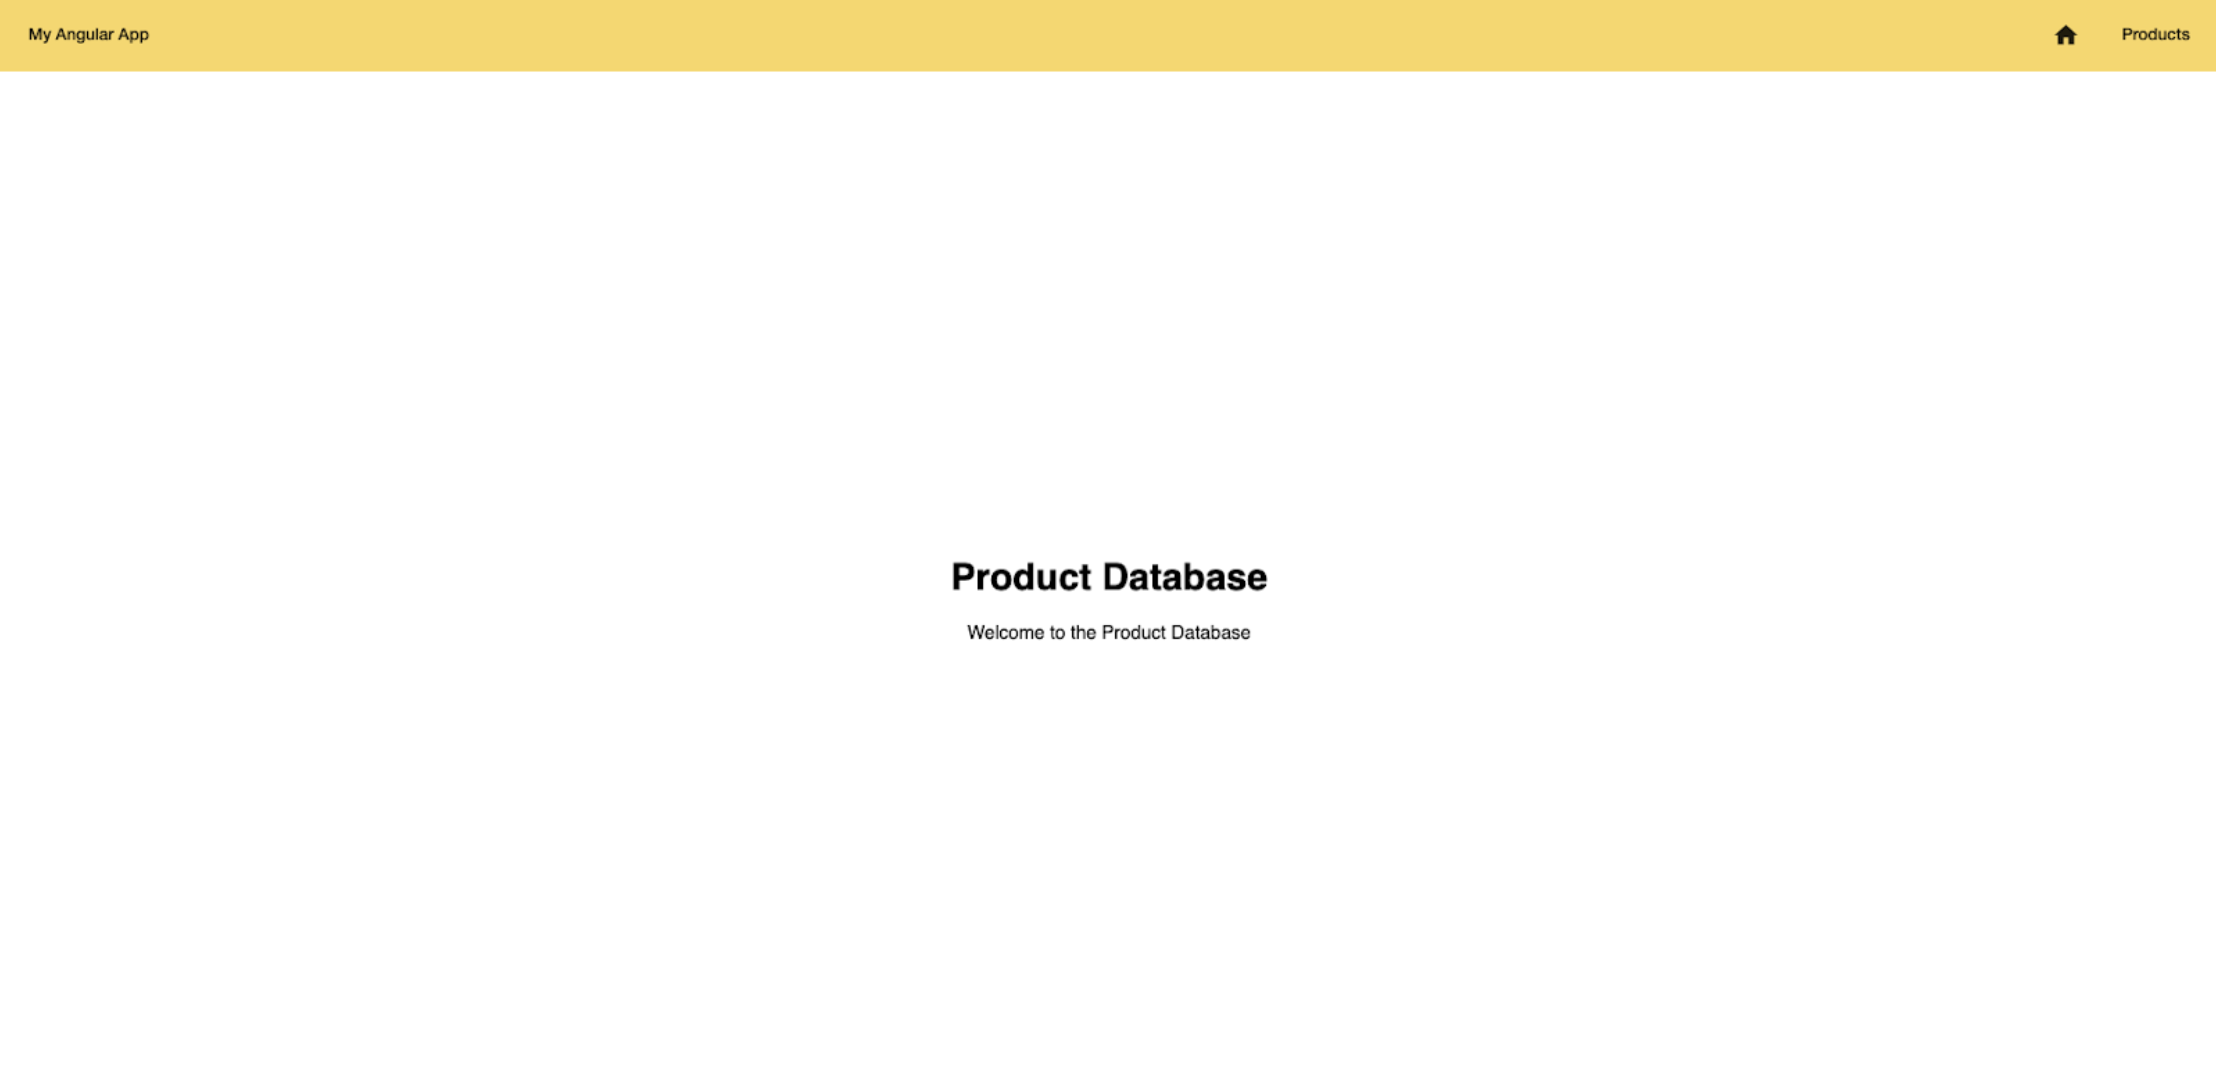
After you add the webhook secret, trigger a small change in your front-end service repository to see if app-ci-pipeline is working. For this example, we changed the content and the color of the homepage navigation bar in a new branch. Doing this created a pull request. To determine if the app-ci-pipeline has been triggered, go to the Developer view on the OpenShift web console. The Pipelines tab will indicate whether the pipelines are triggered and completed successfully (see Figure 9). Upon successfully completing the pipeline, a new image gets pushed to the Red Hat Quay repository that we specified while adding the service.

app-ci-pipeline status.For the changes to be reflected on the deployed application, we need to update the image tag for the front-end service in the config folder. Once the image tag has been updated, we'll push the changes to the GitOps repository and delete the previous front-end service deployment. Doing so automatically updates the deployment with a new image, as shown in Figure 10.
Conclusion
This article provided an overview of the CI/CD experience using the kam CLI. To learn more about the kam CLI, visit the GitHub project.