Embracing the future—making the transition from legacy monolithic applications running on .NET Framework to microservices and images running in containers (or pods)—is a tall task. If only there were a safe, proceed-at-your-own-pace way to make the change, one that was familiar yet led to a new destination. Of course, there is such a path; otherwise, I wouldn't be writing this article. In this article, the last in my series introducing three ways to containerize .NET applications on Red Hat OpenShift, we'll look at running Windows virtual machines (VMs) on OpenShift, and treating them like containers.
In case you missed them, here are the two other articles in the "Containerize .NET for Red Hat OpenShift" series:
Reframing 'legacy' applications
Apropos of nothing, I read an idea that I like, and it might help minimize the bad connotation that often comes with the phrase "legacy application." All you have to do is replace the word legacy with proven. Nice, eh? Suddenly, you're not working on some old code that is barely doing the job. Instead, it's a proven system that is being upgraded with newer technology.
Okay, back to the topic at hand.
Running Windows VMs on OpenShift
Our goal is to run an existing Windows virtual machine on OpenShift but treat it— from an operations perspective—as a container. We also want to keep the "VM-ness" that we're accustomed to, so we'll use the OpenShift Virtualization Operator, which is built on KubeVirt technology.
OpenShift Virtualization allows you to run a virtual machine (hint: it's not limited to Windows VMs) and have it appear within your cluster just how an image would. You get the same role-based access control, service discovery, and other features that you would with any image. Your web service running in IIS appears as just another service in OpenShift. Your other applications can access it by service name; no ports, no IP addresses, no server names ... just the name.
And it works both ways: Your IIS website can access your other services by name. This could even include an SQL Server database.
Now I have your attention. Let's start setting up our development environment.
Install the OpenShift Virtualization Operator
The first step is to install the OpenShift Virtualization Operator. This is incredibly simple:
- Search for and locate the OpenShift Virtualization Operator.
- Click Install.
- Click Install again.
Just like that, you've installed the Operator. All that remains is to create a HyperConverged cluster:
- Click OpenShift Virtualization Deployment.
- Click Create HyperConverged.
- Click Create.
Note: This article has detailed instructions for installing the OpenShift Virtualization Operator.
Install the virtctl CLI
Life is easier if you use the command-line interface (CLI) tool, virtctl. You can install it by following the instructions on this web page. The virtctl CLI is handy for uploading virtual machine images into your cluster.
Prepare the Hyper-V VM
We'll use the qemu-img command-line tool to convert the Hyper-V VM into QEMU copy-on-write (QCOW2) format. This is one of the formats that CNV is expecting. Here's the command I used:
qemu-img convert "C:\Users\Public\Documents\Hyper-V\Virtual hard disks\win2012r2.vhdx" win2012r2.qcow2 -O qcow2
The conversion finished rather quickly on my machine. So quick, in fact, that I double-checked to make sure the output file was there. It's shown in Figure 1.

Once you have this 21GB file at hand, the fun begins.
Upload the Hyper-V VM image to your cluster
Uploading the Hyper-V VM image to a cluster turned out to be more of a project than I anticipated, but I came up with a workaround that I'll share with you here.
I've uploaded and run scores of virtual machines. I typically use a smaller VM image, about 4GB, and it takes 45 minutes using my slow home internet. If something goes wrong, I wipe things out and start over; another hour or so lost.
Based on this experience, uploading a 21GB file would take hours, and I couldn't afford the time to upload it again if something went wrong. Knowing it was possible to pull a VM image into my cluster from a URL gave me a better idea.
Amazon S3 to the rescue
I decided to create a Simple Storage Service (S3) bucket in my Amazon Web Services account and upload my 21GB image to that. This would let me pull from the S3 URL straight into my cluster. AWS and Azure—where I'm using Azure Red Hat OpenShift to host my cluster—both have super high-speed internet connections. Creating a VM should be quick.
It took four hours for my image to upload to the S3 bucket; I launched it in the evening and went to bed, fingers crossed that it would succeed, and it did.
In the end, it now takes about four minutes to pull the image into my cluster. Software development isn't always about failures; we have our winning moments, too. This was one of them, and I enjoyed it.
Create the Windows VM in OpenShift
Once the OpenShift container-native virtualization (CNV) mise en place is ready, it's time to make things happen. Follow along with me here.
First, I logged in at the command-line and created my project, winquotes, as shown in Figure 2.

The remaining work happens in the Red Hat OpenShift administrator dashboard. To start, within the winquotes project, I selected the Virtualization option (shown in Figure 3) to start creating a new virtual machine.
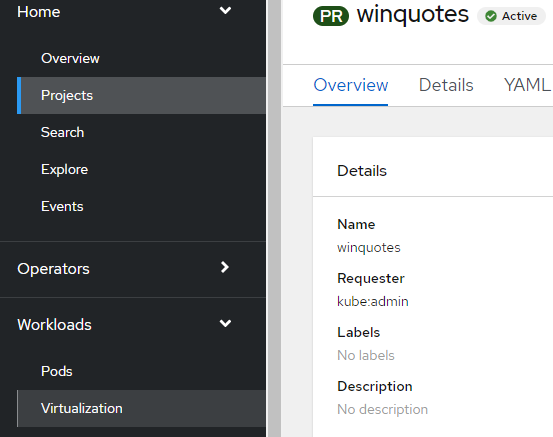
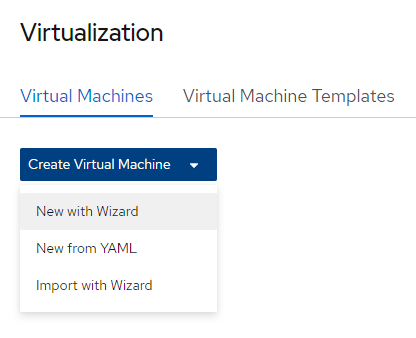
The New with Wizard option stepped me through the process, as shown in Figure 4.
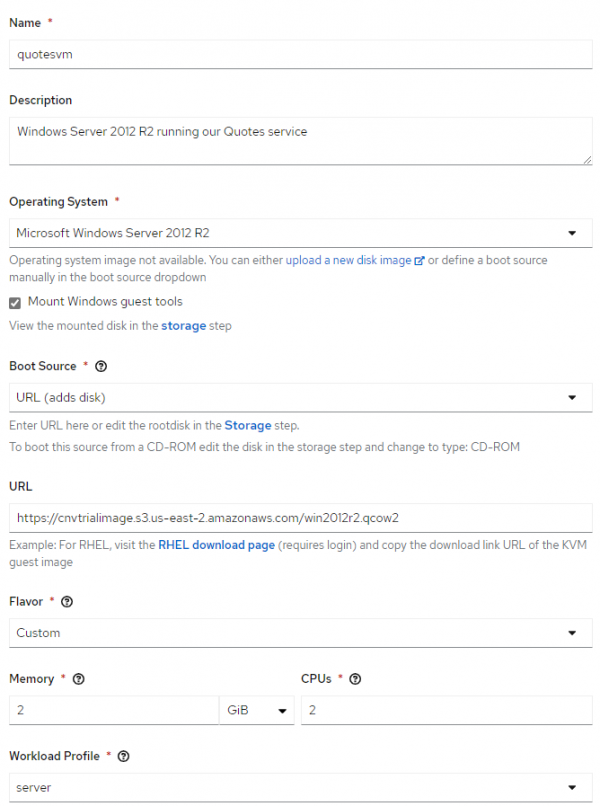
As I mentioned in the last section, the VM instance is imported from the S3 URL. For demonstration purposes, I kept the CPU and RAM constraints low: 2GB of RAM and only two CPUs, as shown in Figure 5.
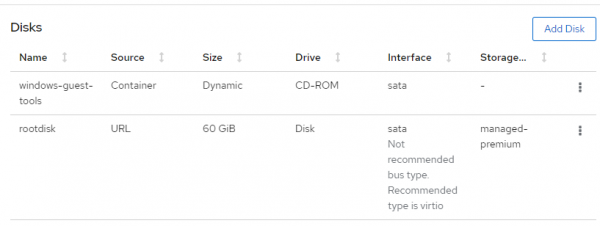
It's important to edit the disk information, especially because the default value for the root disk is 15GB. The disk must be large enough to hold the original VM, which in my case had a 50GB drive. I edited the size to 60GB to be safe. I also changed the drive type to SATA because it's Windows. Figure 6 shows the default storage settings.

Figure 7 shows my edited storage settings.
I was able to go with the default values on the screen for the remainder of the process to create this virtual machine. When I reached the final screen, it immediately began importing the VM located at the supplied S3 URL, as shown in Figure 8.
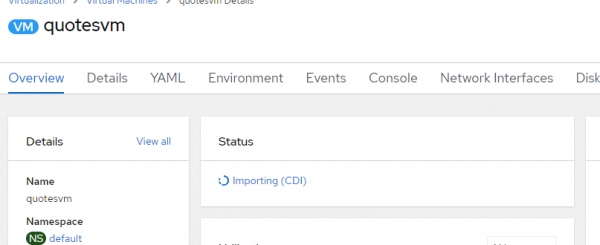
When the import was finished, the VM was turned off, as shown in Figure 9.
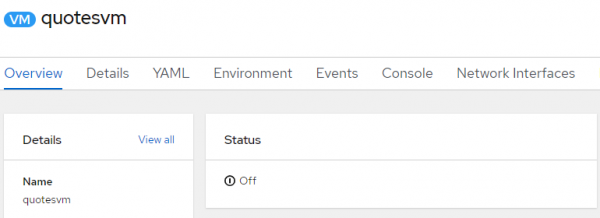
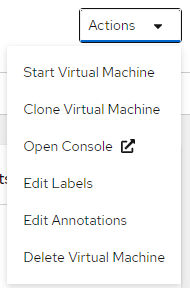
I started it from the menu in the upper-right corner, as shown in Figure 10.
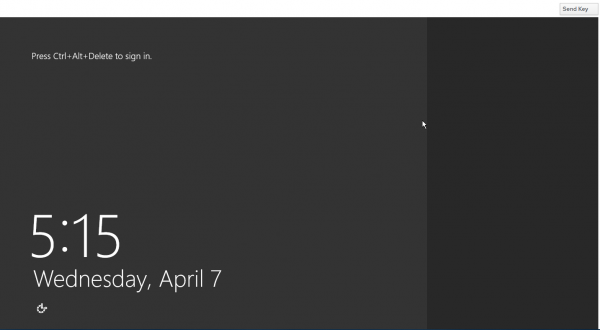
I then switched to OpenShift's console view and waited for my login screen. As shown in Figure 11, my Windows VM was up and running in OpenShift.
I then went to open the IIS application in my browser and localhost:8081/api/quotes, expecting to see it working. But it wasn't working. The application could not connect to the database running in Azure.
As it turns out, the VM cannot connect to the network until the VirtIO network driver is installed.
How to install the VirtIO network driver
If you've followed along with me so far, you can go into your CD drive and install the guest tools, including the VirtIO driver. After that, your application will be connected to the internet. Figure 12 shows the Windows file explorer with the CD ROM listed.
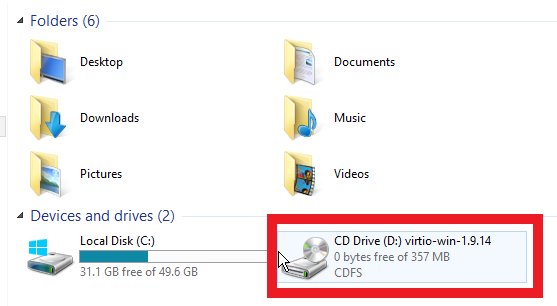
Now, your service should be able to reach your database, and it should be up and running. The next step is to convert the service into an OpenShift service and make it available to other applications within your cluster.
Create and expose a service within a cluster
We want to expose the application as a service within a cluster, which starts with creating a service. The command-line tool, virtctl, is useful for this purpose. For my example, I specified the name of the VM, the port I wanted to expose—8081 in my case—and assigned a name to the service. I used the following command to do all that:
virtctl expose vm quotesvm --port=8081 --name=quotes --type=NodePort
Now, we have a service that is available by name ("quotes," in this case) within the cluster. A service. Running in an OpenShift cluster. Running on IIS. Inside a Windows VM.
Mind, blown.
Finally, just like any other service within a cluster, we can use OpenShift's oc command to expose this service to the world, as shown in Figure 13.

Now, we should be able to open a browser in any internet-connected machine and see the service results at the URL listed. Except, it doesn't work.
Why not?
A VM is a VM is a VM
Let's go back to the VM. Even though everything inside our cluster is aligned and configured correctly, the VM still needs a new Windows firewall rule to access port 8081. Don't forget: It's still a virtual machine and acts like one. You can manage and treat this VM like an OpenShift application in the context of OpenShift, but the underlying technology is still a VM. Adjust accordingly.
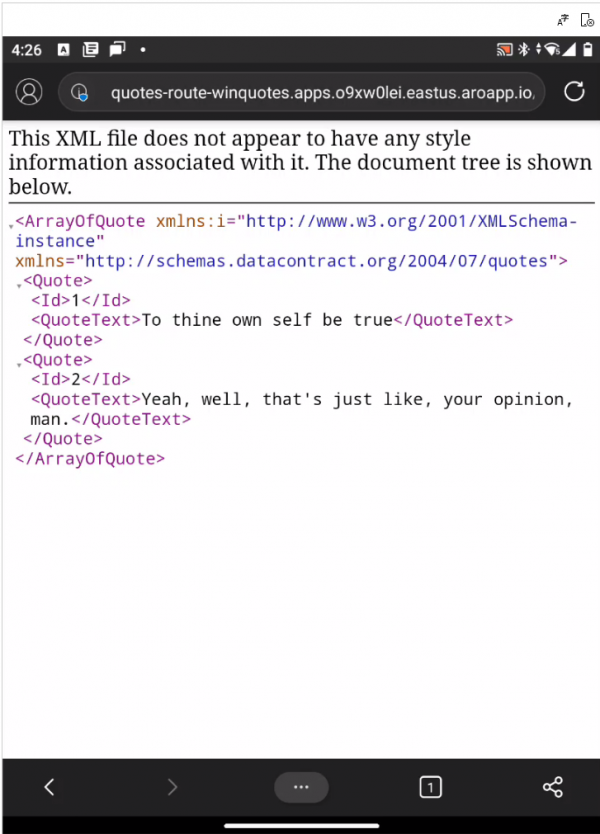
Once we establish the new firewall rule, we have success. Our service is available to the world. Figure 14 shows the service on my phone (a Surface Duo, by the way).
Conclusion: What are you waiting for?
You can run Windows VMs in Red Hat OpenShift and treat them like containers. You can run Windows applications in Windows containers on OpenShift. You can create Linux containers using .NET Core.
There are no blockers. You have the tools. Embrace the future.
Last updated: February 5, 2024
