Imagine an information technology (IT) world where everything is ideal: Every company has switched over to cloud-native applications, every application is containerized, everything is automated, and the IT people see that the world is good. Things are not so ideal in the real world, though, as we know. Applications remain tightly coupled with traditional virtual machine (VM) resources such as software libraries and hardware resources. The effort to migrate them from VMs to containers seems insurmountable, requiring years of dedicated spending and hours from developers and software architects.
The dilemma is that companies want all of their applications to eventually run on containers, but they also need to support applications running on VMs until that glorious shift happens. Given that application migration from VMs to containers will happen over the long haul, some companies are exploring a lift-and-shift approach. In theory, lift-and-shift would let us migrate tightly-coupled legacy applications to a container platform like Red Hat OpenShift. Rather than rewriting application code, developers would simply write interfaces (essentially, code with patterns) that are compatible with the existing structure.
Unfortunately, this scenario is unrealistic for legacy projects involving hundreds of application modules and packages. Therefore, it is logical to ask: What if there was a way to support existing applications running on virtual machines and new applications running on containers in one unified container-based platform?
Luckily, there is a way: Use a Kubernetes-based platform like OpenShift.
In this article, I introduce OpenShift Virtualization, a feature for Red Hat OpenShift Container Platform (OCP). OpenShift Virtualization allows you to run and manage virtual-machine workloads alongside container workloads.
Note: As of version 2.4 when CNV went GA, Container-Native Virtualization was renamed OpenShift Virtualization.
Overview of OpenShift Virtualization
Based on the open source project KubeVirt, OpenShift Virtualization's goal is to help enterprises move from a VM-based infrastructure to a Kubernetes and container-based stack, one application at a time. This means that we must be able to treat applications based on traditional VM-based workflows just like we do native Kubernetes applications, including for management and routing. At the same time, many of these applications require a significant amount of VM-native configuration to function.
OpenShift Virtualization lets you deploy, run, and manage both virtual machines and containers on OpenShift, which is Red Hat's Kubernetes-based platform for the enterprise. OpenShift Virtualization is GA and fully supported with OCP 4.5 and OpenShift Virtualization 2.4. This has been the case since late July 2020.

In the next sections, I will show you how to enable OpenShift Virtualization on OpenShift. As a bonus, I will also show you how to install virtctl, which is the command-line interface (CLI) for managing OpenShift Virtualization resources.
Prerequisites
I used the following technologies for this demo:
- Red Hat OpenShift 4.5.6 on Amazon Web Services Elastic Compute Cloud (AWS EC2)
- Red Hat OpenShift Virtualization 2.4.0. GA through Operator Hub available through Red Hat OpenShift Container Platform
- MacOS for the
virtctlinstallation
Warning: OpenShift Virtualization is fully, but only supported on-prem, on bare metal on x86. We currently do not support public cloud deployments in any case. Red Hat has this on our roadmap, however. While TCG emulation mode should technically work, it is not supported and is not a recommended deployment. Again, those wishing to experiment are free to do so, but the resulting deployment is currently not encouraged or supported by Red Hat.
OpenShift Virtualization on OpenShift
For this installation, I am using Red Hat OpenShift 4.4.3 on Amazon Web Services (AWS). I am also using the OpenShift OperatorHub to install the OpenShift Virtualization Operator. While you can enable OpenShift Virtualization on Red Hat OpenShift 3.11 and above, the process is different if you don't use the OpenShift OperatorHub. In addition, OpenShift Virtualization from Red Hat OpenShift introduces numerous updates, including the following:
- An enhanced web console provides a graphical portal to manage virtualized resources alongside the OCP cluster containers and infrastructure.
- The ability to use OpenShift Virtualization with either the OVN-Kubernetes or the OpenShift SDN network provider.
- The ability to import, upload, and clone virtual machine disks into namespaces that are subject to CPU and memory resource restrictions.
- The
virtctltool, which asynchronously monitors server-side upload post-processing. It also more accurately reports the status of virtual machine disk uploads.
With these caveats in mind, let's enable OpenShift Virtualization on Red Hat OpenShift 4.4.
Step 1: Install the OpenShift Operator and CRD
First, we need to locate OpenShift Virtualization in the OpenShift OperatorHub. Enter the keyword virtualization for this search, as shown in Figure 2.

Click the tile for OpenShift Virtualization. This pops up the window shown in Figure 3 with a short introduction to OpenShift Virtualization, including its description, the current version, the repository, and so on. Click Install to continue.

As shown in Figure 4, the next screen asks whether you want to subscribe to OpenShift Virtualization. Note that on this screen, you can change the version of OpenShift Virtualization and the namespace/project where you want to install your OpenShift Virtualization instance. If you have not created a namespace previously, a new namespace called openshift-cnv will be created, and it will be the default namespace for your OpenShift Virtualization deployment. (I did not create a new namespace, so I will leave everything as it is.) Click Subscribe to continue.

Operator-based installation
Red Hat OpenShift 4 uses Operator-based installation, so the OpenShift Virtualization Operator gathers all of the resources and requirements to prepare for the OpenShift Virtualization setup. After waiting for the magic moment, you will see the installation status for your OpenShift Virtualization Operator change to Succeeded, as shown in Figure 5.

Some Kubernetes and OpenShift Operators, like Red Hat CodeReady Workspaces, do not immediately initiate deployment. The OpenShift Virtualization Operator begins deploying pods immediately after you complete the Operator subscription. Checking for Workloads --> Pods is a good way to confirm the successful subscription before moving on, as shown in Figure 6.

Step 2: Create a hyperconverged cluster
In this step, we will install a hyperconverged cluster. Paraphrasing from Wikipedia:
Hyperconverged clusters include a hypervisor for virtualized computing, software-defined storage, and virtualized networking, and they typically run on standard, off-the-shelf servers.
Now, let's go back to our installed OpenShift Virtualization in Installed Operators and click on it. You will once again see the overview of OpenShift Virtualization's Operator, including its provider APIs, the documentation link, and actions that you can perform. We are interested in the OpenShift Virtualization Operator Deployment action, so let's click that tab, which is shown in Figure 7.

As displayed in Figure 8, there is only one option on this screen, so go ahead and click the Create HyperConverged Cluster button.

Next, you will see the custom resource definition (CRD) file for a HyperConverged cluster. The CRD extends the API with the custom resource concept. It is a stable object that developers can use to create custom controllers and Operators. For a project like OpenShift Virtualization, which is based on KubeVirt, a CRD is an interface for instructing VMs to run on the Kubernetes platform.
As shown in Figure 9, ensure that the file name is kubevirt-hyperconverged, then click Create to continue.

Creating the CRD essentially installs the HyperConverged cluster. That's not so bad, is it? We can now check our pods again to make sure that everything is deployed correctly, with no hiccups.

Troubleshooting pods
When you check your pods, be sure to monitor any issues that might have come up after the HyperConverged cluster installation. If you see any issues—such as pods stuck in the pending state, showing an Err Image Pull status, and so on—you can go inside the troubled pod and look at its events and logs to discover the possible cause of the problem. If there is no problem, your OpenShift Virtualization installation is done.

Step 3: Take OpenShift Virtualization for a test drive
Let's take our installed OpenShift Virtualization Operator for a short drive. I will not dive into what you can do with OpenShift Virtualization in this article, but we can at least start up a virtual machine
Under Workloads, click virtual machines. This brings up a screen where you only see one option right now, which is the Create Virtual Machine button. Clicking that button leads to a drop-down list where you are given three options: New with Wizard, Import with Wizard, and New from YAML. Select the New with Wizard option, as shown in Figure 12.

Hooray! You see a nice wizard interface where you can create your VM within OpenShift, as shown in Figure 13.

I'll introduce what you can do with Openshift Virtualization in another article soon.
Installing the virtctl CLI
Before I wrap up this article, I want to introduce virtctl, which is OpenShift Virtualization's command-line utility for managing OpenShift Virtualization resources. While you can use the OpenShift CLI to manage these OpenShift resources, virtctl lets you interact with the VMs provisioned in an OpenShift or Kubernetes cluster.
In a CentOS- or Red Hat Enterprise Linux (RHEL)-based environment, you can easily use the subscription manager to install virtctl:
subscription-manager repos --enable {repository}
Use one of these options for the repository:
- Red Hat Enterprise Linux 8 repository:
cnv-2.4-for-rhel-8-x86_64-rpms - Red Hat Enterprise Linux 7 repository:
rhel-7-server-cnv-2.4-rpms
Installing virtctl on other platforms
What if you are using an operating system other than RHEL, like macOS, Windows, or another Linux platform? In that case, you can download virtctl and run it as an executable.
To start, locate the version of virtctl that you need from the GitHub release repository, which is shown in Figure 14.

If you have a tool like wget or curl, use the following commands to make the downloaded package executable:
$ wget -O virtctl https://github.com/kubevirt/kubevirt/releases/download/${KUBEVIRT_VERSION}/virtctl-${KUBEVIRT_VERSION}-linux-amd64

$ chmod +x virtctl
A macOS installation
I am using a MacBook Pro, so I decided to download virtctl manually. Once I downloaded it, I renamed the file to virtctl and placed it under a designated directory, as shown in Figure 15.
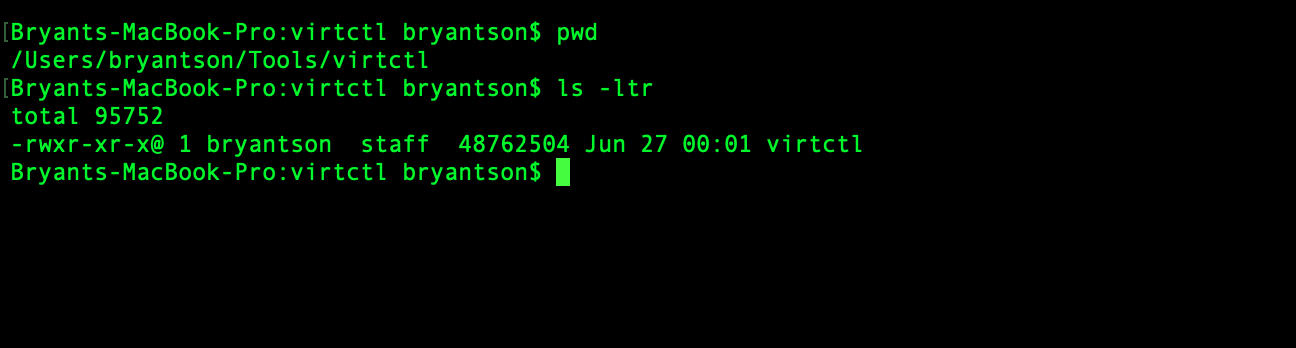
You can make the downloaded file executable by entering the command: chmod +x ./virtctl.
After that, grab the path and export it in ~/.bashrc, as shown in Figure 16. Once you've done that, virtctl will be available everywhere by just typing virtctl.

Figure 17 shows what happens when I enter the ~/.bashrc command followed by virtctl:

virtctl to execute the utility.Conclusion
I hope this article helped you understand what OpenShift Virtualization is and how you can enable it for Red Hat OpenShift. Look for my next article, where we'll dive into what you can do with OpenShift Virtualization.
Last updated: December 1, 2023