Ansible, a powerful automation tool, simplifies configuration management, application deployment, and infrastructure provisioning. When it comes to developing Ansible Playbooks and managing infrastructure, having a well-configured development environment can greatly enhance productivity. In this technical article, we will explore how to set up an Ansible development environment in the popular Visual Studio Code (VS Code) IDE.
Prerequisites
- Install Ansible Automation Platform
- Install
ansible-navigatoron your system - Install Podman or Podman Desktop
- Pulled down execution environment using Podman
- Install Git
Why VS Code for Ansible Development Environment?
The Ansible Language Server extension:
- Provides syntax highlighting
- Autocompletion (including with FQCN)
- Easy jump to module code/documentation
- Can leverage my execution environment
Follow this blog for instructions on how to install ansible-navigator. When the installation is complete, make sure you have to pull one of the following images.
podman pull registry.redhat.io/ansible-automation-platform-22/ee-supported-rhel8:latestThe above image requires a subscription on Ansible Automation Platform. Refer to the following article: How to install Microsoft SQL on RHEL using ansible-navigator
podman pull quay.io/ansible/creator-ee:latestBut this image is open to anyone. Like open source.
You can use any image for your execution environment.
Verify images are successfully pulled in your system using the following command.
podman imagesExtension installation
In the VS Code Extensions tab, search for and install Ansible as shown in Figure 1.
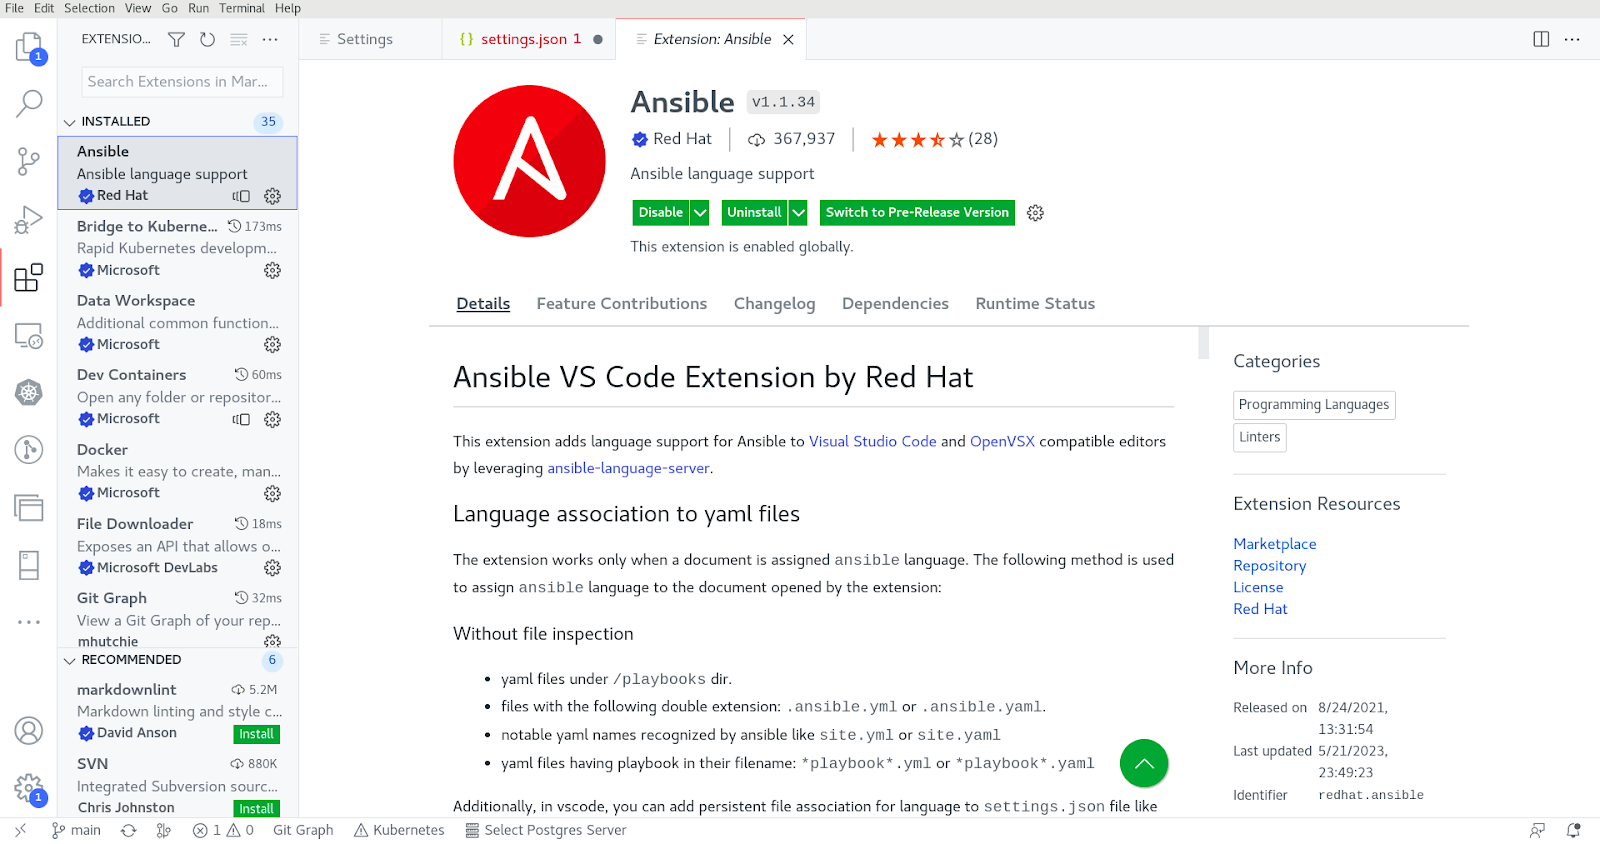
Ansible extension settings
As part of the Ansible extension, several configuration options are available, including the ability to change the executable path for Ansible, Ansible lint, the Python interpreter, etc. Furthermore, users can choose the container engine, image name, pull policy, and more when enabling the automation execution environment. To see and change the configuration options in the VS Code window, go to Code -> Preference -> Settings and in the Search settings box type Ansible as shown in Figure 2.
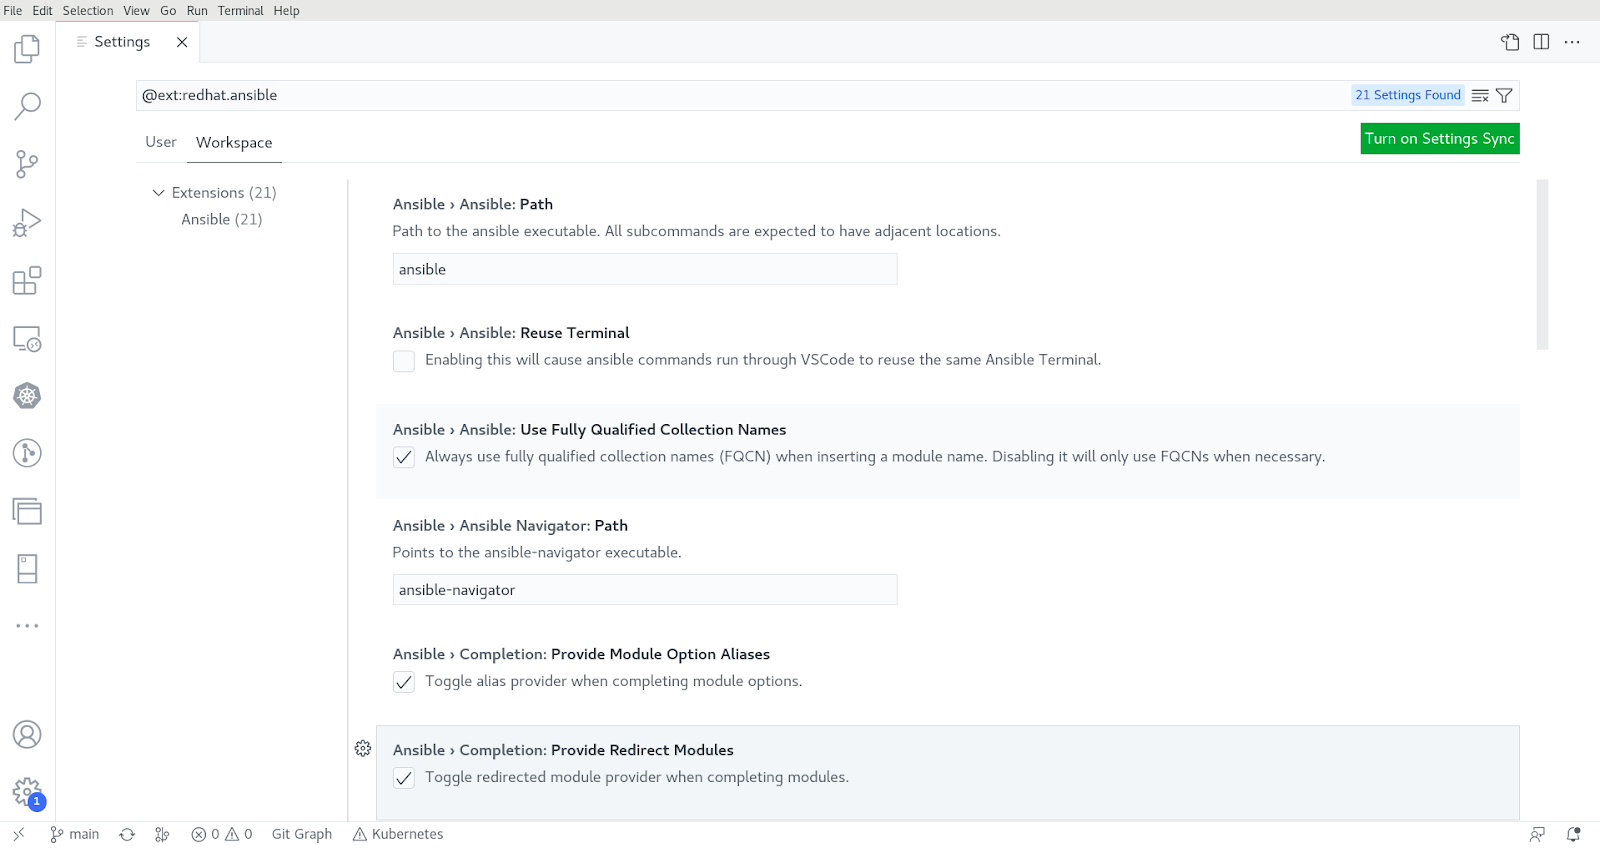
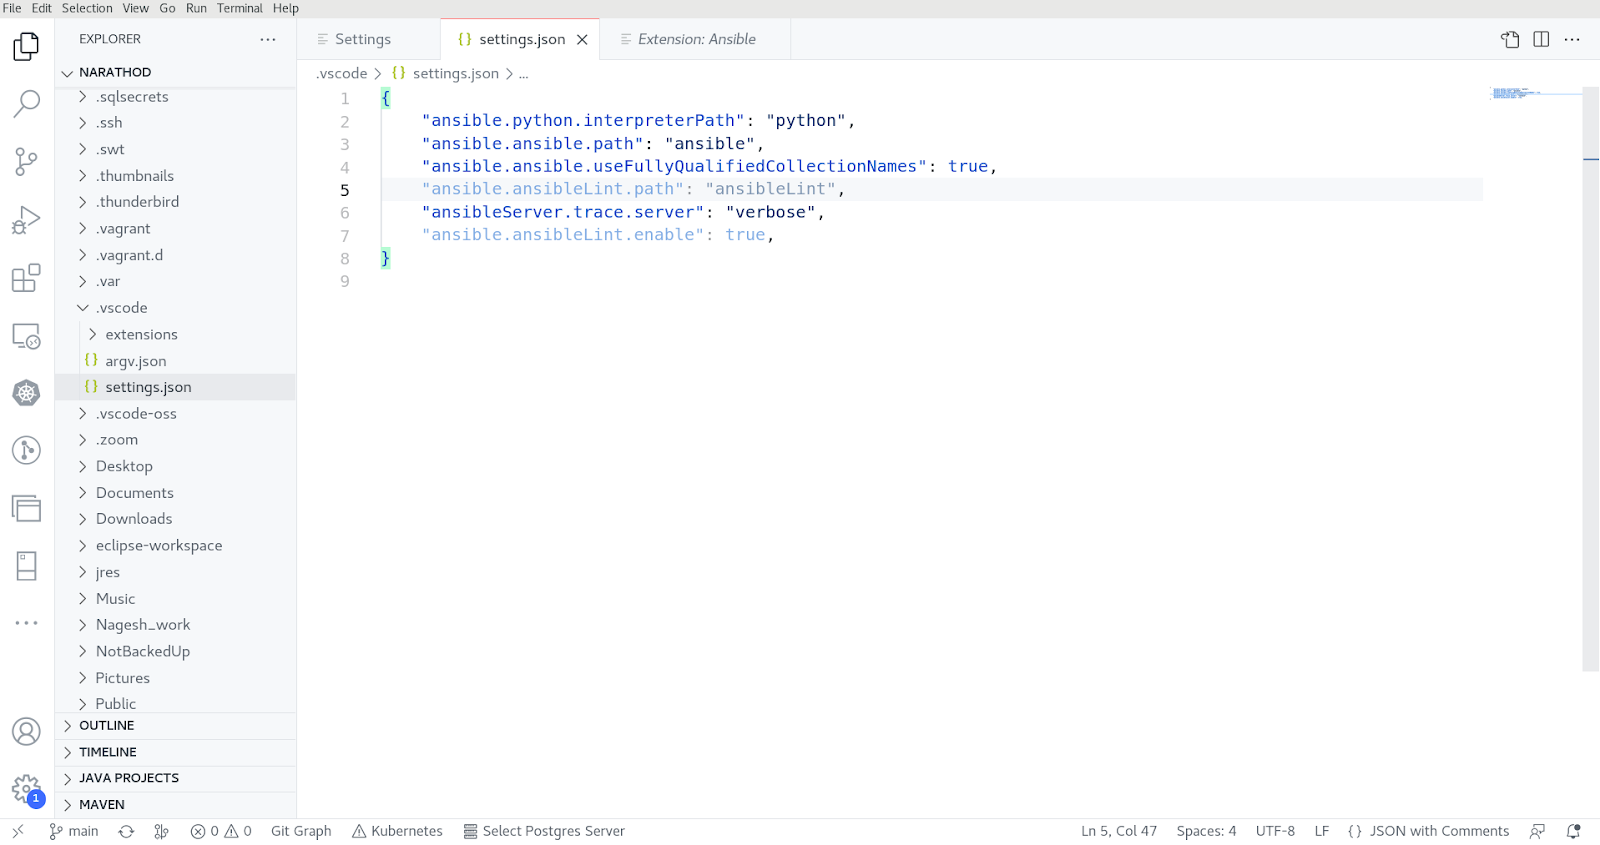
It is possible to set preferences for a specific user or workspace, as well as remote types and workspace folders, depending on the environment. Settings in the user scope will be applied globally to any VS Code instance opened. Workspace scoped settings will be stored inside your workspace and only applied when the current workspace is opened. For more information, refer to the VS Code documentation here. You can also edit the .vscode/settings.json file within the workspace root folder to provide the Ansible settings for workspace settings. See Figure 3 below.
Activating and using Ansible extension
As mentioned above, the vscode-ansible extension depends on the ansible-language-server running as a background process for features like auto-completion, hover, diagnostics, and go-to. In addition to auto-completion and diagnostics information for other related YAML files such as Ansible vars, ansible-navigator settings, ansible-galaxy requirements, ansible-lint configuration and other YAML files, this extension depends on the Red Hat vscode-yaml extension. The extension uses file pattern match to associate the file with the YAML language.
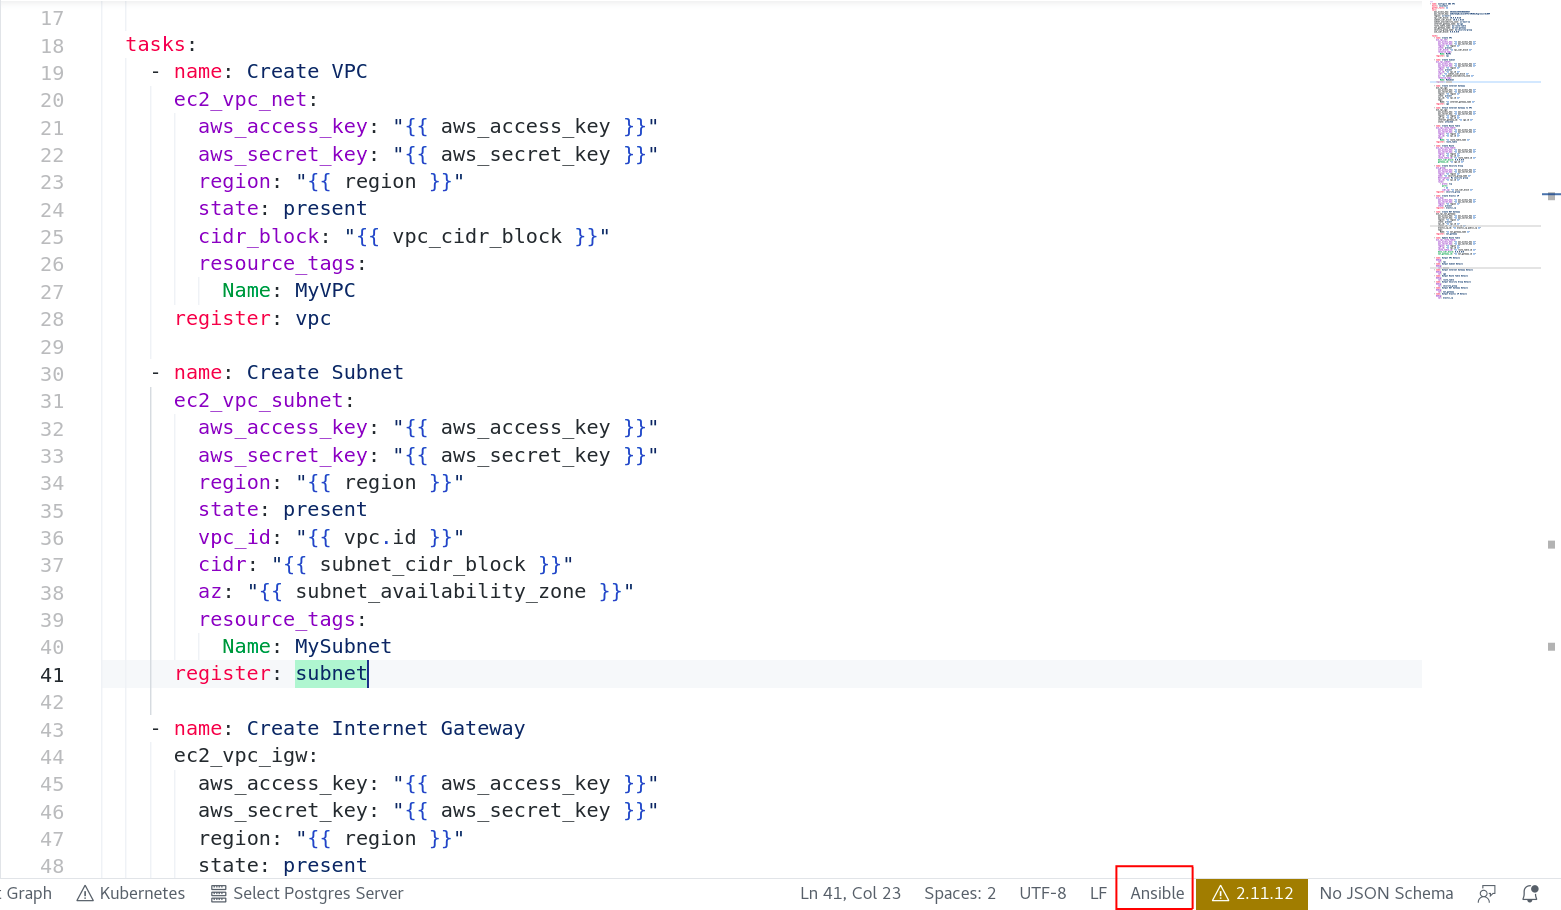
After activating the Ansible extension, you might notice issues like the extension not detecting Ansible Playbooks; instead it detects as yaml or yml format, which is totally fine. See Figure 4.
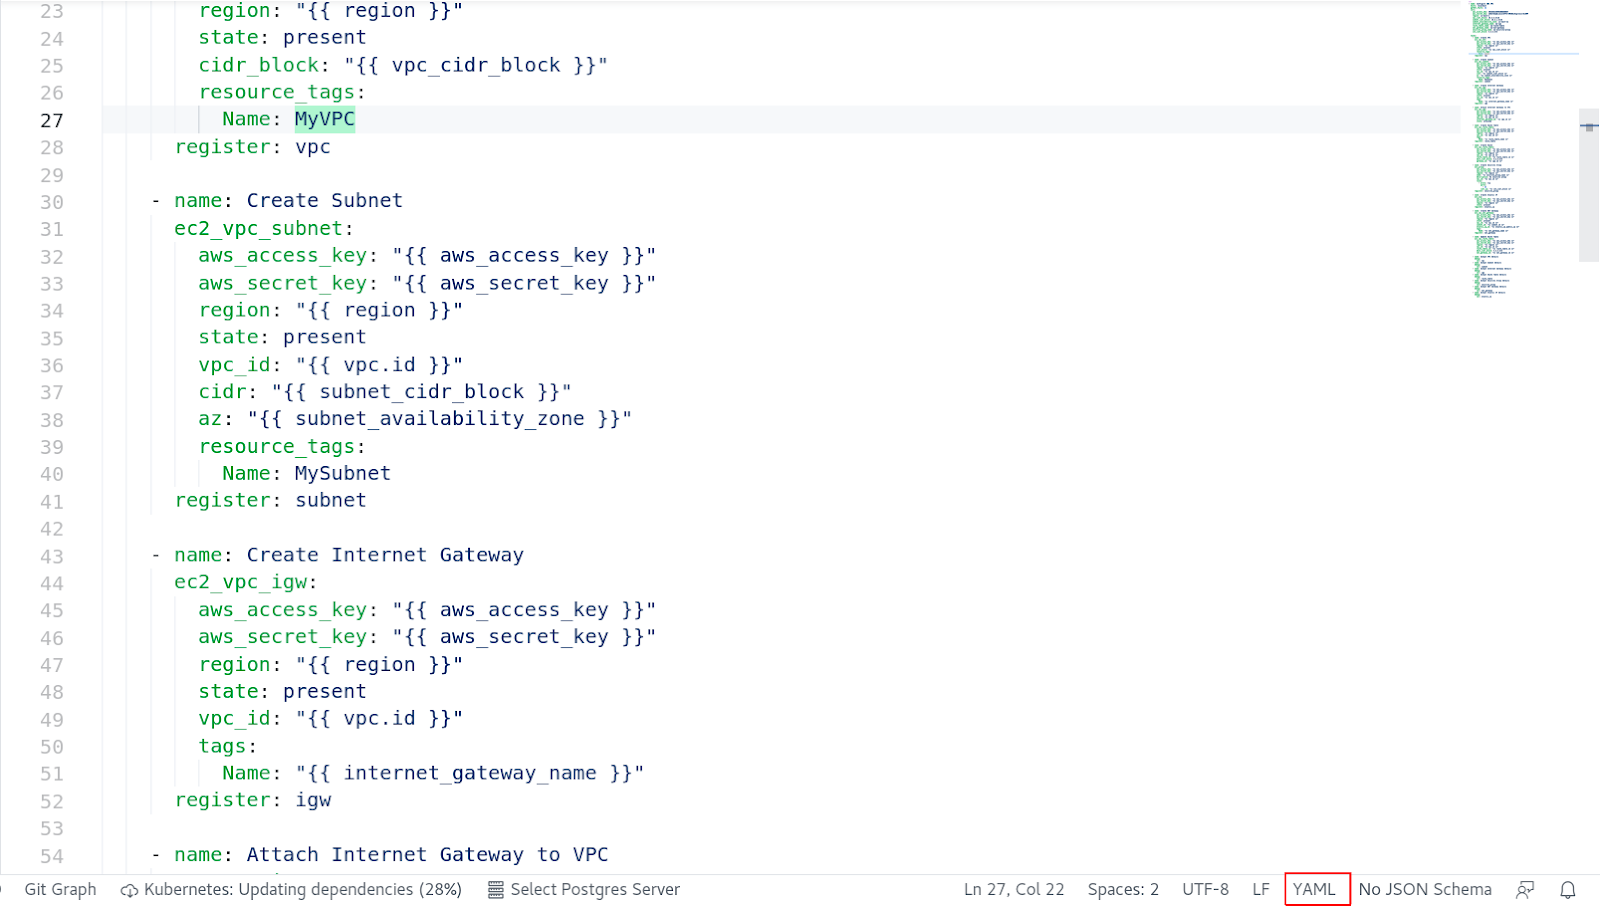
In the bottom right corner, hover your cursor over the language (YAML in this case) to see Select Language Mode. When you click the language name (YAML), a drop-down menu will open; type Ansible into the tab and select it. After doing this, you will notice the identified language for the file is changed to Ansible, as shown in Figure 5.
The file identified as an Ansible language first time, the Ansible extension on VS Code will run the process in background to do auto-completion, hover, and diagnostics in the file as you type or hover within the file. The diagnostics information will be available in the PROBLEM tab which is beside the TERMINAL tab. After installation and once enabled, the language server will run ansible-lint by default to generate diagnostics information on the open file. If ansible-lint is not installed, the server will run ansible-playbook–syntax-check to generate diagnostics information
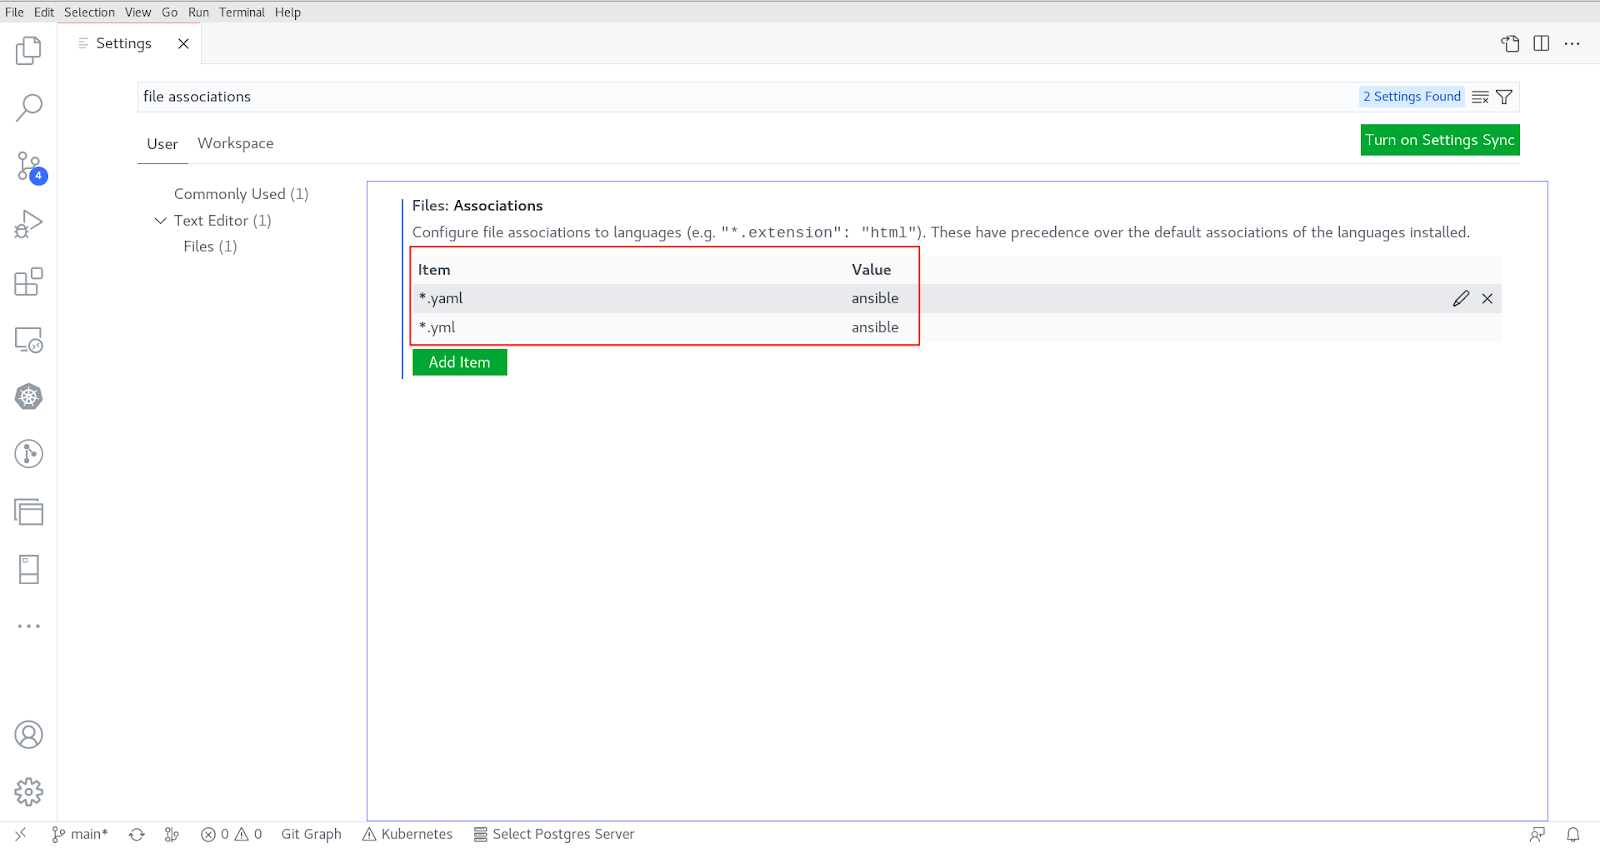
Before changing the above setting to every file, set it for all files by clicking on Code -> Preferences -> Settings and typing file associations in the search box. Add the items in extension with the language type as shown in Figure 6.
Using automation execution environments
To see the automation execution environments supported by extension, you can go to settings (Code -> Preferences -> Settings) and type ansible.execution environment. This is shown in Figure 7.
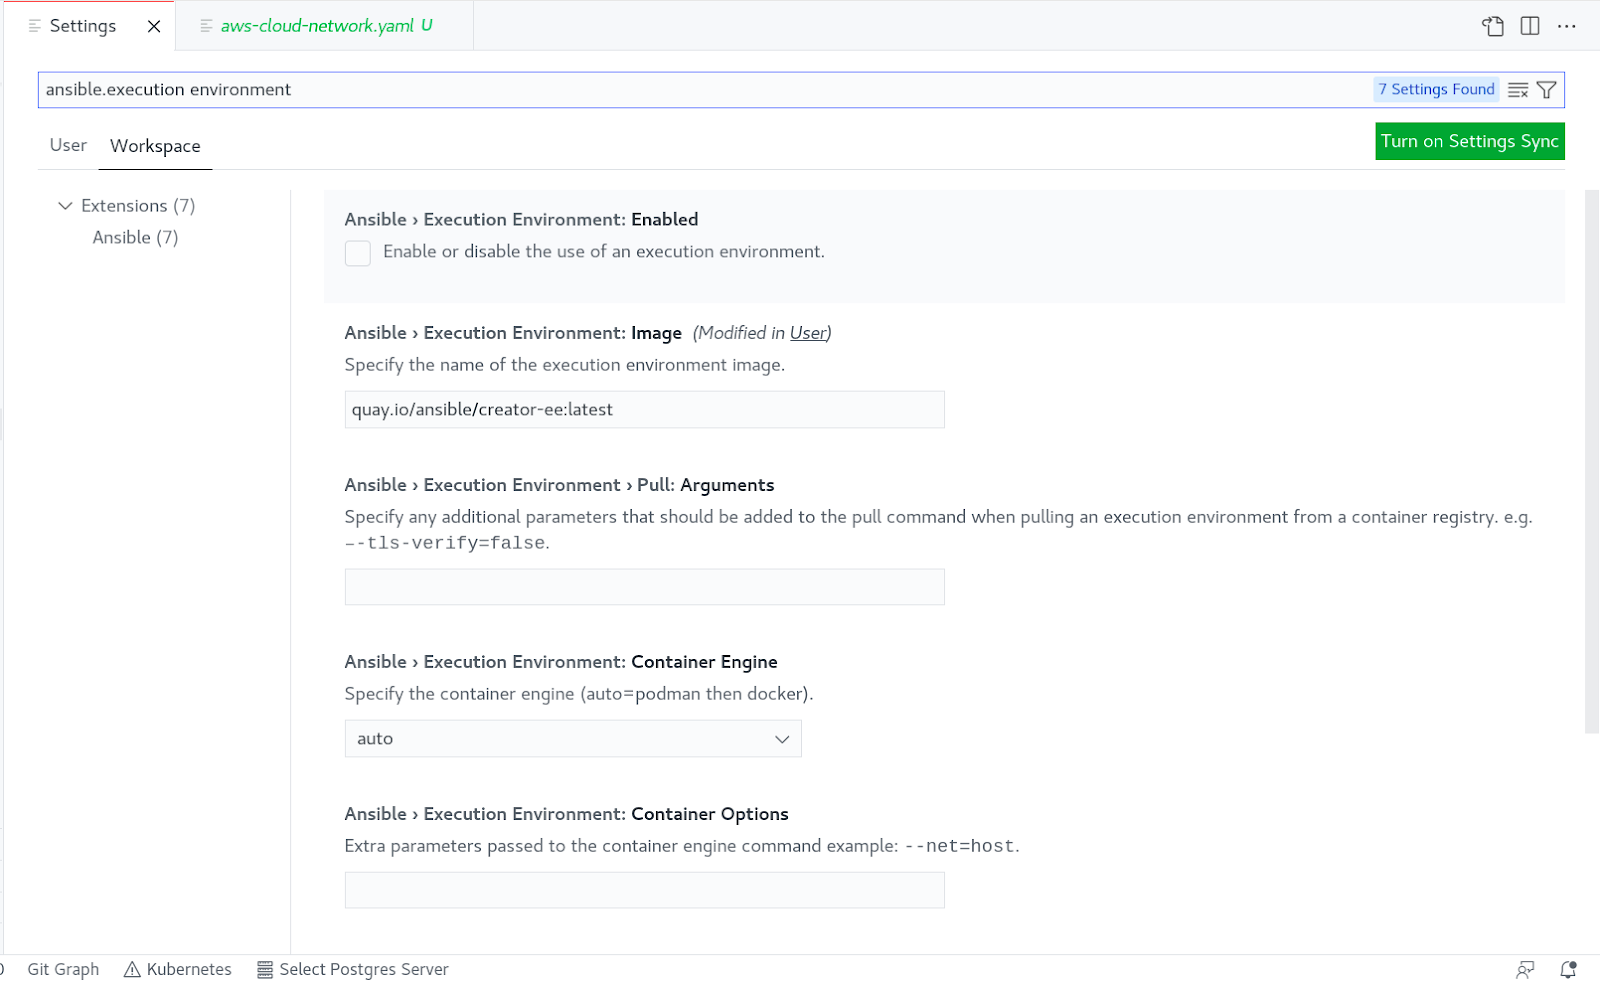
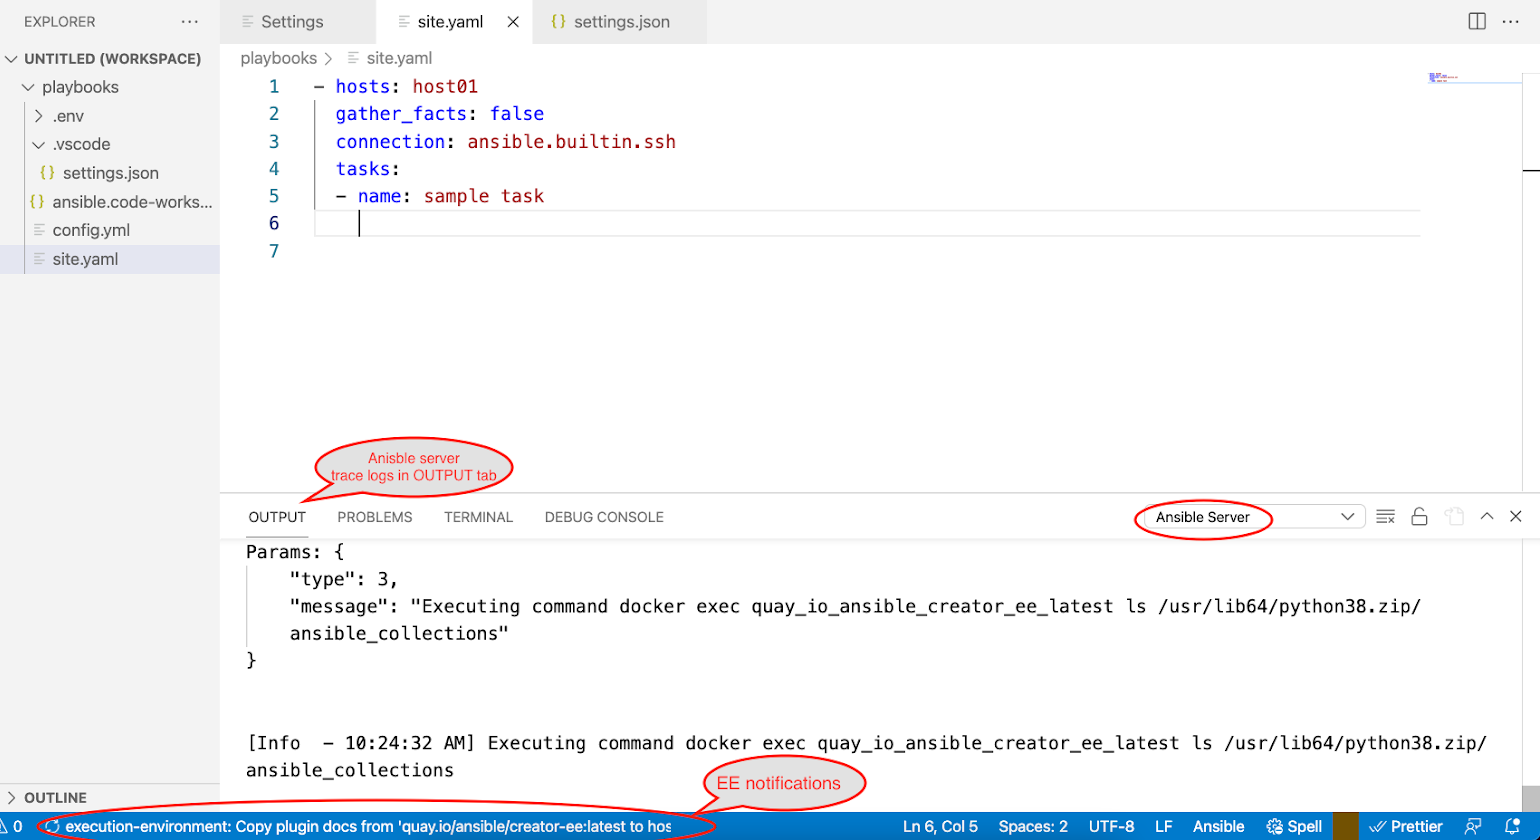
After enabling the execution environment (EE), the extension will pull the quay.io/ansible/creator-ee:latest image by default, if it is not present locally. The value of the image can be changed by providing the intended value for ansible.executionEnvironment.image setting. After the EE pull is successful, the Ansible extension will copy the plug-in's docs from within EE to the local cache folder, and it will be used to provide auto-completion, hover and go to functionality. Since the creator-ee image has ansible-lint bundled, the Ansible extension and ansible-language-server will volume mount the entire workspace within the EE and run ansible-lint or ansible-playbook—syntax-check based on settings to provide diagnostics information in editor. This process is shown in Figure 8.
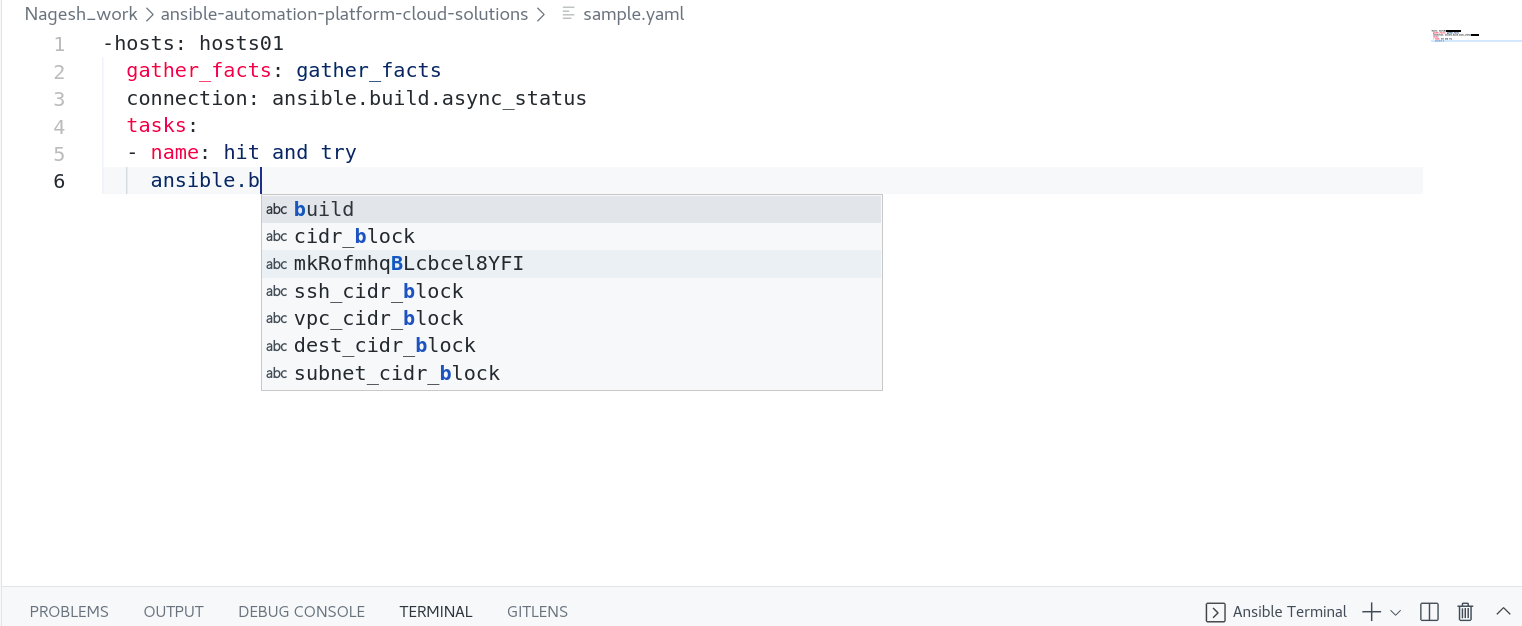
The auto-completions will now provide suggestions for plugins that are part of the given execution environment image name, as depicted in Figure 9.
Ansible Playbook run entry point
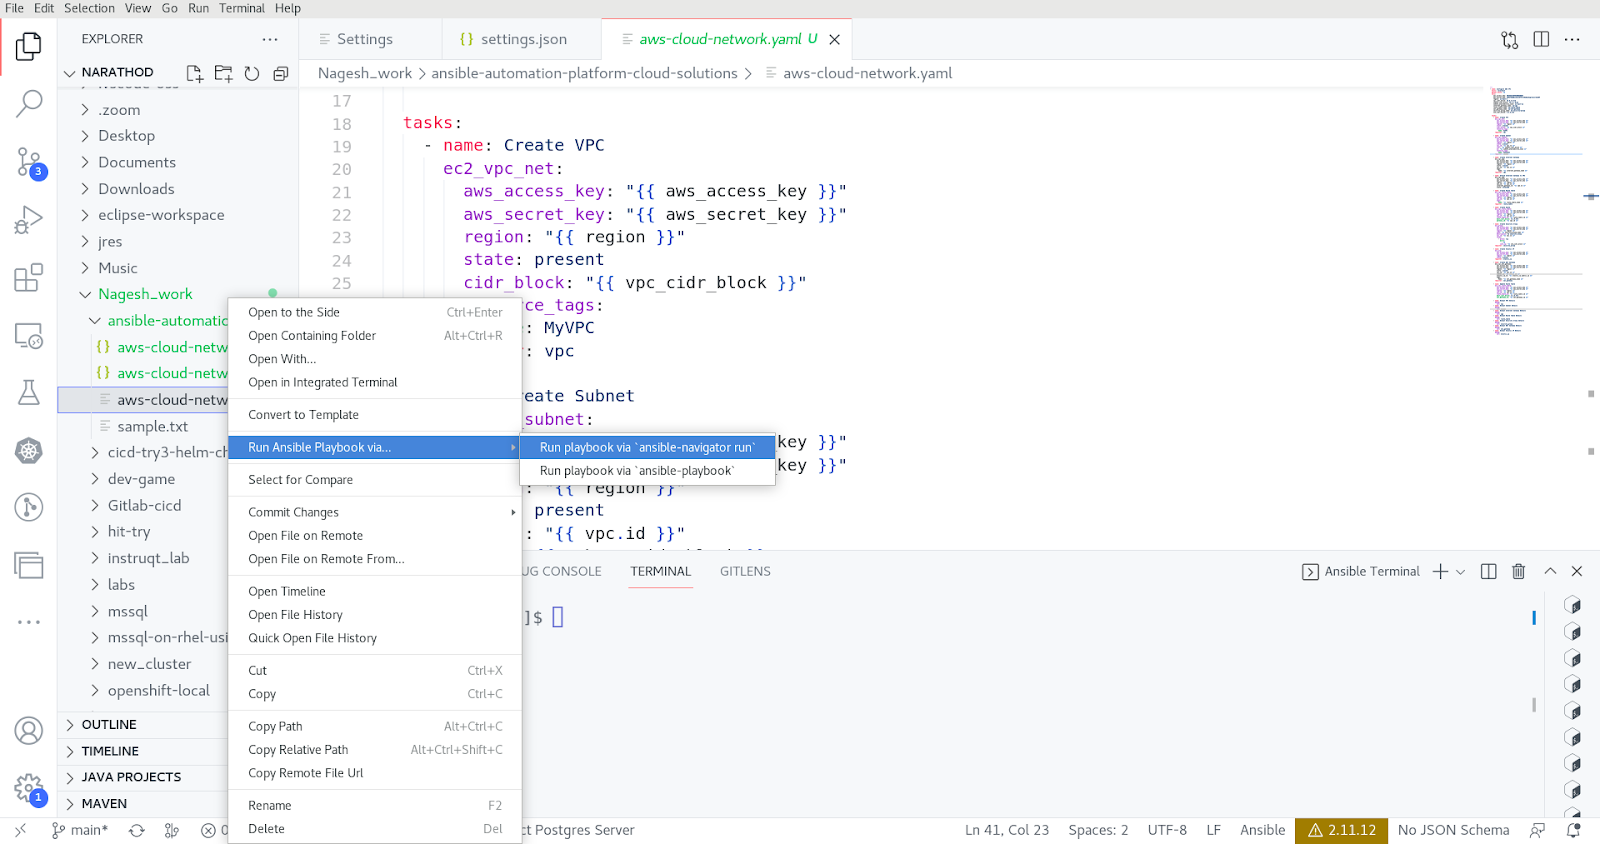
The extension also provides an option to run an Ansible Playbook from within the extension, either using ansible-navigator run or ansible-playbook command as shown in the below snapshot (Figure 10).
Log extraction
The Ansible Playbook logs are collected in the same directory where you keep the playbooks. You have to run the playbook with ansible-navigator, so only the logs file will generate. This is shown in Figure 11. The generated file will be in the following format:
<playbook>-artifact-<Date>-<time>.json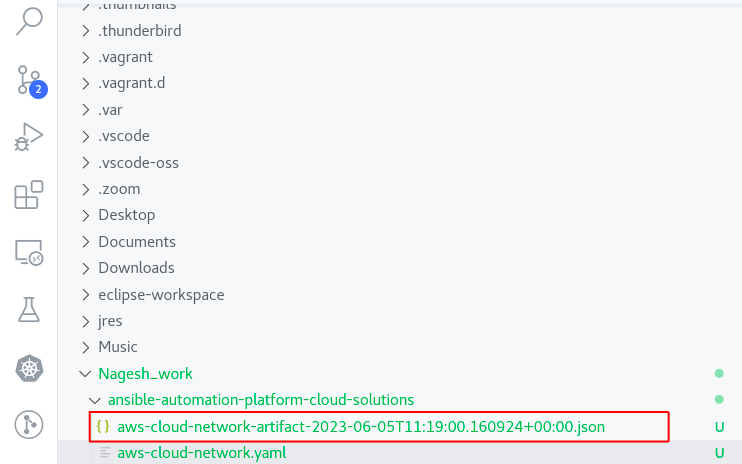
Continue your automation journey with Ansible Automation Platform
Get started with Ansible Automation Platform by exploring interactive hands-on labs. Download Ansible Automation Platform at no cost and begin your automation journey.
Last updated: December 5, 2024