In this article, we will demonstrate how to streamline the application deployment process on a Red Hat Enterprise Linux machine using Red Hat Ansible Automation Platform.
Prerequisites
- Two local VM’s configured with SSH connectivity.
- Bridged networking enabled for the VMs.
- Ansible Automation Platform installed on the host VM.
Our VMs are named vm1-host and vm2 respectively. Edit the /etc/hosts file on vm1-host to include the other VM as a device on the network. You can find its IP by using the command ip -a and then checking the inet address. In my case, it was the following address:
192.168.17.4 vm2
You can try the following command to ping the other VM to check if the connection works.
ping vm2
After that, enable SSH and copy them to all the VMs using the following commands:
ssh-keygen
ssh-copy-id vm2
Now, once SSH is enabled and the machine is reachable from our host, we can start writing our inventory and playbook file. You can copy the inventory and playbook file from my Github.
The playbook file looks like this:
---
- hosts: webstack
  become: true
  tasks:
  - name: Installing podman
    package:
      name: "podman"
      state: present

  - name: Pull an image
    containers.podman.podman_image:
      name: docker.io/httpd

  - name: run httpd container
    containers.podman.podman_container:
      name: webserver
      image: httpd
      state: started
      detach: true
      expose:
        - 80
      ports:
        - 8080:80
Our main tasks are as follows:
- Installing Podman on the webstack servers.
- Pulling a httpd image using the containers.podman.podman_image module.
- Running the httpd image in Podman and exposing it on port 8080 on localhost.
Upload these files to some source control (GitHub or GitLab) so that we can access them in our project later.
Also, running the containers.podman.podman_image module requires us to have it installed in our execution environment. First we need to have a Red Hat registry service account. Login to your registry account using podman as follows:
podman login registry.redhat.io
Username: {REGISTRY-SERVICE-ACCOUNT-USERNAME}
Password: {REGISTRY-SERVICE-ACCOUNT-PASSWORD}
Login Succeeded!
Then, we must write a container file to help build our execution environment that has this module:
FROM FROM registry.redhat.io/ansible-automation-platform-23/ee-minimal-rhel8:latest
RUN ansible-galaxy collection install containers.podman
COPY hosts /etc/hosts
To build an image using podman:
podman build -t <image-name>.
The image should be pushed into the container image registry such as quay.io. Log in to the private container image registry using the command podman login before pushing.
podman push <image-name>
Make sure Ansible Automation Platform is installed on your system. You can follow the instructions in the article, 6 steps to install Ansible Automation Platform 2.3 on RHEL. For now, we will be installing it on the localhost because our entire network is on our machine itself in VMs. For production environments, changes might be needed in the installation inventory file.
Navigate to https://localhost and log in to the dashboard.
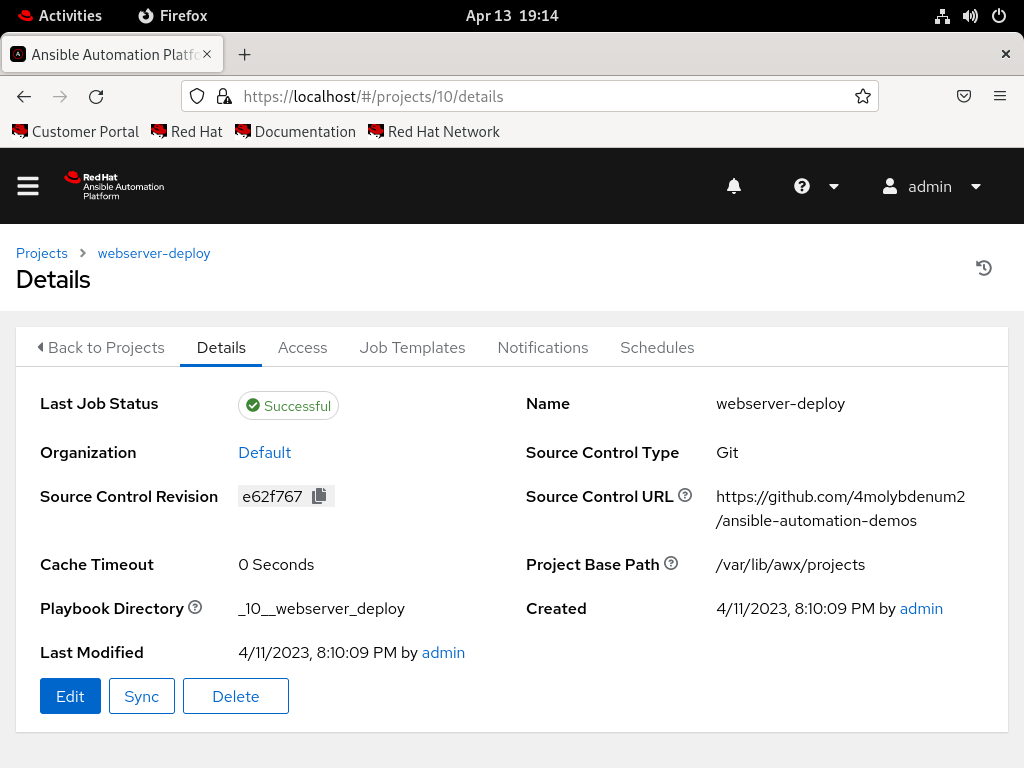
Create a new project
A project is a collection of Ansible Playbooks that perform a certain set of automated tasks. Our project will contain our single playbook which will download and deploy a httpd server on a VM.
Steps to create a new project:
- Head over to the Projects tab.
- Click on the Add option and then select a name for the project and select the default organization.
- Save the project.
- Figure 1 shows the project details page.
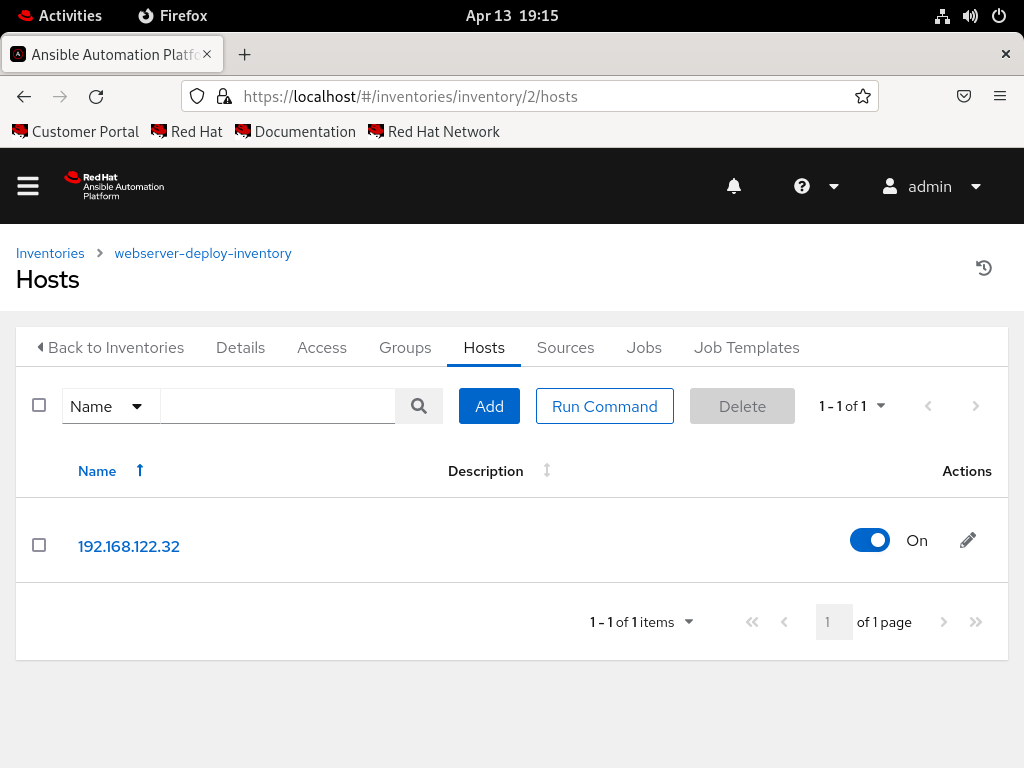
Steps to create an inventory:
- Create an inventory from the inventories tab and add a group named webstack.
- Navigate to the created group.
- Click on the Related Groups tab and add the second group webservers.
- Figure 2 shows the inventory details page.

Head back to the inventory edit page and navigate to the Hosts tab and add a host with the name as the IP address of vm2 (Figure 3).
Steps to add a credential for the VMs:
- Navigate to the Credential tab and add a credential with type Machine, username and password as that of vm2 and private key as copied over from vm1-host’s file: ~/.ssh/id_rsa.
- Fill the Privilege Escalation password with the password for vm2 which will run the commands as sudo on vm2.
- Figure 4 shows the credentials details page.

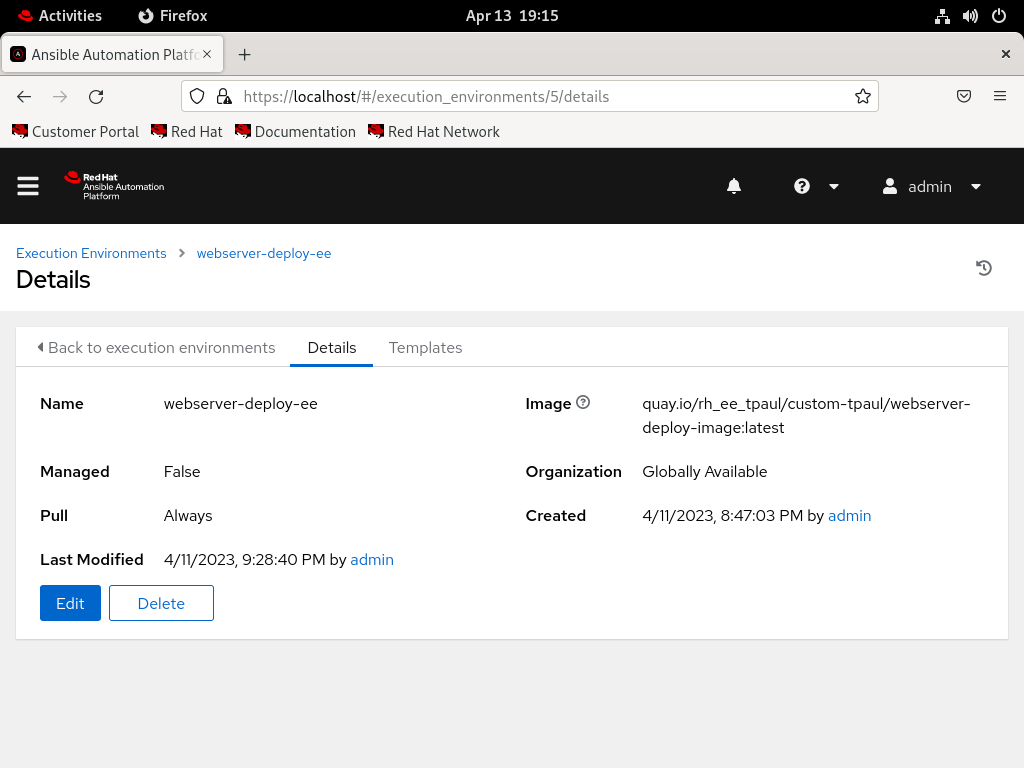
Next we add an execution environment from the left pane. We set the image URL as the one from the private registry we uploaded the EE image to and set Pull policy to Always. Figure 5 shows the execution environment details page.
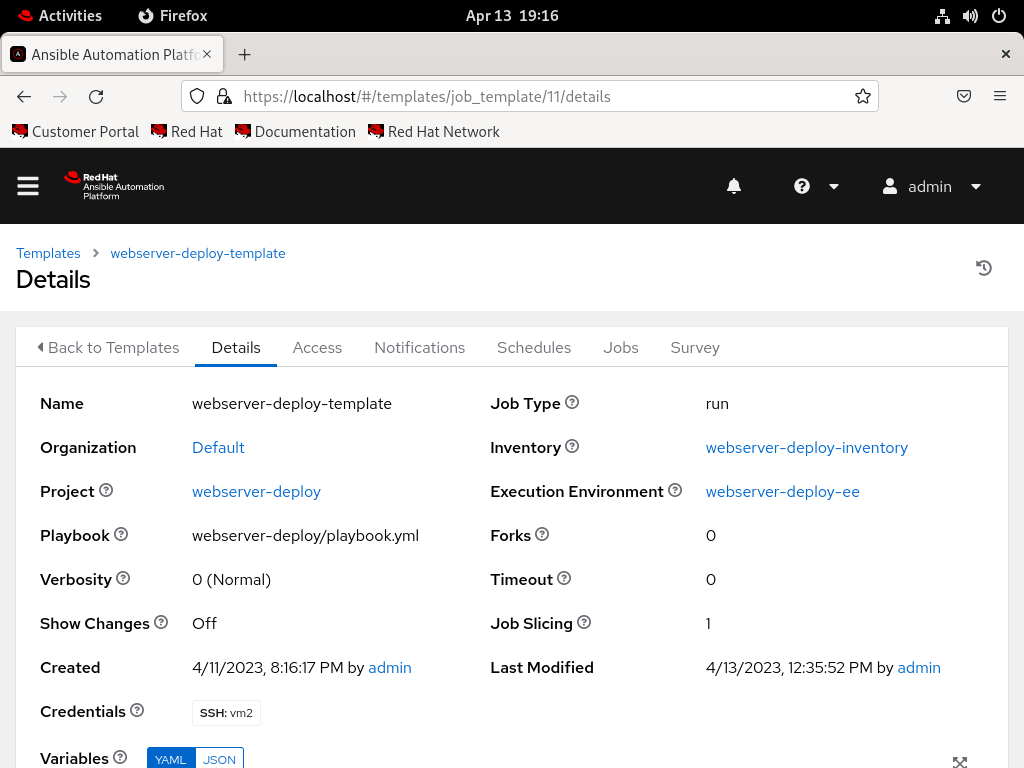
Steps to create a template:
- Head over to the Templates tab and create a new template.
- Add the project we created, and the playbook from our GitHub, or any other source control repository we uploaded the playbook to.
- Add the inventory, credentials and the execution environment fields as necessary.
- Figure 6 shows the templates details page.
We launch our template to see it running. It might take a while to pull the execution environment image. After completion, we can see that the job was executed successfully in the Jobs tab.
Head over to the vm2 machine and navigate to https://localhost:8080 to see the page that shows that it works.
Continue your automation journey with Ansible
You can get started with the Ansible Automation Platform by exploring interactive labs at Red Hat Developer. Check out Red Hat’s hands-on labs for all skill levels to learn more. The labs include a wide range of topics such as useful Linux commands, Install software using package managers, and Deploying containers using container tools [podman]. Try these labs to see your favourite products in action.
Last updated: September 21, 2023