Within the inner loop phase of application development, we’re working with continuous coding, building, and testing our application until it’s ready for staging or production. However, when we deploy to cloud-native solutions like Kubernetes or Red Hat OpenShift, this gets a bit more tricky. There are complexities in knowing Kubernetes and DevOps concepts and a steep learning curve. But that’s exactly where odo comes in. This is a developer-focused command line interface (CLI) for fast, iterative, and simplified container-based application development. Let’s take a look at how to use odo to locally deploy to Podman and then to a Kubernetes and remote OpenShift cluster.
What is odo?
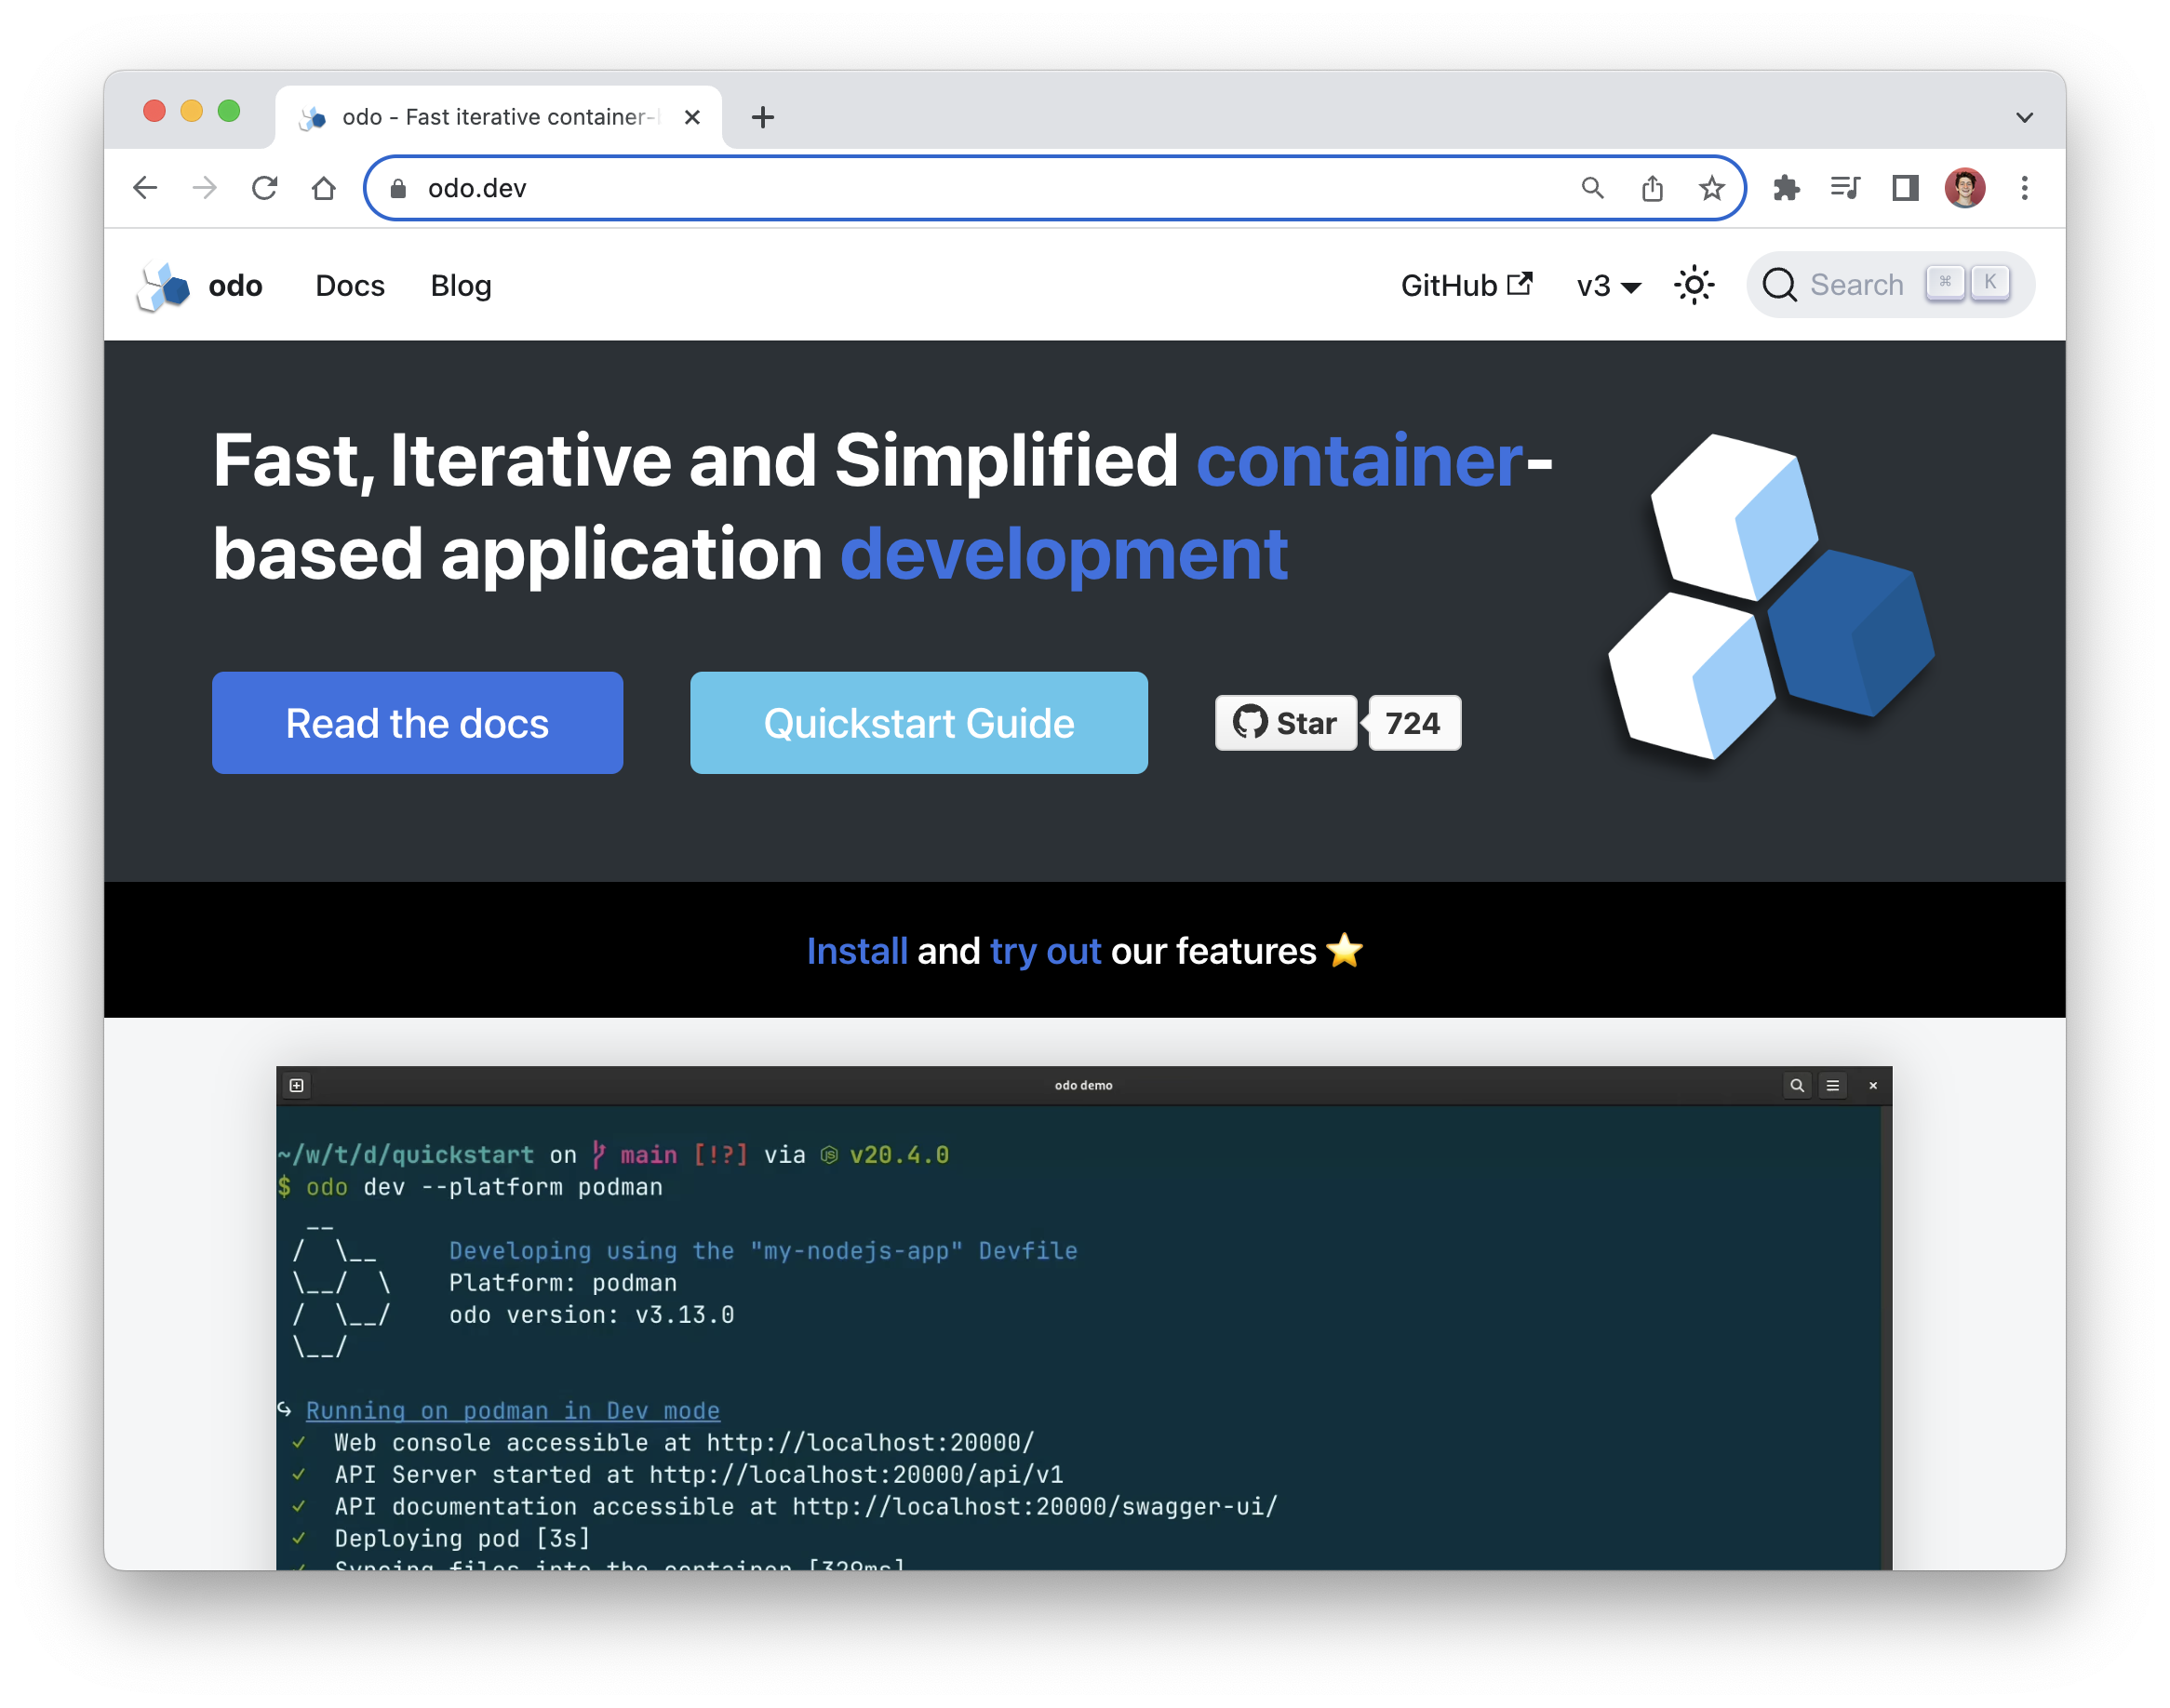
The odo open source CLI tool for rapid cloud-native development facilitates an iterative coding process on Kubernetes and OpenShift and is powered by the open Devfile standard. Specifically, odo can supercharge our path to development within a container in just two commands, odo init and odo dev, which auto-detects our source code and allows live coding. The simple syntax helps to focus on coding, abstracting all the complexities away from Kubernetes and even letting us start without a cluster by running our containerized application locally in the Podman container engine (Figure 1).
Getting started with odo
Let’s take a look at how we can easily install the odo CLI tool, then bootstrap a project using the Kubernetes-ready Quarkus Java framework and begin to see how odo helps us in the inner loop of cloud-native development without hassle.
Installing the odo CLI tool
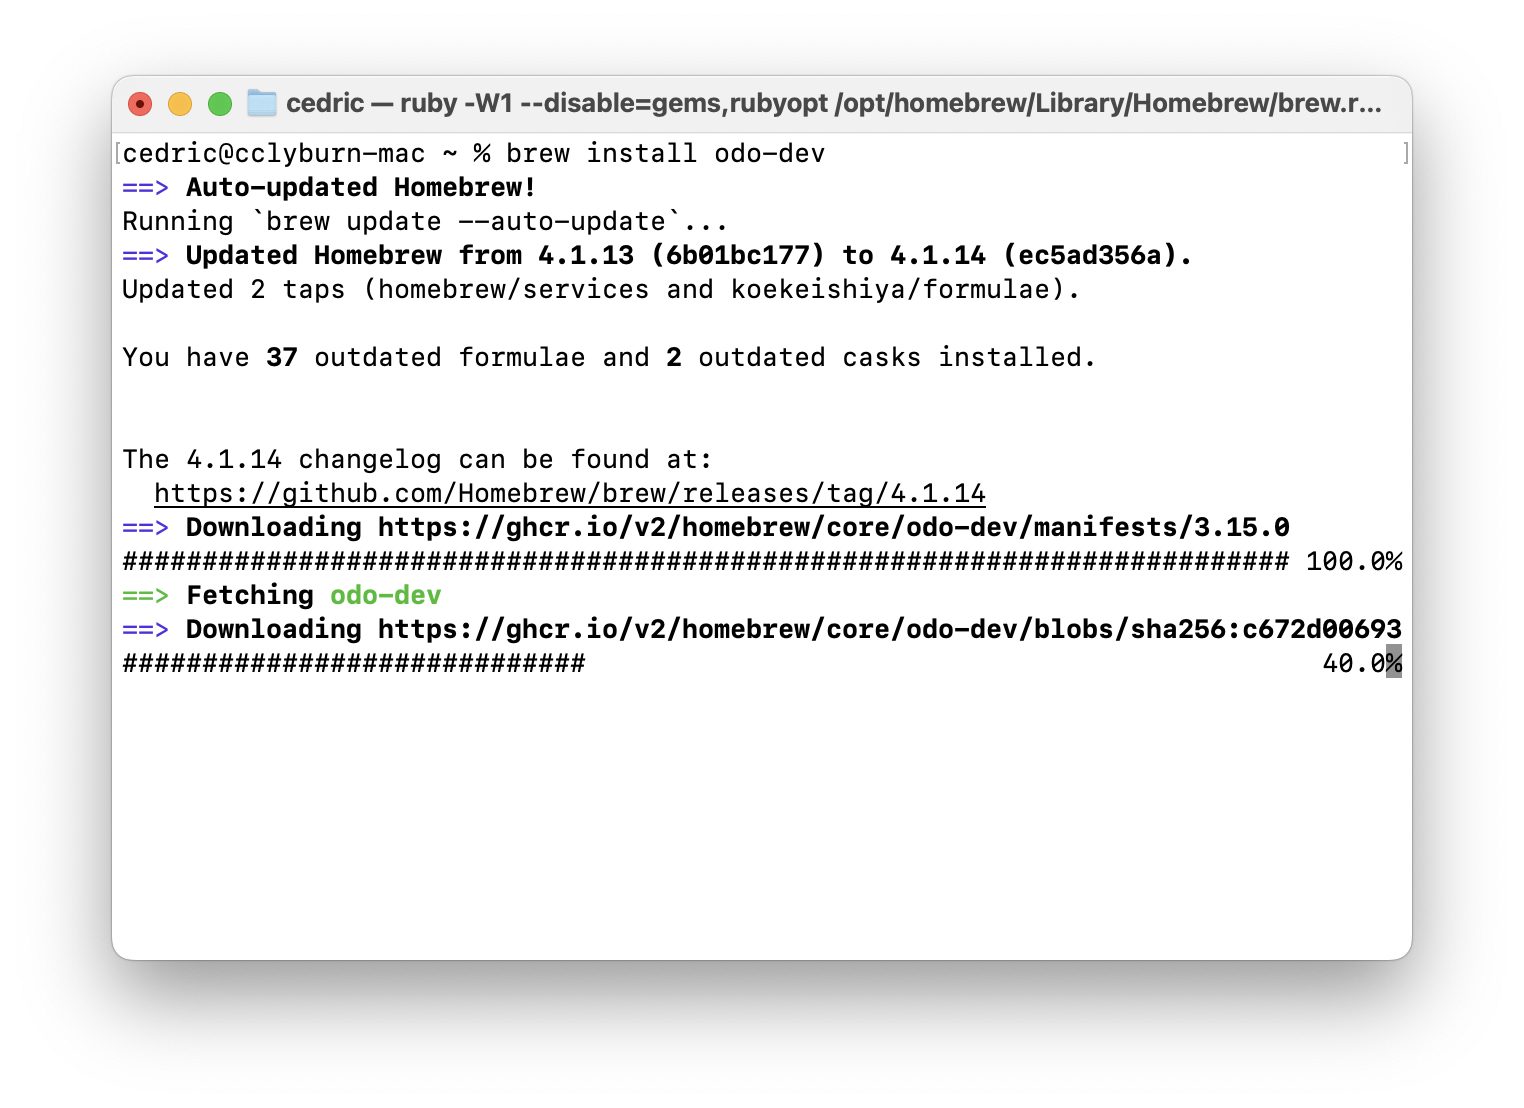
To install odo, head to the website’s installation page to learn about the process for your machine. It’s a simple binary, but being on macOS, I could easily install odo using the Homebrew package manager with brew install odo-dev (Figure 2).
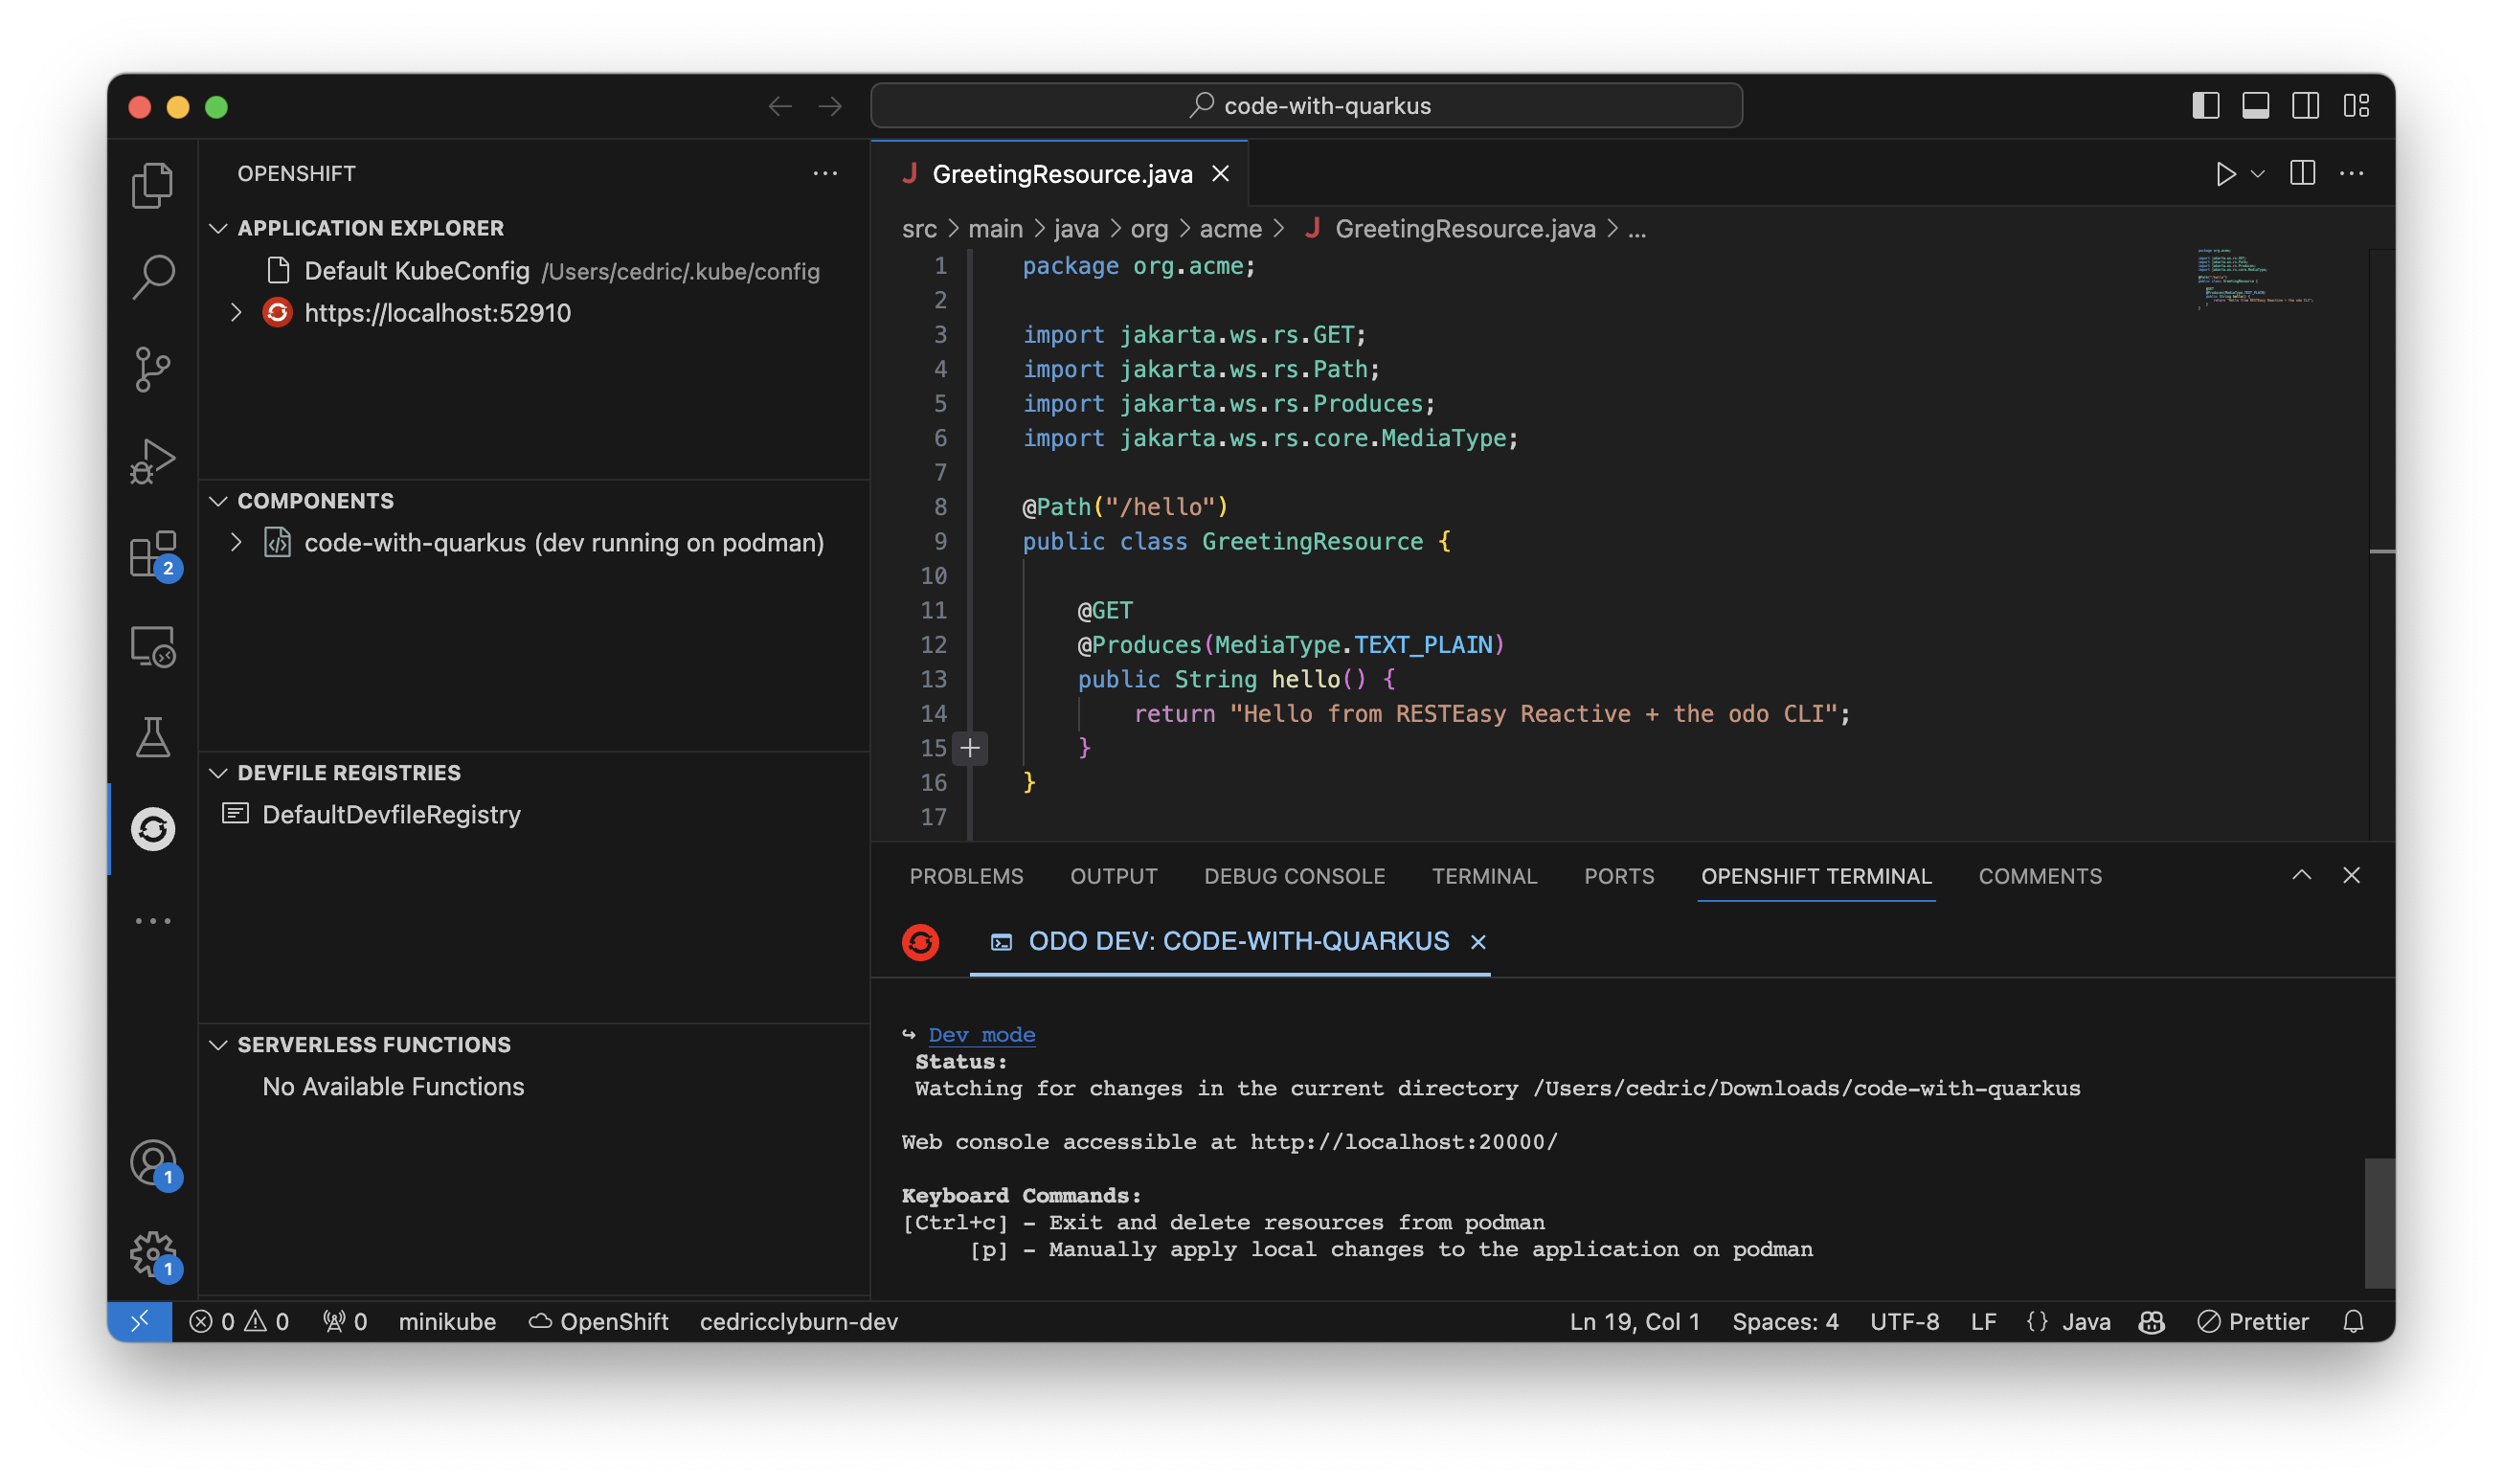
To debug and test remote applications using odo directly from your IDE, the OpenShift Toolkit for VSCode and JetBrains includes the odo binary to interact with your Kubernetes or OpenShift cluster directly, without leaving your development environment (Figure 3).
Initializing an application with odo
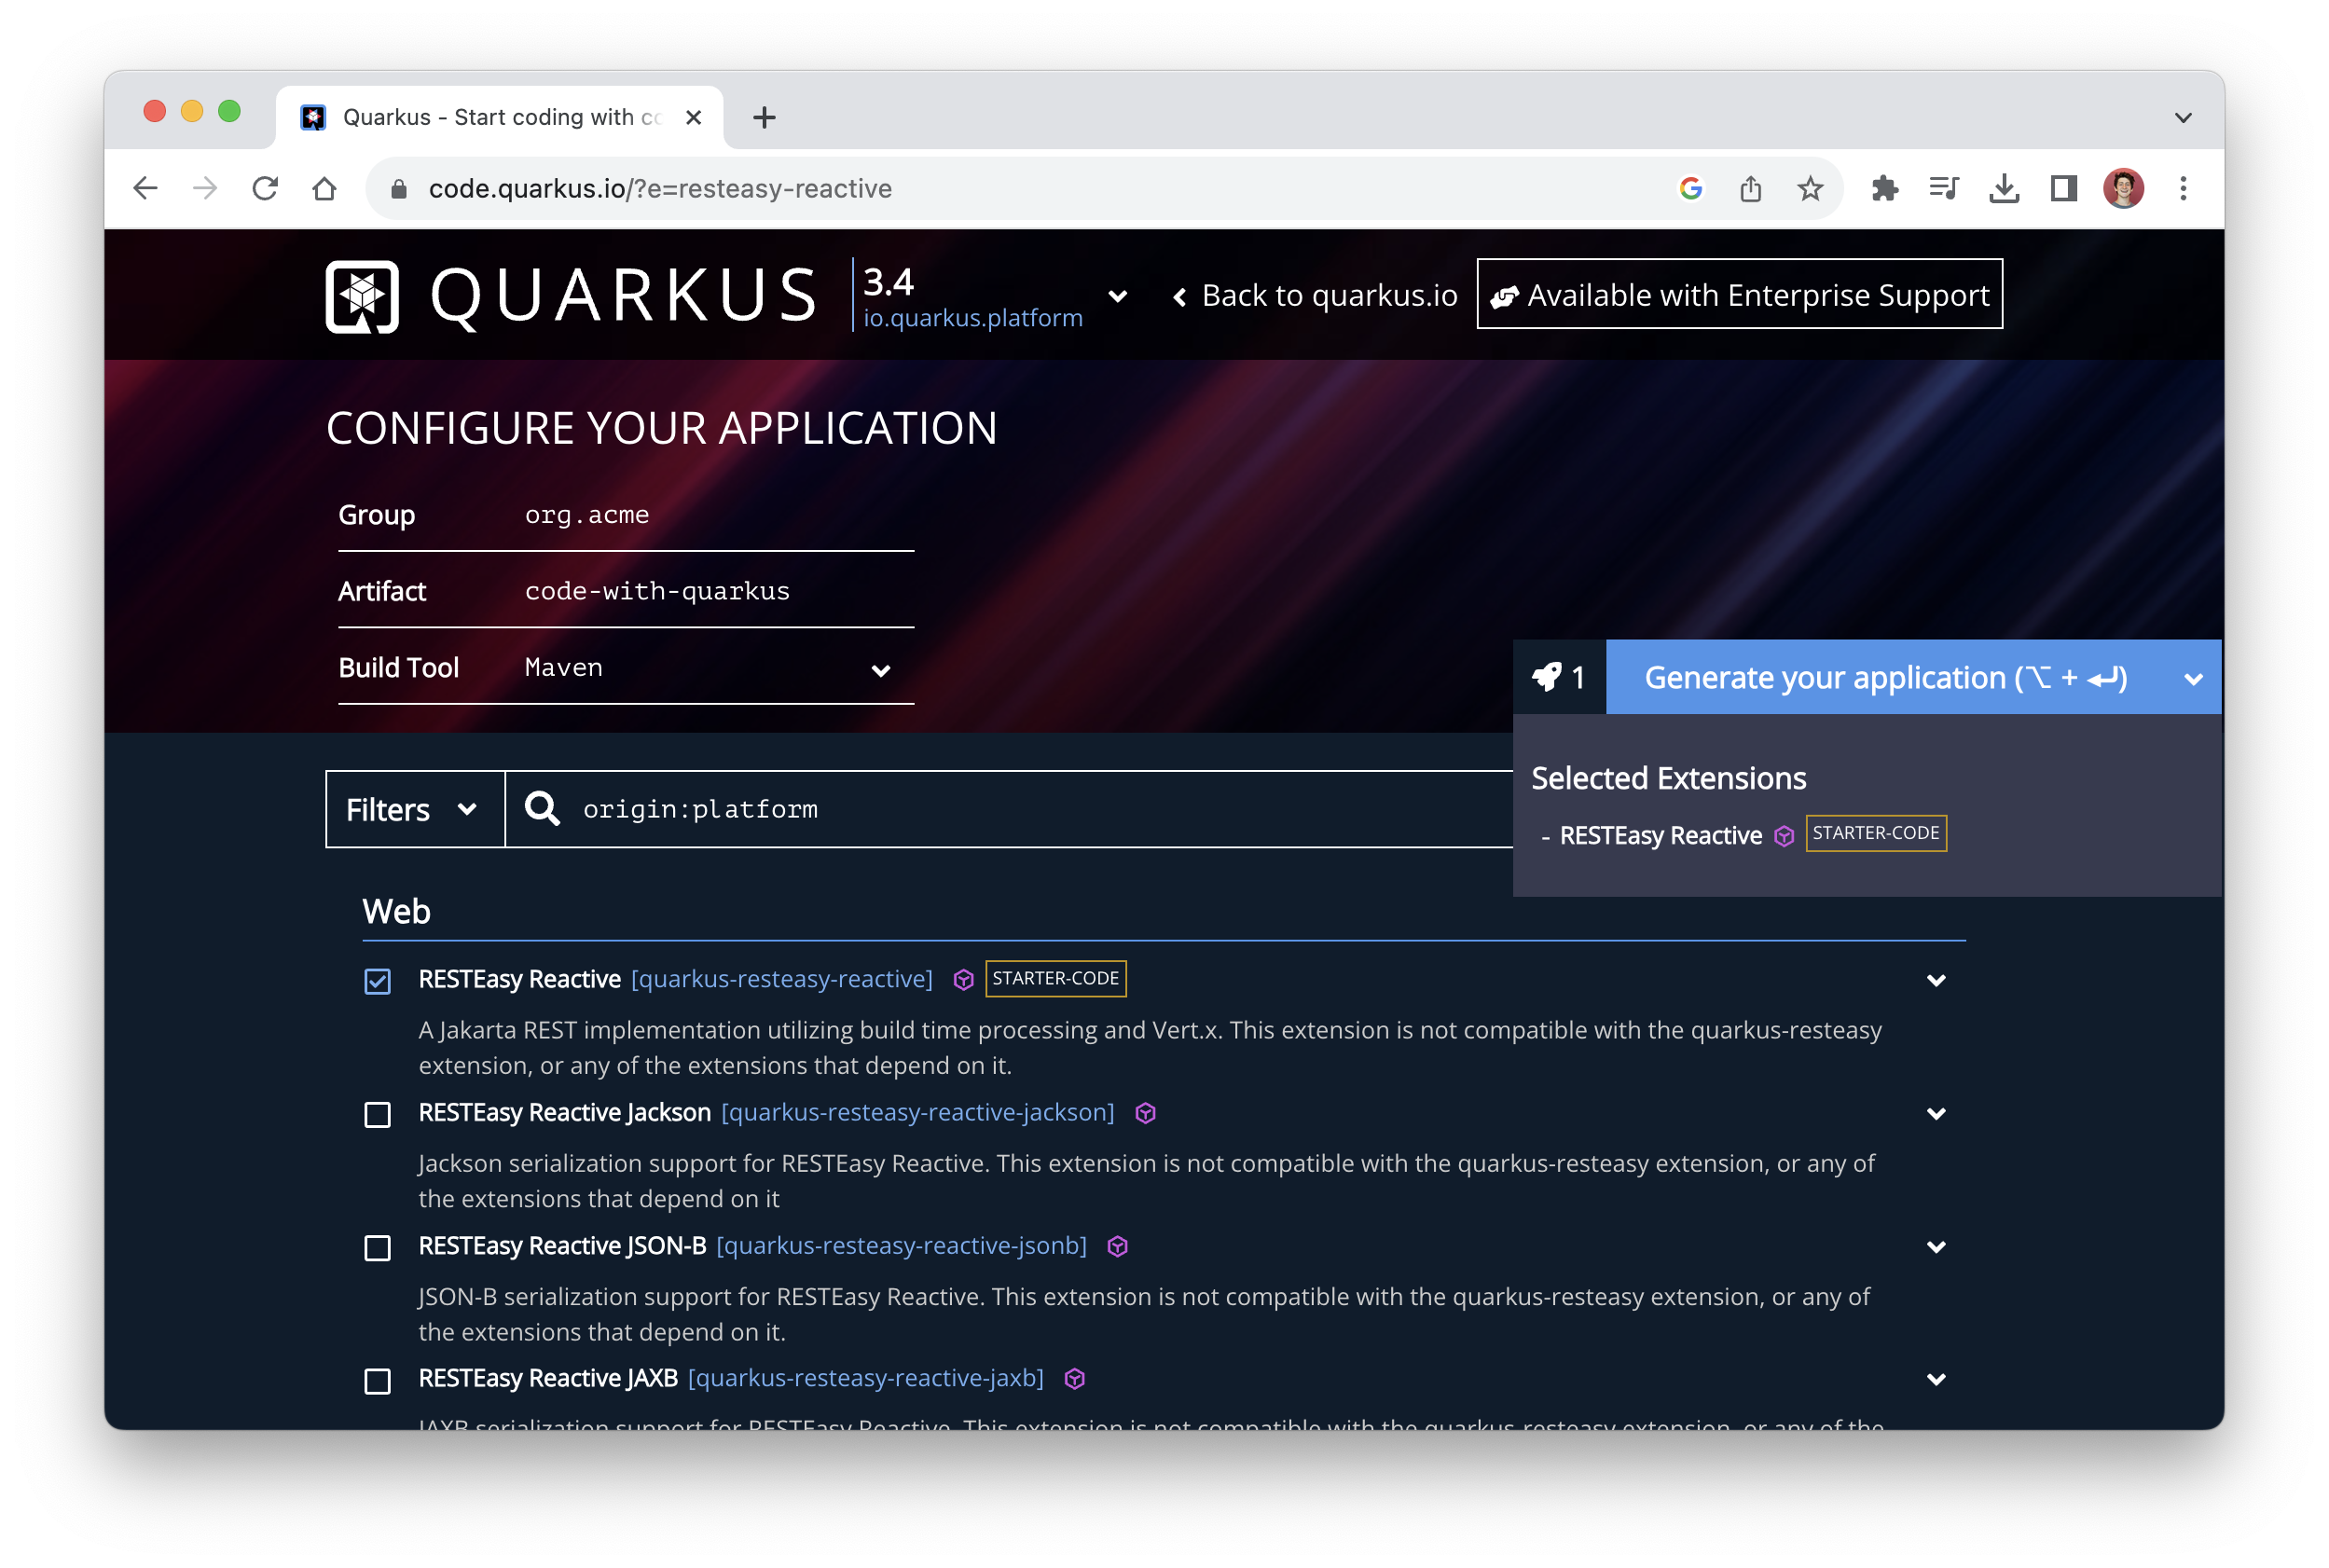
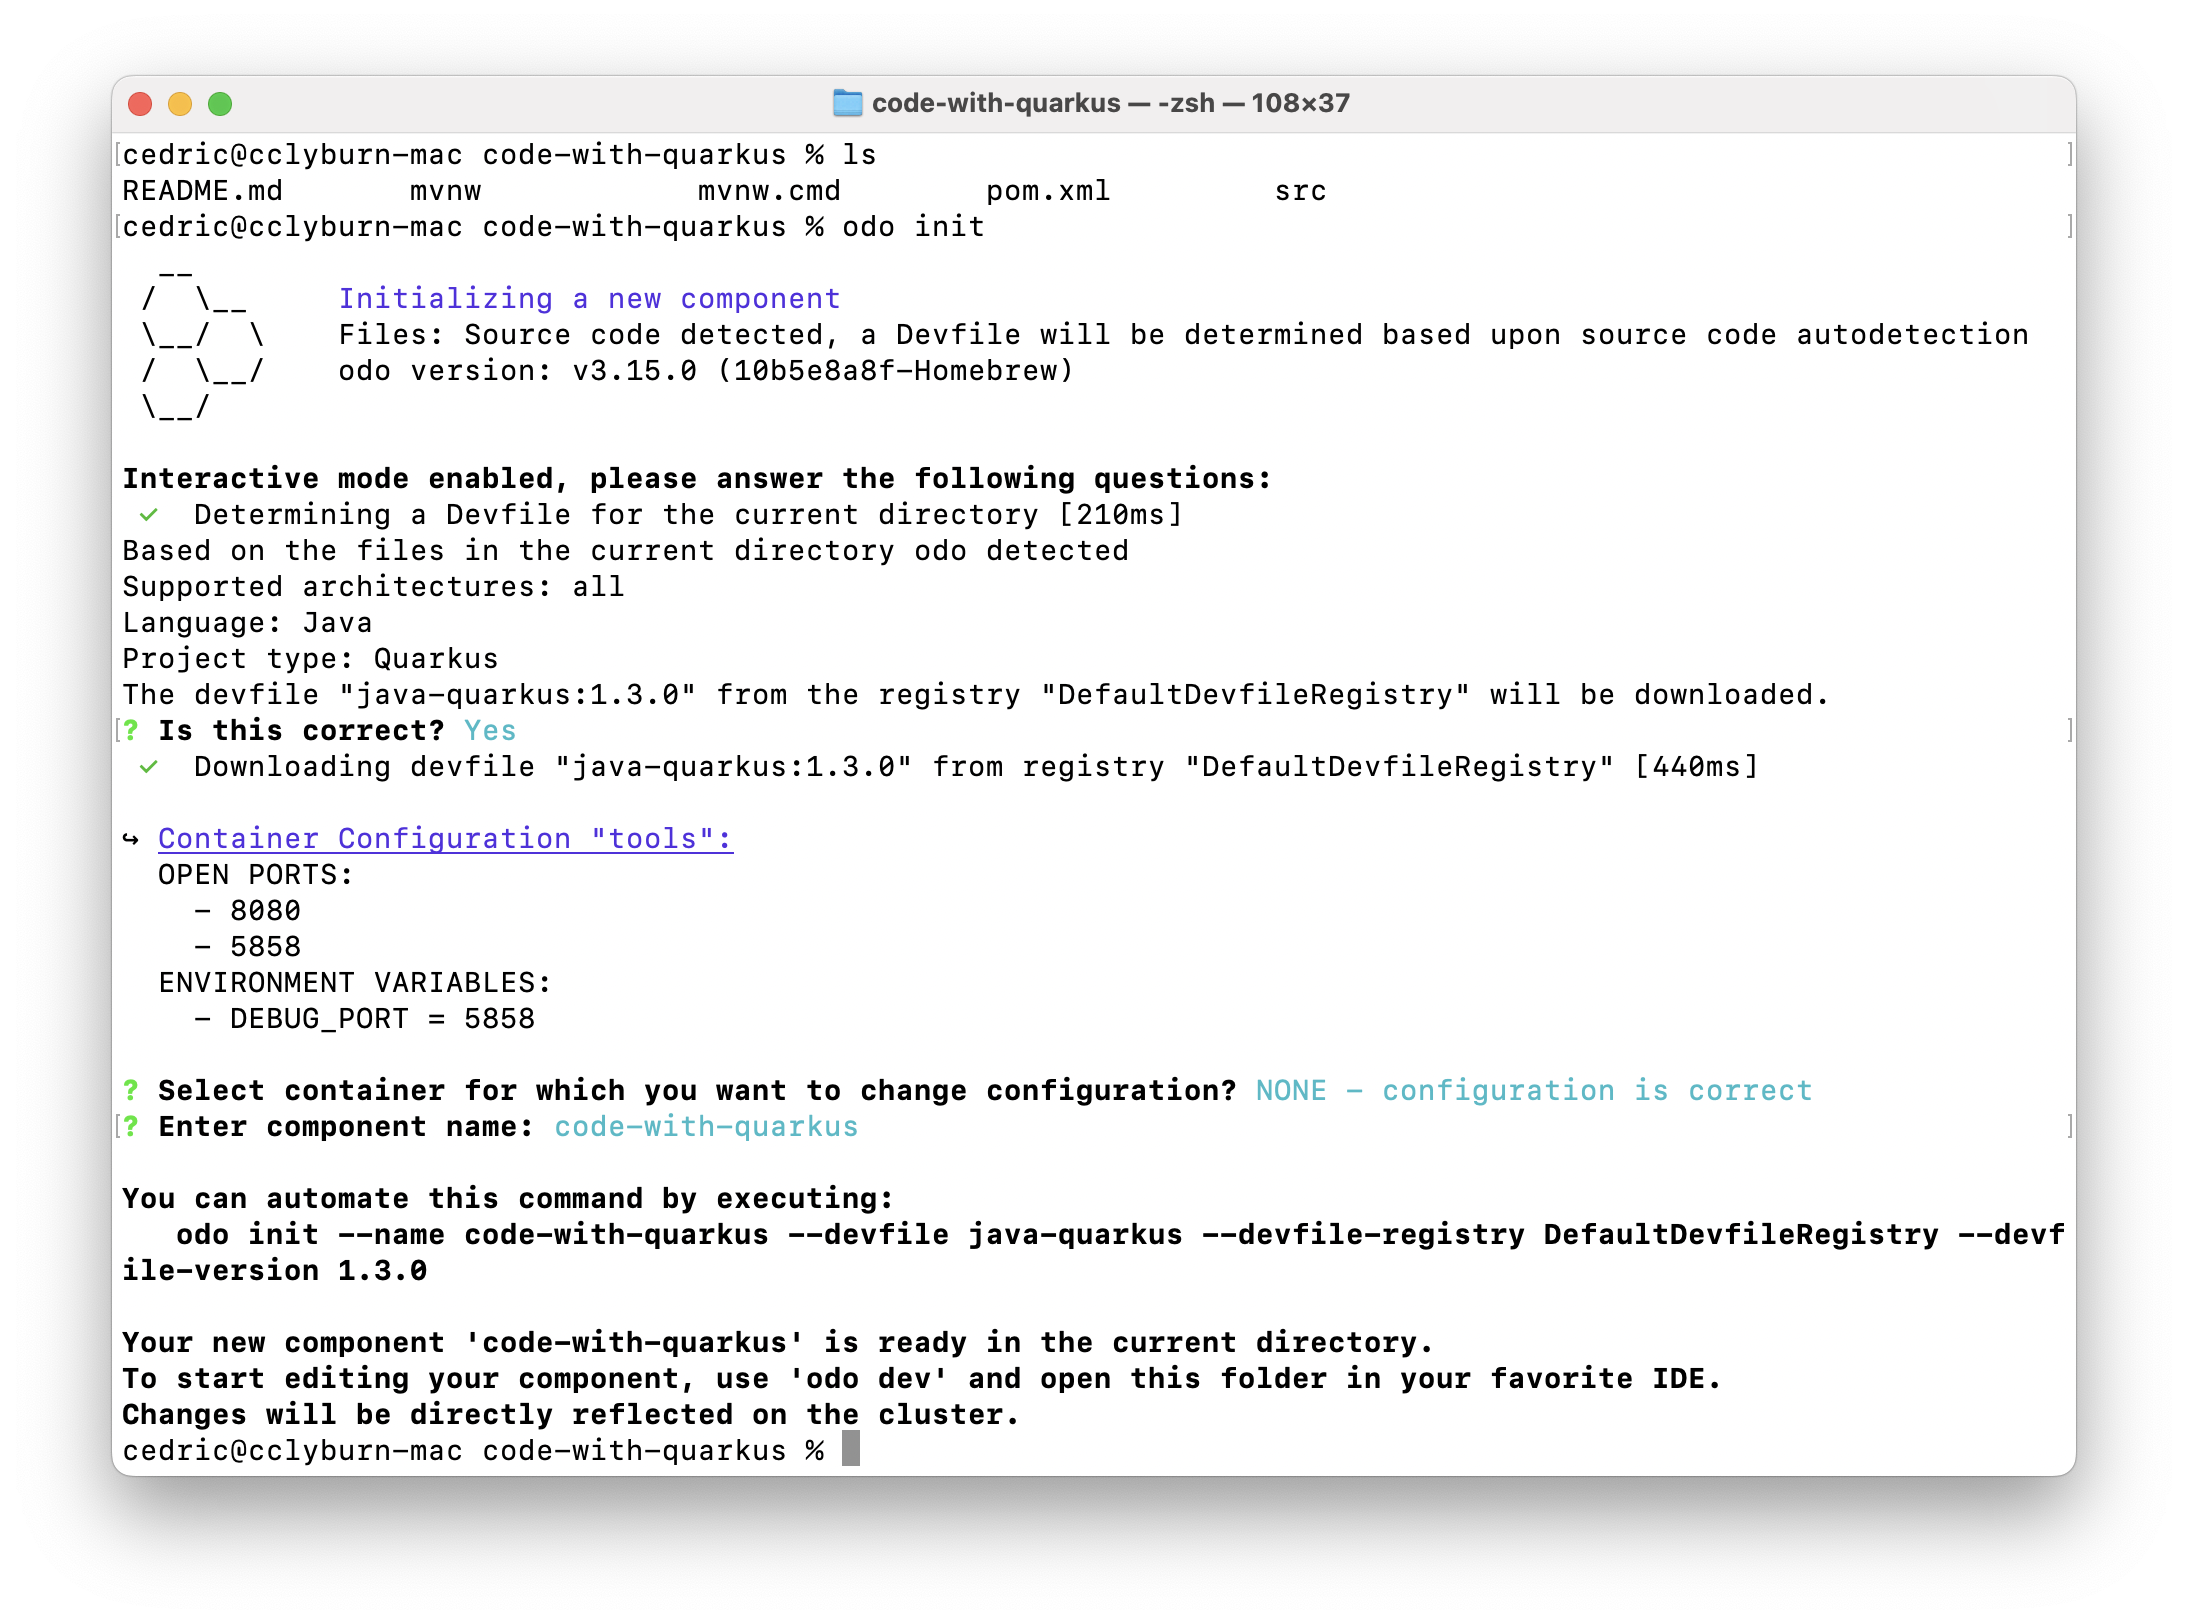
While you may already have a project you’d like to use with odo, let’s start with an example project containing some source code using the container-first Java framework, Quarkus. By visiting the Quarkus quickstart page, we can learn how to quickly generate a project that includes a RESTful endpoint (Figure 4). Make sure to select the Generate your application button on the right-hand side to download a.zip file containing the project (which includes GreetingResource.java exposed on /hello and an index.html landing page for our application).
From here, let’s head into our terminal to initialize our application, using the odo init command. This will auto-detect our source code, and download the appropriate devfile.yaml that contains the definition of our development environment as code, specifying components, commands, and configurations. As shown in Figure 5, we can simply use the default settings for this process.
$ odo init
Developing an application locally with Podman and odo
With our code and Devfile ready to go, we can now use the odo dev command to facilitate the development of our application. For example, this includes making changes and previewing in-real time, testing Kubernetes support for our application, and debugging our application. First, let’s start off by targeting Podman for local development before moving on to a Kubernetes cluster (Figure 6).
$ odo dev --platform=podman
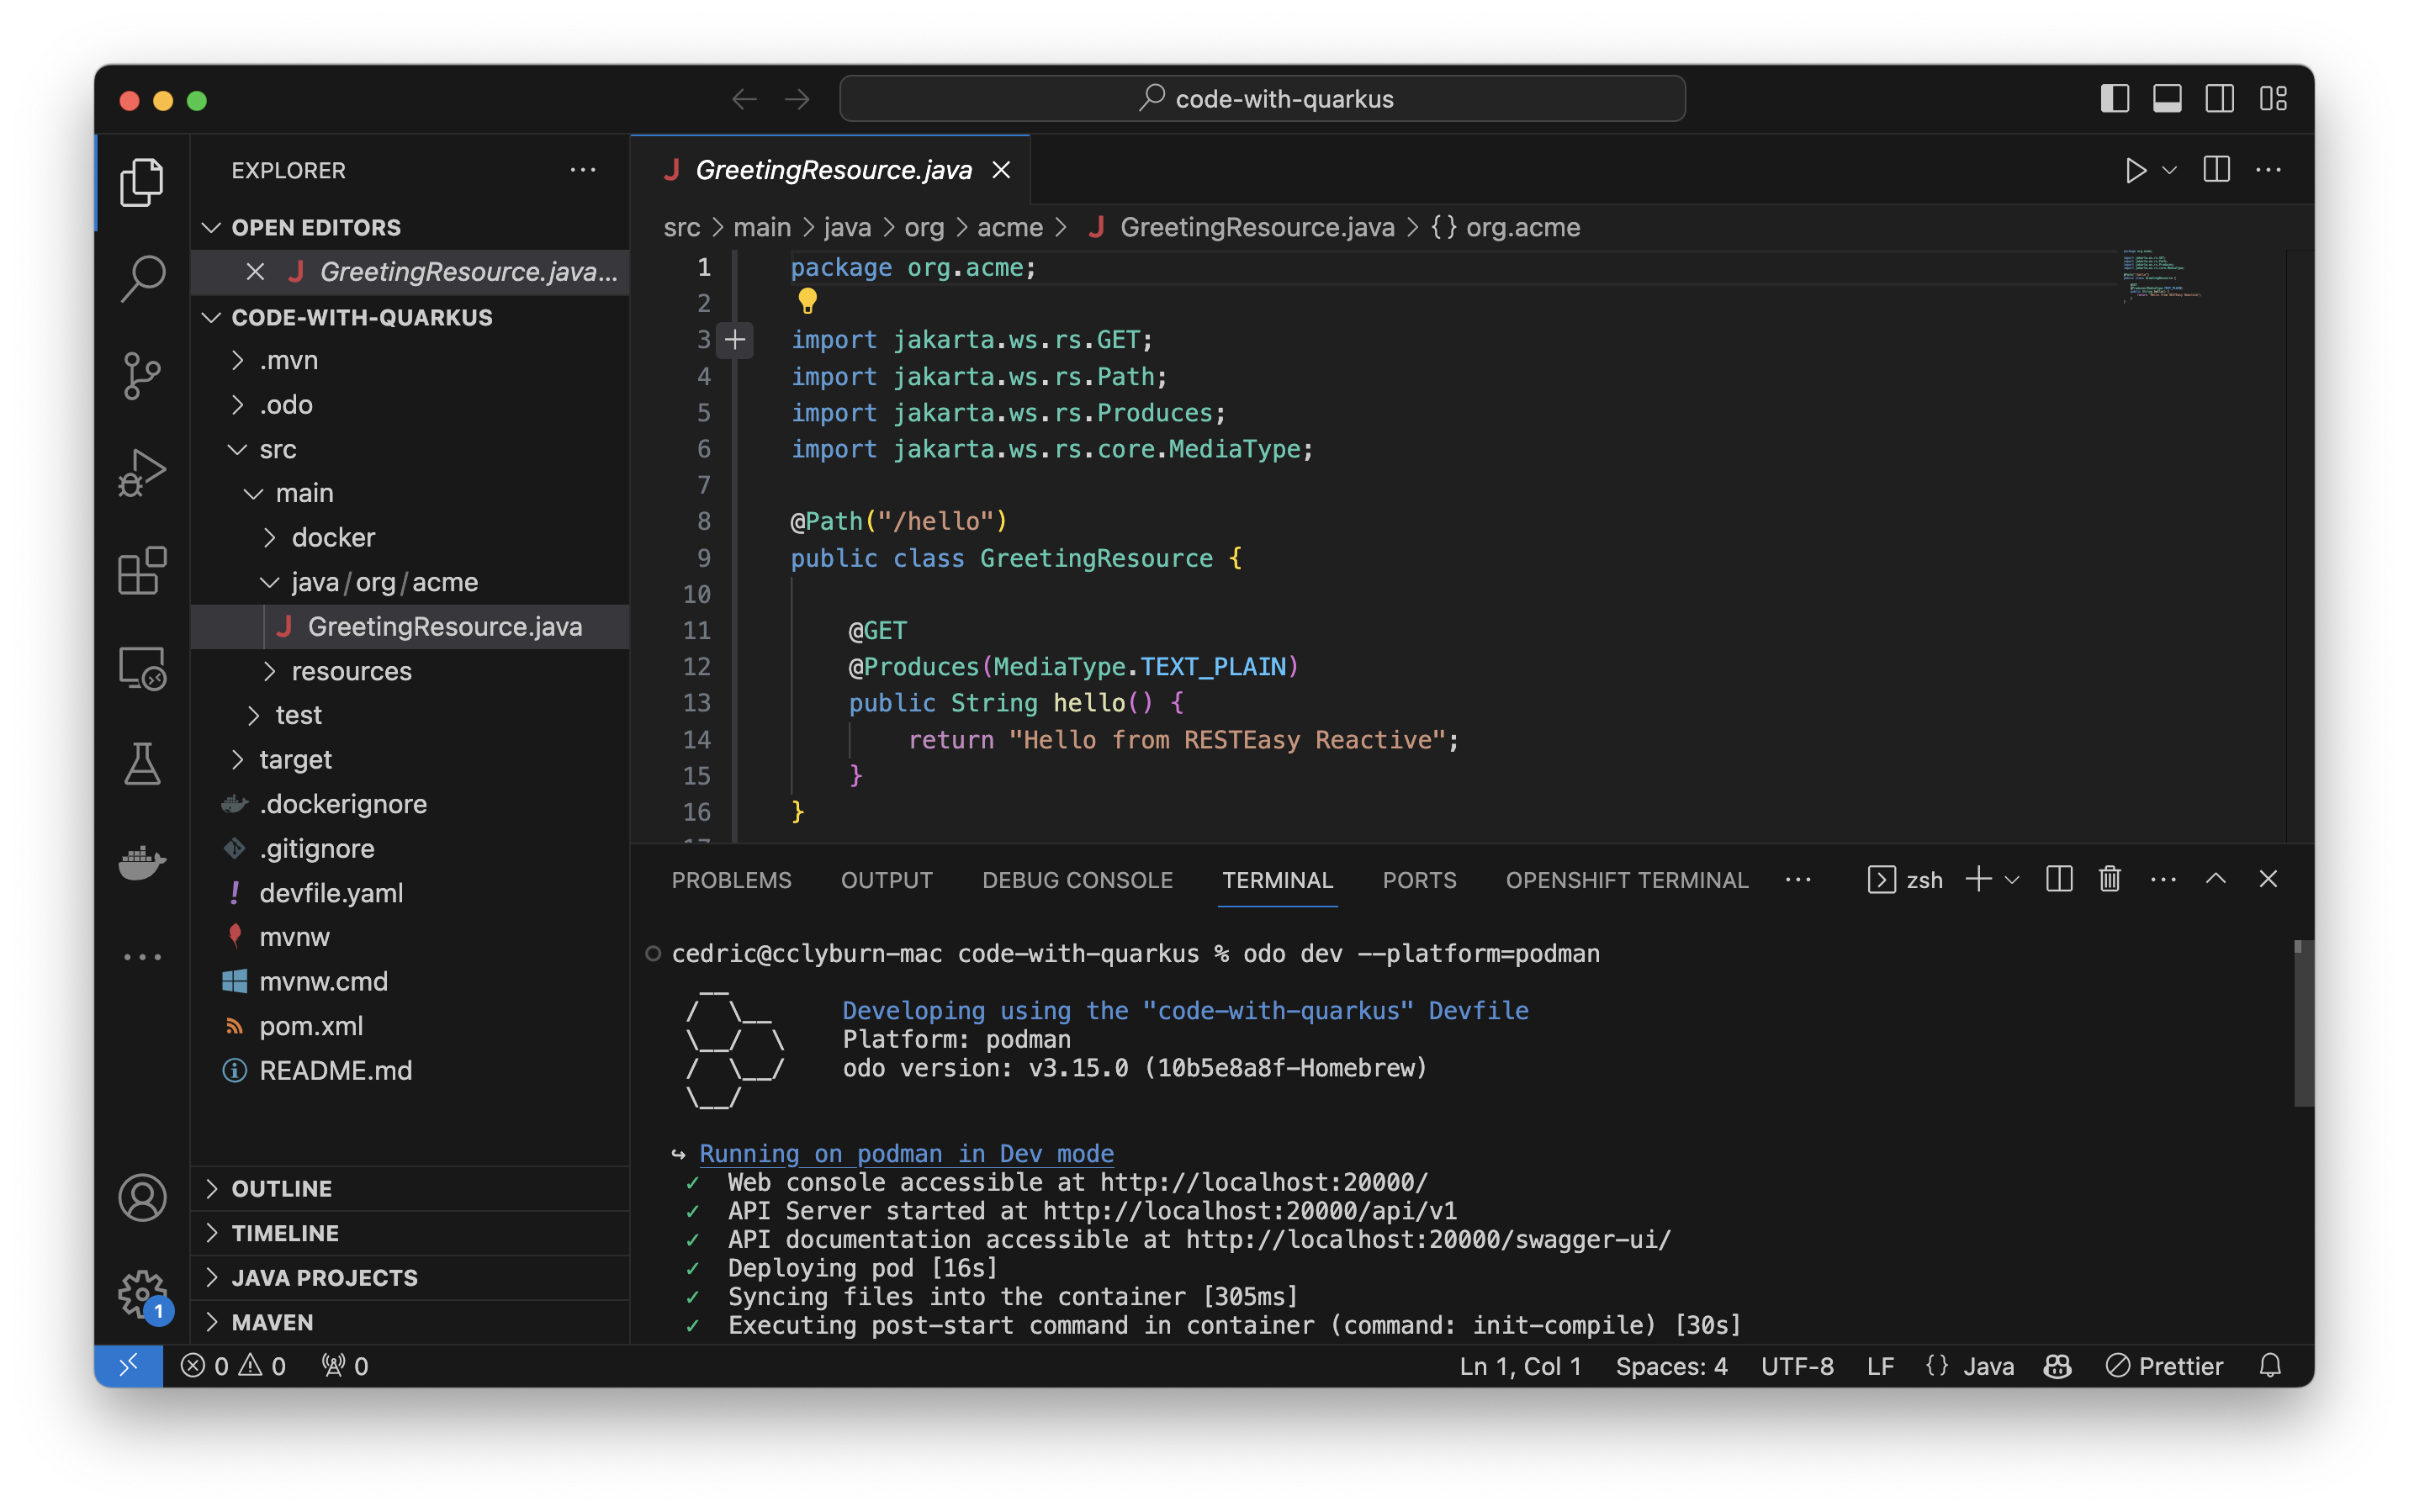
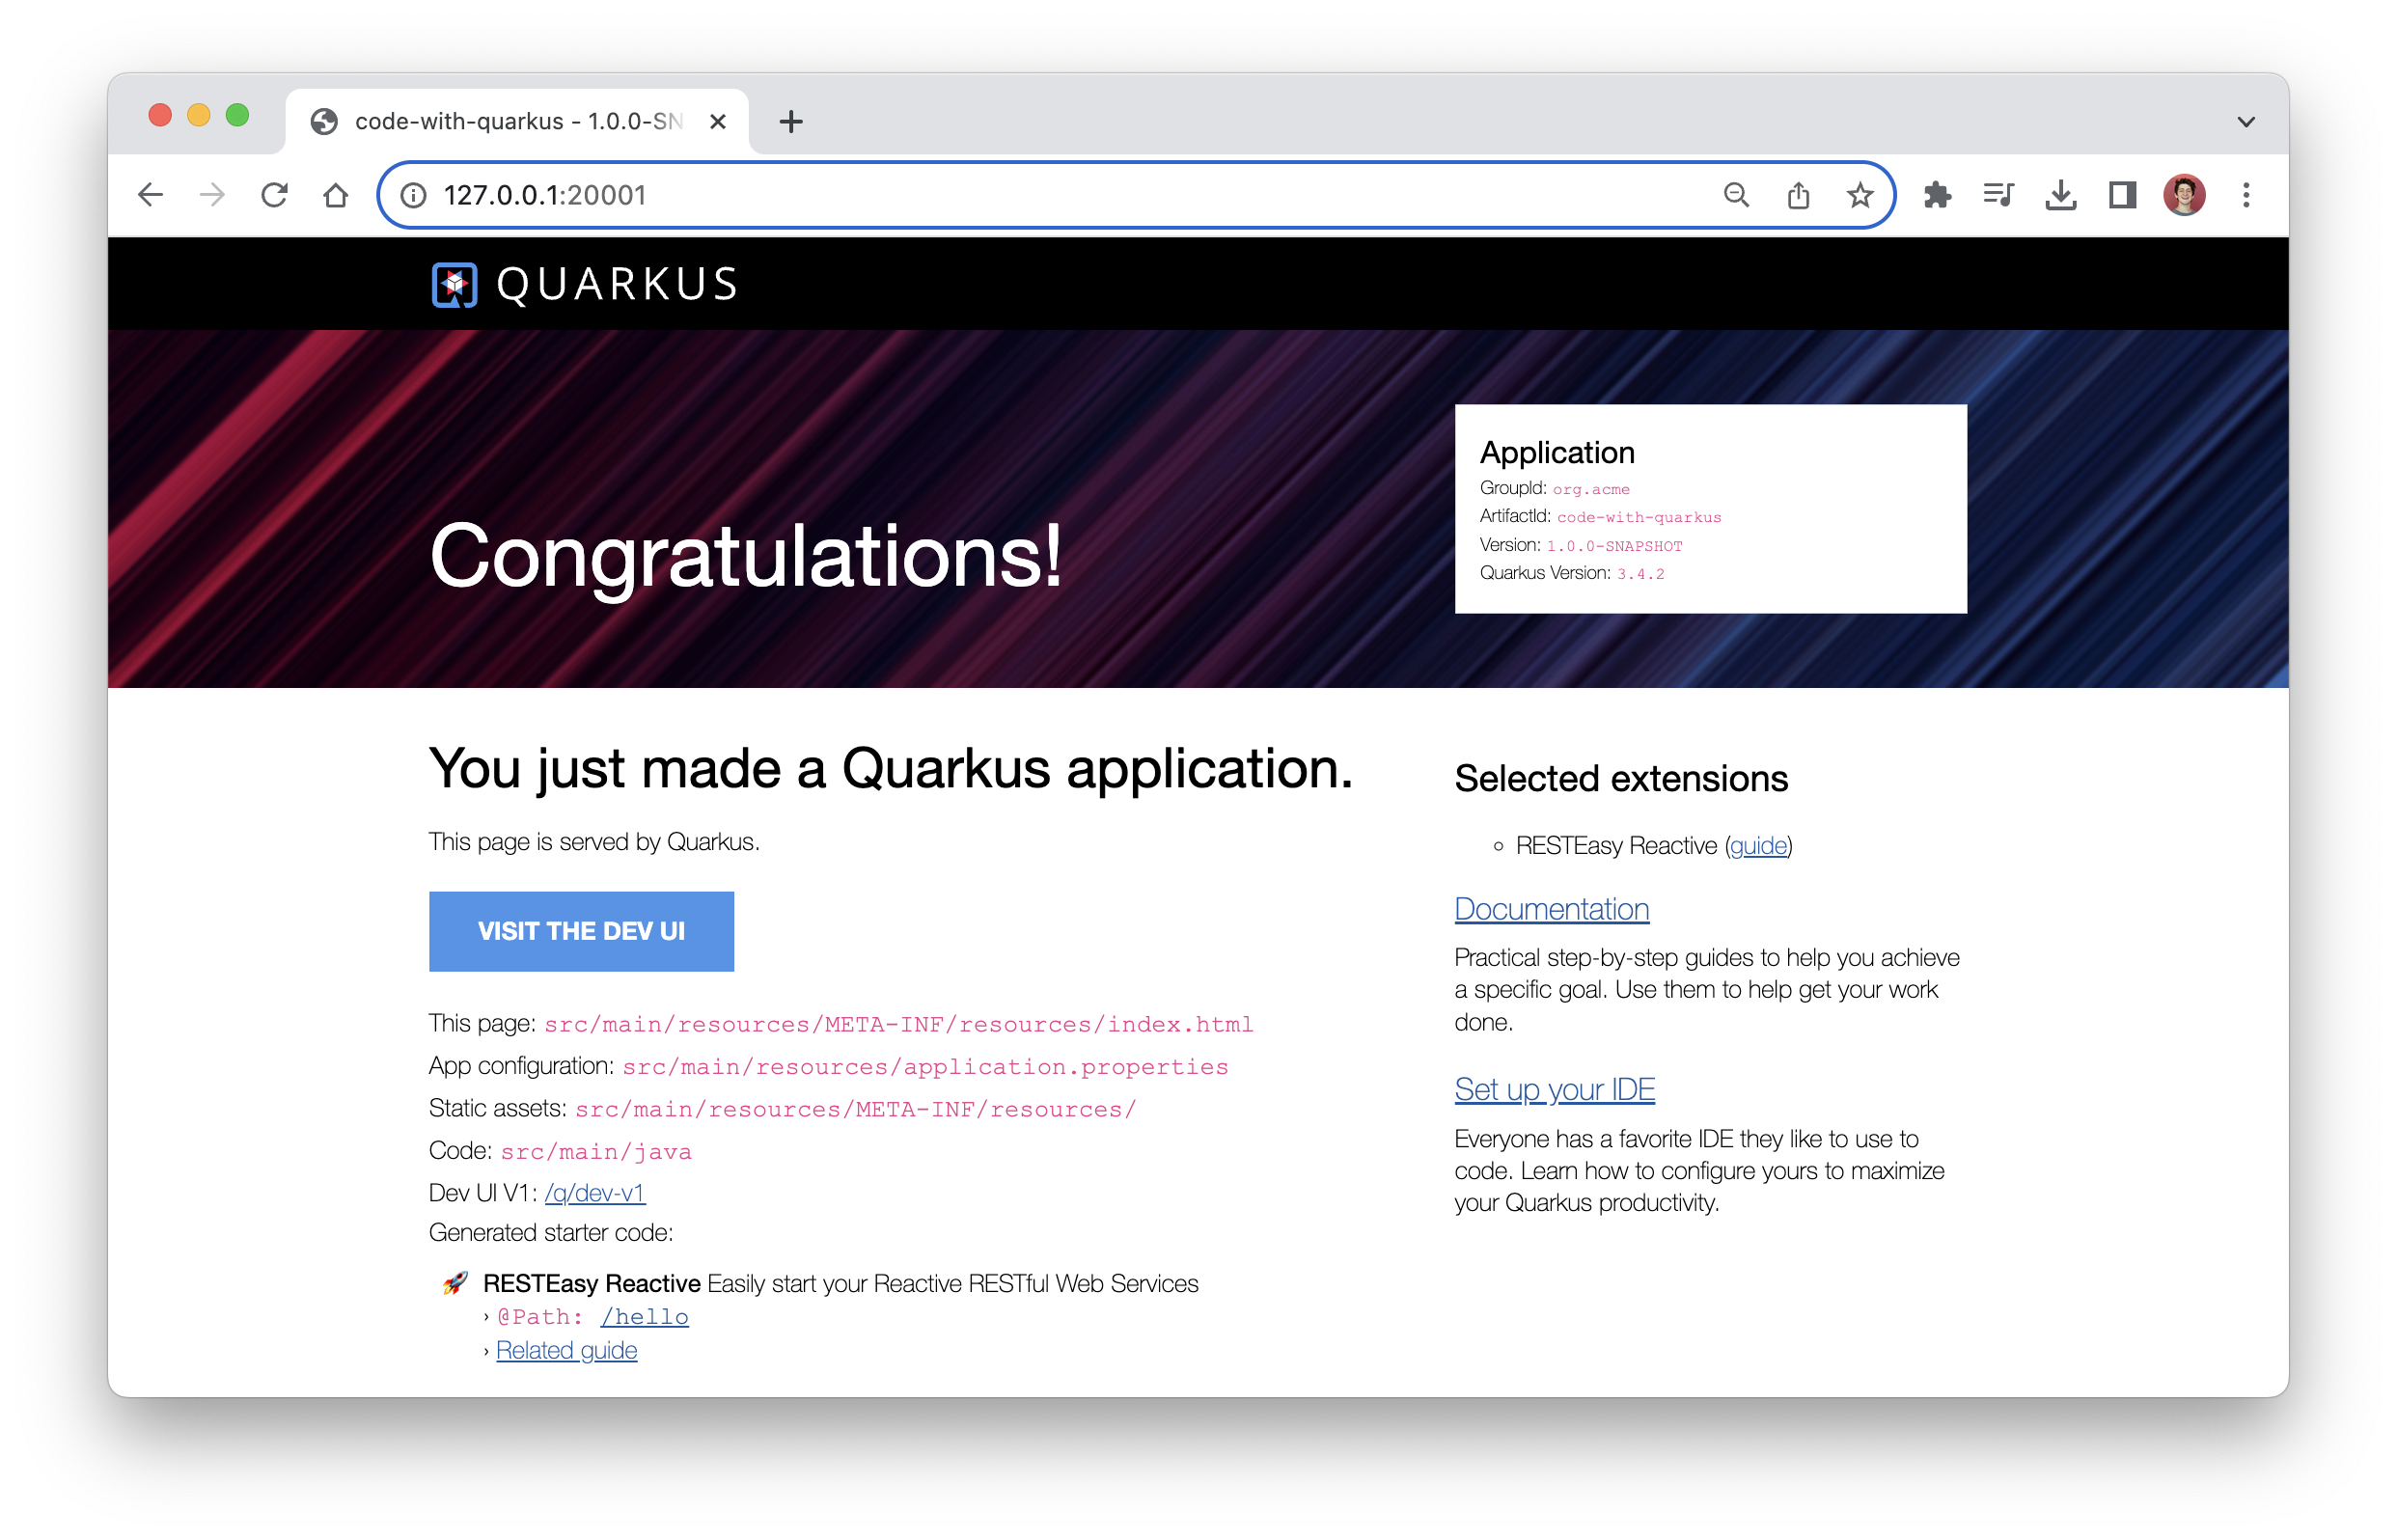
Congratulations! You’ve started development on your Quarkus application, and you can now access the running pod locally with Podman, in addition to some other resources, such as the odo web console and the port forwarding of the application (Figure 7).
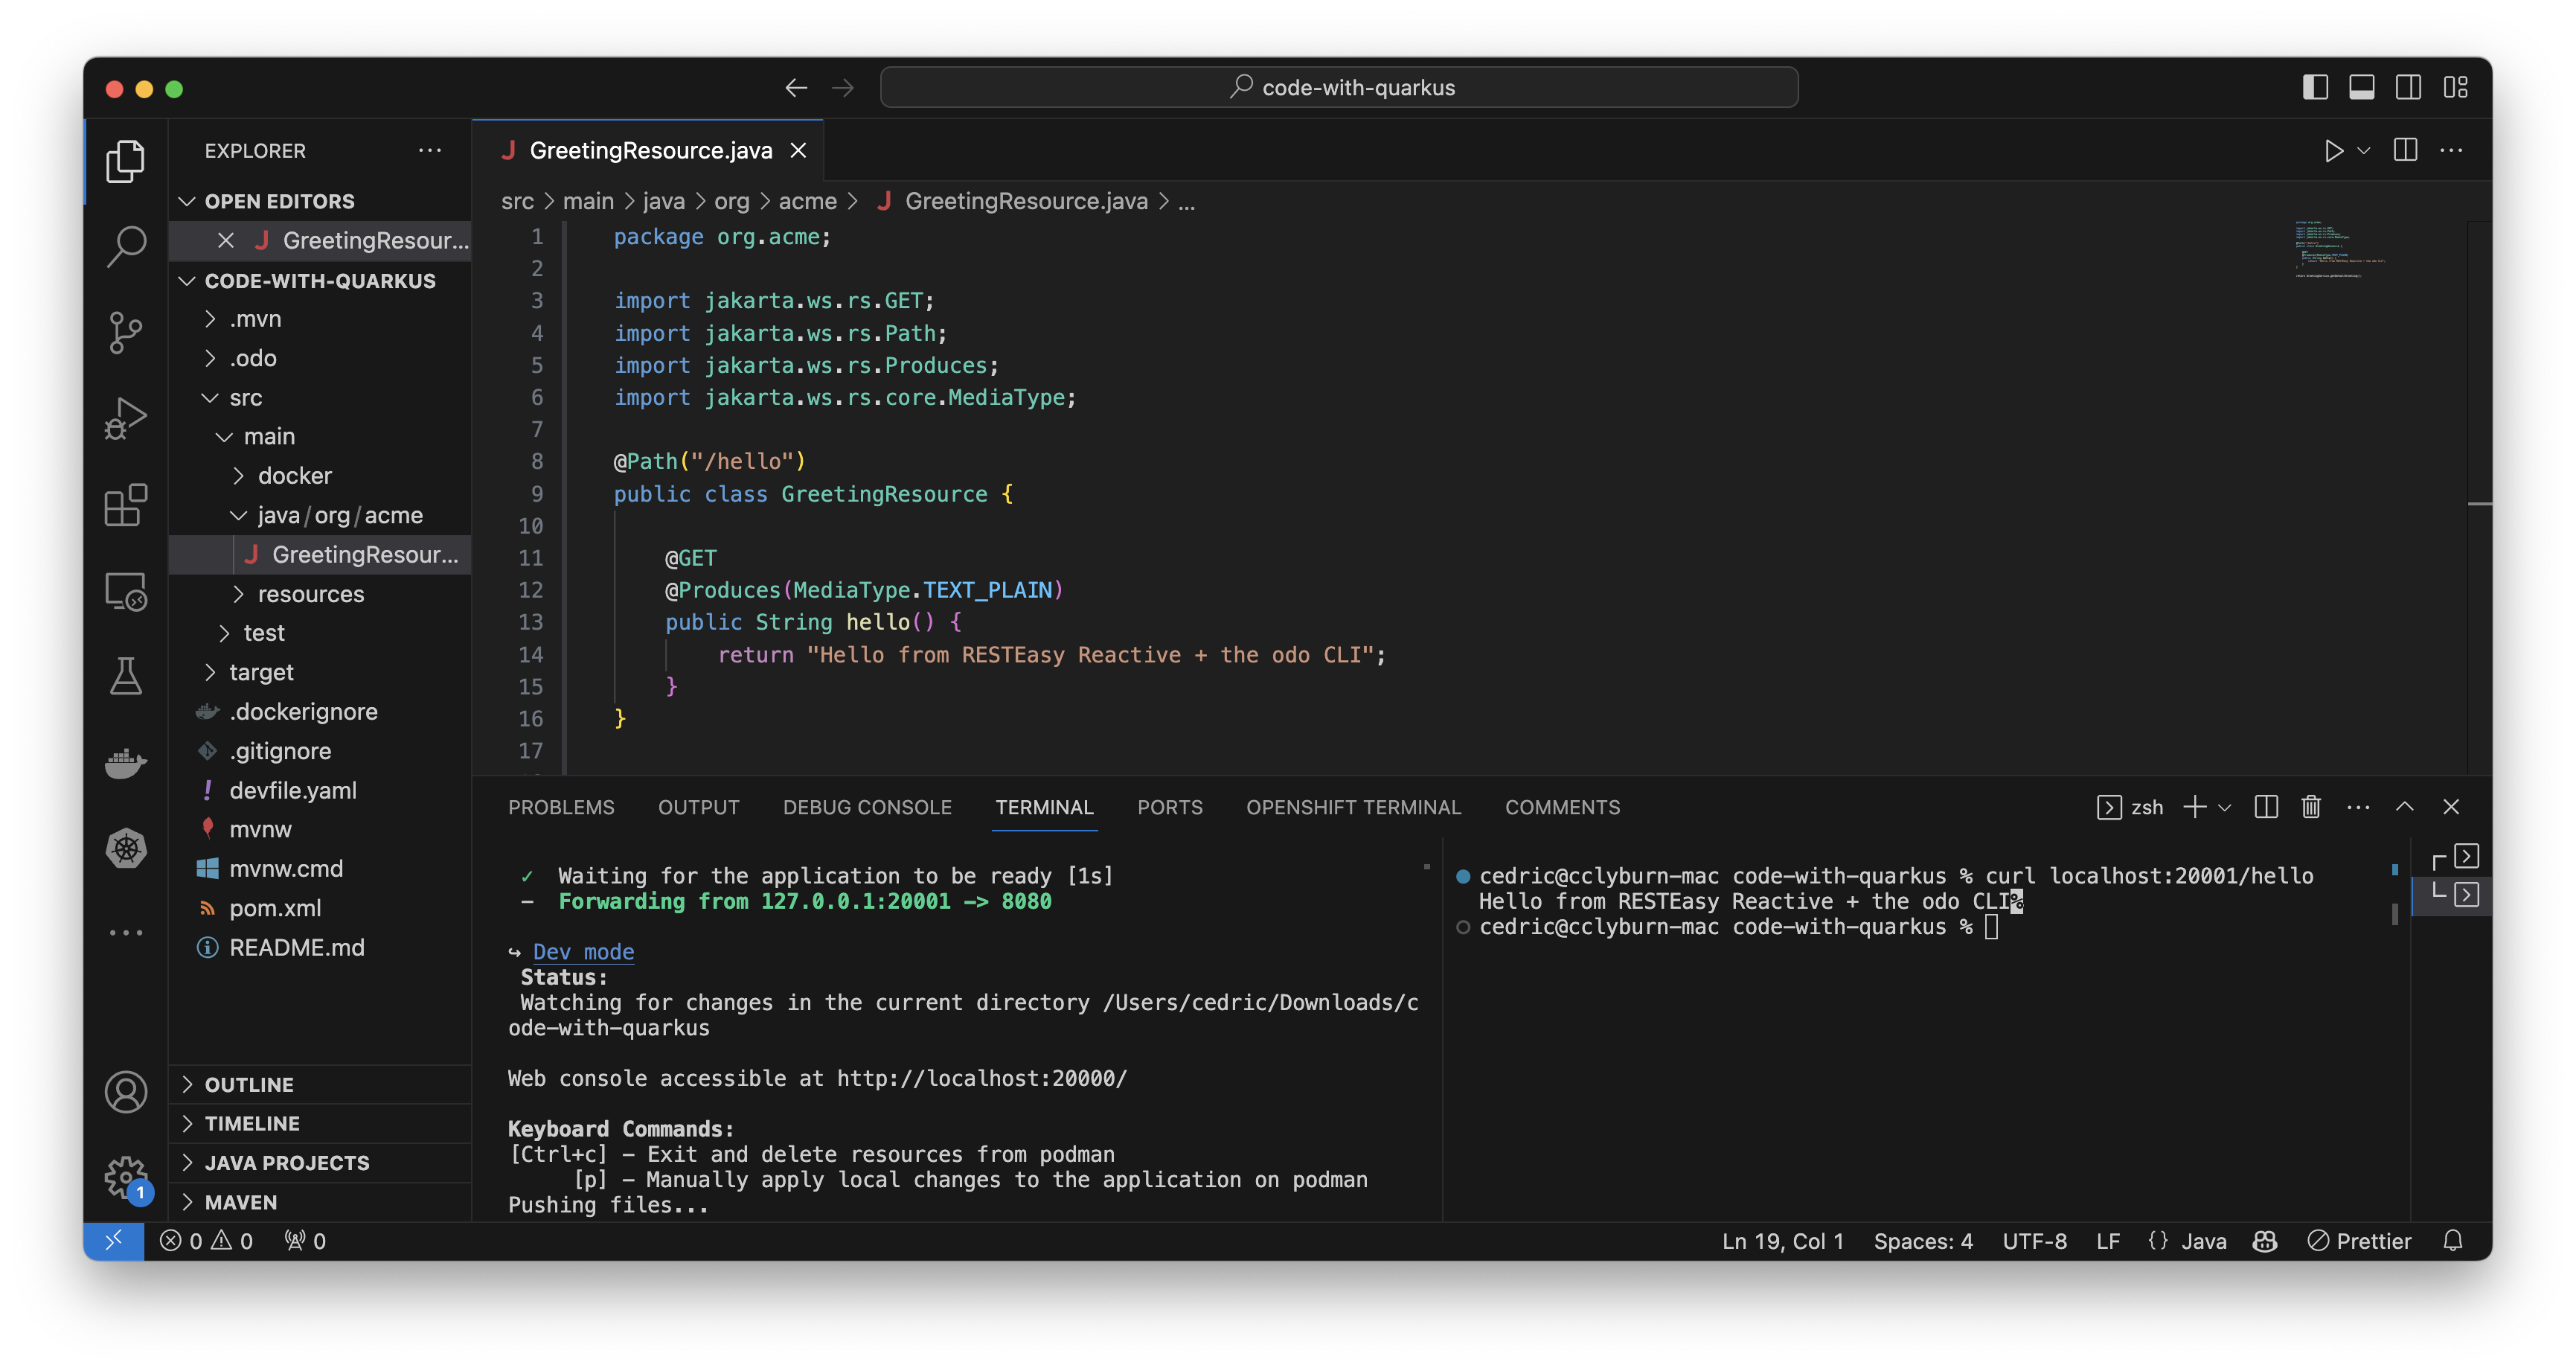
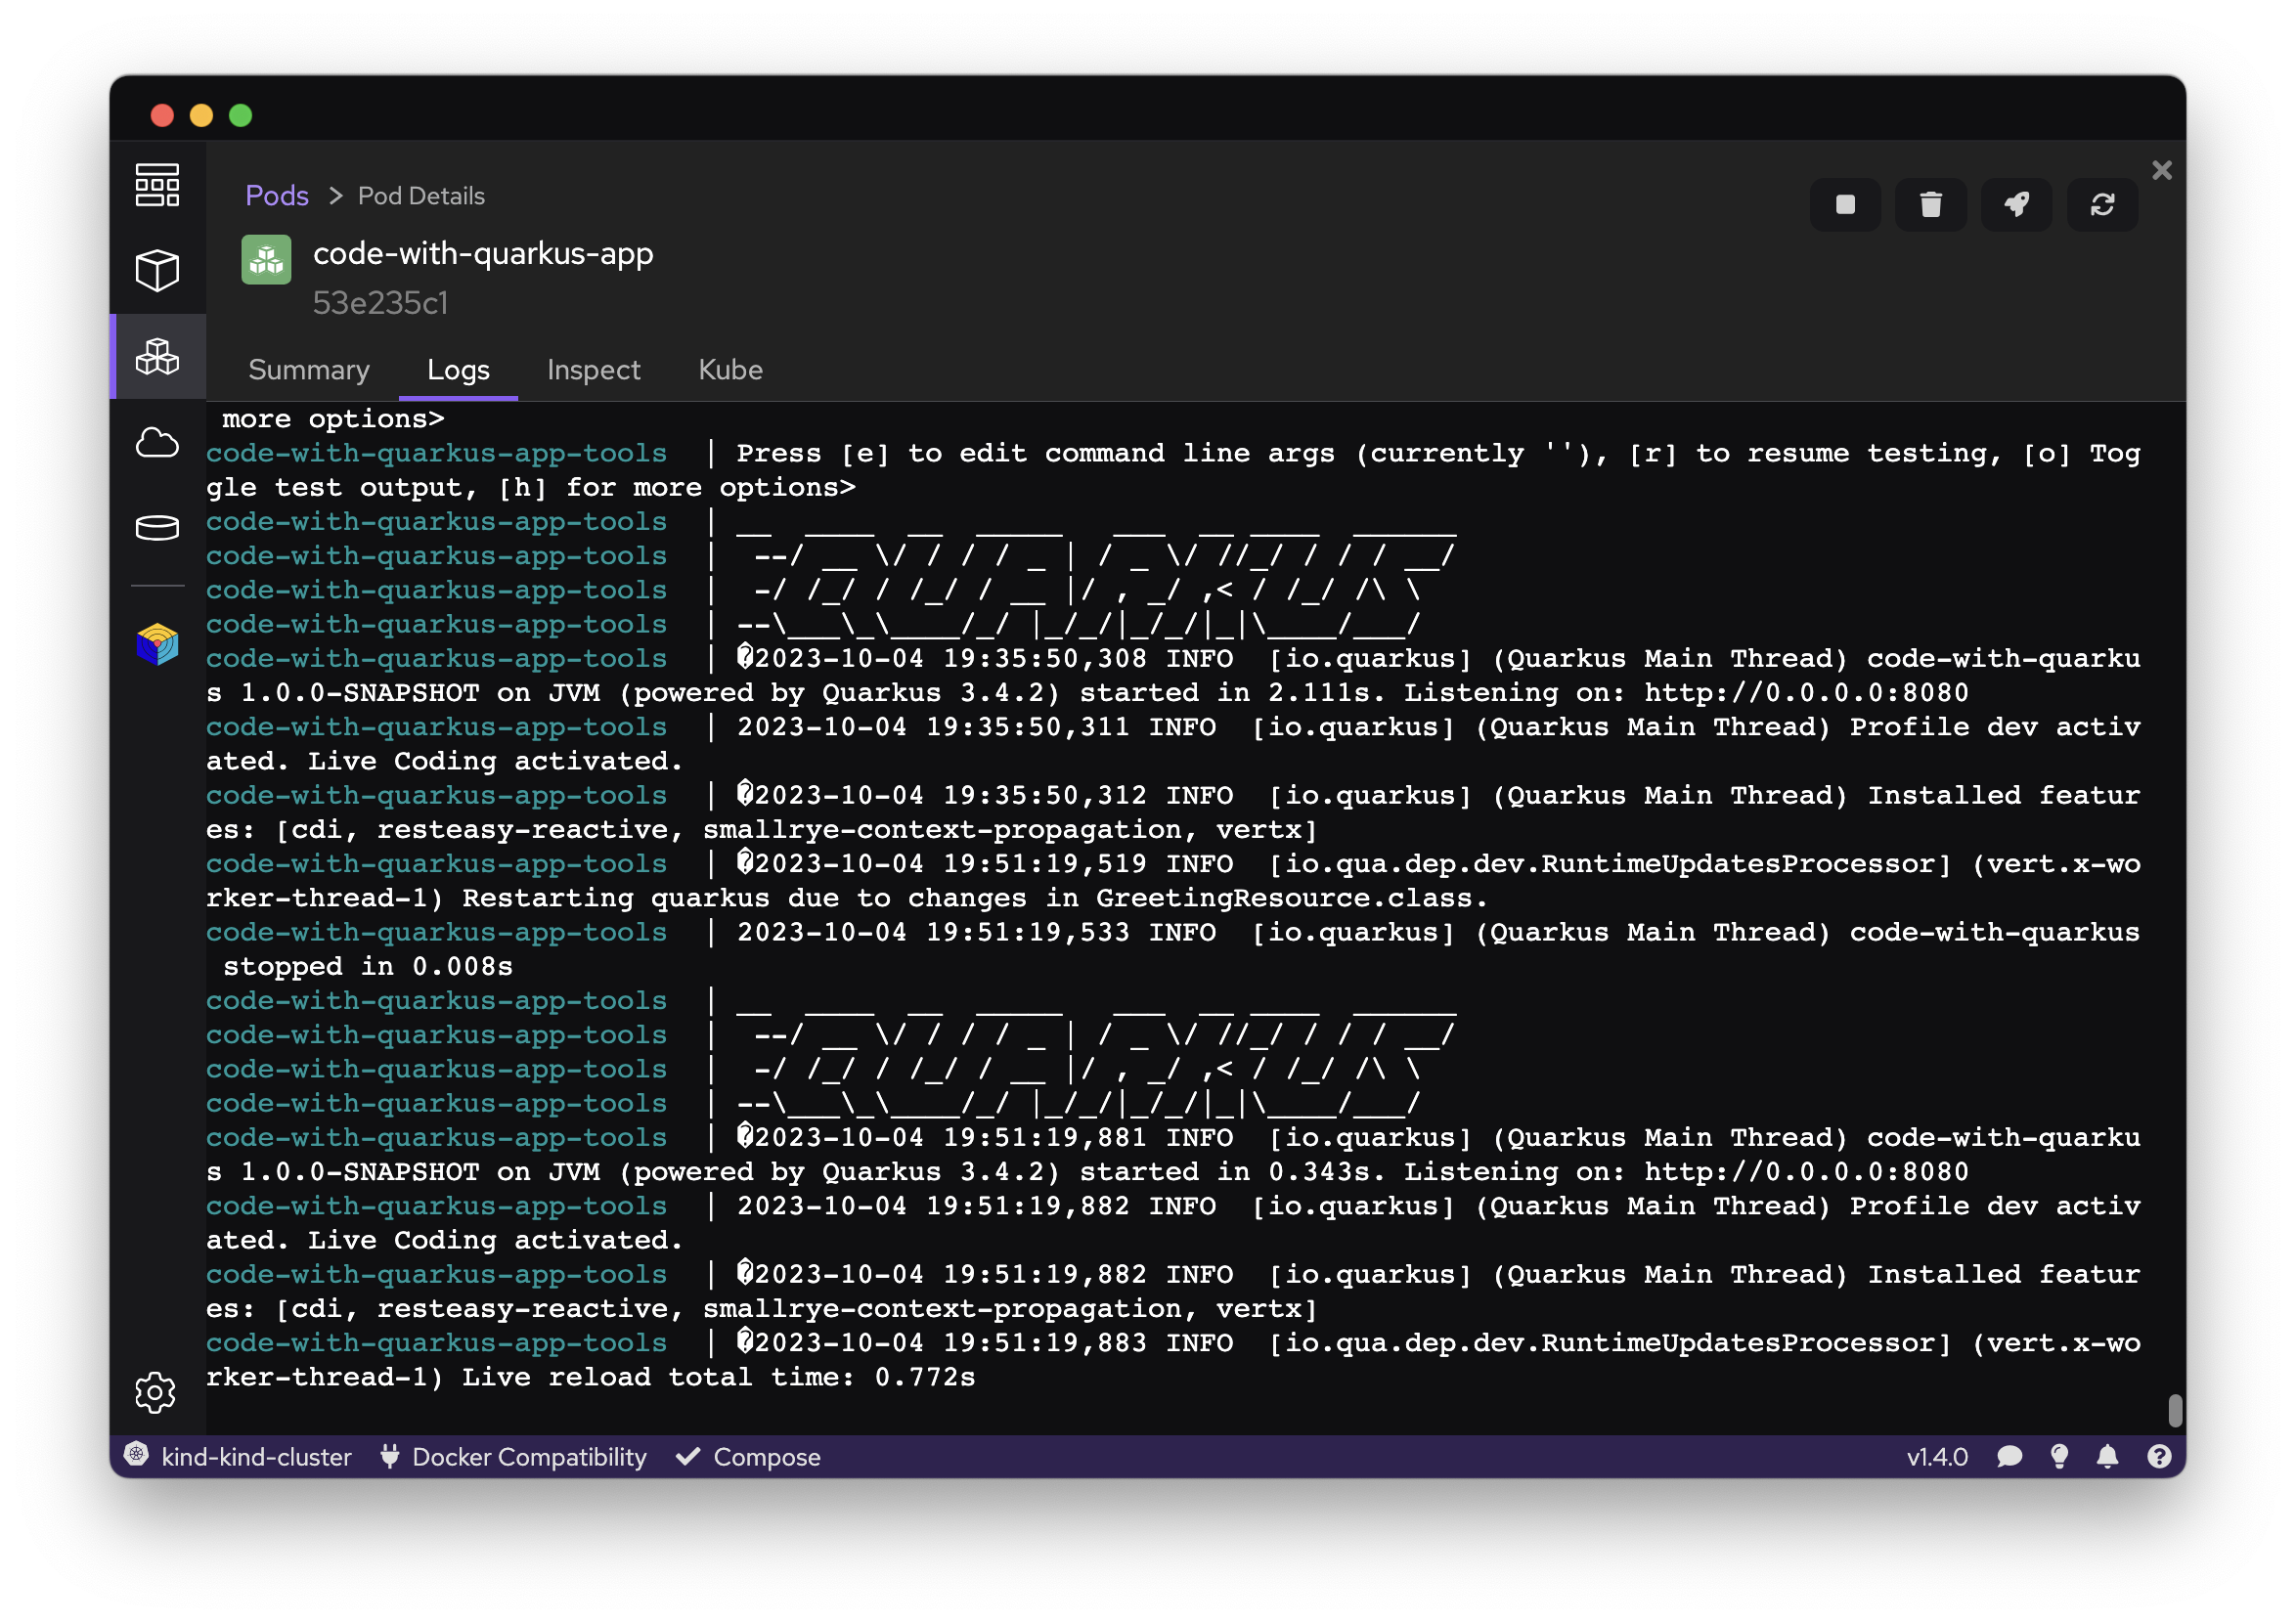
Let’s now begin modifying our source code within the IDE to see odo immediately keeping our containerized application up to date. For this, we’ve added a bit of text to our endpoint. Within seconds, the pod has already been re-deployed. Now, we can see these changes live by calling the example endpoint via our terminal (Figure 8).
We can also check this out visually by using Podman Desktop, a graphical tool to visualize containers and pods. Within the Pods section of the interface, we can see our running Pod, logs, metadata, and more (Figure 9).
Developing an application for Kubernetes with odo
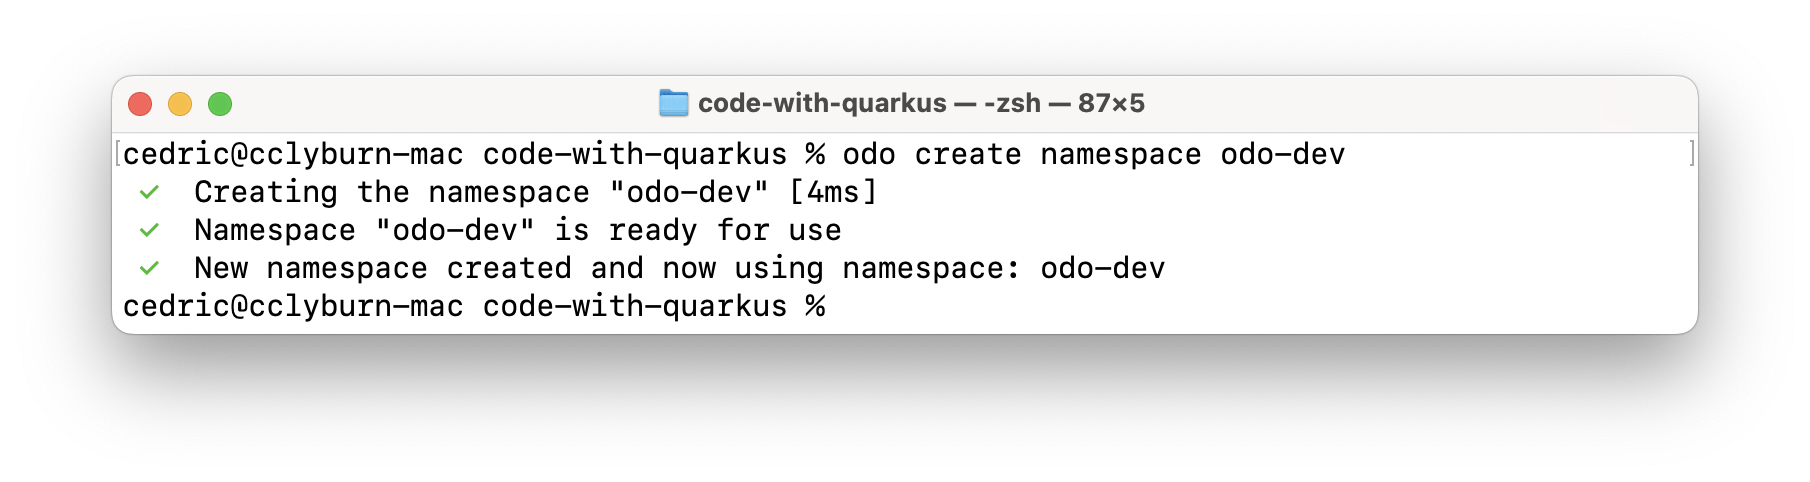
Recently, odo has added support for Podman and local development of containers without access to a cluster. Let’s demonstrate using odo for development on Kubernetes. Of course, you can use any compliant Kubernetes cluster with odo, whether it's a hosted cloud provider, a self-managed cluster, or hosted locally with a tool like Minikube. The process is easy if you’re already connected to your Kubernetes cluster. Simply create a new namespace using the following command (Figure 10):
$ odo create namespace odo-dev
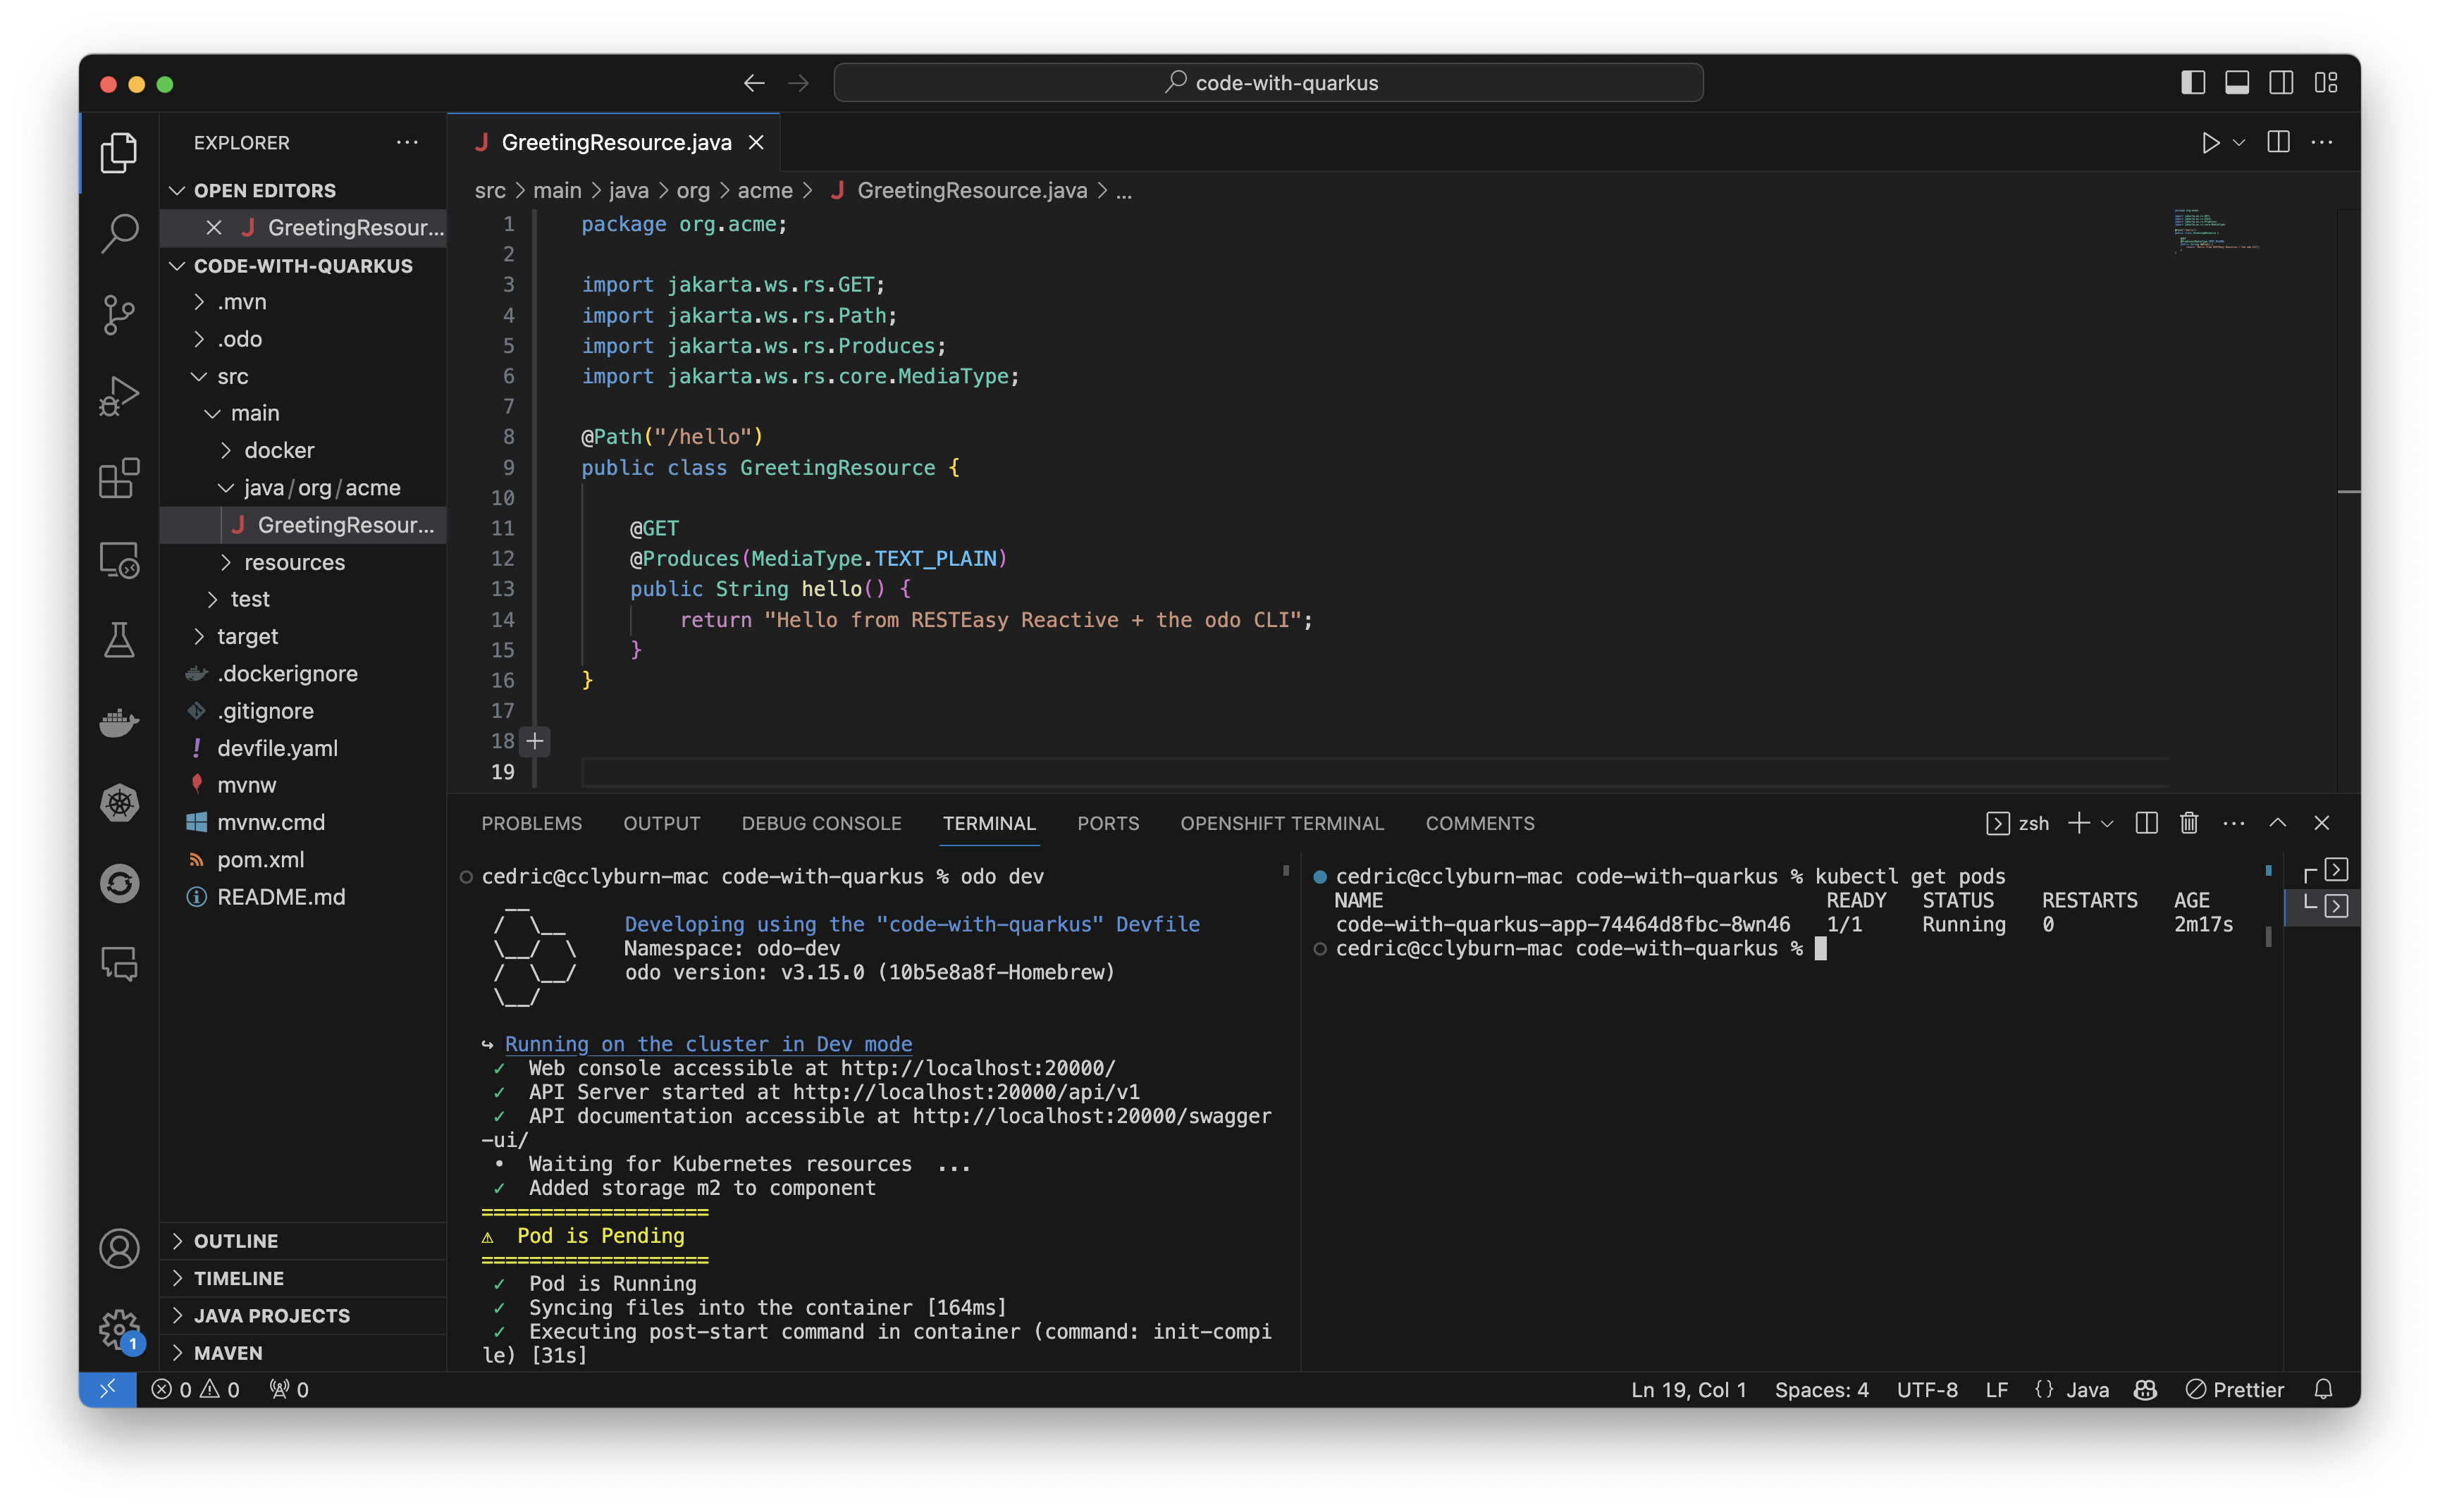
Now, with our devfile.yaml already in the project, we can continue our inner loop development just as we did with Podman, but now in our Kubernetes cluster. Use the odo dev command to start development, and watch the magic happen as odo takes care of all of the resource creation and watches for live coding changes (Figure 11).
$ odo dev
Developing an application for OpenShift with odo
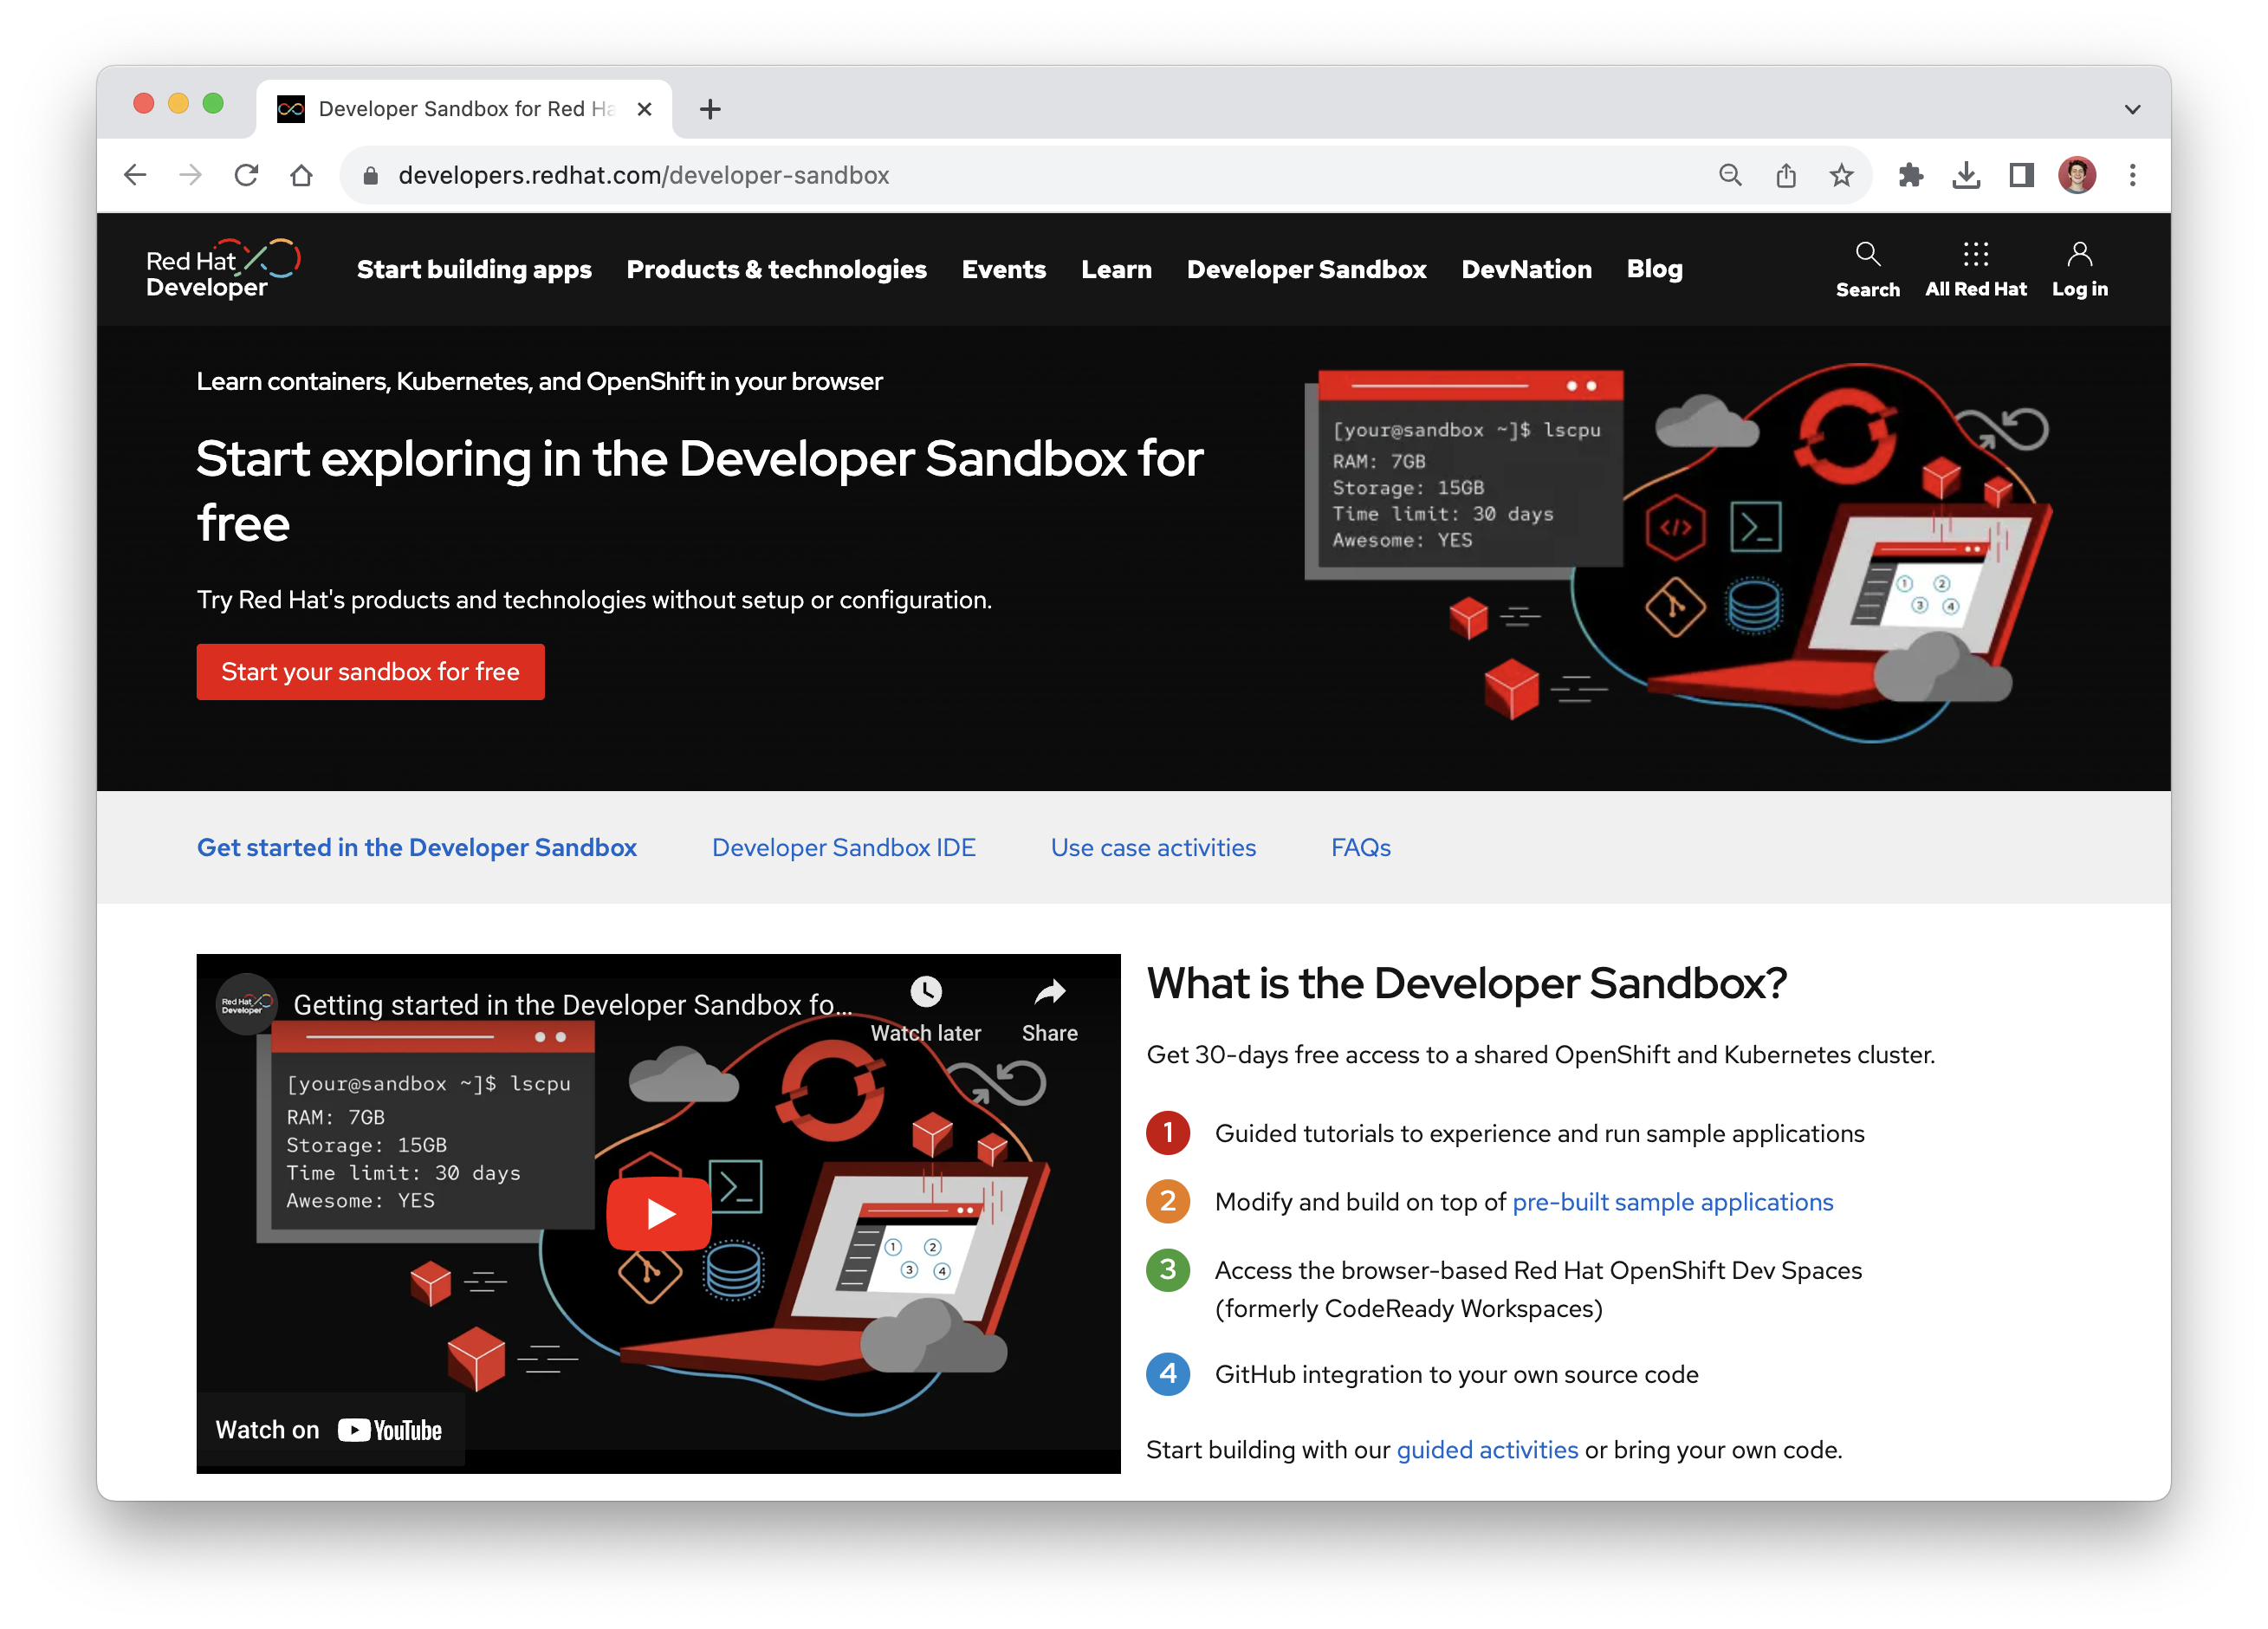
You don’t have a Kubernetes cluster already? No worries. For this next example, we’ll be using the freely available Developer Sandbox for Red Hat OpenShift, which provides immediate access to an OpenShift cluster built on Kubernetes right in your browser.
First, select Start your sandbox for free to log in with your Red Hat account and get free 30-day access to the Developer Sandbox (Figure 12).
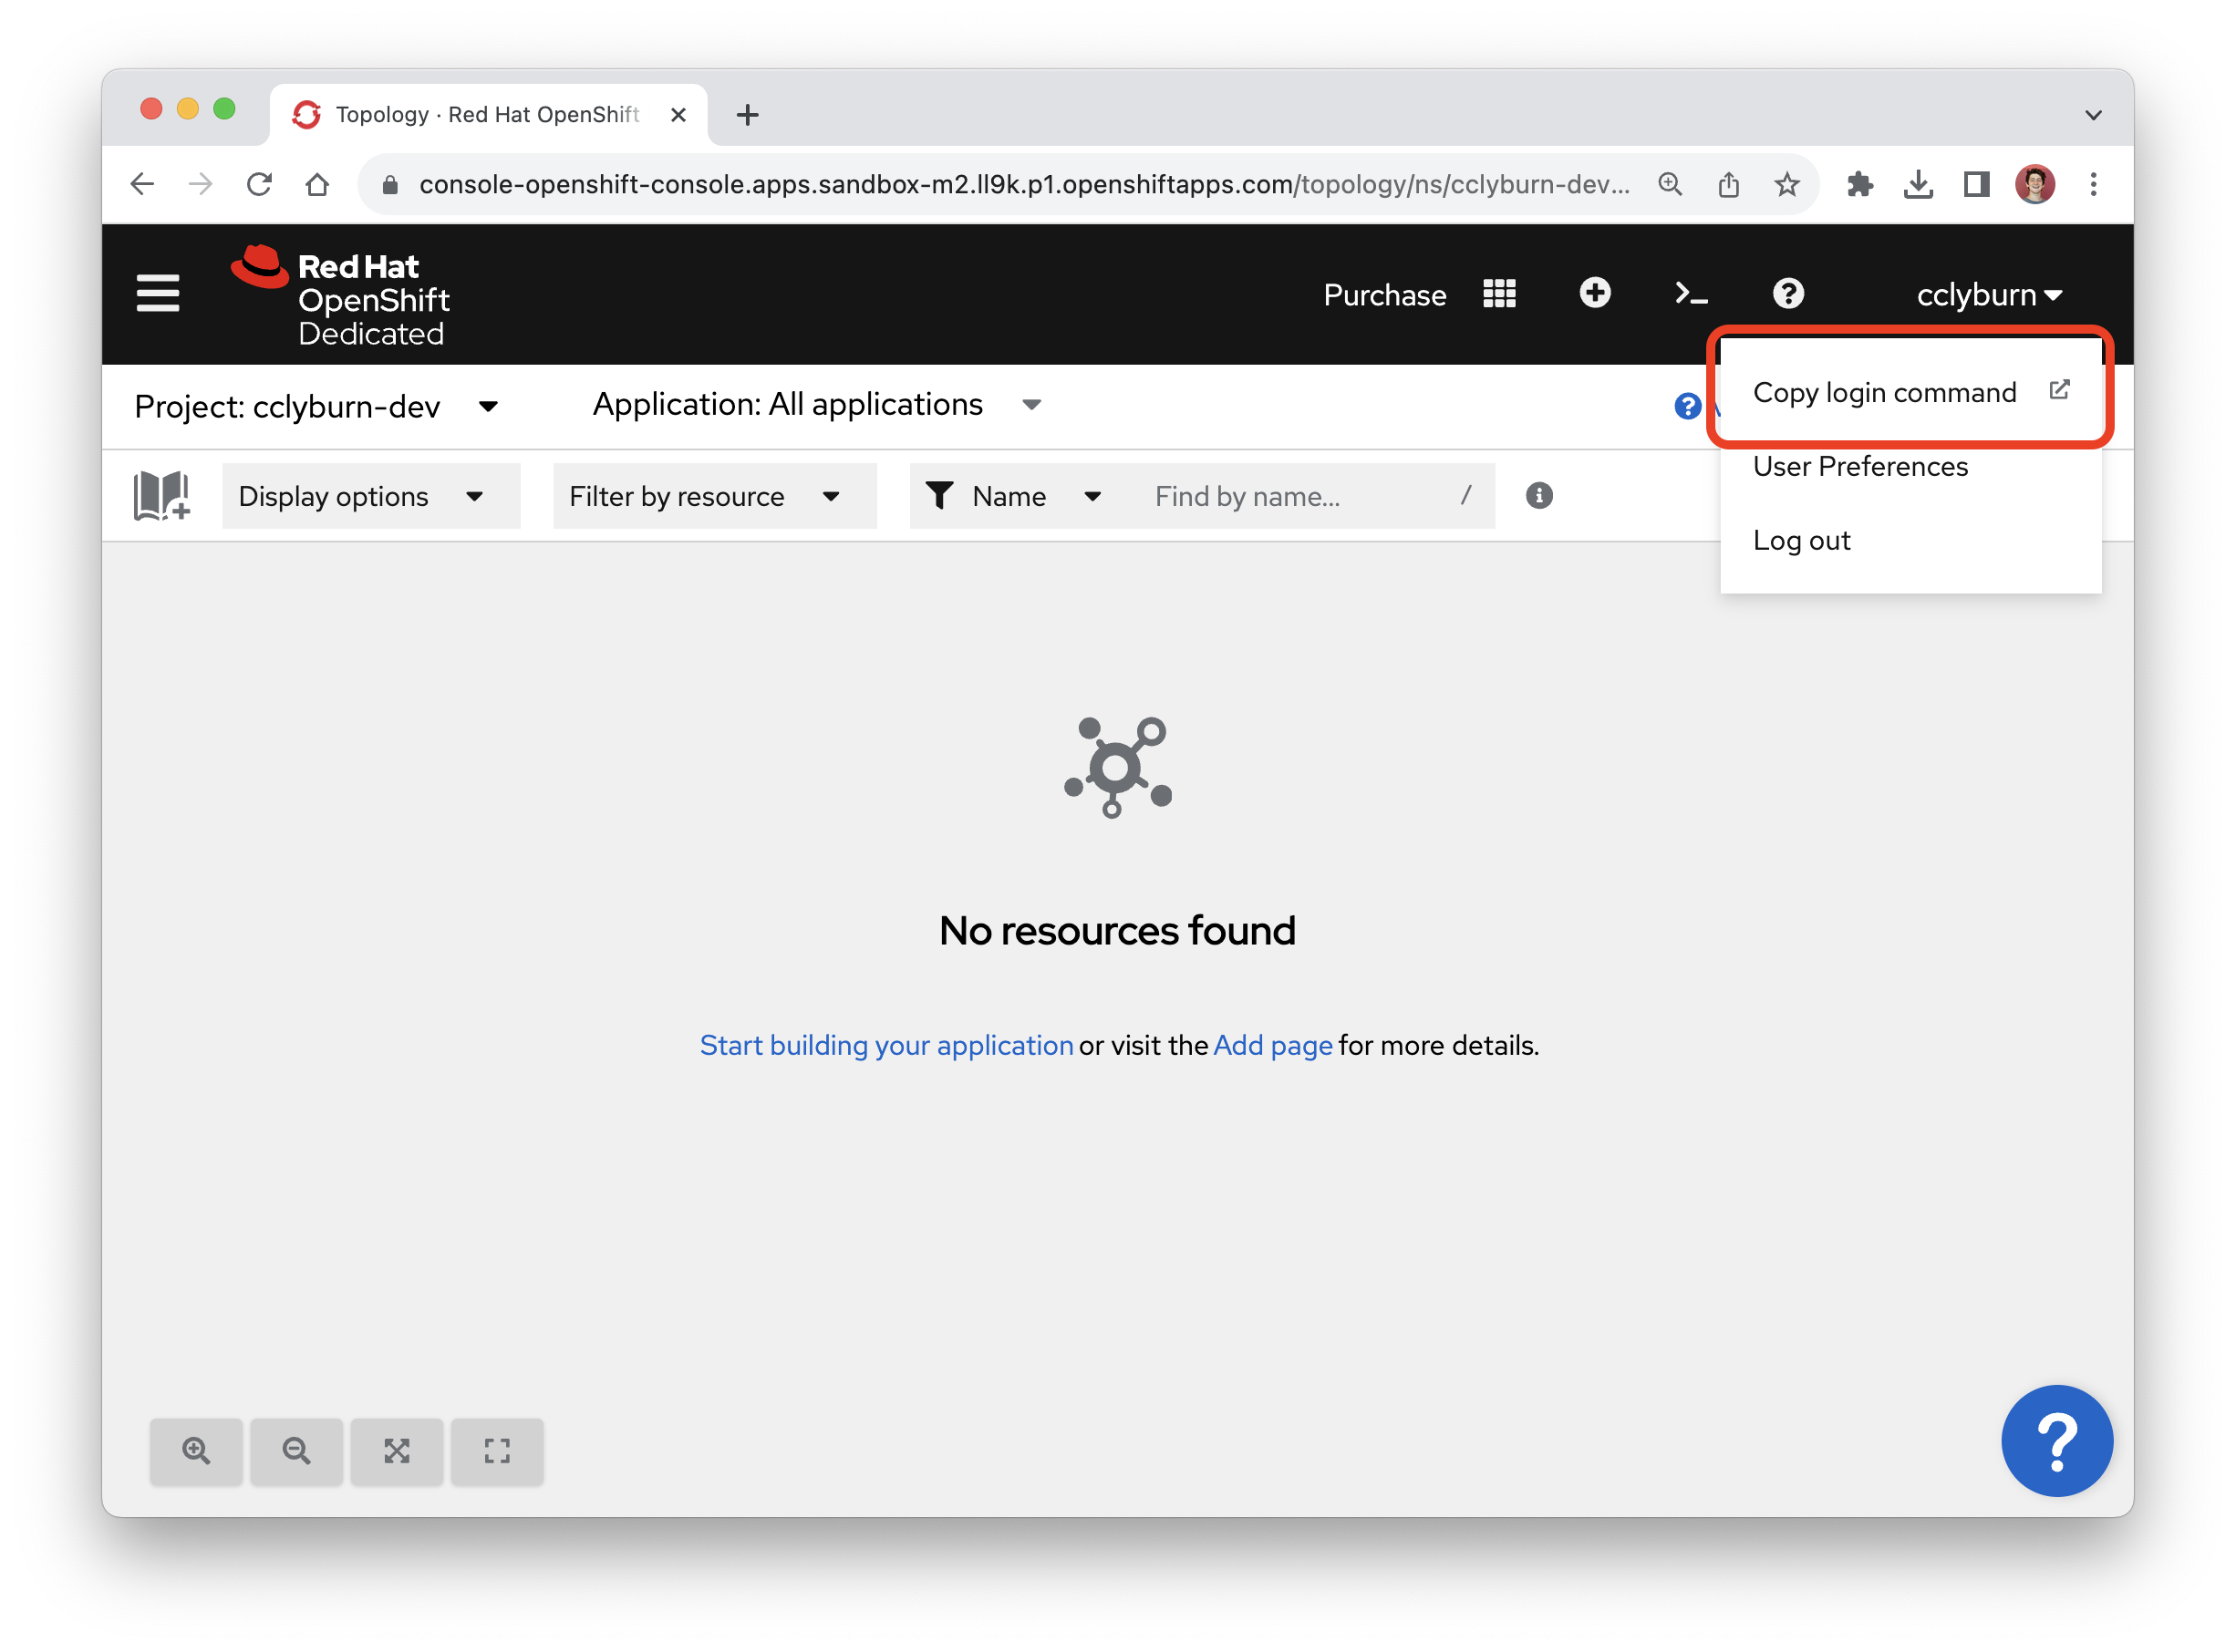
To connect odo to this OpenShift cluster, select the Copy login command button from the top-right of the OpenShift Web Console, where you can display your login token and copy it to the clipboard (Figure 13).
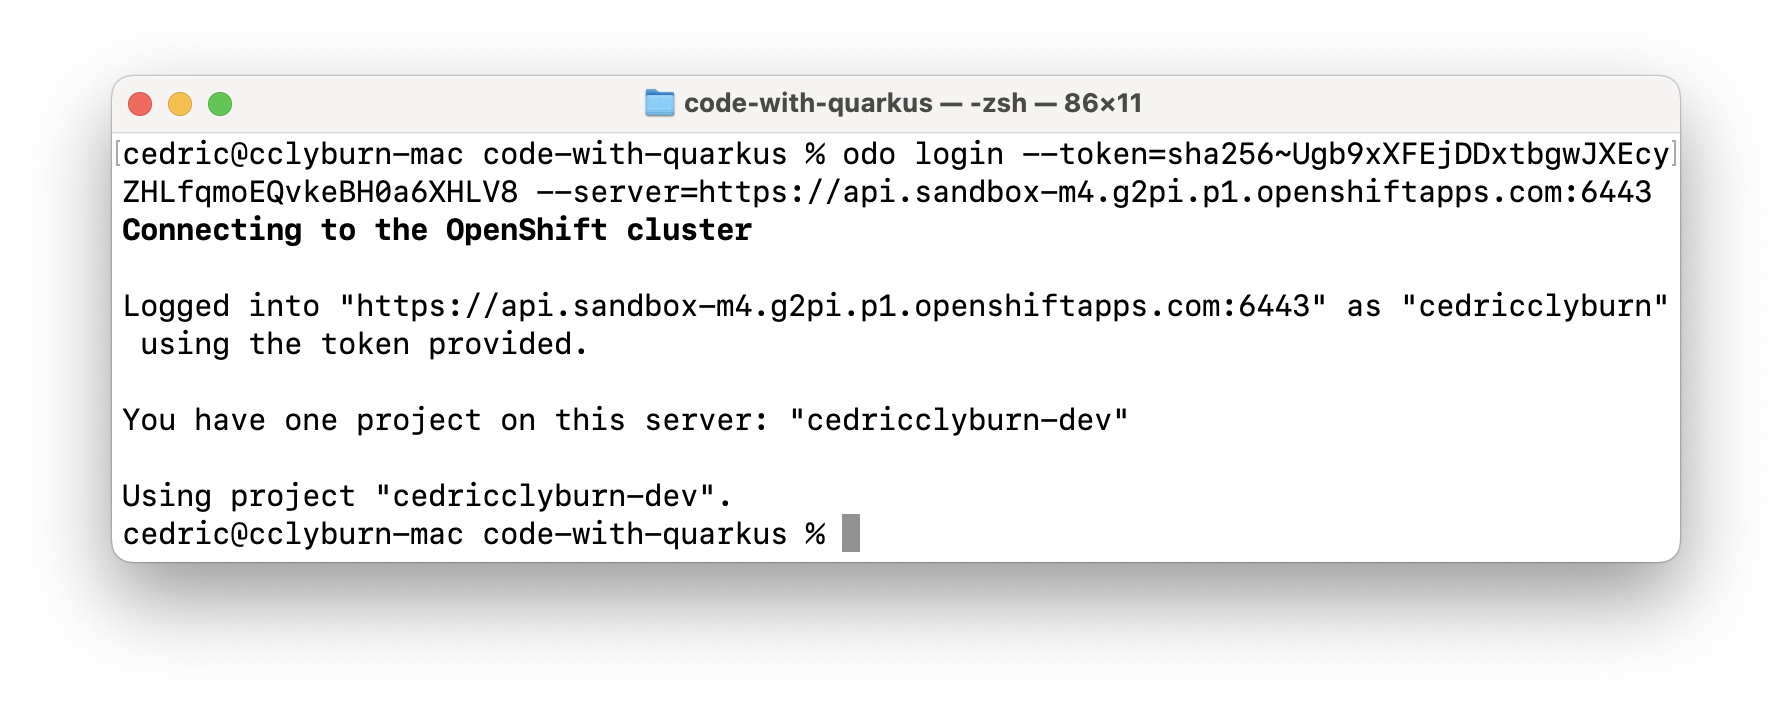
Here’s the trick, if you don’t already have the OpenShift `oc` CLI. Replace odo in the command with oc, and you’ll be ready to enter the login token and successfully connect to your cluster (Figure 14). You’ll automatically be defaulted to your single project/namespace in the Developer Sandbox, so we can continue on without making a new project.
$ odo login <token>
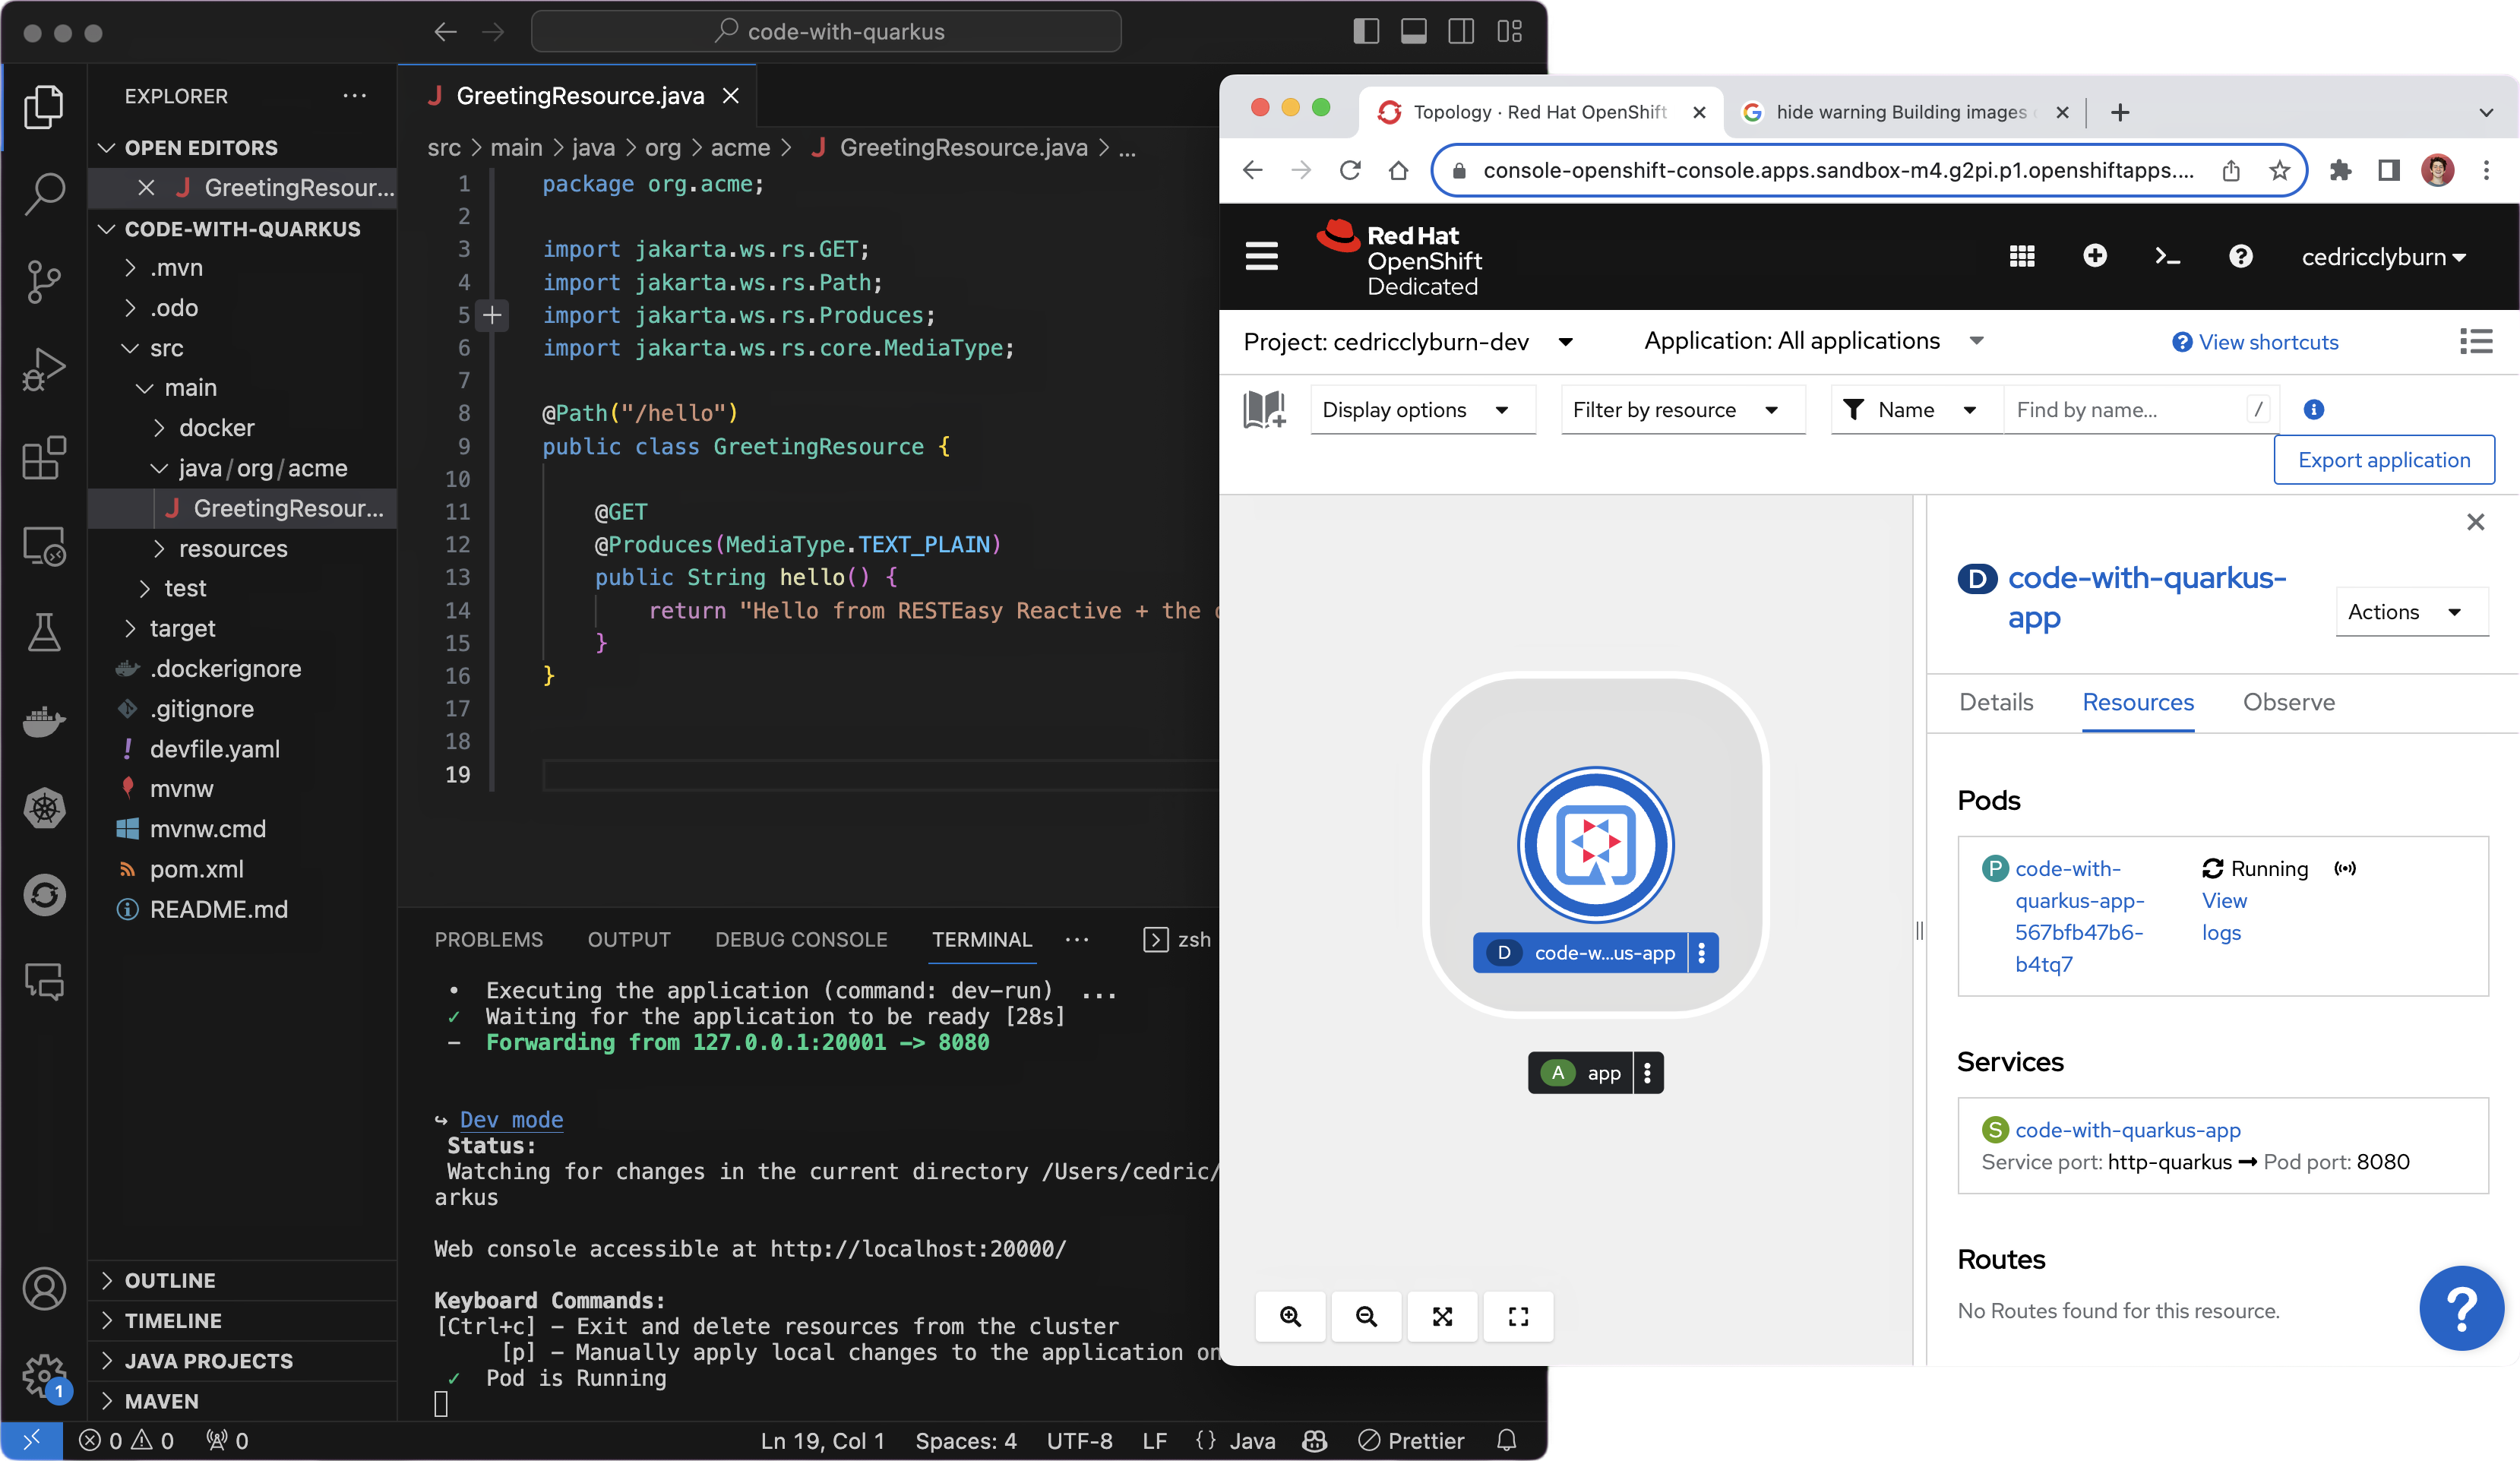
Finally, let’s kick off the inner loop activities in this cloud-native Kubernetes environment with the odo dev command, which will deploy our Quarkus application to OpenShift similar to how we just did with the Kubernetes cluster. We’ll now see the Quarkus app container running within a pod on our cluster with a service already set up (Figure 15). We also have the ability to create an OpenShift route to access our application externally.
$ odo dev
With odo, you can easily iterate your application against the Kubernetes or OpenShift cluster, as well as test and debug without having a deep understanding of the platform. For more advanced topics, feel free to head to the documentation site to learn about topics such as connecting to a service, running applications using odo in a production environment, and troubleshooting.
Summary
In short, odo makes it easy to navigate the complex world of Kubernetes, providing first-class deployment support for Podman and Kubernetes. With just a few simple commands, developers can set up their projects, make live updates, and odo will handle your application's building, pushing, and deployment. Be sure to check out the open source project at odo.dev, star the project on GitHub, and give it a try!