Deploying and configuring a database can be a challenging task, especially when sensitive data such as passwords and API keys are involved. However, by using Red Hat Ansible Automation Platform and Ansible Vault, we can streamline the process and ensure that our data is secure. In this article, we will explore how to configure and deploy a Microsoft SQL database using Ansible Vault, an Ansible Automation Platform feature.
We will walk you through the process, step-by-step, so that you can easily follow along and try it for yourself. By the end of this article, you will have a solid understanding of how to use Ansible Vault to deploy a secure database, making your deployment process more efficient and secure.
Before you begin, make sure to download and install Ansible Automation Platform, available at no cost. For more information about Ansible Automation Platform installation, please refer to our previous article, How to install Red Hat Ansible Automation Platform on RHEL 9.
Enhancing database security with Ansible Automation Platform
Ansible Vault is a powerful tool for keeping sensitive information, such as passwords, hidden from prying eyes. You can easily encrypt sensitive data and keep it separate from your code. This provides an added layer of security and ensures that only authorized personnel can access sensitive information. With this, you can manage passwords and other sensitive data in a secure manner, without having to modify the code itself. In this demonstration, we'll be working with a repository that demonstrates how to use Ansible Automation Platform to deploy and manage MSSQL databases. To protect the MSSQL password in our playbook, we made some modifications that improved our security and simplified our playbook management.
First, we removed the mssql_password key from our playbook, as this was a potential security vulnerability.
The original playbook:
vars:
    mssql_password: "123@Redhat"
    mssql_edition: Evaluation
   ...
The modified playbook:
vars:
    mssql_edition: Evaluation
   ...
Then, we created a new YAML file called mssql_password.yml to store the password separately from the playbook code. By doing this, we were able to keep the password secure and prevent it from being exposed in our code.
mssql_password.yml
vars:
    mssql_password: "123@Redhat"
Then encrypt the mssql_password.yml using ansible vault:
ansible-vault encrypt mssql_password.yml
We will be prompted to enter a password to encrypt the file. Modify the playbook to include mssq_password as a vars file.
---
- hosts: dev
  vars_files: sql_password.yml
  vars: ……
We’re now ready to run this playbook on Ansible Automation Platform.
Step 1: Set up the automation execution environment
Automation execution environments provide a defined, consistent, and portable environment for executing automation jobs. Unlike legacy virtual environments, automation execution environments are Linux container images that make it possible to incorporate system-level dependencies and collection-based content. Each automation execution environment allows you to have a customized image to run jobs, and each of them contains only what you need when running the job.
There are dependencies for the automation execution environment, such as Python 3 and Podman. Make sure these tools are installed. We have provided instructions for installing and using Podman in this video. Before you can complete any of the following tasks, you must create a registry service account. To log in to SA, you'll need to use a container runtime such as Podman or Docker. Podman is a powerful and secure open source tool that can be used as an alternative to Docker, with the added benefits of not requiring a daemon to run containers and having a more lightweight footprint. If you don't have Podman installed, you can use Docker instead, but we recommend using Podman for a more efficient container experience. To log in, open up your terminal and type the following commands:
podman login registry.redhat.io
Username: {REGISTRY-SERVICE-ACCOUNT-USERNAME}
Password: {REGISTRY-SERVICE-ACCOUNT-PASSWORD}
Login Succeeded!
Once we are successfully logged in, we need to create a container image by using a container file containing the following context:
FROM registry.redhat.io/ansible-automation-platform-22/ee-29-rhel8:latest

RUN ansible-galaxy collection install microsoft.sql
To build an image using podman.
podman build -t <image-name>.
The image should be pushed into the container image registry. Log in to the private container image registry using the command podman login before pushing.
podman push <image-name>
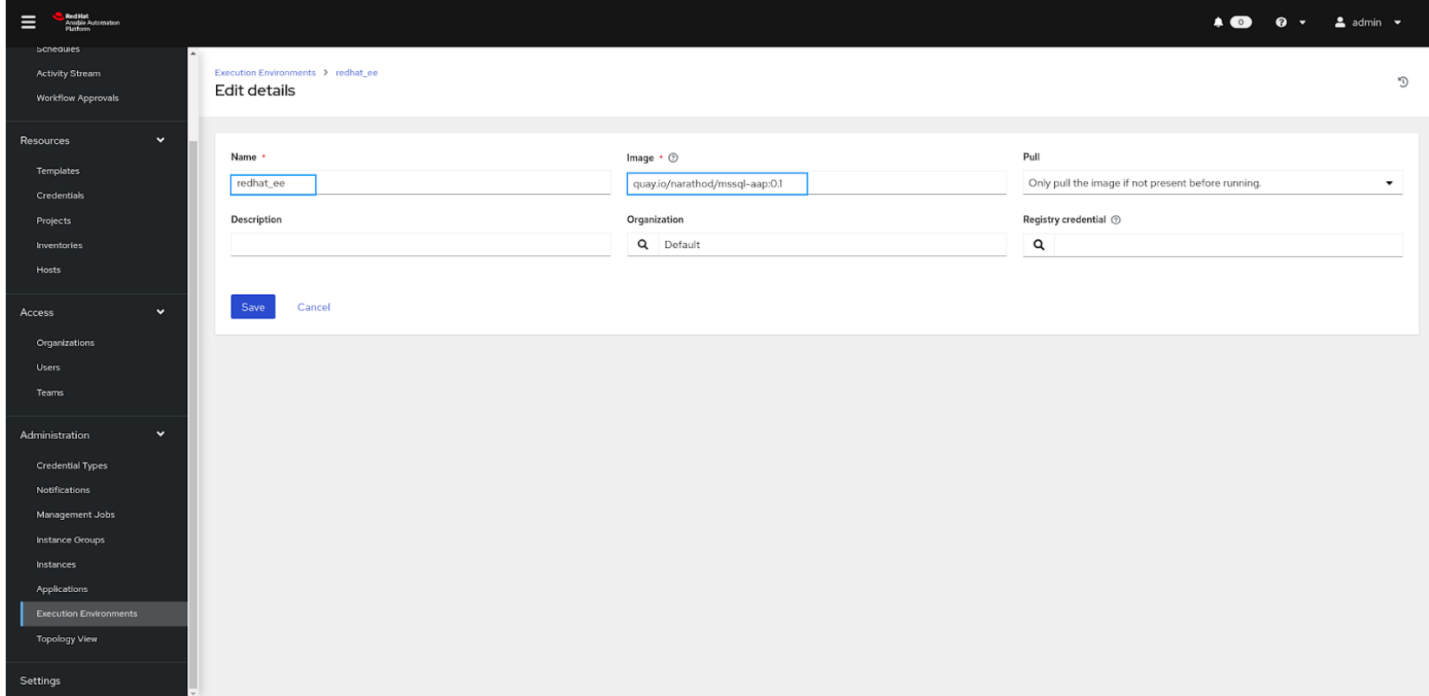
Add the image name in the automation execution environment, as shown in Figure 1.
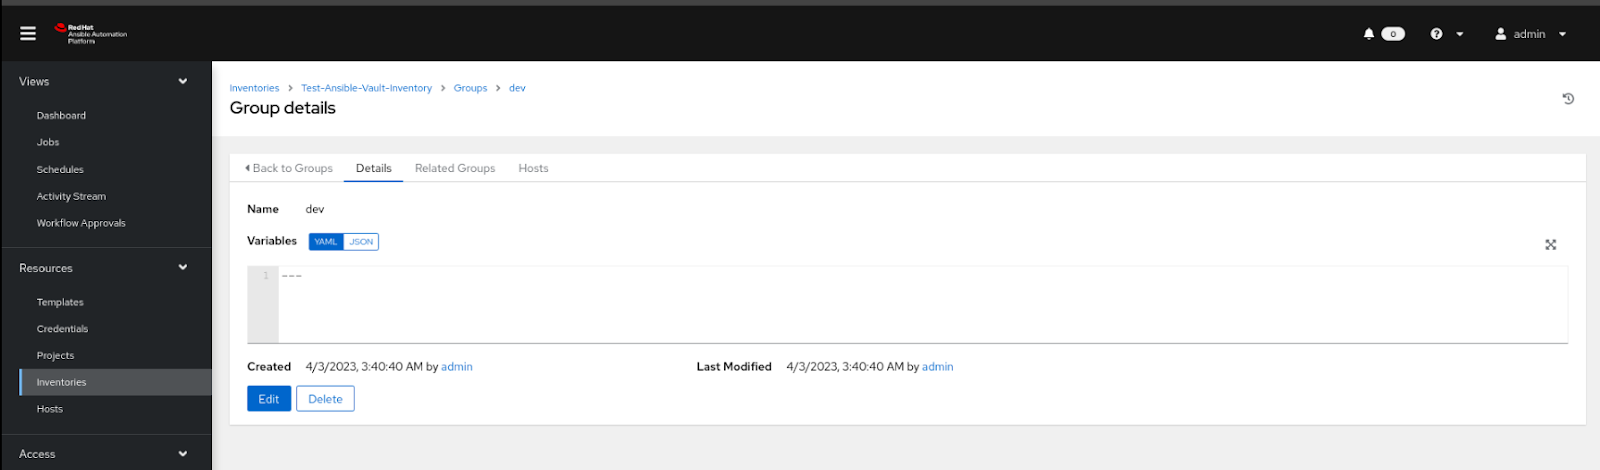
Step 2: Set up the inventory
An inventory is a collection of hosts against which jobs may be launched. To create inventory in Ansible Automation Platform, follow these steps and refer to Figure 2:
- Select the inventory from the left menu.
- Click on add.
- Select add inventory.
- Give a name to the inventory and save it.
- Select the groups from inventories and click add group.
- Give a name to the group and save it.
- Next, click on Hosts and click add a new host
- Give the targeted server IP and save it.
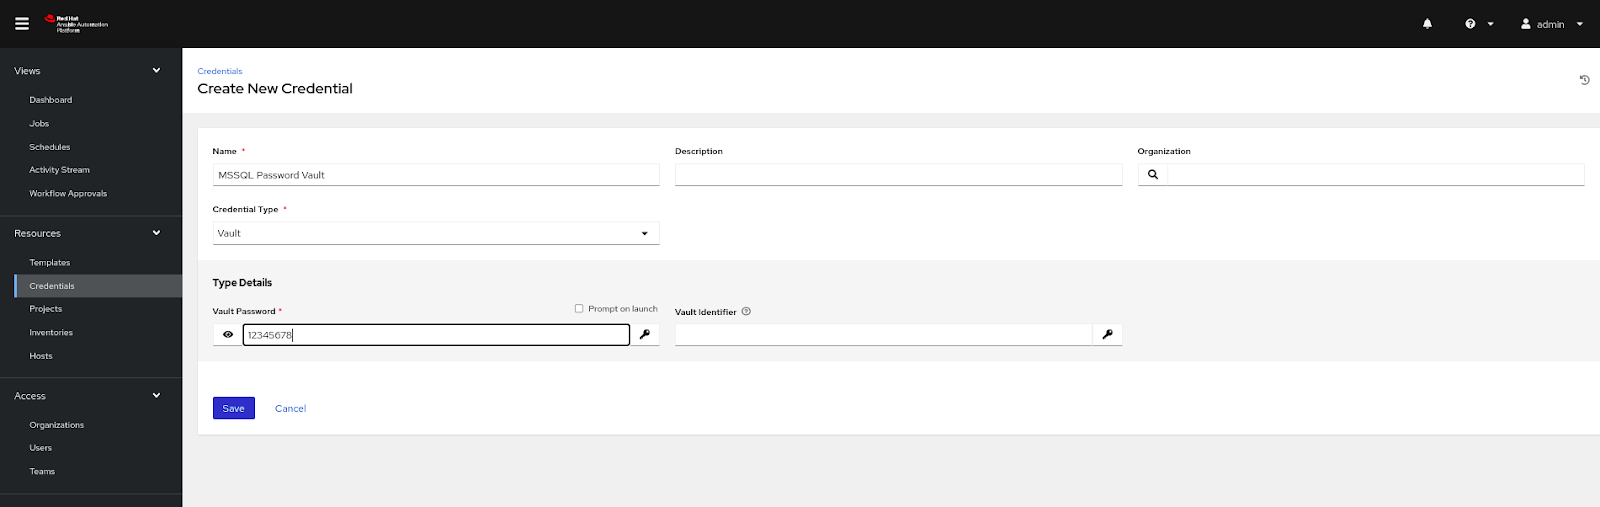
Step 3: Set up the credentials
To connect with the target server and decrypting the mssql_password.yml, we need credentials such as username, password, or ssh key of the target machine and password of the ansible vault. By using credentials, we can pass the required credentials during the playbook execution.
Follow these steps and refer to Figure 3 to set up the ssh machine credentials.
- Select the credentials from the left menu.
- Click on new credentials and select Machine credentials type.
- Add your username, password, or ssh key in the corresponding fields.
- (Optional) You'll be needed to run privileged commands on the remote machine, enter the sudo password in the Privilege Escalation section. This will allow Ansible controller to escalate privileges when necessary

Set up the Ansible Vault credentials (Figure 4):
- Click on new credentials and select vault type.
- Add a name to the credential and the vault password as the password you used for encrypting your mssql_password.yml (in our case, 12345678).
Step 4: Configure a project
A project is a logical collection of Ansible Playbooks represented in the controller. You can manage playbooks and playbook directories on your controller server either manually or by using a source code management (SCM) system, such as Git, Subversion, or Mercurial supported by the controller.
Follow these steps to create a project and refer to Figure 5:
- Create a new project for our git repository from the left menu.
- Click on the + icon in the right corner.
- Give the project a name.
- Select your organization (or choose Default).
- Select the SCM TYPE (GIT in our case).
- Add RESOURCE DETAILS
- SCM URL
- SCM BRANCH(main)
- SCM CREDENTIAL
- Save it.
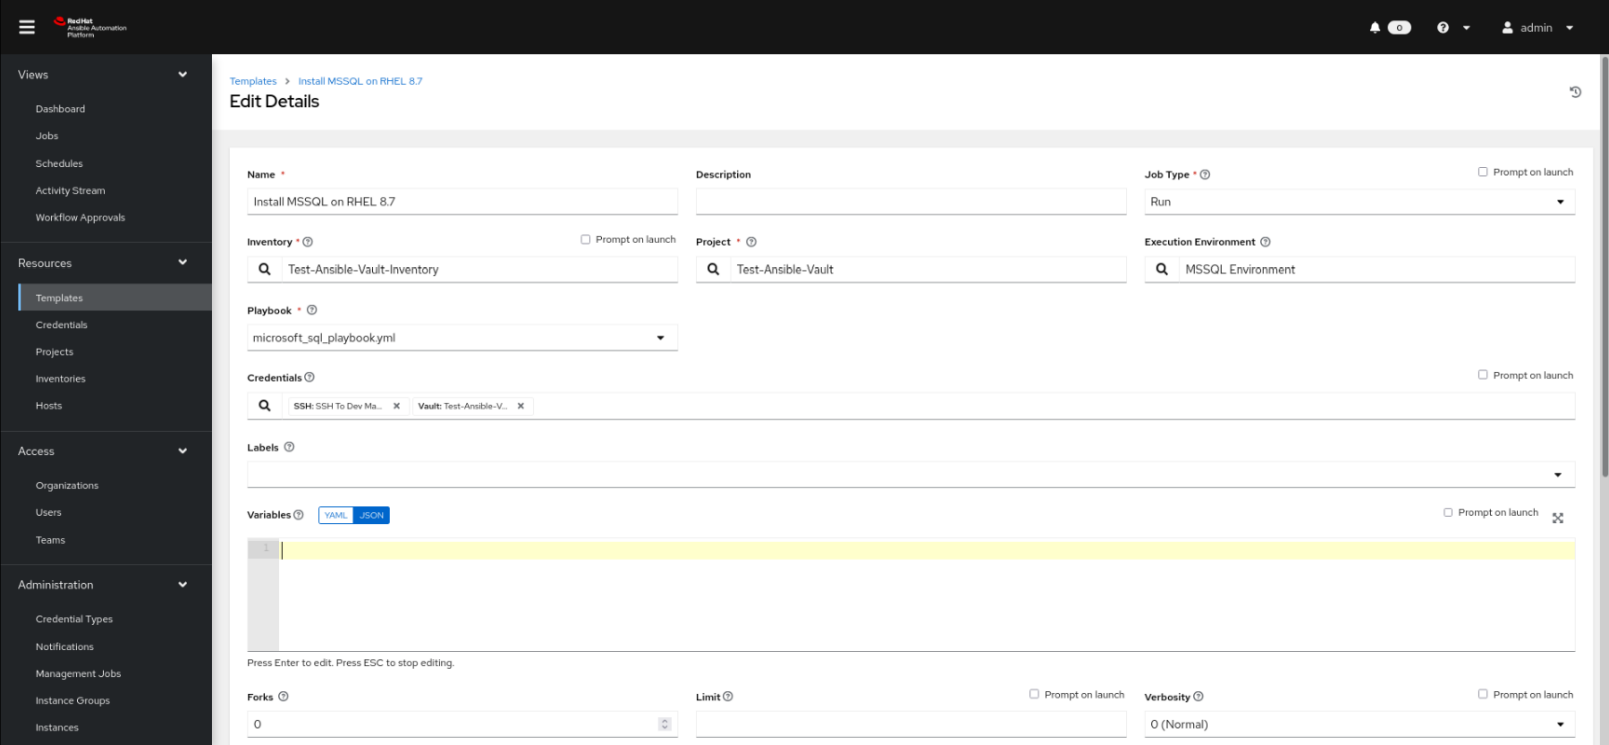
Step 5: Configure the templates
Templates define and set parameters for running jobs. A template is more like a blueprint where all of the dependencies are defined, such as inventory, projects, credentials, etc.
Follow these steps to create a template to execute the job for us (Figure 5):
- From the left menu, select templates and create a new template.
- Click on the + icon from the right corner and select the Job template.
- Give the template a name.
- Select the project and playbook you want to run in the template.
- Select MicrosoftSQL-with-ansible-vault/microsoft_sql_playbook.yml playbook.
- Select the execution environment which you created previously and make sure to check the Privilege Escalation option if you have that enabled with your ssh credentials.
If you haven't set up the privilege escalation password during the SSH credential, you can use still run the playbook by setting a variable called ansible_sudo_pass with the value as the password to your VM.
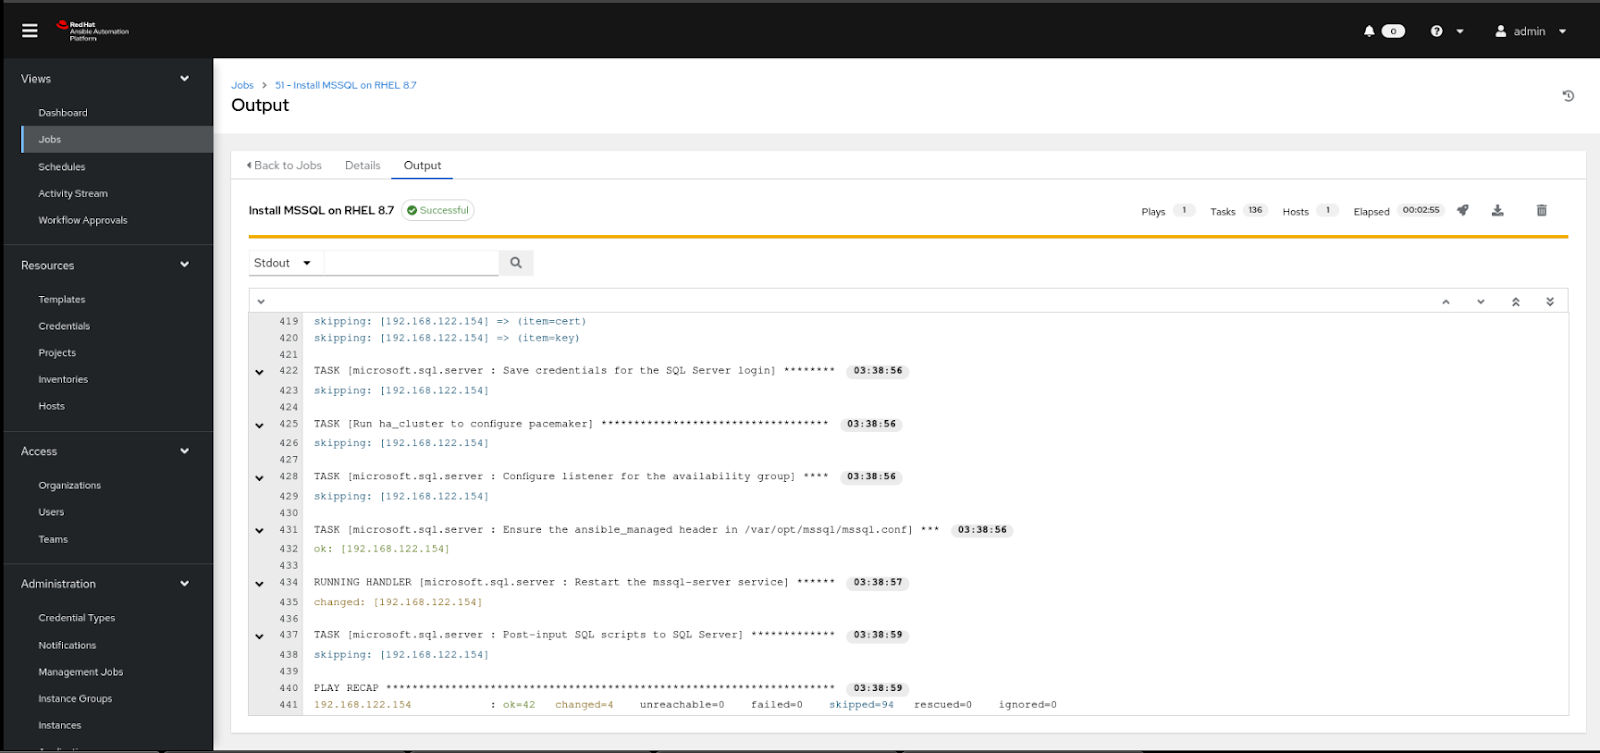
- Launch It (Figure 6).
Summary
Using Ansible Automation Platform and Ansible Vault can greatly enhance the security of your database deployments by keeping sensitive information like passwords separate from the code and protecting it from unauthorized access. To explore more of what Ansible Automation Platform has to offer, visit the official website to download and get started.
Additionally, these e-books can help you explore the capabilities of Ansible Automation Platform:
A cheat sheet is also available for WiFi automation with Ansible and SD, providing a quick reference for network automation tasks.