Red Hat recently launched a new offering for Red Hat JBoss Enterprise Application Platform (JBoss EAP), an enterprise Java platform on the Microsoft Azure marketplace. This offering allows you to deploy certified Azure images running Red Hat Enterprise Linux and JBoss EAP (both fully supported by Red Hat).
You are not required to have an existing JBoss EAP subscription from Red Hat prior to utilizing this service. This is a pay-as-you-go offering. Azure will bill you for the service.
In this article, we will demonstrate the steps to deploy and configure JBoss EAP on Azure. We will demonstrate two methods to deploy this image on a virtual machine:
- The Azure portal method.
- The Azure CLI and ARM templates method.
Prerequisites
- Azure account (active subscription)
- SSH key-pair generated
- Azure Command Line Interface (only required to provision if using CLI)
Complete the software plan form
Before you can use this marketplace offer, you must complete the software plan form. You can access the JBoss EAP offer from the following links depending on your region.
Click on the blue Get It Now button.
A form, entitled Create this app in Azure, will pop up. Complete this software plan form by entering your profile information. You only need to do this the first time you select the offer.
Click Continue and log in to your Azure account to proceed to the launch page, shown in Figure 1.
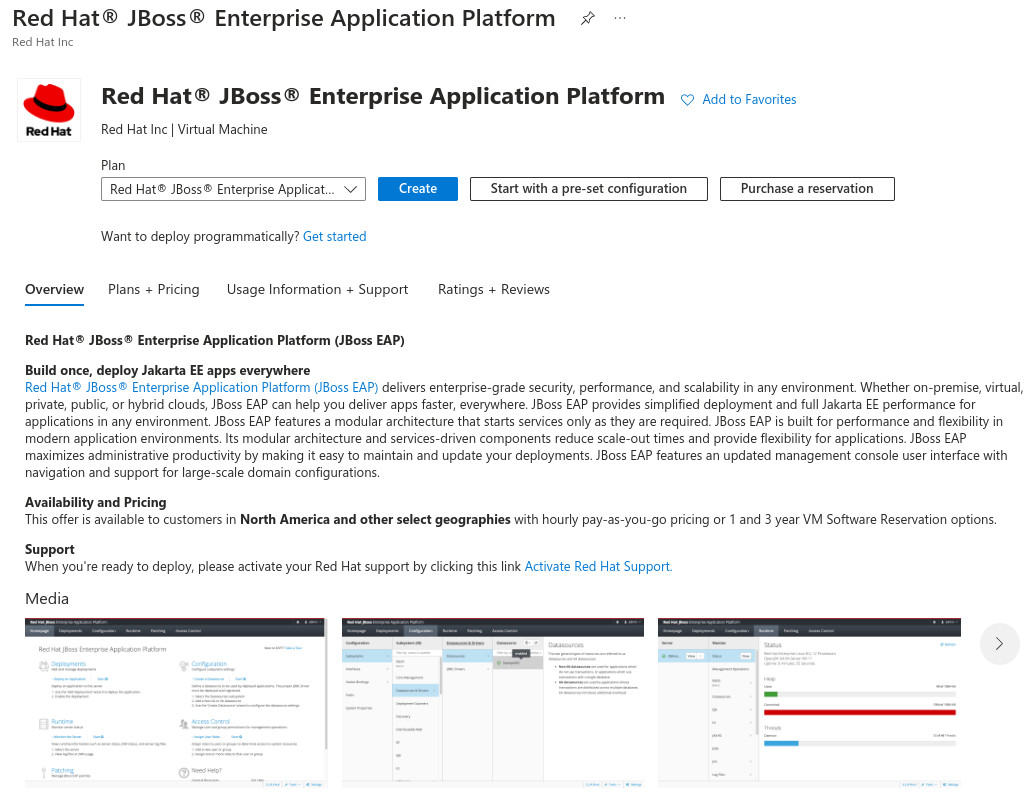
From this page, we can continue through the steps to provision a JBoss EAP virtual machine, or you can enable the deployment programmatically via the Azure CLI (to be covered later in this article).
Provision via the Azure portal
From the portal page, you can choose the Start with a pre-set configuration option or use your own custom configuration. In this quick start demo, we will choose the pre-set configuration.
Click the Start with a pre-set configuration option to proceed. You will be presented with options for standard configurations.
Select a Dev/Test and General Purpose (D-Series) configuration.
Click Continue to create a VM.
The Create a virtual machine form will be displayed, as shown in Figure 2:

You can choose to select an existing resource group, or create a new one, as shown in Figure 2. You will also need to enter a virtual machine name. Enter "eap" in this field.
Scroll down to reveal the SSH public key configuration.
You can configure access via SSH keys or a username with password. In this example, choose the Use existing public key option and upload a public key from ~/.ssh/id_rsa.pub. You also have the option of letting Azure generate a key pair to use when connecting to this instance. Click on Review + create. The virtual machine configuration will be validated, and then you should see the Validation passed page.
Note: To deploy this configuration using the Azure CLI, we can download the ARM template definition.
Click on Create to start the deployment. You will be redirected to the deployment progress page.
A few minutes later, the deployment will be complete, and you'll see the screen in Figure 3:
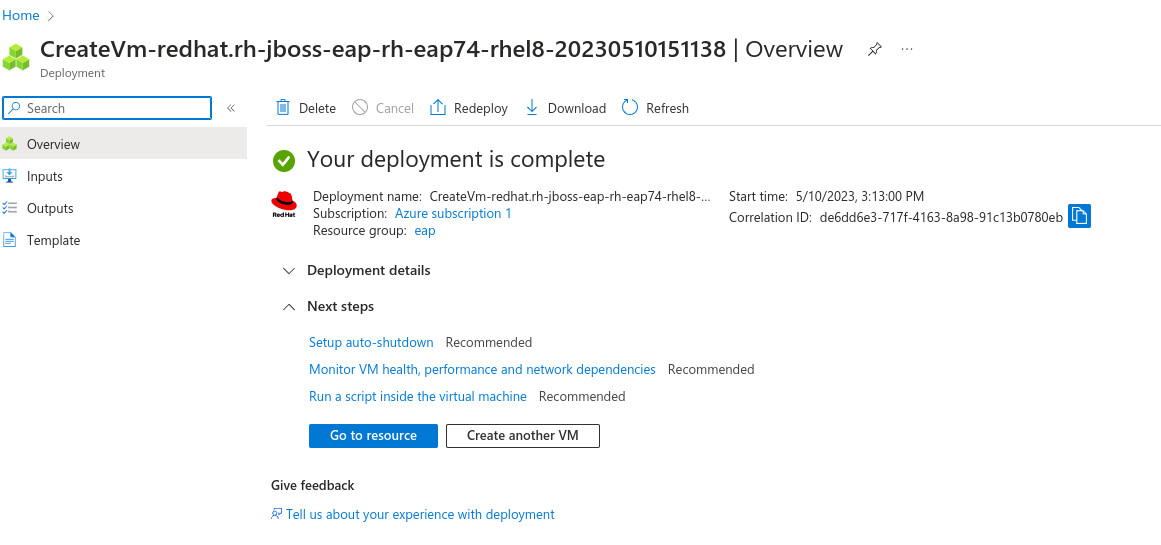
Click on the Go to resource button to view the details of the deployment.
Next, you will see the overview page, as shown in Figure 4.
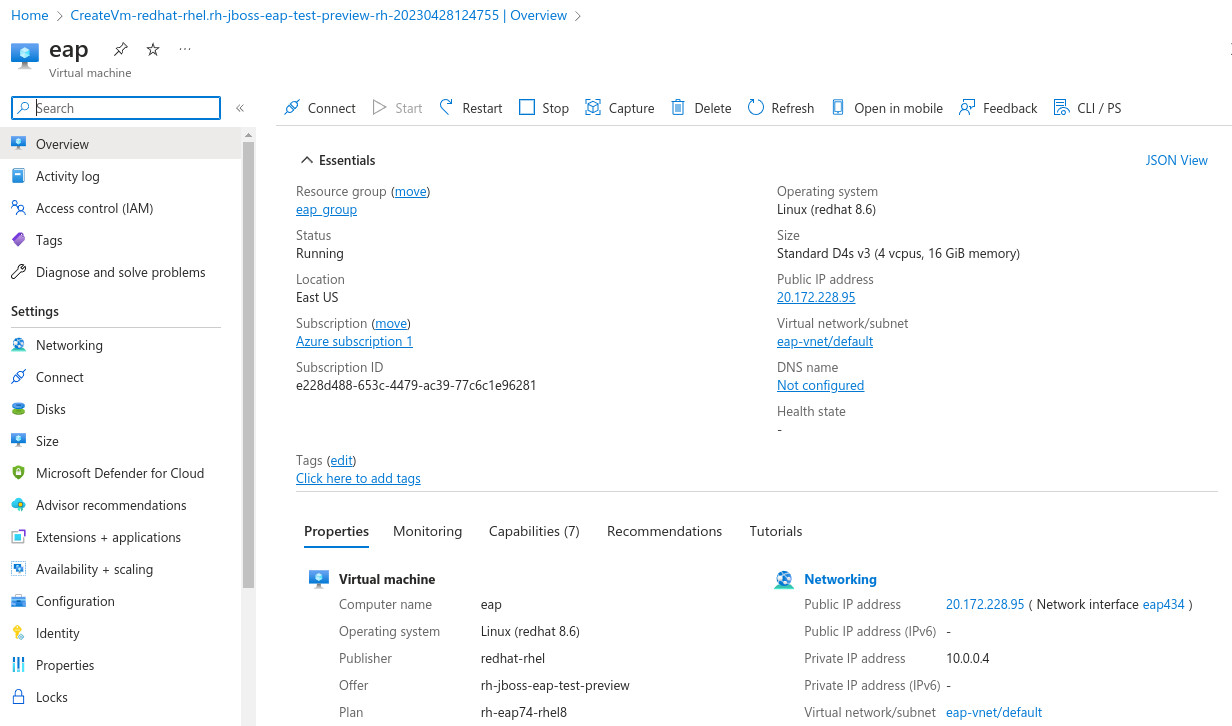
On this page, you can see the details of the virtual machine, including the public IP address.
Networking will be configured to allow inbound access on ports 22, 8080, and 9990.
Note: These ports should be open to the public for testing purposes only. In production environments, these ports would be locked down to a private network with public access enabled via SSL.
The virtual machine should be running and configured correctly. Now, you can log in and start JBoss EAP.
Provision via the Azure CLI and ARM template
To provision a JBoss EAP virtual machine using the Azure CLI, check out our example repository.
Note: This example uses an ARM template. This was created from the Azure portal by clicking on the Download a template for automation link on the Create a virtual machine page, once the validation step was completed.
Before we can deploy this offer programmatically, we need to enable this option for our active subscription. On the offer configuration page (Figure 5), click the Get Started link following the question, "Want to deploy programmatically?"
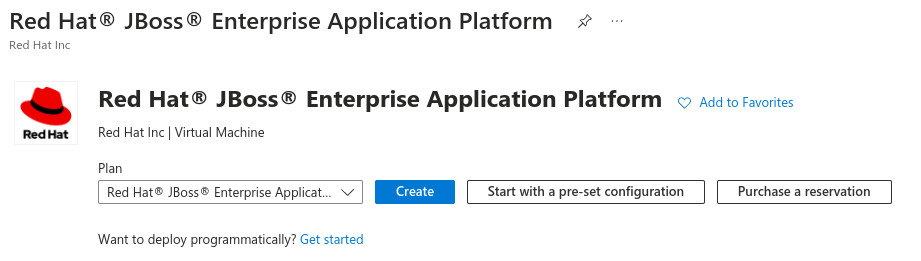
You will be directed to the Configure Programmatic Deployment page (Figure 6).
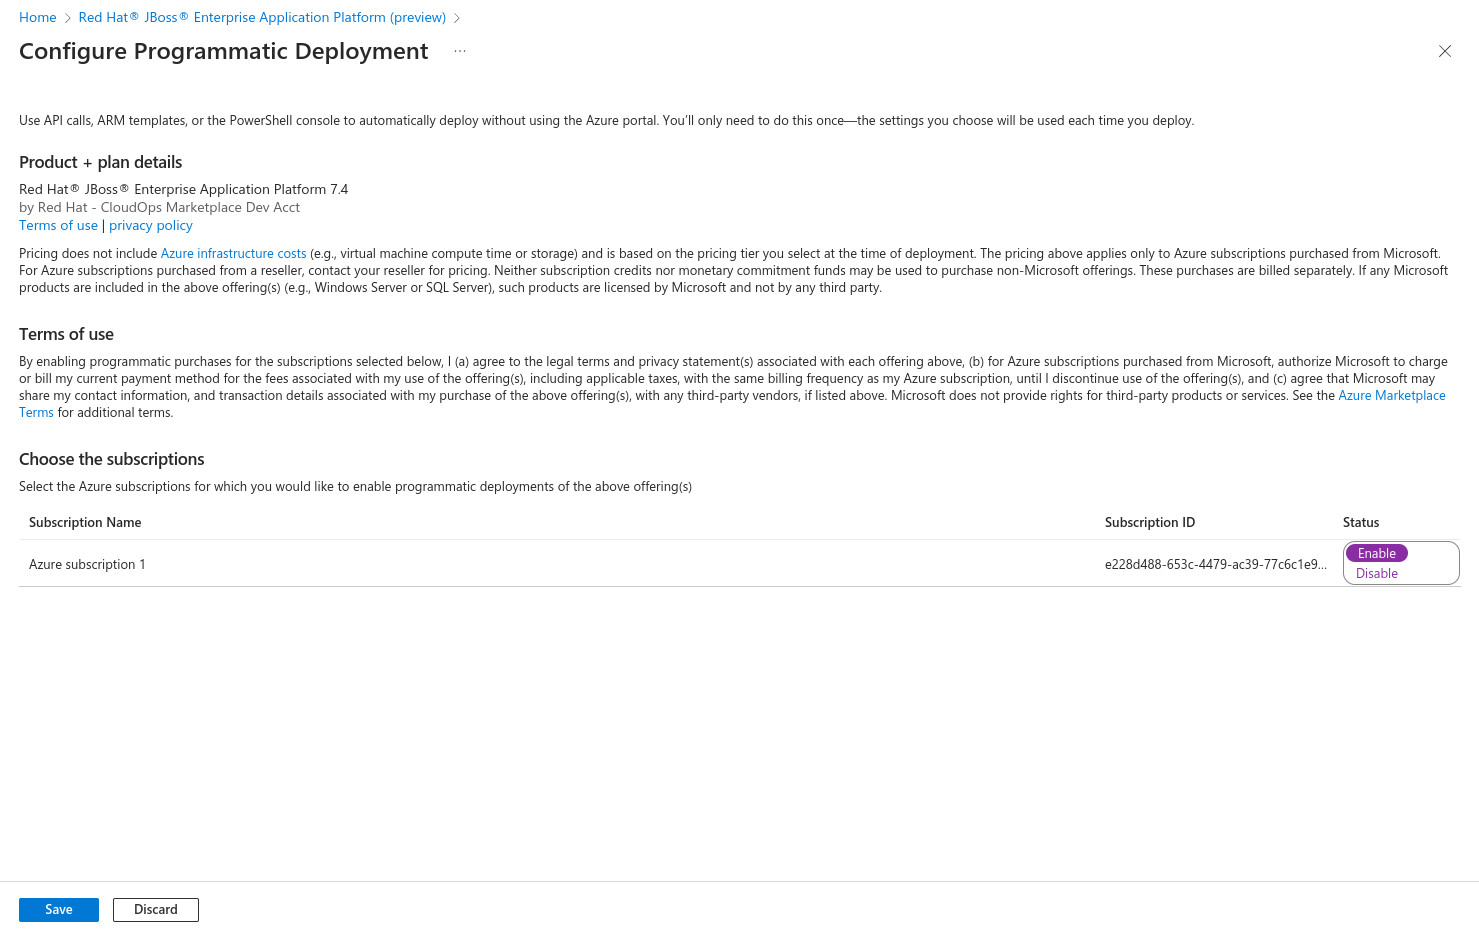
Make sure the subscription status is set to Enable for your active subscription, as shown in Figure 6.
You should now be able to use these instructions to deploy an instance of JBoss EAP on Azure using the ARM template included in the sample repository.
Check out the sample git repository to a local folder. From this folder, follow these instructions:
Log in to Azure using the Azure CLI.
az login
Create a resource group.
az group create --resource-group eap --location eastus
Deploy an instance of JBoss EAP on a virtual machine.
Note: The following command expects a public key to be stored in ~/.ssh.id_rsa.pub. If your key is in a different location you will need to alter this command.
az deployment group create --resource-group eap --template-file./SaaS-ARM.json --parameters./parameters.json --parameters adminPublicKey="$( cat ~/.ssh/id_rsa.pub)"
Once the deployment is complete, you should be able to check the status of your instance with the following command:
az vm get-instance-view --name eap --resource-group eap --query "instanceView.statuses"
You should see something like this:
[
  {
    "code": "ProvisioningState/succeeded",
    "displayStatus": "Provisioning succeeded",
    "level": "Info",
    "message": null,
    "time": "2023-04-27T18:56:59.006880+00:00"
  },
  {
    "code": "PowerState/running",
    "displayStatus": "VM running",
    "level": "Info",
    "message": null,
    "time": null
  }
]
The JBoss EAP virtual machine is now running, we can move on to connecting and starting JBoss EAP.
Starting JBoss EAP
If you deployed using the Azure portal method, from the overview tab, click on Connect to find the instructions to connect to your VM.
Otherwise, run the following command using the Azure CLI:
az network public-ip show -n eap-ip --resource-group eap --query "ipAddress"
Connect to the virtual machine via SSH.
ssh azureuser@<public ip address>
Run the following commands to launch JBoss EAP in standalone mode.
Switch to the sudo user.
sudo su -
Configure the JBoss EAP standalone configuration to allow access to the admin console from public IP addresses:
echo "JAVA_OPTS=\"$JAVA_OPTS -Djboss.bind.address=0.0.0.0 -Djboss.bind.address.private=0.0.0.0 -Djboss.bind.address.management=0.0.0.0\"" >> /opt/rh/eap7/root/usr/share/wildfly/bin/standalone.conf
Start JBoss EAP in standalone mode.
systemctl start eap7-standalone
Navigate to the public IP address on port 8080.
On the familiar JBoss EAP landing page, you will see the default JBoss EAP home page displayed. On this page, you can access the administration console.
Accessing the admin console
If you try to access the admin console you will see a message "you have not yet added any users to access the admin console."
To add an admin user, enter the following from the existing ssh connection to the virtual machine:
/opt/rh/eap7/root/usr/share/wildfly/bin/add-user.sh
You will see a prompt asking for the type of user you want to add, (a) management user or (b) application user. Select a for application user.
You will then be prompted for a username. Enter admin.
The admin user will already exist, so you will be prompted to (a) update the existing user, (b) enable the existing user, or (c) type a new username. Select a to update the existing user.
When prompted, create a password.
You will be asked for a list of groups to add this user. You can leave this section blank.
Enter no for the final question, "Is this new user going to be used for one AS process to connect to another AS process?"
You should now be able to access the admin console by clicking on the link on the JBoss EAP starting page.
JBoss EAP on Azure
In this article, we demonstrated the steps to create a pay-as-you-go instance of JBoss EAP on Azure using the verified image from the Azure marketplace. We also demonstrated how to deploy JBoss EAP on an Azure virtual machine using the Azure portal and the Azure CLI and ARM templates.
The purpose of this article was to introduce the JBoss EAP on Azure Marketplace offer and highlight two ways this service can be provisioned. There are other methods to provision these services. For example, you can use automation with Ansible, utilizing the Azure cloud modules and the ansible-middleware collection. The method you choose depends on your use case and priorities. If you are trying out the service for a POC, you may use the Azure portal. If you are deploying instances to production environments, you would likely provision programmatically using ARM templates.
Last updated: August 14, 2023