Microsoft Azure Red Hat OpenShift is a fully managed service of Red Hat OpenShift on Azure, jointly engineered, managed, and supported by Microsoft and Red Hat. Azure Red Hat OpenShift takes care of cluster and resource management, freeing developers to focus on developing new services (see Figure 1). The service offers a highly available control plane with fully managed master and application nodes—no virtual machines to operate and no patching required. Azure Red Hat OpenShift is backed by the expertise of site reliability engineers throughout the world.
This tutorial (a simplified version of the official documentation) will show how you can easily create and launch an Azure Red Hat OpenShift cluster.

[ Learning path: Getting started with Microsoft Azure Red Hat OpenShift (ARO) ]
Prerequisites
To follow this tutorial, you need an Azure account and portal access. In addition:
- Azure Red Hat OpenShift requires
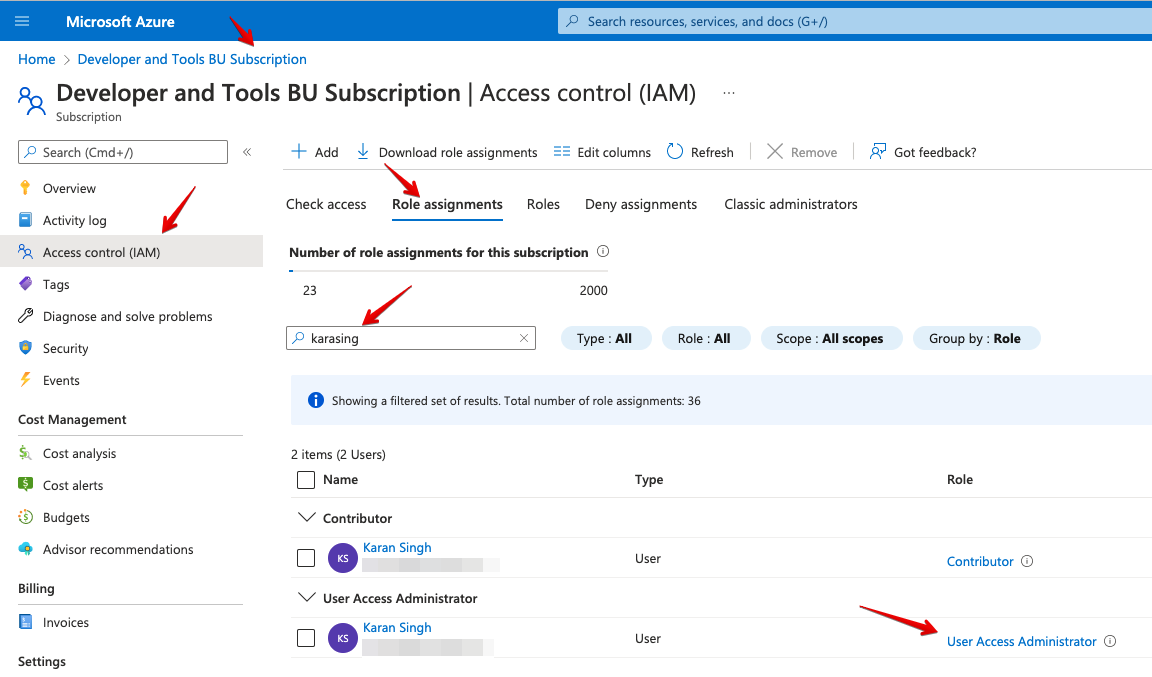
roleAssignment/writepermission, so make sure your Azure user account hasMicrosoft.Authorization/roleAssignments/writepermissions, such asUser Access AdministratororOwner(Figure 2). More info can be found in the documentation for Azure built-in roles.
Figure 2. Azure role assignment and user authorization. - Azure Red Hat OpenShift requires a minimum of 40 cores to create and run an OpenShift cluster. The default Azure resource quota for a new Azure subscription is 10 and does not meet this requirement. Therefore, you have to increase your quota from 10 to a minimum of 40. To request an increase in your resource limit, please consult the Microsoft document titled Increase VM-family vCPU quotas.
Set up Azure Red Hat OpenShift
Before setting up an OpenShift cluster, perform the following steps.
-
Launch Azure Cloud Shell from Azure Portal (top right).
-
Export some variables that we will often use in the rest of the tutorial. Substitute the values for the location and resource group that are appropriate for your environment:
export LOCATION=centralindia export RESOURCEGROUP=ksingh-resource-group-india export CLUSTER=azureopenstack -
Verify the quota:
az vm list-usage -l $LOCATION \ --query "[?contains(name.value, 'standardDSv3Family')]" \ -o table -
Get your subscription ID from Azure Portal:
az account set --subscription <SUBSCRIPTION ID> -
Get the OpenShift pull secrets for your Azure Red Hat OpenShift cluster from cloud.redhat.com.
-
Download the file with your pull secret and store it on Azure Cloud Shell under the name
pull-secret.txt.
Launch an Azure Red Hat OpenShift cluster
Now you can create a cluster as follows.
-
Register the resource providers:
az provider register -n Microsoft.RedHatOpenShift --wait az provider register -n Microsoft.Compute --wait az provider register -n Microsoft.Storage --wait az provider register -n Microsoft.Authorization --wait -
Create a resource group:
az group create --name $RESOURCEGROUP --location $LOCATION -
Create a virtual network:
az network vnet create --resource-group $RESOURCEGROUP --name aro-vnet --address-prefixes 10.0.0.0/22 -
Create two subnets in the
aro-vnetnetwork, one for the OpenShift control plane (master) and one for worker nodes:az network vnet subnet create --resource-group $RESOURCEGROUP --vnet-name aro-vnet --name master-subnet --address-prefixes 10.0.0.0/23 --service-endpoints Microsoft.ContainerRegistry az network vnet subnet create --resource-group $RESOURCEGROUP --vnet-name aro-vnet --name worker-subnet --address-prefixes 10.0.2.0/23 --service-endpoints Microsoft.ContainerRegistry -
Update the master node subnet network policy:
az network vnet subnet update --name master-subnet --resource-group $RESOURCEGROUP --vnet-name aro-vnet --disable-private-link-service-network-policies true -
Create an Azure Red Hat OpenShift cluster with a default configuration:
az aro create --resource-group $RESOURCEGROUP --name $CLUSTER --vnet aro-vnet --master-subnet master-subnet --worker-subnet worker-subnet --pull-secret @pull-secret.txt
Connect to your Azure Red Hat OpenShift cluster
You can start working in your cluster as follows:
-
Get the URL and credentials of the OpenShift console (graphical user interface):
az aro show --name $CLUSTER --resource-group $RESOURCEGROUP --query "consoleProfile.url" -o tsv az aro list-credentials --name $CLUSTER --resource-group $RESOURCEGROUP -
Install the OpenShift
occommand-line client:cd ~ wget https://mirror.openshift.com/pub/openshift-v4/clients/ocp/latest/openshift-client-linux.tar.gz mkdir openshift && tar -zxvf openshift-client-linux.tar.gz -C openshift echo 'export PATH=$PATH:~/openshift' >> ~/.bashrc && source ~/.bashrc -
Connect to OpenShift using
oc:apiServer=$(az aro show -g $RESOURCEGROUP -n $CLUSTER --query apiserverProfile.url -o tsv) && oc login $apiServer -u kubeadmin -p
Summary
As you've seen in this tutorial, launching an Azure Red Hat OpenShift cluster from Azure Cloud Shell and aro CLI is simple and easy. I hope this article helps. See you next time!