Cryostat is a tool for managing JDK Flight Recorder data on Kubernetes. Cryostat 2.1 is now installable using a Helm chart. While the Cryostat Operator is our preferred installation method for production environments, the Cryostat Helm chart is a better choice for demo purposes. The Helm chart has a flexible design and requires few permissions to allow many users as needed.
How to install the Cryostat Helm chart
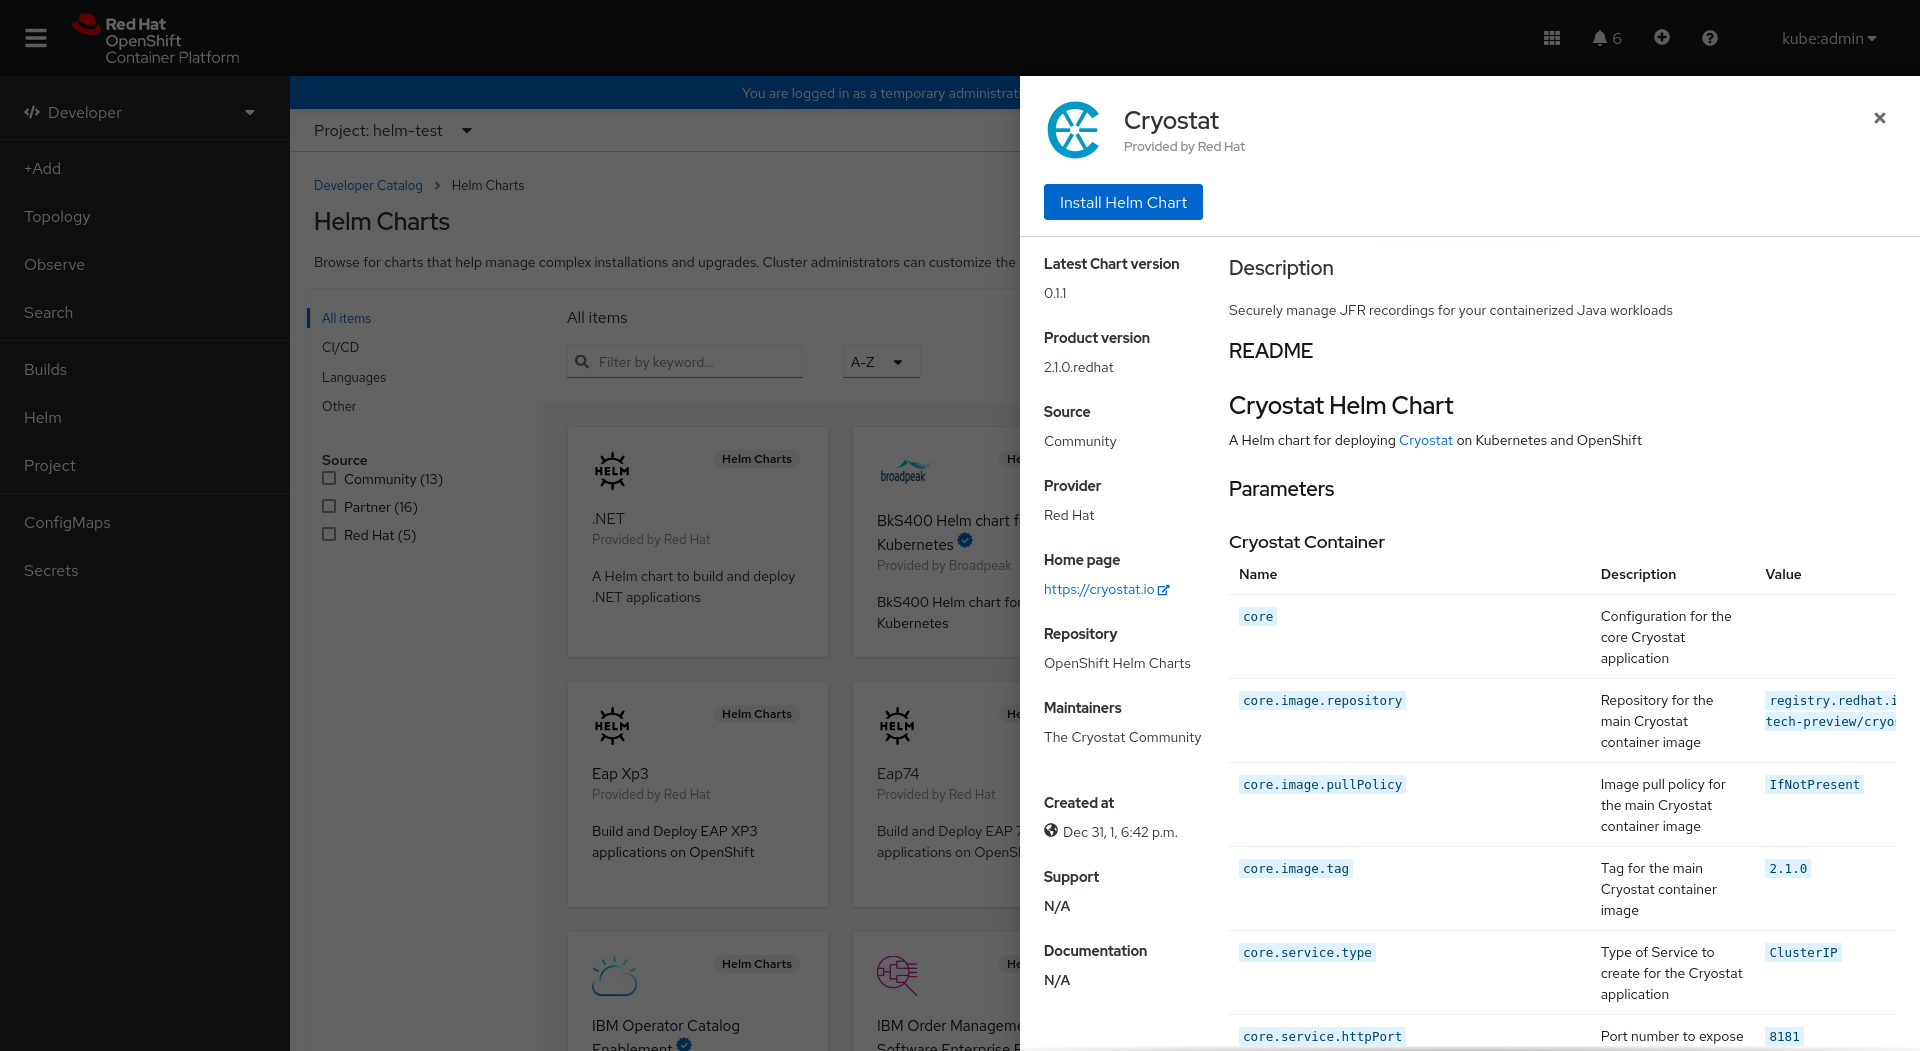
The Cryostat Helm chart is included by default in the Red Hat OpenShift Container Platform versions 4.8 and up. From the OpenShift developer console, click Add+, and then select Helm Chart from the developer catalog card. Search for Cryostat and choose Install Helm Chart (see Figure 1).
To install the Cryostat Helm chart on OpenShift 4.6-4.7, add the OpenShift Helm chart repository:
$ helm repo add openshift-helm-charts https://charts.openshift.io/
$ helm install <release_name> cryostat
Kubernetes users can install the community-supported version of the Helm chart from our GitHub repository:
$ helm install <release_name> \
    https://github.com/cryostatio/cryostat-helm/releases/download/v0.1.3/cryostat-0.1.3.tgz
Installing the Cryostat Helm chart creates the following objects:
- A deployment containing Cryostat, Grafana, and a data source for Grafana.
- Services for Cryostat and Grafana.
- A service account, role, and role binding for Cryostat to use for discovering your applications.
- By default on OpenShift, routes to expose the Cryostat and Grafana services outside of the clusters.
- If enabled, ingresses to expose the Cryostat and Grafana services outside of the clusters.
There are a variety of configuration options to customize these objects. Our chart README contains a complete list of these options for OpenShift and Kubernetes.
Once the Helm chart is installed, it will prompt you to run additional commands which tell Cryostat’s components how to communicate with each other. The ClusterIP service type with no route or ingress will illustrate how to use port forwarding with kubectl or oc. Run these commands in a terminal on your local machine with kubectl or oc logged into the cluster where you installed the Helm chart. Figure 2 illustrates an example of these instructions.
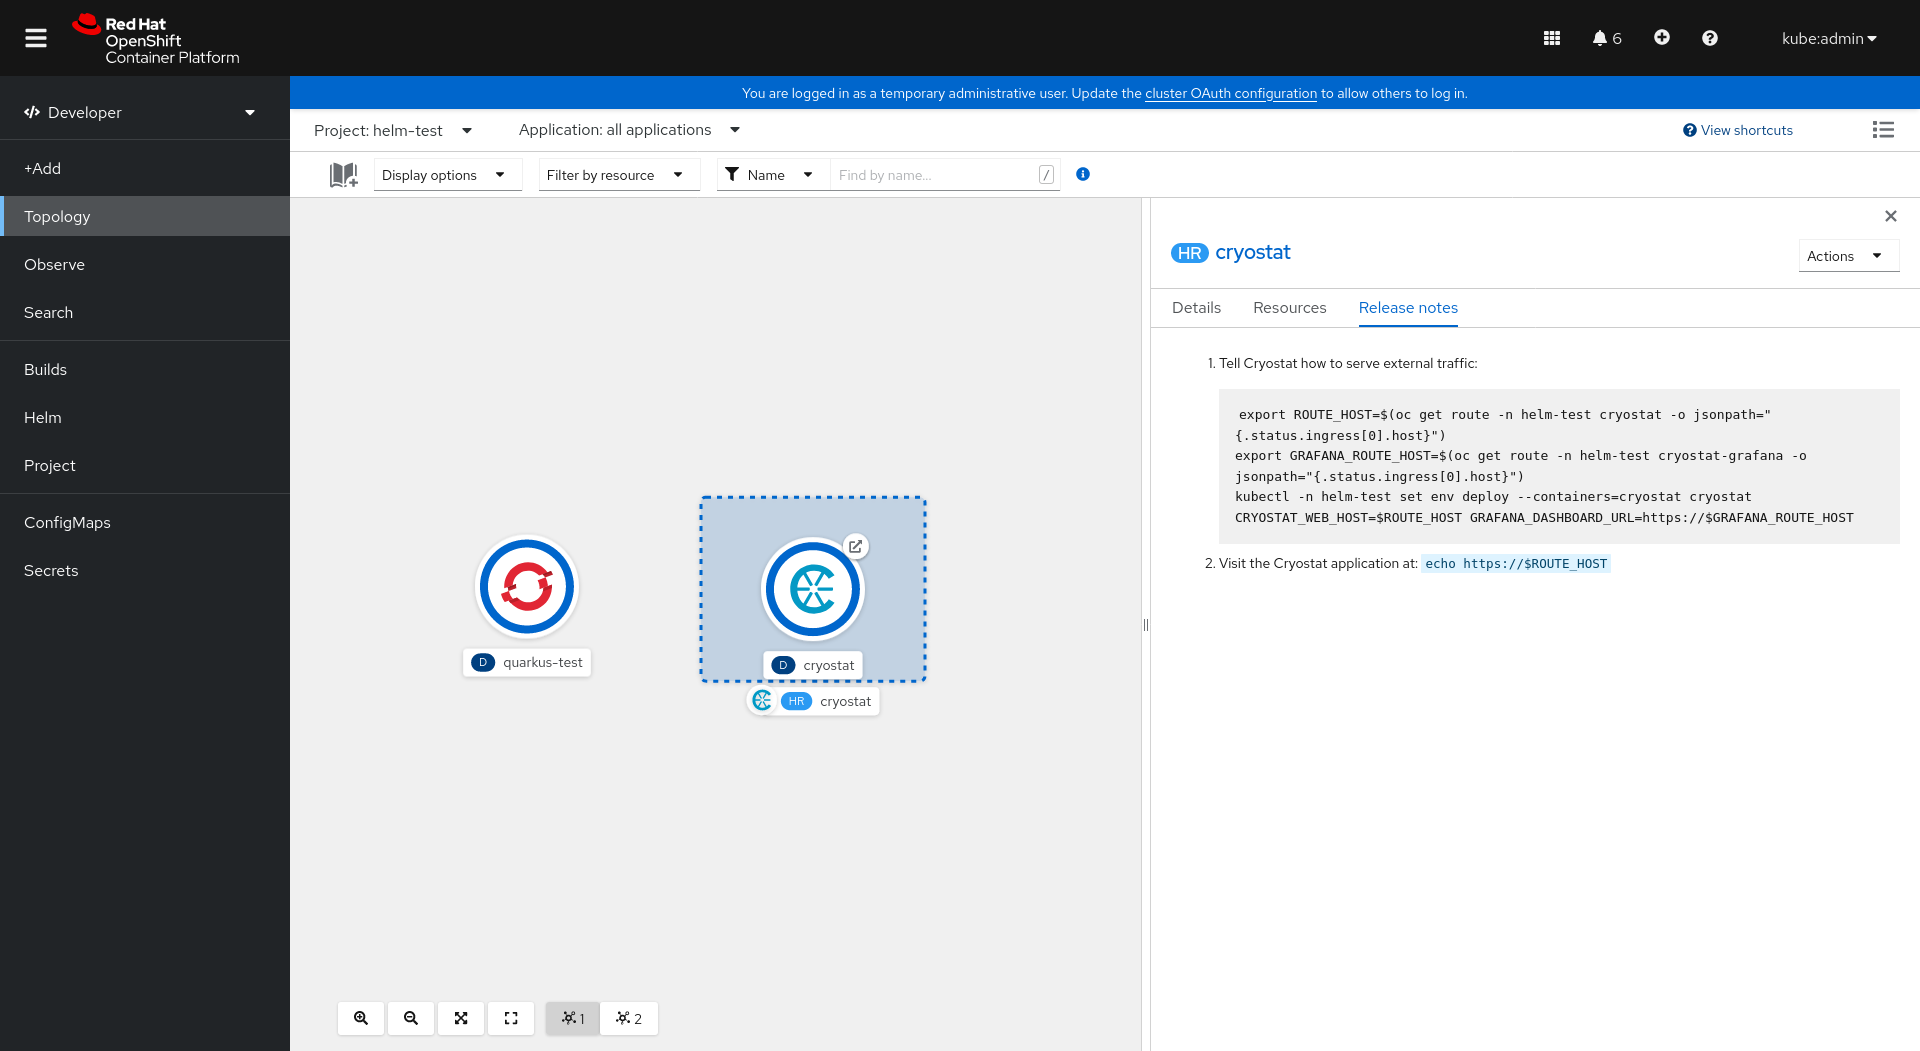
After running the commands listed in the Release notes tab, the Cryostat deployment will roll out a new replica set. Once the new replica set is fully rolled out and the Cryostat deployment is available, click the Open URL (
A comparison of the Cryostat Operator and the Cryostat Helm chart
In the future, we plan to close the feature gap between the Cryostat Operator and Helm chart. This table compares their features:
| Features |
Cryostat Helm chart |
Cryostat Operator |
|
Grafana integration |
X |
X |
|
Access Cryostat using services |
X |
|
|
Access Cryostat using ingresses or routes |
X |
X |
|
End-to-end encryption |
X |
|
|
X |
||
|
Persistent storage |
X |
|
|
X |
Summary
Now there are two easy methods to install Cryostat into your cluster: the Cryostat Helm chart and the Cryostat Operator. You can obtain both of these for OpenShift from the Developer Catalog and OperatorHub, respectively.
Last updated: March 18, 2024