Page
Launch a new workspace and execute a command inside your pod
Launch a new workspace in Red Hat OpenShift Dev Spaces and execute a command inside the pod
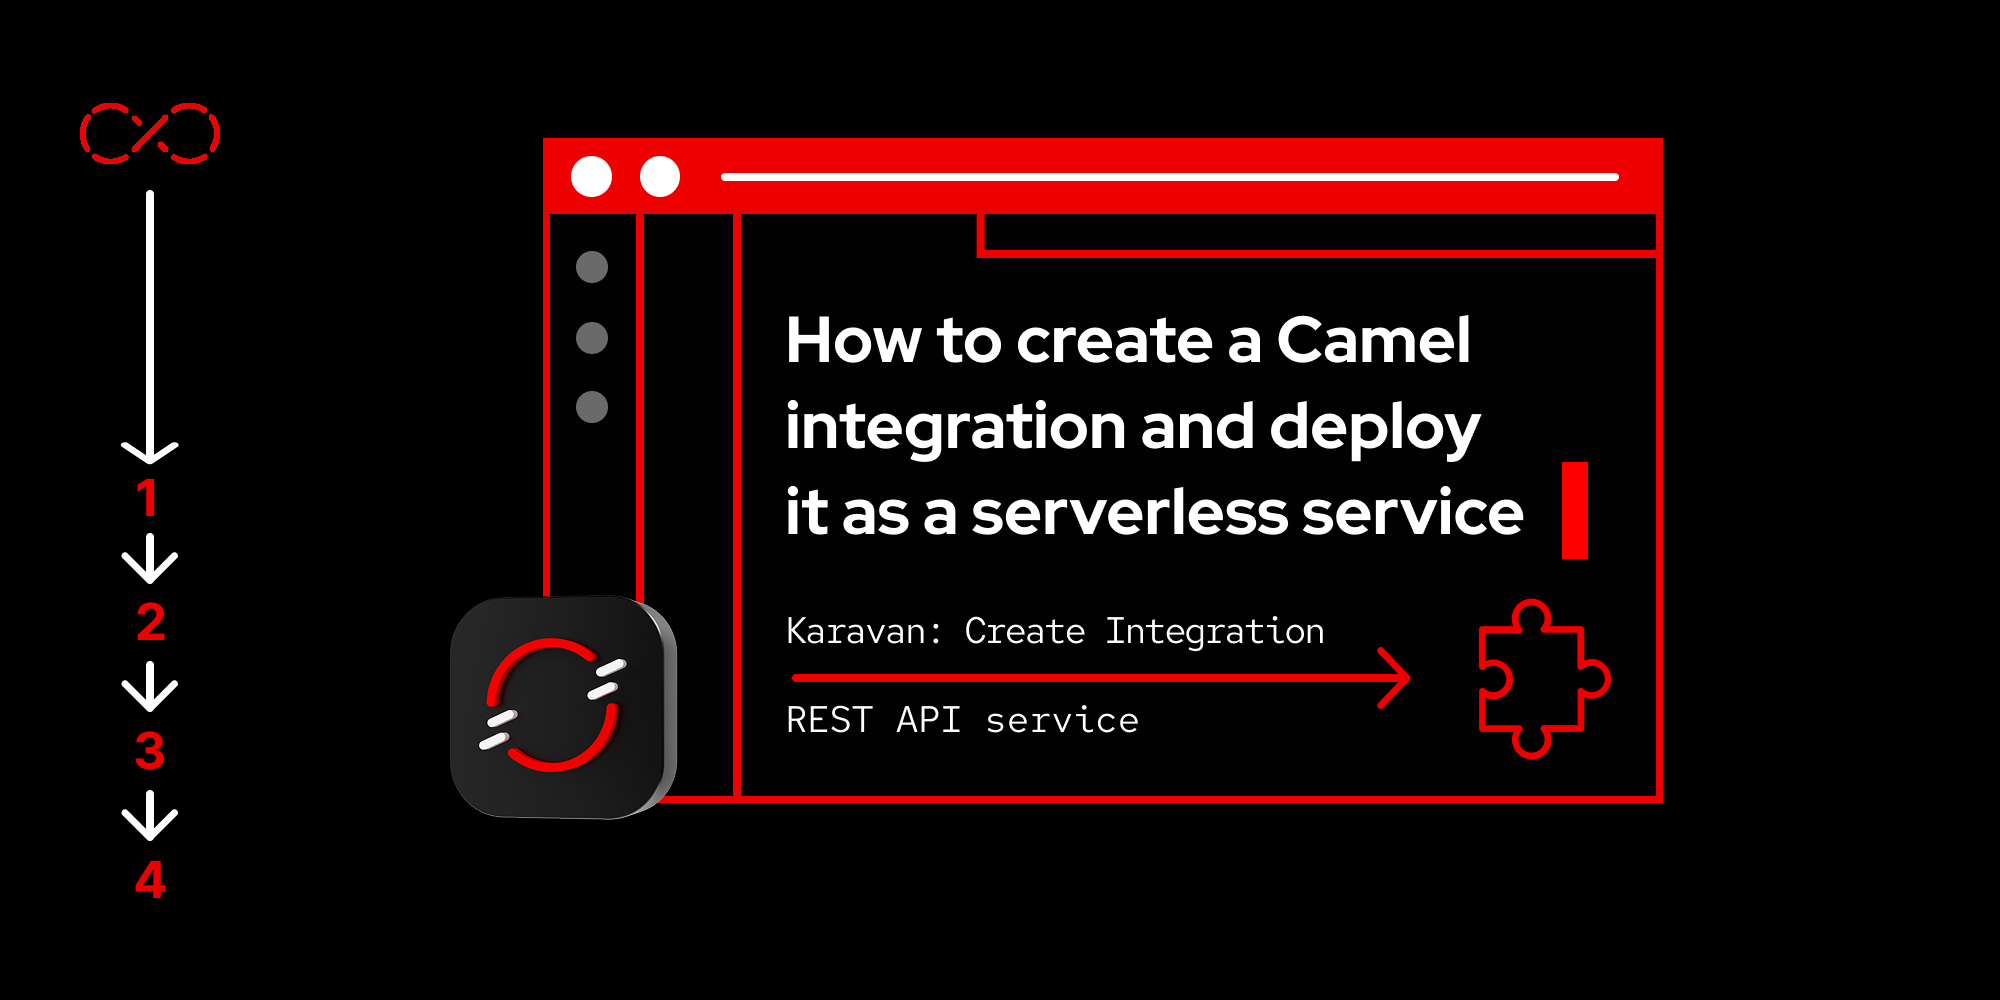
We will create a Camel file using Red Hat OpenShift Dev Spaces and Karavan, scaffold a Quarkus project using the JBang command-line interface (CLI), package it as container images, and deploy it as a Knative serverless service in Red Hat OpenShift (Figure 1).

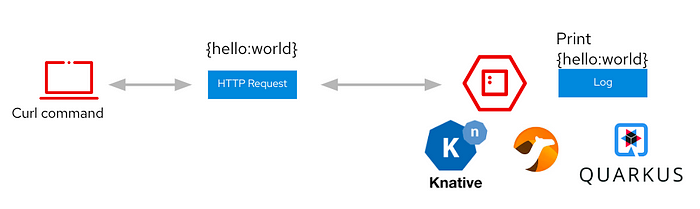
The application we will develop is a simple Knative service running a Camel route that logs the HTTP body and replies back the same content to the Curl command (Figure 2).
What you need
- A workspace in Red Hat OpenShift Dev Spaces
- A no-cost Developer Sandbox environment
What you will learn
- How to access the Developer Sandbox
- How to create a workspace in OpenShift Dev Spaces
- How to execute a command
Get started
First, get your no-cost, 30-day OpenShift sandbox environment.
Once you successfully log in to the Developer Sandbox, select Red Hat OpenShift Dev Spaces from the menu (Figure 3).
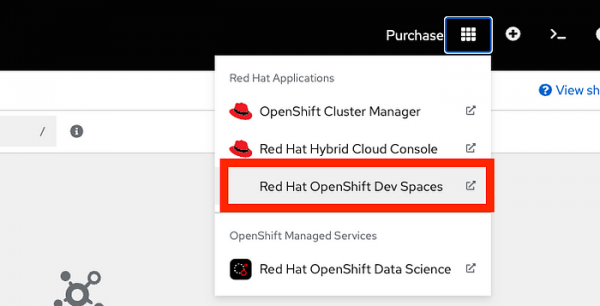
Figure 3: The menu link to Red Hat OpenShift Dev Spaces. The Create Workspace tab will appear. Under Select a Sample, launch an Empty Workspace (Figure 4).
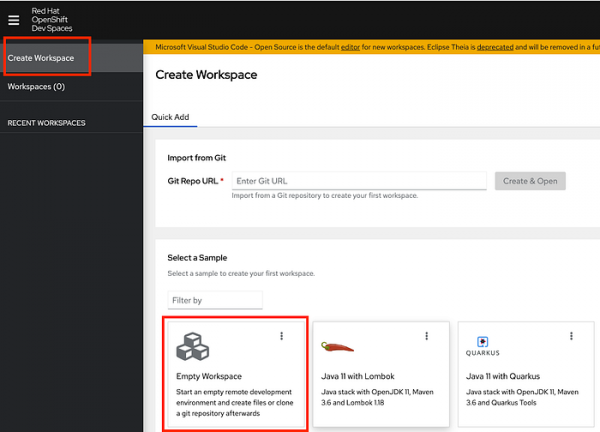
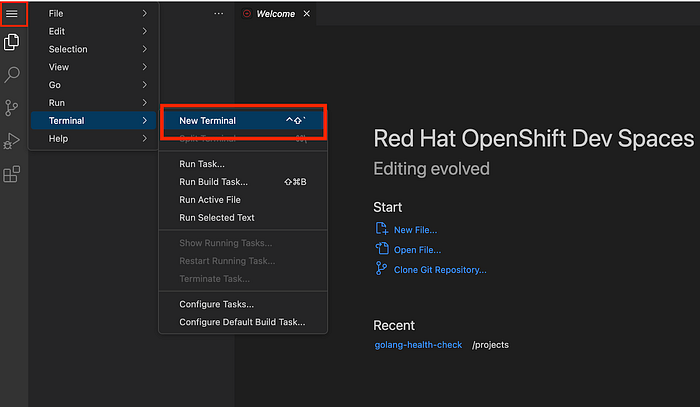
Figure 4: The OpenShift Dev Spaces Catalog. From the menu, scroll down to Terminal, then select New Terminal (Figure 5).

Figure 5: Scroll down to Terminal, then select New Terminal. Run the command
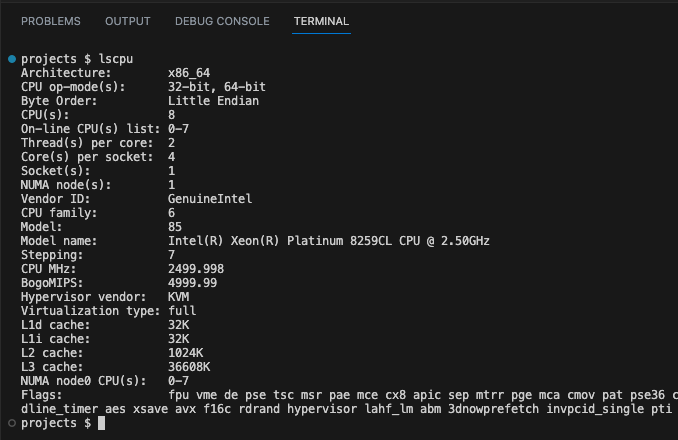
lscpu. You are now running the command inside a pod (Figure 6a).
Figure 6a: The lscpu command and its outputs when executed in x86_64 OpenShift. Info alert: The output shows that you are running in the pod, depending on where the pod is and which CPU architecture OpenShift is sitting on, not your laptop.
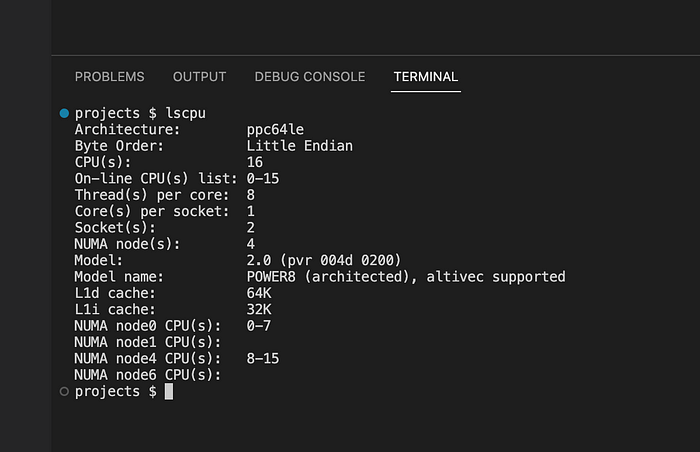
For example, if you run
lscpuin OpenShift running in ppc64le, you will see something like Figure 6b.
Figure 6b: The lscpu command and outputs when executed in ppc64le OpenShift. Run the command to install the latest JBang CLI (Figure 7).
curl -Ls https://sh.jbang.dev | bash -s - app setup
source ~/.bashrc
jbang version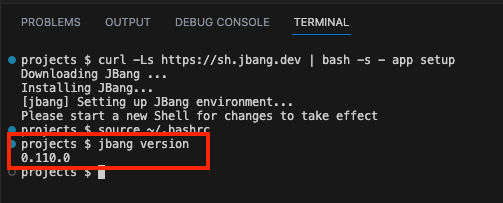
Figure 7: JBang is successfully installed.


Congratulations! You have successfully launched an empty workspace in OpenShift Dev Spaces and executed a command inside the pod.