Page
Run and test inside OpenShift Dev Spaces and deploy it to OpenShift
The finish is in sight. Now that you have successfully created a Camel route file, it's time to run and test it inside OpenShift Dev Spaces then deploy in OpenShift.
What you need
- A workspace in Red Hat OpenShift Dev Spaces
- A no-cost Developer Sandbox environment
What you will learn
- How to install launch Quarkus using Karavan
- How to deploy to Red Hat OpenShift
- How to inspect the OpenShift web console
Run and test inside OpenShift Dev Spaces
Launch Camel as Quarkus using Karavan: JBang run (Figure 29).
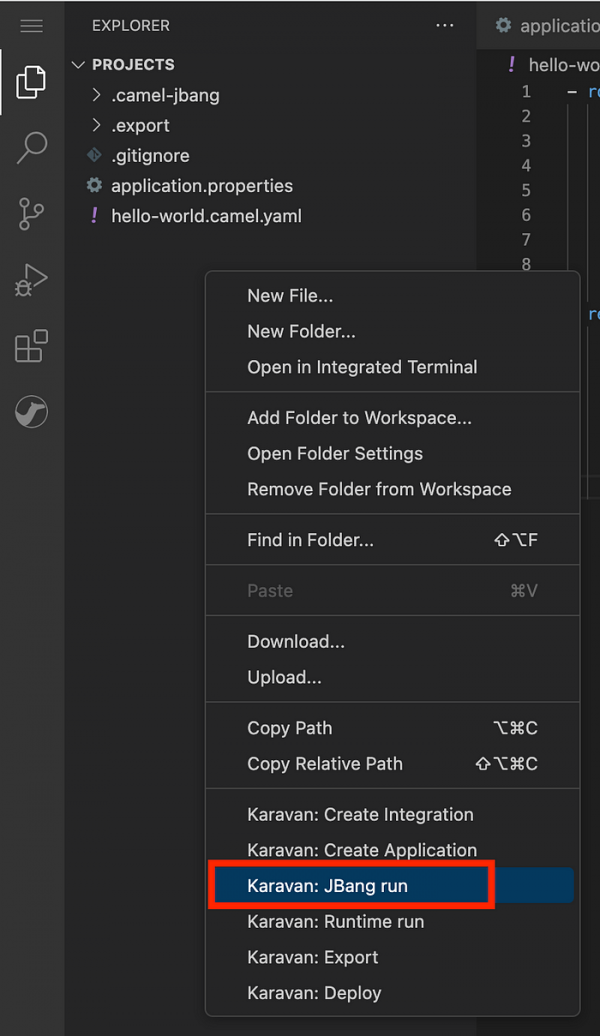
Figure 29: The Karavan: JBang run option from context menu. When prompted, enter
3to trust the content from https://github.com/apache (Figure 30).
Figure 30: The terminal waiting for input from Karavan: JBang run command for first time. After the program compiles, it will wait at the following step and listen to port localhost:8080 (Figure 31).

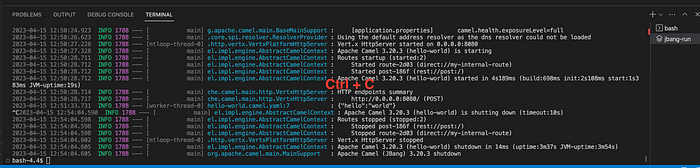
Figure 31: Console output showing application listening to port 8080. Leave the program running in the current terminal (Figure 32). Open a new terminal and switch to it to test the endpoint using the following cURL command:
curl localhost:8080 -X POST -d "{\"hello\":\"world\"}" -H "Content-Type: application/json"
Figure 32: Test the endpoint using the cURL command. Switch back to the terminal running the program and verify the service printout for the body (Figure 33).
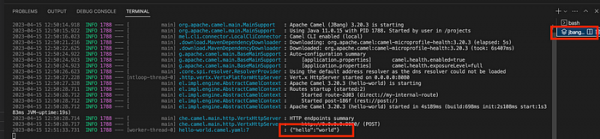
Figure 33: Test the endpoint using the cURL command. Stop the running process by entering Ctrl + C or Command + C (Figure 34).
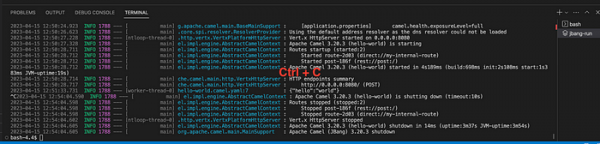
Figure 34: Focus on the terminal when you issue the stop command.


You have successfully developed a simple REST API using Camel and Quarkus. Now let's deploy to OpenShift as a Knative serverless service.
Deploy to OpenShift
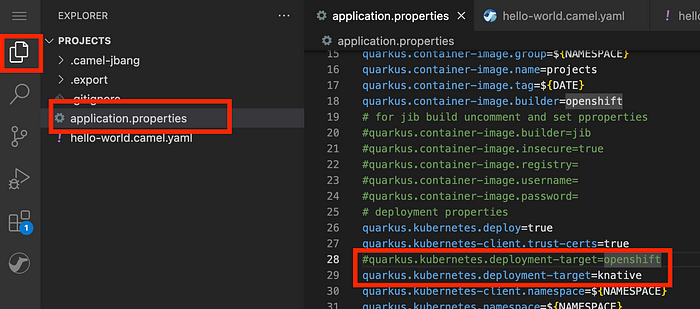
Update the
quarkus.kubernetes.deployment-targettoknative(Figure 35).
Figure 35: The content after deployment target modified to Knative. Copy the login command from the OpenShift console (Figure 36).

Figure 36: The Copy login command from the OpenShift web console. Make sure you log into OpenShift inside the Dev Spaces terminal and are in the correct project/namespace. Note your project name will be different from mine (Figure 37).

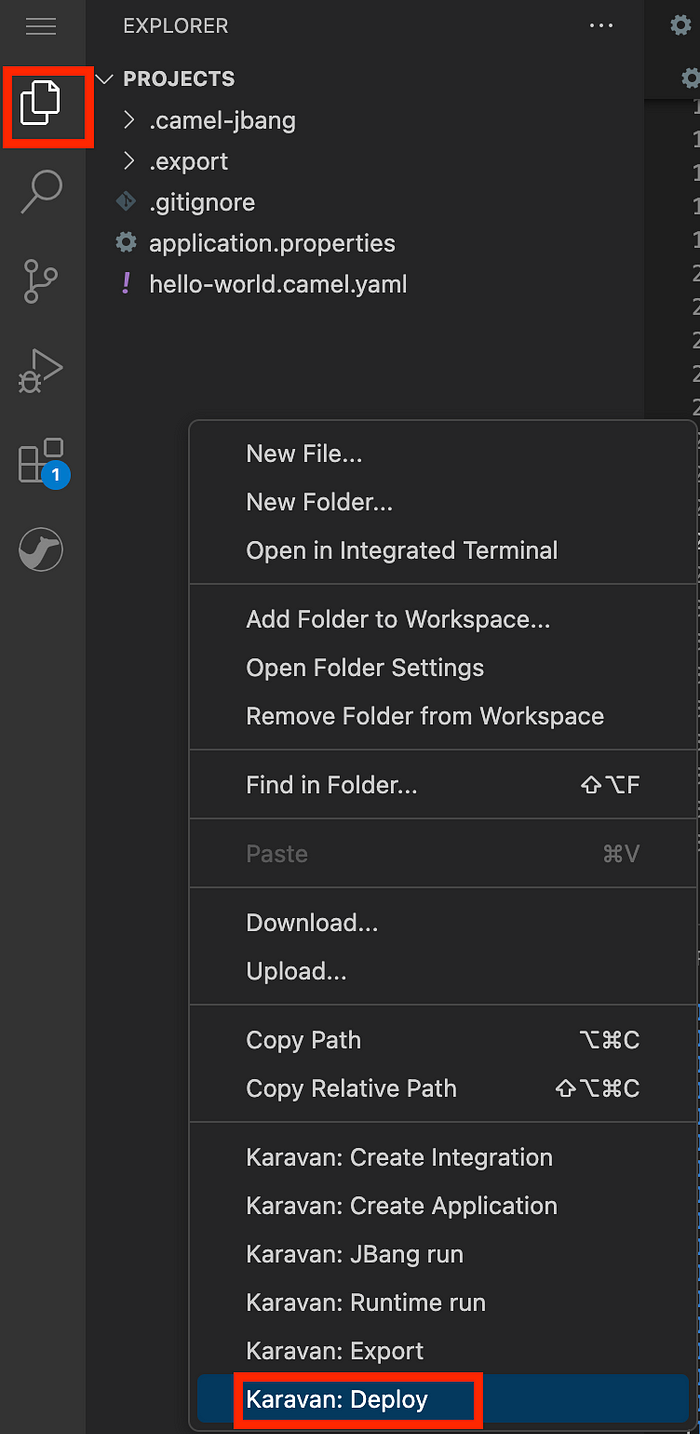
Figure 37: Log into OpenShift inside the Dev Spaces terminal and confirm the correct project/namespace. Right-click on the project workspace area and choose Karavan: Deploy (Figure 38).

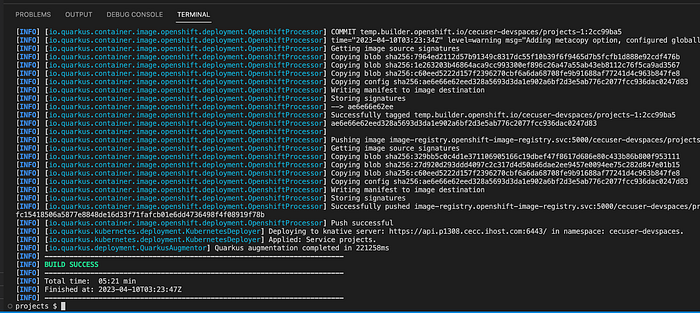
Figure 38: The context menu with Karavan: Deploy. Wait for the container image build to finish (Figure 39).
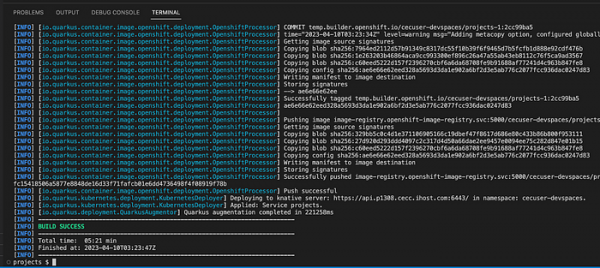
Figure 39: The build success and the time taken. A new build type source is automatically created for you (Figure 40).
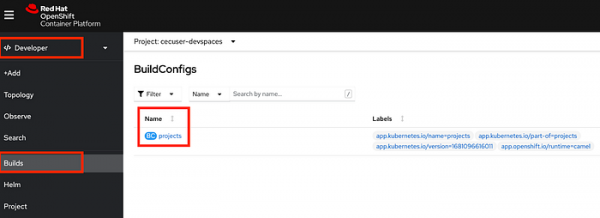
Figure 40: The build configurations created in the OpenShift web console.


Congratulations! You successfully created a Source-to-Image build and built container images. The image is now deployed as a Knative service (Red Hat OpenShift Serverless).
Inspect the OpenShift web console
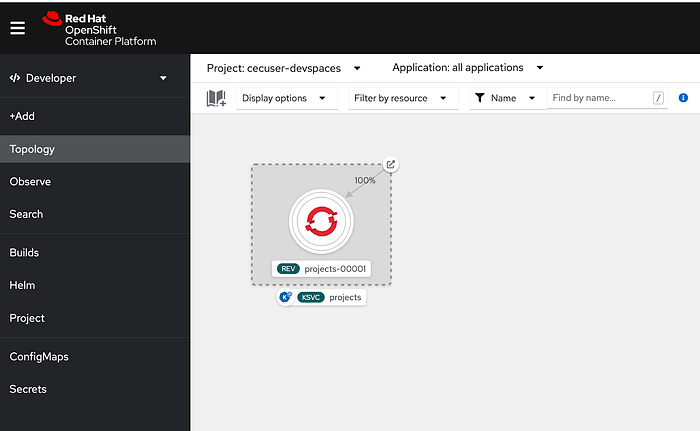
If you inspect the OpenShift web console, you'll notice a new Knative service deployed in Topology view. Wait for a while. Notice the pod has scaled to zero when the circle turns from blue to white (Figure 41).
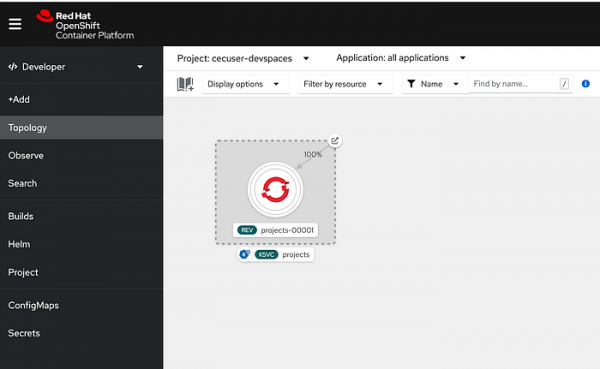
Figure 41: The Knative service deployed in the OpenShift web console. From the Topology view, click on the icon to get the serverless URL from the Knative service (Figure 42).
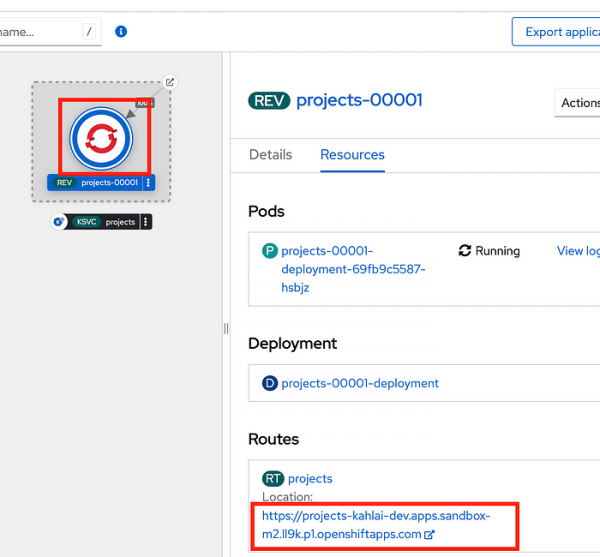
Figure 42: The OpenShift route URLs to the Knative service. Another way to get the URL is to use the
knCLI. Install theknCLI using the following command:mkdir -p /projects/.knative/bin wget -qO /projects/.knative/bin/kn https://github.com/knative/client/releases/download/knative-v1.11.0/kn-linux-amd64 chmod +x /projects/.knative/bin/kn echo "export PATH=\"/projects/.knative/bin:\$PATH\"" >> ~/.bashrc source ~/.bashrcList the serverless endpoint using the cURL command:
kn service listTest the serverless endpoint using the cURL command. The serverless spins up a new pod immediately to serve new requests (Figures 43 and 44):
MYURL=$(kn service list -o json | jq -r .items[0].status.url)

curl -k $MYURL -X POST -d "{\"hello\":\"world\"}" -H "Content-Type: application/json"
Figure 43: The pods servicing the new request. 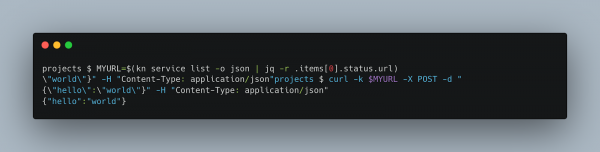
Figure 44: The pods servicing the new request. - After a while, the pod will terminate itself and return all the memory and CPU resources back to the server.


Congratulations! You have successfully deployed a serverless service using Quarkus and Camel.
Conclusion
Creating a Camel integration and deploying it as a serverless service opens up a new approach to implementing Enterprise Integration Patterns (EIP) and helps systems connect to one another. Many exciting things are happening in the integration world. The Red Hat build of Apache Camel is a great place to learn more.