Page
Bootstrap Quarkus and build an image
In order to get full benefit from taking this lesson, you need:
- A web browser
- The latest version of the Red Hat build of Quarkus
In this lesson, you will:
- Bootstrap a Quarkus application and edit the code
- Build and test an image
Bootstrap the Quarkus application
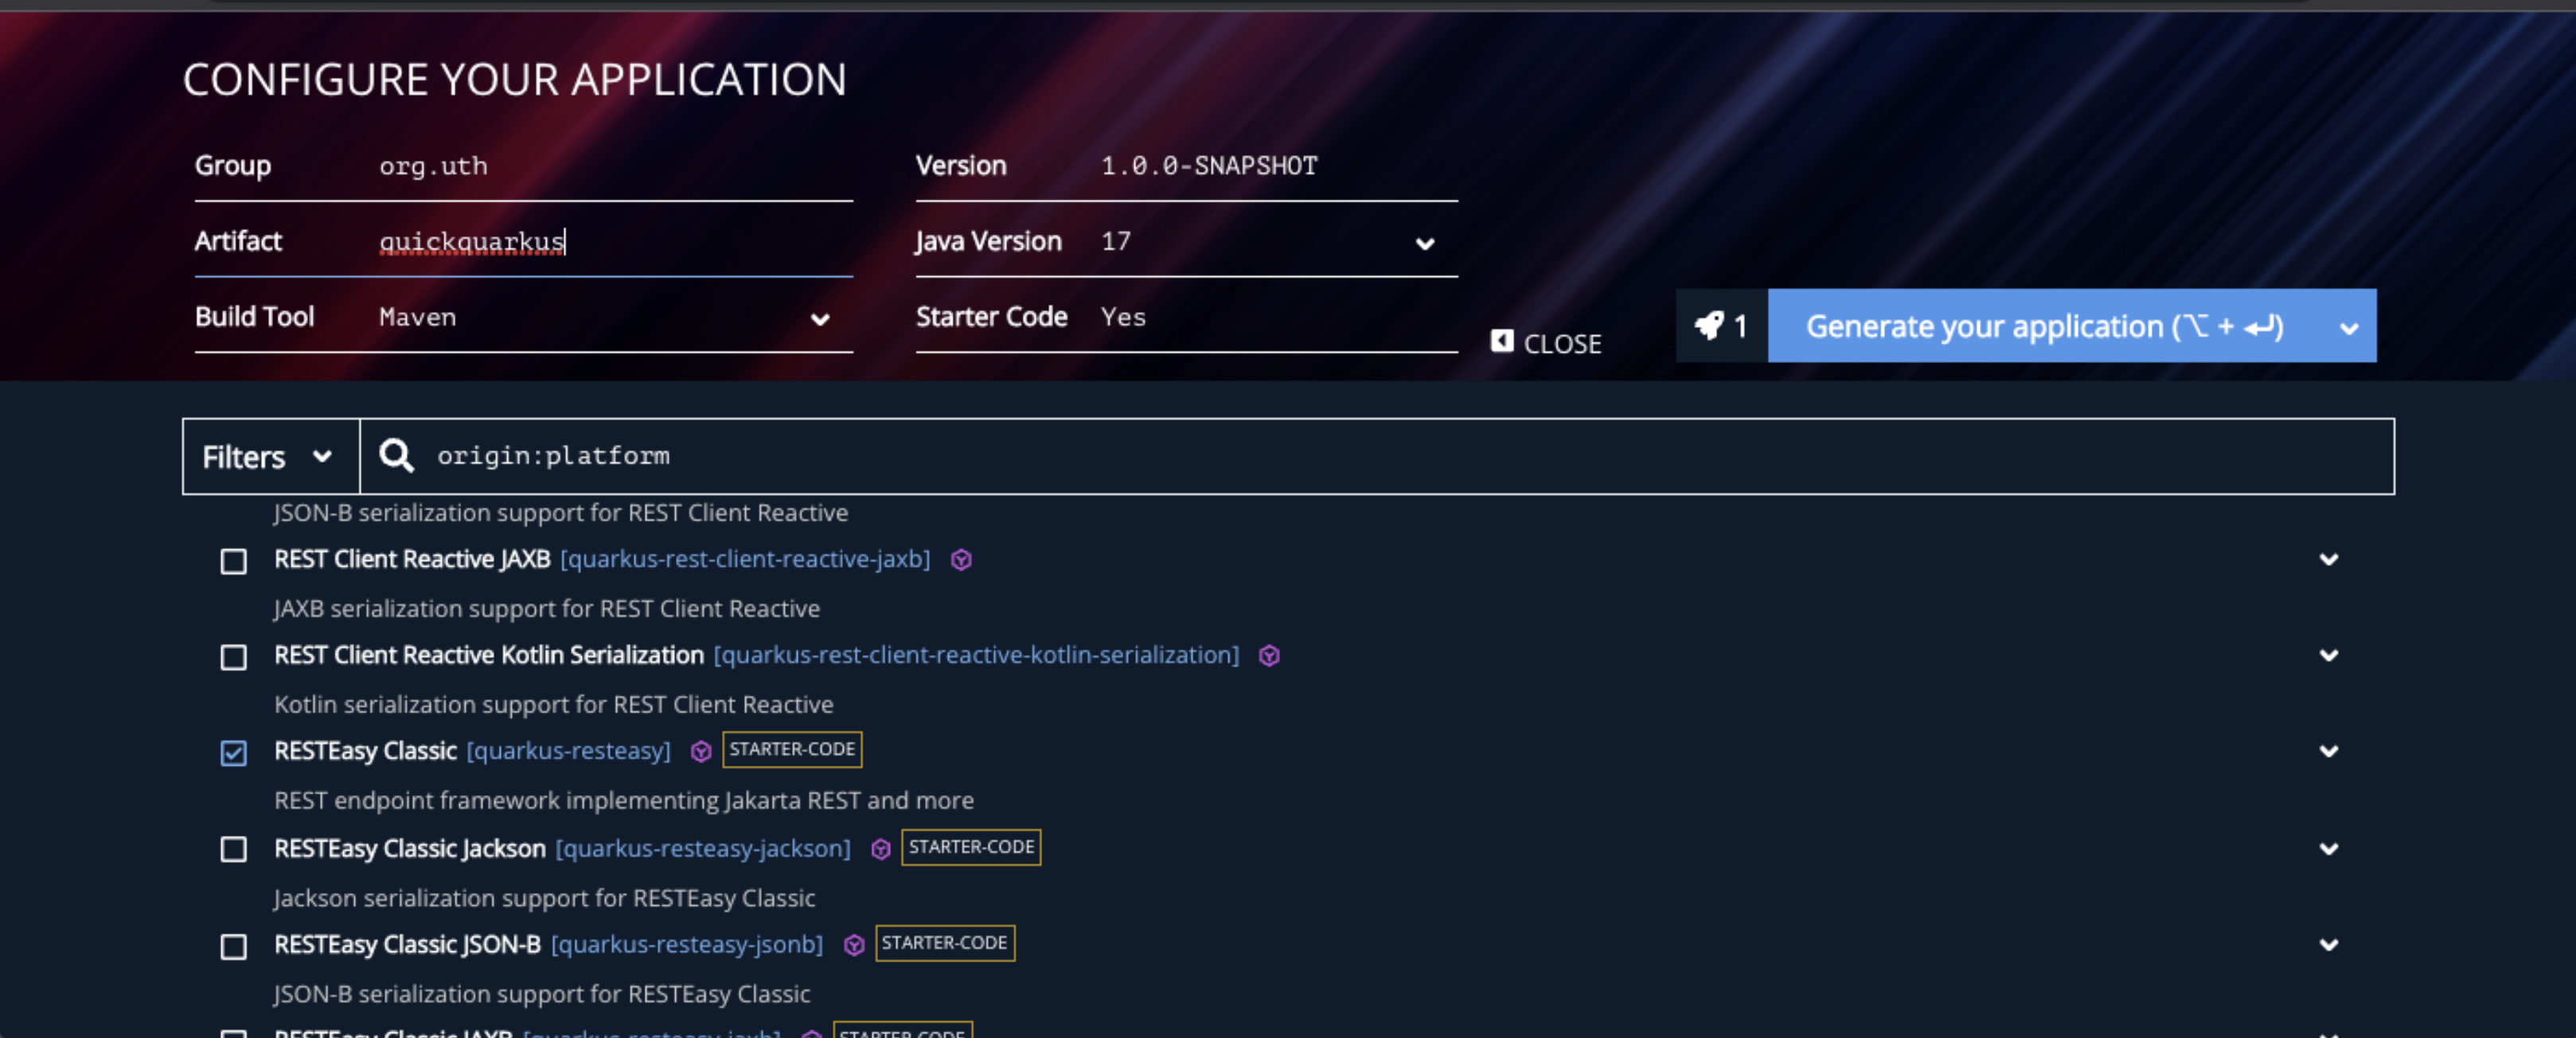
The first step is to get some nice Quarkus source code from the Quarkus code scaffolding page. For this example, I will fall back on my old favorite, RESTEasy Classic.
- Set your Group appropriately (I always use
org.uth), give your app a name, and choose the RESTEasy Classic option. - Make sure the Starter Code is set to
Yes, then click the Generate your application button (Figure 1).
Figure 1: Generate the Quarkus code. - Download the juicy
ZIPfile full of Quarkus goodness and unzip it in an empty directory. - This scaffolded code gives you all the bits and pieces for your Quarkus application, including a
Containerfilewe will use shortly.
Edit the Java code
For the sake of this quick example, let's add another endpoint to the RESTful application at a subdirectory to differentiate the code.
- If you go into the root directory where you extracted the
ZIPfile, you will see a directory calledsrc. - This directory contains all the source code for the app, including the one-stop configuration file (
application.properties) and the Docker/Podman build files for creating a composite Quarkus application, which we will use in a later step. - For now, edit the Java file at the bottom of the
src/main/java/directory structure. There will be subdirectories based on your organization name, but the file will be calledGreetingResource.java. This Java file is the scaffolded example from the Quarkus code page. - Add the additional method and annotations for the
@Path("/subdir"):package org.uth; import jakarta.ws.rs.GET; import jakarta.ws.rs.Path; import jakarta.ws.rs.Produces; import jakarta.ws.rs.core.MediaType; @Path("/hello") public class GreetingResource { @GET @Produces(MediaType.TEXT_PLAIN) public String hello() { return "Hello RESTEasy"; } @Path("/subdir") @GET @Produces(MediaType.TEXT_PLAIN) public String systemTime() { return "Systime: " + System.currentTimeMillis(); } }
Test with Quarkus dev mode
One of the nicest features of Quarkus is the dev mode feature, which enables hot deployment with background compilation. We will use it now to see if our code change has worked.
- At the root directory point where the
pom.xmllives, typequarkus devto run up the application from the source code. To test it, go to another terminal window and type:curl http://localhost:8080/hello/subdir - If all has gone well, you should see a microsecond system time.
- As a quick test to show the power of the Quarkus dev mode, in the new terminal window, edit the file to change
Systimeto something else, and select Save. - Repeat the cURL command, and whatever change you made will be reflected in the output.
Prepare the image build components
So, Quarkus dev mode works a treat, but the Containerfiles provided to build an image from the source need some binary components that aren't created as part of the dev mode.
- Exit the dev mode in the terminal where it is running (just hit q to quit).
- To quickly create the necessary components, type the following command at the root directory (where the
pom.xmllives):./mvnw clean install - If you look in the directory, there is a new folder called
targetwhere the binary artifacts are staged/created. - If you do a directory listing, you will see a subdirectory called
quarkus-app. The Containerfile uses this as the application component when building the composite image.
Congratulations. You're done with Lesson 1. Now it's time to move on to using the Developer Sandbox to run the application.