We are pleased to announce that the new release of the OpenShift Connector extension for Visual Studio Code (VS Code) is now available. The 0.2.0 release offers new features for rapidly developing and deploying code on Kubernetes and Red Hat OpenShift clusters. OpenShift Connector now supports component deployment using devfiles, leveraging odo 2.0 command-line interface under the hood.
With this release, the extension now supports connecting to vanilla Kubernetes clusters and includes a new option for creating OpenShift 4 clusters locally via Red Hat CodeReady Containers (CRC). In this article, we introduce these new features and present the workflow for using CodeReady Containers with OpenShift Connector 0.2.0.
Install OpenShift Connector 0.2.0
- Install the OpenShift Connector plug-in directly from the Visual Studio Code Marketplace.
- Alternatively, select the Extensions view in VS Code by clicking on its square icon in the left-side taskbar. Search for the OpenShift Connector plug-in and click Install.
- Once you have installed the extension, the OpenShift icon will be added to the left-side activity bar and ready for use.
Odo 2.0 in OpenShift Connector 0.2.0
OpenShift Connector now supports odo 2.0 in addition to Source-to-Image (S2I) files. Using odo, you can create devfile-based components and deploy them on your OpenShift and Kubernetes clusters.
Using devfiles in VS Code
A devfile is a YAML file used to define the developer workspace in Eclipse Che. Now supported in odo 2.0, devfiles are easily configured and reproducible definitions for portable developer environments. Each devfile is a declarative abstraction of a developer workspace. It includes the runtime environment and project source code, mapped to the repositories, tools, plugins, and commands that you need to code, build, test, run, and debug your applications. Using devfiles makes your developer workspace replicable. You can use OpenShift application definitions within a devfile.
List devfile components
OpenShift Connector now lets you view a list of currently supported devfile components in your integrated VS Code terminal window. Right-click on your OpenShift or Kubernetes cluster and select List Catalog Components. You will see the following output in the terminal (see Figure 1).

List Operator-based services
You can also use OpenShift Connector (and odo 2.0 under the hood) to view a list of Operator-based services in your VS Code terminal window. Right-click on your OpenShift or Kubernetes cluster and select List Catalog Services. You will see the following list in the terminal (see Figure 2).

Note: OpenShift Connector's support for odo 2.0 aligns with the move to using devfiles as the common definition format across Red Hat's developer tooling portfolio.
Working demo of a devfile integration
This demonstration video guides you through the workflow to use a Node.js devfile deployment configuration on a remote OpenShift cluster.
Run OpenShift clusters locally
OpenShift Connector now lets you create OpenShift 4 clusters directly from the extension in VS Code. We have added this feature to improve the inner loop development experience for developers on OpenShift. Several infrastructure options are available, including using CodeReady Containers to run an OpenShift 4 cluster locally.
To access this feature, select the new Add OpenShift Cluster (+ icon) command in VS Code's Application Explorer view, as shown in Figure 3.

You will then see the two options displayed in Figure 4.

Create a cluster locally
OpenShift Connector leverages CodeReady Containers to let you create a minimal, preconfigured OpenShift 4 cluster on your laptop or desktop for development and testing. The OpenShift Connector 0.2.0 extension supports CodeReady Containers 1.16.0, which currently runs OpenShift 4.5.9. (We are releasing support for OpenShift 4.6 soon.)
Selecting the Create/Refresh Cluster option opens a wizard view where you can configure the cluster memory, CPU cores, nameserver, and more. Once you've completed the configuration, you will be able to start, stop, and refresh the cluster as needed. You can then view the cluster's status as it runs in your local system. This feature is supported for all three platforms, including Windows, Linux, and macOS.
Note: The CodeReady Containers OpenShift cluster is ephemeral and is not intended for production use. See the CodeReady Containers Getting Started Guide for more details.
Deploy a cluster in a public cloud
If you prefer to deploy your cluster in a public cloud, you may install OpenShift 4 in your account with a supported public cloud provider. Public cloud options include Amazon Web Services (AWS), Microsoft Azure, and Google Cloud.
How to run CodeReady Containers using OpenShift Connector 0.2.0
You can quickly set up and run CodeReady Containers using OpenShift Connector 0.2.0.
- Download the CodeReady Containers bundle: Download and extract the CodeReady Containers 1.16.0 bundle for your operating system and place the binary in your
$PATH. Be sure to provide the full executable location when you provide the path (for example,~/Downloads/crc-macos-1.16.0-amd64/crc). Figure 5 shows the options to download the 1.16.0 bundle and set the binary location.

- Set the file path for the image pull secret: The next step is to provide the pull secret's file location, as shown in Figure 6. You can download and upload a pull secret file using your Red Hat developer account.

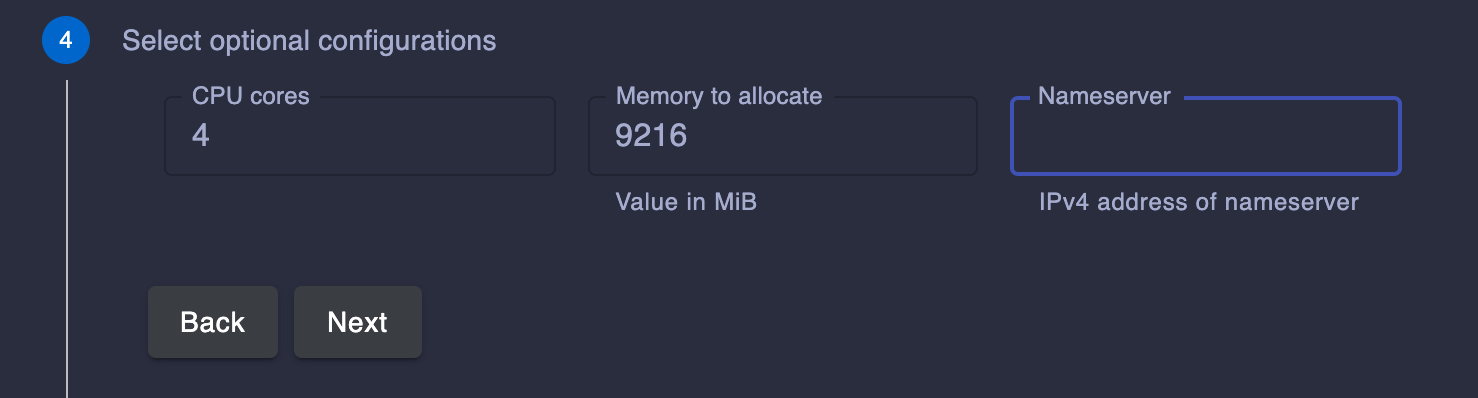
- Select the following optional CRC configurations:
- CPU cores: Number of CPU cores to allocate to the OpenShift cluster (the default is four).
- Memory: MiB value of memory to allocate to the OpenShift cluster (the default is 9,216).
- Nameserver: IPv4 address of the nameserver to use for the OpenShift cluster.
Figure 7 shows the optional configurations.
- Set up CodeReady Containers: Click Setup CRC, and the command will be executed in the VS Code integrated terminal, as shown in Figure 8. This action sets up your host machine's environment for the CodeReady Containers virtual machine. The
~/.crcdirectory will be created if it does not already exist.

- Start the cluster: This command, shown in Figure 9, starts the CodeReady Containers virtual machine and creates a minimal OpenShift 4.5.9 cluster on your laptop or desktop computer.

Once the cluster is running, the OpenShift cluster status will be displayed, as shown in Figure 10.

Viewing and managing Kubernetes clusters
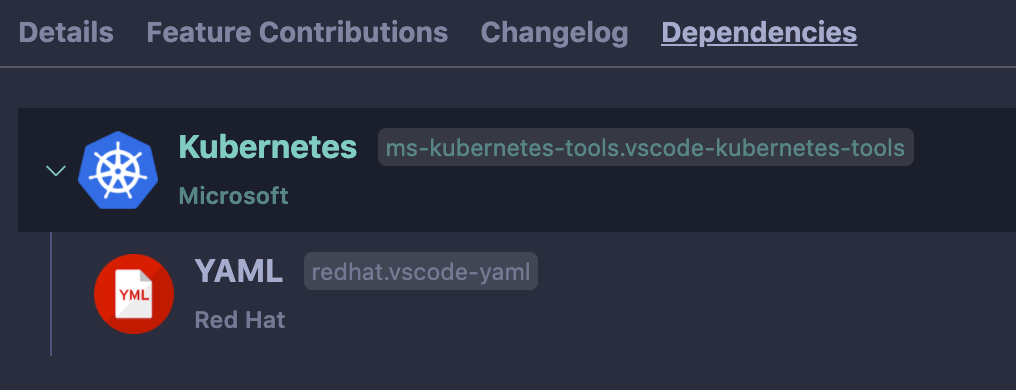
The OpenShift Connector extension depends on Microsoft's Kubernetes extension, which is installed automatically with OpenShift Connector. This extension lets you view all Kubernetes clusters and simplifies the management of Kubernetes resources. Figure 11 shows the Kubernetes extensions as one of OpenShift Connector's dependencies.
Using the Kubernetes extension's public API, the Kubernetes Clusters view shows OpenShift-specific resources like projects, routes, deployment configurations, image streams, templates, and more. These resources are visible only for OpenShift clusters. The OpenShift Connector extension also provides a Use Project command for switching between multiple OpenShift Projects in the Kubernetes Clusters view.
Support for OpenShift Connector 0.2.0
Please reach out if you need support fixing bugs or using new features in OpenShift Connector 0.2.0. We would also be glad to hear from you if you want to propose a new feature for this VS Code extension. You can connect with the OpenShift Connector 0.2.0 development team by:
- Selecting OpenShift: Report Extension Issue from your VS Code command palette or the extension title view.
- Submitting an issue directly on the VS Code OpenShift Tools GitHub repository.
- Discussing your issue with the development team and community on Gitter.
Try OpenShift Connector 0.2.0
The OpenShift Connector 0.2.0 extension is available for installation from the VS Code Marketplace and the open-vsix.org registry. We are already working on new features for future releases. Stay tuned for updates!
Last updated: February 5, 2024