In this article, we will examine the pattern when writing the REST API in any known framework vs. writing an Operator using Kubernetes' client libraries. The purpose of this article is to explain the Kubernetes internals by comparing REST API and Operator writing patterns. We will not discuss how to write a REST API.
Prerequisites
The following must be installed:
- Go version 13.4
- operator-sdk
- CodeReady Containers (OpenShift version 4.2)
- oc and kubectl
- code repo
As a developer, understanding and writing an operator will be easier for you if you have used the REST API with frameworks like Quarkus/Spring (Java), Express (Nodejs), Ruby on Rails, Flask (Python), Golang (mux), etc. We will use this experience with other languages or frameworks to build our understanding.
By writing an operator, you implement a REST API using Kubernetes client libraries as your framework (i.e., extending the Kubernetes APIs with your custom logic).
If you are running a single-cluster Kubernetes instance locally using CRC/Minishift/Minikube, etc., type this command into the terminal:
$ kubectl proxy
The Kubernetes API endpoints are shown in Figure 1:
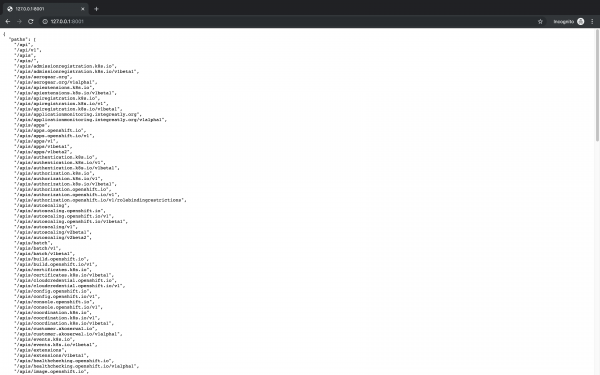
As you can see, each entity within the Kubernetes domain space is an exposed API endpoint. Whenever you trigger a deployment or scale up a pod, you hit these APIs behind the scenes.
We can start by writing a REST API in the framework that is familiar. I will use Spring Boot for building a simple Customer API. Later, we will write a customer-api-operator that extends Kubernetes' api-server with our defined Customer API. If you are not familiar with Spring Boot, you can continue. The main idea is to understand that writing the API using any language and using the Kubernetes client libraries follows nearly the same pattern.
REST API example
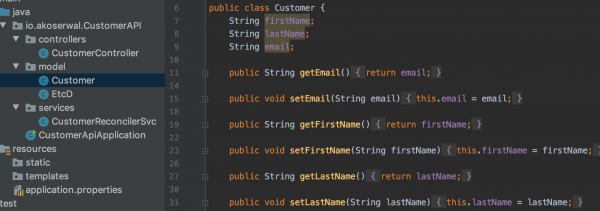
Let’s start the REST API side of this comparison by defining our Customer model class shown in Figure 2:
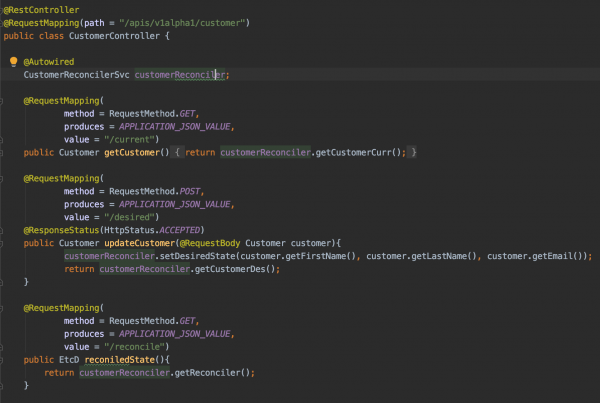
Next, we need the controller, which exposes a Customer REST endpoint and handles the request/response process. Let's define three endpoints (current, desired, and reconcile) and a CustomerReconciler service that handles the business logic shown in Figure 3:
Start your Spring Boot application by entering:
$ mvn spring-boot:run
This command starts the application on the default port.
Let’s get the current state of our customers using the values from this demo. In general, we fetch this information from other APIs or databases, but for this example Figure 4 shows the current state of our Kubernetes pods:
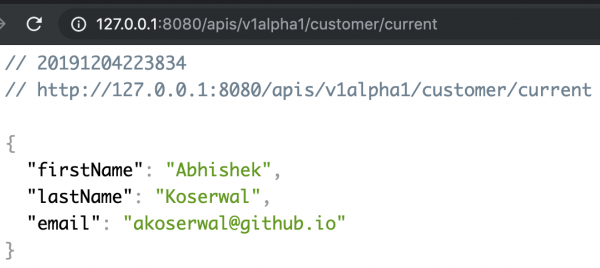
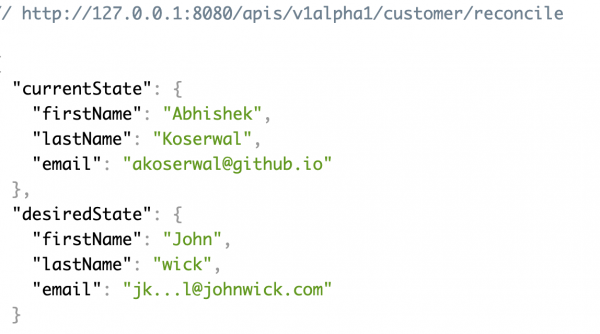
Now, let’s try to update the state of our Customer with the desired state using the POST method and JSON data in Figure 5:

In Kubernetes, updating the state from current to desired is handled by the reconcile endpoint, which shows the difference between the current state and the desired state. We defined our business logic to handle this state in the reconciler loop shown in Figure 6:
Now we have a Customer API that can get the customer's current state, update the state, and reconcile it to handle the change.
Custom operator example
Now let's see how to implement a similar API by extending the Kubernetes API server using the Operator SDK. First, generate the Operator:
$ operator-sdk new customer-api-operator
This action generates basic boilerplate code for our Customer API Operator shown in Figure 7:

Start by adding the model data type (i.e., Customer), where kind is an entity like a pod, node, deployment, etc. Next, add a custom API for the Kubernetes platform, which requires generating a new Custom Resource Definition (CRD) with an API version:
$ operator-sdk add api --api-version=akoserwal.io/v1alpha1 --kind=Customer
This command generates a basic scaffolding for our Customer API. Half of the work for defining a basic model is now already done by the SDK. You can look into the file customer_types.go (the same as your model class, customer.java, defined in the first example).
In Figure 8, you can see that Spec and Status are already pre-defined with the generated Customer struct and that we add the new entities from the Customer model class (i.e., FirstName, LastName, and Email):
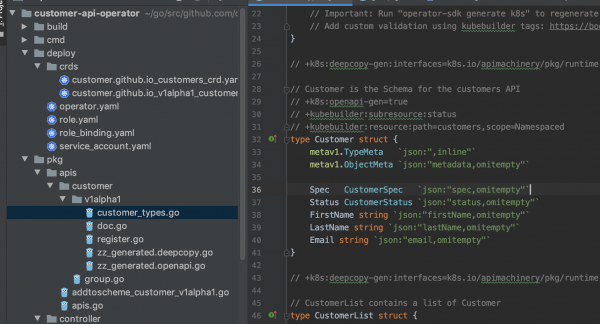
After modifying customer_types.go, run these commands for deep copy and generating an OpenAPI spec for the Customer API:
$ operator-sdk generate k8s
$ operator-sdk generate openapi
Now, generate the controller:
$ operator-sdk add controller --api-version=akoserwal.io/v1alpha1 --kind=Customer
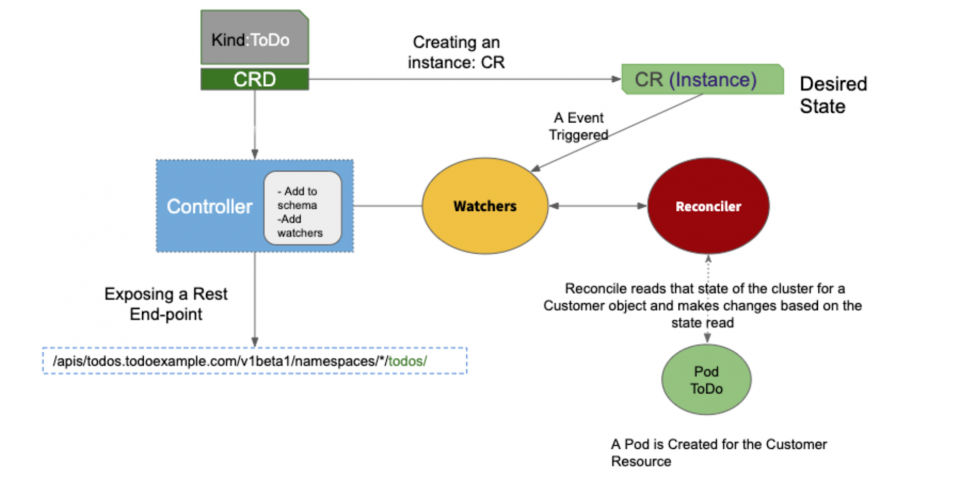
The generated boilerplate controller code adds our Customer API schema to the Kubernetes schema. Next, we add a couple of watchers to look out for any changes or events, which triggers the reconciler loop for handling the changes as you can see in Figure 9:
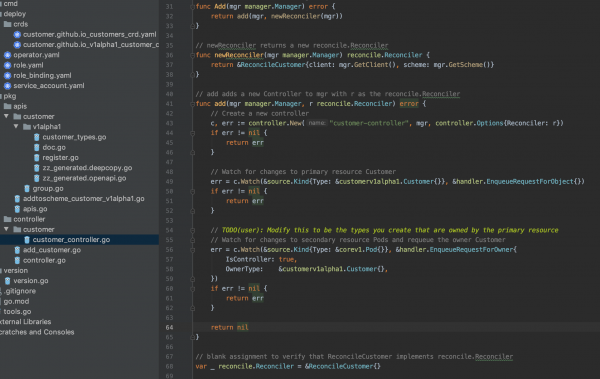
We can relate this result to the Spring Boot example's CustomerController and reconciler endpoint. Although, this version does more than our Spring Boot controller.
You can see the simplified flow in Figure 10:
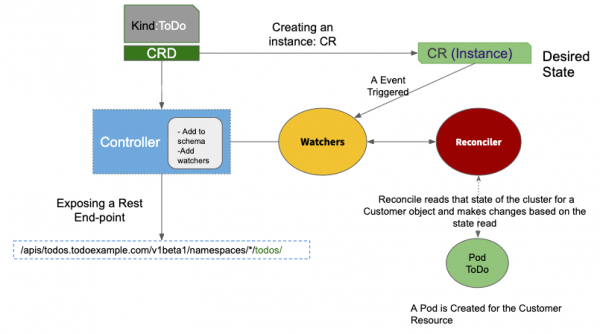
So, to reiterate, creating a custom Operator—instead of using a REST API in your chosen framework—flows as follows:
- Define a namespace for our operator (i.e.,
Customer). - Create the Customer Resource Definition (CRD), so define the "kind" (i.e., the customer as a resource in OpenShift/Kubernetes).
- Let the controller analyze the CRD and add that information to the Kubernetes API schema.
- Expose a new API endpoint for the CRD.
- Add watchers for the namespace to observe.
- Run a process/loop (i.e., reconciler loop) for acting based on the desired change.
- Store the state in the EtcD.
Now that the custom Operator is defined, let's continue. Deploy the Operator:
$ crc start
Log into the CRC instance:
$ oc login -u kubeadmin -p <secret>
Create the custom CRD:
$ oc create -f deploy/crds/customer.github.io_customers_crd.yaml
Add the roles, role_binding, and service account for the customer. These settings define the permissions and rules regarding access to our Operator:
$ kubectl create -f deploy/role.yaml
$ kubectl create -f deploy/role_binding.yaml
$ kubectl create -f deploy/service_account.yaml
Run our Operator locally:
$ export NAMESPACE=customer
$ operator-sdk up local
Now our controller is in the running state. It watches the NAMESPACE for any changes.
Create an instance of the CRD by creating a Custom Resource object:
$ oc create -f deploy/crds/customer.github.io_v1alpha1_customer_cr.yaml
Once created, the CR looks like this:
apiVersion: customer.github.io/v1alpha1
kind: Customer
metadata:
  name: customer-api
spec:
  # Add fields here
  size: 3
firstName: Abhishek
lastName: Koserwal
email: ak..@redhat.com
When we create a CR object, an event is triggered that gives control to the reconciler loop. Reconcile reads the state of that cluster for a custom object and makes changes based on the state it reads.
Figure 11 shows the Customer Custom Resource in the OpenShift UI:
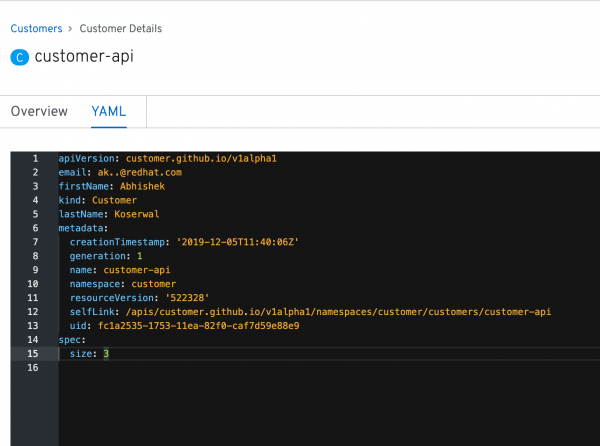
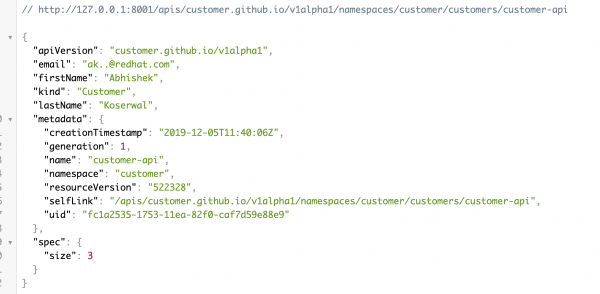
Figure 12 shows the Customer Custom Resource in its raw API format:
Based on the logic inside our reconciler loop, this CR object creates a pod for the instance customer-api:
// Define a new Pod object
pod := newPodForCR(instance)
Figure 13 shows such an instance:
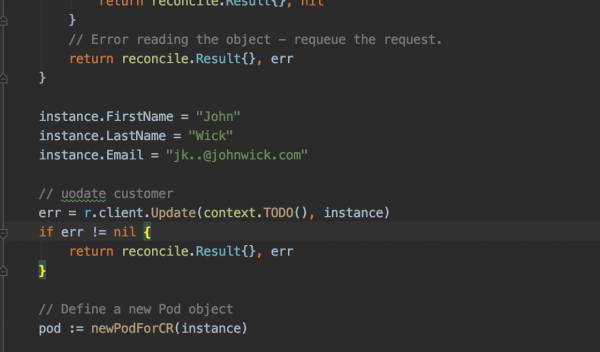
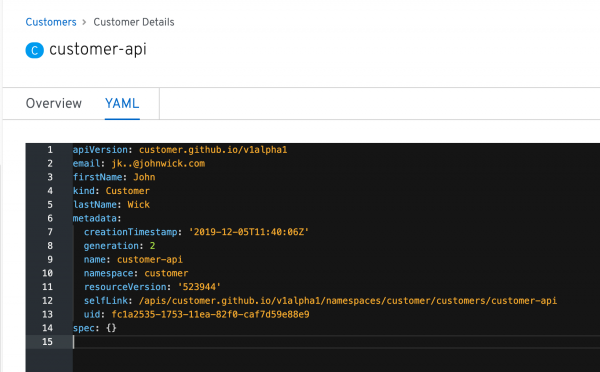
Now, we can add update logic for defining the desired state for our existing Custom Resource. Let’s update the reconciler so it will update our CR (firstName, lastName, and Email) as shown in Figure 14:
customer_controller.go [func (r *ReconcileCustomer) Reconcile]

Re-run the Operator:
$ operator-sdk up local
Finally, in Figure 15, we can see that the reconciler has updated the desired state for the Custom Resource:
Conclusion
Operator patterns allow you to use Kubernetes platform capabilities to run custom business logic. These patterns are powerful and go beyond what I have covered here. In this article, I focused on Kubernetes internals and Operator patterns with a relatable approach via the REST API. Writing these types of extensions is not the best use case for Operator patterns. You can run a Spring Boot—or any other language—application in a container for use cases such as "building a REST API application/service." For actual use cases, visit operatorhub.io.
Thank you for reading, I hope you find this article helpful. You can find the code here. Happy coding.

