When I was introduced to Apache Camel K a few months ago, I was amazed at how quickly developers could write and deploy an Apache Camel-based integration on Kubernetes. We immediately started work on creating Microsoft Visual Studio (VS) Code-based tools to make things even easier.
What is Camel K? It’s a lightweight integration framework built from Apache Camel and designed for a serverless/microsystem world that runs natively on Kubernetes. It lets developers write integrations in their favorite Camel DSL and quickly deploy them on Kubernetes or Red Hat OpenShift. You can even write your integrations in lightweight languages like Groovy or JavaScript.
We already built language support in VS Code for Apache Camel using the Language Server Protocol (LSP), offering auto-completion for Camel component URIs in both XML and Java. More recently, we began adding the same support for Groovy, JavaScript, YAML, and Kotlin. (See the Apache Camel LSP client project for details.)
Now, with our new Tooling for Apache Camel K by Red Hat extension, we add support for Camel K in your IDE. To illustrate the tools in action, let’s start with a simple user story inspired by an article that Nicola Ferraro wrote a few years ago (Creating a Telegram Bot in 5 minutes with Apache Camel).
- As a developer, I want to send myself a telegram notice any time somebody mentions the hashtag #camelkrocks so that I can better engage with our social media community.
To get started, let’s assume that you have the following:
- Telegram account and access to the Telegram messaging client or access via https://web.telegram.org/.
- Apache Camel K running in an accessible Kubernetes instance, with the Kubernetes and Camel K command line tools installed locally.
- Microsoft Visual Studio Code running locally with the Tooling for Apache Camel K by Red Hat extension installed.
Before you create the Camel K side of the Telegram bot, you have to create your bot on Telegram. Nicola did a great job detailing those steps in his article; see the section on creating the Telegram bot there and give your bot a unique name, like camelk-hashtag-telegram-bot. Be sure to note the authorization token given by the @BotFather.
Now in VS Code, create a new workspace with an empty directory called hashtagbot. In the hashtagbot directory, create a file named hashtagbot.groovy and copy this text into the file:
from("telegram:bots/replace-me-with-your-telegram-token")
    .choice()
        .when()
            .simple('${in.body} != null')
            .to("direct:response1")

from("direct:response1")
    .log('Incoming message from Telegram is ${in.body}')
    .setBody()
        .simple('You said \"${in.body}\"?')
        .to("telegram:bots/replace-me-with-your-telegram-token")
Note: Remember to replace “replace-me-with-your-telegram-token” with your Telegram authorization token given by the @BotFather.
After you save your file, right-click it and select Start Apache Camel K Integration from the pop-up menu. A drop-down appears in the command palette with a few choices. Select Dev Mode - Apache Camel K Integration in Dev Mode.

As your integration starts to run, watch the Apache Camel K output channel that appears:

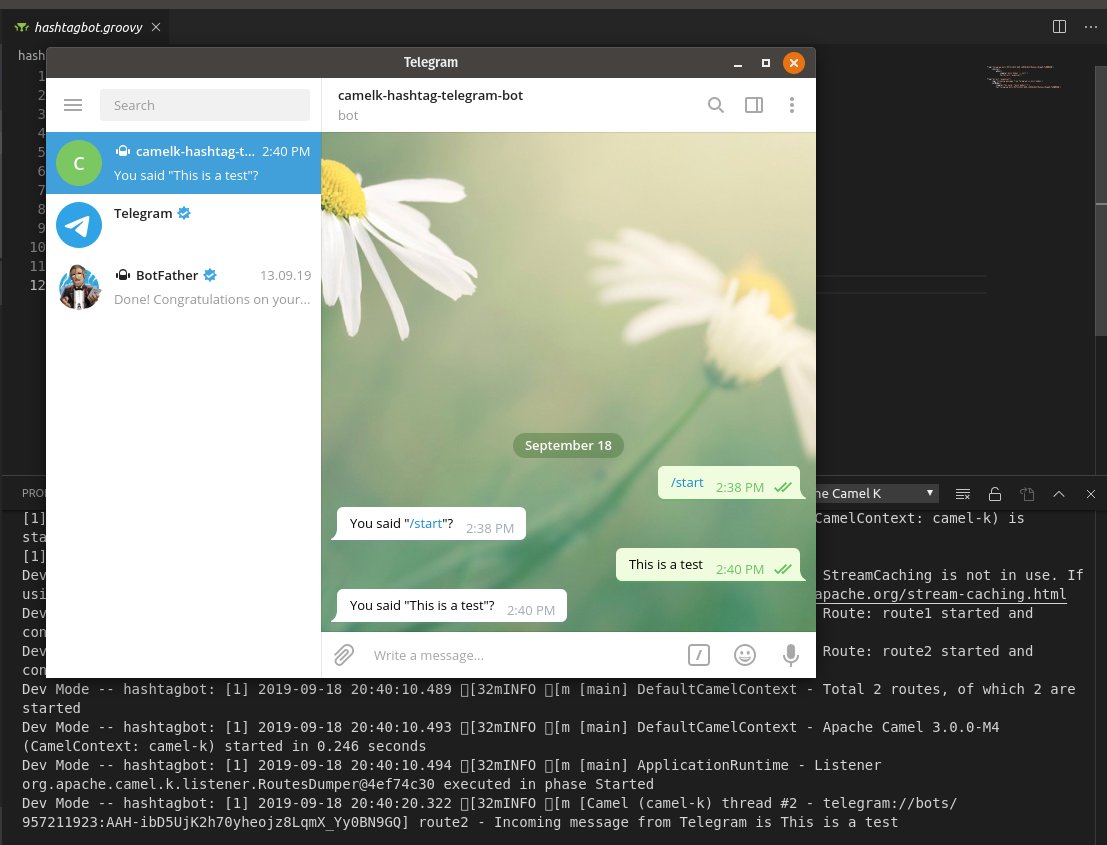
In your Telegram app, find your bot (use the name you specified when you created the bot in @BotFather) and start a new conversation. Everything you type in Telegram should be repeated with “You said “<whatyoutyped>?” For example:
Next, update your route to check whether a given string has our hashtag #camelkrocks in it and respond accordingly.
Change the second route in your hashtagbot.groovy file as follows:
from("direct:response1")
    .log('Incoming message from Telegram is ${in.body}')
        .choice()
        .when(simple('${bodyAs(java.lang.String)} contains "#camelkrocks"'))
        .setBody(simple('Did somebody say #camelrocks? Of course it does!'))
        .to("telegram:bots/replace-me-with-your-telegram-token")
                .end()
Once you save your route, it updates the deployed integration and you can try it out. For example:

Though this is a very simple example, you could use the approach as a basis to do things like routing messages to a database or to an email address for follow-up later.
We also have different deployment options that can save you from having to include your telegram token in the body of your route.
One way is to use the Apache Camel K “property” option.
- In the
hashtagbot.groovyfile, edit the route by replacing your token with{{telegram-token}}. - When you start the integration, deploy the route by selecting the Property - Apache Camel K Integration with Property option in the drop-down menu.
- Specify a property with the name
telegram-tokenand the value as your telegram authentication token. The runtime will replace{{telegram-token}}with your token value.
Another way is to use the Apache Camel K ConfigMap or Secret method. With this method, your token value is secured in the Kubernetes system.
For example, to use the Secret method:
- Create a new
application.propertiesfile and save it to yourhashtagbotfolder. - In the
application.propertiesfile, add the following line (replace the value with your actual token):
telegram-token=replace-me-with-your-telegram-token - Right-click on the
application.propertiesfile and then select Create Kubernetes Secret from File. - Name the new secret
telegram-secret. - In the
hashtagbot.groovyfile, edit the route by replacing your token with{{telegram-token}}. - When you start the integration, deploy the route by selecting the Secret - Apache Camel K Integration with Kubernetes Secret option in the drop-down menu.
- In the drop-down list that appears, specify the
telegram-secretthat you created. The Camel K runtime will replace{{telegram-token}}with your token value.
To learn more, check out the latest on Apache Camel K and see the Tooling for Apache Camel K by Red Hat extension for Microsoft VS Code.
Happy coding!
Last updated: July 1, 2020